Quality over quantity: The importance of good bird seed
High quality bird seed sourced as locally as possible can make a significant difference in the number and variety of birds you are able to attract to your feeders.
A Goldfinch waits its turn to go to the finch feeder.
Buy locally grown for the best seed
Trying to save a buck when it comes to bird seed is not a wise decision… for a lot of reasons.
I found that out recently when I decided to pick up some cheap bird food at a local store known more for, let’s say, its car parts rather than bird food.
The specialty bird store I usually buy my seed from is in the next city over and involves a 20-minute drive, so I kept putting it off until it was too late and I needed to quickly restock my supply before a snowstorm hit.
A composite of a goldfinch and dark-eyed junco, the two birds that have taken to the new nyger seed.
The result is a large bag of bird seed that is maybe okay for the local squirrels and mice. (I’m actually putting the seed beneath our owl box hoping to attract mice to it to provide a ready-made food source for our little screech owl who lives in the yard.)
“Not only will a higher quality of seed attract more birds to your yard, it will attract a greater variety of birds.”
But, in searching the internet for a closer specialty store that stocks the seed cylinders I love so much, I discovered The Urban Nature Store – a Canadian-based bird and nature store that just happens to be located right in the small town where I live.
Turns out it’s been hiding just a couple kilometres away in plain sight for close to a year.
Why is this important? Because it verified what I already knew but choose to ignore to save a buck – high quality bird seed makes all the difference in the world. Not only high quality seed, but preferably seed that is locally sourced.
Not only will a higher quality of seed attract more birds to your yard, it will attract a greater variety of birds.
Let me explain.
On my first visit to The Urban Nature Store, I picked up a bag of nyger seed and a 25-pound bag of what they call their “no-mess blend” of bird seed.
My existing nyger seed was bringing in a grand total of zero gold finches, juncos or even sparrows, but within one day of filling the feeder with this new nyger seed, I had flocks of Juncos waiting in line to get their fill of this black gold. Today, I have a combination of juncos goldfinches and chipping sparrows lining up at the nyger feeder to get their fill of this important, high energy winter food source.
Cardinals, bluejays and a host of woodpeckers have reappeared in the yard since using a more locally sourced bird food.
There is a good reason why the old nyger proved unattractive to our backyard birds – it had simply dried out probably before I even brought it home. (For more on Nyger seed, go to my earlier post here.)
A few days after refilling the nyger feeders with this locally-purchased seed, I emptied our regular feeders at our main feeding station that was full of the cheap seed and replaced it with the no-mess blend seed from The Urban Nature Store. I also put one of the store’s seed cylinders up and within hours the feeding station was boiling over with birds lining up for a taste of this new seed. Cardinals, Blue Jays, Goldfinches, Dark eyed Juncos, mourning Doves, sparrows and a mix of woodpeckers including red-breasted and downy, just to name a few.
This was more bird action than I ever really got from even the best seed from my “other” specialized bird store in the next town over. This was truly remarkable.
The mess-mix is packaged in Canada using local and international ingredients, and combines sunflower hearts, peanut halves, dried cranberries and raisin. The mix is perfect for those who want to serve a variety of premium seeds with no messy leftovers. No shells means everything is eaten. The Nature Store reports that the seed mix is very popular with cardinals, chickadees, warblers and finches. Not sure about warblers, since they are primarily insect-eating birds.
And, since I have been using this seed, the number of birds at our feeding stations has only grown steadily.
Even the woodpeckers have returned with the new seed and seed cylinders from the Urban Nature Store.
“So what’s the difference?” you may ask.
Besides being a high-quality seed, an important difference is where it was sourced and the closer to home the better. This happens to be a Canadian-based store that sources much of its seed locally.
Who knows where big box stores source their seeds from, and I know that the other “specialized bird store” I purchased my seed from in the past was American based and likely sourced much of their seed from the U.S.
The closer you can purchase your seed, the more success you are likely to have. If you are based in the U.S., look for seed that was sourced nearby. The same holds true for U.K. based readers.
In the case of nyger seed, which mostly comes from Africa, the critical factors are how old the seed is and, if it has been overcooked in ovens that remove the natural oils that give the seed its nutrients. Purchasing from a specialized bird food store helps guarantee high turnover and is less likely to leave you buying old seed that has not been handled properly.
Not only has the seed from my local Nature Store been a magnet for local birds, the seed cylinder that I purchased is still going strong more than a week after mounting it, despite continued snow and rainfall that often prematurely weakens other seed cylinders I have used in the past. The fact it has held up so well means an extended run for the woodpeckers rather than the seed cylinder breaking up and falling to the ground for the squirrels and other critters.
If you have taken the time to check out The urban Nature Store link here, you will find that it is a wholly-owned and operated chain of Canadian stores with its head offices based in Toronto. It does offer mail-order for some products for anyone who does not live near one of its 9 store locations in
Ancaster/Hamilton
Etobicoke/Toronto West
Kingston
Markham
Mississauga
North York/Toronto East
Oshawa
Pickering
St. Catharines
I encourage all my readers to check out their impressive web site and support a truly Canadian company.
However, I recognize that we have many American and UK followers who cannot or choose not to purchase from The Canadian based Urban Nature Store.
All I am saying is that whenever possible – especially when it comes to purchasing bird seed – buy it from a local supplier. If the results I am having means anything, It really does make a difference.
Fresh bird seed that comes from a locally sourced supplier can make all the difference in the world to your bird feeding success.
Luminar Neo’s AI module shines as an educational assistant
Luminar Neo chooses to us Ai as a learning tool to help beginner photographers.
This image of red barns lit up dramatically against a stormy sky was created with a number of post processing modules. It’s important to note that the above image was NOT made with Luminar Neo’s new Ai module. In fact, an attempt to replicate it with the AI module proved fruitless. However, it’s equally important to know that the educational resources Luminar Neo’s new AI tool provides photographers – especially beginners – will help give them the knowledge they need to transform their images and create images like the one above from the original pictured below. The creators of Luminar Neo’s AI assistant believe that It is more valuable to know how to properly edit and create images than expect the computer to do all the work.
Using Ai as a learning tool
Whatever you think of Ai, there’s no denying that it is here to stay. The question many are asking is: Will AI be used for good, or for evil?
The answer to that question is still being written. Luminar Neo, however – unlike many other photo processing programs – is putting its support on the side of good.
The original image straight out of camera shows distracting elements, a bland sky and uninteresting lighting.
To be more precise, Luminar Neo is tapping into the power of AI to use it as more of an educational and learning tool, than one to dramatically manipulate images.
At least that is my initial impression after putting it to the test with a number of my images. The focus seems to be at least as much about education as it is about transforming images.
Understanding the capabilities of modern photo editing programs and techniques has never been more important.
After all, getting the most out of our images, whether they are from our latest vacation, pictures of our kids, grandchildren or flowers in our garden, is the goal for most of us.
The before and after pictures of the red barns are examples of how, with a little knowledge, we can transform boring images into dramatic ones simply by understanding a little about post processing techniques.
So how does Luminar Neo’s AI assistant help us achieve similar results?
The image below shows one of three suggested edits from the Luminar Neo AI assistant module. The image is much better than the original, but falls short in comparison to the full edited version at the top of the page.
Over time, however, we the AI assistant teaches us how to achieve desired results by explaining what tools were used and making suggestions on how the image can be improved.
The above image is one of three suggestions Luminar Neo’s AI assistant suggested. You can see the suggestions and a detailed analysis of the above image in the Edit 1 description. You can also see that the suggested improvements are still rather subtle compared to the top image. Similar analysis are provided for Edit 2 and Edit 3.
How it works
Luminar Neo’s AI Assistant is available in both the Presets and Edit tabs and users can simply input text prompts to get AI Assistant’s editing suggestions.
There are two types of prompts.
Action prompts, like “Enhance this photo,” provide tailored recommendations with three adjustment sets and live previews, while How-to prompts, like “How do I remove this object?,” offer step-by-step guidance and buttons to quickly find the right tools in Luminar Neo.
It’s like having a personal editing advisor at your fingertips, helping you explore creative possibilities and discover the best tools and workflow for every image. You can use text commands in all Luminar Neo languages.
Back to our discussion about using AI in our work flow.
Knowledge about the tools available helped me create the top image. The original image’s sky was replaced and dramatic lighting was added in Luminar Neo’s Light Depth module.
“For the beginning photographer who has not yet perfected the art of post processing, this AI module is a tool that promises to transform their images over time and equip them with the knowledge they need to “make” outstanding images.”
In the past, we took pictures, today we make images
In photography, we often talk about “making” images rather than simply taking them. In the past, that most often was referring to “making” images in-camera during the analogue era of photography. Making images today with modern post processing can be taken a step further to include anything from minor enhancements to the photograph and removing distractions, to completely changing the image by adding elements not in the original image.
I’m not here to debate the validity of the different “levels” of enhancement, except to say that every photographer has to define the line they are not willing to cross. If you take a photojournalist approach to your photography, only minor enhancements are appropriate. If, however, photography is more a creative outlet for you, the same restrictions would not apply.
Important note: If you are looking to dramatically transform your images using ai, chances are you are not going to find those capabilities in this version of Luminar Neo’s AI module.
What you will find, however, is the ability to make positive, yet more subtle, changes to your images, while at the same time getting a thorough education on, not only what the program is doing to the image, but how the photographer can take control of the post processing and add their own creative effects using Luminar Neo’s wide range of creative modules.
For the beginning photographer who has not yet perfected the art of post processing, this Ai module is a tool that promises to transform their images over time and equip them with the knowledge they need to “make” outstanding images.
It might be the best use of Ai in any photographic post processing program. Understanding how to use post processing tools is much more important than just telling your computer to do the work. Luminar Neo does exactly that by adding three informative text-based explanations of changes it suggests for the particular image.
How to choose
This image is the result of rather subtle changes made in Luminar Neo’s new ai module. See edit 2 for the list of enhancements added to the image by the ai module.
A good illustration is this image of a baby picking flowers at a local garden.
Once the Ai module is opened in Luminar Neo, the photographer is faced with two questions: 1) Typing in a command to enhance the image; or, asking the ai module how to use the tools available in Luminar Neo to make changes to the photograph.
The first suggested prompt is a simple one and a good starting point: “Enhance this image.”
If you choose this prompt, the program goes into action generating three different suggestions to enhance the image.
For this image the suggestions range from boosting the highlights and shadows and adding more golden light, to increasing depth of field and making colour harmony adjustments.
By explaining the enhancements, the beginner photographer gets an understanding of what is being done to improve the image and can take that knowledge to use with their other images.
Here the ai program responds to my request on how to get the best skin tones on the baby.
Other simple commands that are available to users include changing the photograph to a B&W image.
More important are commands to teach the user how to change the image. Questions such as: how do I remove distracting elements in the image, or how do I improve the skin tones in the image?
The result is a list of suggestions the program makes to guide the user to the appropriate modules to make the changes themselves. The result, a better understanding of the capabilities of the program and how to use it to make the images you originally envisioned.
Here is an original image of a rusty car before asking Luminar Neo to enhance the photograph. Below is the result after asking Luminar Neo’s AI to enhance the image.
The enhanced version of the rusting car and the explanation (below) of what was done to the photograph.
Luminar Neo is continually improving their Ai features and will certainly further refine many of the features in their recently released AI module.
Meanwhile, beginner photographers have a built-in assistant to help them learn the intricacies of the program and expand their post processing knowledge with the end goal of creating images anyone would be proud to share with friends and family.
If you are interested in further exploring Luminar Neo and its features, please use my link here.
Luminar Neo and Lensbaby combine for the ultimate in creativity
Adding a creative touch with Luminar Neo and Lensbaby lenses.
Our spring dogwood proved to be the ideal subject for the Lensbaby Composer and Sweet 50mm lens with a macro filter attached. Combine this soft, ethereal image with two subtle textures using Luminar Neo’s layering and blend modes and the existing photograph is turned into a painterly image that I’m betting most would be proud to call their own.
Textures add painterly effects to ethereal images
Ansel Adams once said you don’t “take a photograph, you make a photograph.”
Back then, Adams used the traditional darkroom to create magnificent Black and White images of the natural world, often times spending days in the darkroom “making” these images.
Today, the traditional darkroom has been replaced with the digital darkroom, turning the concept of “making” images rather than just “taking” them accessible to every photographer who chooses to explore their creativity and take their photography to new heights.
In this post, I am going to explore how, combining the inherent creativity built into every Lensbaby lens with the creative tools available in Luminar Neo, can change how you approach garden and flower photography as well as portraiture and landscapes.
• Go to the bottom of this post for the latest HOLIDAY offering from Luminar Neo
In case readers are unaware of the magical qualities of Luminar Neo post processing software and Lensbaby’s creative line of photographic lenses, let’s take a moment to familiarize ourselves with these creative photography tools.
While the first image of the dogwood flower is rather subtle, this image of paperbark maple leaves in fall shows what can be achieved with heavier textures applied through Luminar Neo’s layering and blending modules. The original image was taken with the Lensbaby 2.0 and sweet 50mm lens.
Luminar Neo is a photo editing software package that combines ease of use with the power of Ai to assist photographers, who may have been hesitant to dive into more complex photo editing software in the past, to embrace the ease and convenience of a more simplified, yet powerful, editing program.
Lensbaby is a lens manufacturer that embraces and encourages photographers to push creativity by offering lenses with unique characteristics that create elegant, soft-focus effects, beautiful colour blending and soft ethereal results that enhance almost any image, especially in the garden, with flowers and portraits.
In the final days leading up to Christmas, Luminar Neo is offering a special “creative” Advent Calendar package just in time for photographers to give themselves a special gift for the season.
The lowest price is available now, but once the doors officially open, the cost will range from $119 to $159 depending on if you are a new or existing user.
The Advent Calendar includes 12 unique surprises, each hidden behind a daily window. Photographers can discover a new gift every day, such as:
🔸 Luminar license
🔸 Marketplace items (Skies, bundles and more)
🔸 X-membership subscription
🔸 Educational courses
There are different surprises depending on the Luminar Neo package you choose or currently own.
Check out the information at the end of this post for details on the special creative and educational packages.
This image was taken with the Lensbaby Composer and sweet 50. It was then brought into Luminar Neo where a number of textures were applied creating a more painterly effect. One of the textures was also used to add the lovely, subtle pink tone to the image.
Adding textures to existing images is rather simple with Luminar Neo’s intuitive photo editing program. It’s as simple as dropping a textured image on top of your main image and then choosing from a host of blend modes from a drop-down menu. Once the texture is applies and the blend mode chosen, it is up to the photographer to decide if they want to go farther using masks or a host of other editing modules within Luminar Neo.
One of my new favourite modules is Luminar Neo’s incredible “Light Depth” module that is capable of transforming flat, boring images into beautifully lit, three-dimensional images. Check out my earlier post here, for more on using the Light Depth module in Luminar Neo.
These Northern Sea Oat grasses photographed with a Lensbaby 2.0 was given added interest by using a Luminar Neo built-in golden dust texture effect. You can create your own textures, find free ones on line or purchase more professional textures through Luminar Neo. Their latest creative package might just include some of their professionally produced creative tools.
If you are interested in exploring Lensbaby lenses further, you can check prices here (Amazon.com) or here (KEH used camera exchange.) If you are interested in exploring Lensbaby lenses further, check out the offering of books available through Alibris used books here.
My earlier posts on Luminar Neo
Adding textures, manipulating lighting, or even repairing old family photos are just a few of the incredible bonus features offered by Luminar Neo’s comprehensive editing software. For more of my posts on the benefits of exploring Luminar Neo, I encourage you to check out the following posts.
• Exploring Luminar Neo mobile for your phone: click here.
• Exploring Luminar’s incredible photo restoration module: Click here.
• Can Luminar Neo act as your only photo editing program. Click here
Subtle textures were added to this macro image of a Hydrangea blossom taken with the Lensbaby composer fitted with a Lensbaby macro filter.
Of course, garden flowers are not the only subject for Lensbaby lenses and Luminar Neo textured effects. Below is an image taken recently of our new flat Coated retreiver, Colby. This image was taken with the Lensbaby Velvet 56. The Velvet series of lenses are capable of truly beautiful results with an ethereal glow that is magnified depending on the f-stop used (from quite sharp at f5.6 through f16 and getting softer from F5.6 through to F2.
Two B&W textures were added to the original image to maintain the overall B&W, painterly effect.
The image below and the above images represent just a few of the creative approaches available to photographers using special effect lenses and/or filters, and combining them with the creative effects available through Luminar Neo. Please explore the links provided for my earlier posts on Luminar Neo and be sure to click below to check out all of the special deals on creative assets, tools and educational resource materials Luminar Neo is adding for their “creative advent calendar.”
Our rescue Flat-Coated Retriever with his baseball stuffy taken with the Lensbaby Velvet 56 with two textures added for a painterly effect.
Luminar Neo’s holiday calendar of gifts explained
From December 13th to 24th, open a new surprise every day and discover creative tools, content, and inspiration worth more than $1000.
The calendar can also be gifted to friends, family, or photography enthusiasts, making it a thoughtful and creative holiday present.
Here’s what all the excitement is about. Unlock your treats every day leading up to the big day.
Calendar Timeline:
December 10: Presale begins with lower prices
December 13–24: Daily windows open (one per day)
December 16–25: Calendar available at full price
Luminar Neo brings treasured family memories back to life
Restoring vintage family photos has never been easier with Luminar Neo’s new Ai restoration module.
Luminar Neo not only took this outstanding vintage black and white image of my mother, father and aunts posing with our cousin Audrey and her husband, acclaimed singer of the Ink Spots, Bill Kenny, but modernized it with an extraordinary colour rendition using the “Full” module in the post processing photo program. (see BW image below.)
Restoring, colourizing vintage photos
Not long ago, fixing old family photographs involved bringing them to professional photo retouchers and paying a week’s salary to have a handful of them restored.
Those days are gone thanks to a new, incredibly impressive new feature in this fall’s Luminar Neo release.
With a single click of your mouse, you can transform a faded, scratched, blemished old black and white photograph into a perfect reproduction of the original Black and White version.
And that is just the beginning.
The simplicity of the “restore” module is almost too good to believe.
Rediscover treasured photos
This prized family group portrait of the acclaimed lead singer for the Ink Spots Bill Kenny and wife Aubrey pictured here with my mother (2nd left and father far right) at a club in Halifax Nova Scotia. Luminar Neo was able to repair any scratches and blemishes on this BW image with the simple click of a single button. Another button colourized it (see above).
Restore module is the essence of simplicity
In fact, there are just three buttons to choose from to transform your vintage images: “Full” which repairs scratches, blemishes and colourizes the image to modern standards; “Colour” which simply colourizes the image without removing scratches and blemishes for a more authentic Lomography look; and “Scratches” which leaves the image either in its original BW or colour state and simply removes any scratches or blemishes on the photograph.
It’s so simple and effective that it is difficult for me to go into much more detail than – choose what you want to do and press the appropriate button.
If you are interested in trying Luminar Neo, please consider using my affiliate link HERE to purchase the program. By doing so, I receive a small payout that does not affect your purchase price.
This is the restoration module in Lumina Neo. Simply drop the image into the box and choose Full, Color of Scratches. Then hit the Restore button. The final image will show up in a separate folder within Luminar Neo called “Restoration.”
My sister and I on large format negative inverted.
The same image of my sister and I ran through the full module which colourized the photograph as well as adding some interesting vintage touches. Running the images through the module can result in slightly different results, which makes the entire process even more exciting to see the results.
Obviously, you will have to have a way to get the old images into Luminar Neo. I choose to use a flatbed scanner, but you could easily take digital pictures with your phone or, even better, a digital camera with the ability to take close-up images.
Once the images are on your computer or phone, import them into Luminar Neo, drop them into the restoration box, choose the appropriate button – either Full, Colour or Scratches – and Luminar Neo will drop the finished photo into a separate folder named restoration.
It’s as simple as that. The following are just a few examples’s of what the “restoration” Ai module can do in just a minute or two.
For more before-and-after images, check out my new “Spaces” gallery from Luminar Neo here.
The original BW image prior to any post processing.
A “Full” colorized version of the vintage image.
The following is a good example of what the Luminar Neo “Restoration” module can do for heavily compromised images by not only restoring them by removing scratches and even missing parts of the image, to colourizing them to create authentic-looking images.
The following shows the original scan, a repaired scan and the final colourized version.
This is the original, untouched image of my uncle and his dog.
The same image ran through the restore module – a single click of a button in Luminar Neo.
The final restored and colourized image. Note that the ai changed the dog’s profile slightly.
If you are interested in trying Luminar Neo, please consider using my affiliate link HERE to purchase the program. By doing so, I receive a small payout that does not affect your purchase price.
If you are a new user to Luminar Neo, use this link.
If you are a current user of the program, use this link
Prices below: Black Friday is Coming:
Dates: October 24 - December 1
Discounts: Up to -75% on the Luminar Neo Ecosystem - the best prices of the year!
Prices for new uses:
Luminar Neo Desktop Perpetual: $99
Luminar Neo Cross-device Perpetual (Desktop + Mobile): $139
Luminar Neo Max Perpetual (Desktop + Mobile + Spaces): $159
Luminar Neo takes lighting to another level
Luminar Neo has changed the way we see light forever.
This woodland fall scene is an example of how Luminar Neo’s new light-depth module can transform a relatively flat image into a more three-dimensional one. The smaller inset photo below shows the original image.
Transform your fall images with newest tool
If photography is all about light, Luminar Neo may have just rewrote the future of post processing.
I can’t think of a single feature, besides Ai erase and replacement, that has excited me quite as much as Luminar’s new Light Depth module.
Subtle but sweet
The change in the photos is subtle unless you know where to look. The light in the first image is moved forward to create a strong foreground band of light that lights up the brush in the front as well as the tree trunks. The effect helps to give the entire image added depth.
This module can take a good image to greatness in seconds and create a completely controllable, three-dimensional-lighting effect that is unmatched by any other post processing program I have experienced.
And, if used carefully, it can be beautifully subtle, or, not so subtle at all but always believable.
It’s just one of the new features unleashed in Luminar Neo’s fall package that includes a host of outstanding additions from improved mobile/desktop compatibility, to a highly useful photo restoration module that also has the potential of changing the way photo restoration is done both for amateur and professional photographers. And all of this added to an already impressive package of features for a very low price. For pricing details, go to the end of this post.
For more of my images showing Luminar Neo’s new Light Depth module as well as their free galleries for members, click here.
Although the Beech tree was also “lit up” in the original image, by manipulating the light depth module settings, I was able to darken the background and create a much more dramatic image. In addition, I used Luminar Neo’s light ray module to emphasize sunrays coming in from the right side of the frame.
If these three additions were not enough to convince anyone sitting on the fence about diving into this Ukraine-based post-processing photography package, this extremely innovative company is adding personal galleries to their repertoire of features to allow Luminar Neo users to share their best work with family, friends, clients and other Luminar Neo users.
I’ll be making separate posts on these features in the future.
If you are interested in trying Luminar Neo, please consider using my affiliate link HERE to purchase the program. By doing so, I receive a small payout that does not affect your purchase price.
Added drama
The before-and-after shows the dramatic difference created by darkening the background by shifting the light in the depth module. Luminar Neo’s new feature helps to create a more three-dimensional look.
Luminar Neo Light Depth module: Painting with light
But back to the reason for this post: The incredible “Light Depth” module.
I am not going to try to explain how this thing works, but suffice it to say that it’s an example of how ai can transform your images in subtle, yet incredibly useful ways. The module does not add anything to your image, it simply helps the photographer to manipulate the lighting in the scene.
How it all works in real life
In short, the module allows you to control the light “near” the front of the image, and the light toward the back of the image. Sliders give the photographer control of the amount of light, the warmth of the light and the softness all the while providing a map of the scene to help the user control the light in quite fine detail.
The module’s secret sauce can transform your images from flat, evenly lit scenes into more three-dimensional images with much more depth.
Below are a few before-and-after images I took just recently of fall colours in the woodland around our home showing the results. I try to keep most of the edits subtle, but you can choose the amount and quality of light you feel is needed to create the images you are trying to achieve.
This spectacular old oak tree set against the colours of fall literally stopped me in my tracks. Pulling the oak tree away from the background proved to be relatively simple in Luminar Neo’s Light depth module. without it, the scene (see below) is rather flat and the beautiful oak tree dissolves somewhat into the overall scene.
The rather flat lighting seen here, does not put the beautiful old oak tree in its best light.
Although I loved the birch trees and the leaf-covered pathway in this image, the lighting in the original proved to be very flat. Luminar Neo’s Light Depth module created the ray of light across the pathway and into the tree canopy as well as adding a subtle light to the birch trees. The result is a more three-dimensional image with a whole lot more interest. This result probably could have been achieved with other post processing software, but certainly not this easily and with this amount of control.
Adding depth to flat lighting
The before picture is rather flat in comparison to the edited version. Of particular note is the absence of the ray of light that cuts across the leaf-covered pathway in the edited version,.
Luminar Neo’s new tool will help transform your fall images
Fall is a spectacular time to get out and capture the rich colours all around us. However, no matter how good the colour is, lighting plays an important role in the success of your images. Getting out at different times of the day including early morning and late afternoon improves our chances of capturing great light, but there are no guarantees.
Luminar Neo’s new Light Depth module helps photographers improve their chances of creating images with interesting light by giving them control of the light in post processing. The results can be subtle, yet very effective.
If you are interested in more of my posts on using Luminar Neo, check out the following links:
• Luminar Neo in the woodland.
Fall colour and birch trees using Luminar Neo’s Light Depth feature.
If you want to see more of my fall images using Luminar Neo’s Light Depth module, be sure to check out my new Fall 2025 Gallery brought to you by Luminar Neo as part of their fall rollout of features. Check it out here.
If you are considering adding Luminar Neo to your existing photo processing packages such as Lightroom and Photoshop, it should be noted that the programs work seamlessly together. You can even open Luminar Neo from within Lightroom.
If you are wondering about the cost of this exceptional photo editing program, let me share some information and a couple of images that might help convince you to make the jump.
This image taken with a Lensbaby and the Light Depth module creates an interesting effect that I think works nicely.
If you are interested in trying Luminar Neo, please consider using my affiliate link HERE to purchase the program. By doing so, I receive a small payout that does not affect your purchase price.
If you are a new user to Luminar Neo, use this link.
If you are a current user of the program, use this link
Prices below: Black Friday is Coming:
Dates: October 24 - December 1
Discounts: Up to -75% on the Luminar Neo Ecosystem - the best prices of the year!
Prices for new uses:
Luminar Neo Desktop Perpetual: $99
Luminar Neo Cross-device Perpetual (Desktop + Mobile): $139
Luminar Neo Max Perpetual (Desktop + Mobile + Spaces): $159
Prices for existing users of Luminar Neo:
Ecosystem Pass: $69
Upgrade Pass: $49
Prices for legacy users of previous Luminar versions:
Luminar Neo Cross-device Perpetual (Desktop + Mobile): $89
Luminar Neo Max Perpetual (Desktop + Mobile + Spaces): $109
Why I chose the Pentax Q7 to capture a European river cruise vacation
Is the Pentax Q system the ultimate travel camera? Decide for yourself after checking out the results on our European river cruise.
Convenience, quality wrapped in a tiny package makes Pentax Q series the perfect travel cameras
Okay, before you start laughing, let me explain.
Yeah, the miniature 20-plus-year-old, Q7 mirrorless camera with its tiny 12.3 megabyte 1.17-inch backlit CMOS sensor would not be many photographers first choice to document a once-in-a-lifetime family Rhine river cruise vacation.
In fact, I’d bet I’m probably standing pretty much alone here, with maybe the exception of all but the most die-hard Pentax Q users.
And that’s fine with me.
Pentax Q: Tiny and terrific
The Pentax Q with its fine collection of proprietary lenses, just might be the best travel companion for those simply looking to document their vacation with a high-quality camera and lenses that is small enough to fit into a coat pocket.
The purpose of the vacation was not to capture incredible images, rather it was to spend time with my wife and adult daughter. In other words, I felt the experience was going to be more important than the images I was going to make on the vacation. Afterall, time limitations and tourists getting in the way makes serious photography difficult on these types of vacations, to say the least.
Complete system fit nicely in a coat pocket
I figured the Pentax Q system was, at least, better than relying on my phone for capturing memorable moments, and, being able to fit the miniature camera and all three lenses into a coat pocket would allow me to grab the odd shot without having to lug around a full system of cameras and lenses. I’ve made that mistake too many times in the past and was determined not to make it on this vacation.
So, after much thought prior to the trip, I convinced myself that, because of the limiting factors of time and an abundance of tourists, at best I was going to get a couple of nice snapshots.
Boy, was I wrong and more than a bit surprised..
But more on that later. Let’s continue this talk about the interesting camera decision.
For more on the Pentax Q system, check out my other posts below:
The tiny Pentax Q7 fit nicely in my coat pocket and could be easily retrieved at a moment’s notice to capture an iconic scene like this one of a man walking down a deserted street in the heart of a quaint German town. (Pentax Q7, ISO 1600, 1/125 sec, F5, with 02 standard zoom at 14.9mm.)
Sigma DP2, Fujifilm X10, Olympus and Lumix micro 4/3 cameras all stayed home
My camera choice certainly wasn’t because the Q10 and accompanying lenses were the best I had available to me. I’ve got Olympus and Lumix M4/3 systems, A Pentax APS K5 system, the venerable Fujifilm X10, the Lumix LX7, even a Sigma DP2 as well as a host of other cameras to choose from. (I know I have a problem.)
But when it came down to it, I chose the Q7 along with the 50mm (01) equivalent, 28-80mm (02)kit zoom and the weird little fisheye lens. I meant to take the 80-200mm equivalent (06) to give me some pull-in power, but in my haste to pack everything, I grabbed a second 28-80mm kit lens instead.
I should say that I also packed a Fujifilm EXF660ER travel camera with a 16mp CMOS sensor and 24-360mm zoom lens, which I had purchased a few weeks earlier from a thrift store for $12 Canadian. Its 360mm reach easily took the place of the 80-200mm 06 lens for capturing distant scenes. However, the Fujifilm was used only sparingly and often when the Q10 battery died while out on the town.
Would I do it again? In a heartbeat.
But, rather than explain my decision and trying to justify it to an audience that can’t imagine bring the tiny Pentax instead of a larger format system, let me show you why.
I think these images speak for themselves.
Montreau, Switzerland taken with the Pentax Q7 from the Lake Geneva boat cruise. (Pentax Q7, ISO 100, at 320 sec at 9.1mm.
From past experience, I knew the Pentax Q system was capable of capturing exceptional images. Despite the tiny sensor, the camera boasts the ability to shoot both high-quality JPEGs as well as RAW (DNG) files, has very capable image stabilization built into the camera and no anti-aliasing filter to soften the image. I believe the lack of anti-aliasing filter is often overlooked by many, but accounts for the very sharp images achievable straight out of camera.
The results point to a surprisingly capable camera system more than up to the task of capturing extremely sharp images with the array of dedicated lenses. This is not even taking into consideration the huge number of third-party lenses that can easily be added to the system from the diminutive 110 lenses (see story here) to a host of manual lenses via a simple adapter. (seee story here)
Before the trip, I added a step-up ring which, in turn, allowed me to use a polarizing filter to deepen the blues in sunny skies and remove unwanted reflections from water, windows and other reflective surfaces.
After going through almost 2,000 images, I think I can safely say that I was not disappointed. In fact, once again, this little camera system managed to impress me even more than I expected.
I was careful to photograph everything in both Jpeg and RAW formats and, although the JPEGs were more than useable, I chose, in most instances, to work with the RAW images in Lightroom to pull out fine detail and a wider exposure range. The RAW DNG files proved to be incredibly easy to manipulate and arrive at the results I was wanting to achieve.
To my surprise the kit zoom (02) that gives a zoom ratio of approximately (28-80 range) with the Q10, was used for maybe 80-90 per cent of the images. Most of the images included the polarizing filter, if nothing else to cut glare.
Eight dedicated lenses to choose from
For a little background, Pentax introduced a total of 8 miniaturized lenses beginning with the excellent 01 standard Prime with a focal length of 8.5 mm (47mm equivalent for the Q, Q10, and 39mm for the Q7, Q-S1 with the larger sensors.) More lenses followed: 02 standard zoom (27-80 range equivalency, 23-69mm), 03 Fisheye (17.5mm, 16.5mm), 04 Toy wide angle lens ( 35mm, 33mm), 05 Toy lens (100mm, 94mm), 06 Telephoto zoom (83-249mm, 69-207mm), 07 Shield mount lens (63mm, 53mm) and finally the 08 Wide Zoom (21-32mm, 17.5-27mm). For more complete story on the hard-to-find O8 wide angle lens click here.
The lake cruisers traditional looks and almost silent motors made the Lake Geneva cruise a real joy. (Pentax Q7, ISO 200, 02 lens at f4 and 5.5mm.)
One of the weaknesses of the Q system is their tiny batteries which do not hold the best charges. I carried two batteries most days, but was able to get through the majority of days with a single battery by conserving the power by turning off the camera immediately after using it and keeping chimping (checking the images on the back LCD screen) to a minimum.
Keeping an eye out for interesting “street” images adds more depth to your typical vacation photographs and helps to capture a greater sense of the local character.
Ideal system for capturing street scenes
As a former journalist, capturing interesting street scenes was a prime focus whenever I was wandering the small towns and cities where the river cruise ship stopped. Nothing screams professional more than a large 35mm camera and an array of lenses cascading out of the camera bag. That’s not the image I wanted to convey while wandering the back streets trying to capture street scenes.
A couple strolls down the quintessential European street in the heart of a quaint German town (Heidelberg I believe). (Pentax Q7, ISO 400, F4, with 02 standard zoom at 11.2mm.)
Nothing could be more inconspicuous than the miniaturized Pentax Q system. Even with the 80-200mm f2.8 mounted on the camera, no one is going to mistake you for anything more than an annoying tourist, if they even notice you are photographing them at all. The whole package is so small that, if you are shooting from the hip, I can guarantee no-one will take notice.
This well-dressed woman seemed to be taking a moment to do a little people watching or maybe waiting for a friend, but I could not resist capturing this captivating scene.
These are just a few “street scene” images taken during our two weeks in Europe. I hope to write a separate post on capturing more authentic images on vacation rather than just your family members posing in front of typical tourist destinations, which will include capturing street scenes.
Getting a grip on the Sigma DP series cameras
The incredible Sigma DP series of cameras with their minimalist approach to design combined with an outstanding foveon sensor makes them a true cult camera. Adding a third-party 3-D printed grip only makes the cameras even better.
Third-party grip takes street photography to a new level
Let’s start by saying I love the minimalism of the Sigma DP1 and DP2. Their simplicity, along with their incredible foveon sensors give them special status among the many high-end point-and-shoot cameras in my arsenal.
My Sigma DP2’s brick-like look and feel is perfect when I’m using it out of a camera bag or from a tripod capturing landscapes in the woodland. However, when it comes to street photography, I like a good grip to give me the assurance I’m not going to accidentally drop one of my favourite cameras.
That’s when Shutterspeedblog’s creative expertise comes into play with its outstanding grips for the Sigma cameras as well as a host of other high-end cameras from Leica, Canon and Lumix just to name a few.
Sigma Hand grip
The 3-D printed grip has been meticulously designed to incorporate both a grip and thumb rest, while allowing access to the battery and SD card.
There is something comforting about walking around town with the Sigma DP2 hanging off your fingertips ready to capture anything that catches your fancy. Of course, I use a simple wrist strap for a little added insurance, but the camera sits nicely in my hand with just the grip. The built-in thumb rest is added security and helps me to hold the non-ibis camera still during longer exposures.
Grip and build-in thumb rest
This overhead view shows the grip and build-in thumb rest that helps to make street photography style shooting with eh Sigmas that much easier.
The meticulously 3D printed grip also allows access to the battery (and we all know how important that is for the battery-eating Sigmas) and SD card, to make the entire experience seamless.
Want to remove the grip? Unscrew it from the tripod mount. Want to still use the camera on a tripod? No problem, there is a separate, yet very sturdy tripod mount built into the grip.
There is no doubt that the very reasonably priced grip significantly improves the handling of the camera. Depending on the size of your hands, some of the buttons on the back of the camera might be a little more difficult to reach, but that is a miniscule price to pay for the convenience the grip provides.
Lumix LX7 grip
Similar grips are made for Lumix, Leica, Canon and other high end point and shoot cameras.
I decided to give it a good workout during a walk with our new dog down the Main Street of our small town. Walking a dog and carrying a camera loosely in your hand is not always recommended, but the new grip on the Sigma made it not only possible, but immensely enjoyable. All I had to do is raise the camera and shoot away like a real veteran street-shooter.
I can only imagine how much easier it will be to use the grip on the cameras for someone who regularly shoots from the hip, whether they are using the camera in manual focus mode or autofocus.
The following are just a few more images from my morning walk with our Flat-coated retriever, Colby and the Sigma DP2 and grip from Shutterspeedblog’s eBay store.
Colby goes to church
A quick grab shot of Colby in front of a gothic church door. The grip just makes stealing images like this much easier with the Sigma series of cameras.
Minolta 125 film camera: A classic point-and-shoot
The Minolta 125, point-and-shoot, 35mm film camera is ideal for a new photographer or one interested in experimenting with Lomography.
Beginner photographers and Lomography aficionados will love this little gem
This post is a combination of a review of the Minolta 125 film camera as well as a focus on post-processing using Lightroom and Luminar Neo. I hope the post illustrates the importance of post processing your images, whether they are from a digital camera or a film camera. Learning this skill does not have to be difficult. Luminar Neo developers have gone to great lengths to simplify the process so that excellent results are more easily achievable. Please take a moment to check out my other posts on Luminar Neo listed at the end of this post.
If you’re looking for a 35mm film camera that just works with little to no fuss, this little compact Minolta might fit the bill.
Forget about setting it on manual, adjusting apertures or shutter speeds, this is a genuine point-and-shoot camera from the year 2000.
It has a lovely high-quality look to it with a champagne and silver exterior combination that might make you think it’s a very high quality all-metal Contax or Rollei. Pick it up, however, and you’ll know it’s not in that league. It does appear to have an all-aluminum front and bottom plate, but high-quality plastic abounds in the back and in other parts on the camera.
Before and After
Image shows the Before-and-after following some work in Luminar Neo. Notice how the colours, especially the greens and magentas pop in the Luminar Neo image at right.
Mind you, the Minolta Riva Zoom 125 is a fine example of an autofocus, DX-coded, film point-and-shoot camera that can deliver very pleasing results without a lot of thought on your part. It will read film from ISO 25 (think Kodachrome) to 3200 but the recommended film is ISO400. In my tests, I shot ISO 200 for a finer grain, and used a tripod to reduce the chances of motion blur.
Before and After image
This shows the before-and-after image. The photograph on the left is the Lightroom image and the image on the right is after additional post processing with Luminar Neo, including a complete sky replacement.
How it performs
Would it be the only camera I would take on an important shoot? Absolutely not. But, for a very lightweight, simple camera that can fit in a pocket, it’s certainly one that most film shooters would be happy to carry around as a back-up, or one to take with them to grab shots at a party or fun family event.
For students of Lomography, this little Minolta will allow you to focus on getting the images rather than the technical aspects of photography.
A highly competent flash (with red-eye reduction and a fill-flash feature), and superior lens doesn’t hurt either.
What sets the Minolta apart from many point-and-shoot cameras is that sweet Minolta lens that starts at a convenient wide angle range of 37.5mm and stretches to 125mm.
This little Minolta has a nice finish, a great lens and easily fits in your pocket.
Not particularly fast at f4.5 -f10.3, but the built-in flash comes in handy to stop motion and a tripod with the electronic self timer can be used if you are working a landscape. For those who care, the lens is a 6 elements/ 6 group construction with a close-focusing capability of about 2 feet.
Minolta added an ingenious electronic zoom lever that is actually set up to give the user access to the most poplular focal lengths – five to be exact. At the widest end you are at the 37mm focal length – consider it a sweet little 35mm. One click and you are in the 50mm focal length. Hit it again and you’re at the perfect portrait setting 85-100. One more click and the lens zooms to its max at about 125 – close enough to the popular 135mm focal length.
Buy these lenses separately, and you’ll be paying 10 times the cost you could probably pick up one of these on the used market these days.
An orange flashing LED on the viewfinder provides several warnings from; flash will fire, flash charging, and camera-shake warning, depending on the blinking speed. Above the orange light is a green light that tells the shooter the subject is in focus, subject is too close or the contrast is too low for accurate focusing.
Stream and waterfalls
Extensive post-processing was to rescue this image, including removing unwanted objects, adding an Orton-effect to some of the foliage and boosting the blues and greens in the stream and waterfalls to give it a more pleasing colour.
Before editing
This image has had only minor edits to it in Lightroom. The above image shows the results after work in Luminar Neo post processing software.
The flash can be set to auto flash, auto flash with red eye reduction, fill-flash, flash cancel, and night portrait (with red-eye reduction.)
For my woodland garden, landscape and flower test shots, I set the camera on automatic, turned off the flash and popped the camera on a tripod. To ensure the sharpest images possible, I also used the built-in self timer with ASA 200 Kodak film.
For close-focus subjects, lines engraved in the viewfinder corrects parallax issues and helps the user get the image they were hoping to capture. That’s a nice touch for flower photographers looking to capture subjects without a lot of complex macro gear.
It takes a relatively inexpensive single CR123A lithium battery that can handle about 12 rolls of 24 exposure rolls with flash for 50 per cent of the exposures.
Four small buttons on the top control the on/off, flash, timer and date functions. (some cameras including the one I used do not have the date button.)
An LED screen on the top plate provides the needed information including battery life and film counter as well as the camera’s other settings – flash, timer etc.
Important notes: Minolta made it difficult to accidentally open the camera back before the film is rewound. That’s a good thing. The back locks until the film is rewound into the spool. It can be over ridden if you want to change film mid-roll, for example. The other point that needs to be discussed is how to load film. It’s a little tricky at first if you are used to loading 35mm film into a typical SLR. With the Minolta, users just have to place the front of the film onto the spool and let the camera take in the film. Hard to explain, but once you get the hang of it, it works beautifully.
So how about the results?
More results of the Minolta 125 can be viewed on the Lomography site here.
The cons
This is probably not the camera for an advanced amateur and certainly not for a professional looking for complete control of the settings.
I am thinking the camera is perfect for the upstart Lomography student looking to have some fun with print film at a reasonable cost. Or a photographer looking for a second camera to use as a simple point-and-shoot.
Unlike so many of today’s digital point-and-shoots, this has a decent viewfinder –maybe a little small – but entirely usable.
It’s a fun camera to grab quick shots. For a street photographer, it gives you quick power up and good autofocus with a nice range of focal lengths that are more than capable of getting the job done.
Its compact form is never going to suggest that you are shooting professionally, but its reach at 125mm will give you lots of opportunity to keep a comfortable working distance.
Before and After
The before and after shows the original colour image and finished B&W after processing with Luminar Neo.
It’s the camera to pop in your pocket for a fun night out or a party where getting results is more important than capturing fine photographic images. The strength and simplicity of the flash makes it ideal to capture party portraits. The night mode makes getting night portraits with city lights in the background a simple process.
That’s not to say the camera is not capable of great results.
If you are more serious, put the camera on a tripod and use the electronic self timer to capture impressive results with Minolta’s high-quality lens.
The B&H price in 2001 for the Freedom Zoom 150 with an extended zoom range of 150mm, 25mm for than the sister camera the Freedom Zoom 125.
Look for a good used camera and put it to use. For the price you’ll likely pay, there is no need to worry about it either being damaged or stolen.
In its day, it was considered a sweet little point and shoot. Certainly not the most inexpensive camera in the year 2000. It sold at many of the large New York camera retailers for more than $200. The advertisement shows the B&H price of the Riva 150 at $224.00.
Today, you can probably pick one up for easily less than $100.
That’s a steal for a good working copy.
Post processing with Lightroom and Luminar Neo
Today’s print film offers the photographer plenty of exposure latitude. The above images were shot with Kodak 200 film and scanned on an Epson 500 flatbed scanner.
The initial edit from a high resolution TIFF scan to a jpeg was done in Lightroom. (I have included some of these digital images above.)
Then, I brought the jpeg images into Luminar Neo and went to work on transforming the images into the more creative visions I imagined when I was taking the photographs.
Luminar Neo’s modules allow for a more creative approach to editing your work, if that is the direction you want to take your images. That’s not to say that other post processing programs (including Lightroom and Photoshop) are not capable of similar results, it’s just the these creative processes are built into Luminar Neo.
The ability to try the creative filters will inspire you to experiment more and come away with a more creative finished result.
Whether you like to add a creative touch to your images, or prefer to leave them as they are straight out of the camera, Luminar Neo offers the photographer the ability to make that choice.
Luminar Neo post processing software
If you want more information on how I use Luminar Neo to post process my photos, take a moment to check out my other posts listed below:
• The beauty of the woodland with Luminar Neo
• Can Luminar Neo stand on its own as a post processing package?
• A Walk in the Woods: A Photographic Approach
If you are interested in purchasing Luminar Neo, please consider using the code FernsFeathers at checkout to receive a 10 per cent discount. By using this code, I receive a small percentage of the proceeds which helps me to continue producing articles for readers.
Focus on the Pentax Q’s 08 rare and wonderful wide angle lens
Wide angle photography is taken to a whole new level with the Pentax Q and 08 extreme wide angle lens.
This sunset image shows the impressive results that are capable with the Pentax Q cameras and the 08 wide angle lens.
Another tiny but tough-to-beat legendary Pentax lens
Pentax has made more than its share of legendary lenses, but nothing really comes close to the rare and relatively unknown (except to Q-series owners) 08 wide angle lens.
Why? Because it’s so small and sharp that it defies logic.
In December of 2013, Pentax released their final Q-series lens for their diminutive, mirrorless Q-series cameras. This 17-33mm equivalent lens (depending on the Q camera used) originally sold for almost $500 US and could pass for a 50mm, M-series lens, accept it’s probably smaller and lighter.
Today you would probably be hard pressed to find one much cheaper than the original price thanks, in part, to a combination of quality and rarity.
This garden image was photographed with the Q7 and the 08 extreme wide angle lens. Note the strong colours together with the edge-to edge sharpness.
Of course the whole Q-series of cameras and lenses are ridiculously tiny. The 08 wide angle lens in the Pentax Q “high performance” lens series follows in those same footsteps, but it’s still mind boggling that a lens packing this kind of punch can be this small, have image quality that matches and surpasses some of the finest 35mm equivalent lenses, and boasts such a high-quality build standard.
Pity that so few photographers will ever get the opportunity to run it through its paces. Thankfully, I’m not one of them.
I was able to purchase the lens as part of an entire Q7 series that included the 01 (nifty 50mm), the 02 wide angle, the 06 (70-200 f2.8), the fisheye and the mount shield lens. Despite already owning most of the lenses, let’s just say the offer was too good to refuse.
One of several waterfalls images that shows the incredible capabilities of the original Pentax Q camera together with the approximate 17-30mm wide angle lens. This image was shot using an accessory waist level finder (see below) and post processed with Luminar Neo. (see below for details on how you can get 10 per cent off of Luminar Neo with my special code.
“It’s still mind boggling that a lens packing this kind of punch can be this small, have image quality that matches and surpasses some of the finest 35mm equivalent lenses, and boasts such a high-quality build standard.”
This Pentax lens packs a punch
But we are here to focus on one lens only – the Pentax 08 wide angle lens.
Chart provided courtesy of Pentax Users Discussion Group.
First, it’s important to remind Q-series camera users that the various cameras in the lineup have different sized sensors that affect the focal length of the lenses. In the case of the 08 wide angle gem, the different sized sensors mean that the 08’s focal range is equivalent to approximately 21 to 33 mm in the full-frame (24 x 36 mm) format when used on an original Q or Q10 camera, and 17.5 to 27 mm when used on a Q7.
Add to the excellent build quality, wide focal length and miniature size, an image quality that again, defies most logic.
For more Pentax Q-series images with the 08 wide angle lens, be sure to check out my photo gallery here.
This image is one of a series taken on a one-day visit to downtown Toronto. The Pentax Q series of cameras together with the 08 are a great combination for architecture or street photography. Add the waist level finder accessory (see below) and no one would suspect you are taking serious street images.
Sharp throughout; including the corners; excellent distortion control; built-in ND filter, and shutter which prevents rolling shutter and synchronizes with the built-in flash; a built-in autofocus motor that features a quick-shift which allows the photographer to manually fine tune focus without switching out of autofocus mode. There is also a plastic tulip-style lens hood available, (sold separately). The lens mount is made of metal and the front element accepts the traditional 49 mm lens filters.
What more could you ask for in an extreme wide angle lens.
Suffice it to say it’s incredibly wide for such a tiny camera sensor, and with that comes all the challenges the world of wide angle photography presents.
You might think that using an extreme wide angle lens is easy, but that would be a mistake. Even though I have owned the lens for close to a year, maximizing its unique characteristics comes with a whole set of challenges.
This garden image makes use of strong foreground grasses and a misty morning to keep the image simple.
Now, if I lived in an area of epic landscapes, maximizing extreme wide angle lenses would be a whole lot easier. Unfortunately, epic landscapes are hard to come by where I live. Successful extreme wide angle photography begs for simplicity and finding natural images that work with a wide-angle lens takes time and a whole lot of patience.
Nevertheless, in time, I’ve collected a decent selection of images exploring the potential of the lens. I’m sure the lens will be put to the test many more times in the near future and I will try to add them both to this post as well as my photo gallery of Pentax 08 images here.
What others are saying about the Pentax 08 wide angle lens
The following are just a few comments from Pentax Q-series owners who have made images with the 08 wide angle lens.
Tiny but Tough
Pentax’s Q-series 08 wide angle lens is both rare and wonderful with exquisite image quality and very high build quality. Image provided by the Pentax Discussion users group.
From the Pentax Forums discussion group:
“In 2019, I still do not know what beats the Q-system with this and the 06 tele-zoom. As for sharpness, this lens is as good as it gets on the sensors in the Q's. Bokeh is impossible: shoot in BC mode if you need that, but, really, just bokeh in post if you need that. This lens is crazy unique, which alone makes it crazy good.”
“After a few test shots, I believe that this is the perfect lens for the Q system. It's as sharp as the 01, yet incredibly small for an ultra wide. It's almost unbelievable how Pentax has made such a marvelous feat of a lens! Now, if only Ricoh did not scrimp on a hood. With a 06 on Q, and 08 on Q7, and 01 on standby, I'm all set.”
“I was a bit hesitating before purchasing this lens due to the steep pricing (nearly cost as much as I spent on 01+02+06 all together). However, once I received my copy and started shooting with it, all my concerns went away. What a lens! It is certainly compact, quite a bit smaller than 02 or 06 lens. The amazing thing is the IQ, corner sharpness smashed my DA* 16-50. In fact, it is one of the sharpest wide angle lens I have ever seen. Colour reproduction is great, which makes RAW file super easy to work with. To sum up, for any one who owns a Q system camera, this lens is a must_have!”
Waist level finder
This waist level finder accessory from Temu allows the photographer to get the camera at a lower angle or use it more like a view camera. It has no electronics to hook into the camera but is handy to get a different perspective.
Add a waist level viewfinder to your Pentax Q
For most of the waterfall images shot with the Pentax Q and 08 lens, I used an ingenious accessory that allowed me to to get very low and better use foreground elements in the image.
The accessory brings back memories of my beloved Pentax LX with waist level viewfinder, except it can be used on any camera with a hot or cold shoe including the Pentax Q series of cameras. No information is transferred from the camera to the finder, so it is only for compositional purposes. I purchased it primarily for my coveted Sigma DP2 with its 42mm fixed focal length, but it allows me to get a good feeling for what’s in the frame of any camera, especially one that lacks a flip-up digital screen.
I purchased this waist level finder from Temu for less than $60 Cdn. That amounts to about $44 American. I also purchased some very nicely made camera straps at the same time.
Similar waist level finders are also available on Amazon.
For more on both the waist level finder and camera straps, click on the above links.
Finder is ideal fit for Q-series
The accessory waist level finder is handy for all sorts of photographic situations, especially if you want to get low and see the image in a top-down view..
The well-built, waist level finder has markings for a 40mm lens but goes out to about 28mm. It’s a far cry from the 17mm available on the Q-series 08 lens, but it gave me a good idea of the image I would obtain when the camera was set so low that I could not use the back LCD screen with any success.
It is ideal for the 02 lens and the 01 lenses, but will get called on for a number of my digital point-and-shoot cameras when I need to get low or just want to have some fun with the waist-level finder.
The extreme wide angle lens allowed me to take advantage of strong foreground objects including the small waterfalls and rocks.
Conclusion: It’s not always about size
Imagine heading out for a day of photography with a Pentax Q, the 08 wide angle, the 01 nifty fifty and the 06 telephoto slipped into your jacket pocket. Heck you might as well add the 02, a couple of toy lenses and the mount shield lens to round out your gear since everything fits nicely into two pockets or a small camera bag.
Just having a capable camera with you whenever you go out can do wonders for your photographic development. I love my cell phone, but give me a camera with a couple of sweet lenses any day over a phone. And that’s where the Pentax Q line of cameras and lenses really can’t be beat.
These things might be tiny but they aren’t toys. In fact, without the anti-aliasing screen that Pentax chose to eliminate on these cameras, you can shoot them in RAW DNG format with sweet Pentax lenses and get excellent results.
I’m hoping some of the images in this post and on my 08 photo gallery will inspire Q shooters and disbelievers to rethink what is possible with these exceptional mirrorless camera systems.
If you are interested in purchasing Luminar Neo, please consider using the code FernsFeathers at checkout to receive a 10 per cent discount. By using this code, I receive a small percentage of the proceeds which helps me to continue producing articles for readers.
Sigma DP2: Capturing unrivaled detail with a compact camera
Sigma’s DP2 enthusiast camera has a cult following of photographers looking for the highest quality images in a simple point-and-shoot camera.
It’s a love-hate relationship based on the Foveon sensor
If you know anything about Sigma Foveon cameras, you’ll understand the love-hate relationship owners develop with these coveted little point-and-shoots.
We love them for the quality of the pictures that are possible with such a simple point-and-shoot camera. At the same time, however, we hate them for just about everything else.
For me, love of the final results wins out every time.
It’s almost always about image quality.
Sigma DP2 is a high-end point and shoot camera complete with an APS-C sized foveon sensor.
I have to admit, however, I’m growing to love the quirky little “features” of this camera – from its noisy start-up to its minimalist design. That simple design is hard to ignore, and you can’t help but compare it to the simplicity of the iconic Leica cameras. Even the back buttons’ black-on-black design (making it impossible to read the button functions) is divine. (Although I have read many reviews from photographers unable to appreciate the minimalist approach.)
All you have to do is watch this interview with Sigma CEO Kazuto Yamaki to get a better understanding of Sigma’s approach and direction to minimalist design.
Please take a moment to check out my Gallery of Images taken with the Sigma DP2 here.
Sigma Foveon pros and cons
For those who may not be familiar with these very specialized cameras, let’s explore for a moment what makes them special.
It’s the sensor!
Just like the older, CCD-sensor-based cameras are highly sought after, the Foveon-based Sigma sensor cameras are coveted by those photographers looking for the best possible images out of a pocketable, point-and-shoot camera.
And the Foveon sensor built into these cameras truly delivers.
‘Why, what’s the big deal,?’ you may ask.
Without getting into all the complexities of how a sensor is made, suffice it to say that the Sigma’s very unique Foveon sensor is actually three sensors sandwiched together to extract the red, blue and green (RBG) colours that combine to give us the full spectrum of colours.
Other cameras use a single sensor to extract the red, green and blue spectrums of light. Sigma uses three sensors in its Foveon-based cameras.
The result is a very complex system that maximizes not only the colour, but the fine detail and micro contrast in the images. Most photographers will agree that the Foveon sensor is the reason the images have the most film-like look right out of the camera.
You may or may not agree, but it’s difficult to argue that these images don’t have a special quality to them that is hard to ignore and even harder to replicate with other, non-foveon sensors.
A simple comparison between the DP1 and DP2 shows similarities in all but the lens size, battery life and ISO capabilities.
Why do so many photographers dislike Sigma cameras?
What are the cons of this love-hate relationship?
I have the Sigma DP2, so this review is based on that camera.
This love/hate relationship starts when you turn it on. The camera makes some weird squeaky grinding noise that can be quite concerning when you first hear it turn on and the lens pops out. The first time I turned it on, I was sure it was broken. However, that’s just the sound of a DP2 turning on. I can certainly live with that. In fact, the more I hear it, the more I’m even beginning to like that sound.
If that was the only negative, we would have little to complain about. But, of course, it’s only the beginning.
Heavily cropped image
This heavily cropped image shows the capabilities on the RAW images. Despite the extremely heavy crop, the image holds together showing incredible detail and colours.
Let’s start with the focus – it’s not the fastest or the greatest. The writing speed is the slowest I’ve ever experienced in a camera. Even with the fastest SD card you can get, it’s slow.
Speaking of slow, the startup time is also slow.
If that’s not enough, you really need a separate Sigma-based software program – Sigma Photo Pro – to work with the RAW files (although that has changed somewhat with the latest Lightroom release).
The lens is a fixed focal length 42mm lens (35mm equivalent), and there is no built-in shake reduction. Oh, did I mention that you really want to shoot this camera at 100 ISO for best results. Anything over 400 and you probably want to consider converting the image to B&W for best results.
Noise at higher ISOs is a problem.
So, maybe dig out that tripod you have buried in the basement.
The interface is simple enough, but very different than most other cameras I have used. Thankfully, the easily accessible “Quick Menu” makes it quick to change on the fly, once you get used to how it works.
And I would be remiss not to mention the lack of a viewfinder and the rather poor back LCD screen for viewing images.
And, if you are purchasing one of these, consider buying additional batteries. One battery is good for only about 80 images before it needs changing.
There’s probably more I’ve forgotten about, but I think you get the point.
For more on the Sigma DP2, check out my post A misty morning with the Sigma DP2.
This camera is not for everyone.
For those who appreciate slowing down, who don’t need all the bells and whistles, and who enjoy a slow, thoughtful methodical approach to making images, the Sigma series of cameras (and there are a few to choose from) are a perfect choice.
I would not make it my one and only camera, but as a secondary choice for those times when it’s the best choice, it’s almost perfect.
“No other camera can match its performance for sunsets and colour reproduction. ”
And, if you own one of these sweet little cameras, you may be sitting on one of the last of the breed of affordable Foveon sensor cameras. Sigma has seemingly announced that any additional Foveon-based cameras could be more of a custom order than a mass-produced piece. They are currently doing research on the Foveon sensor to “modernize” it but that research and development is apparently moving slowly.
All this usually means serious coin for a camera that was never inexpensive to begin with.
Although the camera can be quite pricey because of a combination of high quality images and rarity on the used market, good deals are still available for now if you keep watching on-line market places.
I was fortunate to purchase a Sigma DP2 in mint condition at a very good price. No battery and no charger included, but that was rectified by a quick search on the internet that landed me on Aliexpress where I was able to purchase a couple of batteries and a charger for a very reasonable price.
Minimalism at its finest
The Sigma FP is the company’s most recent example of minimalism at its finest. The FP takes the minimalist features of the the DP1 and DP2 to new heights
The third-party grip and built-in thumb rest for the Sigma DP1 and DP2
When Sigma’s minimalism is just too much
If Sigma’s minimalist approach is just too much and you love the camera but find it uncomfortable in your hand, there is an incredibly simple solution that is both elegant and incredibly useful.
Jim Rinner at Shutterspeedblog, has used his incredible engineering skills to design the most exquisite hand grip complete with an integrated thumb grip. No longer do you have to put up with the minimalist block-design of the Sigma DP1 and DP2.
This image shows the Sigma DP1 complete with the exquisite grip and thumb rest that completely transforms the already outstanding DP1 and DP2 cameras.
This single piece of equipment, that can even incorporate a Swiss Arca mounting plate, will transform the look and feel of your favourite Sigma DP1 or Dp2 camera.
Jim is a retired professional photographer and inventor with 75 (currently) US patents and with dozens more pending. In his spare time he puts is skills, along with $5,000 in CAD software, five 3D printers, and a love for photography to work creating exquisite camera accessories for a multitude of cameras ranging from the Sigmas, to Lumix, Leica and a host of cameras in between.
This image from Jim’s Ebay store shows the built in thumb rest on the back of the camera.
One look at he grip, and it’s not hard to see the attention to detail that Jim puts into these accessories. In the case of the grip for the DP2, not only does it sport an exquisite finish, it also leaves openings to replace the battery without removing the grip. The built in thumb rest is an excellent addition to the camera helping the photographer to use the camera with one hand for street photography without fearing the camera will slip from their grasp.
The accessory wraps around to the back where it enables the photographer to access all of the controls without getting in the way.
One only needs to check out his incredible EBay store to see the work he has done in the creation of so many photographic accessories.
A bird’s eye view of the grip for the Sigma DP1 and DP2.
When was the Sigma DP1 and DP2 released?
The original Sigma DP1 was introduced in May of 2008 followed by the DP2 in September 2009.
Although Sigma made very minor changes to the DP2 from the DP1, the main difference centred around the lens’s focal lengths. The original DP1 sported a 16mm, f4 lens (28mm equivalent), while the DP2 had a 41mm f2.8 equivalent lens. The latter offered a little more depth of field control with its more traditional field of view.
As You tuber Mattias Burling points out in his comparison of the two cameras: The “DP2 is not a better performer or an upgrade to the DP1, it’s just a different focal length. DP1 was a 28mm f4 equivalent, and the DP2 is a 41mm f2.8. providing a more shallow depth of field if needed.”
The X3f RAW files out of my camera are usually between 17 and 17.7 megabytes but the sensor’s unique construction underestimates the quality that can be pulled out of these APS-C-sized sensors.
I’ve included heavily cropped images in this post and in the accompanying photo gallery to illustrate the incredible capabilities of the foveon sensors.
What users say about the DP2
And don’t just take it from me. On-line opinions from other photographers illustrate the love that is out there for these cameras and sensors.
“I have been using the Sigma DP2 as my everyday camera for the past 2 weeks, and I have mixed feelings about it. The camera is slow and frustrating to use, with a confusing focus and a tendency to crash. However, it takes some of the best pictures I have ever seen, with vibrant colours and a clear, 3 dimensional quality. It’s not great for low light or flash photography, but excels in street photography, making subjects more natural. Overall, it’s a temperamental but impressive camera that I hope will be improved in the future.”
And another user says:
“The files from the camera are “officially the sharpest and most detailed I have ever used with no competition from Bayer systems ccd or cmos, nor Fuji’s X-trans (sensors). No interperlation or anti-aliasing filter. It’s simply bizarre to see the sensor in action… images are simply too sharp. ... It’s simply surreal. … The micro contrast is so high it feels life-like.”
Another said it all:
“No other camera can match its performance for sunsets and colour reproduction. I do recommend it for someone looking for something truly special.”
YouTuber spells out five reason to own the DP2
Well known YouTuber Mattias Burling spelled out his five reasons why you should own the Sigma DP2
pointing out the price of these cameras on the used market (not sure how long they will remain inexpensive), the high quality finish, the controls - “the buttons are nice, nothing special but the “manual focus wheel is simply genius. I could probably go on and on about it and how useful it is for street shooting, so let’s just leave it at being the best thing ever in a camera. It’s also been given a nifty quick menu …. a nice addition and well implemented.”
Mr. Burling wraps it up with the number 1 reason you need to own a DP1 or DP2 or any Sigma foveon camera - the incredible colours. “They are so film like and so organic and just so awesome. It is why putting up with the shortcomings of a Foveon sensor totally worth it.”
In conclusion
I agree wholeheartedly with Mr. Burling on his five points. It’s the reason I’ll be shooting this DP2 every chance I get.
More Sigma cameras with Foveon sensors
In this review, I am focussing on the Sigma DP2 and to a lesser extent the DP1 because I own a DP2, but there are several other Sigma cameras with Foveon sensors that are exceptionally good cameras, though priced appropriately.
If you are interested in exploring Sigma cameras and the Foveon cameras still further, be sure to check out the Merrill line of DP cameras here.
In addition, there are the four Sigma Quattro series cameras. Like the DP series, they differ only in the fixed lenses they sport.
DP0 (14mm or 21mm on a 35mm camera)
DP1 19mm (equivalente to 28mm on a 35mm)
DP2 30mm (45mm equivalent on 35mm)
DP3 50mm (75mm equivalent) f2.8
The waist level viewfinder is made for a 28mm focal length lens, but the lines in the finder are for a 40mm lens. Perfect for the Sigma DP1 and DP2 cameras.
Add a waist level viewfinder to your Sigma DP camera
I recently added an ingenious accessory that allows me to either get a very low angle in my images or see the image much better when the sun makes it difficult to see the back LCD screen. It’s also just a fun addition to the Sigma DP line of cameras or any camera with a hot or cold shoe. It is shown here with the Pentax Q camera.
Waist level finder
Another angle of the waist level finder that is almost made for the Sigma DP2’s 42mm lens. Here it is seen with the diminutive Pentax Q camera.
The accessory brings back memories of my beloved Pentax LX with waist level viewfinder, except it can be used on any camera with a hot or cold shoe. No information is transferred from the camera to the finder, so it is only for compositional purposes. I purchased it primarily for my coveted Sigma DP2 with its 42mm fixed focal length, but it allows me to get a good feeling for what’s in the frame of any camera, especially one that lacks a flip-up digital screen.
I purchased this waist level finder from Temu for less than $60 Cdn. That amounts to about $44 American. I also purchased some very nicely made camera straps at the same time.
Similar waist level finders are also available on Amazon.
For more on both the waist level finder and camera straps, click on the above links.
Pentax PZ20: A modern, classic film camera?
The Pentax PZ20 is a modern film camera and when teamed with Luminar Neo is capable of magical results.
PZ20 and Luminar Neo take simplicity to creative new heights
The PZ20 is a simplified camera wrapped up in fine heritage and capable of some serious professional work.
But, what the heck was Pentax thinking when they released this workhorse in 1993?
A that time, film photography was in a good place. Digital was still a distant dream and camera manufacturers were working hard to encourage beginner photographers, who were comfortable using point-and-shoot cameras, to graduate to 35mm SLRs.
The PZ20 has the look of a modern digital SLR.
First Pentax released the truly dumbed down but still capable PZ10. Then they introduced the Pentax PZ20. Both were considered stepping stones from simple point-and-shoots to just slightly more complicated but very capable and impressive SLRs complete with a host of interchangeable lenses and packed with modern features capable of making professional-calibre images.
If the professionally-spec’d Pentax PZ1-P was the ultimate camera for wanna-be professionals, the PZ20 was the little sister who could stand alongside her big brother and get the job done with a whole lot less fuss. In truth, the big brother is probably much more capable, but the learning curve for average photographers was off the charts, and the results, well they were pretty much the same for most average users.
Click on the link for my full review of the Pentax PZ1-P.
“If a camera is nothing more than a conduit to capture a properly exposed image, which can then be scanned and manipulated beyond our wildest dreams in 1992, then the PZ20 and cameras like it, are a steal.”
Pentax, like other camera manufacturers at the time, took a professionally-spec’d camera, dumbed it down and said “go take great pictures for a fraction of the cost of your big brother.”
Dit it work? Well, it sure worked for a while as SLR camera sales soared along with film. The film era was doing just fine, thank-you.
Screech owl just hanging out
A heavily cropped image shot with the Pentax PZ20 on Kodak 200 and post processed with Luminar Neo.
The days of beautifully crafted, all-metal cameras might have ended for all but the highest-end cameras, but as everyone knew from The Graduate, “plastics were the future.”
And we’re not talking cheap plastics like the type that often followed in cameras after the PZ line of cameras. These plastics were meant to last, with a feeling of quality that continues with many of today’s better digital offerings.
“Post processing to this extent was literally non-existent when the PZ20 was manufactured, but the digital age has re-imagined the possibilities of these cameras.”
Is the PZ20 still good in 2025?
Okay, but what about this PZ20. Are they any good in 2025?
Damn right they are.
Why, for example, would anyone buy a Pentax Monochrome digital camera when you can buy a PZ20 for under $50 and eat up B&W film like it was 1960?
For the Monochrome lovers out there, I know they’re great cameras and capable of some lovely B&W images, but unless you’re shooting professionally, the PZ line of cameras, a couple rolls of Ilford, a high quality scanner and top-notch photo editing software like Luminar Neo, gets the job done.
Click here for my post on the Pentax Monochrome camera.
But we’re not just talking B&W. I loaded my PZ20 with some off-the-shelf Kodak 200ASA colour film and took it, along with my digital cameras, to see how it measures up.
The results: Pretty damn nice.
“Take a simplified SLR like the Pentax PZ20 and team it with Luminar Neo – an Ai-based post processing program ideal for beginners – and you have the perfect combination of simplicity and creative possibility.”
Now, I like to think that post processing had a lot to do with the results. Negative film is very forgiving so getting the image on film and converting it to digital with a simple scanner, opens a world of possibilities not available in the early ‘90s.
Post processing software opens doors no-one could dream about in 1993 when the PZ20 was introduced. In those days, everything had to be done in-camera when the image was captured. Today, for many of us, that is just the beginning of the process.
Take a simplified SLR like the Pentax PZ20 and team it with Luminar Neo – an Ai-based post processing program ideal for beginners – and you have the perfect combination of simplicity and creative possibility.
And, if a camera is nothing more than a conduit to capture a properly exposed image, which can then be scanned and manipulated beyond our wildest dreams in 1992, then the PZ10 and cameras like it, are a steal.
I think I paid $20 Cdn for mine. For American readers, that’s probably, like the cost of a roll or two of film. And it’s mint and came with an electronic shutter release to boot.
It takes all the Pentax lenses but is really at home with the M and A series of lenses and the F and FA series of autofocus lenses.
As one Pentax enthusiast wrote on Pentax Forums: “If you shoot film-only, this can be a fantastic main camera. On the other hand, if you also have a Pentax DSLR, this camera can also be a fantastic companion, if your lenses are full-frame you can use them even if they do not have an aperture ring (which is the case in most modern lenses).
The autofocus is fast and accurate. It has Hyper Manual and Hyper Program modes in addition to the usual Av, Tv, M, B and P modes. It also has many other fully automatic modes. In manual mode it has spot metering. Actually, it has many functions of more advanced (and heavier) cameras.”
Another reviewer wrote: “Using it, it's actually more enjoyable then it's bigger brother (PZ1-P). Less settings to scroll through, I don't even mind the lack of second control wheel.”
He went on to explain: AF confirmation works too with M, K, A glass. Focus screens are not inter-changeable, but plenty bright enough… . The info screen inside the viewfinder on the right of mine is crap and hard to read, no matter, the meter is present on the top lcd and that works nicely to get the exposure close. Using M42, M, K's glass it's less of a worry as you only have to pay attention to the shutter values….”
Redwing in early morning light
Early spring image of a Redwing blackbird post processed with Luminar Neo photo imaging software.
One user explains that, although the PZ20 lacks AE Exposure lock, it has Hyper Manual and Hyper Program modes which can be used in a similar way. And, unlike the big brother PZ1-P, the PZ20 does not have two dials (one for aperture and the other for shutter speed), instead it has a button to chose which parameter to modify and a rocker switch to change these values.
This is a simplified explanation but the camera certainly gives us the control most of us need to capture a properly exposed, in-focus image.
I’m not really one for the details, you can get them all over the web, but here is a spec sheet from Pentax Forums that may help those inclined.
Thanks to Pentax Forums for the PZ20 digital Spec sheet.
Once we get the images, unlike life in the early ‘90s when we were more or less stuck with what the camera produced, the magic really begins.
I’d love to show you hundreds of images I’ve shot with the camera, but frankly I’ve only put through one roll to date. Many more to follow, including some B&W.
One roll, however, is enough for me to draw some conclusions.
Like I said, the magic begins when the digital images are in front of me and I get to work exploring the creative potential.
Creating presets with Luminar Neo
After some work on the image below, I decided to create a preset to use on all the other images of the abandoned antique truck. The preset helped to create a unified effect for the entire series of images.
For more posts on Luminar Neo click here for a Walk in the woods with Luminar Neo, and here for the question: Can Luminar Neo stand on its own as an image processing package?
The same preset was used on the red-barn-and-window image at the top of the page.
Luminar Neo goes to work on abandoned antique
Above are a few images from that first roll. Below are a few more of my abandoned roadside antique truck that are given a stylized look through post processing entirely with Luminar Neo photo editing software.
The software provides all the necessary tools that other professional photo editing programs provide, but with the addition of some truly exceptional Ai tools that make photo editing – even for the beginner – much simpler than the traditional post processing programs.
Here are just a few examples from the combination of the Pentax PZ20 film camera and Luminar Neo.
Luminar Neo, a Ukraine-based photo editing program, allows the photographer to literally have fun adjusting the effects of the filters until they find the perfect setting. For these images, a “mystical” module was called upon to give the images a soft, glowing effect that I thought worked well for the subject.
Post processing to this extent was literally non-existent when the PZ20 was manufactured, but the digital age has re-imagined the possibilities of these cameras. Many young photographers who have discovered the joys of Lomography are experimenting with cheap film cameras and lenses, but there is no need to resort to the cheapest new film cameras when high-end film cameras and modern software is capable of creating magical images. For images made with the PZ20 by Lomography’s talented creators, you can go here.
If you are interested in purchasing Luminar Neo, and exploring the program’s creative possibilities, please consider using the code FernsFeathers at checkout to receive a 10 per cent discount. By using this code, I receive a small percentage of the proceeds, at no additional cost to you, which helps me to continue producing articles for readers.
The program is already a great value, whether you buy it outright or pay on the monthly plan. In addition, you would be helping a Ukrainian-based company in Kiev that we all know is experiencing extremely difficult conditions.
If you are interested in exploring Luminar Neo’s creative possibilities, please consider using my 10 per cent off discount code “FernsFeathers”.
• Looking for a slick new camera strap for your classic camera? I just ordered one of these beautiful braided straps for under $10 Canadian from Temu.
A Walk in the Woods: A photographic approach
Enthusiast cameras from yesterday can be incredibly valuable tools for the everyday photographer looking for a simple carry-everywhere camera. Here are four I took with me for A Walk in the Woods.
Point-and-shoots find their place in the woodlands
Part three of a series
It started as a small project to get some serious exercise, experience the spring woodland in all its glory, and test a few of my favourite point-and-shoot cameras.
It quickly grew into a little bit of a passion, some might say even an obsession.
Before long, I found myself hiking the woodlands around our home several times a week exploring the many paths – big and small, some nothing more than a deer path – that meander through the Conservation lands and lead me to new areas for exploration.
Now, my “Walk in the Woods” project to document this fabulous woodlot I had been ignoring for far too long, has become more of a labour of love than anything that resembles work in any form.
The project combines two passions in my life – woodland/native gardening and photography.
What more can you ask for in life?
How about an outlet for my love of everything photography. Inspired by the works of Canadian photographer Freeman Patterson and his suggestion to embrace projects in your photographic endeavours, I set out to document the spring woodlands.
More posts from the Walk-in-the-Woods series.
• Native plants in the Woodlands
• Walk in the woods photo gallery
I didn’t want to carry in all my heavy equipment, so I opted for lightweight, but higher-end, enthusiast point-and-shoot cameras which I had collected over the years, mostly for the price of a couple cups of good coffee and a donut.
Part of my plan was to show readers of this website how simple, inexpensive enthusiast cameras are more than capable of creating good, maybe even very good images. And, always hoping that a few of the images would more than meet my expectations and enter the realm of excellence. I’m not sure I’ve reached that level, but I’m more than happy with many of the images to date and many more to come.
I’m more than happy with the whole experience and the lessons I’ve learned about woodland gardening from the master herself, Mother Nature.
Point-and-Shoots are not perfect
I’m not kidding myself here. I know that point-and-shoot cameras – even the better ones – have inherent problems with them.
Not the least is the fact they have difficulties achieving soft, out-of focus backgrounds. Their small sensors and minimum aperture openings can be seen as both a pro and con, but mostly influence the images in a negative way.
Photographers looking to achieve beautiful bokeh, for example, either have to work extremely hard to achieve it or simply give up trying.
Well, that’s not entirely true any longer. Today’s post-processing software has changed all that, providing you know how to take advantage of these features.
In addition to trying to get the most out of these enthusiast cameras, part of my challenge was to also show how proper post processing of these images can take them to higher levels than ever expected, especially with modern post processing, including Ai or artificial-intelligence-based applications, including Luminar Neo. But more on that later.
The cameras of choice
I’m going to narrow this review down to four of my favourite, inexpensive, enthusiast point-and-shoots. Here’s a quick look at my cameras of choice.
Lumix DMC-ZS8
• The Lumix DMC-ZS8 travel camera with its 16X, 24-384mm (35mm equivalent) Leica lens that packs a lot of power in its sweet 14.1 megapixel CCD sensor. It’s tiny and very pocketable, but has the heft of a well-made, high-quality camera. Add to these specs, a 3.0-inch LCD display with 230,000 dot resolution.
Lumix DMC-ZS8: CCD sensor.
I got this sweet little package for the ridiculously low price of $10 Canadian, so how could I go wrong? When I went to pick it up, I expected to receive a beat-up old camera that barely worked. What I got was an almost mint CCD-sensored camera with a quality build that left me more than impressed.
I actually managed to capture two of my favourite images of all time driving home from picking up the camera from a distant town. Looking for more information, check out my review here or another one here.
• Then, I added another real gem – the Pentax WG-2 underwater, go-anywhere adventure camera. Again, an on-line marketplace purchase I could not resist.
Pentax WG-2 adventure camera.
My plan was to use the camera to photograph the beautiful clear stream that meandered through the woodland from above and below the water. In fact, I wanted to drop the camera in the stream to get underwater images impossible with any normal camera without underwater housings. Let’s just say my plan is working, but I need to experiment more to get the results I know are possible.
The camera sports 16 megapixels with an aggressive, military-looking armour design that begs to be abused. I’m doing my best, but it still looks like new.
One of the features I find fascinating is its unique macro and digital Microscope modes that feature lights around the lens that light up very, very close subjects in super-macro mode. There is too much packed into this camera to get too deep into it here, but suffice to say that it comes with a 5X Pentax lens that provides a 28mm to 140 (35mm equivalent) internal optical zoom. For a detailed review go here.
• Next is maybe the piece-de-resistance of my compact point and shoots – the Sigma DP2 complete with a micro 4/3-sized Foveon sensor. If this means nothing to you, no worries. Just know that very few cameras in this class compare with the quality obtainable with this incredibly frustrating camera.
Sigma DP-2: Foveon sensor.
Frustrating for so many reasons: A fixed 42mm equivalent lens that is neither wide angle nor telephoto, a writing speed that is slow enough to take a nap waiting for it to complete the process, weird noises on start-up and focusing, and autofocus that leaves something to be desired.
I have not even mentioned the fact that you basically need special Sigma software to properly process the RAW files from the camera. But, when it all comes together, the results can be magic. (More on this later.)
• Finally, there is the 10 megapixel Lumix LX7 workhorse of a camera that continues to impress me in so many ways every time I pick it up.
This sweet little Lumix brings a touch of old-school to enthusiast cameras with its manual aperture ring, but its 24-90mm equivalent fast Leica f1.8-f8 lens is what makes this one special.
It’s got 70 megapixels built into internal memory. It can take an optional EVF and shoots RAW with the best of them. The LX7 is just one in a line of excellent Lumix LX-series cameras.
For more on the camera and Lumix’s LX series of cameras, check out my full review here.
Can these point-and-shoots deliver?
Okay enough about the tools, let’s take a look at the results.
A couple of images from each camera will help give you an idea of their capabilities and I’ll touch on their shortcomings.
Be sure to check out my “Walk in the Woods” photogallery for many more images made with these cameras.
The Lumix DMC-ZS8 was the first camera I chose for the project. I used it to document the early spring before most of the foliage from the trees and flowers had emerged, so the images can be a little stark.
The Lumix ZS-8 is a pocketable gem
Skunk cabbage emerges from wet areas in the woodlands. The The Lumix ZS-8 was able to capture the lovely muted colours in the scene as well as show off its solid close-focusing ability.
The Lumix ZS-8 was able to capture the fine details in the forest floor of a lovely pine forest. In early spring before the foliage has emerged, it’s important to explore the details the woodland offers us.
My first butterfly of the spring, captured on the Lumix DMC ZS-8, handheld at ISO 100 at 250th/second, at f6.3.
This photos was made more as a documentary image showing the work of woodpeckers on dead and dying trees. I liked the soft muted tones, the story the holes in the tree trunk tell viewers about nature and the search for food as well as the importance of leaving dead trees standing whenever possible. This is also an example of how modern technology can benefit a typical point-and-shoot camera. In the original image, the background trees were all very much in focus, but by using Lightroom’s blur/depth of field module, I was able to soften the distracting background and focus on the main subject. Too much depth of field is a problem with small-sensored cameras. This module can save many pictures that would otherwise be lost by distracting, busy backgrounds.
The Pentax WG2
I had never owned an all-weather camera prior to purchasing the Pentax Optio WG-2. (Most camera makers have one including the Olympus Tough series and Nikon) Frankly, I didn’t expect much from the camera considering its small sensor, many features and the low price I was able to purchase it for.
Boy was I surprised. Although, in landscape mode, the images seem to have a very warm cast, it’s nothing that can’t be adjusted in any photo editing package. I have only had the camera for a short time, but have managed to capture some of my favourite images with it.
The Petax WG2 all-weather, indestructible camera captured this scene of a stream while being half submerged in the water. That’s not something you would do with any other camera without a waterproof housing. The results can be hit and miss but the possibilities are limitless. Fish in the stream, a frog half in and out of the water, waterlilies photographed from underneath the water looking up onto the flowers. Although these cameras are often advertised as “beach and vacation” cameras, they certainly have a place in any nature or garden photographer’s arsenal.
Some flowers’ shapes beg to be photographed from above. I thought these two dog-tooth violet flowers and mottled leaves benefit from a top-down approach. The image was given a mystical effect in post processing using Luminar Neo’s outstanding editing opportunities.
The scene appeared almost out of nowhere as I walked along a path through the early-morning mist. Marsh Marigolds as far as the eye can see were captured by the Pentax WG2’s wide angle lens at 5mm (28mm). And, if this does not impress you, check out the image below shot with the camera’s extreme macro-capable lens and built-in ring light.
An example of the “macro” capabilities of the WG2 camera that features a built-in ring light type of flash for extreme closeups like this marsh Marigold bloom.
Sigma DP2 a special camera and sensor
If you are unfamiliar with the unique features of Sigma’s Foveon-based-sensor cameras and, you are not alone. Suffice it to say that the cameras (and there are more than a few)would never sell except that they offer the possibility of incredible results that are difficult to obtain on other cameras in their class. I would say impossible, but I know there are too many naysayers out there to debate. Needless to say, the results can be incredibly good, but getting there is not easy. Let’s say it’s a camera for the very dedicated among us.
Although the RAW image out of the camera was perfectly good, I did explore the full capabilities of Luminar Neo photo processing software to bring out the most in this image. The result of this hand-held image is one that I am particularly happy with, especially the fine detail that Sigma’s Foveon sensor is known to capture.
The fine detail that the Sigma sensor is able to capture is evident in this image. The background was blurred using Lightroom’s outstanding lens blur tool to focus more on the trillium.
Skunk cabbage takes centre stage in this early spring woodland image with the Sigma DP2. The moss-covered fallen tree proved to be inspiration to create a similar effect in my woodland garden.
A fallen spruce tree and small waterfalls shot hand held with the Sima DP2. I particularly like the water captured at a slow enough shutter speed to show detail while, at the same time, showing the motion of the water.
The Lumix LX7: A gem in the world of point-and-shoots
I may have saved the best for last. Maybe not the best images, but the best all-round camera. The Lumix LX series of cameras are known for their ease of use and outstanding results all wrapped into a camera that exploits our desire for a little retro in our lives.
In my case, a working aperture ring on the lens where us old-school photographers remember it. It’s all just a nice little package that works. I have only had the LX7 out in the woods once or twice but came away with some of my favourite woodland images.
Fern in late afternoon sun beam is a favourite of mine. I love how the low sun kisses the fern and lights it up against the dark background of a fallen tree and barely visible pathway. The image required a two-stop under exposure to get the proper exposure on the fern while letting the background go dark. The fact that there is still detail in the background gives the image an air of mystery and guides you down darkened path. Unless you are shooting in complete manual exposure, taking advantage of the plus- and minus-compensation feature on cameras is necessary to capture images with strong sunlight and dark shadows.
This image of wild strawberry flowers caught my eye along the path. It’s simple, but the vivid greens and textured leaves play nicely against the white flowers.
The Lumix LX7 was able to catch this ray of sunshine on a group of Forget-Me-Nots along the path. Again, I needed to underexpose by several stops so that the flowers were not blown out. Simply following the meter in the camera would have made the highlights to bright and probably make them unrecoverable. Shooting in the RAW format provides the photographer with more latitude in these situations.
The close-focusing capabilities of the Panasonic LX7, and its pocketable size, make it an ideal choice as an everyday walk-around camera. Here, the elusive Mayapple flower was captured hiding under the leaves of the forest ground cover plant. Although I could have removed the green cast, I thought it was appropriate to leave it to illustrate how the flower grows under the leaf of the Mayapple.
I’m hoping this post convinced you of the value of carrying a simple point-and-shoot camera with you at all times both in the garden as well as when you go for a walk, be it in the woods or just a pleasant walk in the neighbourhood. These camera are incredibly useful. Yes, your smart phone can certainly get the job done in a pinch and I’m guessing you always have it with you, but trust me, in most circumstances the camera will deliver better results.
Of course, the camera involves more work. First you have to learn its features, then transfer the images from the SD card to your computer before you even begin the editing process. Once the post processing is completed, you’ll have to save it and then post it to your favourite social media platform.
Sounds like a lot of work. It is. But when done well, it’s incredibly satisfying and rewarding. Take these images and create a book or, at least consider printing some of them.
Explore your creative side with some of the new photo editing software like Luminar Neo, Lightroom and Photoshop just to name a few.
Many of these images were post processed using the Ukraine-based Luminar Neo. I have partnered with the company and can offer readers a 10 per cent discount at checkout with my code “FernsFeathers.” Using the code will not cost you anything, but I get a small amount of money to keep me writing extensive articles like this one.
If you are interested in exploring Luminar Neo further, check out my posts here (Luminar Neo in the woodland garden and nature) and here (Is Luminar Neo the only software I will need) and here (exploring a film camera and Luninar Leo)
Happy shooting.
Can Luminar Neo stand on its own?
Is Luminar Neo the only photo editing software you will ever need? Let’s explore what it offers and see some results.
Photo editing software package is all most of us need
Luminar Neo is a photo editing program quickly gaining a following in the photography world for its combination of ease of use, exciting Ai features, and ability to go deep into photo editing if that’s what you need.
Add to that, its extremely competitive pricing in either a subscription model, or an outright purchase of the program, and it’s hard to argue that Luminar Neo is not one of the best all-round photo editing packages to compete with the big boys over at Adobe – namely Lightroom and Photoshop.
Oh, did I mention Luminar Neo also takes advantages of the ability to add unlimited, multiple layers?
But can Luminar Neo stand on its own?
That’s the question most photo enthusiasts need to know before jumping into the pool.
The answer to that question is not an easy one. The best I can offer is, it depends.
But let me say this right off the bat, for 95 per cent of photographers looking to take their images to new heights – maybe create some beautiful results on a regular basis or process their garden or travel images so they can be shared on social media, put in a self-published photo book or hung on your wall – Luminar Neo is without a doubt all you need.
In other words, for the vast majority of photographers, Luminar Neo gets the job done with flying colours..
Even if you’re a seasoned professional, Luminar Neo can create memorable images you would have never imagined before.
But, if you are a more of a graphic designer or creative artist than a photographer, or are looking to transform your photography into painterly images that are not obviously recognizable as photographs, or if you need to manipulate text on images as graphic artists often do, your best bet is teaming up Luminar Neo with a more graphic arts-oriented program like Photoshop.
Check out my earlier post on combining Luminar Neo as a plugin for Photoshop and Lightroom.
Not a problem, Luminar Neo has designed its platform so that it can be simply added to Photoshop, or Lightroom as a plugin.
So to answer the original question: Can Luminar Neo stand on its own? The answer is a resounding yes for probably 95 per cent of photographers. For the remaining 5 per cent, just use it as a plugin.
To help prove my point, here are four very different images created using only Luminar Neo, including a “creative” almost painterly image at the end.
The four images illustrate the very real possibilities for photographers and photo artists alike.
So, let’s dive in and look at our first example.
This image of Peggy’s Cove near Halifax, Nova Scotia in Canada, was edited using Luminar Neo.
The first image is more or less a straight forward landscape or travel photograph taken on vacation many years ago at Canada’s Peggy’s Cove near Halifax, Nova Scotia. The image was shot on slide film, scanned on my Epson flatbed and processed entirely with Luminar Neo.
The before and after image below shows exactly what Luminar Neo is capable of producing, quickly and efficiently.
The chart, left, shows the editing tools used to transform and enhance the original image. One of the helpful tools Luminar includes is a list of all the editing done on the image. Other programs may show the changes as “history” but Luminar Neo has it in a separate area in the editing module that not only allows you to see the edits you have applied to the image, but go in and make further changes to tweak the image to your liking.
Without getting into all the details, here are a few of the steps used to achieve the finished image.
I used the Ai feature to denoise the scanned image, followed by some work in the colour enhancement module to lift the washed out colour and boost saturation in the reds.
In addition, I used the dramatic light module for a little added pop as well as the magic light Ai module and Structure Ai modules.
The clone tool was also used to remove some distracting elements in the image. The image was also cropped to focus more on the fishing village and the red boat in the middle of the scene.
A water enhancement module was also used on the image. This module allows you to work with bodies of water to increase colour saturation in the blues and greens, among other things.
The more comfortable you get with the tools, the quicker the editing process becomes and the more confident you are to take your image to higher levels.
Barn in snow with Sigma’s DP-2
The second image is another landscape showing a lovely red Barn in a snowy landscape shot with Sigma DP-2 equipped with a Foveon sensor.
The red barn really caught my eye as I drove along the road, but it was the sculpted pine that stopped me in my tracks. Add to that the wheat-coloured grasses in the snow and I knew I had to pull over on the busy road to capture the scene. The single 42mm focal length lens on the sigmaDP-2 made cropping in-camera impossible so I took what was offered knowing that I could crop later with the software.
This image of a barn in a snowy landscape was taken with the Sigma DP-2 with its Foveon sensor. The RAW image was first processed in Sigma Photo Pro to convert it to a TIFF. The remaining image was post processed using Luminar Neo’s many editing features, although the image was not heavily edited.
Unedited version
The unedited version shows how effective Luminar Neo can be to enhance landscape images.
I mentioned that it was shot with the Sigma DP-2 because of the incredible detail- and colour-capturing ability that a Foveon-sensored camera is capable of achieving. As a result, I did not increase sharpness or detail in this image or the cropped image.
If you are interested in purchasing Luminar Neo, please consider using the code FernsFeathers at checkout to receive a 10 per cent discount. By using this code, I receive a small percentage of the proceeds which helps me to continue producing articles for readers.
In addition, I had to first run the image through the Sigma proprietary Photo Pro software to convert the raw file to a TIFF to work with it in Luminar Neo. The Sigma Foveon sensor is so unique that it is best to run the raw image through Sigma Photo Pro to convert it to a jpeg or TIFF before working with it in other photo editing software.
With that said, Here are the steps taken in Luminar Neo to edit this original TIFF file.
• Easy Landscape/longexposure preset set at 50 per cent
• Enhance Ai sky set at 65 per cent with an Accent at 20 per cent
• Develop module: Exposure set to -.30 and shadows increased to 40
• Removed a few small distracting details with the erase tool and clone tool.
•Structure Ai: Added 20 per cent overall with a boost of about 5 for the fine details
• First small crop to remove more distracting details
• finally added 23 per cent saturation to red, and 29 to yellow and green colours in the HSL sliders.
• The second image (below) was cropped more severely to focus more on the barn, the tree and the diagonal line of grasses running through the image.
Please write in the comments which of the two images you like more. I’m leaning toward the more cropped image.
Foxes in field with sun rays
The top image in this post of the two young foxes was originally shot on slide film and scanned with an Epson scanner.
The image suffered from a lot of problems which Luminar Neo was able to easily solve in post processing. But I was able to take the image to even greater heights by tapping into Luminar Neo’s sun ray module that enables the photographer to add sun rays to the image.
The image above is the unedited version prior to Luminar Neo’s post processing applied. See the edited version at the top and below of this page.
Without going into great detail, the image suffered from grasses partially blocking the fox’s faces. By carefully using the Ai erase tool, the grasses were eliminated on the foxes faces.
Foxes in grass
The edited version is clearly sharper with more contrast and colour. The sun rays were also added in post processing.
The red fur of the foxes were enhanced with HSL (hue, saturation, luminosity) sliders and the grasses were enhanced using the foliage enhancement module.
Finally, Ai sharpening was used to bring the foxes into sharper focus.
Cherry blossom in selective focus
The final image we are going to explore involves a more creative approach using Luminar Neo. I mentioned earlier in the post that painterly-quality images are best made with programs like Photoshop, which offers a more flexible painter effect with the ability to create your own paint brushes, sample specific colours and an overall more graphic approach to working with images.
That said, with a little creativity, artistic, painterly images are entirely doable using only Luminar Neo tools.
In this image, I primarily used the clone tool while sampling various parts of the cherry blossoms to create a painterly effect. In addition, gaussian blur filters were masked in to areas of the image to further soften the outer areas of the image.
A high-key filter kept the image light and a vignette set to white rather than the traditional black setting added to the light and airy look.
Conclusion: Is Luminar Neo the only photo editing software you need?
The jury may be still out whether Luminar Neo is the only software you’ll ever need, but I’m hoping my arguments in this post has convinced the jury that it is certainly the only software package most photographers will ever need.
That’s not to say that it’s perfect. I don’t think there is any software that can solve every photographer’s need, but Luminar Neo is inching closer with each new update.
And, if you are like many professional and advanced amateur photographers, you’ll want to have Lightroom and Photoshop at your disposal when you need it. The fact Luminar Neo can be treated as a plugin for these programs makes it the perfect complement to these other high-end programs most of us have grew up using.
If you are still on the fence, Check out my earlier post on combining Luminar Neo as a plugin for Photoshop and Lightroom.
For a completely different look at what Luminar Neo is capable of producing from digitized film, check out my review of the Pentax PZ20 with Luminar Neo processing of the scanned film here.
If you are interested in purchasing Luminar Neo, please consider using the code FernsFeathers at checkout to receive a 10 per cent discount. By using this code, I receive a small percentage of the proceeds which helps me to continue producing articles for readers.
Explore the beauty of the woodland with Luminar Neo
Photographing the woodlands is always exciting, but when you can create magic in post processing using Luminar Neo, the fun never ends.
New photo software is latest tool to create my woodland images
The woodland calls out to me in all seasons. In spring, the fresh greens beckon with drifts of welcoming wildflowers, while fall explodes with warm shades of burnt orange, yellows and vibrant greens. Summer gives us the possibility of capturing fledgelings and winter offers nature in all its simplicity.
Documenting this change of seasons has been a passion of mine for decades.
The original image seen here before I added the enhancements (see image above) with Luminar Neo.
My tools of choice have ranged from film cameras loaded with Kodachrome 25 and Fujichrome Velvia, to modern digital cameras ranging from high-end point-and-shoots to digital SLRs and micro 4/3rd cameras.
Photoshop and Lightroom have been important tools along this road, but more recently, a new player has emerged to renew my excitement about capturing and creating memorable images of the woodland, and that tool is Luminar Neo.
Luminar Neo can work alongside Photoshop and Lightroom as plugins, or as a stand alone photo editing program capable of turning your images from average to outstanding. Whether you are new to photo editing, or a master of the trade, Luminar Neo’s tools will satisfy most everyone’s needs.
Read my post on whether Luminar Neo can function as a stand alone photo editing program, here.
Luminar features all the normal editing features of most photo editing programs as well as full masking capabilities. A series of built-in presets allows photographers to create stunning results with the click of a button or two.
Luminar Neo, a photo editing program based out of Ukraine, has taken the best traditional photo editing programs offer and reimagined them to create a simple, easy to understand but incredibly powerful program that enables photographers to create stunning results with a few simple clicks on their computers. If you want to dig deeper into the program’s offerings, there is an incredible wealth of both Ai and traditional tools to transform good images into great ones, and great ones into works of art.
Although I have been using the program for only about one week, I find I am getting very comfortable with its features. The more comfortable I am getting, the more I realize that this may be the photo editing package I have been unknowingly waiting for my entire photographic life.
As I slowly begin to import my images into the program, it becomes increasingly clear that all my vintage slide-film images that I have scanned into my computer have an opportunity for new life with the help of Luminar Neo’s toolbox of features, from pre-programmed presets, to impressive Ai tools that can instantly transform your images with a click of a button.
I should say that Luminar has provided me with the program, but in no way have they tried to influence what and how I review their photo editing program. I will say, however, that along the way they have been incredibly helpful answering questions and providing training.
“Photoshop and Lightroom have been important tools along this road, but more recently, a new player has emerged to renew my excitement about capturing and creating memorable images of the woodland, and that tool is Luminar Neo.”
The following is a brief explanation of how the five images in this post were transformed in post processing using a combination of Photoshop, Lightroom and Luminar Neo. It should be noted, that although Photoshop and Lightroom may have been used for some processing of these images, from my experience to date Luminar Neo is entirely capable of creating most of these images on its own.
In my next post, I plan to take a number of images from start to finish using only Luminar Neo’s wide range of photo editing tools.
Let’s get into Luminar Neo
Luminar Neo features all the normal editing features of most photo editing programs as well as full masking capabilities. A series of built-in presets allows you to create stunning results with the click of a button or two. Presets include modules on: Scenery, Big City Lights, Sunsets, Overcast situations, Landscapes, Waterscapes as well as our Animal Friends. It’s also easy to create your own presets as well as saving your favourites to use later on other images.
The develop/essential module includes a highly effective denoise module, Black &White, Colour, Vignette, Structure and Details settings.
Here you can see the original image prior to subtle enhancements (above) with Luminar Neo.
In the Landscape module, photographers can take advantage of Sunrays, an Ai Twilight Enhancer and Atmosphere enhance as well as a Water-Enhancer module.
There are separate areas for photographers who like to experiment with creative modules including Magic Light, Mood, Toning Neon Glow and Mystical. Black and white and Film Grain modules are perfect for Lomography fans.
It is in the Mystical module under Glow that photographers can choose between soft focus, glow, Orton effect and Orton effect soft. The modules also have a slider that allows photographers to control the amount of the effect, giving you complete control of the look.
Five images processed with Luminar Neo
This post will explore some of the filters used in Luminar Neo to enhance these images.
• In the top image of our woodland garden in fall captured on a smartphone during an early morning walkabout, I used Luminar Neo to enhance the misty morning with its Ai mood feature. In addition, the sun rays were added with the program’s very effective Sun ray module that allows the maker to not only add sun rays, but have complete control over the effect of the rays, including the number of rays, length, strength and warmth.
This waterlily benefited by the water enhancement module by darkening the water and adding a blue cast.
• The second image of a cluster of cherry blossoms was post processed in Photoshop where I used a number of brushes to soften the edges of the image before bringing it into Luminar Neo where it was given a more ethereal look through the use of softening and mood filters as well as a vignette to further lighten the edges. Unlike many other photo editing programs, Luminar’s vignetting capabilities allow the photographer to control how and where the vignetting appears on the image.
• The third image of the deer in the woods, was first processed in Lightroom where a number of distracting elements were removed as well as focus softening added to the background. It was then brought into Luminar Neo where additional mist helped soften the background. Although I liked the original image, Luminar Neo’s mystic filter was called on to create a mood in the image that I think really adds to the mood of the early-morning image.
• Waterlily benefitted from another Luminar Neo module that focuses on enhancing water in your images. The module allows the maker to enhance both the darkness and lightness of the water as well as adjusting the water’s colouring in the blue and green ranges.
• A combination of subtle orton glow and sun rays were added in Luminar Neo to the monarch butterfly on sunflower.
Final thoughts on Luminar Neo in the woodland
The five woodland images in this post are examples of how Luminar Neo can enhance existing photographs. If you are an experienced photographer, Luminar Neo can be used to enhance images that have already been post processed in other programs. However, as a stand-alone program, Luminar is also a fully-capable editing program.
If you are new to photo editing, Luminar Neo has built-in presets that make post processing as simple as just a few clicks. For more experienced photo editors, the presets can be used as a starting point for more exacting photo enhancements.
This post is meant to give readers a taste of what Luminar Neo offers. The article barely touches on the full capabilities of the complete program. Over the next several months, I will try to provide more detailed information on the many modules and features and how they can be used in the real world, either for nature and woodland images, or other styles of photography from street photography to travel and people photography.
If you are interested in purchasing Luminar Neo, please consider using the code FernsFeathers at checkout to receive a 10 per cent discount. By using this code, I receive a small percentage of the proceeds which helps me to continue producing articles for readers.
Give your garden and wildlife images room to breathe
Why not try your hand at taking environmental portraits in nature? Try telling a story rather than moving in too close and put those wide angle lenses to work.
Consider adding more “environmental portraits” to your portfolio this year
In high school one of my buddies was what you call a “close talker.” Great guy. Everyone loved him except when he got up close and personal telling a story or passing on information.
So, whenever he wanted to talk to you, for some reason he felt he had to get so close that it became a bit uncomfortable. You wanted to be polite and not say anything, but inside you’re saying to yourself, “please back off a bit, this is uncomfortable.”
That’s exactly how I feel about many images I see from photographers on social media. I’m not sure if they want to justify the purchase of a very long and expensive telephoto lens, or if they think that getting in as close as possible to a subject instantly makes the image superior to one that has a little breathing room.
In many cases, but I want to make this perfectly clear, obviously not all, the images would benefit from moving back and showing the animal, bird or flower in more of its environment.
This thought was brought home to me this week while reading Portraits of Earth, written by Freeman Patterson my all-time favourite photographer and a Canadian I might add. His environmental portraits of the earth capture the essence of his subjects, while always leaving room to appreciate them in the context of their role on earth.
Of course, there are many occasions when the best shot is a close one, or one that has been closely cropped in post processing. A busy or unnatural background are just two reasons to move in close. An outstanding subject in beautiful light that just begs for a close approach is another. And there are lots of other reasons to get as close to your subject as possible.
In fact, in many instances getting as close as possible still leaves the photographer so far away that you have no other choice but to create an environmental portrait.
But when you are making a picture – whether it’s of a bird, mammal or flower – ask yourself whether the image would benefit from backing off a little. If you are cropping the image during post processing, ask yourself if moving in as close as possible and eliminating all sense of environment is the best choice.
This thought was brought home to me this week while reading Portraits of Earth, written by Freeman Patterson my all-time favourite author and photographer and a Canadian I might add. His environmental portraits of the earth capture the essence of his subjects, while always leaving room to appreciate them in the context of their role on earth. Check out used book retailer Alibris to get great buys on Freeman’s outstanding photography books including his book The Garden that I will be reviewing in the near future.
This image of a bull and female moose in Medicine Lake, Jasper, Alberta is, in my mind, the essence of an environmental portrait of these two magnificent animals. Moving in close would only have ruined the sense of space that the lake and mountains in the background provide. For me, the image illustrates how huge our wild areas are when it can literally dwarf these two massive animals.
This approach, while much more artistic, is also more revealing. If done well, an environmental portrait more often captures the essence of what the photographer was trying to portray much more than an extreme closeup could ever achieve.
As nature and garden photographers, it’s important to show our subjects in their environment whenever possible. By showing our subject in its environment, we reveal the habitat where it lives. A warbler reaching for an insect hidden in the bud of a native dogwood tree, for example, reveals the story of how the warbler survives on its migratory journey and the importance of native trees and plants are to its survival. A fox kit playing outside its den on the edge of a forest provides the viewer with important details of where foxes choose to raise their young. A wildflower growing on the edge of a stream where it thrives in the damp, woodsy soil, illustrates the importance of habitat for that flower’s survival.
Hepatica on river’s edge
These two tiny native hepatica flowers were taken with a wide angle lens to show the environment in which they grow. Water from the stream dampens the soil as the decaying leaves from the deciduous forest break down providing nutrients to these lovely native wildflowers.
Even in our gardens, where flowers might not grow in their natural locations, environmental images help us identify where they grow best, what conditions they thrive in and what flowers may complement them.
I am certainly not against moving in close with a macro lens to capture small details and reveal new worlds to others who may not have the opportunity to experience these intimate views. All I’m saying is don’t be afraid to back away to show the flower, plant, tree, butterfly, bird or mammal in its environment whenever possible.
Some of my favourite images, for example, are environmental portraits that left breathing room for the subject to shine.
Here are just a few from my files that might inspire you to experiment with environmental portraiture rather than an up-close and personal approach that has become all too common these days on social media.
Each image will include an extensive cutline explaining why I think the image works and why I decided to capture the subject in its environment rather that moving in close.
Here, a young male whitetail deer approached me through the tall wildflowers probably unsure of what I was and hoping maybe I was a female deer. The experience was truly wonderful and I wanted to capture the pure wildness of the area. By leaving out-of-focus plants in the foreground and including much of the environment, it created almost a glimpse into the secret life of this young buck.
By leaving room around the Red-wing blackbird singing in spring, it helped to create both a sense of place and time (spring in the marsh) but left room for its song to spread through the image in the direction he is looking. The bull rushes make it clear that it is spring time. An extreme close-up of the bird might well have been a better image in some people’s mind, but it would have failed to provide a sense of space and time.
This tufted titmouse was enjoying a winter’s snowfall out on a limb of a branch. Showing the snow build-up on the branch it is sitting on as well as the branches in the background helps illustrate the extent of the snowfall and maybe helps viewers realize the difficult time that awaited this little fellow over the next few days. Fortunately, my feeder full of birdseed was not too far away and always available for dinner.
Here, a fawn eyes the greenery in our garden while its mom sits quietly nearby, always keeping a close eye on her baby. This environmental portrait clearly says spring with both the size of the little one-week-old fawn as well as the presence of hundreds of blue Forget-Me-Nots that transform the garden into a sea of misty blue.
It’s every photographer’s dream to stumble across a massive drift of trilliums in their prime. But how do you do them justice with one image? Move back, find a centre of interest in the sea of trilliums and capture an environmental portrait of the scene showing as many of the trilliums as possible. By putting the fallen birch tree running diagonally through the middle of the trilliums, I was able to add a dynamic line while still showing the mass of flowers. The fallen birch tree will soon begin to decay and add its nutrients back into the earth to feed future trilliums that will rise up from the woodland floor.
I have many images of sunflowers up close in the garden, but a scene like this begs to be taken as an environmental landscape image. Move back, include several hundred sunflowers and add a high-impact red barn as the subject. Now the sunflowers become part of a larger scene rather than the centre of interest. The environmental portrait illustrates how they are grown and the incredible numbers of flowers. This is a farm near where I live that grows sunflowers for bird seed that it sells to the public. The story behind the image even brings me great joy.
This garden image shows one of our Cornus Kousas in full bloom in early summer. Although I could have moved in closer to show the tree in more detail or even to take macro images of the individual flowers, I thought an environmental approach showing how and where the tree grows tells a better story. Here it is pictured growing at the edge of our massive fern garden, where its roots are shaded all summer. The image shows how the dogwood grows on the edge of a mini woodland beside a lovely Cornus Florida (left) and a smaller (Cornus Mas) between its larger cousins.
This image of a bittern in the reeds is a good example of an environmental portrait that really help to illustrate the environment where this bird lives. Without this context I think the image looses much of its story-telling capacity. By moving in close, it would still be a strong image, but without an illustrative story of not only where the Bittern hunts, but also how it works to become part of its surroundings in order to find prey and protect itself from becoming prey.
This image of a massive bull elk reminds me somewhat of the earlier image of the two moose. By placing it in its environment, viewers are able to get a much better idea of habitat as well as its place in the large landscape.
This image of a single fern struggling to survive in a rock crevice was certainly inspired by Canadian photographer and author Freeman Patterson. The viewer can only imagine its struggle to find enough earth to set its roots down, but its obvious health suggests that it has carved out a niche for itself to not only survive in these harsh conditions but to thrive along with the mosses that it happily shares the rock.
I have many images of these showy orchids up close, but it’s this environmental portrait tat pleases me most. The birch tree, grasses, fallen tree and the hint of the cedar on the left edge provides a hint of where these beautiful orchids grow. The habitat is a swampy, acidic area not too far from where we once lived. It is a difficult environment to photograph in given the mosquitoes and deep mud that are present while they are blooming. It’s also the perfect environment to keep those who want to harm the plants away. Nature sometimes works in its own favour.
I’ve got closer images of this beautiful swallowtail butterfly, but in this image I was able to not only show the environment where the butterfly calls home, I was also able to capture a wasp that is sharings the plant with the Butterly.
It’s hard to argue that a full-frame image of an impressive animal or beautiful flower isn’t necessarily a perfect one. These extreme close-ups can reveal details that an environmental image can’t possibly hope to show. However, extreme close-ups often miss out on the very reason the image is so special to the photographer. That is often based on the fact it was shot either in the wild, or in their garden or some other location that made getting the image more difficult than simply capturing it in a controlled environment.
I can show you hundreds of images shot at my local zoo that I’m proud of capturing. All are very tight shots of the animal restricting as much of the background as possible. Some of the images are excellent and you would be forgiven if you might thing they were shot in the wild.
But they were not. Because of this, they lose a certain validity compared to an image shot in the wild.
So, why not celebrate the fact that these birds are wild, that the flower grows in a wide-open field or by a river bank. Back away, move in close but use a wide angle lens. Show the mountain in the background even if it means your subject takes a little of a back stage.
Stand back and show that beautiful flower growing in your garden. Celebrates that animals’ freedom with an environmental portrait showing the home where it has chosen to live – be it a woodland or your garden.
Celebrate nature on a grand scale and try not to be that close talker we talked about earlier.
A misty morning with the Sigma DP2
A misty morning in late spring with freezing rain still clinging to some of the trees and rural fences captured with the Sigma DP2 and its excellent, built-in 42mm (35mm) lens.
This was my first stop in my morning of misty photographs with the Sigma DP2. The moss-covered rock outcrop is a favourite spot of mine although I have never been able to capture its beauty in the past. The soft, warm light on the morning mist rendered a quiet image, almost monotone in colour if it was not for the hints of soft green moss on the rocky outcrop. Photographed hand held at ISO 200, 1/50th second, f2.8.
Foveon sensor captures details in ethereal scenes
The conditions were just too good not to grab my cameras and head out for a morning shoot in the misty rain of late March.
It’s an in-between season where the snow has more or less vanished, the spring greens have yet to appear and all that really remains are bare trees and wheat-coloured fields. Even the migratory birds have yet to make their appearance.
The misty conditions combined with the remnants of freezing rain still clinging to some trees, shrubs and fenceposts made for a promising morning. Although I took along a digital slr and even a film camera, those two camera bodies remained in the bag so that I could focus entirely on my newly acquired Sigma DP2 with its unique and truly outstanding Foveon sensor.
Along a back country road the thin ice from the previous night’s freezing rain still clung to the steel fencing and roadside plants adding a little sparkle to what is normally a rather drab scene. Although I could have moved in closer to isolate a single plant along the fence line, I think the simplicity of the colours allowed for a more environmental portrait of the scene. Photographed hand held at ISO 100, at 1/160 second, F5.0.
For those not familiar with the Foveon sensor and what makes it so special, there are plenty of articles on-line explaining how the Foveon actually combines three separate sensors into one that is said to create the ultimate film-like look. I don’t know how true that is, but I do know that, even in the short time I have used this high-end enthusiast camera with an almost cult-like following, I’ve noticed that the results are quite unlike any from my other cameras.
One of the features of the Foveon sensor is that it renders extraordinarily fine detail. What better test than to take it out in misty conditions where a lot of the fine details are lost in the mist and rain.
Without any preconceived ideas of how the images would turn out, I took off for the surrounding woodlands and agricultural fields around our home.
If you are looking to purchase a Sigma DP2 or another Foveon-sensored Sigma camera, consider checking out the large selection at KEH Camera Exchange. Click here to see what they have to offer. In Canada, check out Henry’s photography. Link below.
Rather than rambling on about the camera, (I’ll do that in my review at a later date after using the camera over an extended period) I’ve chosen to include a number of images taken on that morning complete with detailed information in the cutlines.
Afterall, I think images speak louder than words is this situation.
All images shot in RAW, converted to TIFF in Sigma PhotoPro and post processed in Lightroom and Photoshop when necessary.
The fence line weaving through the landscape and trees almost in silhouette caught my eye and forced me to stop to explore the scene further. I have driven past this scene many times, but without the mist, it loses much of its charm and sense of mystery. The warm colours in the foreground field work against the overall coolness of the scene revealing hints of the green grass on the horizon. For now, however, the beiges of late winter and early spring still dominate the scenes. This image is heavily cropped to create the panorama effect, but the Foveon sensor is able to still create a useable image for the web at least. ISO 100, 1/125th of a second at F4.5.e Foveon
I am particularly attracted to fenceposts along the side of the road. I think I’m secretly hoping or maybe dreaming for a blue bird or cardinal to land on the post to add a punch of colour. In this image however, the subtle tones of beiges from the spent grasses, and reds from the red-twigged dogwoods in the distance combine with the misty background and glistening ice covered foliage to create a lovely texture that reminds me of the paintings of Canadian artist Robert Bateman or the photographic images of Freeman Patterson. ISO 100, 1/80th second, F3.5.
Keeping with the fence line theme, I noticed this lovely scene incorporating two red Adirondack chairs, a green canoe and bird feeder overlooking a pond. I imagined sitting in the chairs with a coffee in late summer, birds visiting the feeder while ducks went about their business on the pond. Maybe an owl calling in the distance. This image is one of a few that I cropped heavily to move in closer to the subject. Being restricted to the 42mm (35mm equivalent) fixed focal length lens on the Sigma DP2 is difficult to contend with after using longer focal lengths and zoom lenses all my life, but the discipline it invokes is refreshing. Having to move closer to the subject rather than just zooming in to get a closer view is part of how the camera forces you to slow down. The camera’s superior Foveon sensor also provides for the flexibility to crop images and still get acceptable results as was done with this image. Hand held at ISO 100, 1/80th second, f3.5.
In this image, the ice still clings to some of the spent grasses. The fallen tree provides a vertical line leading to the hay bale which helps provide context to where the image was taken on the edge of a farmer’s field. The fallen tree has been left in place providing habitat for a host of insect, mice and other critter that will, in turn, provide a food source for birds, owls, foxes and coyotes that live in the area. ISO 100. 1/100th second at f4.0.
By moving along and in closer, the scene takes on a different feel with the icy grasses standing out against the rounded background of the hay bales.
Mist and freezing rain combined in this image to create a lovely woodland scene combining the warm colours of cattails growing in the marshy open area while a native white pine with hints of ice covering its needles stands proudly on the right side of a spruce forest. The ghostly tree stands in the rule of thirds providing a centre of interest. I particularly like how the combination of the grasses in the foreground warm the rather scene of the cool-tone pine and spruce forest that fades away into the mist. ISO 100, 180th second at f2.8
The delicate red and pink tones in this sene caught my eye while the almost ghostly image of the sumach creates a centre of image for the eyes to stop at before wandering throughout the scene. The misty background adds to the ethereal feel and again helps to simplify an image that would be very busy on a normal day. ISO 100, 1/50th second at f3.2.
When I am in the area, I always make a stop at this local wetland. It can be a wealth of images, from red-winged blackbirds in early spring, leading to warblers and blue birds later in spring. Muskrats, build their home among the reeds and ducks of all kinds nest on the hummocks. Bald eagles have known to visit as well as a host of other predatory birds. Capturing it in a wide variety of atmospheric conditions helps you appreciate the incredible importance of this marshland and all the others that are hanging on as “progress” continues to threaten these vital areas.
Morning mist fades and it’s time to call it a day
One of the secrets to capturing morning mist is to move quickly once you see it. Enjoying that extra coffee may not be the wisest choice if mist is what you are after. In this case, the mist lasted longer than usual because it was caused as much by rain as it was by warm clashing with cool ground.
Nevertheless, it only lasted a couple of hours before it began to dissipate and leave me with uninspiring overcast conditions. With my morning at an end, I returned home to check out the images I had attained.
I was happy with most of the images after processing the RAW files first in Sigma Photo Pro before bringing them into Lightroom to complete the final edits.
I find Sigma images easy to work with for the most part once they are converted into TIFFS and imported into Lightroom. There is one nagging problem that other Sigma photographers have pointed to and that is evident in many of these images. A green cast often works its way into the images, and sure enough you can see it in many of these images despite my attempts to remove or, at least, lessen its effect. It is particularly evident with the white, misty skies.
The green cast is just one of the many negatives that other photographers have pointed out about the camera. Slow focussing, and a painfully slow ability to write images to the SD card, are just two of the many annoyances this camera exhibits. Do these mean the camera is not useable? Absolutely not.
Does it mean that it is not the right camera for some photographers. Absolutely.
But if you are the type of photographer who enjoys the challenge of creating unique images with their own style and look, than the Sigma cameras with their incredible Foveon sensors are certainly worth a try.
If you don’t subscribe to my weekly newsletter, please consider signing up. I write a new newsletter every Sunday covering Woodland gardening, native plants and wildlife with a focus on photography.
Getting a grip on the Sigma DP2
If you are one of the lucky owners of the early Sigma cameras – DP1 or DP2 – you might be interested in adding a grip and thumb rest. If that sounds good, Jim Rinner’s Ebay store has the solution.
Jim Rinner at Shutterspeedblog, has used his incredible engineering skills to design the most exquisite hand grip complete with an integrated thumb rest. No longer do you have to put up with the minimalist block-design of the Sigma DP1 and DP2.
This image shows the Sigma DP2 complete with the exquisite grip and thumb rest that completely transforms the already outstanding DP1 and DP2 cameras.
This single piece of equipment, that can even incorporate a Swiss Arca mounting plate, will transform the look and feel of your favourite Sigma DP1 or Dp2 camera.
Jim is a retired professional photographer and inventor with 75 (currently) US patents and with dozens more pending. In his spare time he puts is skills, along with $5,000 in CAD software, five 3D printers, and a love for photography to work creating exquisite camera accessories for a multitude of cameras ranging from the Sigmas, to Lumix, Leica and a host of cameras in between.
One look at he grip, and it’s not hard to see the attention to detail that Jim puts into these accessories. In the case of the grip for the DP2, not only does it sport an exquisite finish, it also leaves openings to replace the battery without removing the grip. The built in thumb rest is an excellent addition to the camera helping the photographer to use the camera with one hand for street photography without fearing the camera will slip from their grasp.
The hand grip and thumb rest screw into the tripod mount but provides a second screw to still use a tripod mount if necessary.
The accessory wraps around to the back where it enables the photographer to access all of the controls without getting in the way.
One only needs to check out his incredible EBay store to see the work he has done in the creation of so many photographic accessories.
Pentax *ist-D: A CCD sensor with DSLR punch
CCD-sensor cameras have developed a bit of a cult following now that working copies are getting harder and harder to find. The Pentax *ist-D is an example of an excellent CCD camera that continues to deliver in its old age.
CCD-sensor cameras prized by photographers looking for film-like images
It’s hard to believe that a 20-plus-year-old digital SLR not only still works, but continues to create outstanding images.
Is the answer its outstanding CCD sensor, its build quality, ease of use or all three? I’m going with the all-three conclusion, but that CCD sensor in the original Pentax *istD, which actually was the premiere digital camera for that camera maker, certainly makes this camera a keeper for any photographer looking for those intrinsic qualities that only CCD sensors provide.
Its low price on the used market makes it a camera you might want to grab while you can, especially if you have some fine Pentax glass to complement this highly competent digital SLR. Other notable DSLRs sporting CCD sensors include the Nikon D100, D70, and the Canon EOS-1D as well as the Minolta Maxxum 5D.
There are no doubt other CCD-bssed cameras available, but this post is about the Pentax *ist-D. I know, the name Pentax chose for the camera is completely weird, but Pentax marketing has never reached the heights of its cameras. The marketing department may well be big part of the reason that the camera maker is slowly disappearing from the market. It is certainly not because of the quality of the cameras.
At the time of this writing KEH Camera exchange actually has a Pentax *ist-D listed for just $54, or the price of an inexpensive dinner out with a friend.


Whether you believe in the CCD-sensor hype or not, I find its superior film-like images hard to argue with when it comes to the quality of the images.
And I should know. I’ve owned the 6-megapixel camera since it were first released in February of 2003 and used it for years as my first and only digital SLR. I still use it today as a backup to my CMOS censored Pentax K5.
Defining the positive qualities of the ist-D CCD sensor is difficult, but needless to say time after time when I go through my tens of thousands of images on Lightroom, it’s the images taken on the CCD sensor that catch my eye and please me most.
Photographing in the garden
In the garden, the *ist-D is often my camera of choice to capture the incredible colours of flowers, birds, insects and butterflies that the CCD sensor seems to bring to life more so than the CMOS-based cameras.
The image below of the Ladybugs attacking aphids on a milkweed plant is a good illustration of the colours the CCD sensor can bring out in your images. It is also an interesting example of nature at work in the garden and how important natural predators are in our gardens.
CCD sensors and the film look
For those who have never given much thought to the sensor in their digital camera, think of it as how analogue photographers used different films to give them very different results. The muted but natural colours of Kodachrome, for example, vs the punchy, vivid colours that Fujichrome delivers. Both deliver fine results, but often very different ones.
And, yes, if you dabble in Lightroom or Photoshop, you can achieve similar results with good post processing if you want to learn the intricacies of the digital darkroom. But, maybe it’s just easier and a whole lot more fun to just use a camera with a CCD sensor to begin with and push it to the max to capture pleasing images.
Check out my other featured posts on Pentax cameras and lenses:
Either way, there is no denying that Pentax’s original DSLR, for me at least, proved to be an excellent purchase – even if it was outrageously expensive coming in at a suggested retail price of US $1,600.
Defining the positive qualities of the ist-D CCD sensor is difficult, but needless to say time after time when I go through my tens of thousands of images on Lightroom, it’s the images taken on the CCD sensor that catch my eye and please me most.
The camera itself with the separate motor drive is a nice, high-quality piece of kit that seems to be able to take anything thrown at it over the years.


Decent autofocus, the fact it takes four AA batteries to power it and its multitude of buttons to prevent the user from having to dig too deep into the menus, makes it simple to use.
However, its back LCD display, use of CF cards and slow writing capabilities, takes away at least some of the joys of using it. It’s not perfect, but no cameras from that era were perfect and most delivered inferior results or were not built with the same quality that earlier film-based cameras offered from Pentax and other camera makers.
I’m not going to go into a full review of this camera here; that’s available elsewhere on the web. But unlike many of those technical reviews, I can offer readers 20 years of images shot with the Pentax *ist-D together with the F*300 f4.5, 28-100 power zoom Pentax lens, 100mm F4 macro lens and the Kiron f2.5, 105 macro just to name a few.
What others say about the Pentax *ist-D
All of these comments are taken from the Pentax Forums - an excellent resource for all things Pentax. Also, the charts below are courtesy of Pentax Forums.
• “I bougth my copy in 2013. It looked like it had taken a beating, and it had! I bought it to use in very harsh environments such as dry, sandy deserts, beaches and wetlands. It did its job and never skipped a beat. AA batteries made it much easier to manage power supply.”
• “I purchased my first *istD used to begin taking real estate photos. I have since shot over 50,000 photos with the same camera. It has never ever missed a beat. It is absolutely top rated for reliability in my situation. I leave this camera in a Pelican case in a truck with a sunroof in the super hot Mississippi summer heat and it doesn't seem to mind.”
• “That *ist D was my main camera for almost 8 years. Here's what I liked and disliked about it:
Likes:
- Small size and weight. There has still never been a DSLR with better specifications that is smaller and lighter, by a long shot. For years I waited for a real D replacement, but it never appeared. Now Pentax doesn't even offer an entry-level model that small. If you want something this small today, you have to go to an entry-level Nikon or Canon. Have fun with that.
- Pentax lenses. Yes others have greater quantity, but narrowing it down to the lenses I might actually buy, Pentax's selection, both old and new, was more interesting.
- Compatible with TTL flash. It was the only Pentax DSLR compatible with TTL flash, and I used an old AF500FTZ for years. On all other models, the 500 is manual-only (no Auto Thyristor mode).
- Ability to set three completely separate sets of settings. Weird that the K-7 doesn't offer that. It was the one part of going to the K-7 that was an uncomfortable downgrade.
- Everything else was good enough. Though N/C are better at some things, there was no deal-breaker for my needs with the *ist D. It was a small, light camera that did everything I wanted and took the lenses I liked.
Dislikes:
- Slow write times! Even with the fastest cards (Lexar with "Write Assist" technology), RAW write times were about 6 - 6.5 seconds. For cards without the Lexar "Write Assist" technology, make that 7 seconds. And the buffer was only 5 RAW files. So very often I'd fill the buffer and have to wait 6 seconds for each shot thereafter. This was by far my biggest dislike, bigger than all the others combined. My understanding is that it was the last DSLR to do writes in software; just months later the D70 appeared with much faster writes, doing it in hardware. Then the DS, and all other Pentax DSLRs, have had much faster writes.
- That grip. It was not great to hold. The battery grip made it better but at the cost of increased size. All other Pentax DSLRs have been MUCH better to hold.
- Batteries. For best results you want to use CR-V3 batteries (NIMH rechargeables make the AF slower with lower voltage; Alkaline rechargeables could fry it with higher voltage). But they are expensive. Finally I found that I could find large lots of them in unusual brands on eBay, pretty cheaply. That was an improvement but still annoying. Yes it's nice that if you run out of battery you can find alkaline AAs just about anywhere. But in real life the only time I ever needed that was at a beach, far away from any place where I could get AAs.
- Can't control ISO with wheel. I mostly use aperture priority, so one of the two wheels usually goes unused. When the K-10D came out with the ability to control ISO on one of the wheels in aperture-priority mode, I wished they'd do a firmware update that allowed that on the *ist D. But no such luck.
- Control wheel. Hard to hit it right, and to hit it hard enough for it to respond. Not a good design. But I don't like the K-7 solution much better.
- Small, low resolution LCD. Much better on the K-7.
- Can't write both RAW and Jpeg. I don't have a lot of time for PP, but my wife uses my shots for scrapbooking. Converting all those shots to Jpeg was often an issue. When the K-10D came out with the ability to write both, I wished they'd do a firmware update that allowed that on the *ist D. But no such luck.”
The charts below are provided by the Pentax forums website at www.pentaxforums.com
In conclusion
Your first DSLR is like your first girl or boyfriend, there’s always a soft spot and a little love for them left over even if others have since taken their place.
For me, there have been many other digital cameras that followed the *ist-D, but she still holds a place in my heart. I am lucky enough to still own a very good working copy of Pentax’s first DSLR and plan to continue to use it until that mirror slaps against the camera internals for the last time.
This summer, I plan to give it a good workout and will report on how well it holds up. It continues to provide high quality images out of its 6 megapixels and the joy it continues to give me makes it an important part of my growing arsenal of cameras.
Stay tuned.
For more on Pentax cameras, including the PZ1-P and the PZ-20 click here for the PZ20 and here for the PZ1-P
Please take a few moments to check out my gallery of images here.
Konica C35 Automatic: Simplicity with impressive results
The Konica C35 Automatic is a brilliant little rangefinder camera that sets the shutter and exposure automatically while leaving the photographer to set the ASA and focus.
The Konica C35 automatic. A study in simplicity and elegance wrapped up in a beautiful rangefinder camera from the late 1960s.
Late 1960s film camera combines auto features with a manual vibe
They say good things come in small packages. The Konica C35 Automatic film camera is a perfect example of this.
Simplicity and elegance are combined with a sophisticated look creating an enjoyable user experience that is reflected in the finished results.
There is something inspirational about using a late ‘60s-era rangefinder that asks the user to only set the ASA and focus on their subject, nothing more.
Designed for travel
A top view of this elegant rangefinder film camera with its exquisite rope strap and simple design. For more images, be sure to check out my photogallery of images taken with the Konica C35.
Be sure to check out the Konica C35 photo gallery here.
Although the Konica C35 is primarily an automatic camera, it has a very real manual feel to it. Lomography afficianados will love its vintage charm.
It’s easily pocketable and is more than capable of documenting your garden both in a wider landscape view as well as a closer approach to individual plants, or environmental portraits.
Wintery woodland scene
The Konica C35’s meter and impressive 38mm lens was able to deal with the very bright conditions of this forest scene during a snowstorm. Be sure to check out my Konica C35 gallery for a stunning BW image of this scene.
Meeting the travel-camera market
The Konica C35 Automatic was Konica’s answer to creating a small travel friendly camera to compete with the Olympus Trip cameras that enjoy an almost cult following as film cameras enjoy a modern-day renaissance.
Konica made 4 models in the C35 lineup. In 1971 Konica updated the original camera and came out with the C35V that eliminated the rangefinder focusing system. That was followed shortly after by the C35 Automatic and finally the Konica Auto S3 in 1973. The final version added the ability to continue operating even if the battery dies. The Auto S3 also came with a faster lens – f1.8 rather than the previous f2.8.
The Konica C35 is primarily an all-metal, programmed automatic range finder camera that sets its own shutter speed and f-stop while requiring the user to set the ASA (ISO in digital camera terms) and the focus. Focus is on a lovely smooth ring on the camera lens and the ASA setting is brilliantly set on an inner ring around the lens with a window showing the ASA. It can be set from ASA 36 up to about 800.
It sports a fixed 38mm f2.8 lens. Shutter goes from 30th of a second to 650 and it focusses from about one meter to infinity.
The meter is clearly evident on the right side of the viewfinder and gives the photographer a good idea of where the exposure is falling. If the needle goes into the red at either end, you know you are out of the camera’s range. You can still take the picture, but caution would be needed and the results will be difficult to predict.
This vintage camera includes the ability to use a traditional cable release if, for instance, you have the camera mounted on a tripod for longer exposures. It also has the ability to add a flash.
Although the Konica C35 is primarily an automatic camera, it has a very real manual feel to it. In other words, it has a point-and-shoot vibe, but with the added ability to focus on what you want to be sharp.
One point that is worth emphasizing is that the shutter on this camera was made by Copal, an historically highly regarded company that made some of the best shutters of their time. A quality shutter is important both for the accuracy it provides and its ability to stand up to continued use over a long period of time. This, in part, accounts for the longevity of these cameras in today’s marketplace.
The fact that you can set your own ASA and focus means this is a giant step up from many vintage and modern point-and-shoots.
Even the new, quite expensive Pentax 17 half-frame camera does not enable the user to “focus” on a specific subject. Instead, it uses a zone focus system that works but is not ideal.
Konica managed to combine the best of both worlds, that of a point-and-shoot camera with the focus control and ASA setting often found in higher-end rangefinders and SLRs.
A built-in light meter takes the guesswork out of capturing images and the 38mm f2.8 Hexanon lens provides the perfect walk-around street shooter and travel camera. The meter is built into the lens, enabling it to recognize if filters are being used and compensate for them.
A lens cap should be left on the camera to ensure the meter is not operating at all times, which would eventually drain the battery
The camera originally took mercury-based MR44 (1.35V) batteries which are no longer available or even legal to use, but operates perfectly fine on today’s common LR44 (1.55V) batteries. Some suggest overexposing the film to account for the voltage difference, but I shot according to the recommended ASA and the results were right on target.
But enough about the specs of the camera. What about the results?
Impressive results from a 50-plus-year-old camera
After using the camera, I was actually shocked with how good the images turned out. Considering the quality of the lens, maybe I should not have been surprised. Even in difficult lighting conditions, the camera performed remarkably well despite the fact that exposure is set automatically with a 50-plus year old meter.
Check out this link for savings up to AliExpress Spring Sale! Up to 60% favorites, plus Save $3 off a $29 purchase with CODE: USAFF360 per cent from Alixpress who specialize in hard-to-find photo products.
In good lighting conditions, it performed exceptionally well considering the age and the fact that the camera was in control of both the aperture and shutter speeds.
These images were scanned with an Epson 500 flatbed film scanner and processed using Lightroom.
Most of the images required limited post processing. I do, however, enjoy working with digital images so some of the photographs received their share of tweaking including some images that required cropping. Despite some heavy cropping, the images held up well.
Conclusion: Konica C35 simply gets the job done
There is something about using an elegant rangefinder camera that is simple to use and gives great results.
Just ask Leica camera users why they love their cameras so much.
The Konica C35 may not be up to Leica standards, but then again they can be purchased for a “whole lot less,” and provide much of the same feeling that a Leica provides.
On my camera I used a step-up ring so that I can use 49mm filters, including a polarizing filter. With the light meter sensor on the lens, the camera is able to nail exposure.
Focussing the double image through the bright viewfinder is both elegant and extremely easy. These cameras make a great street shooter, travel camera and will hold their own in a garden setting.
Obviously, like any rangefinder, macro or even close-up photography is not ideal. However, if you are looking for a film camera to capture overall garden images, take on vacation or use in the streets, this is a good choice.
They may be available for under $100 dollars on camera resellers like KEH Cameras, EBAY and other on-line sites.
Take a moment to check out more images from the Konical C35 on my photo gallery pages.
Living with Wild Turkeys in the garden
Wild Turkeys, for better or worse, have become a part of some our more rural gardens. Find out more about these massive wild birds and how they play a role in our woodland gardens.
Attracting cardinals, blue jays, nuthatches and other garden birds to your yard is one thing, but wild turkeys (Meleagris gallopavo silvestris) – that’s on a whole other level.
They are large. Massive, in fact, and their oversized feet capped with claws can make short work of a properly manicured garden bed. If you’ve got a layer of black landscape fabric under the mulch, plan to have most of the that ripped up and left in a dishevelled mess under the feeders.
But that’s a mild inconvenience. I’m more than happy to endure some inconvenience to see these magnificent birds strutting their stuff through the garden and bedding down in our fern garden.
I don’t want them sticking around forever, but for a few days in spring or fall, it’s just fine with me.
If you have never seen wild turkeys, you may not be looking in the right places. These massive birds are often seen walking in fields or on the edges of deciduous and mixed woodlands. They are well adapted to this environment, foraging for food during the day and roosting in trees during the night.
For more on wild turkeys, you may want to check out “The Wild Turkey, Biology and Management.”
A male wild turkey under our bird feeder filling up on white millet bird seed.
What do wild turkeys eat?
Turkeys are omnivores, meaning they will eat seeds, nuts, berries, snails and a host of insects. Acorns are by far their favourite food. Oak trees, once again, come to the forefront of must-have trees to have in your yard.
For more on why oaks are so important in our landscapes go here.
Eastern wild turkeys will also readily eat small mammals such as mice and voles helping them to become a gardener’s friend.
They typically forage in the morning and evening, but can also, at times, be seen during the day. They especially like to go into corn and wheat fields after the harvest and feast on the remaining grains.
Identifying male and female wild turkeys
The distinctive gobble, beards and beautiful tail feathers of the male makes them easy to identify.
In North America primarily in the United States there are five native subspecies – the Rio Grande, the Merriam’s, the Osceola, the Eastern, and the Gould’s. But we are here to talk about the native eastern wild turkey.
Turkeys are wide spread across the United States up into Canada as far north as Quebec and down south into Mexico.
An immature wild turkey strolls through the garden. The trailing beard gives away the sex of the bird, although a small percentage of females also grow beards.
Why did wild turkeys become almost extinct?
Over hunting the clearing of its woodland habitat and the loss of its staple food to chestnut blight made this, the largest of North American game birds, one of the rarest. But the Wild Turkey has made and impressive comeback and is now found in every state except Alaska.
According to the Ontario government website: The eastern wild turkey (Meleagris gallopavo silvestris) was reintroduced into the province in 1984 and is now a thriving population playing an important part of the biodiversity of Southern Ontario.
Today, it is estimated that more than 100,000 turkeys call Ontario home. All of these wild turkeys are descendants of the original 274 turkeys that were released around 1984.
“Unregulated hunting and clearing of native forests for agriculture caused the extirpation (regional extinction) of wild turkeys from Ontario in 1909,” the Ontario government website states. “Efforts to restore wild turkeys began in 1984 and were successful. Ontario experienced a rapid expansion of the number and range of the birds in the province. Because of forestry, agriculture and milder climatic conditions, the occupied range of wild turkeys in Ontario is now larger than the historical range.”
Reintroduction programs throughout the United States introduced wild turkeys in the early 1990s have also proved very successful and helped wild turkeys become a “species of least concern.”
Why have wild turkeys come to my yard?
And, it is this group of reintroduced wild turkeys that have decided to spend several days in our yard primarily gorging on our bird feed, but also systematically routing through our fallen leaves looking for insects. The fact that our fallen leaves are left on the ground – unlike most of our neighbours – is one of the reasons the wild turkeys have chosen our yard to feel at home.
For more on why it’s important to leave fallen leaves in the garden go here.
Raking up leaves and disposing of them not only kills so many insects and other wildlife that depend on them to overwinter, it discourages birds and other animals from coming to our yards in search of food.
Wild Turkeys in the garden
There is no mistaking a wild turkey in the yard. If a crow or even a raptor is the largest bird you’ve had in your yard, you better be prepared for what appears to be a prehistoric invasion of the avian kind.
This year I’ve counted as many as nine roaming through the yard scratching for insects and seeds buried just below the duff of the woodland floor. That was in the early summer when the babies were old enough to more or less have their adult feathers but still quite small to be mistaken for a very large group of crows.
There is no mistaking the trio of male wild turkeys we’ve been entertaining this week in the yard. These are three wild turkeys looking for food for the long winter ahead.
And what better place to find it than beneath our bird feeding station.
When I say large, I mean about three feet tall.
These wild turkeys are actually 1 of 5 sub-species and is the most common one found in Canada and the Eastern half of the United States. They also have the widest range of each of the five sub-species.
The eastern wild turkeys actually live in diverse habitats but can usually be found in a near hardwood forest and in agricultural fields.
They are the largest of the five sub-species. Adult males, also known as a gobbler, average just over three feet in height (91 centimeters) and can weigh up to 25 pounds (11.34 kg). Juvenile males, also known as jakes, will typically be 2.5 feet to 3-feet in height and average 16 pounds (7.25 kg). While female turkeys known as hens, are slightly smaller than jakes and weigh around 9 pounds (4.082 kg).
To keep warm during our cold winters, Adult wild turkeys typically grow 5-6,000 dark yet extremely colourful feathers. The feathers are actually beautiful and appear to change colour when light hits them at different angles.
Wild turkeys also have some of the best eyesight of any animal or bird. Their eyes are positioned on each side of their heads giving them an almost 360 degree field of vision. They also have excellent colour and depth perception, and don’t have to shift their focus to see other objects at different distances, meaning everything in their view is always in focus.
Wild turkeys generally roost or sleep high up in trees where they are safer from marauding coyotes and other predators. But when it comes to laying their eggs, hens prefer the ground. Eastern wild turkeys lay their eggs from late March to May, typically laying and average of eight to twelve eggs.
This process can take one to two weeks to complete as hen turkeys tend to only lay one egg a day.
The hens do not collect sticks or other material to build a nest, instead choosing to lay their eggs directly on the ground, often in a grassy areas protected by overgrown bushes. The incubation period lasts 26 to 28 days.
The baby wild turkeys are called poults and are able to fly and run shortly after hatching. Both Wild Turkey parents care of the poults teaching them how to find food and avoid predators. In addition the male will help to incubate the eggs.
The poults usually stay with their parents for several months learning how to find food and escape predators.
Wild turkeys live in groups called flocks. These flocks can have just a few birds up to several hundred birds.
The courting period of wild turkeys is certainly the most entertaining time of the year. This phase happens just before and during the nesting period when the gobblers strut their stuff much like a peacock showing their 18 tail feathers in an impressive show meant to catch the attention of a nearby hen. Although strutting is used to attract hens, it is also used to show dominance over other male turkeys. As a result, strutting can often be seen outside the typical courting season.
During the mating season, the top of the gobblers’ heads turn a pure white during this strut further showing off the spectacular colours in their face and neck ranging from bright blue, reds and whites caused by blood vessels in their heads and necks. The male turkeys can control these colours which helps to communicate to other turkeys what kind of mood they are in.
The more colourful the tail, the more attractive it is to female turkeys.
In addition, the fleshy, wormlike piece of skin on their foreheads just in front of their eyes just above the beak is referred to as the snoot. It also has the ability to change colours along with its shape ranging from short and stubby to long and colourful.
Wild winter of turkeys
Our wild turkeys decided to stay with us all winter allowing for some interesting winter images.
Male turkeys produce a loud and rather unique vocalization called gobbling. A gobble can be heard up to a mile away and is used for a variety of situations. Most of the time, however, turkeys are quite elusive birds that spend most of their time clucking and purring to one another. These much lower calls can be harder to hear unless you are very close to the bird. The variety of clucks can mean many things, from friendly and courting purrs, aggressive fighting purrs and even warning clucks to alert other turkeys that danger is near.
Turkeys are capable fliers and can run up to 25 miles per hour but usually only do this when they are trying to escape a predator.
Wild turkeys are an important part of our ecosystem. In the garden and in the wild, wild turkeys help control populations of insects and rodents,
It is the state bird of six states including Arkansas, Delaware, Georgia, Kentucky, Missouri and Pennsylvania.
Climate change has played a role in Eastern wild turkeys’ success in Canada including Southern Ontario and into colder regions into Quebec. They are also found as far west as the Dakotas in the United States.
Differences between wild and domesticated turkeys
Domestic turkeys tend to gobble all year long rather than just in spring. It’s head and neck are covered with more parenthelated skin and its snoot, which hangs over its bill, is much longer. It is said to have a smaller brain and are unable to survive outside of captivity.
Domestic gobblers can also weigh up to 50 pounds.
Selective breeding has also created the domesticated white turkey.
The wild turkey is far more alert, its neck and legs are longer and its body is more streamlined. Adult males have a beard which grows four to five inches a year and can get up to a foot long on three-year-old gobblers. But because they only grow so long, they are not an accurate measure of age. Although the beards look like long hair, they are actually a tuft of modified feathers.
About one in twenty hens also have beards.
The gobblers and hens spend most of the year apart, using a variety of vocalizations to locate one another for mating season.
Every flock has a dominant gobbler. The spurs on his lower legs indicate his age more accurately than his beard, The spurs grow about half and inch per year and go from round the first year to blunt after two years to sharp three years to very hip at older than three years.
Nearly all turkeys live within a five mile radius but a foraging flock may wander widely.
The art of capturing Cherry trees in bloom
Capturing the Cherry Tree blossom can be challenging but these five tips will help ensure your success.
Five tips to photograph the essence of these beautiful trees
It’s early spring and the Cherry tree blossoms are emerging along with tourists looking to capture the ultimate selfie. I’m here in our local botanical garden with my tripod and a couple of cameras looking to document the cherry trees in all their beauty.
The early morning light is at its best and most of the “tourists” are still at home just getting out of bed. That’s a good time to begin shooting. Not only is the early morning light at most locations at its best, but this is the only possibility of capturing the trees alone in the landscape.
Tip one: Get out early to beat the tourists and capture the trees in their best light. Getting up early is always a good idea whether you are photographing the trees in your own garden or at a public garden. Light is the key here and soft morning light on these trees in bloom helps to capture the soft petals in a delicate light.
Also, since the flowers on the trees are white or pink, consider over exposing the image 1/3 of a stop to “hold the whites” and not end up with a muddy, underexposed images that fall short of what you are seeing. The camera is going to want to turn those lovely white/pink flowers middle grey. By overexposing the images slightly, the whites are kept clean. Use the over exposure button available on most modern cameras.
Cherry Tree bloom: A worldwide attraction worth capturing
The cherry tree blossom is a phenomenon that sweeps across the world as spring arrives creating a spectacle from Japan’s incredible displays to the National Cherry Blossom Festival in Washington where tourists and residents even turn to websites to help them find the ultimate location to capture a photograph.
Whether it’s Japan’s incredible sakura cherry blossom show, the Washington display, a local cherry tree festival or a beautiful tree blooming in your backyard, the secret to capturing these delicate blooms is a combination of an ideal scene and good timing.
For the blossoms, that time is during peak bloom, which is defined as when at least 70 per cent of the cherry trees have fully opened. This year, peak bloom for the Yoshino cherry trees in Washington hit around March 17. In Toronto, Canada, peak bloom was around the week of April 21-26th. In Japan the sakura bloom lasts from late March through May.
The best viewing of the cherry blossom trees typically lasts four to seven days after peak bloom begins.
Tip two: Try to get out a few times during peak bloom.
Capturing good images of the cherry trees in bloom is best achieved by visiting the trees several times during peak bloom. By making multiple visits to the cherry trees at different times of day, your opportunity to capture the potential of different scenes and changing light increases dramatically. It’s also an opportunity to explore different approaches from macro photography to a more journalistic approach of documenting the tourists.
Tip three: Be creative. Try to go beyond just documenting the trees in bloom.
It’s also a great opportunity to try different lenses, and cameras in an ideal environment. Pull out your cell phone to capture images that can instantly go on to social media, but use your cameras and specialty lenses to capture the more atistic and intimate images.
Experiment with different cameras and lenses when you have such a perfect subject. Here, I used a vintage lens 18mm 110 manual focus lens on my tiny Pentax Q to capture this image.
In the above image, I used a vintage lens meant for vintage 110 lenses on my tiny Pentax Q to capture the image. It’s not only fun, but again it provides you with an opportunity to give your lenses a real work out to create more unique images from different perspectives.
Use a macro lens to capture up-close images of the individual blooms at life size. Open the lens up to its maximum aperture and include out-of-focus cherry blooms in front of the lens while focussing on a more distant bloom to create a beautiful “selective focus” image.
On a recent visit to photograph cherry blossoms at our public gardens, I focussed on a more artistic approach using a 50mm Lensbaby on my Olympus micro 4/3rds system. By working with a Lensbaby lens, photographers can create interesting out-of-focus elements in their images.
Tip four: Look for special situations that add a surprising element to your images. While I was working with the Lensbaby, I noticed a native bee sitting on one of the blossoms. It created the perfect opportunity to add a natural element in a creative way.
Don’t wait for blue skies to get out with the camera. While blue skies can make for dramatic pictorial images, overcast days are ideal for capturing soft light. But don’t stop there. Rain can add further drama to the scene whether you are shooting close-up images or taking a more pictorial approach.
Tip five: Get right under the canopy of the tree and shoot up with a wide angle to capture the intricate branching of the tree. If there is a blue sky, consider using a polarizer to deepen the blue and show off the flowers. Lay on the ground and look up. Also, this is the ideal time to experiment with many of the built-in filters incorporated in many digital cameras. Try the soft focus filter for a delicate look. Although many photographers use them for portraits, they can work well with flower photography.
Black and white images might be something you want to experiment with while you are photographing the trees.
If you are looking up at a white sky, try shooting with the high-key filter to create a very light and airy image. In addition, consider shooting in black and white for dramatic results.
Try experimenting with ICM or intentional camera movement. This is a technique where the photographer uses a long exposure and moves the camera during the exposure. Results are varied, but interesting images with a creative flair are possible using ICM. In the photograph below, two images of the cherry tree were sandwiched together in photoshop to create a single image. The first image is the traditional one while the second is a very abstract image of the trees during significant camera movement. Included is a smaller photo showing the ICM image.
Finally, don’t be afraid to incorporate the cityscape in the background whenever possible to help give the image a sense of place. If you are shooting in Washington, be sure to include elements in the scene that gives readers an idea of where you photographed the image. Consider shooting a panorama of the scene or pull out your extreme wide angle for a unique feel.
In conclusion, take advantage of an ideal situation
Whether it’s a sea of cherry trees blooming in a public garden, or a single tree in your own garden, consider it an opportunity to go to town. Focus on capturing that iconic image but don’t be afraid to stretch your creative vision to the max. Bring out your widest lens, a fisheye or extreme wide angle. Pull out a macro lens, use built-in filters or add them to the front of your lens.
Find unique angles… shoot the scene like a photojournalist would and include people in the scene. Look up, look down. Return to the scene at different times of the day, during bright sunny days, overcast days and even rainy days.
Use the opportunity as a learning experience and most of all have fun.
Author Profile: Vic MacBournie is a former journalist and author/owner of the award-winning website and newsletter Ferns & Feathers. He writes about his woodland wildlife garden that he has created over the past 25 years and enjoys sharing his garden photography with readers.







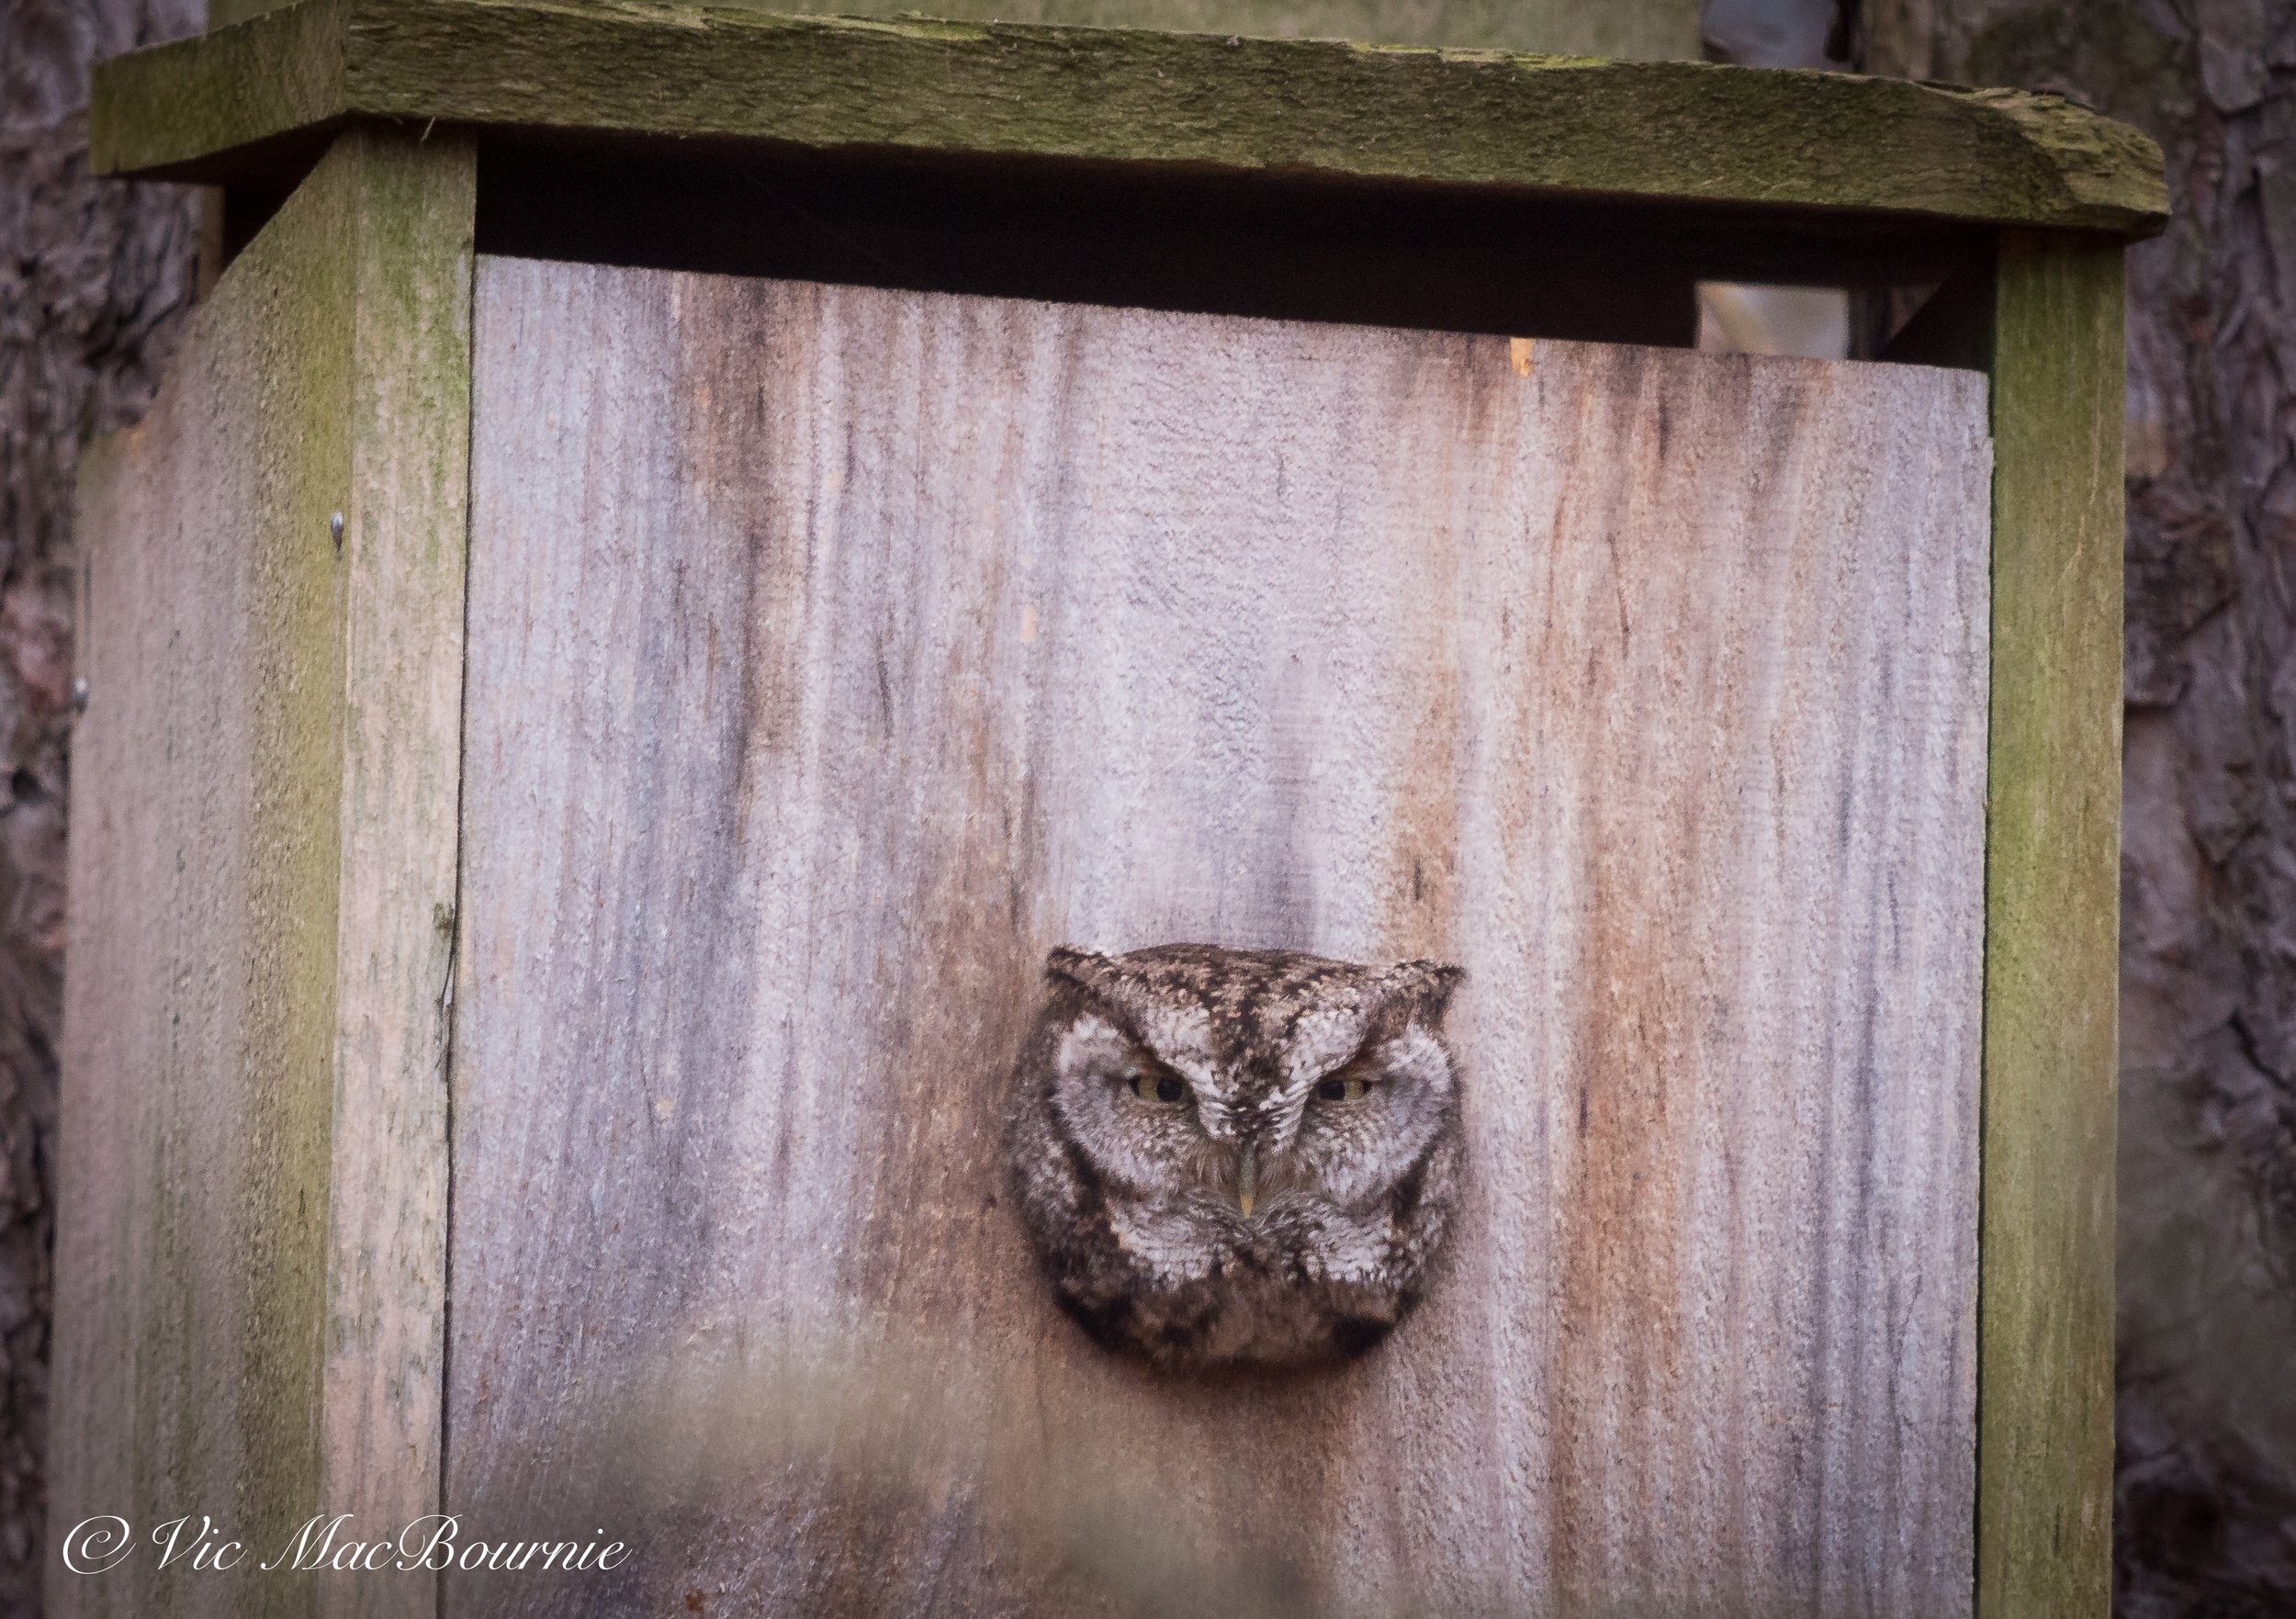






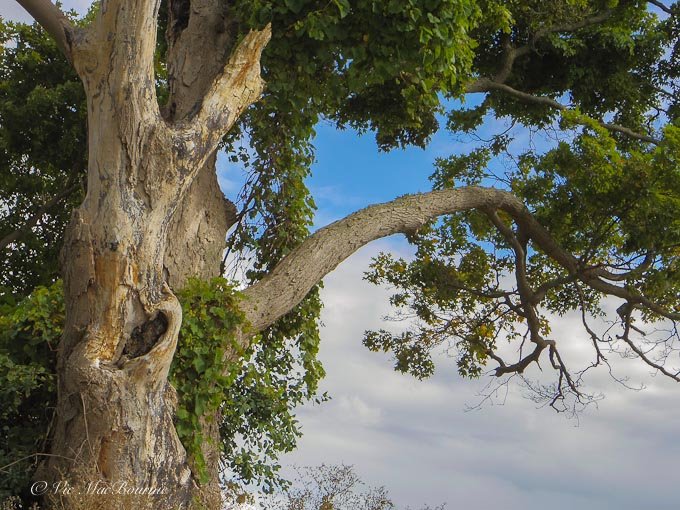


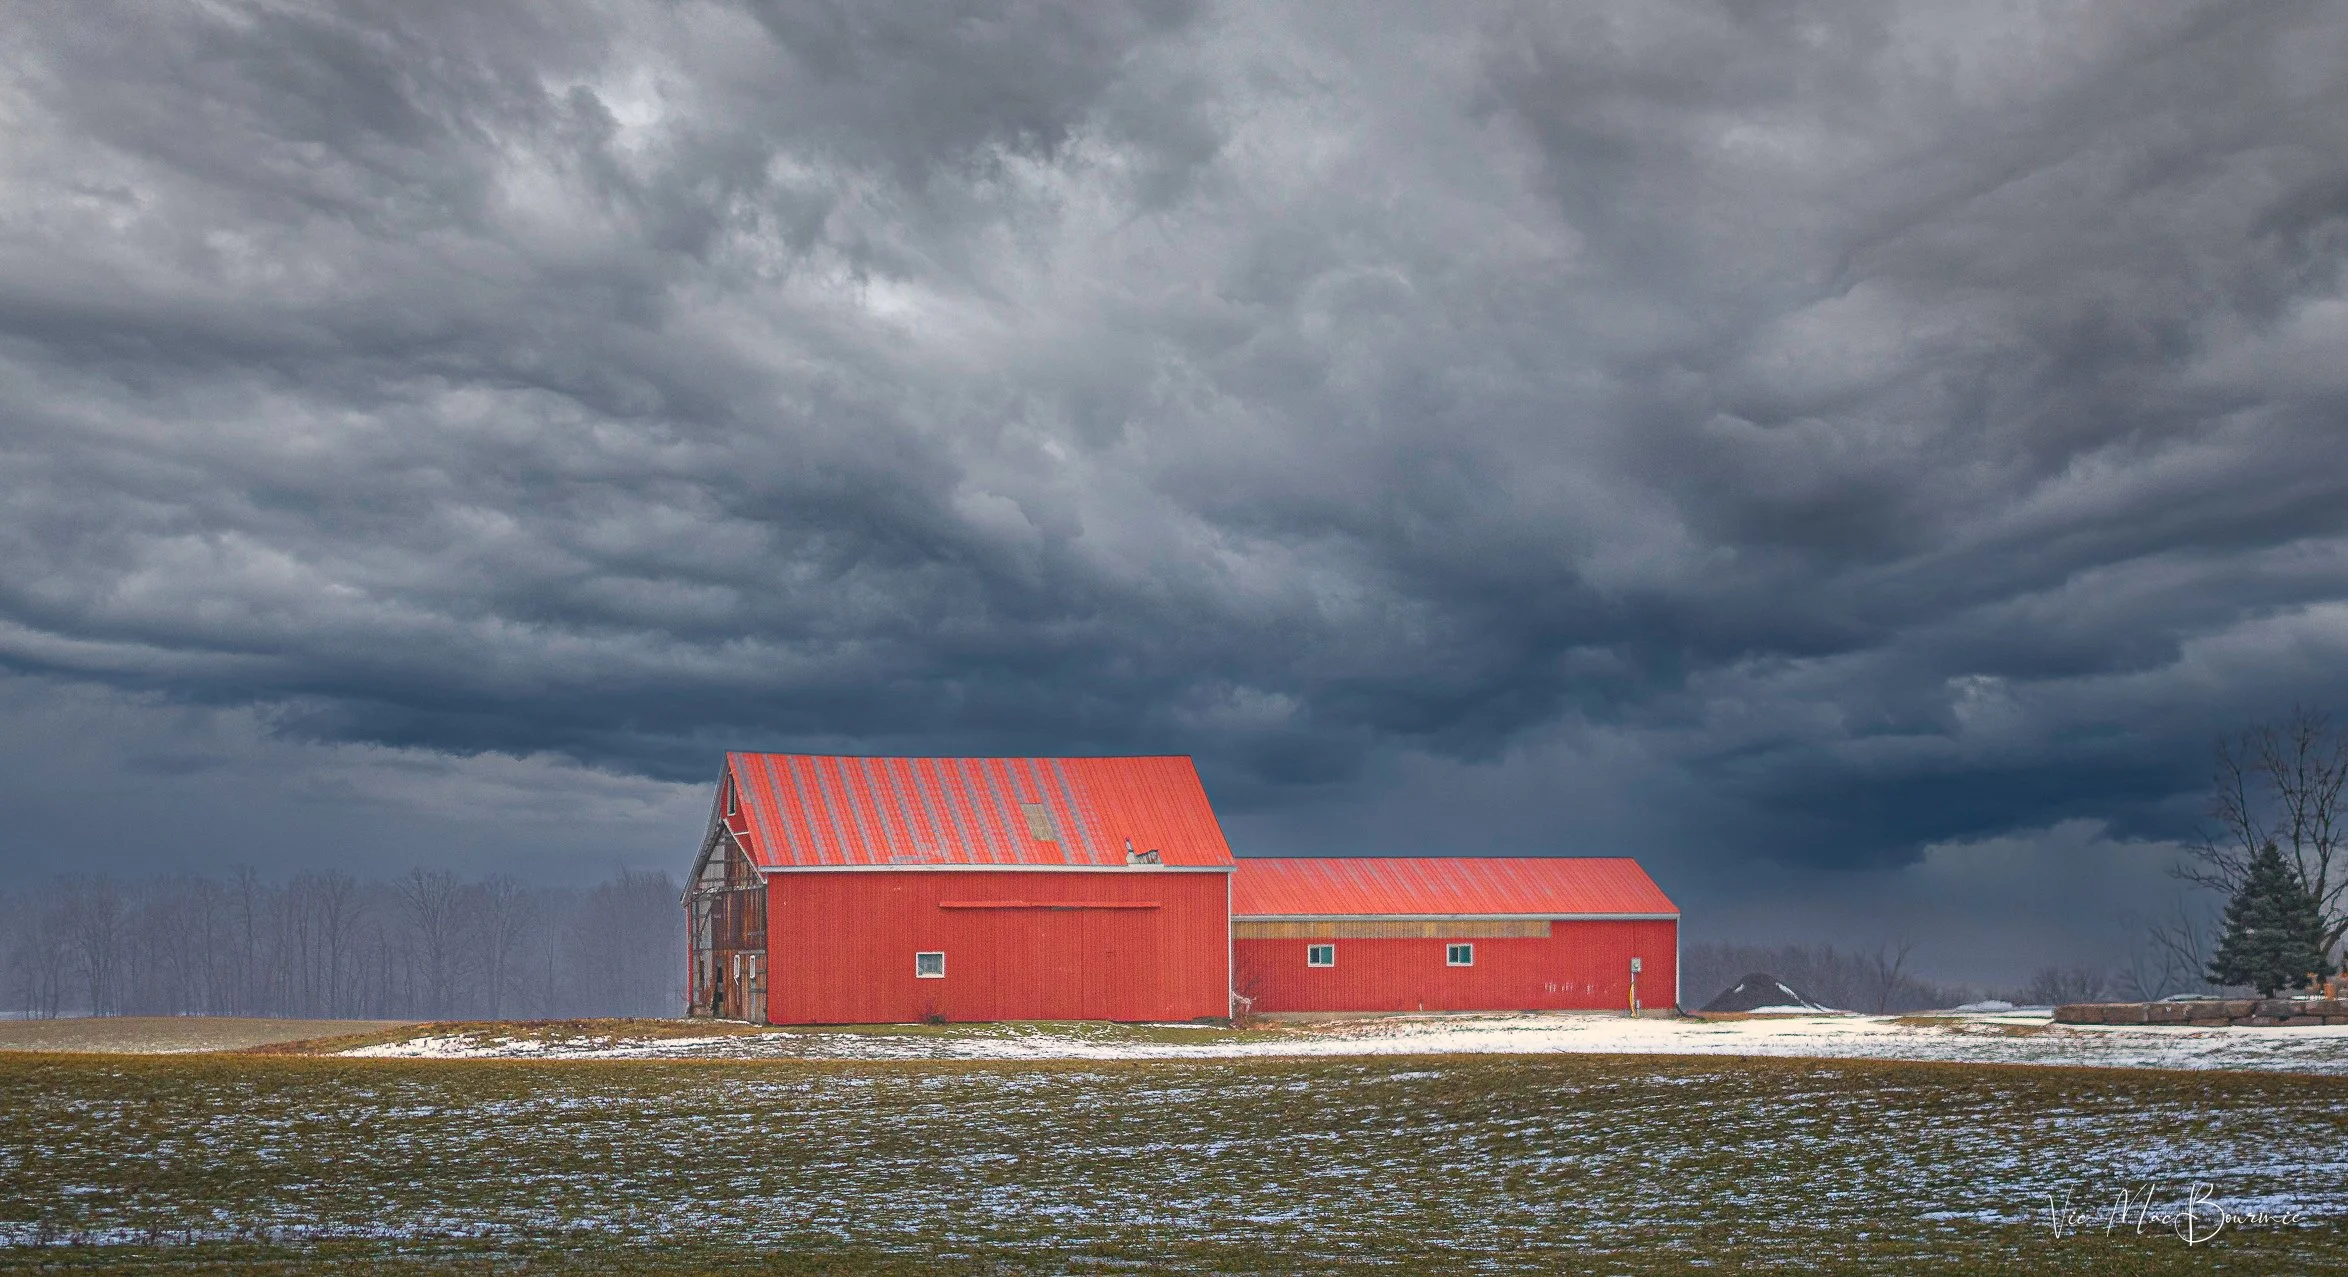

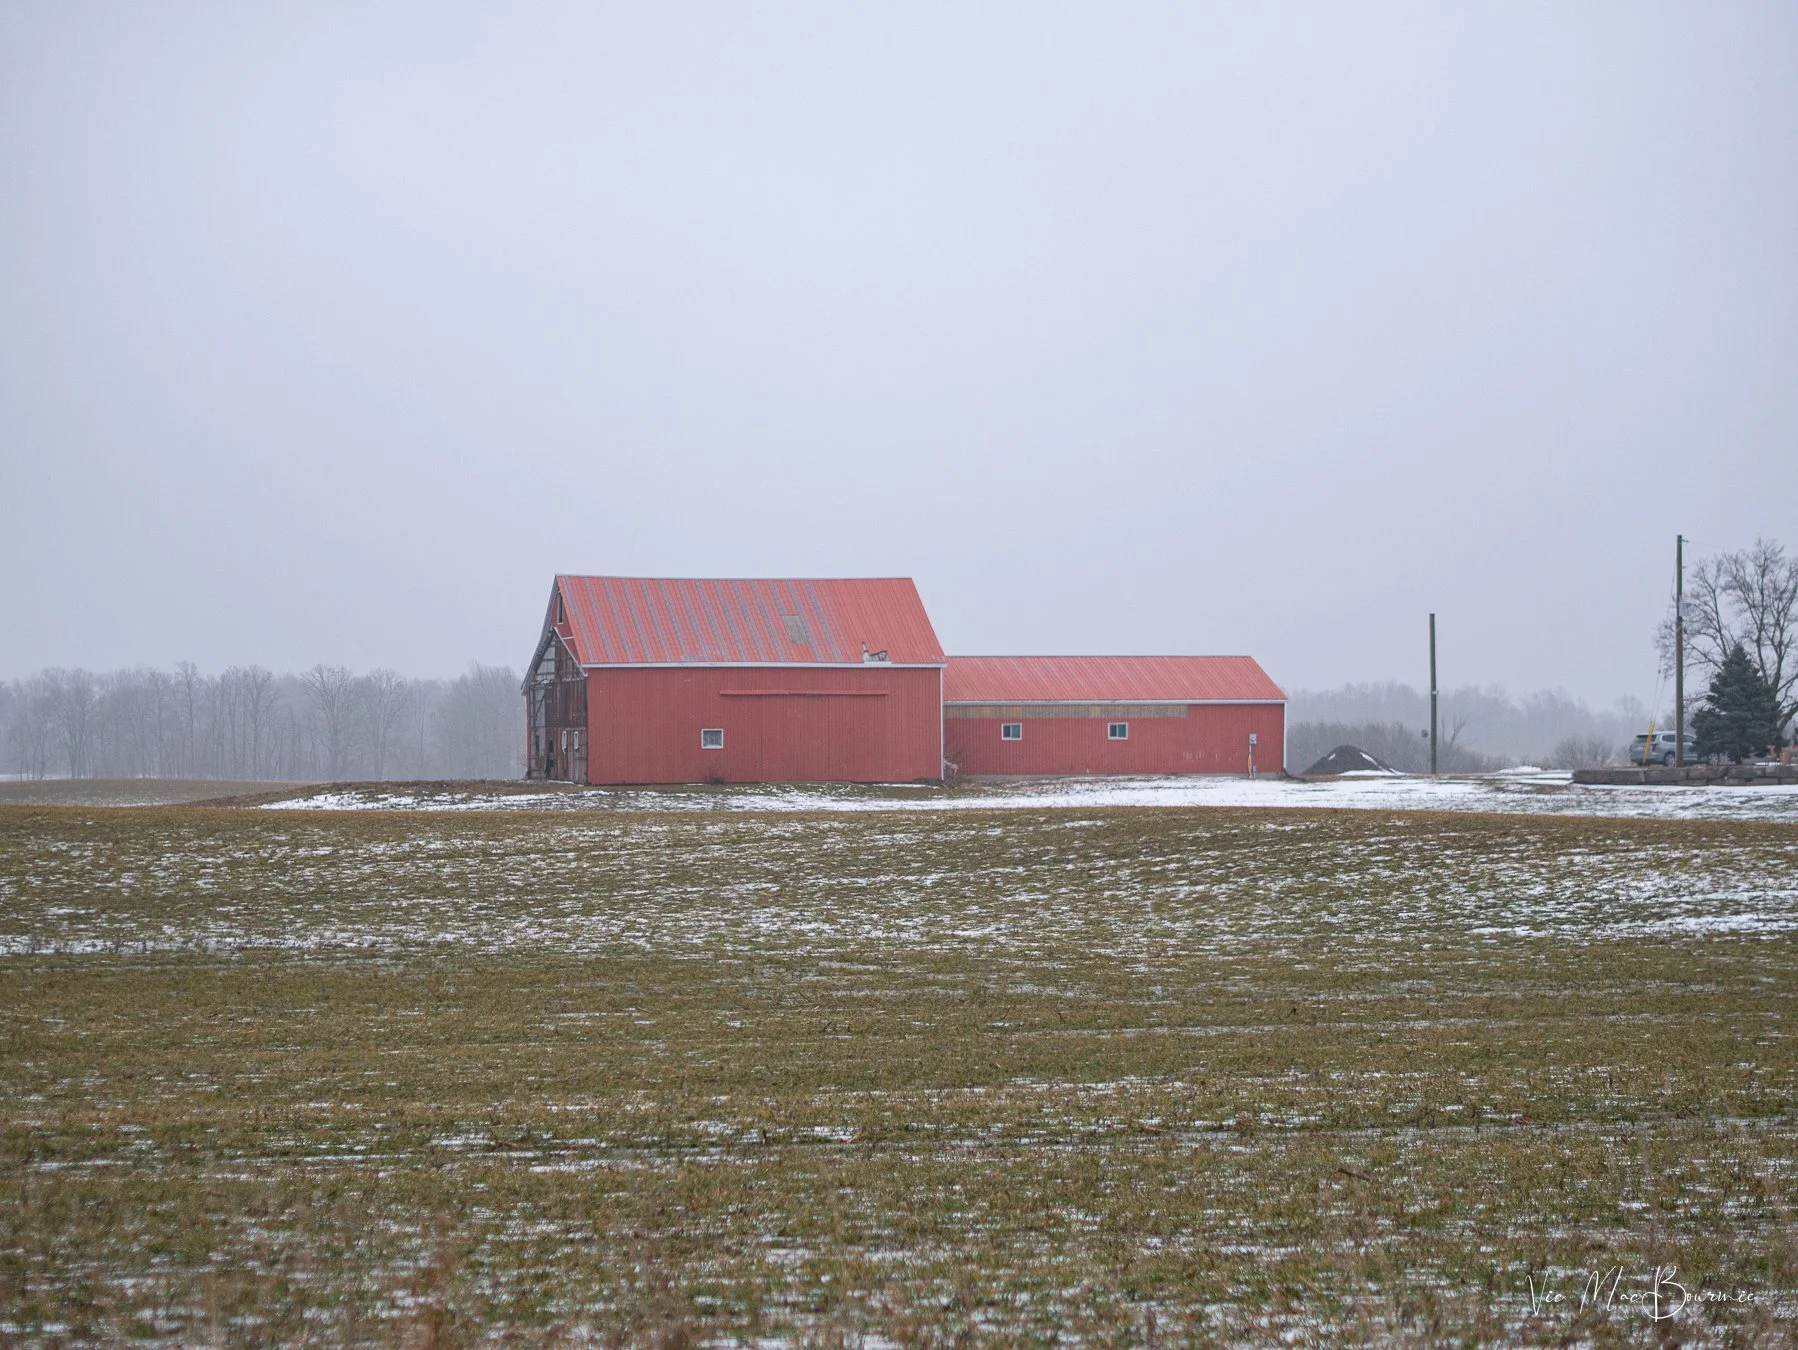
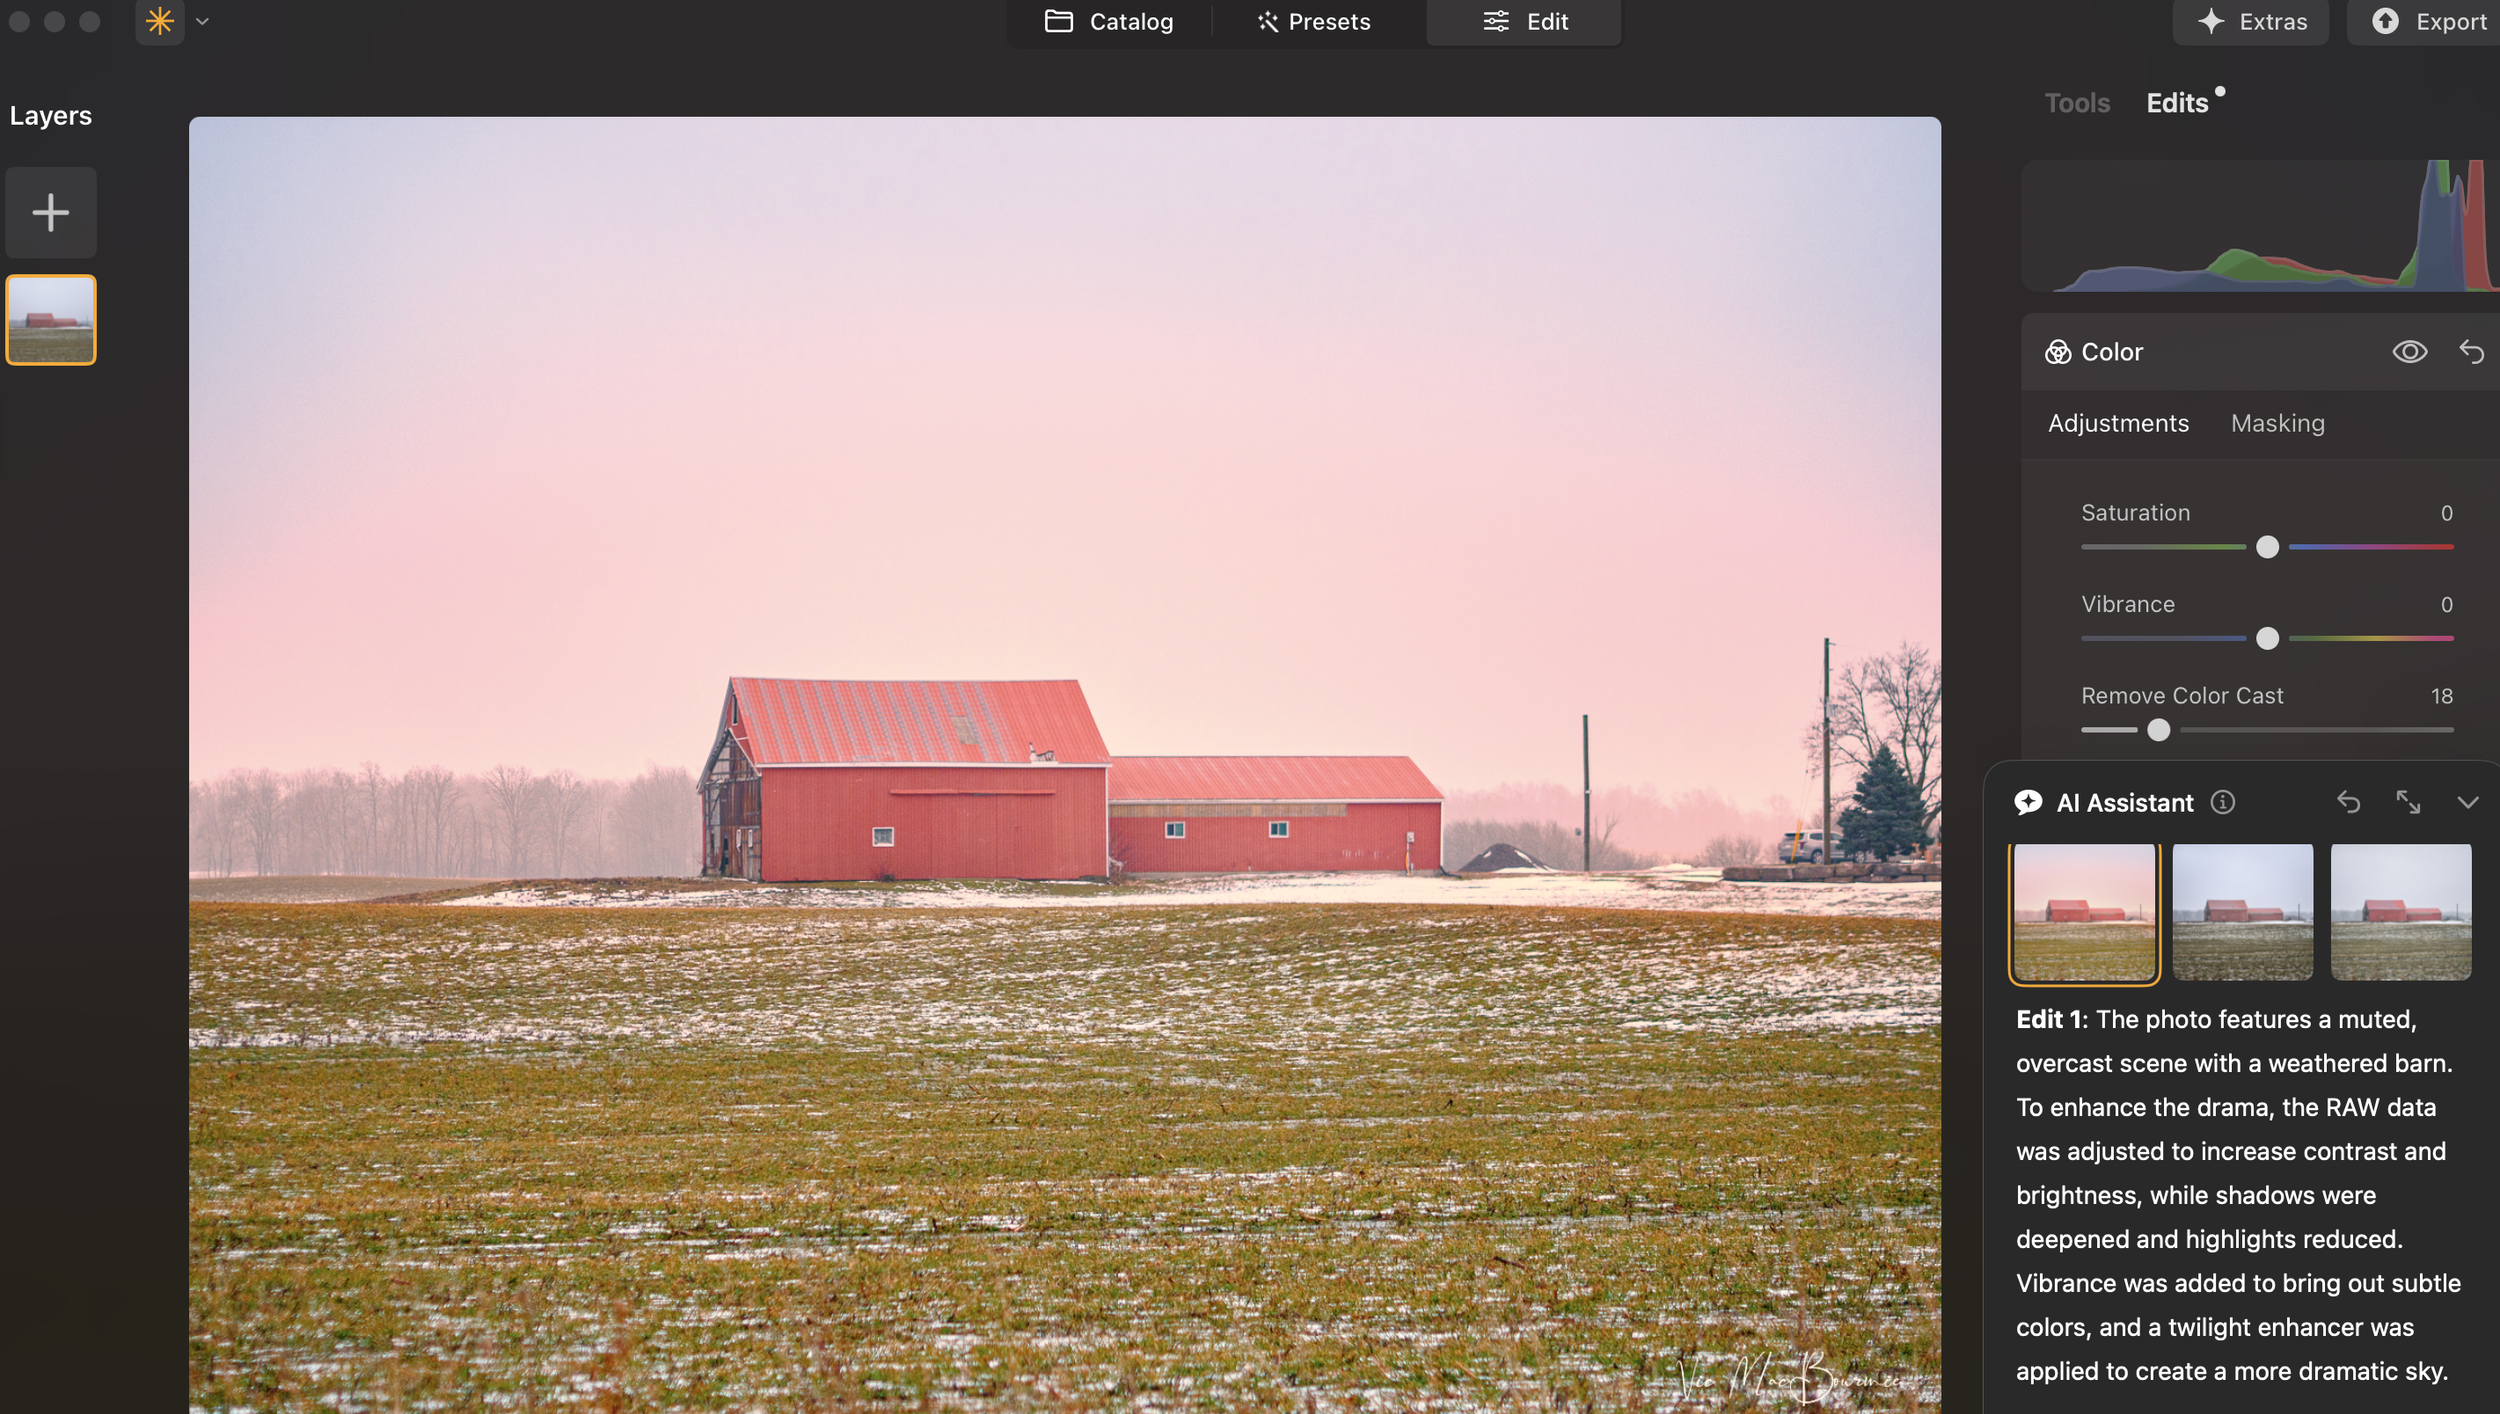

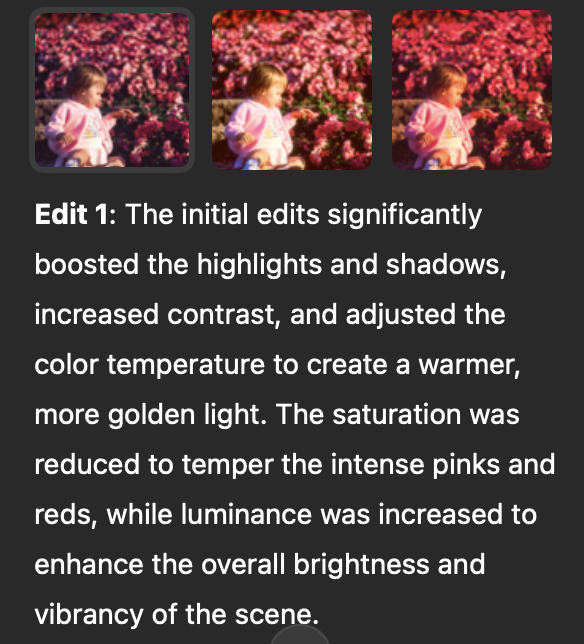
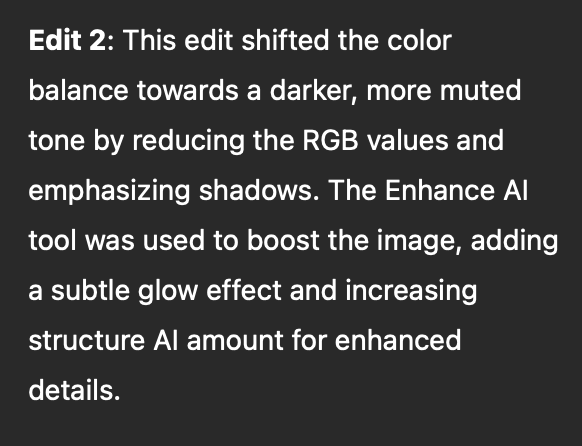
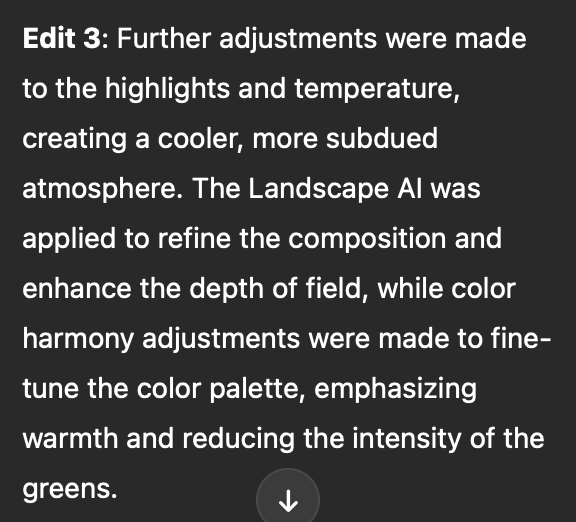


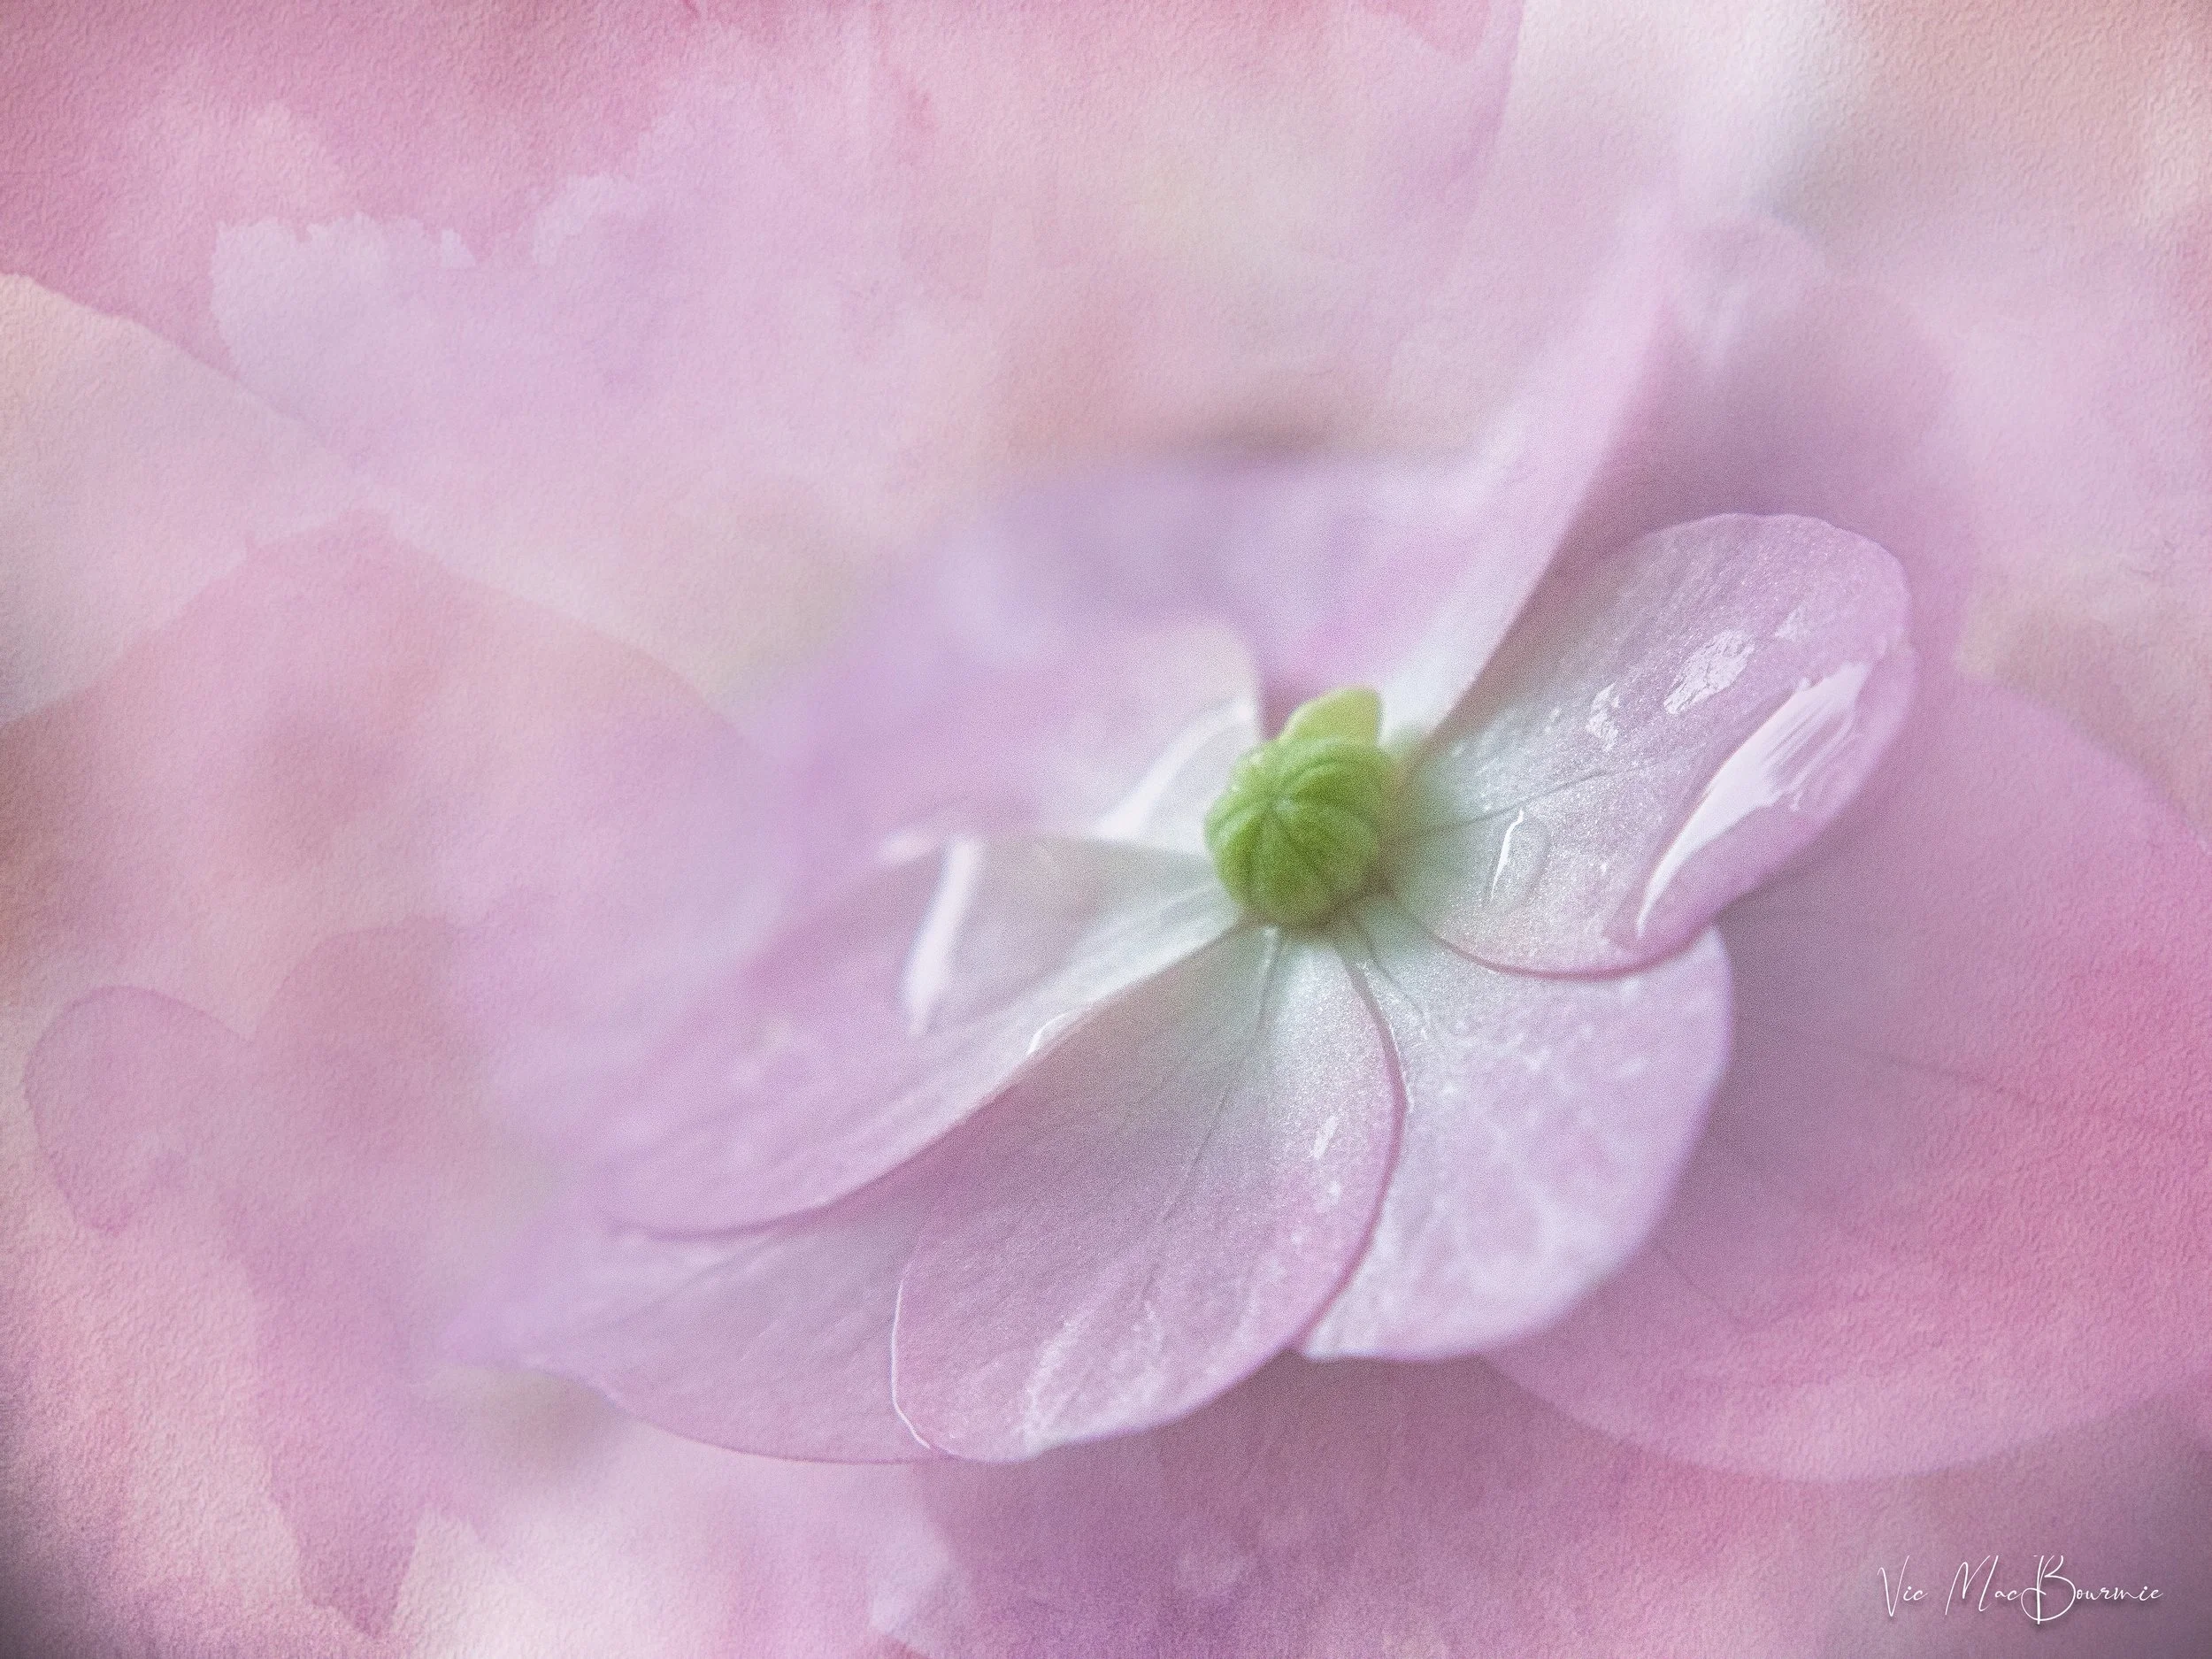



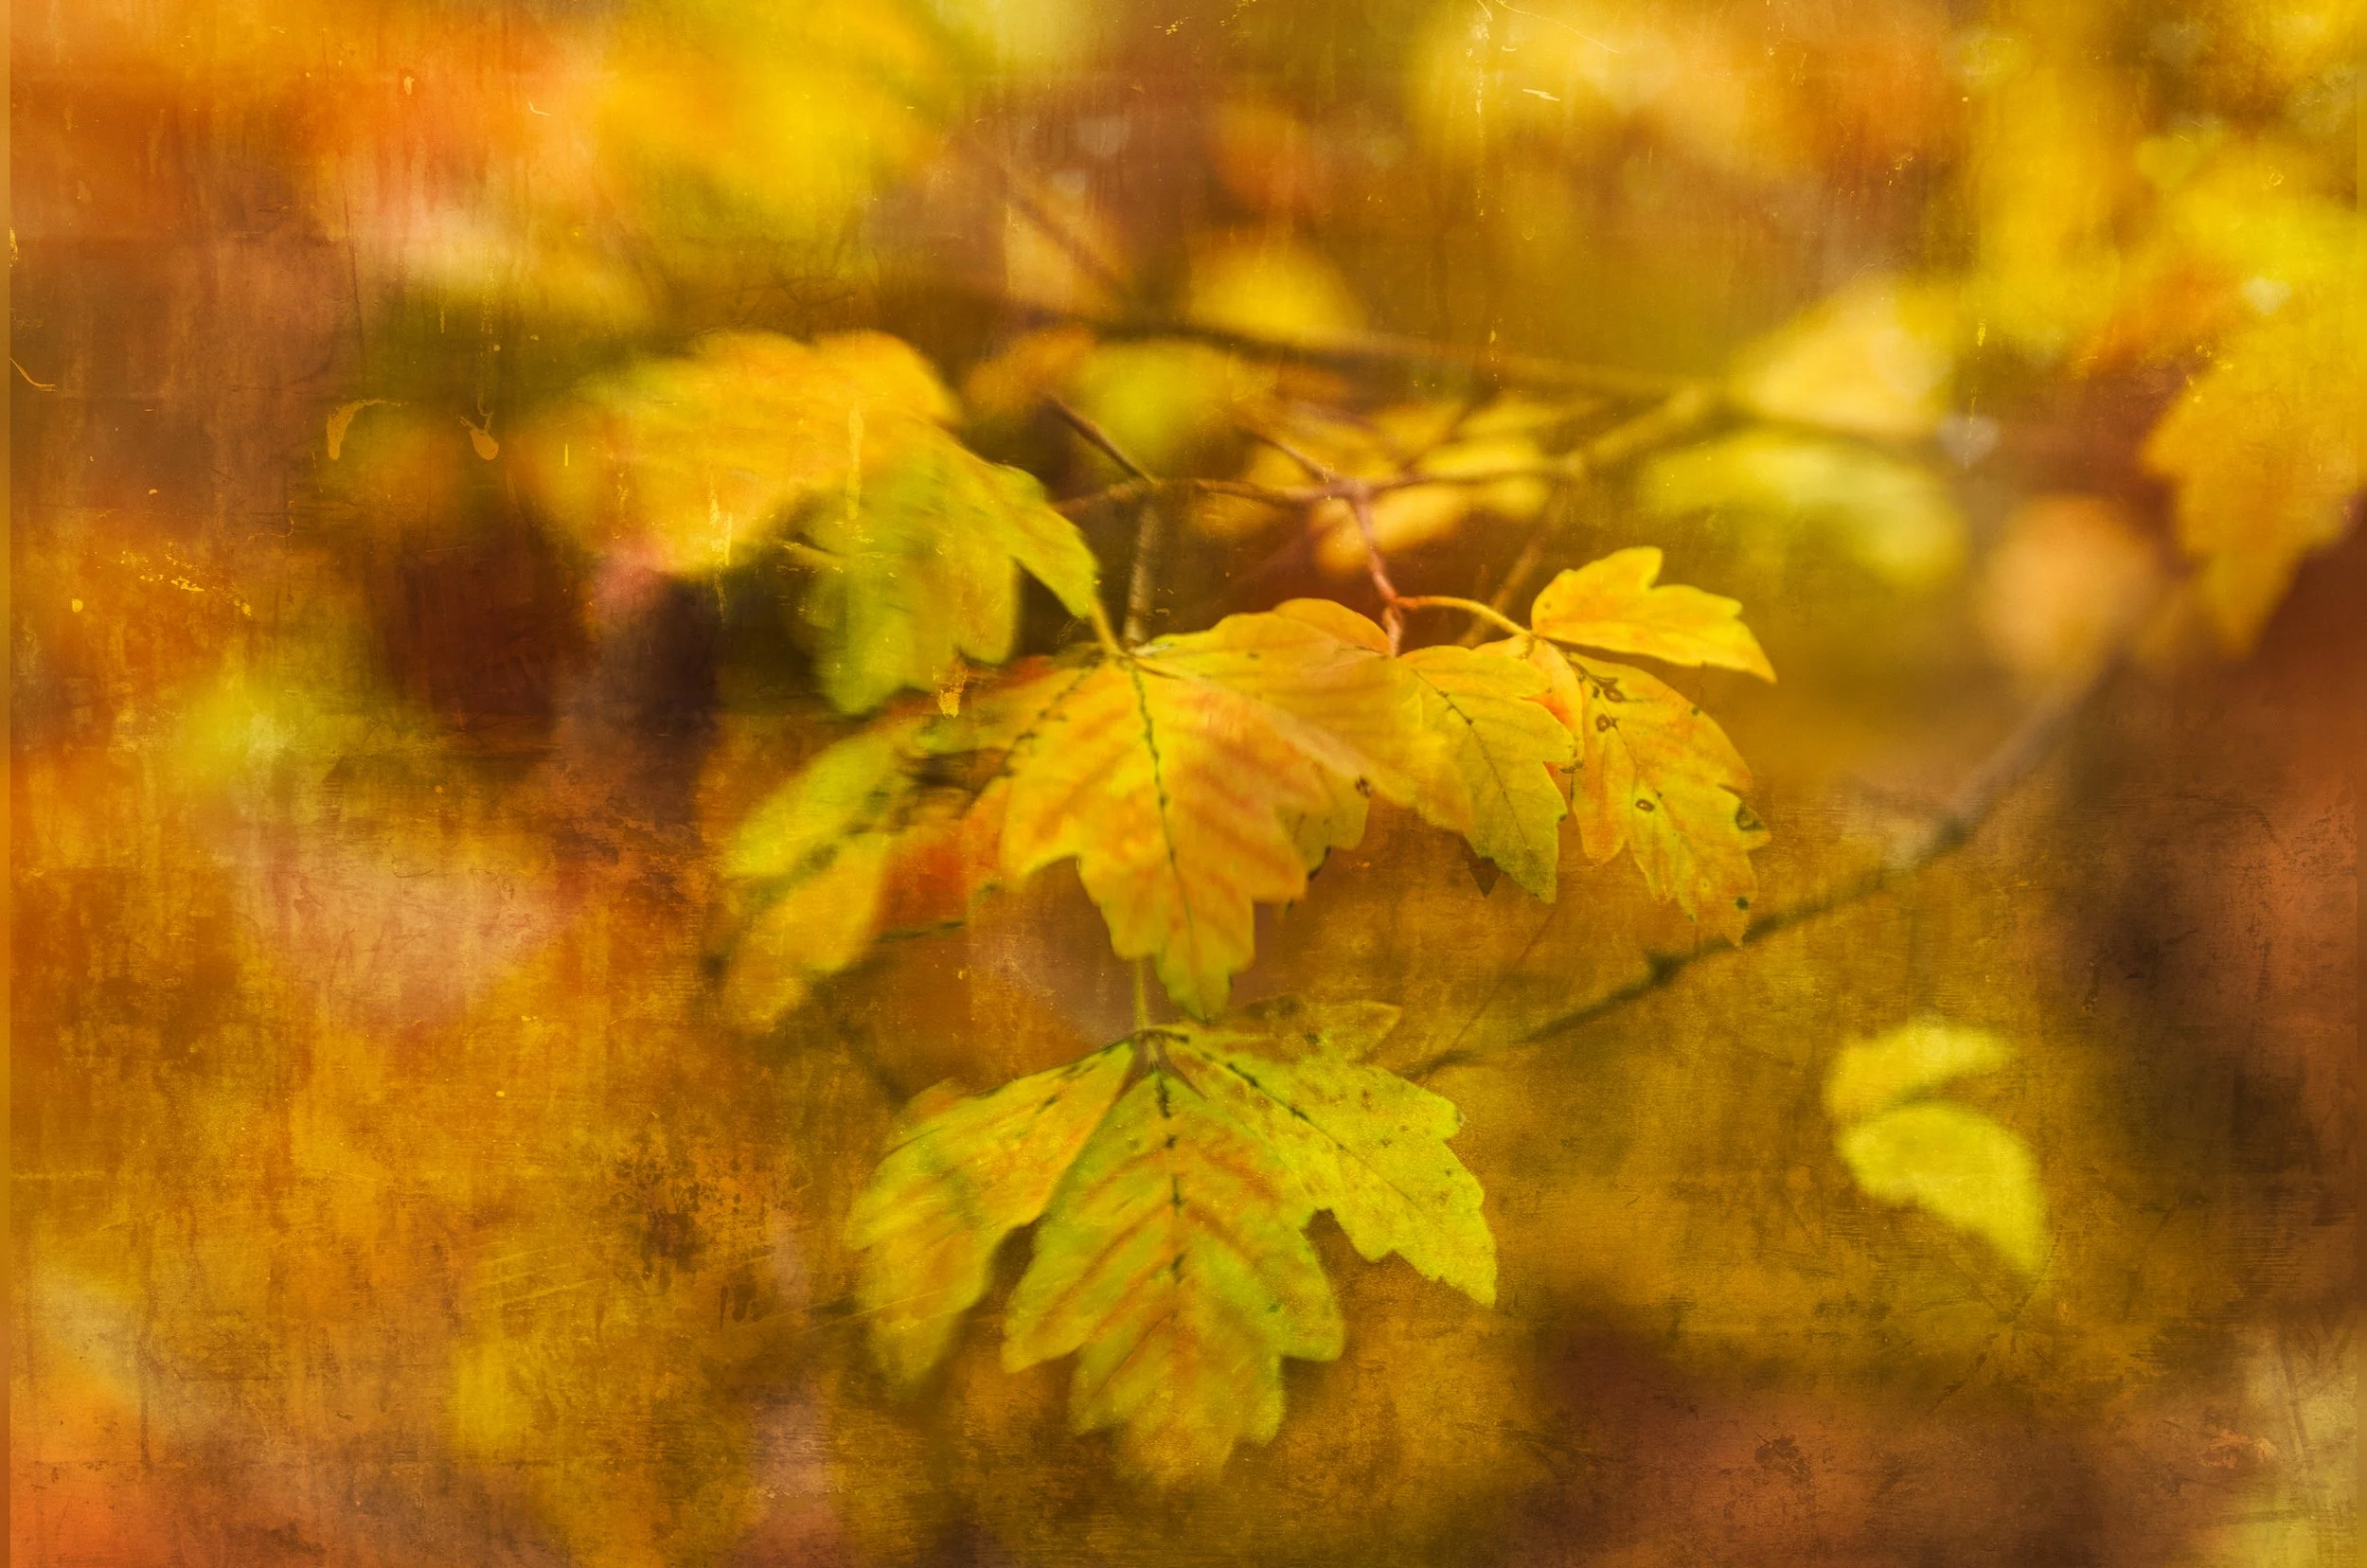




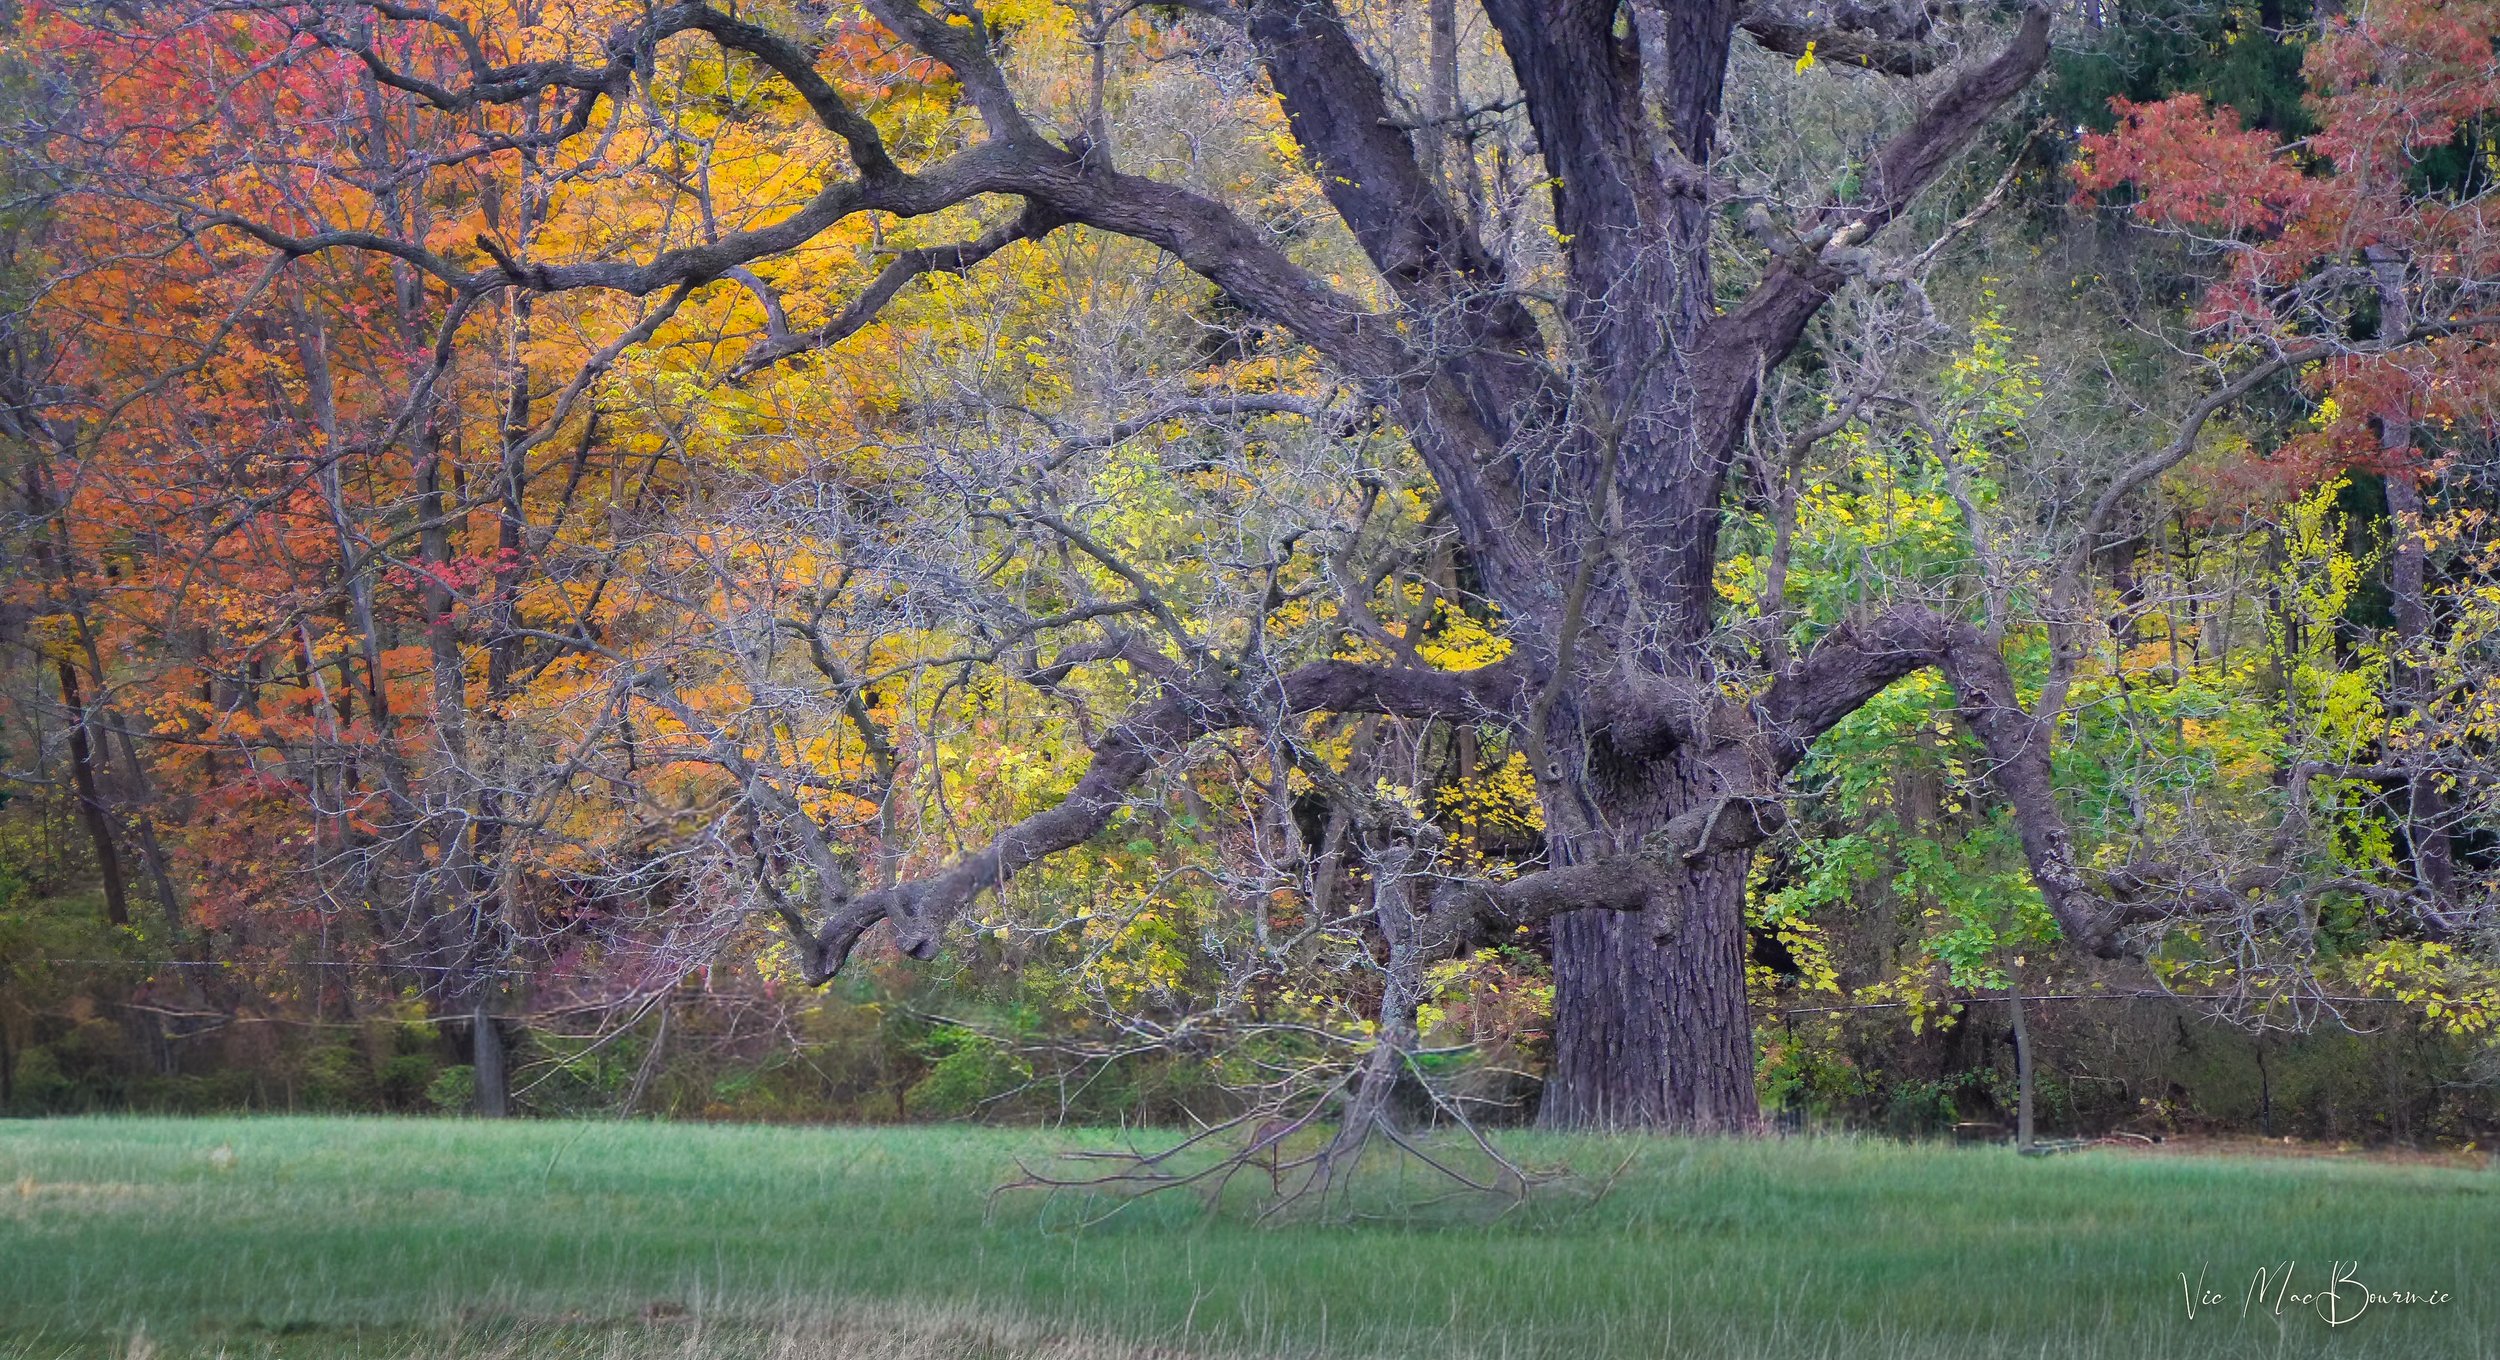
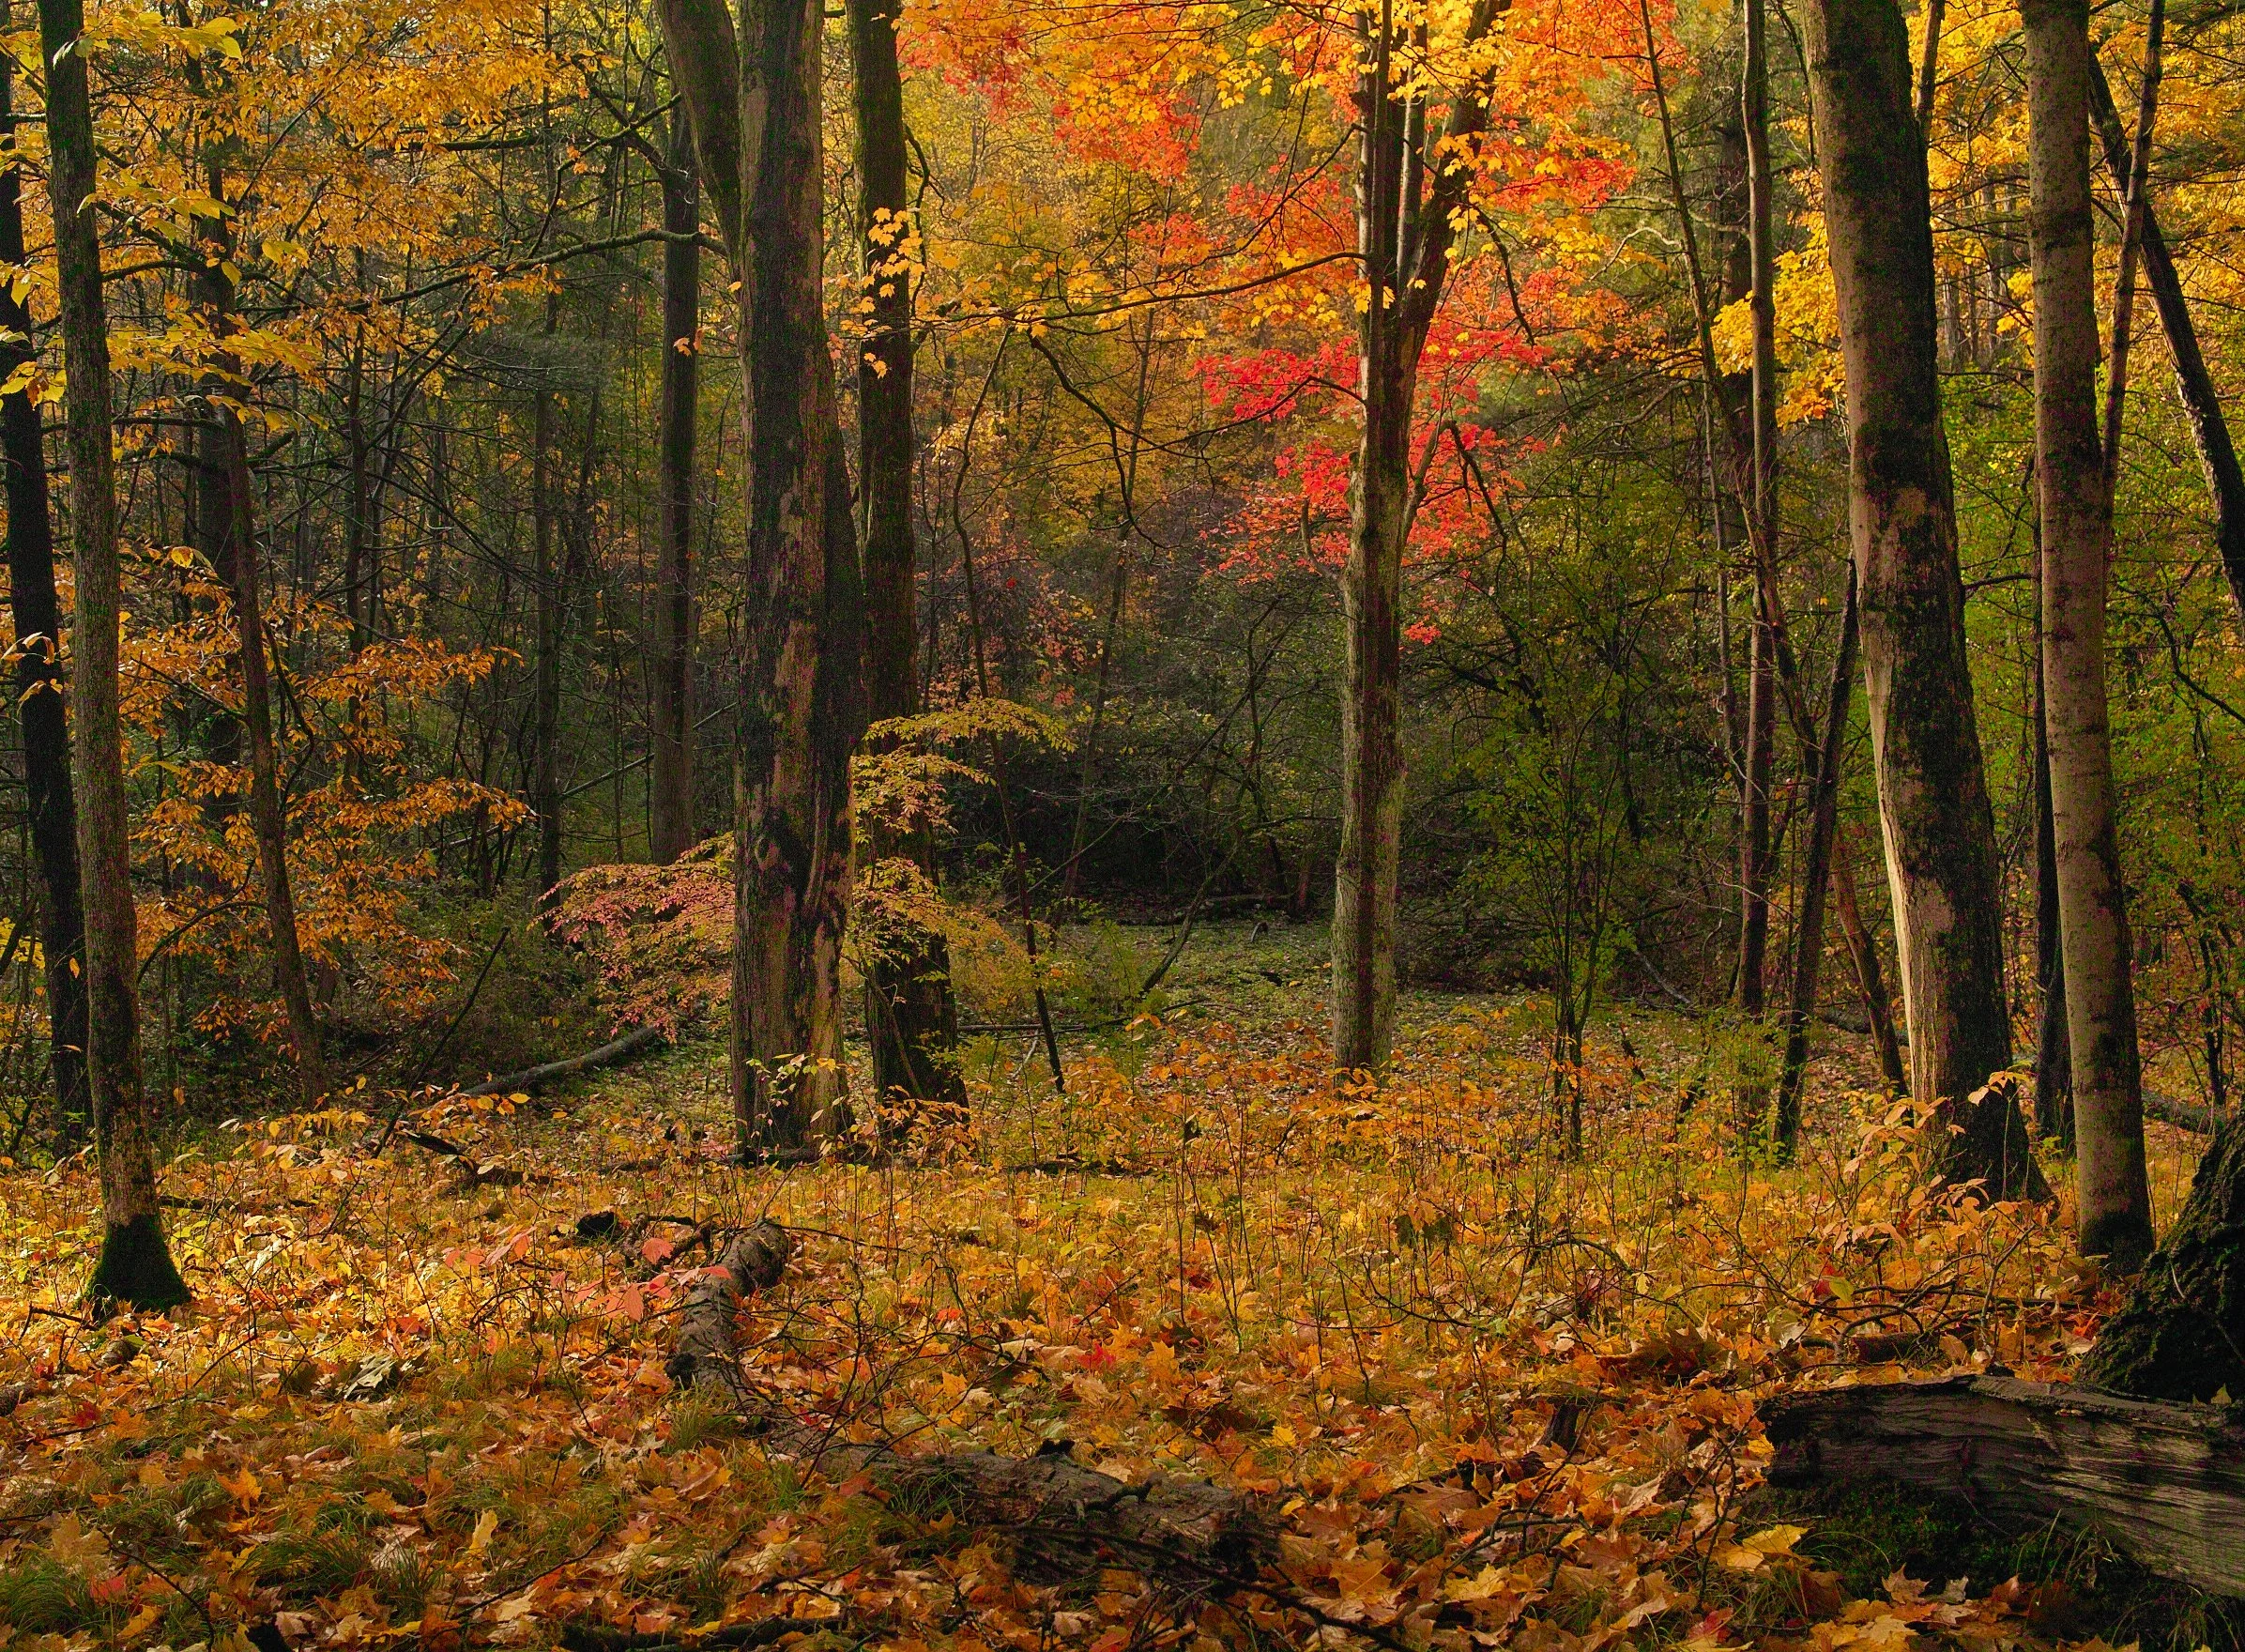

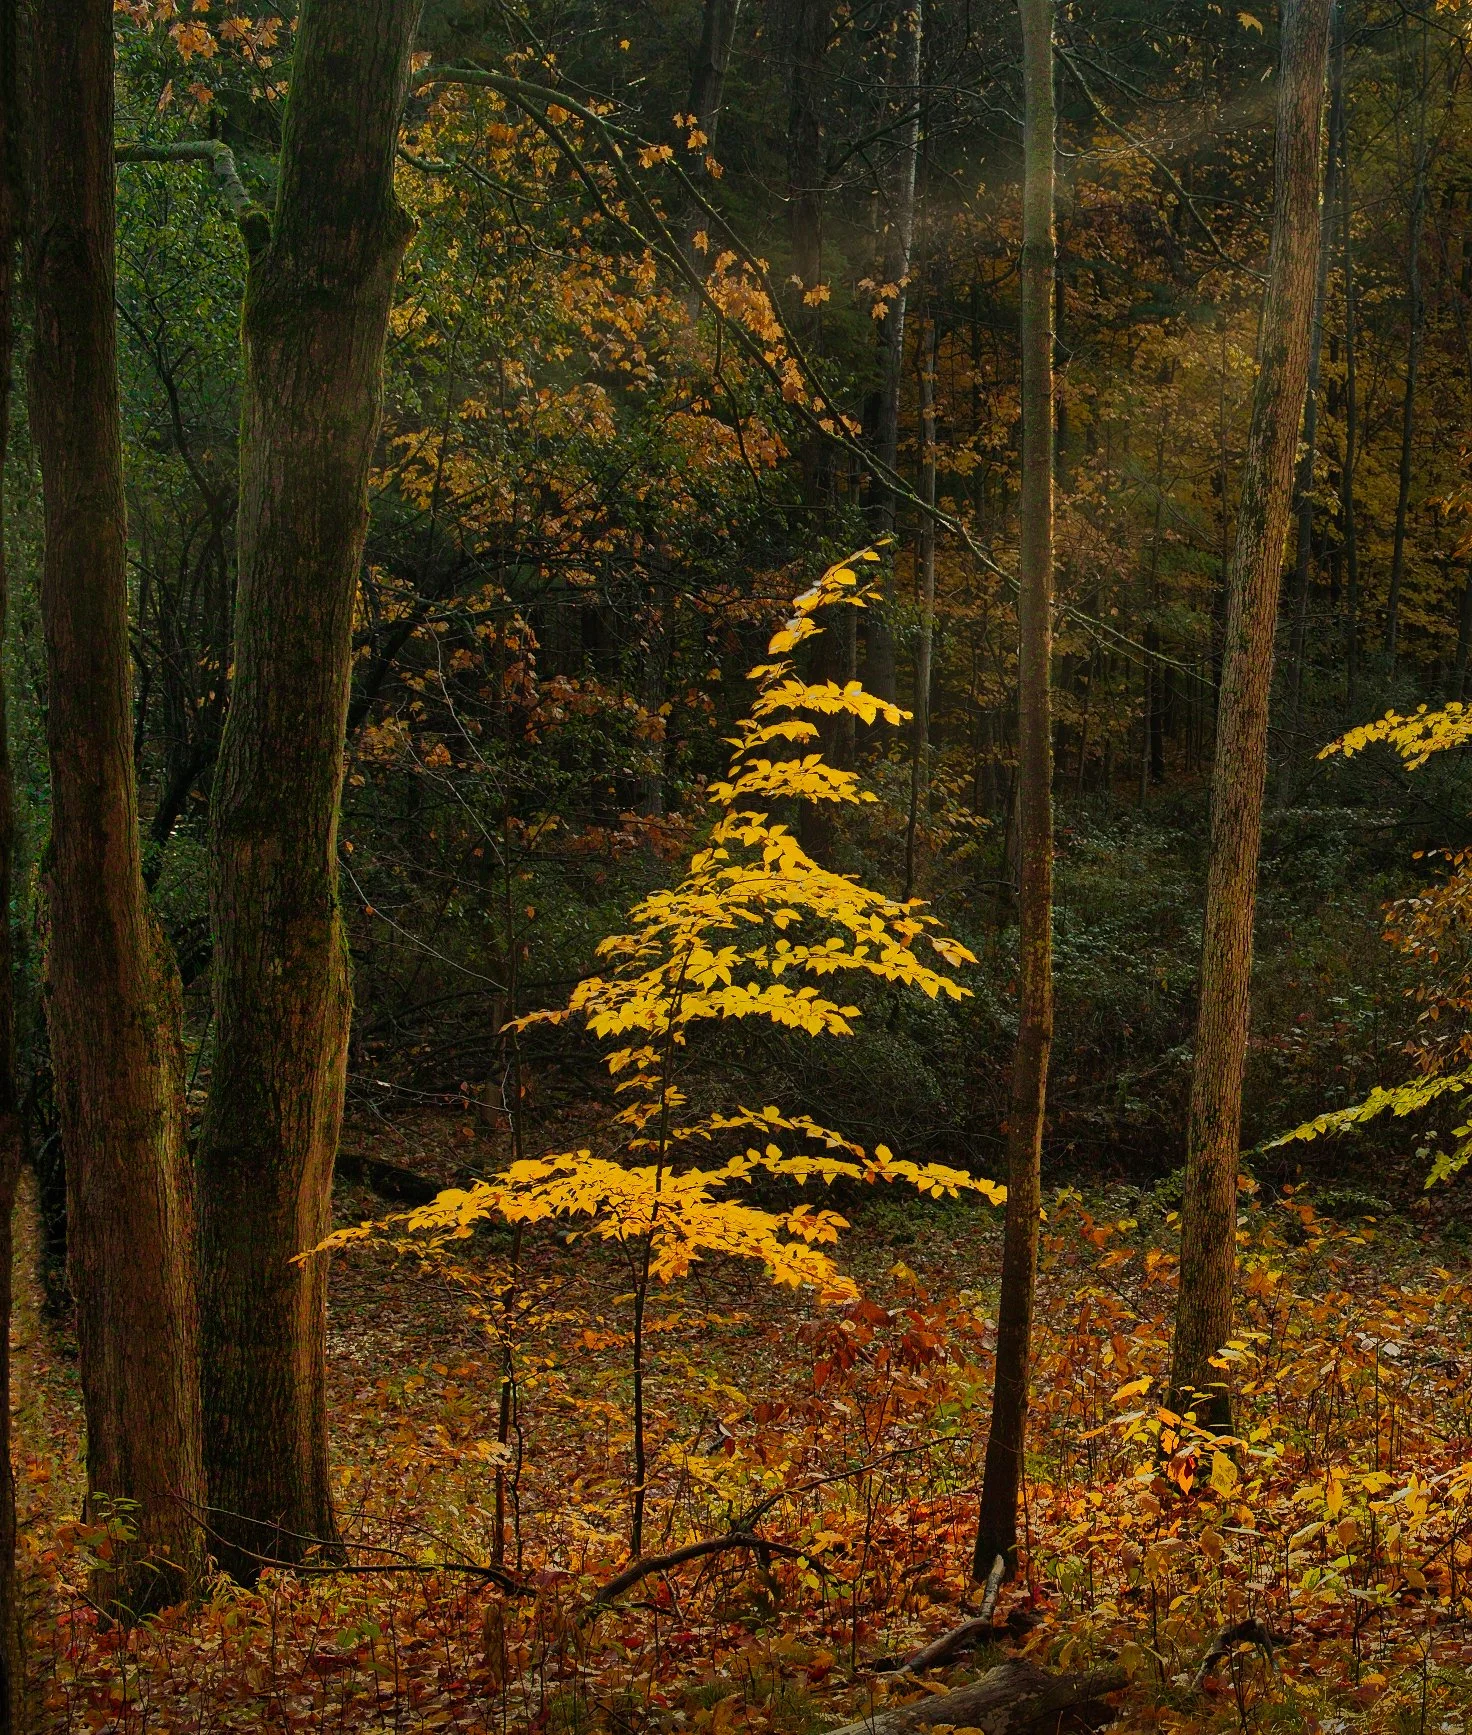


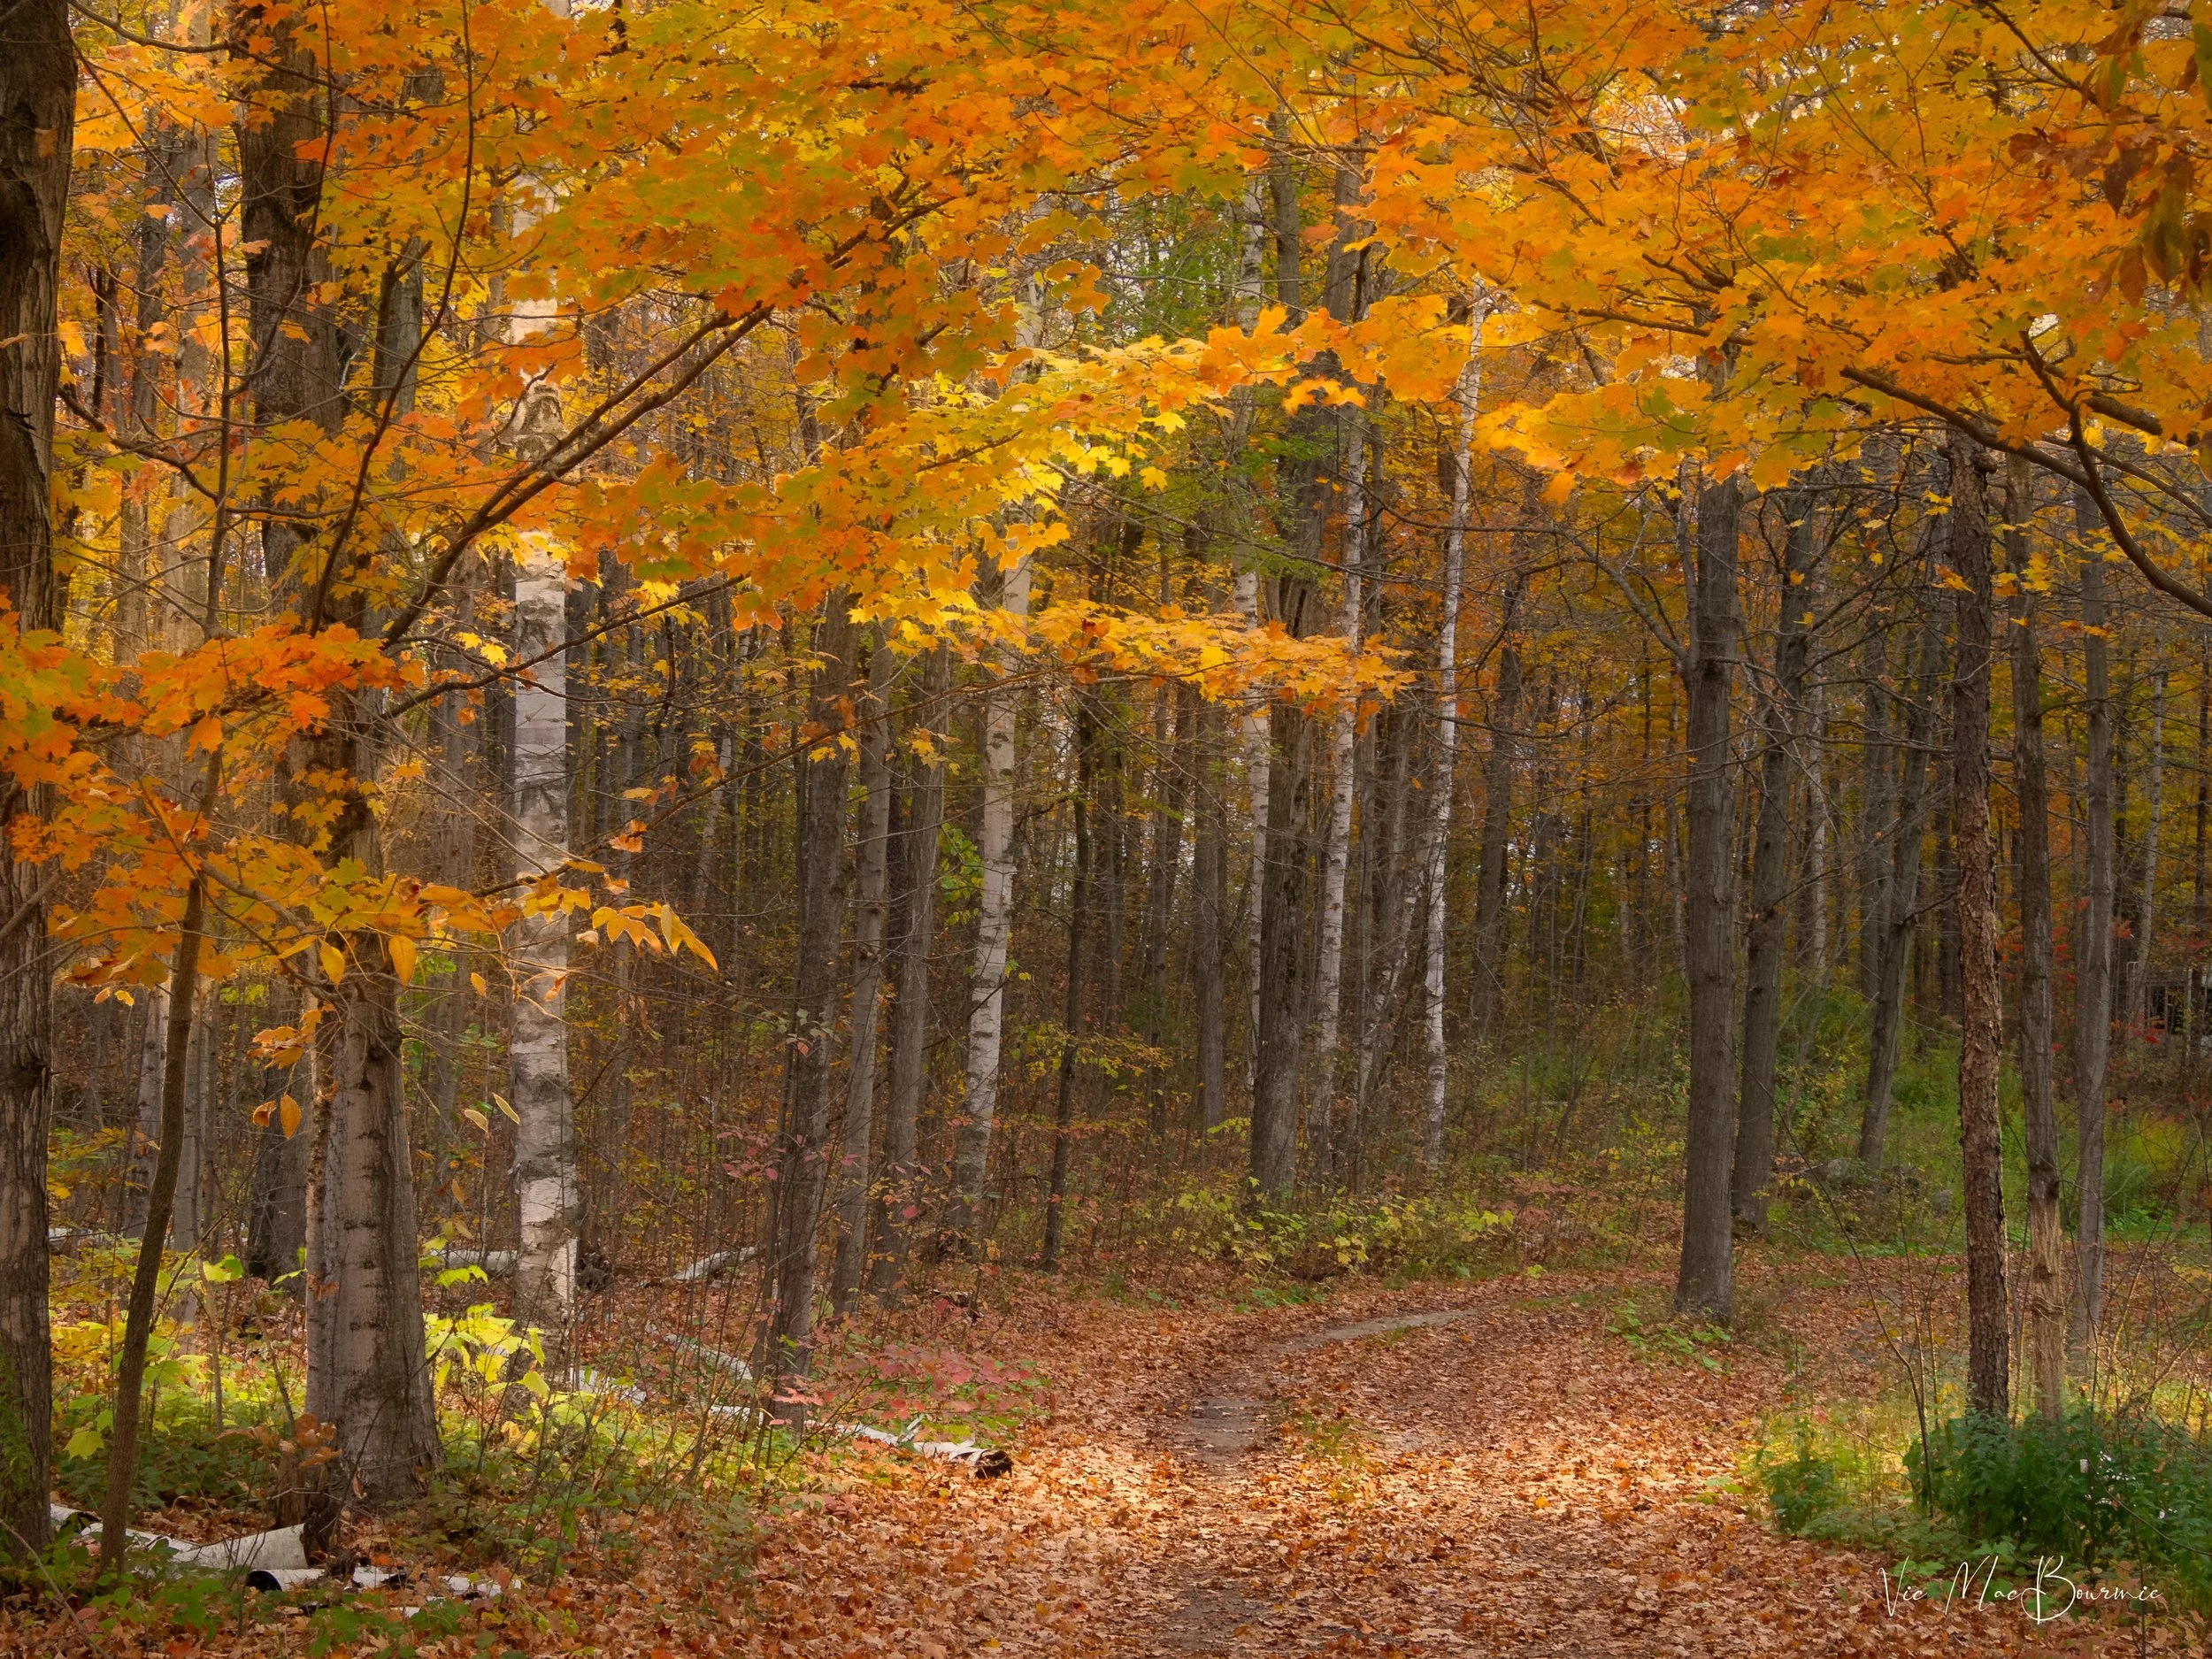

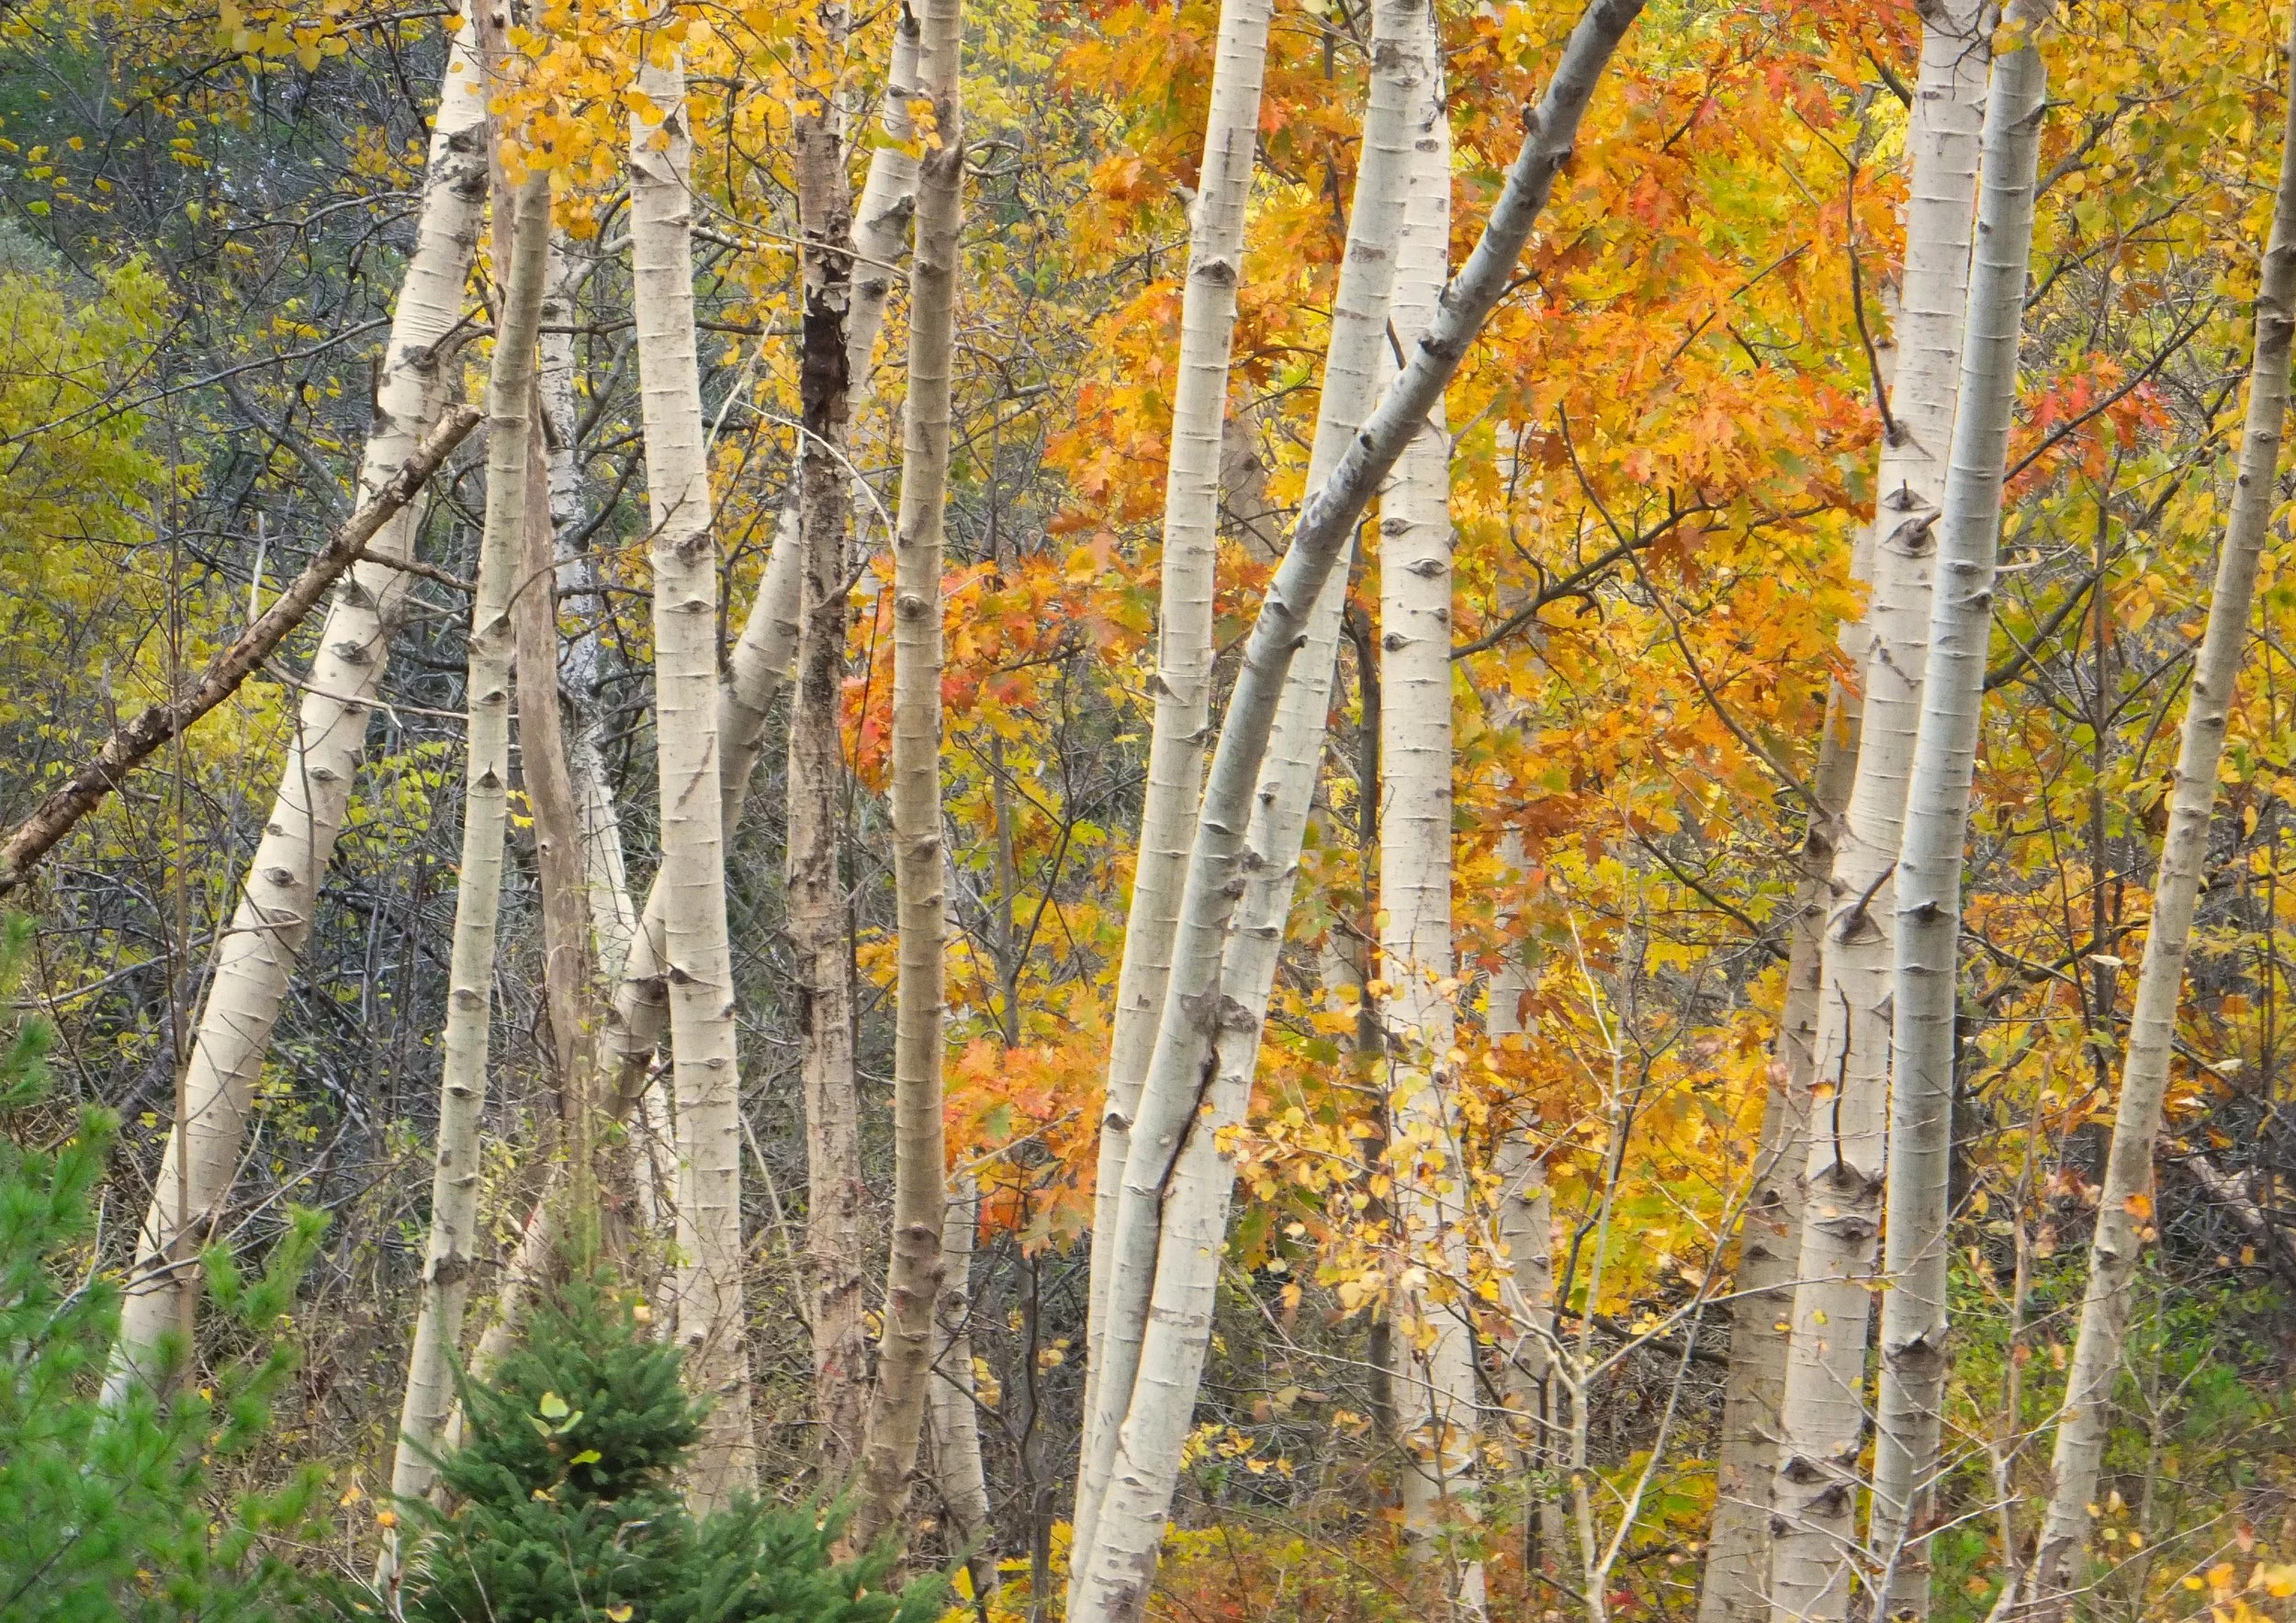
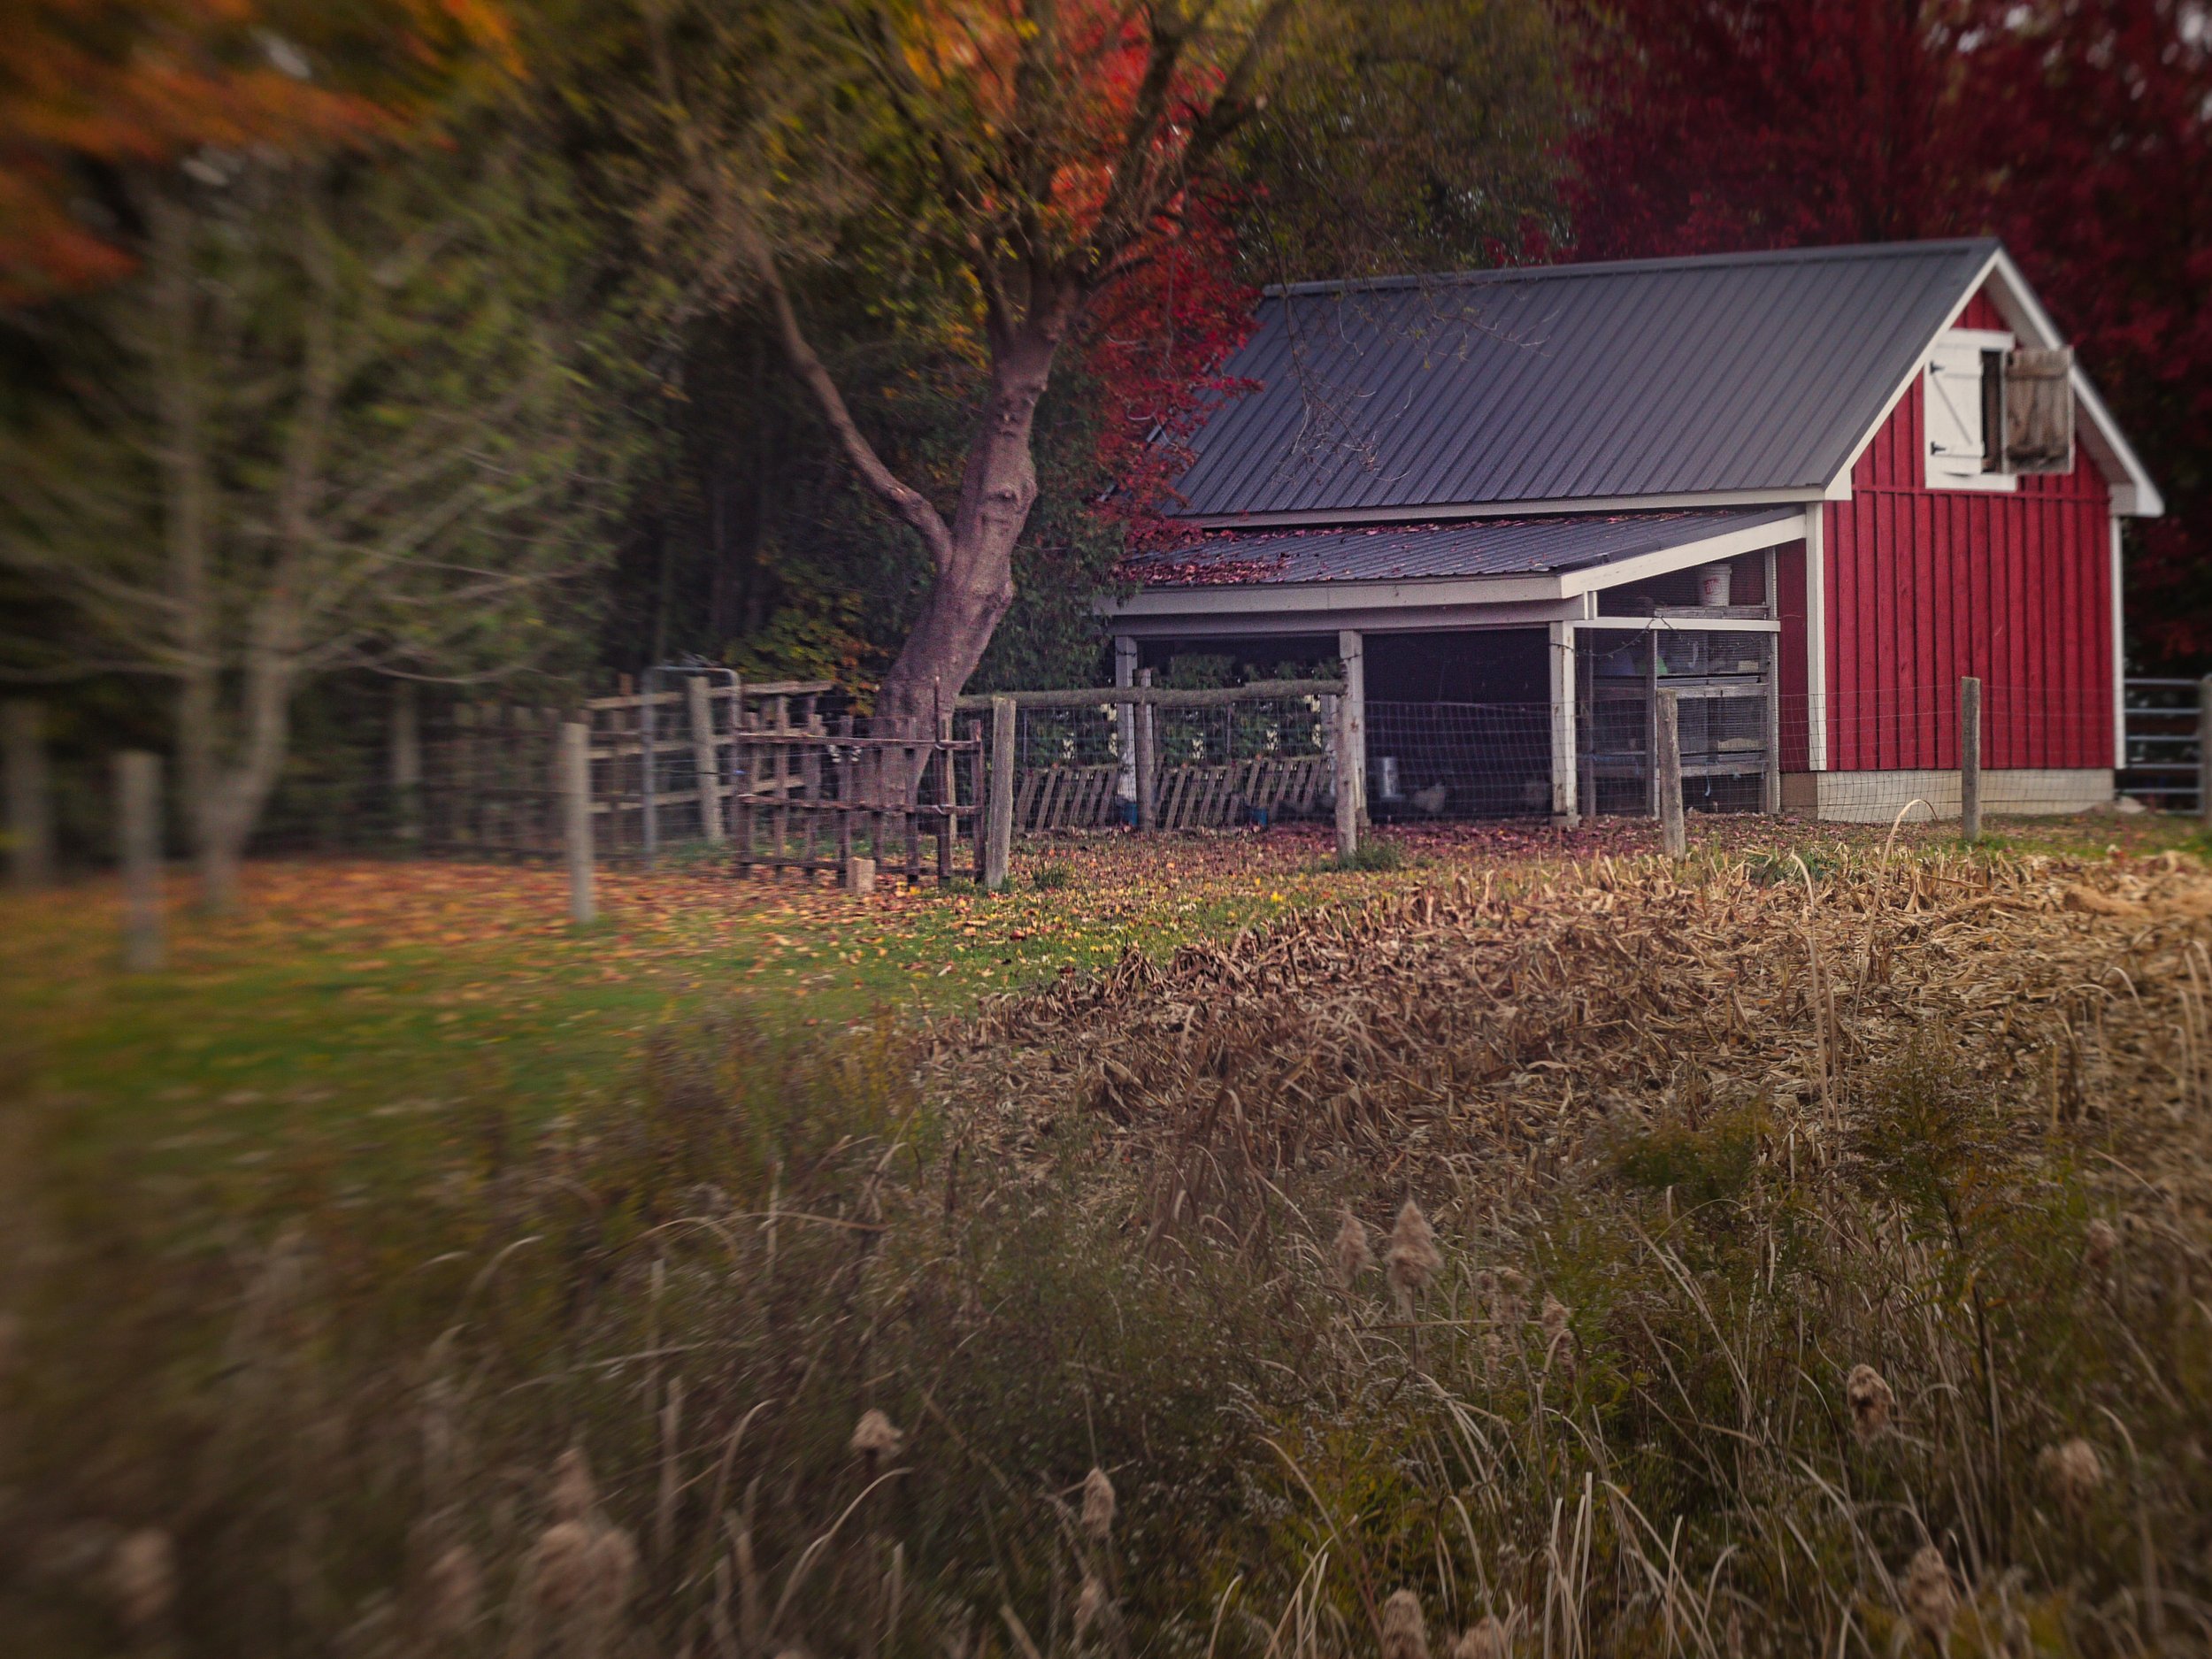


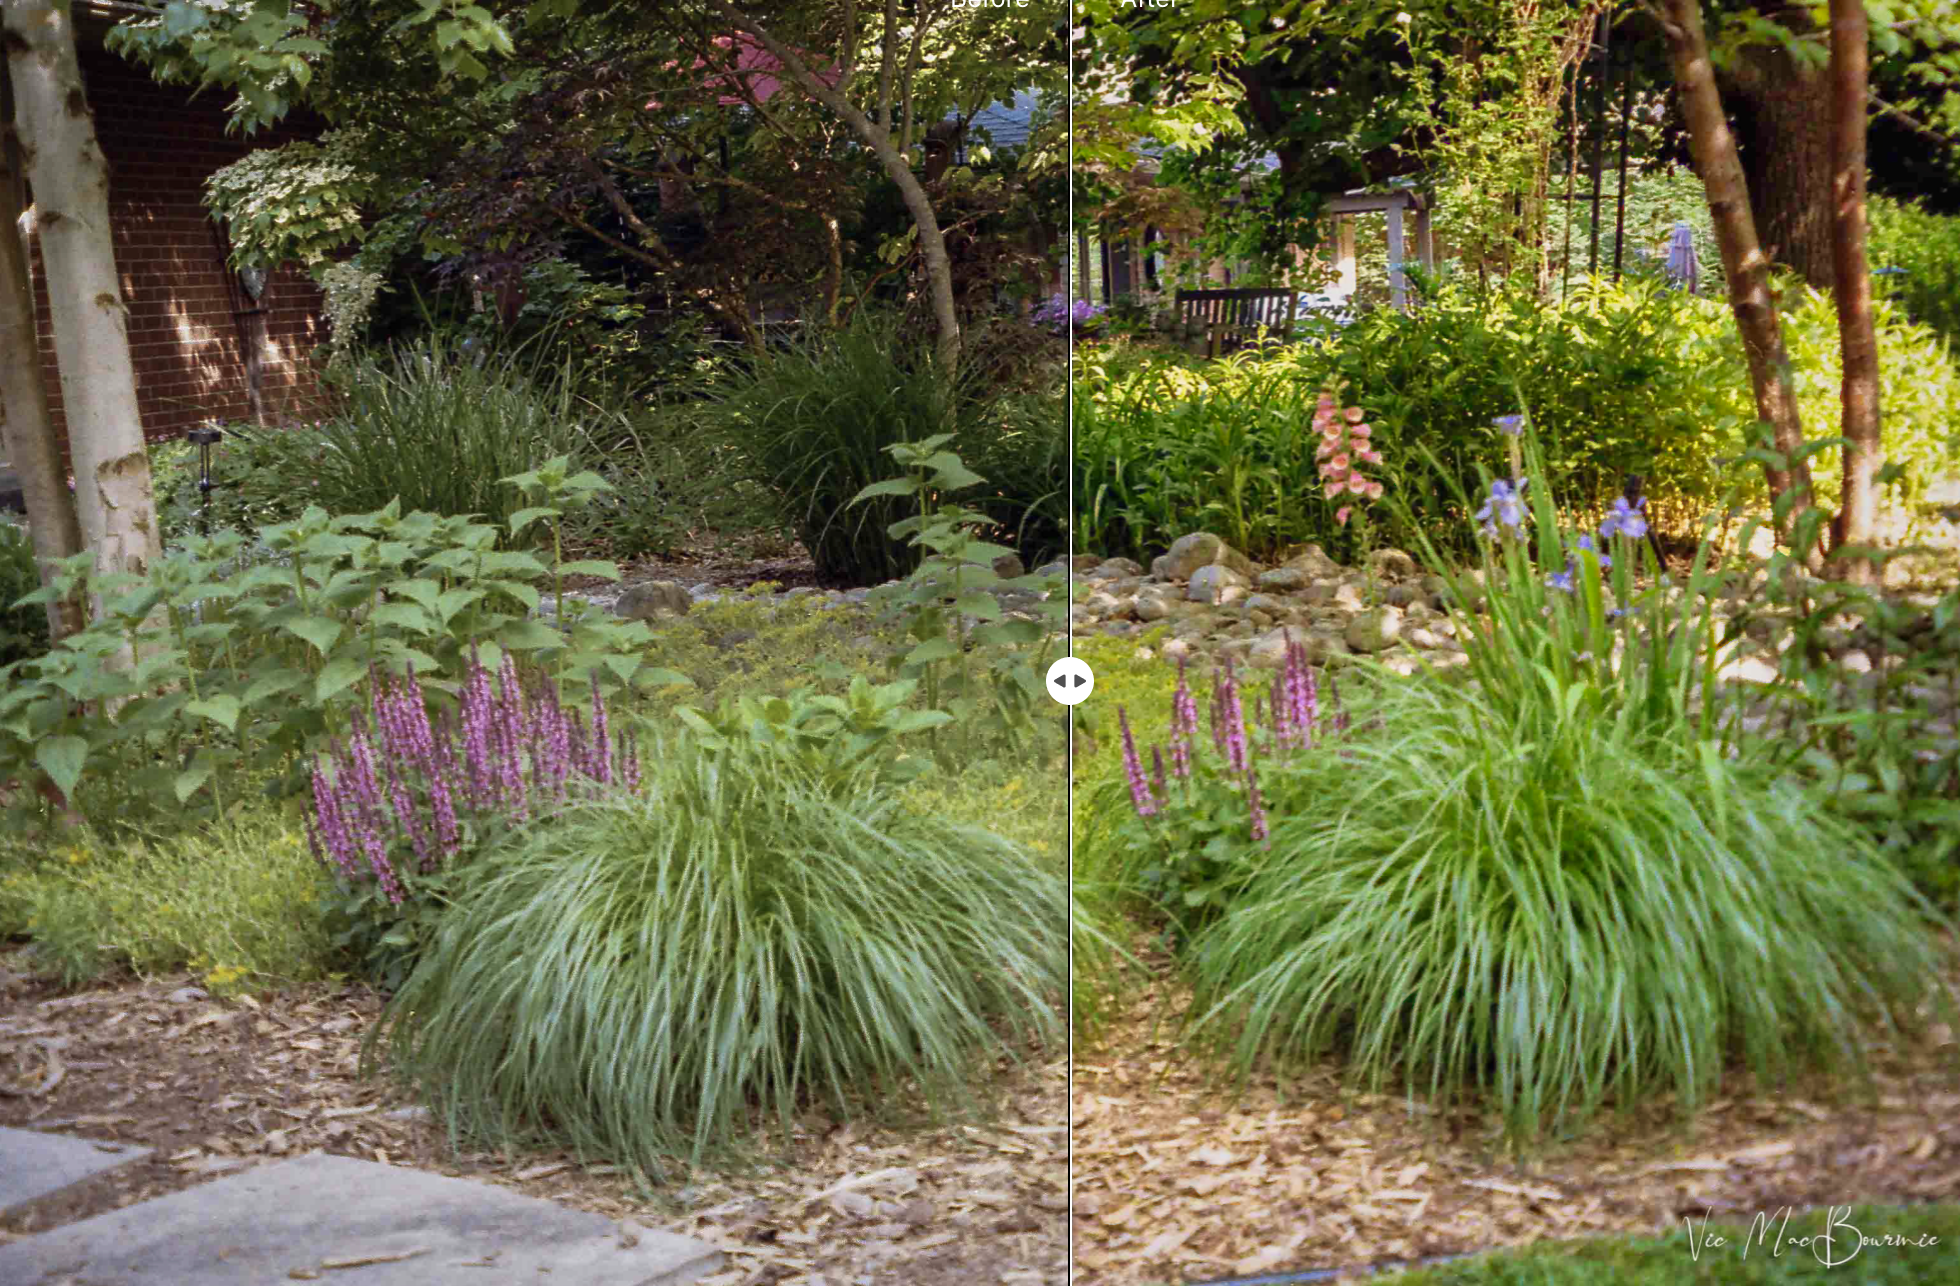


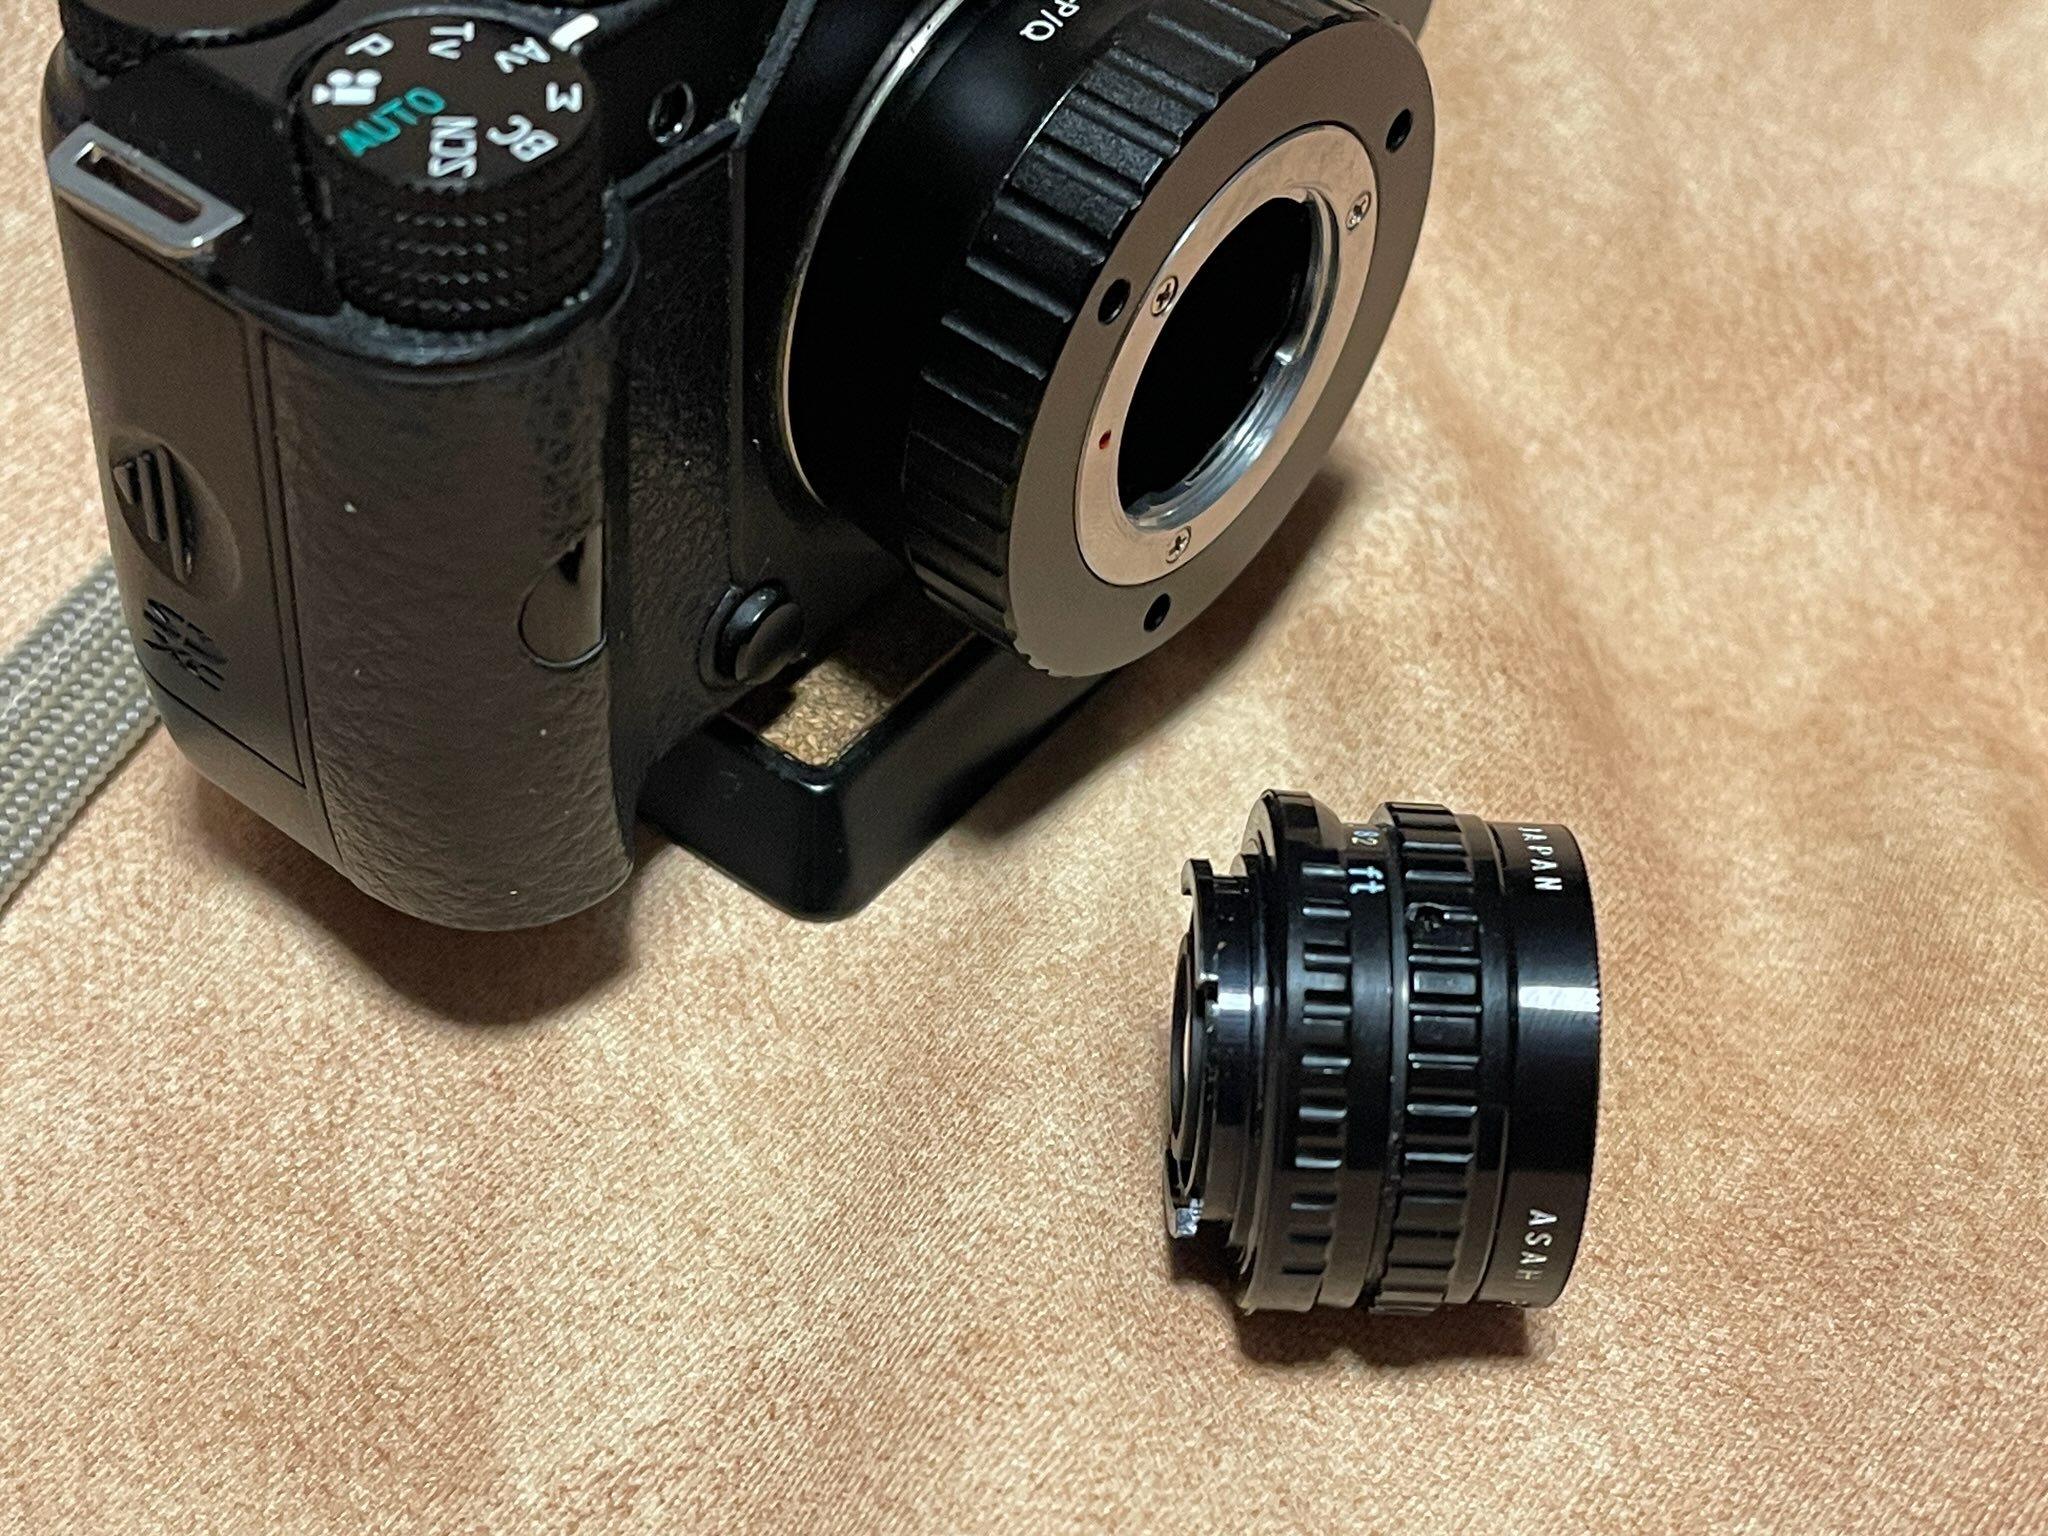








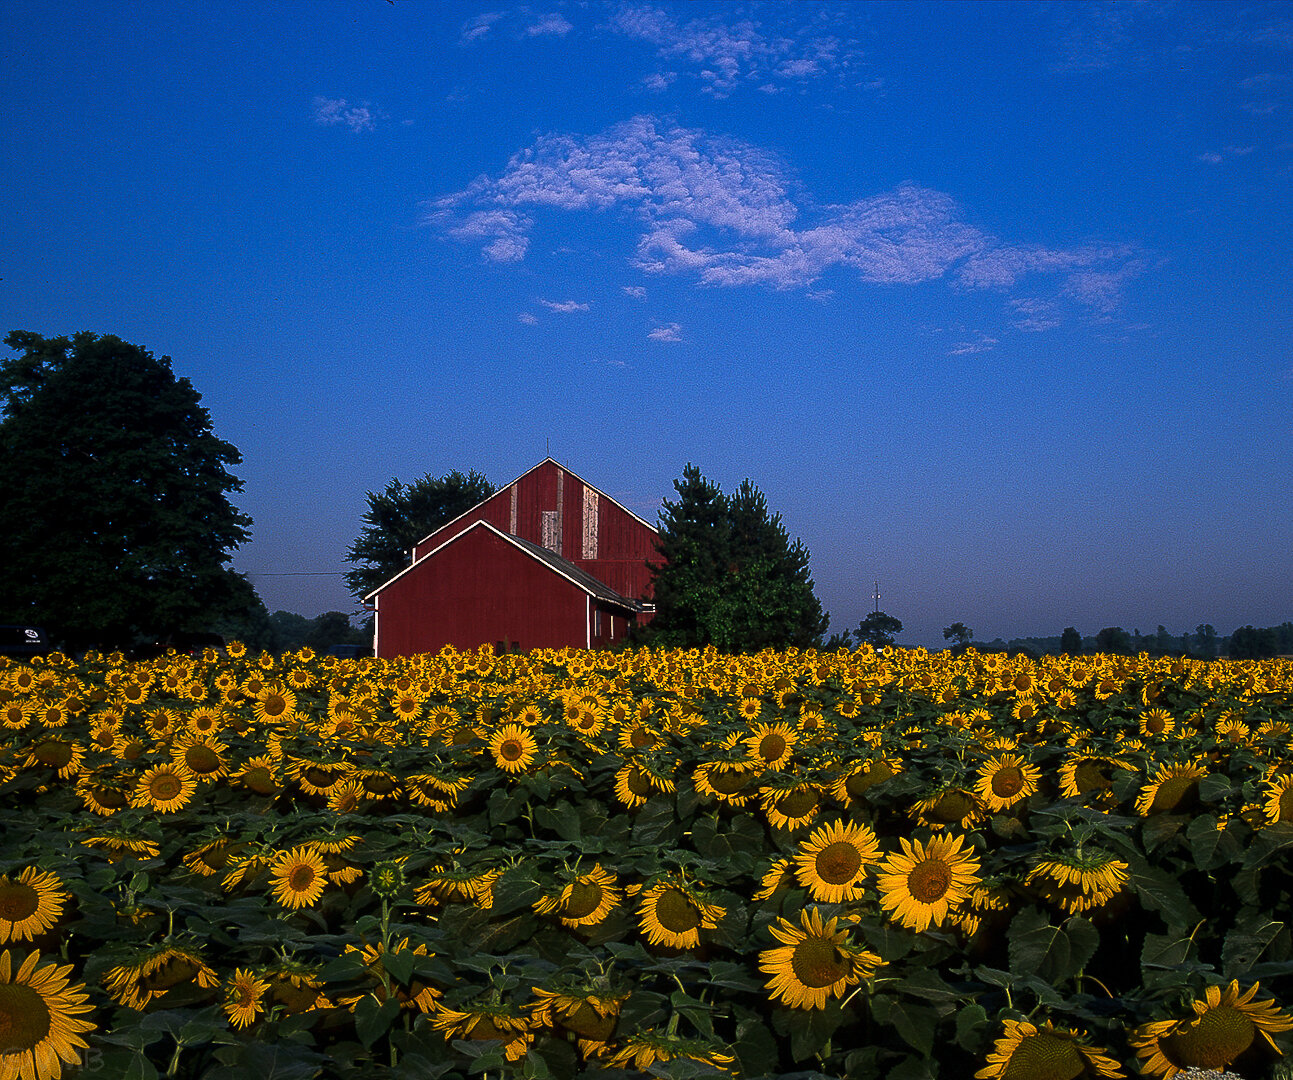


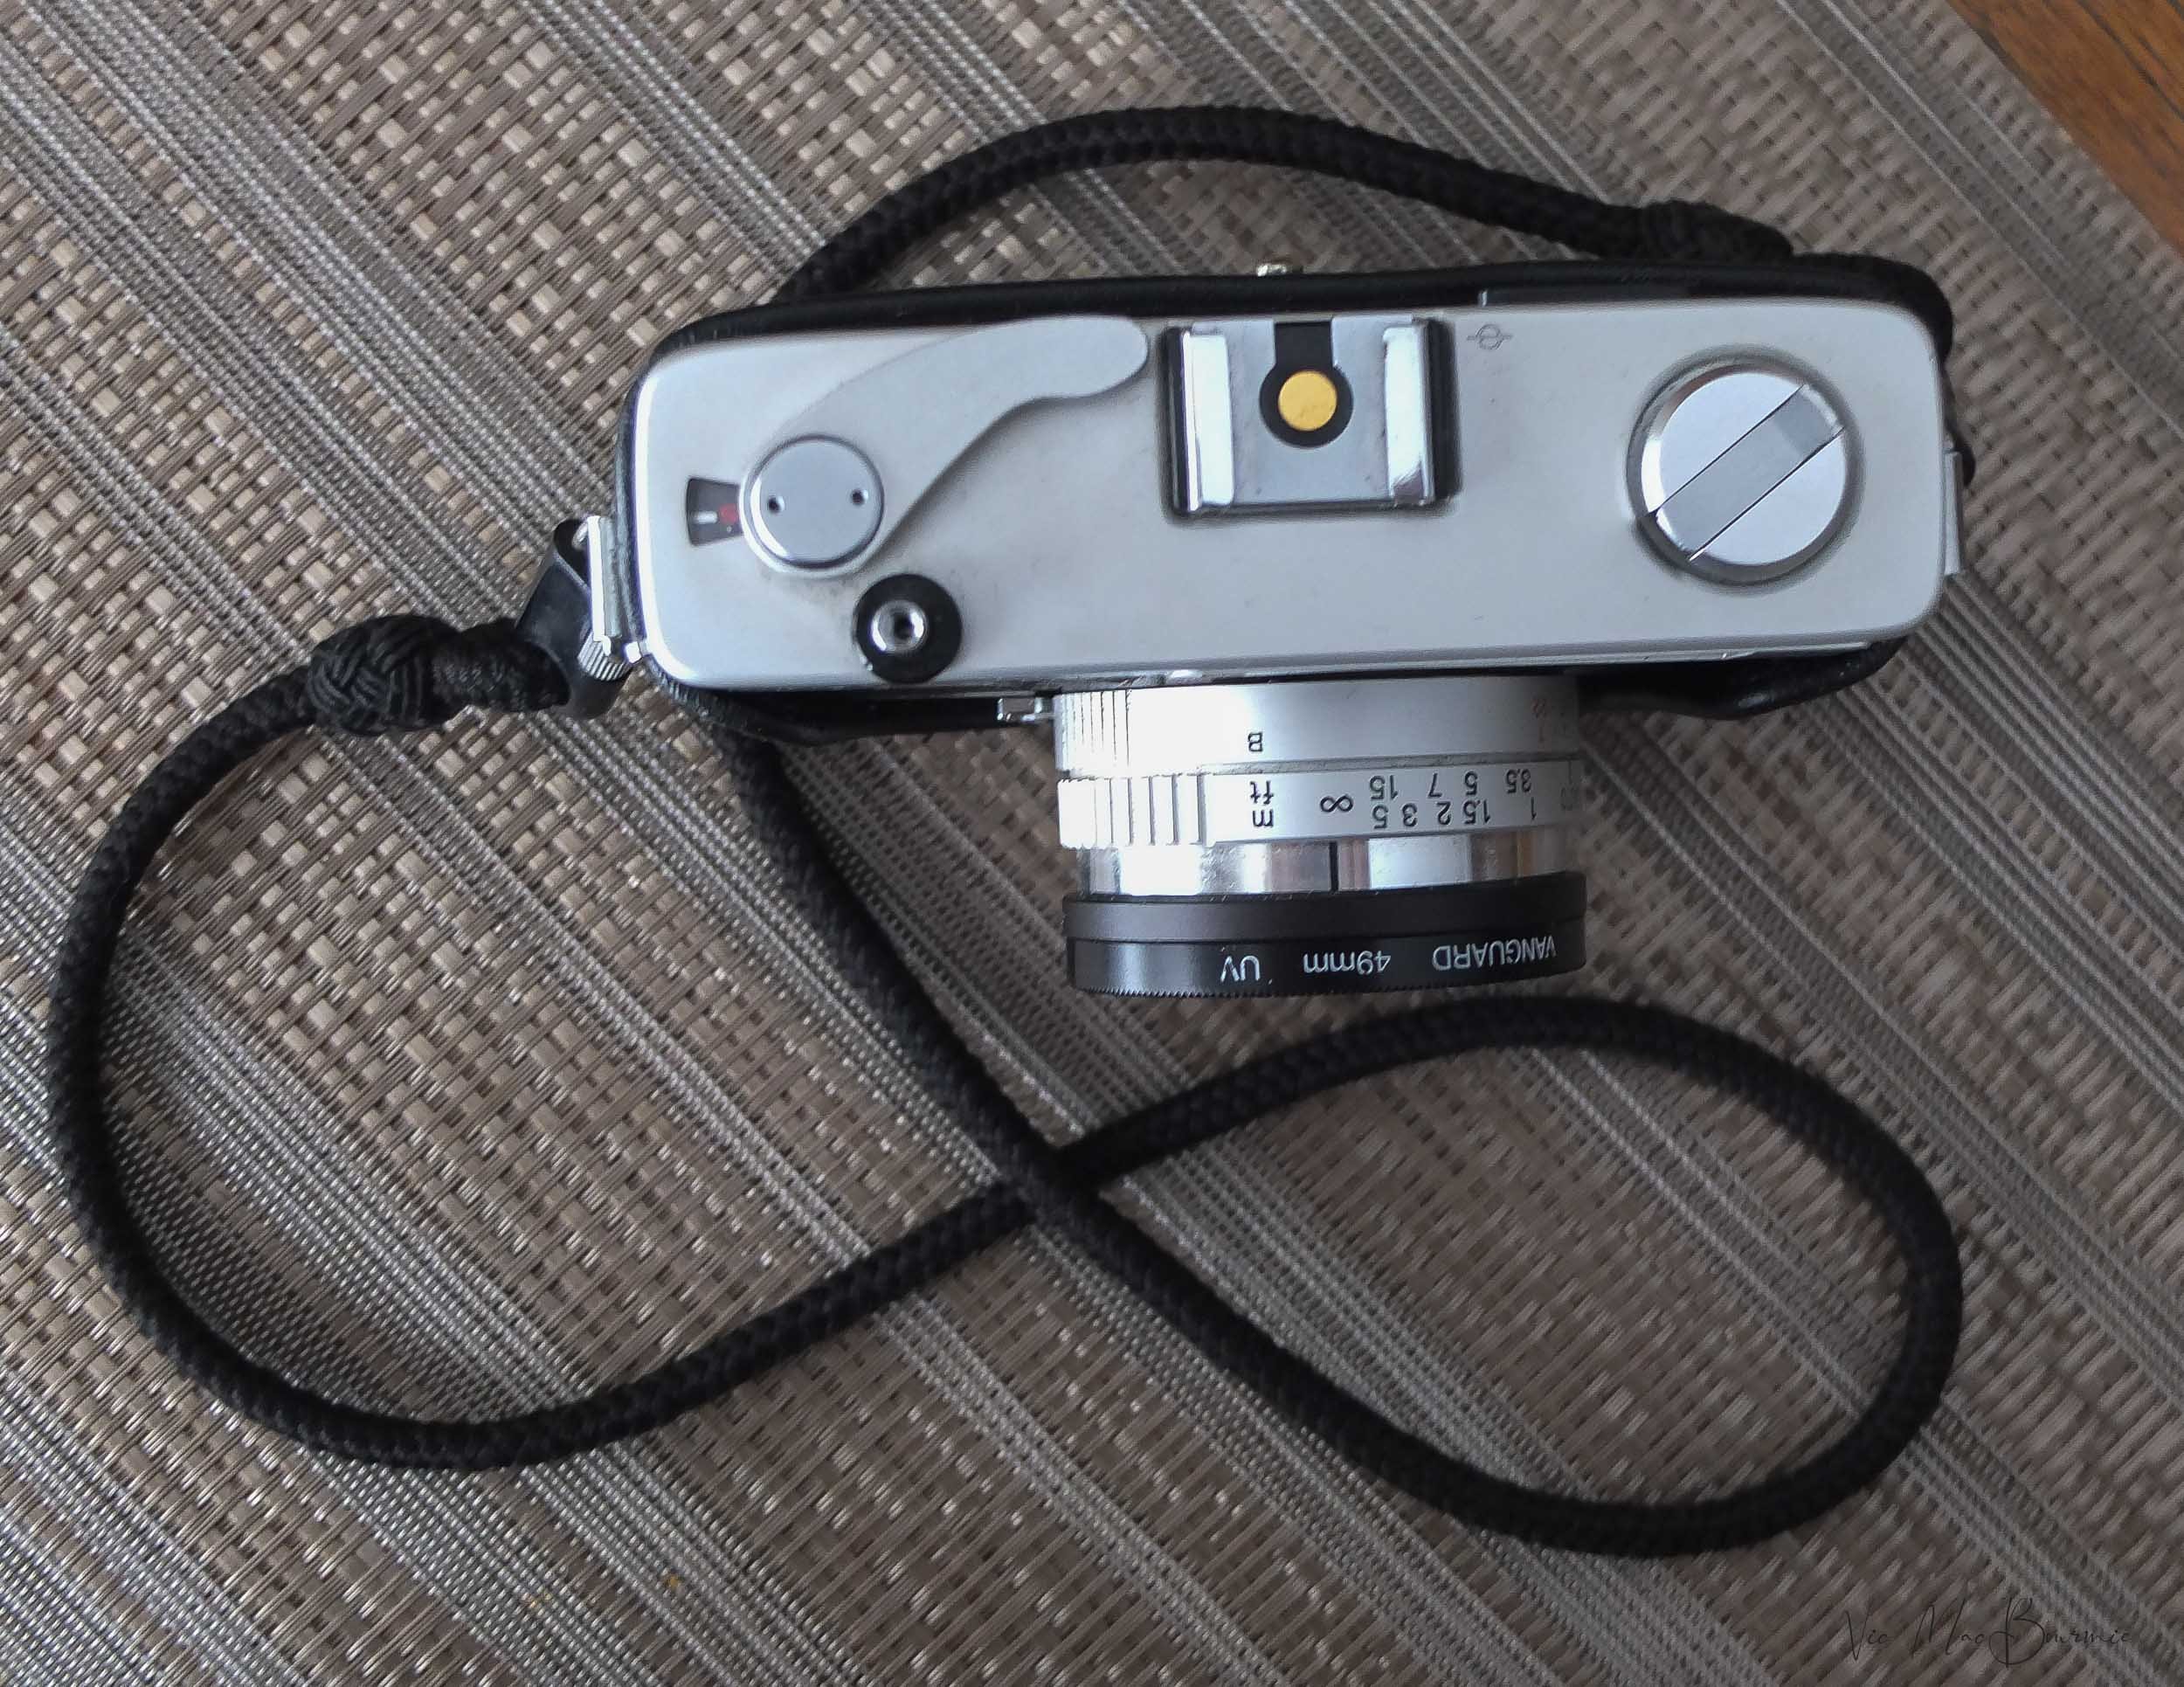






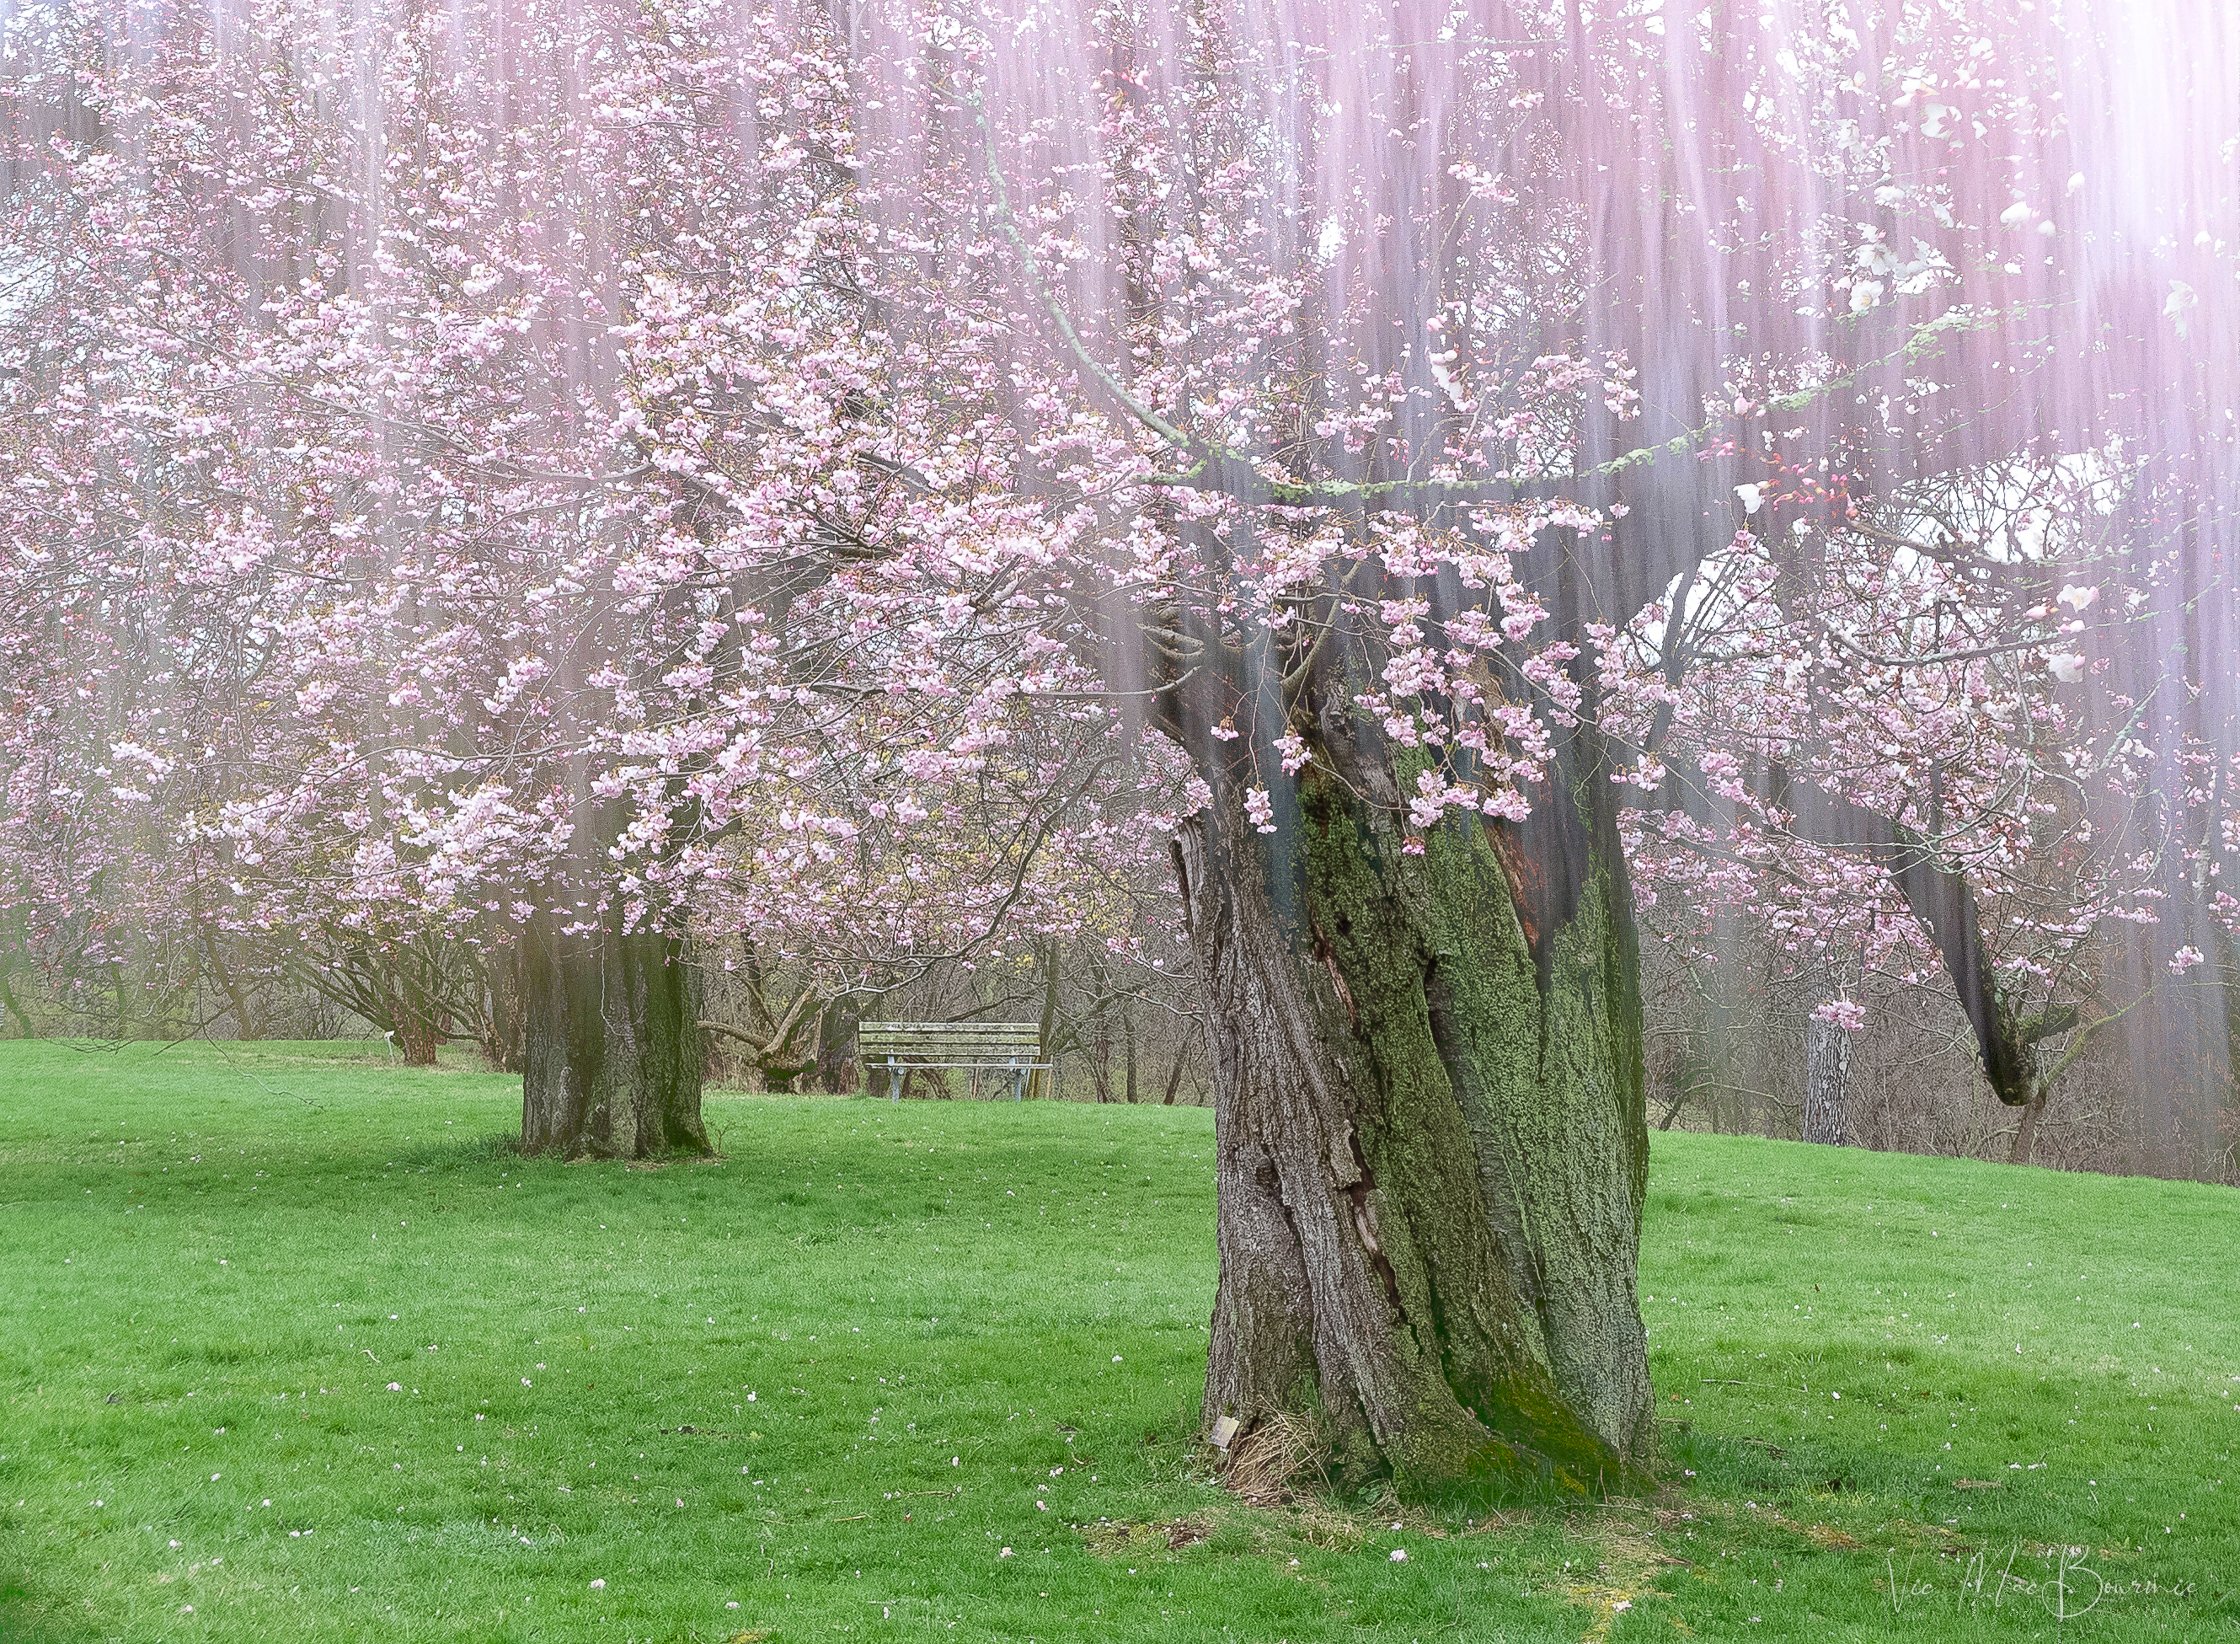

They’re boisterous, bullies that add a hit of colour to our backyards. Blue Jays are one of the most beloved birds in our gardens, but it was not long ago when they were threatened by a deadly virus that wiped out hundreds of thousands of birds.