

Shinryoku: Capturing the subtle, fleeting beauty of spring
The Japanese culture has its own way to describe and experience the joy of spring greens. We too can learn from their enlightened perception of the woodland.

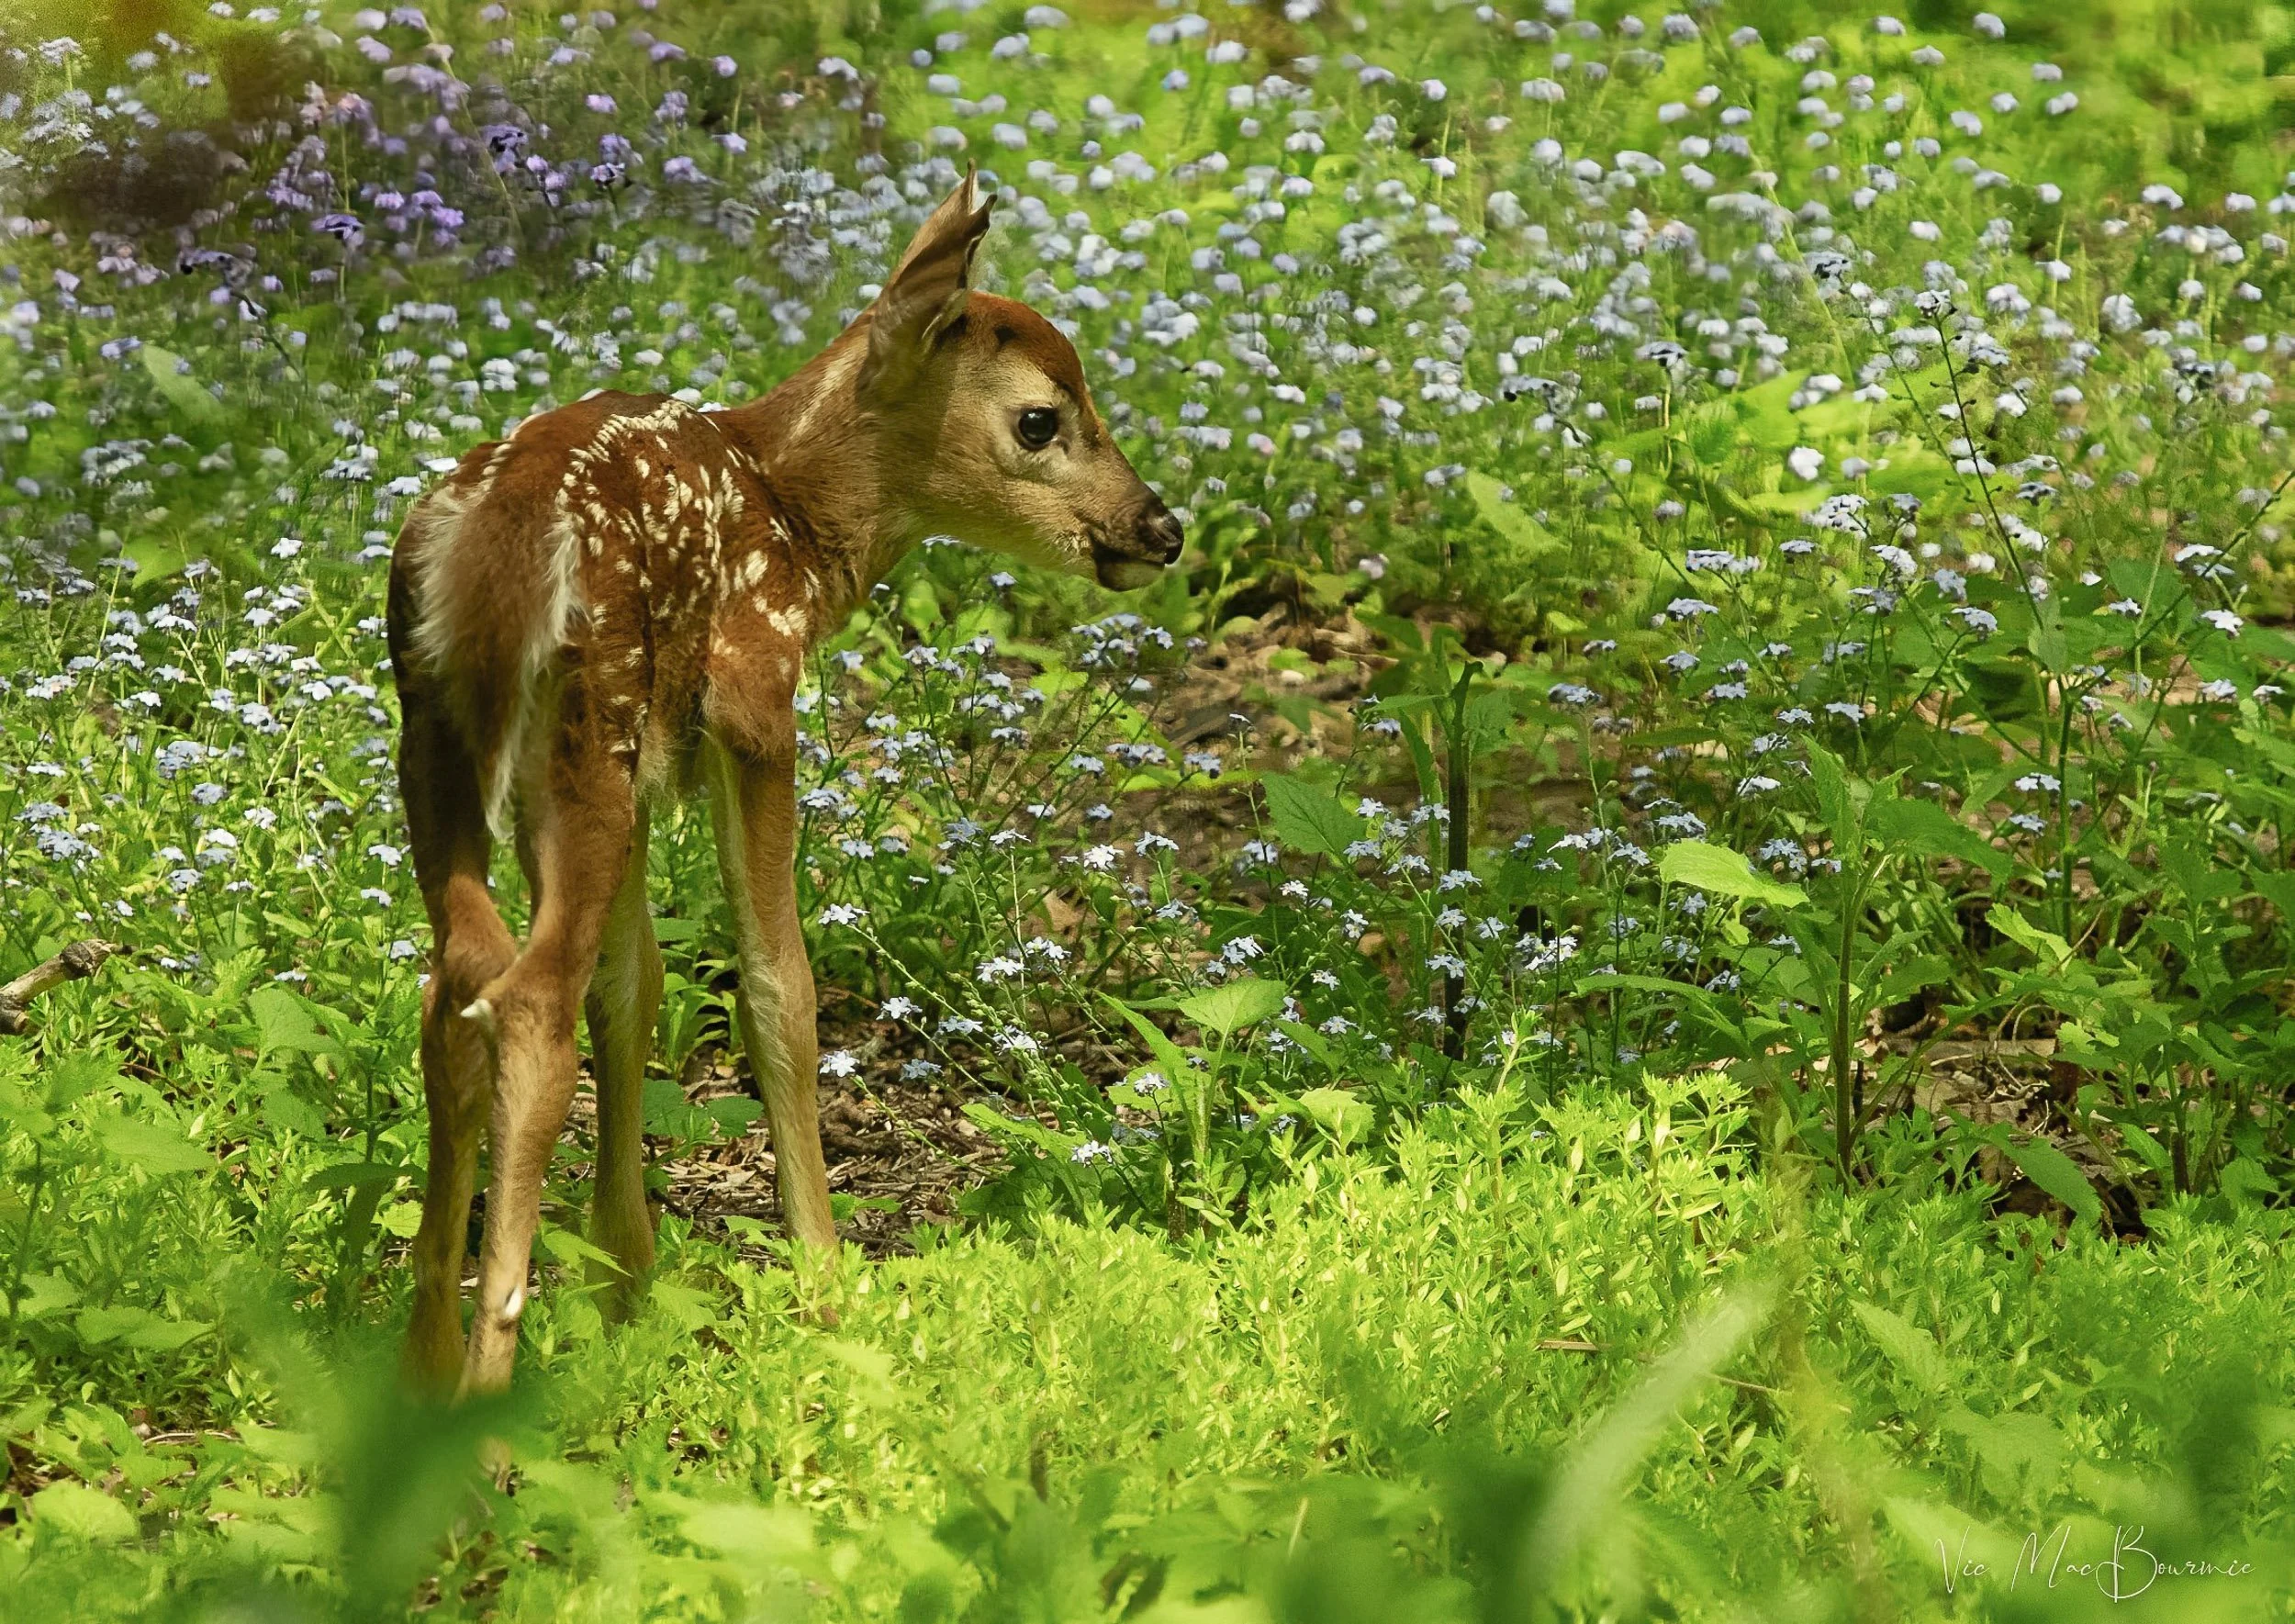
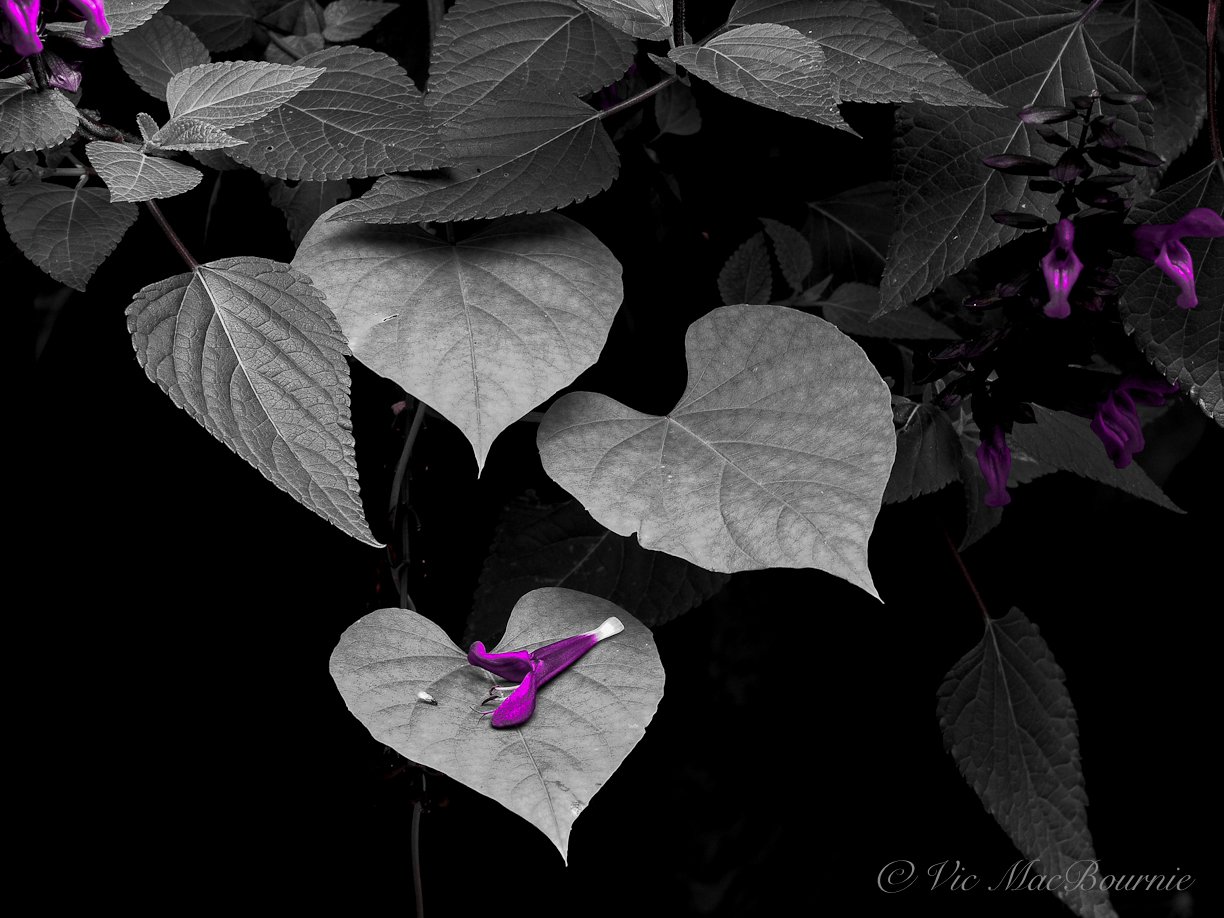
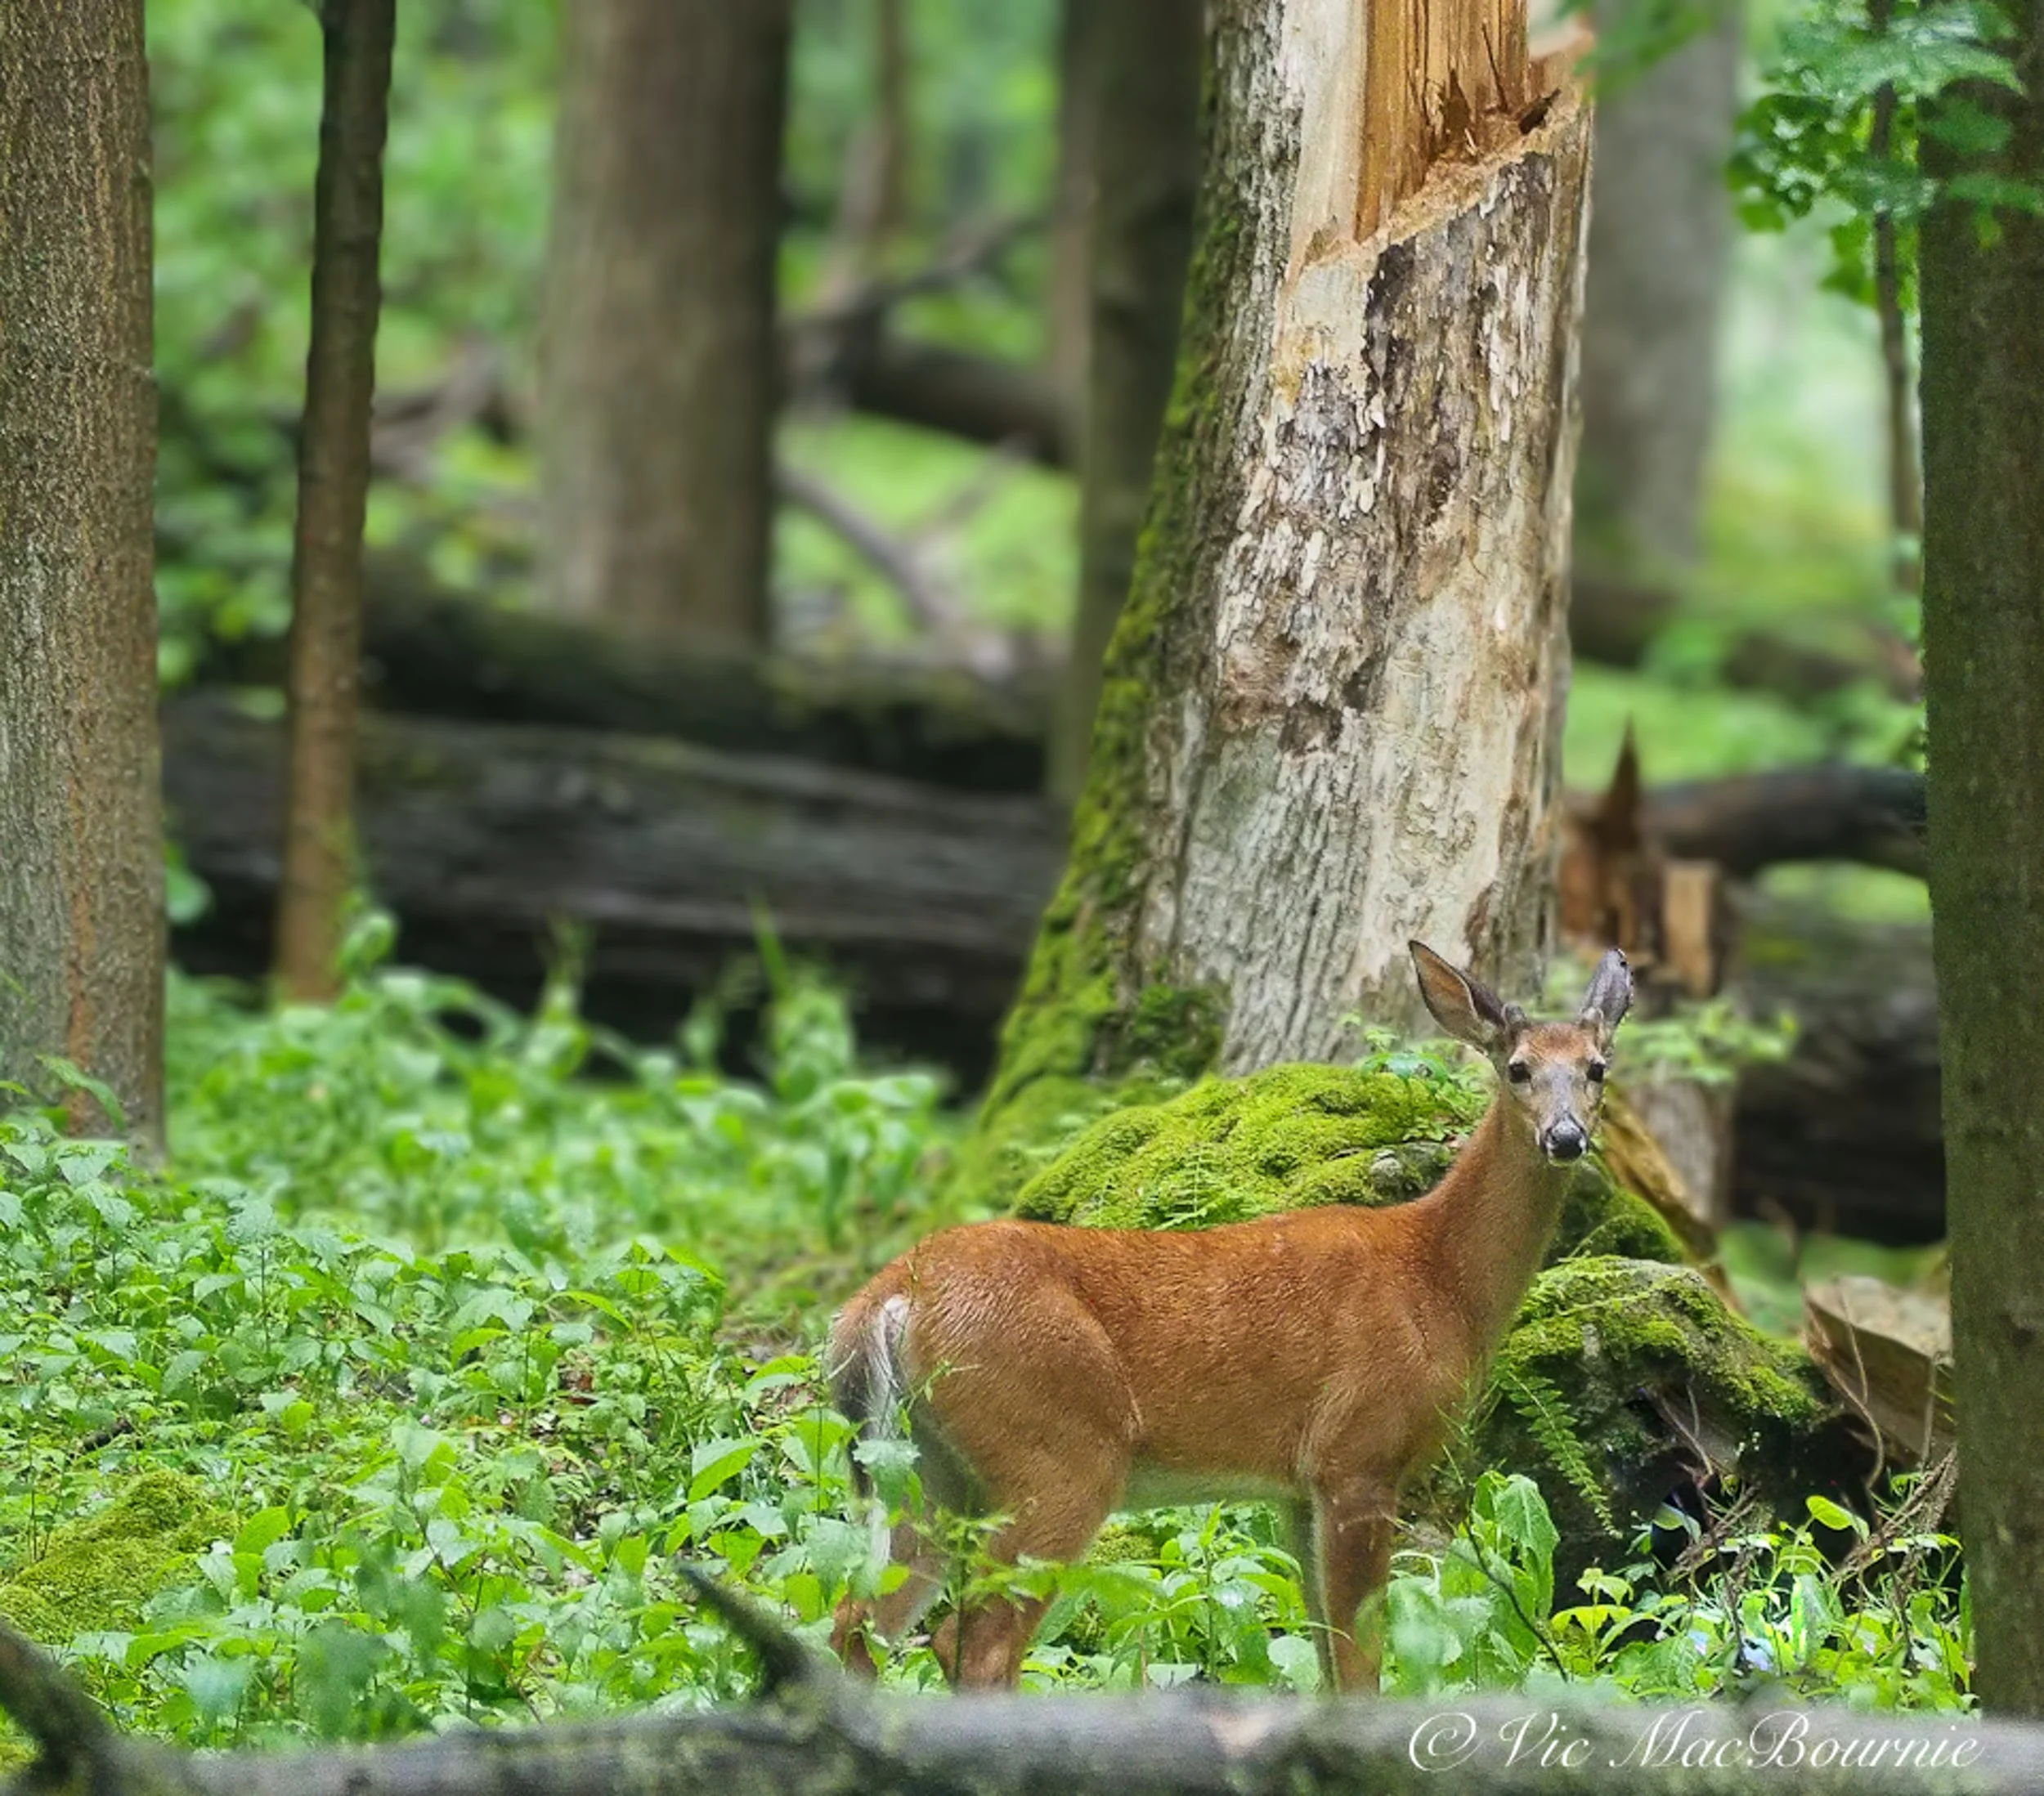
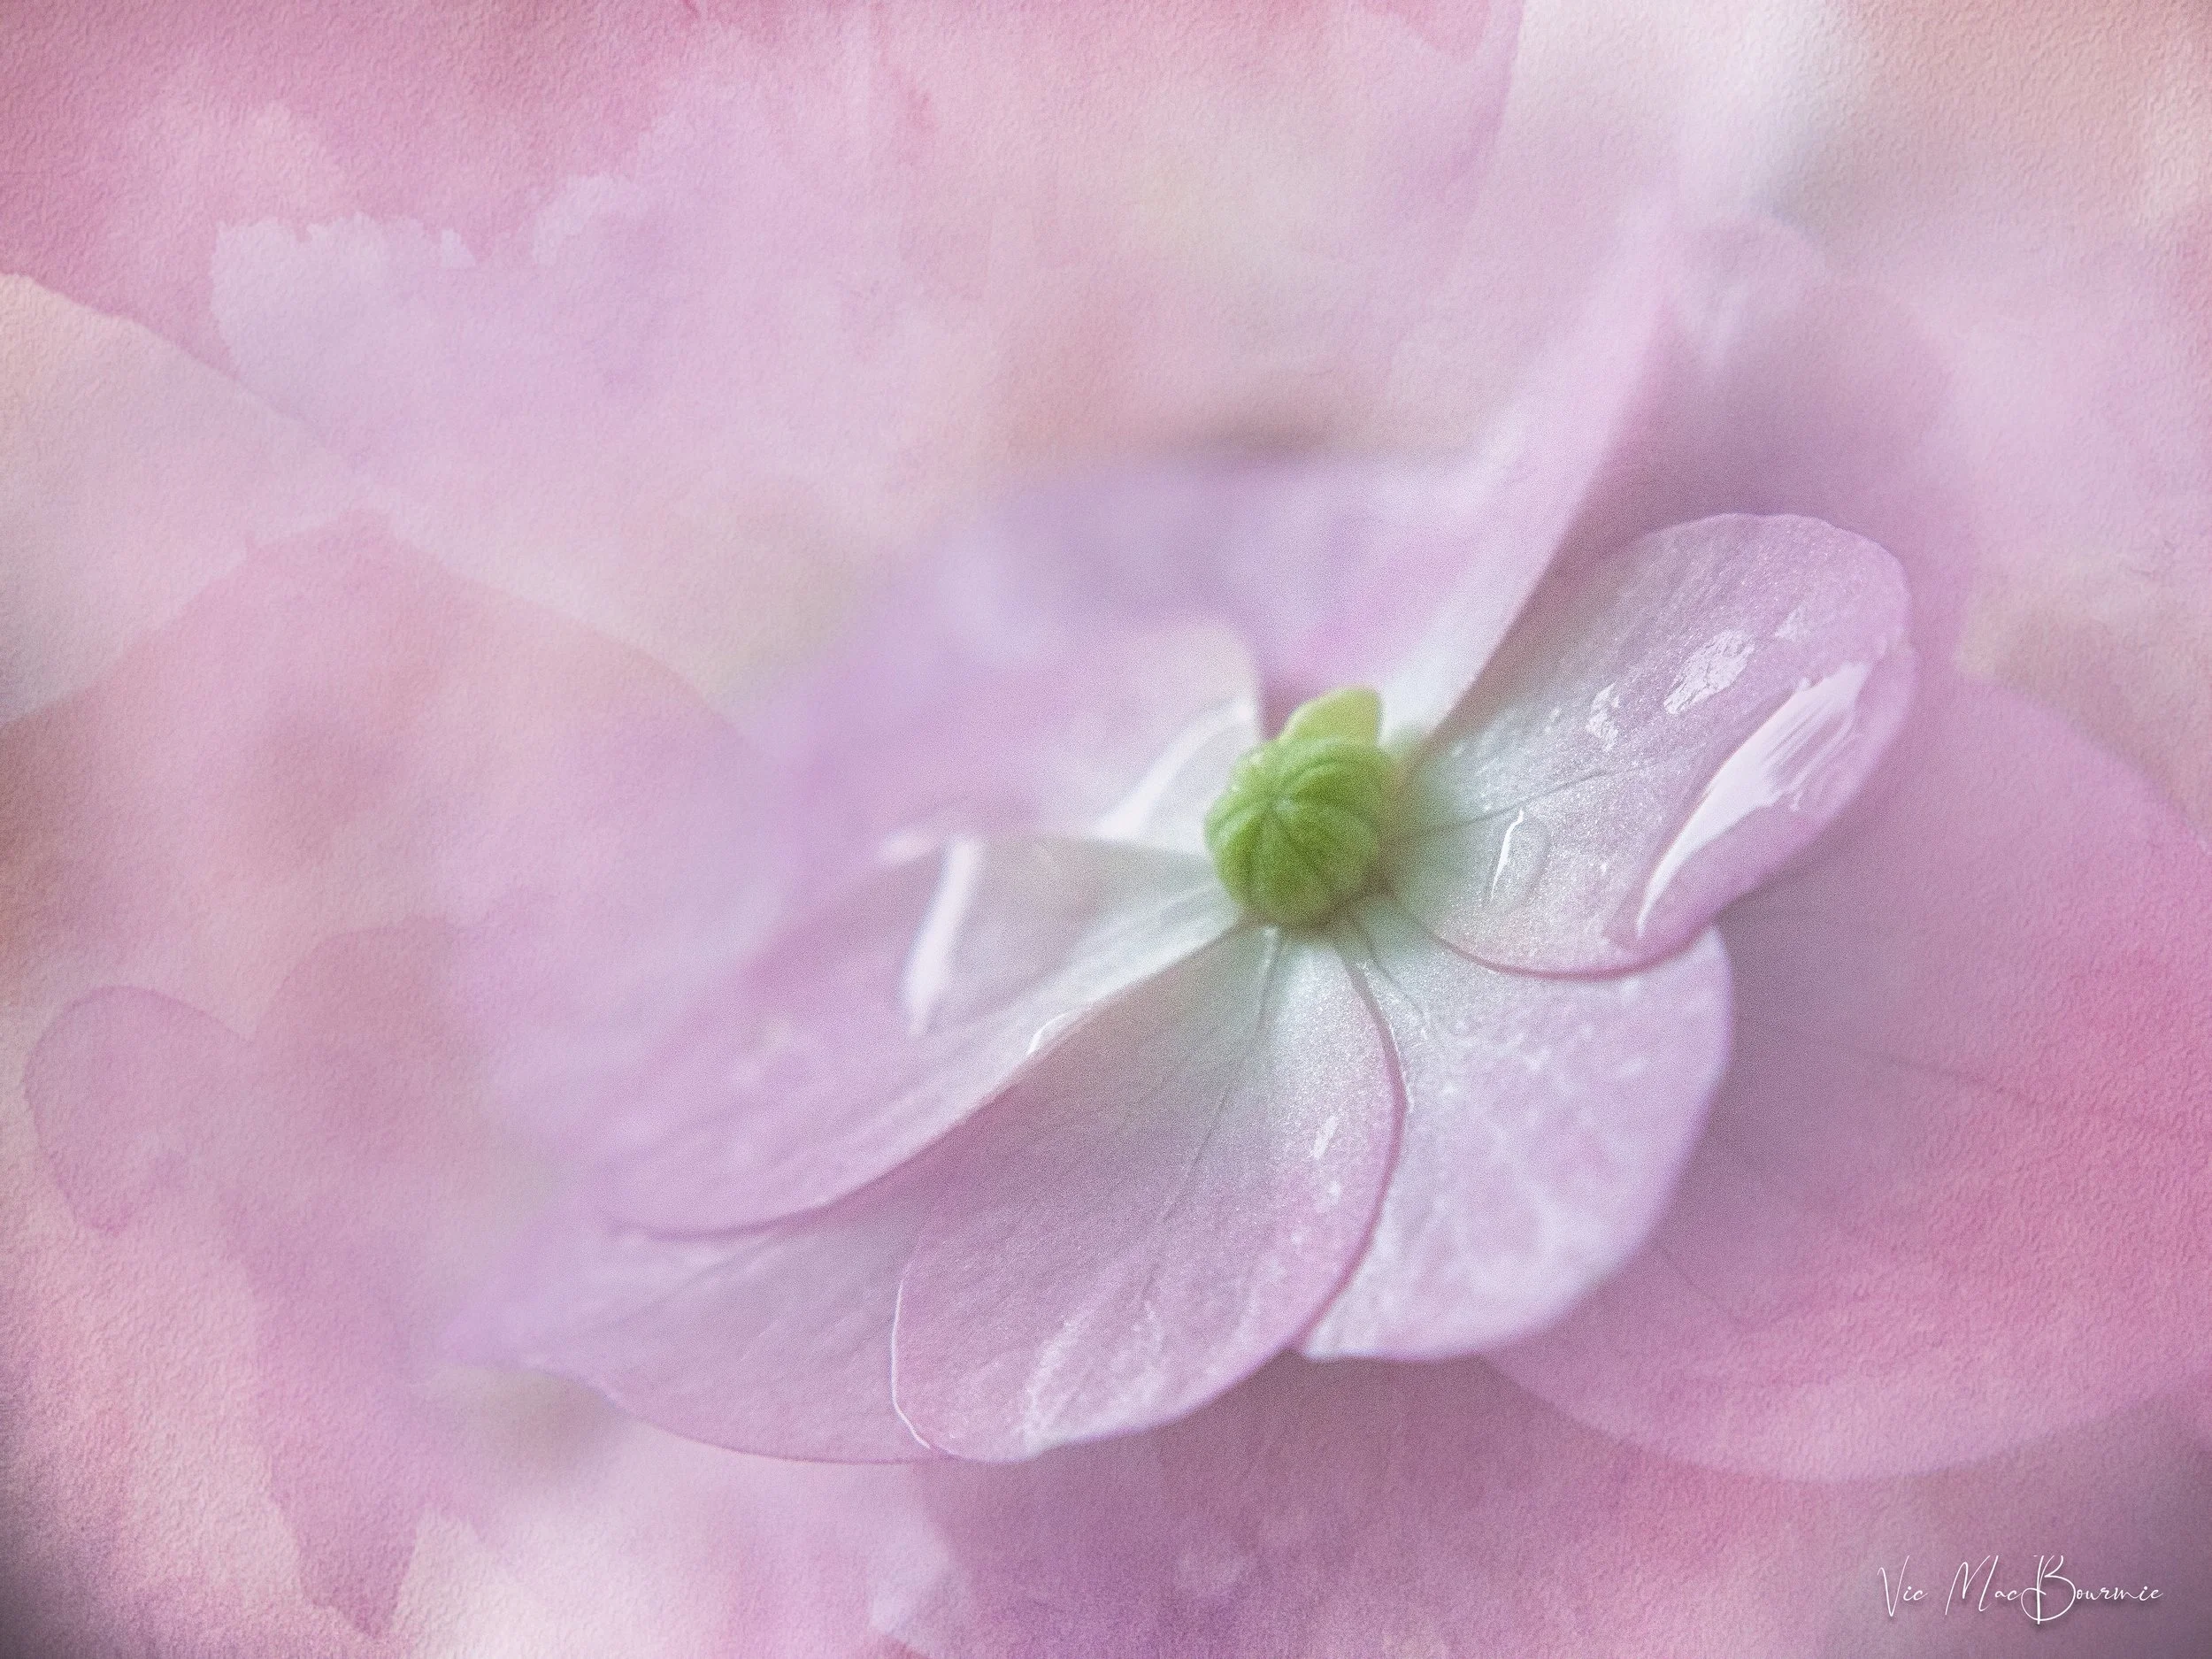
Early spring greens emerge in the delicate flowers of Solomon’s Seal dripping off of an arching stem.
Celebrating spring greens Japanese style
Learning has always been a passion of mine. Unfortunately, this thirst for knowledge rarely involves text books. These days, it takes the form of the hundreds of YouTubers that I follow, from gardeners to photographers and everything in between.
One that combines both gardening and photography is a channel based out of Japan called “Shizan style” that focuses on learning to see and experience nature through the eyes and soul of the Japanese culture.
Fine art photographer Joshua 'Gensetsu' Smith, PhD, describes his channel in the following way: “it focuses on Japanese aesthetics, photography, creativity, Japanese gardens and culture. A Shizen Style is about designing a Japan-inspired creative lifestyle infused with nature.
You can check out the channel here if this approach to gardening, living and photography interests you.
I have found many of his videos inspirational in so many ways. They inspire viewers to slow down and experience the finer elements of the garden that are often easily overlooked in the hustle and bustle of everyday life. Whether you choose to capture your experience photographically is really a less significant focus of the channel, but I fully appreciate his approach to documenting the journey.
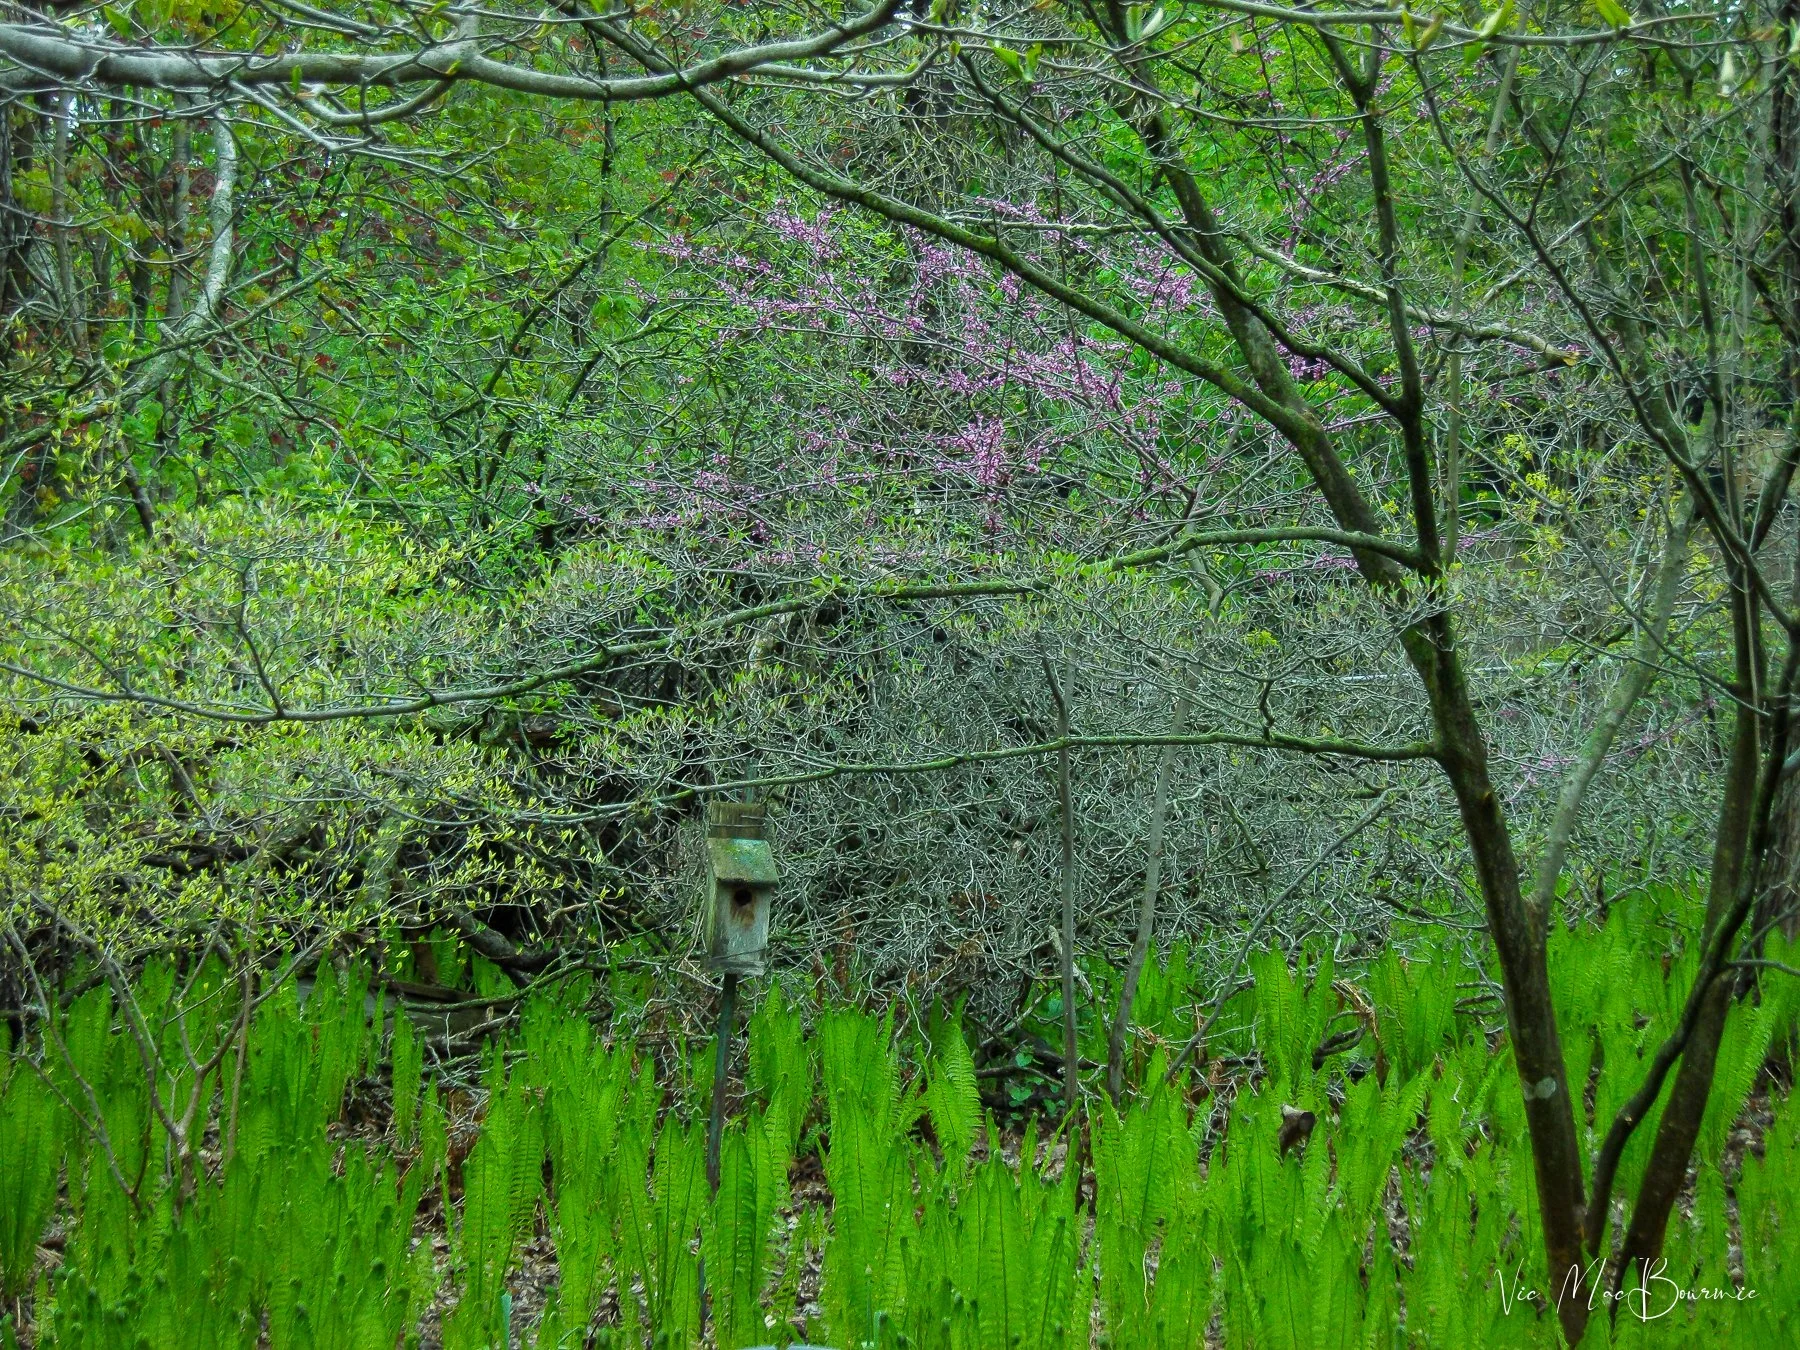
Looking up to experience the translucent flowers of the yellow magnolia against the brilliant blue sky. The experience is as much about seeing the translucent flowers as it is about the space between the flowers.
Spring greens in the woodland garden
His recent video exploring how the Japanese experience “spring greens” fascinated and inspired me enough to share some of the concepts with readers so we can all, hopefully, experience spring in a deeper, more meaningful way.
At the root of the video is how the Japanese describe the term “spring greens.”
While the rest of the world either uses those simple two words, or don’t even acknowledge the incredible new greens of spring, the Japanese have many ways and words to describe the emerging greens.
Discovering the intricacies of Shinryoku: A moment in time
Josh explains in the video that the greens of mid may are described as Shinryoku. The word describes that brilliant new green emerging in the woodland and gardens. It describes the leaves that have just opened and represent not just a colour but, even more importantly, a “moment in time.”
Shinryoku describes the particular green of leaves that have just opened –”tender, bright, almost shy.”
In Japan, it represents that time at the end of the cherry blossom season, but before summer heat sets in and turns the focus on the beginnings of new life emerging.

Try moving in close on back lit leaves to show the veining structure of the emerging leaves.
It’s a time many of us are experiencing at this very moment in our spring gardens.
However, so many of us are so overwhelmed with trying to get our gardens into shape, that we fail to appreciate the emergence that is ocurring before our eyes.
Shinryoku, or the feeling it brings, is important to experience and capture, whether it is just a memory and feeling we store in our minds or an image we capture with our cameras.

Finding beauty in the simplest things requires you to really look at your surroundings. Here, spring unveils a new beginning – the dead leaves and pine cones give way to fresh spring moss and small seedlings that are just beginning their new life on the forest floor.
Capturing early spring in the woodland garden
Josh’s video explores the many approaches to documenting Shinryoku. Here I’ll just touch on a few and if you are interested in exploring further you can watch his video.
The first involves moving in close to exerience the translucency of the emerging leaves. Capturing the small details in the leaves as sunlight that filters through the leaves and flowers brings out the delicate veining.
To quote Josh: It is an important time when we get to capture the “beginning of something that will spend the rest of the year becoming.”
This is the time to either use a macro (close focussing lens) or a telephoto lens to move in close and use backlighting to capture the translucency of the leaves and flowers, like I tried to do in some of the images above.
This is the time, as Josh explains, that we: Capture the “beginning of something that will spend the rest of the year becoming.”
It’s an opportunity to photograph a “thing that is not yet what it will be. “
Shinrin-yoku: Looking up and Forest bathing
The Japanese concept of Shinrin-yoku or forest bathing finds its success because it encourages the eyes to look outward and upward.
The second approach is to simply look up through the leaves and the sunlight filtering through them. It works so well because, in spring, leaves are still transparent.
Josh suggests to: Find a tree. Lie down point your camera straight up. Capture the leaves’ transparency. Contrast and geometry. Dark branches against that luminous green. … the negative space betweeen them when the sky comes through.
“You can’t look up to a canopy like that and hang on to a to do list,” he says in the video.
In our backyard in spring, I often look up through the branches and flowers of our yellow magnolia. The mellow yellow flowers light up against the backlit sky. (See second image in post.)
Later, when the massive bright yellow locust tree leaves begin to emerge, the results can be spectacular.
It’s best to underexpose the scene to capture the bright yellows and greens against a dark blue sky. A polarizing filter will further deepen the sky and help remove the bright highlights off of the waxy leaves.

Although this is not in my garden (thank goodness) I think It represents the perfect combination of old and new and shows how, over time, new growth slowly covers last years newness. I like to compare this to fallen leaves and how so many people are obsessed about clearing out every last leaf on their properties in fall and early spring. If new growth can eventually cover this old car, imagine how quickly it can hide last year’s decaying leaves. Lesson learned: Relax and let nature do its work.
Wabi Sabi: Finding beauty in combining the old and the new
In my mind, the most successful gardens are a blend of old and new. It's one of the reasons I am drawn to the aesthetic of European gardens where plants find a home inside an ancient stone urn or vines climb the walls of historic castles. Documenting this in our own gardens is not always easy, but if we look hard enough we may be able to find a moss-covered urn or rock. An ancient boulder or tree covered in mosses and lichens.

The beautiful early greens of spring are punctuated by the emerging purple alliums.
Now look to capture new growth up against the old tree, branch or moss-covered container. Maybe an old garden gate with a new vine growing on it. …
Josh so eloquently describes the core of Wabi Sabi in his video: “Beauty lives in the relationship between aging and renewal. Not in one or the other. The green is more alive when it is next to something that has been here much longer. The rough stone is more beautiful when something young grows through it
This is actually how Japanese gardens work. Every element is in conversation with every other element. You don’t place a stone alone, you place it in relationship.
Apply that thinking to your photography. You are not dicumenting just the leaf, you are documenting a relationship.
Time and now permanence and impermanence. More interesting than a simple photograph it’s a conversation. It’s an about it’s not a picture of something it’s about something.”
This is the perfect time for us to get out in the garden and experience, maybe even capture photographically, what the Japanese refer to as Shinryoku.

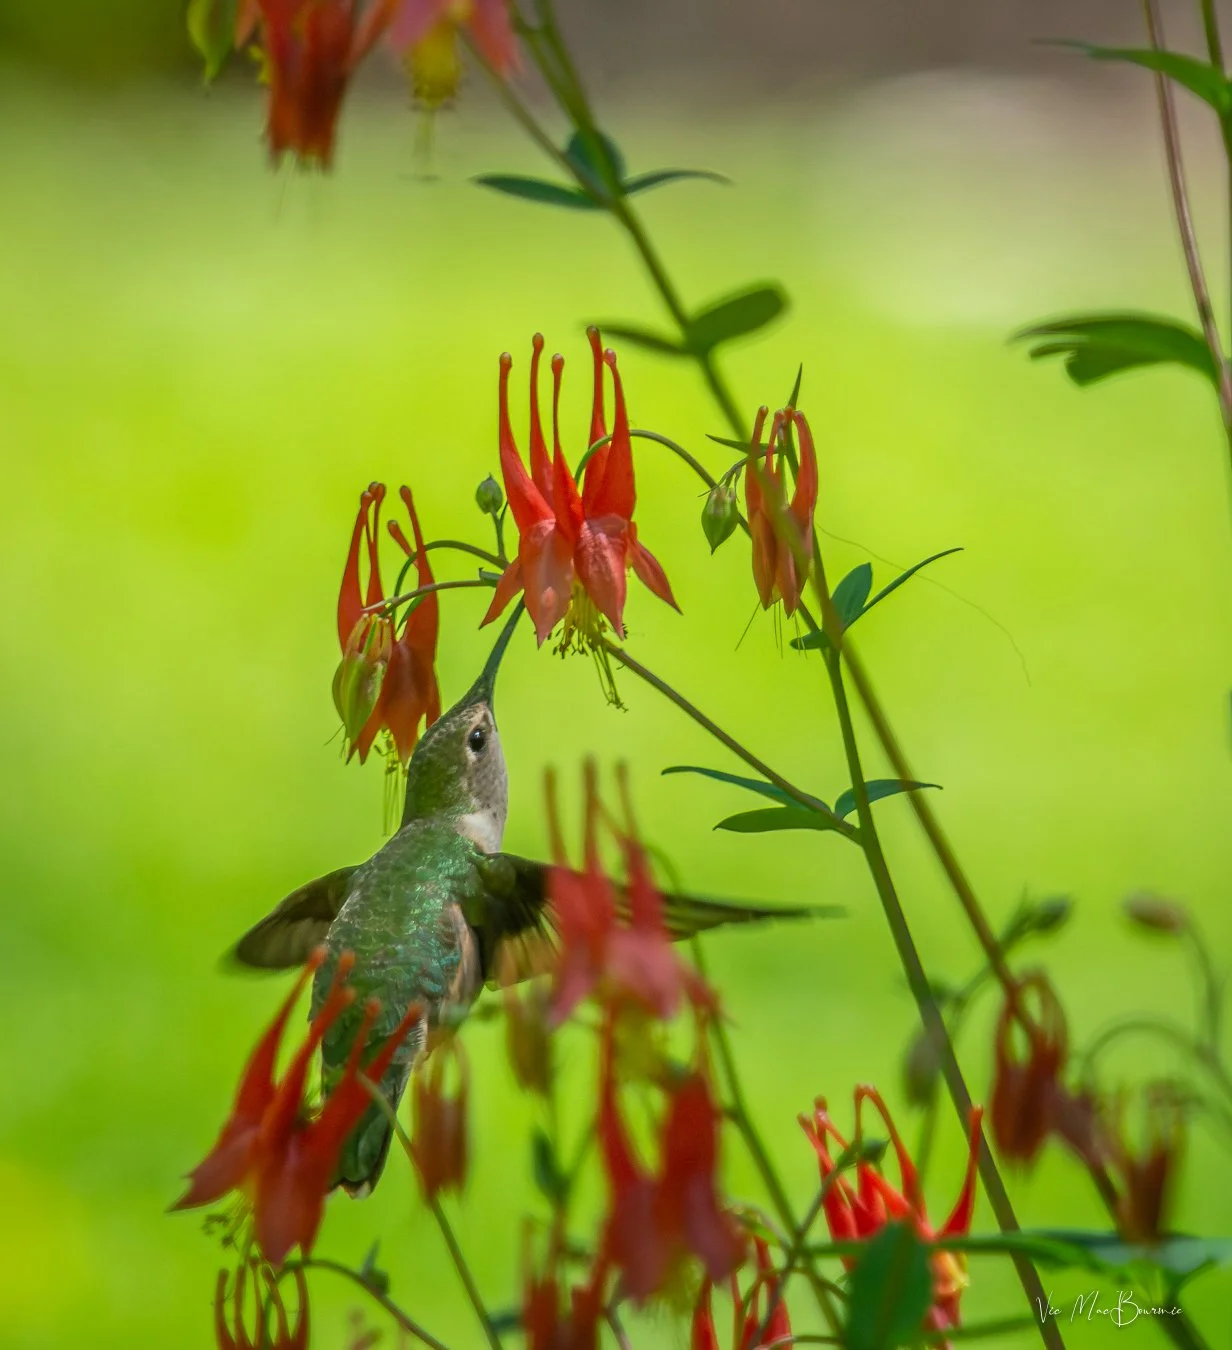
The Columbine and the hummingbird
Native plants, especially native columbines, are an important early spring food source for migrating hummingbirds.

A hummingbird works on native Columbine in the woodland garden in early spring.
Spring in the woodland garden: Importance of native plants
One look at a native columbine and you know they were “made” for hummingbirds.
The colours – a vibrant red and yellow. The shape – long tubular flower petals perfect for our hummingbirds’ long beaks and even longer tongues. The way the entire flower hangs off the stem.
It’s the perfect match for the hummingbird.
This week in the garden watching hummingbirds work the columbines was all I needed to be reminded of the important relationship between our native columbine and hummingbirds. In fact, it proved to be even more verification of how important native plants are to our local wildlife.
I don’t think it’s a coincidence that our ruby-throated hummingbirds arrived to our garden just as the columbines were preparing to open.

Columbines, along with Solomon’s seal and a handful of other natives and non-native plants, are just a few of the key plants that provide a food source for migrating hummingbirds. Flowering trees such as crabapples, serviceberries and a host of other shrubs also play a major role in helping migrating birds, such as hummingbirds.
For more on columbines, check out my earlier posts here.
For my post on helping migrating birds, see my earlier post here.
Commercial feeders are no replacement for native plants
One look at all the activity around our commercial feeders (Amazon link) and it’s easy to forget that these tiny birds that have just made their way from as far away as Central America to our backyards in the northeastern United States, Ontario and more northerly parts of Canada, are more dependent on native plants than our feeders.
In other parts of the world, including the southwestern U.S., into western Canada, a similar dependency exists with the beautiful Rocky Mountain columbines and other native plants that feed the migrating hummingbirds along their journey.
Hummingbird feeders have certainly become an important, readily available, high-energy food source that is available to migrants as they make their way to their summer breeding ground. But, it is plants like columbines that ensure hummingbirds’ survival over long stretches of uninhabited areas where feeders are not as readily available.

Columbines can be an important food source for migrating hummingbirds in early spring.
Not only are native plants, including columbines, important as an early food source for hummingbirds, they also feed smaller insects which can be a source of protein for hummingbirds.
Many of us might not realize that insects actually make up a huge part of the hummingbirds’ diet. In fact, leaving pieces of fruit out near a feeder to attract fruit flies can also be beneficial for hummingbirds. When it comes to feeding their babies on the nest, it’s small insects and spiders that make up the diet of both the tiny babies and their parents.
The Rocky Mountain columbines – non-native in my location – as well as the more hybridized varieties may not be as beneficial to hummingbirds in our area, but more than likely offer some of the same benefits as our native plants.
It’s always good to include at least some native varieties in your naturalized garden.
If you don’t have native columbines in your garden, be sure to put them on your list for next season. If you can still find plants are your local nursery, pick up a few and get them in the ground for the hummers. If you can’t find any plants, you can probably purchase some seed which you can try to sew directly in the garden or grow in pots.
For more on native plants and their importance in the landscape, check out my earlier posts here.

This image shows how the hummingbirds flies low and then up to feed on the low hanging columbines. They are able to lift the flowers as they feed.
How I photographed the hummingbirds
Anyone who has tried to photograph these tiny, extremely fast and skittish little birds knows how difficult it can be.
Using an electronic flash helps to stop movement, throws a catchlight in the eye and adds a fill light to darker areas in the image, but I prefer to keep it simple when it comes to capturing images of hummingbirds.
I used a digital SLR (Pentax K5) combined with a Pentax 300mm f4.5* lens teamed with a 1.4 converter that gave me the equivalent of about a 720mm lens on the cropped sensor. I bumped up the ISO to 1600, which added even more noise to the images.
I’m lucky that I planted the Columbines right near where I like to sit with my coffee and look out over the garden. So, I grabbed my monopod and waited… and waited.
A hummingbird flying almost vertically to feed on the columbines.
The hummingbirds visited the many feeders I had put up around the patio but took their time to check out the columbines.
It was late morning and the flowers were in the shade while the background was well lit, so I knew it wasn’t ideal lighting. I knew I could save the RAW images in post processing with a combination of Lightroom and Luminar Neo, but wasn’t under any great expectations that the results would be anything more than acceptable.
As a result of the bright background, most of the images of the birds were underexposed. Bringing the exposure up only added to the noise in the high-ISO images.
The birds visited a few times giving me lots of opportunities to get a variety of images. I shot in continuous mode but the K5 and lens combination wasn’t ideal to capture these fast-moving subjects.
Several hours later and I could see the shade moving away and the flowers beginning to get lit up. All I could do was hope the hummingbirds would return with the better lighting. And they did.

This image shows the hummingbird’s beak moving into the long Columbine flower petals to feed.
The results with the sun on the plants and the birds proved to be much better with a natural catchlight in the eye and a faster shutter speed to better freeze the motion of the bird. In addtion, the better lighting allowed me to stop down the lens for a little added depth of field.
The results of the photo shoot was a mixed bag of good and bad. I was happy just to capture the hummingbirds at the columbines, but unhappy about the quality of images and the amount of post processing needed to make them acceptable for publication.
A lot of work was needed to get the most out of the images, including a heavy amount of sharpening in both Lightroom and Luminar Neo.
Speaking of Luminar Neo, I used its “light depth” module on many of the images to create nicer light on the hummingbirds. I also used Luminar Neo’s AI sharpening tool in a few of the images.

This image shows the hummingbird flying almost vertically to feed on the columbines. During post processing, I darkened the background edges to focus on the hummingbird. Warm sun rays were added and the entire image was warmed up. The result is a more creative approach to a natural image.
Finally, I decided to push Luminar Neo’s creative capabilities to see what was possible. (See image above.)
After using the light depth module to lighten the hummingbird against the surroundings, I tapped into the sunrays module to add warm beams of light on the subject.
And the result: As a creative image I think I really like the results.
Some may argue that it is too contrived, and that’s okay. I see photography as a creative expression and have no problem taking an image to its creative limits.
I enjoy nothing more on a rainy day, than sitting in front of the computer and playing with the creative aspects modern post processing programs provide photographers.
For my post on creative approaches to photography, check out my earlier post here.
What do you think? Is it too much or are you open to creative expression in nature photography?


Woodland Garden: Mid May brings lots of little surprises
Mid May is an exciting time in the woodland garden when spots of colour break the beauty of the spring greens.

Native wild geranium (cranesbill) front, join Mayapple and Forget-Me-Nots for an early spring show in the woodland garden.
Native plants sparkle in spring
It’s the middle of May but it’s cold, really cold. In fact, earlier this week, if you can believe it, there were overnight frost warnings here.
Frost warnings and cold days, however, are not slowing down our hardy native plantings from moving forward and actually performing very well, thank you.
Leading the way are the Mayapples that are fully stretched out and creating a lovely green carpet in the main area of our garden that they are slowly taking over. They are also blooming in a distant corner of the woodland where I can see them, but rarely wander over to that “wilder” part of the yard.
But don’t count out the lovely arching stems of Solomon’s Seal that are reaching out for the sun with their delicate little green flowers hanging down below the leaves.
Solomon’s Seal, whether it’s the straight native or the variegated variety, is a good addition to any woodland garden adding a needed sense of verticality in the spring garden and lasting throughout the summer well into fall. Not unlike Mayapple, its tattered, beigey fall look is almost as nice as it is dressed in its spring greens.
The Forget-Me-Nots are also putting on their subtle spring show with their soft, mist-like haze of blue forming a perfect backdrop to the Mayapple and geranium ground covers. These lovely, dainty little flowers are an important early source of nectar for early emerging insects and butterflies.
In the woodlands surrounding our home, massive waves of Forget-Me-Nots fill sunny spots on the woodland floor spilling over the deer paths that zig zag through the forest.

Delicate native columbines and foamflower prepare to put on their spring display. The vibrant spring greens of the foamflower are hard to miss.
And, while spring greens are always a joy in the woodland garden, let’s not overlook the hints of colour that are already poking through the greens.
Just in time for our hummingbirds’ arrival, our native columbine are about to explode in red-and-yellow flower. A favourite early source of nectar for migrating hummingbirds, Columbine are another early spring favourite that needs to be in everyone’s woodland garden.
In the image above, Foamflower (Tiarella cordifolia) grows happily alongside a Columbine as part of one of our many newly created little woodland vignettes from last year. These were created from cut branches pruned from our larger trees and, rather than disposing of them, we “planted” them in the ground and planted woodland plants around them. Over time they will break down and add nutrients – various fungi – to the soil. For more on our woodland vignettes (log planter), check out my post previous here.
Joining our Columbine, of course, are the always popular bleeding hearts. Our clumps are already blooming in the back garden where they get maybe six hours of sun while the leaf cover is still sparse.

The leaves of native bloodroot form a nice clump alongside a grape hyacinth. It’s all part of our front garden’s ground cover along with non-native pachysandra and epimediums along with black-eyed Susans and other summer-blooming plants.
Both the Columbine and bleeding hearts are a photographer’s delight so make sure to get out and document them before they past their prime.
Right beside the Columbine, our foamflower (Tiarella cordifolia) is preparing to put on a show. It’s the first year with foamflower, so I’m looking forward to experiencing it in the garden and photographing it at its prime.


A bigger look of the spring garden shows the mini birch grove forming a canopy over the bubbling rock and dry-river bed that leads to the stepping stones of the pathway. Japanese maples and low-growing ground covers with larger ornamental grasses fill out the area as spring turns to summer.
Throughout the garden, ferns are unfurling, the eastern redbuds are beginning to put on their magnificent show and the Flowering dogwoods are hinting at what’s still to come.
I’ll let the following pictures tell the rest of the story.
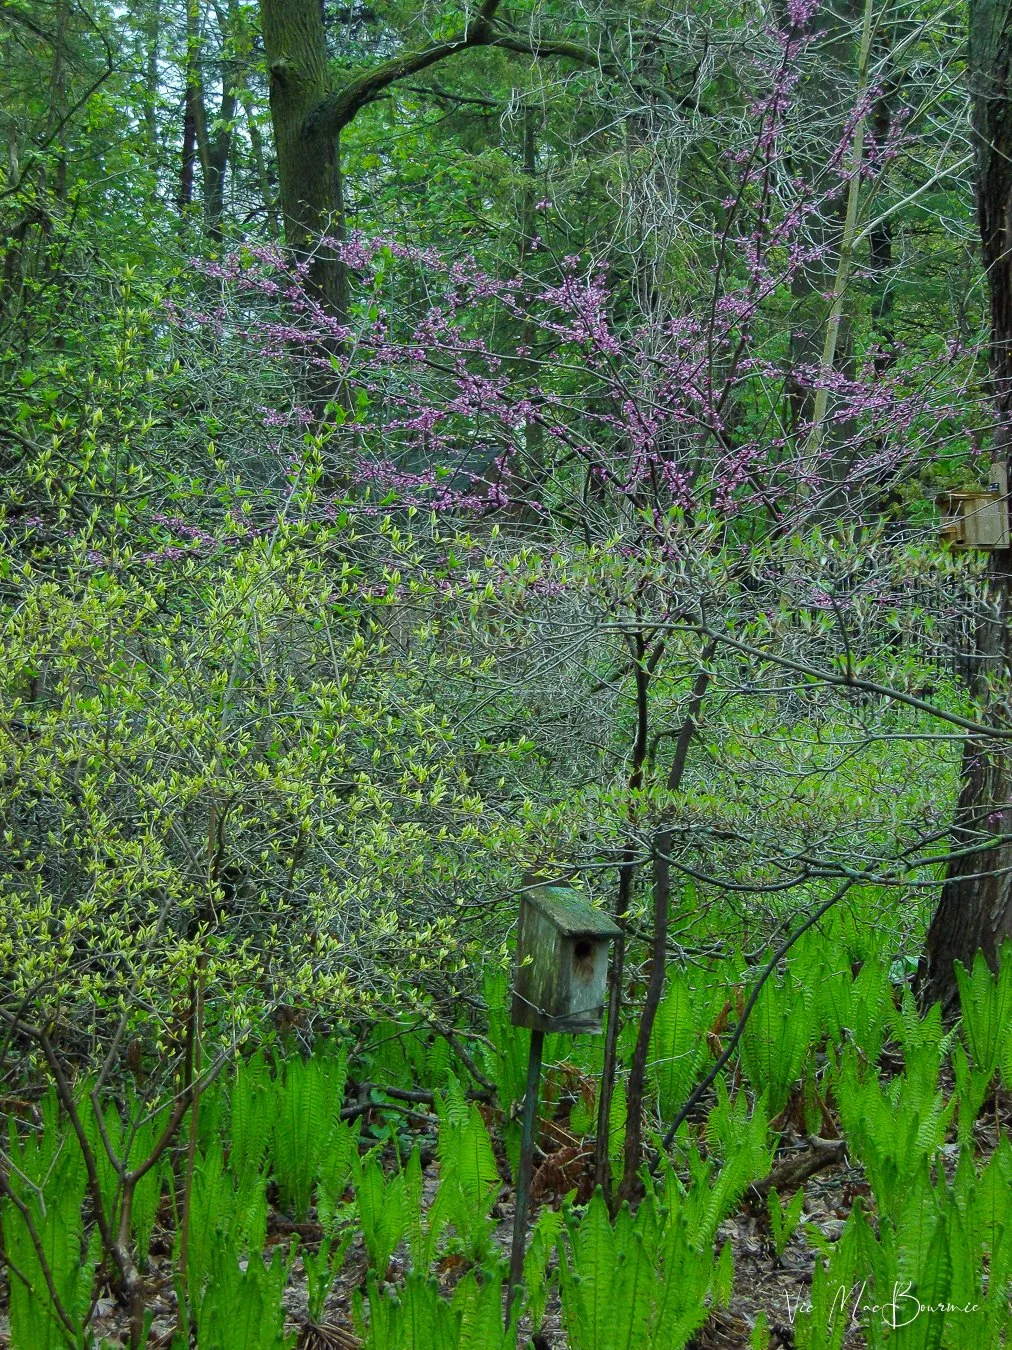
A multi-stem Eastern Redbud blooms alongside a Cornus Mas Dogwood in the fern garden.

The front woodland garden showing the creeping phlox, Japanese Maples and serviceberry tree.

Bleeding heart is always a fan favourite in any garden.


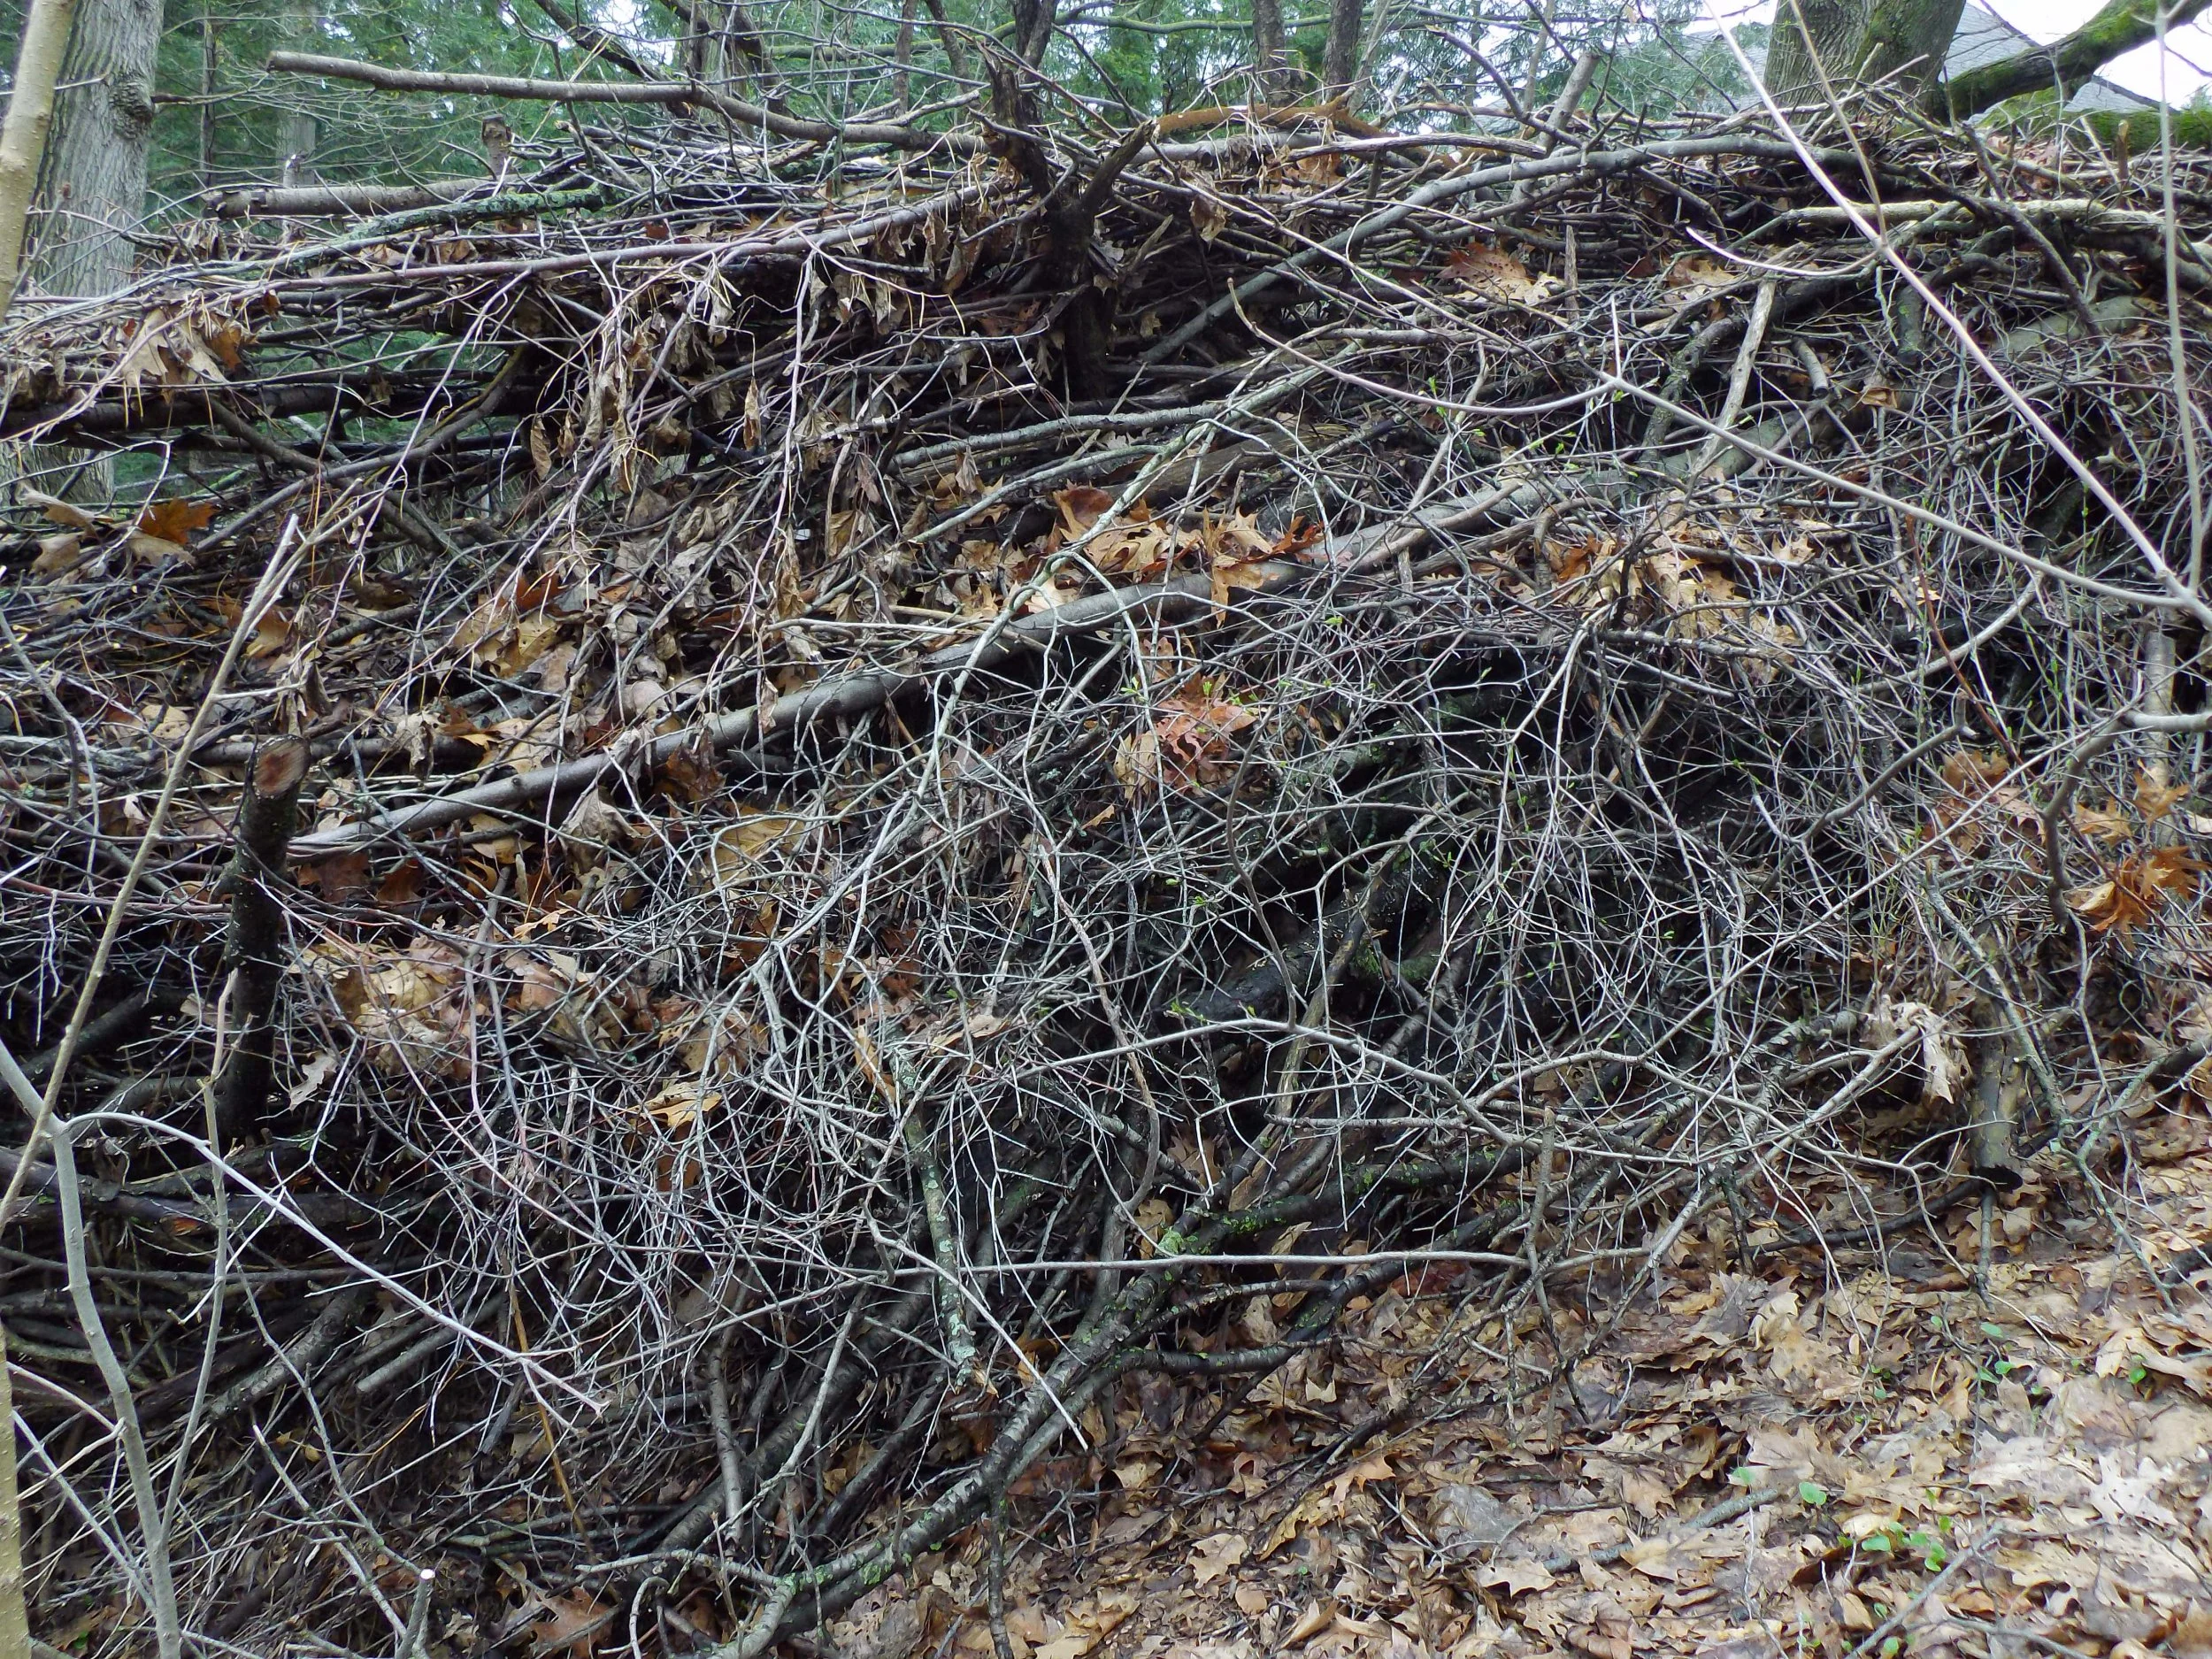
The “dead hedge” is coming to life
A dead hedge or brush pile just might be the solution to blocking an eyesore and/or creating much needed vertical wildlife habitat in your backyard.

This image shows my brush pile in the foreground with my neighbour’s dead hedge in the background. Although they look similar, the brush pile in the foreground has been built up over years and is much wider covering more ground, while the dead hedge has been built in just the past year and is taller than it is wide.
Dead hedge vs brush pile: Both can create excellent habitat
What do you do with hundreds of non-native trees and shrubs that need to be removed and disposed?
Well, you could do a lot worse than using them as building blocks for what is known as a “dead hedge.”
That’s exactly what my neighbour, Peter, has done with a grove of buckthorn that quickly spread across the back of our properties.
While I yanked mine out and threw them on the top of our massive brush pile, Peter used the larger ones as fenceposts while the smaller trees and branches became the horizontal “filler” for the hedge.
It’s made by stacking branches and garden waste between the posts, which don’t have to be dead trees. You could just as easily use store-bought wooden or even steel posts for the vertical support.
Think of it like a very vertical brush pile, but with a more utilitarian role to play in the landscape.
Using a dead hedge like a fence doesn’t just block views, it creates safe shelter for birds, small mammals, and beneficial insects as well as hangouts for snakes, toads etc.

The dead hedge my neighbour built to get rid of piles of non-native buckthorn and other clippings. Rather than put them out in the recycling, he smartly used small trees that were removed as vertical posts and then began piling branches and twigs between them to build a 15-20-foot dead hedge where birds and other small animals and insects can escape to or even build nests in the spring.
The dead hedge fence can turn even the smallest yard into a living habitat and act, not just as a boundary wall like a traditional fence would do, but as n inexpensive way to block a distracting view or eyesore. Now, some would say that the dead hedge in itself an eyesore – and I can understand that argument – but read on for ideas on how we can turn the dead hedge into a living one.
As the dead hedge slowly breaks down – replaced by newer garden material – it feeds the soil and supports fungi and microorganisms in the soil.
The result is another new home and safe place for birds, chipmunks, squirrels and any other living critters that can make use of the structure. Native bees, too, can also take advantage of the dead wood to lay their offspring, especially if you take the time to drill holes in some of the larger branches.
It probably wouldn’t provide the same potential habitat that a large brush pile provides, but its vertical space and dense branch structure provides safety for birds and small mammals looking to escape predators.
Set up a bird bath or bird feeder nearby and you will likely get lots of action.

Adding secret passageways in the brush pile in the form of plastic tubing gives smaller animals quick escape passageways for predators such as foxes.
Turn the dead hedge into a living one
I’m thinking the dead hedge would be the perfect place to grow flowering annual and perennial vines to hide the woody brown mass and create a colourful vertical spot for local wildlife to hang out. Vines that attract hummingbirds would be a great choice. In a shady area, consider flowering hydrangea or, even better, Virginia Creeper that offers fruit and lovely fall foliage.

This little red squirrel is comfortable among the many branches of either the woodpile or dead hedge.
Over time, the dead hedge can be built out so that it stretches across a larger area in the yard creating a natural source of privacy, a sound wall that fills with bird song, or a natural wall to create a shady wind break area and the perfect spot to grow woodland flowers.
Although the dead hedge looks a little messy in spring, my plan is to allow a number of flowering vines to grow up and over the hedge and create a lovely, living hedge with lots of nooks and crannies for birds and other wildlife.
Safe spot from predators
I’ve added a hanging bird/wildlife water source and a bird feeder nearby to introduce a greater variety of birds and other wildlife to the dead hedge, which gives our feathered friends and other wildlife a quick and safe escape from potential predators.
While the dead hedge may act like a barrier of sorts for larger mammals such as deer, it allows smaller animals to pass through it with relative ease – everything from red and grey squirrels and chipmunks, to possums, weasels and mice.

Jays, woodpeckers, warblers and lots of other birds can take advantage of the potential habitat and food source that the dead hedge or brush pile affords them.
Adding to the beauty and usefulness of the dead hedge, is the fact it is free to anyone who wants to take the time to put it together.
Another benefit of the dead hedge/fence is that it does not need to go together in one season –although if you had enough material it certainly could be built in a single season. It’s probably better to think of a dead hedge as a long-term project that can be added to on a yearly basis both vertically and horizontally until you get the hedge to a point where you are satisfied. From that point, simply add to it with your annual pruned branches or garden waste.
Your backyard wildlife will thank you.


Taking on Ticks in the woodland garden
Ticks can be both a real nuisance as well as dangerous. Here are some steps you can use to control and deter them in your garden.

One of the signs that greets visitors to the nearby woodlands around our home. Note that not all ticks transmit Lyme disease. In this area, the Blacklegged Tick is the one that can transmit Lyme disease. Thank goodness it is the American dog Tick that is most prevalent in our area. It doesn’t mean, however, that you want these little critters biting you and remaining attached for any period of time. Removing them can be a problem. We use a special little tool that makes removing them a little easier.
Steps to discourage ticks in the garden
There was a time as a young boy and teenager growing up in Southern Ontario when ticks were not a thing. In fact, I remember only a single location where ticks were present in Southern Ontario – Longpoint Provincial Park.
It just so happened that Longpoint on the Lake Erie coast was my favourite summer hangout. The beaches were the best around and on good days we could ride the waves.
And, although I spent a lot of time at Longpoint Provincial Park, still, I never encountered a single tick. In fact, during my entire childhood, through my crazy teen years and right through my 20s, 30s, 40s, 50s …, I never even really thought about ticks.
Those care-free days are gone.
It wasn’t until more recently that ticks have become an issue in our neck of the woods.
And have they ever.
Today, as I write this post, ticks have become a serious problem not only in this area but in our own backyard.
Last year, I needed precautionary Lyme disease medication after discovering an engorged tick on my leg (see image below). It had to have been attached for at least 24 hours. This year, after a little garden cleanup, my wife has already had two ticks attached and we have pulled a number both dead and alive off our dog. More recently, I have had to remove a tick off my back and have found several of the tiny sesame-sized ticks crawling on my hand and foot after going into the garden.
Not all the ticks may have been picked up in our yard, but I’m guessing most originated in the dry ornamental grasses and fallen leaves in the yard.
Of course, having a massive black dog is certainly a tick magnet, but even without Colby to bring ticks into the yard and eventually into the home, transitory animals and birds spread these little critters from property to property.
Ticks are one of the reasons I welcome Opposums on to the property whenever I see them. They are known to devour ticks by the hundreds even thousands.
Last year, after taking our dog into the nearby woodland, we discovered he was covered with ticks and, as a result, seemed to have an allergic reaction to being bitten in and around his face.
Now that was not a whole lot of fun.
Thankfully, he was on his regular tick medicine from the vet and the situation cleared itself up over a short time.
Bringing a boat load of ticks into your living space via your dog, however, is not something most of us want to do.
For more information check out this post about using Permethrin on your clothing https://www.nytimes.com/wirecutter/reviews/sawyer-permethrin-premium-insect-repellent-review/

This tick decided it was a good idea to crawl up my leg during a photo shoot in the fern garden. A knee brace stopped its forward progress and marked the spot to dig in and start drawing my blood. You can see how engorged he is compared to the image above of the various ticks. I’m not proud to say that I can report back that it was indeed its last meal.
Reasons for the rise in ticks
I’m no expert, but I can’t help but think the rise in our local tick population is the direct result of climate change. In past years, our bitterly cold winters killed any chance of ticks migrating north from our southern neighbours. But, as our winters warmed, new animals appeared along with plants and, of course, ticks – lots and lots of ticks.
Once established in the area, they are impossible to exterminate and, because they can potentially spread Lyme disease, they are not something to be taken lightly.
I had hoped this year’s severe winter would diminish the local tick population in the area. Instead, the deep snow cover, like a nice warm blanket, actually helped the ticks survive winter and left us with even more of the critters this spring.
Ornamental grasses such as these low-growing fountain grasses are perfect places for ticks to lie in wait for an animal – either wild or domestic to pass by and provide a free meal. Humans too provide a free meal for these annoying little insects that are incredibly small and easily go unnoticed until they have had their fill of blood.
The very nature of a woodland/wildlife garden almost guarantees you are going to have ticks if you live in an area where ticks are a problem.
In the entrances to the woodlands surrounding our home, large signs (See top image) warn that there are ticks in the area and to take precautions both for your own well being and for your pets - primarily dogs but also cats.
In fact, in hindsight, I’m thinking we may have lost one of our cats from a tick bite. Cats can get a number of diseases from tick bites.
According to Petmeds: Cats can contract several dangerous illnesses from tick bites, most notably Cytauxzoononosis (bobcat fever), Hemobartoneliosis (feline infectious anemia), Lyme disease, Ehrlichiosis and Anaplasmosis. Severe anemia, high fever, lethargy, and loss of appetite are symptoms. Regular, year-round tick prevention is the best protection.

Even in the fall and early spring, ornamental grasses provide the perfect spot for ticks. If possible, I like to burn the grasses in spring to reduce the possibility of ticks that survived winter.
Tips to deal with ticks in the garden
So how do we deal with them?
First off, it’s important not to use general insecticides to control ticks. Doing so will only eliminate other important insects that call your garden home.
Take the following steps before resorting to the use of any harsh insecticides.
Take a multi-faceted approach to controlling ticks
I think keeping ticks at bay is probably best accomplished through a series of actions meant to deter them from areas of the garden where you and your pets like to hang out.
A first layer of defence can be the plants we choose to place near the areas we most frequently visit – near the patio or deck or other sitting areas and pathways around the garden.
Ticks are known to hang out in ornamental grasses or any long grass so it’s probably wise to keep long grasses in areas of the garden where you won’t brush up against them on a regular basis. But, it’s not just ornamental grasses where these tiny insects can hide. Any foliage could be home to these little critters.
Use plants as a first defence
With this in mind, there are plants we can grow that are said to actually help repel ticks. Don’t expect miracles from these plants, but if they help even a little they are definitely worth adding to your garden, especially in heavy traffic areas.
The following is a list of six suggested plants that help deter ticks in your yard.
Lavender,
Mint
Marigolds
Catmint
Rosemary
Chives
Tick removal tool is critical addition to your kit
If you or your dog get bit by a tick and it is still attached, it helps to have a tool to remove it as quickly and painlessly as possible.. This premium tick remover (Amazon Link) will get the job done. It’s always a good idea to have one of these tools available even if you have never had to remove a tick.
Sprays to keep ticks at bay
The next line of defence I like to use is a spray – Mosquito Barrier – that is said to keep mosquitoes, ticks and fleas from attacking you and your pets. It’s important to note that this is not an insecticide and only acts as a deterrence.
Its primary use is to form a barrier against mosquitoes, but it’s listed to be effective against fleas and ticks as well.

These larger grasses are ideal spots for ticks to hang out and latching on to an animal –whether its your dog, a deer, racoon or even a person.

Mosquito Barrier is a premium quality product that, although a little pricey, uses industrial-grade garlic to deter mosquitos, and ticks. It is concentrated so it needs to be mixed with water before using. As a result, for most people, a single bottle should last several years.
Mosquito Barrier (company web site) comes in concentrated form so although it may appear expensive, a single bottle can last several years. Its main ingredient is industrial-grade garlic which gives off a powerful odour on application but eventually mellows out to a pleasant garlic smell – and who doesn’t like a little garlic.
In a small yard, you can spray generously around the perimeter of the property on plants, fences, trees and walls. In larger yards, it is probably better to just create a boundary around the areas you and your pets tend to hang out.
We like to give the area a spray about once a week and top it off after a rainfall.
So far, we have found it helps keep the mosquitoes aways so I’m sure it’s having some effect with ticks and fleas. I plan to use the spray much more this year directly on plants around the patio. The spray is available through Amazon, (link to Mosquito Barrier) but we purchased our bottle at our local RAW dog food store.

Tick Attack and other similar herbal-based products can be sprayed directly on our pets or our own clothing to keep ticks at bay. There are even recipes on line to create your own essential oil sprays.
Safe botanical/herbal sprays specifically for use on dogs and clothing
The next line of defence is a botanical-based spray used directly on both our pets and our own clothing to repel ticks. Again, it’s important to note that these are not insecticides they are a repellent. The main ingredients are essential oils that repel ticks and fleas safely.
If you don’t want to spray your dog directly, consider spraying a cloth and rubbing the cloth over the dog’s legs, chest and head being careful to keep it away from their eyes.

I have just added these Tick Control Tubes from Thermacell throughout the garden in the hope of knocking back the number of ticks. Most reviews suggest that it takes at lest a year of use to see a significant reduction in backyard ticks, but some report an immediate result.
Using mice to control ticks
Tick control tubes made by Thermacell are another defence that you may be interested in. Although these DO use an insecticide and are more aggressive than botanicals and other deterents, some users swear by them. They work in an interesting very targeted way by using garden mice to kill the ticks.
The concept is that mice take the cotton stuffed in the tubes laced with a natural insecticide and use it for bedding in their lairs. When ticks attach themselves to the mice and are taken back to the lair the insecticide kill the ticks without injuring the mice and their offspring.
I’m a little Leary about this approach but plan to try it this year to see how well it works.

These Tick Control Tubes are an interesting way to control ticks in your yard. They depend on mice and other critters to take the cotton balls back to their dens. When ticks go on the mice they are eventually killed by the plant-based insecticide.

Medication is a good solution for tick control, especially when you are in an area where there is a lot of tick activity. We are using Spimparica Trio, but there are alternatives. Getting your dog to eat the large pill monthly is not always easy.
Using harsh medicines to control ticks
Finally, using a focused medicine to protect your dog and cat from ticks is often a necessity, if you live in an area where ticks are abundant. If you live in an area where ticks are not a problem, you could probably skip this final defence method.
Not all dogs and cats react positively to taking these drugs or putting the medicine on them. The decision to go ahead and use these medicines should be made after discussing the possible cons with your veteranarian.
It’s important to note that the medicines do not kill the ticks until they actually bite the dog or cat. At that point the ticks die. Even while on the medication, it’s not uncommon to see a tick crawling on the dog. If you see one, just pick it off and dispose of it.
For more ideas on how to control ticks, you might want to check out this Amazon page of potential solutions.

Pentax VS20: A CCD-sensored travel camera ahead of its time
Pentax was ahead of its time when it unveiled its Optio VS20 portrait centric digital camera with separate shutter releases for the portrait and landscape modes. Did they foresee the future of social media platforms like instagram.
The Pentax VS20 is capable of capturing everything from garden landscapes with its expansive wide angle lens to the little critters that take up residence in the garden. The telephoto zoom was used to capture this little chipmunk in late winter when hints of snow remained on the ground.
Was the Pentax VS20 a digital precursor to modern-day Pentax 17 half-frame camera?
Say what you will about Pentax cameras, but this venerable Japanese company is not afraid to take risks. Unfortunately, not all of the risks prove successful.
The recent Pentax 17 half-frame camera might be a case in point. Although it did meet with initial success as one of the first film cameras to be released in recent times, with the exception of an avid hipster fan base, collectors and film enthusiasts – which, mind you make up a sizeable number of photographers – I’m not sure the camera attracted sufficient users to call it an overwhelming success. Add that to their even more recent Monochrome DSLR experiment, which has proven moderately successful to a narrow group of BW digital enthusiasts.
No one is saying these cameras are not great, only that their narrow base might not be enough to take the cameras over the top in regards to overwhelming success.

Never a huge fan of Pentax’s Optio series of cameras, the VS20 is certainly an exception, with both its good looks and very high build quality.
The concept behind the vertical shooting “Pentax 17” was twofold: first double the number of pictures out of a roll of 35mm film to save costs, and second; provide users with instagram-ready images already in the vertical/portrait format to perfectly fit the smartphone aesthetic on social media. All this wrapped up in a nicely built, pocketable camera that looks as good in your hand as it does on the table of your favourite trendy coffee shop.

A second separate shutter release and zooming mechanism on the top of the camera makes taking portrait-style images extremely convenient.
Bravo to Pentax engineers and designers for throwing caution to the wind and producing cameras no other mainstream camera company dared create.
Pentax’s forgotten digital social-media gem
To be honest, Pentax already had experience creating a camera that specialized in vertical images. In fact, it could be argued that their first attempt made a whole lot more sense than their latest film-based endeavour.
Wild geranium, Mayapple and Forget-Me-Nots take centre stage in the woodland garden wit the Pentax Optio VS20 capturing the scene in vivid greens.

The Pentax VS20 camera includes a Pano feature that stitches as many as three images together in the panoramic mode. Here, two images were stitched together (in-camera) to create this garden panorama.
Head-to-head with the smartphone
The problem, like many of Pentax’s adventures, was their first attempt was just too far ahead of its time.
The Pentax Optio VS20 was officially announced by Pentax/Ricoh on January 25, 2012 – just as 14-million or so smartphones with their built-in cameras saturated the market. Pentax’s answer was a pocketable camera with a 20x optical zoom and separate portrait and landscape shutter releases complete with zooming mechanisms and separate tripod sockets. For more information, check out the Pentax/Ricoh official site.
Now, you would be hard-pressed to name a smartphone that packed that much of a punch.

The Pentax Optio VS20 captures the early spring greens of ferns ad a Eastern Redbud.
For many camera enthusiasts and reviewers, the Pentax VS20 digital camera with its dual shutter releases – a traditional release and a separate vertical/ portrait release – was nothing more than an unnecessary gimmick to sell their latest travel camera in a large field of new digital camera releases.
One highly respected on-line review put it succinctly: “While ideally each new camera should have a special, unique feature that sells it on its own terms and distinguishes it from the pack, depressingly most don’t. But, in the case of the Optio VS20 from Pentax we don’t quite know whether to rejoice in or ridicule its points of difference.”
This highly cropped image shows the quality of the files even after extensive (50 Percent) crop. I think it also shows the classical film-like look provided by the CCD 16mp sensor.
Whether photographers of the day ridiculed or admired the camera, it’s almost as if the Pentax designers knew that the world would eventually be obsessed with vertical/portrait images in the never-ending search for as many social-media “likes” as possible.
Today, smartphones dominate that market, but there was a time when the very nicely built, easily pocketable little VS20 travel camera may have competed with that same market.
If the VS20 included modern-day bluetooth capibilties to quickly and easily transfer images from the camera to your smartphone, it may well have become the darling of social media.
Instead, it faded into the history books along with so many other excellent point-and-shoot cameras.
But back to why this camera might be worth considering again today.
For one thing, the new film-based Pentax 17 will set you back $400 or so dollars, while the digital equivalent can be purchased for a fraction of that. I got a mint condition never used version – for a mere $35 Canadian, quite possibly the best deal ever for the camera – but typical used versions go for about $100.

Portrait mode made easy
The Pentax/Ricoh VS20’s portrait mode makes capturing social-media-ready images easier than ever.
Feature-packed camera
Not only was the camera already designed to shoot vertical images, it sported a highly sought after 16 megapixel CCD sensor and an Intelligent Zoom function that extended the core 20x optical range (22.-580mm in 35mm terms) by 144x to provide a lens reach of a ridiculous 4032mm in terms of a 35mm film camera. You might not want to push it that far, but in case of a once-in-a-lifetime picture, it’s nice to know the possibility is there for the taking.
Oh, and have I mentioned that it even sported two tripod socket mounts for more serious photographers who were either looking to achieve the ultimate in sharpness, or just wanted to be included in the picture. (It’s also wise to use a tripod when you are extending the camera’s lens to these extremes.)
Again, you’re not going to get that type of reach on your average smartphone.

Portrait mode made easy
Pentax’s convenient portrait mode shutter release and zoom ring turns the camera into the ultimate social media darling.
Add a CCD-based sensor
And, yes, you read that right the camera was equipped with a 16mp CCD sensor. If that means nothing to you, a little research will quickly unveil the cult following for CCD-sensor-equipped cameras that are said to be able to obtain a more film-like image quality.
I can’t say the results a film-like, but I can verify that the jpeg images coming out this camera are very natural with excellent colour and depth. Unfortunately, it does not shoot in RAW.
Hipsters everywhere must be losing their minds to have missed such a great little CCD-based social media darling camera.
But, it’s not only hipsters. Any photographer looking for an everyday carry might want to take the time to track down this sweet little travel camera from 2012 that sports a host of goodies under its hood.
Features galore
Let’s take a Quick Look at what this camera offers.
I’ve never really been a fan of the Optio series of Pentax cameras because they lack many of the ultimate control more advanced photographers look for in a serious camera.
The VS20 is no different – lacking the ability to put the camera in shutter or aperture priority let alone in fully manual. That aside, the camera’s multiple modes are enough to satisfy most photographers’ wants and needs.

This image of a church shows the nice colour, sharpness and depth possible with the CCD-sensored camera.
The trick is, like many point-and-shoot style cameras to learn how to get the most out of these cameras’ shooting modes.
And, like most cameras in Pentax’s Optio line, the VS20 sports a plethora of modes – 20 to be exact –, presented across two screens and tabbed through using the multi directional pad.
The intelligent Auto Picture mode and Program Auto join with natural skin tone portrait mode, handheld night snap, night scene portrait, night scene, digital panorama, plus the self-explanatory landscape, blue sky, sunset, flower and digital shake reduction options. The second screen and second dozen options cover kids, pets, generic portraits, food (enhances saturation and contrast), fireworks, surf and snow, sport, plus the digital effects filters which comprise fish eye, sketch and miniature, along with text mode and frame composite mode – adding a border to your image but fixing the pixel count at 3MP at the same time.

These colourful chairs in an old barn were too good to pass by. Despite the relatively low light, the camera was able to capture the scene nicely.
More serious photographers will choose the “program Mode” where we can narrow or enlarge the focus area, as well as activate AF tracking. Exposure can also be tweaked between +/- 2EV, the camera’s dynamic range can be adjusted for highlight correction, shadow correction or both, plus the likes of shake reduction, face detection, blink detection and the digital zoom implemented if desired.
That’s just a taste of what this highly useable, should I say '“enjoyable” camera offers users.
Of course whether you are on vacation, out for a walk with your dog or just capturing your garden images, this very pocketable camera can be a daily carry to capture memorable images.
There is a standard (for its era) 3-inch, square-ish 4:3 aspect ratio LCD with anti reflective coating to compose and review stills and 1280x720 pixels video clips. The screen still holds up as a higher resolution than one would expect of an entry-level snapper of this era at 460k dots.
The black faceplate on the back adds a little sophistication to the camera’s aesthetic – with white being an alternative choice on some cameras.. There’s also a gentle curve to one end by way of a hand grip, plus a rubber pad at the opposite end for those preferring the two-handed approach when lacking a tripod.
The camera also features an extremely good macro feature that allows the photographer to get extremely close-up images. Perfect for flower and insect photography.
The camera’s 16mp CCD sensor is more than enough to capture beautiful landscape images. The wide-range zoom has the ability to crop the image in-camera to get the ideal composition.
Image quality
All of the images in this review were taken using the 16 megapixel “best” JPEG setting, which gives an average image size of around 4.5Mb.
Is this camera capable of matching what you would get out of your mirrorless camera or DSLR? Of course not. Is it capable of capturing your garden in full bloom, the critters that share it with you as well as your pets, children, grandchildren and even your next vacation – absolutely.
Not only is it more than capable, you might find using the camera is actually fun. It is certainly small ebough to fit into your pocket so you have it with you wherever you go.
That’s not to say it’s the perfect camera.

Pentax’s VS20 was never considered an “expensive” camera with an original retail price at about £199.99 / $249.95 new. Today’s prices on the used market make it an absolute steal if you can find one in good shape. (I got mine for under $50 Canadian virtually brand new and never used.) Ebay.com has them listed anywhere from around $60 to almost $200 U.S..
That said, the focus is slow. As a result you may find some of the images are not sharp - it’s a little hit-or-miss at times if you are snapping pictures quickly. It’s important to give the camera time to get focus before clicking the shutter. You might want to turn the “beep” up so you get an audible assurance before clicking the shutter. Also, because you don’t have complete control of the shudder speed, don’t be afraid to use the built-in flash or a tripod to ensure sharp images.

Many modern digital cameras offer an “extract colour” feature that takes an image and converts it to black and white but pulls out a single colour of your choosing. The VS20 allows for blue, red and green to be extracted after the original image has been taken. In this case, I chose to extract red.
Images maintained detail into the corners for the most part at maximum wideangle, with minimal if any barrel distortion too. Brighter conditions can result in over exposed highlight detail plus there can be some pixel fringing between areas of high contrast, but the latter only becomes an issue on close inspection.
In terms of low light performance, the camera can be used up to ISO800 with acceptable results. Higher ISOs begin to degrade the images more than you would want, unless it is a critical shot. If you have access to high quality post processing software, these high-ISO problems become less important.

The Pentax Optio’s close-focus capibiities are also very impressive. This hand held image was taken from just a few centimetres away. The lichen and mosses are tiny.
Having said that, the camera has a night scene mode and, as long as you have a steady surface at your disposal, it’s possible to achieve really quite acceptable results in low light situations.
One last annoying problem I have discovered. The four-way button is easily pushed with your thumb which, in my case, sends the camera into a 10-second timer mode causing me to miss a couple of shots of birds and other wildlife. Not a big deal if you are aware of it, but it did cause me to miss a couple of potentially good shots.

It’ not hard to see how the camera’s CCD sensor was able to capture the fine details and colour of this old barn door.
Specifications
Camera Type: Super Zoom Compact CameraSensorTypeCCDSize1/2.33’’ CCDTotal Pixelsapprox. 16.00 megapixelsEffective Pixels
16.56 MP
Still16M (4608x3456), 12M [1:1] (3456x3456), 12M [16:9] (4608x2592), 7M (3072x2304), 2M [16:9] (1920x1080), 640 (640x480)Movie
Compatibility AVI (Motion JPEG)
Resolution :
HD: 1280(1280 x 720): approx. 30/15 fps.
VGA: (640 x 480): approx. 30/15 fps.
320:(?320 x 240): approx. 30/15 fps.
SensitivityAuto ISO, manual (80 ? 6400 ISO)
Shake ReductionCCD-shift Shake Reduction
LensFocal Length 5-100mm, equ. to 28-560mm in 35mm, aperture : F/3,1 - 4,8
Digital Zoom
Optical Zoom:20X
Digital Zoom: Approx. 7.2 X
Smart Zoom Approx. 30x at 7M, approx. 144X at 640 (including optical zoom)
Construction11 elements in 8 groups (1 aspherical elements )
Focusing SystemTypeTTL autofocus with contrast détention
FunctionsManual Focus, Infinity-landscape
Focus Range (automatic)
AF points
Standard
1.6m - infinity (at tele setting)
3-point AF, Spot AF, Auto tracking AF (anticipating moving subject), 0.4m - infinity (at wide setting)
Macro
0.1m - 0.5m (at wide setting)
Super Macro
0.01m - 0.2m (middle zoom position)
ScreenType3’’ LCD Colour screen
Resolutionapprox.460K points
ShutterTypeElectronical shutter with sheduled automatic exposition
Speed1/2500 - 1/4 sec. 4 sec max. (Night Scene mode setting)
Exposure systemMeteringMulti-segment metering
Exposure Modes Auto Picture, Program, Natural Skin Tone, Handheld Night Snap, Night Scene Portrait, Night Scene, Digital Panorama, Landscape, Blue Sky, Sunset, Flower, Digital SR, Kids, Pet, Portrait, Food, Fireworks, Surf & Snow, Sport, Fish-eye, Sketch, Miniature Filter, Text, Frame composite, Movie, Green.
Compensation+/-2EV (1/3 EV steps)
FlashType Integrated auto flash control
Automatic activation in low light conditions.
ModesFlash-on and Flash-off modes "Red-eye" reduction function
Effective Range
Flash range Wide: approx. 0.2 ? 5.1m (ISO Auto) Tele: approx. 1.6 ? 3.3m (ISO Auto)
Exposure ParametersModes Mode: Standard, self timer,burst shooting, high speed burst (L,M,H****), Remote control DRE: "Dynamic Range Enlargement", shades compensation: high lights
Face Recognition Face recognition AF&AE is available for all modes up to 32 faces, Smile Capture, Blink Detection, animal recognition
White BalanceAuto, Daylight, Shade, Tungsten, Fluorescent, Manual setting
Digital Filter B&W/Sepia, Toy Camera, Retro, Color, Extract Color, Starburst, Soft, Fish-eye, Brightness, Miniature, Natural Skin Tone, Sketch
MovieRecording
Sound : Yes
Movie : Shake reduction Mode (SR)
Duration : Depends on memory card capacity
Resolution :
VGA (640x480), approx 30/15 fps
QVGA (320x240), approx 30/15 fps
HD 1280 (1280 x 720p), approx 30:15 fps
EditingRecord as pictures, spilt movies.
PlaybackDigital Filter
B&W/Sepia, Toy Camera, Retro, Color, Extract Color, Starburst, Soft, Fish-eye, Brightness, Miniature, Natural Skin Tone, Sketch
Options
Slideshow, Image Rotation, Stretch Filter, Small Face Filter, Digital Filter (B&W/Sepia, Toy Camera, Retro, Color, Extract Color, Starburst, Soft, Fish-eye, Brightness, Miniature, Natural Skin Tone, Sketch), Frame Composite, Movie Editing, Red-eye Compensation, Resize, Cropping, Image Copy, Protect, DPOF, Startup Screen
StorageInternalApprox. 16MB
ExternalCompatible with SD, SDHC, SDXC memory cards
File Format
Photo format : JPEG (Exif 2.3), DCF 2.0, DPOF, PRINT Image Matching III
Video format : AVI (Motion JPEG), with sound
Special FeaturesFeatures
Text size: Standard, large
World time : 75 cities, 28 time zones
?Language
English, French, German, Spanish, Portuguese, Italian, Dutch, Japanese, Danish, Swedish, Finnish, Polish, Czech, Hungarian, Turkish, Greek, Russian, Thai, Korean, Simplified Chinese, Traditional Chinese
PrintingFormatInterfaceInterfaceUSB2.0 (Hi-Speed), PC/AV terminal (NTSC/PAL, mono)
PowerSource
Battery : Rechargeable D-LI122 Luthium-ion battery
Optional AC adapter also available
PerformanceRecording capacity approx. 200 shots and 180 min in play mode.
DimensionsHeight60mm
Width108mm
Depth34mm
Weight191g (charged with battery) Approx. 170g (body only)
CompatibilityPCWindows XP SP3, (SP3), VistaTM and 7MacOS X 10.3.9 or aboveAccessoriesIncluded SoftwareSoftware: (CD-ROM) S-SW121
Kit ContentUSB cable I-USB7, AV-IAVC7 video cable, rechargeable battery Li-ion D-DLI92, battery charger D-BC92, O-ST104 strap and software.
OptionalOptional AC adapter


Fujifilm’s powerful, fun travel cameras pass the test
Fujifilm’s travel cameras are capable of impressive results whether you are travelling the world or just wandering into your garden for a day of flower or wildlife photography.

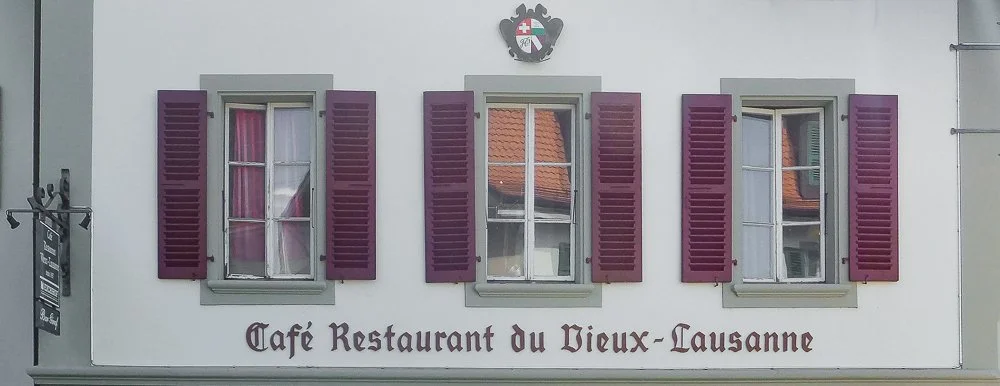
The harbour in Lausanne's Ouchy/Olympic district in Switzerland.
Fujifilm F660EXR: From thrift-store find to priceless European vacation images
It takes a special camera to find a spot in your travel pack just weeks after picking it up at a local thrift shop for less than a couple of fancy Swiss espressos.
That’s exactly what happened recently when my wife and I flew to Switzerland to board a once-in-a-lifetime Rhine River cruise. I had been trying to decide what cameras would be small enough to take everywhere I went in Europe, but also could provide the quality I wanted to ensure I would not regret the choice when I returned home with hundreds maybe even thousands of images.

Sunset over Amsterdam from the deck of our ship taken with Fujifilm F660EXR travel camera.
The choice was the Fujifilm F660EXR travel camera from 2012 that boasts a 15X compact superzoom with a 35mm equivalent lens ranging from a very wide 24mm to a more than adequate 360mm.
This combination meant there was nothing standing in the way of capturing the incredible vistas of the Rhine River valley complete with its magnificent castles, or the details of same castles from the comfort of our deck chairs. All this capability packaged with Fuji’s EXR technology and a 1/2"-inch, 16MP CMOS sensor with a generous 3.0-inch 460,000 dot LCD viewing panel.

The Fujifilm F660EXR quick startup helped to catch this image of a woman in red walking beneath an impressive Swiss flag in the city of Lausanne.
For the beginner photographer who cares little about such details, these specs simply translate into a very capable camera.
But the impressive stats were not the only reason I chose to pack this camera rather than a host of other more capable possibilities filing my camera case.

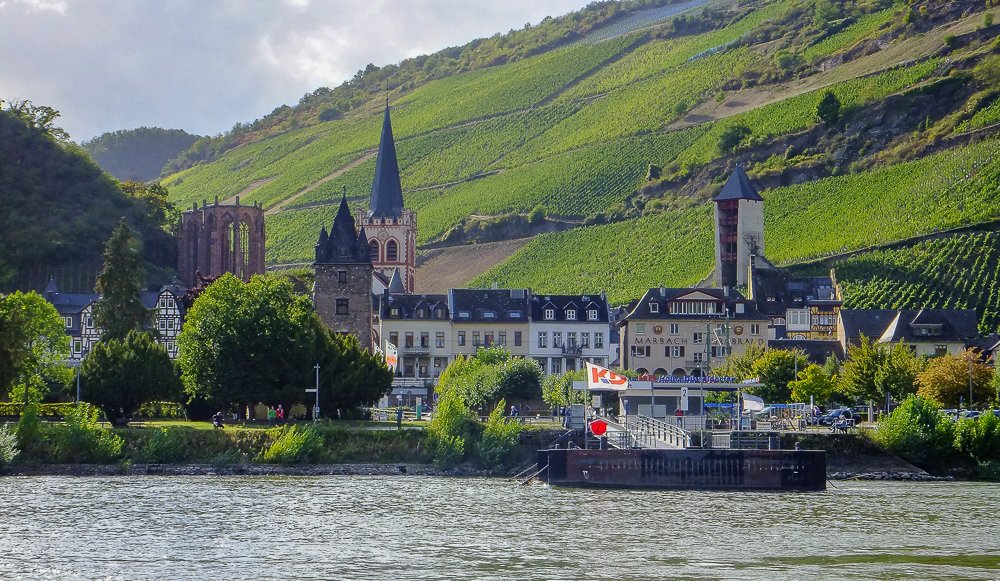
The Fujifilm F660EXR’s zoom range was able to frame this image of a church while cruising the Rhine River.
What really convinced me was the camera’s superb performance discovered in the few weeks prior to the cruise. After running the camera through its paces, I gained complete confidence that it would deliver. That, and the fun factor of using this little gem to capture the spring woodlands around our home made the decision easy.
Now, to be fair, a big part of the decision revolved around the camera’s pocketability and, once again, the Fujifilm F660EXR proved too good to be true. Fuji made this thing so streamlined that there wasn’t a pocket it didn’t like.

A day cruise of the beautiful Lake Geneva in Switzerland taken with the Fujifilm F660EXR.
I confess that Fuji’s magnificent little travel camera was not the only camera in my pack. The other travel companion was the miniaturized Pentax Q complete with a couple of its tiny lenses. Both cameras gave me everything I needed to capture the beauty of Switzerland and the Rhine River.
Fujifilm F660EXR
In this post, however, I am going to focus on the Fujifilm. For my separate post on the Pentax Q, click here. For my post on shooting street photography while on vacation, click here. And, for my post on capturing window box images in Europe click here.
As travel cameras go, the Fujifilm EXR F-series pack a real punch including their almost cult-like film-simulation settings including Velvia for vivid colours, Provia for a more natural look, Astia for a softer effect (excellent for portraits and people pictures) and, of couse, B&W and sepia settings.
Add to the film simulations a huge selection of picture modes for special effects or difficult exposure situations. A particularly useful addition is Fujifilm’s impressive pro-focus selection that creates an image with a soft background that can be varied depending on your preference.
Windows onto the world captured by the Fujifilm F660EXR.
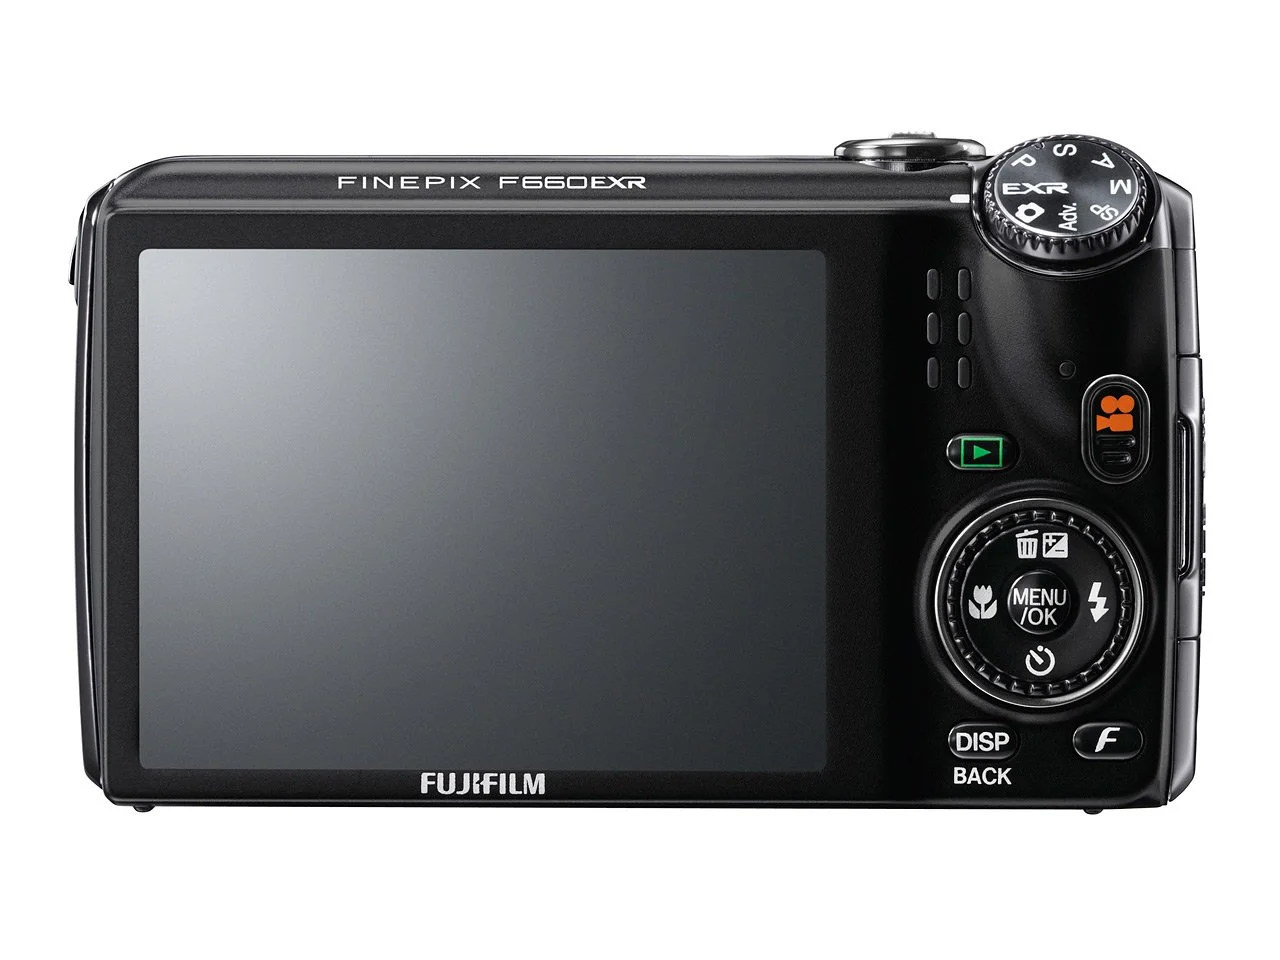
Back of the Fujifilm F660EXR
The list of features the camera includes are too numerous to list here but of note is the ability shoot in every mode imaginable from manual to aperature and shutter priority for those who want to take full control of the camera, to the EXR mode that looks at the scene and selects the best option for the finest results. Unlike a typical “program” mode – the Fujifilm has this mode as well – the EXR uses the camera’s most advanced abilities to ensure high-quality images even in the worst or most difficult lighting conditions often involving taking a series of images and then incorporating them into a single, high-resolution image.
The above images and the following ones are just a few of the images taken on the European vacation. For more images taken on with the Fujifilm F660EXR film camera – including some of my favourite images not taken on the vactation, watch for my photo gallery which will be appearing here at a later date.
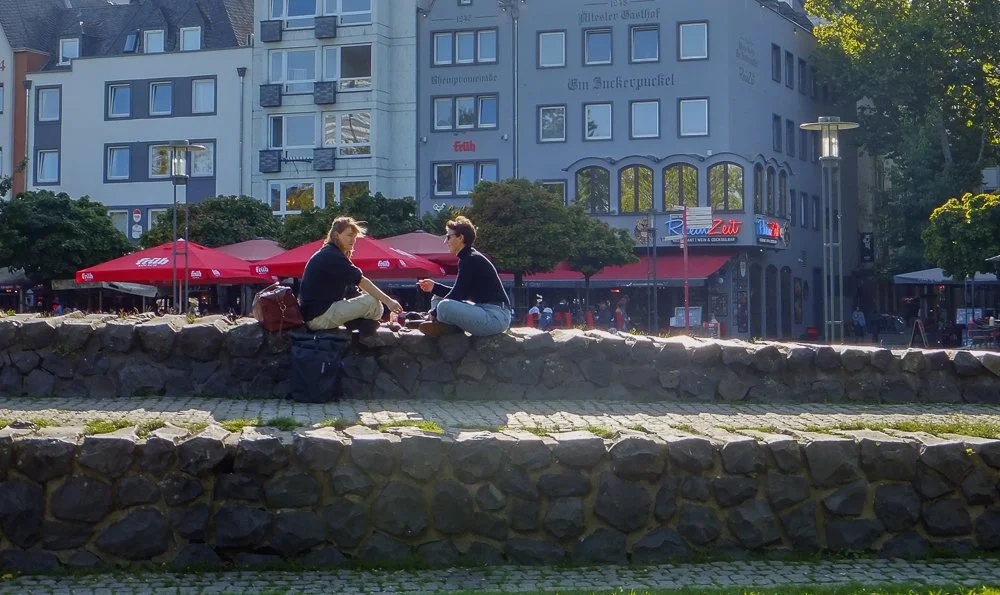
The long focal length of the Fujifilm allowed me to capture these two talking from a comfortable distance.

Olympic statue
Lausanne, Switzerland is home to the International Olympic Committee. This beautiful statue sits outside the Olympic museum. Originally photographed in colour and converted to B&W.

Fujifilm F660EXR Specs
Body type: Compact
Max resolution: 4608 x 3456
Effective pixels: 16 megapixels
Sensor size: 1/2" (6.4 x 4.8 mm)
Sensor type: EXR CMOS
ISO: Auto, 100, 200, 400, 800, 1600, 3200 (6400 and 12800 with boost)
Focal length: (equiv.)24–360 mm
Max aperture: F3.5–5.3
Screen size: 3″
Screen dots: 460,000
Max shutter speed: 1/2000 sec
Storage types: SD/SDHC/SDXCUSBUSB 2.0 (480 Mbit/sec)
Weight (inc. battery): 217 g (0.48 lb / 7.65 oz)
Autofocus
Contrast Detect (sensor)
Multi-area
Center
Tracking
Single
Continuous
Face Detection
Digital zoom Yes (2x)
Macro focus range: 5 cm (1.97″)

A street performer performs under a bridge in the city of Cologne, Germany.

A harbour in Lausanne, Switzerland.
Based on the Fujifilm FinePix F-series history, there were at least 10 distinct EXR-model travel cameras released between 2009 and 2013.
10 distinct EXR-model travel cameras released between 2009 and 2013
These cameras were characterized by the EXR CMOS sensor technology, designed for high-resolution, low light, or high-dynamic-range shooting in a compact, portable body ideal for travel photography or as an everyday carry camera.
Key models in the Fujifilm EXR F travel zoom lineup included:
F200EXR in 2009 – the first to feature the EXR sensor
F80EXR/F85EXR (2010)
F300EXR/F305EXR (2010) introduced Phase Detection AF
F500EXR/F505EXR/F555 (introduced in 2011 adding GPS and RAW capabilities
F600EXR/F605EXR/ (introduced in 2011)
F660EXR/F665EXR Introduced in 2012
F770EXR/F775EXR introduced in 2012 along with the 20X zoom
F800EXR/F820EXR introduced 2012-2013
F800EXR/F820EXR introduced in 2012-2013
F900EXR introduced in 2013
The Fujifilm FinePix F660EXR is a 15x compact superzoom built around the company's EXR technology. It features the same 1/2" type 16MP CMOS sensor as the co-announced F770EXR, along with the same 3.0" 460,000 dot LCD but loses the more expensive camera's zoom range, GPS and Raw-shooting capability. It still offers an impressive 24-360mm equivalent stabilized zoom and 1080p movie shooting.


Lensbaby: Perfect partner for flower photography
The Lensbaby Velvet: Perfect companion to take your flower photography to new heights.

My first impressions of the Lensbaby Velvet 56.
If you wanted to pick the perfect partner for flower photography, it would be hard to beat a Lensbaby.
“What the heck is a Lensbaby,?” you may ask.
Think a specialized lens (system) that is almost designed specifically to photograph flowers. And, not just your typical flower photography, Lensbaby is all about encouraging photographers to take a creative approach to flower and garden photography using built-in, selective-focus techniques.
Suffice it to say that Lensbaby offers a selection of different lenses for most of the major camera brands that uses various “selective-focus” techniques giving photographers incredible opportunities to expand their creative approach to flower photography. Although the lenses are not limited to flower or garden images – they also excel at portrait and landscape photography – there is no question that garden and flower photography is certainly their sweet spot.

A creative approach
The selective-focus approach can be subtle or extreme depending on the F-stop you select. Using a high f-stop like f5.6, f8 or f11 with the Velvet lenses creates a very subtle effect that is almost unnoticeable as you reach f8-f11, but the velvet look becomes much more obvious at f4 through f2.
In the company’s own words: “Lensbaby revolutionized creative photography forever with our unique award-winning creative-effect camera lenses. Known for their distinctive in-camera effects, our lenses and optics allow photographers to highlight specific areas of an image while creating effects that can't be mimicked.”
This post is going to focus on my first impressions of the Lensbaby Velvet 56 after taking it to the local public garden greenhouse and putting it to use for a couple of hours one afternoon in the cold of winter.

Lensbaby lenses have been around in different forms since 2004, but they have taken giant steps in just the past few years with the introduction of their Velvet series of lenses – the 28mm, the 56mm and the 85mm.
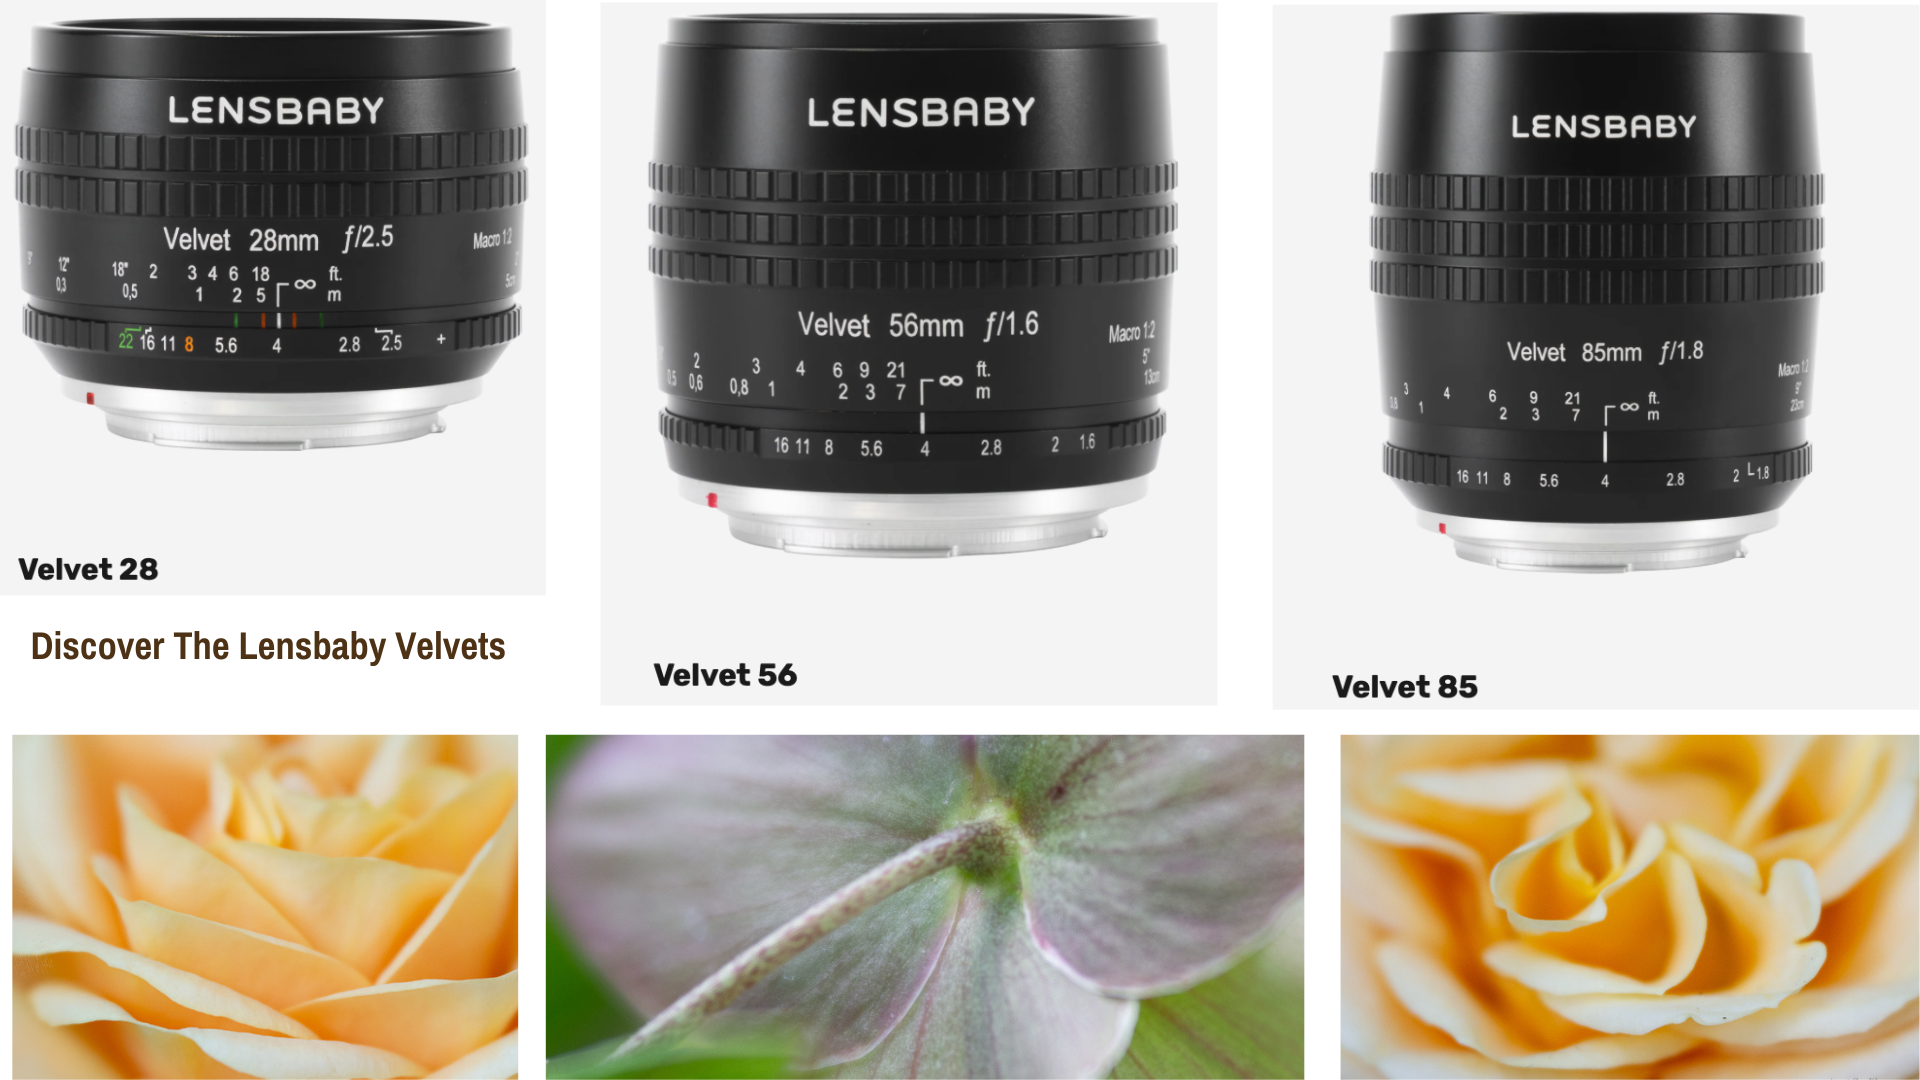
The three Lensbaby Velvet lenses pictured here from the wide angle 28mm to the 85mm telephoto lens, with the 56 mm sitting right in the middle sweet spot.
Check out Amazon for the complete listing of Lensbaby lenses and accessories, including a book about using the various Lensbaby products.
Lensbaby describes the effect as: “The Velvet effect is … designed to produce images with a uniquely soft and velvety appearance, reminiscent of classic portrait lenses from the past. They combine a sharp central focus with a smooth, ethereal glow in the out-of-focus areas, resulting in images that exude a romantic and timeless quality. The Velvet effect is particularly well-suited for portraits, still life, and any subject where a touch of artistic flair is desired. It adds a sense of depth and emotion to the image, enhancing its storytelling potential and evoking a sense of nostalgia. With its distinctive rendering and dreamy aesthetic, the Velvet effect allows photographers to create images that are both visually stunning and emotionally compelling.”
Okay, no mention of flower and garden photography, – a real miss on their part – but trust me, you will love the results.

So here are just a few more images made with the Velvet56 in just a few short hours in the greenhouse. All the images were made, handheld with an Olympus EM10 digital camera.
Although shooting handheld is a lot easier and fun than lugging around a tripod, I prefer to use a tripod if possible to ensure accurate focus and to force me to slow down and fully explore the possibilities each flower offers.
Lensbaby lenses are all manual-focus and can be difficult to get pin-point focussing accuracy at times because of their inherent soft-focus attributes. Focusing the lenses closed down (at f8 for example) and then opening them up to f5.6 -f2.8 prior to capturing the image is always a good idea. I find using a focusing aid such as a hoodman (amazon link) on the back of the camera’s focusing screen can go a long way to ensuring proper focus.

Learning to use the Velvet line of lenses is not difficult. Besides having to manually focus the lenses like vintage manual focus lenses, and setting the f-stop manually, the lenses simply mount on your camera and are ready to use. In most cases it is best to set your camera to use aperture priority. This way you can let the camera choose the ISO setting and the shutter speed to get proper exposure.
In conclusion, I recommend anyone who is serious about flower or garden photography to seriously consider adding one of the many Lensbaby lenses to their camera bag. The lenses are often available at very good prices on places like Facebook marketplace, e-bay or other on-line locations.
You can also check out camera outlets such as KEH, BH cameras and Henry’s cameras.


Quality over quantity: The importance of good bird seed
High quality bird seed sourced as locally as possible can make a significant difference in the number and variety of birds you are able to attract to your feeders.

A Goldfinch waits its turn to go to the finch feeder.
Buy locally grown for the best seed
Trying to save a buck when it comes to bird seed is not a wise decision… for a lot of reasons.
I found that out recently when I decided to pick up some cheap bird food at a local store known more for, let’s say, its car parts rather than bird food.
The specialty bird store I usually buy my seed from is in the next city over and involves a 20-minute drive, so I kept putting it off until it was too late and I needed to quickly restock my supply before a snowstorm hit.

A composite of a goldfinch and dark-eyed junco, the two birds that have taken to the new nyger seed.
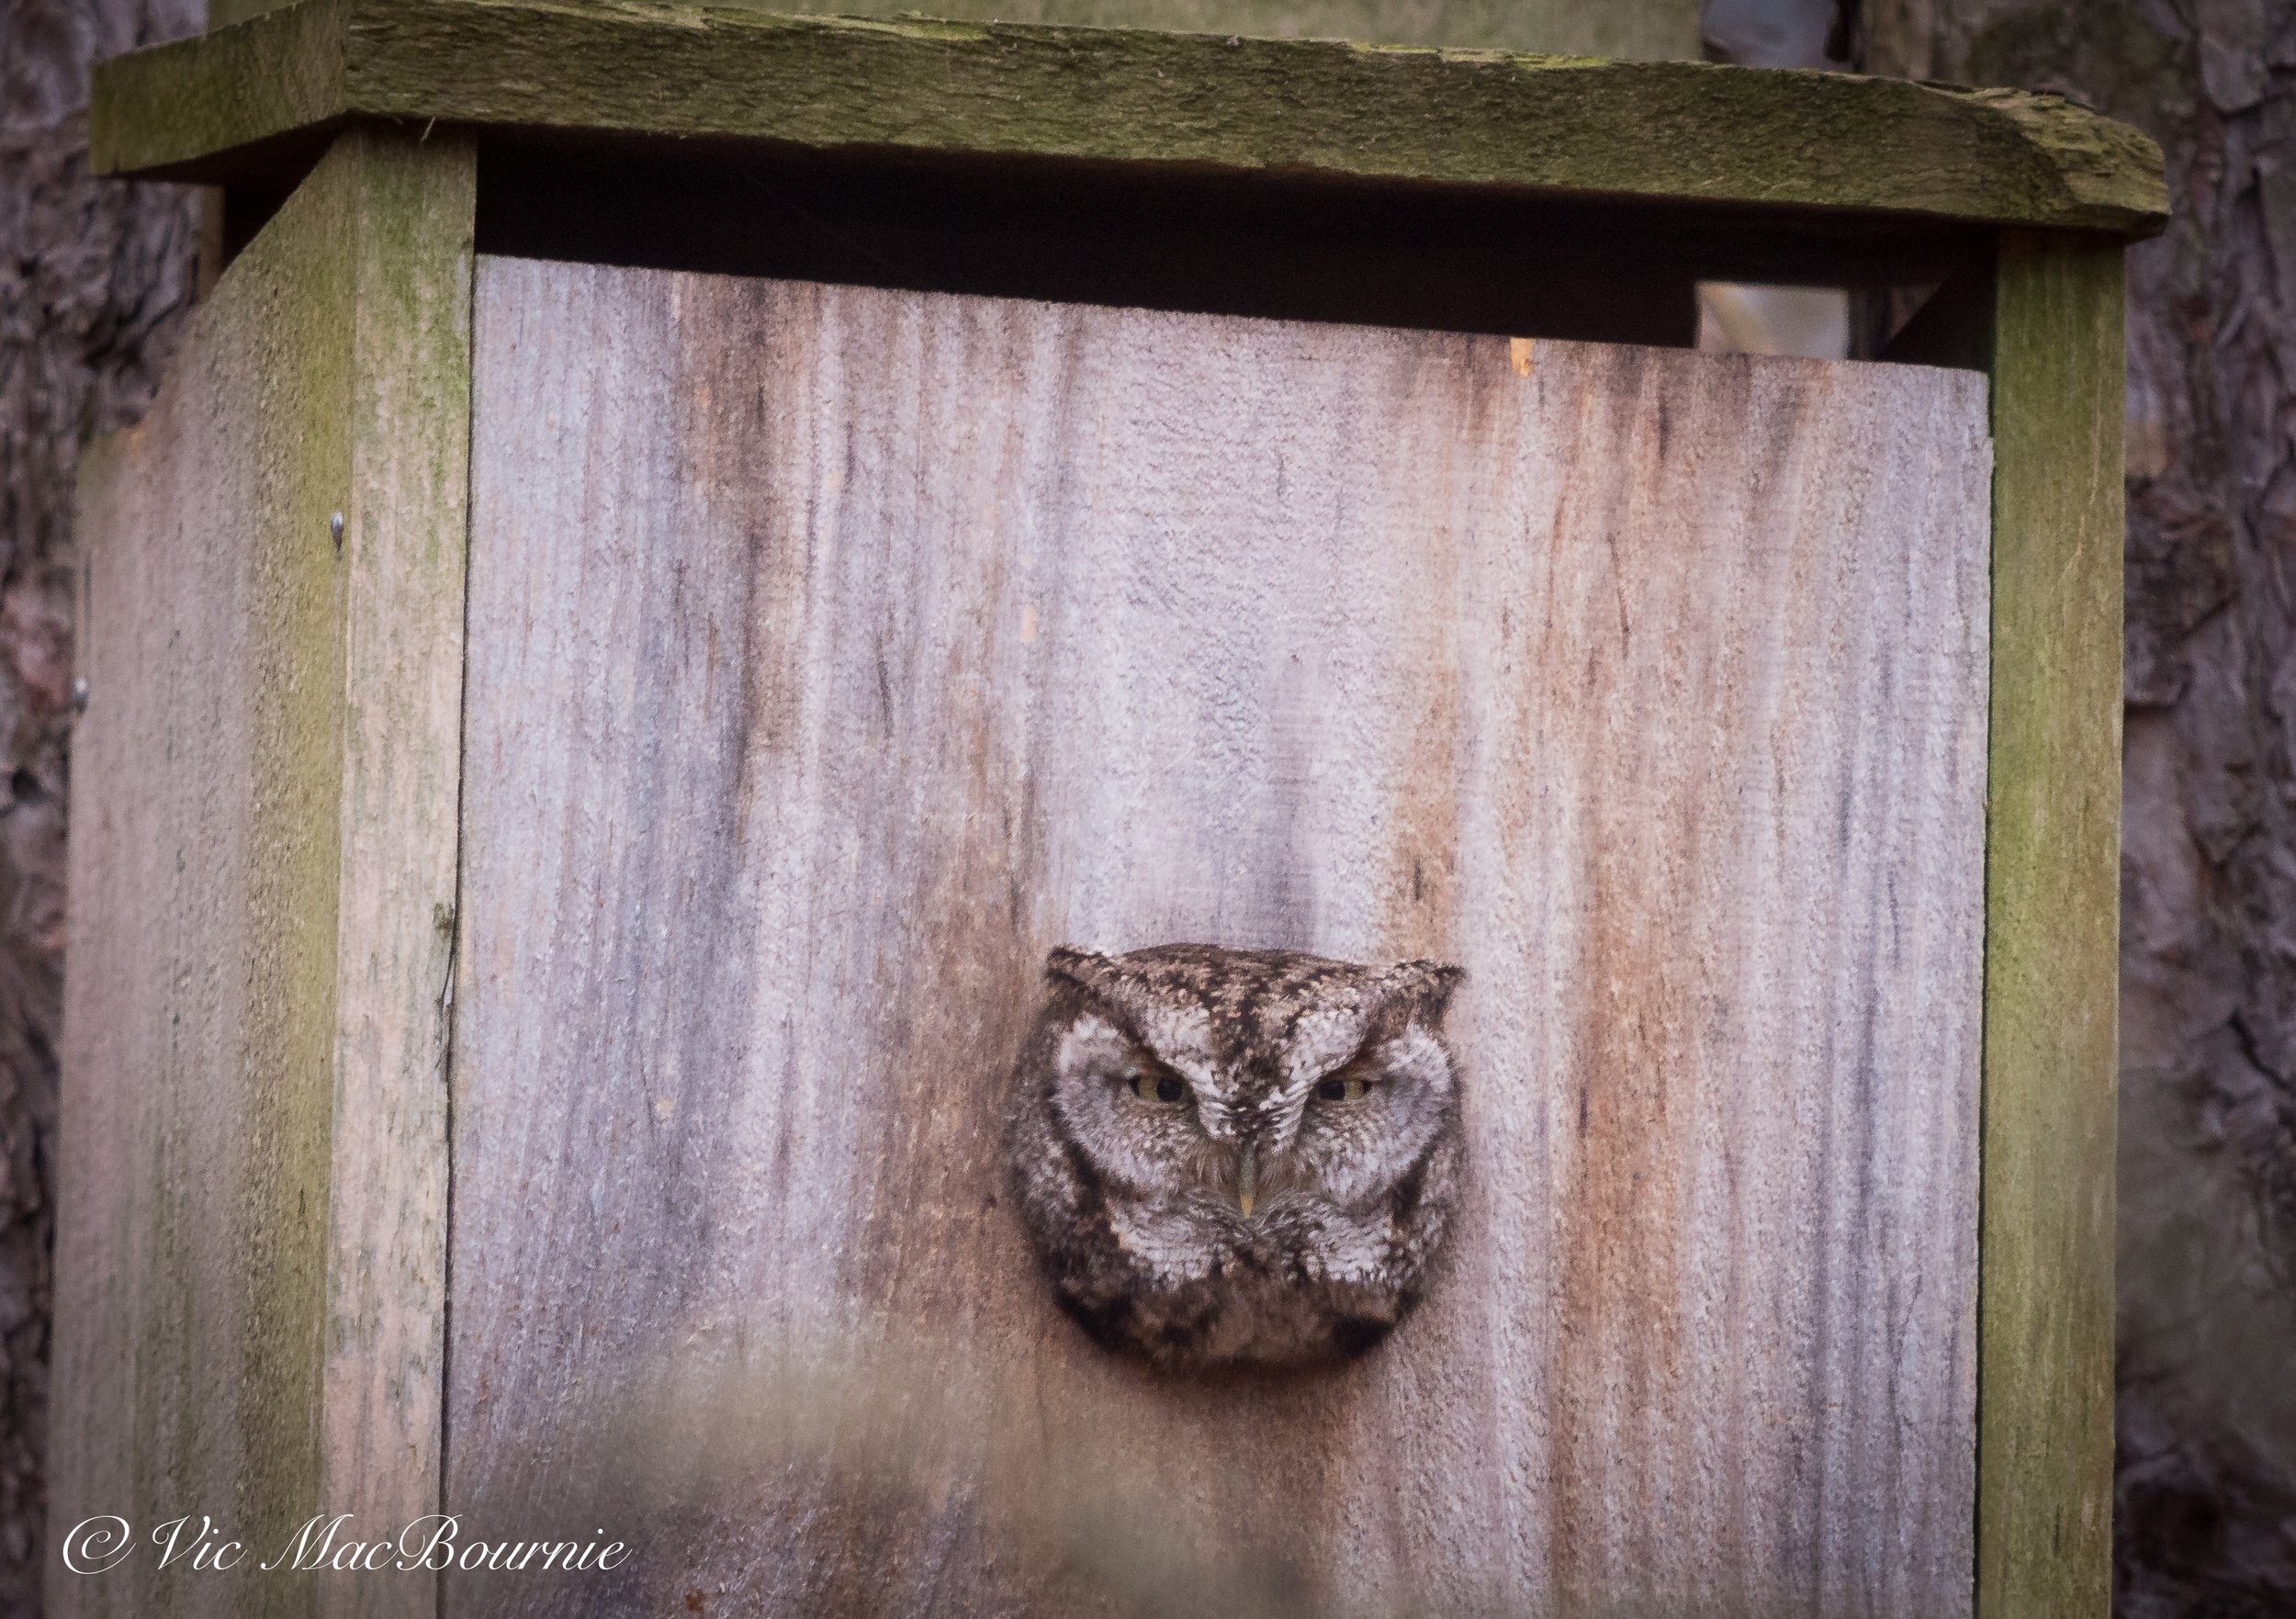
The result is a large bag of bird seed that is maybe okay for the local squirrels and mice. (I’m actually putting the seed beneath our owl box hoping to attract mice to it to provide a ready-made food source for our little screech owl who lives in the yard.)
“Not only will a higher quality of seed attract more birds to your yard, it will attract a greater variety of birds.”
But, in searching the internet for a closer specialty store that stocks the seed cylinders I love so much, I discovered The Urban Nature Store – a Canadian-based bird and nature store that just happens to be located right in the small town where I live.
Turns out it’s been hiding just a couple kilometres away in plain sight for close to a year.
Why is this important? Because it verified what I already knew but choose to ignore to save a buck – high quality bird seed makes all the difference in the world. Not only high quality seed, but preferably seed that is locally sourced.
Not only will a higher quality of seed attract more birds to your yard, it will attract a greater variety of birds.
Let me explain.
On my first visit to The Urban Nature Store, I picked up a bag of nyger seed and a 25-pound bag of what they call their “no-mess blend” of bird seed.
My existing nyger seed was bringing in a grand total of zero gold finches, juncos or even sparrows, but within one day of filling the feeder with this new nyger seed, I had flocks of Juncos waiting in line to get their fill of this black gold. Today, I have a combination of juncos goldfinches and chipping sparrows lining up at the nyger feeder to get their fill of this important, high energy winter food source.

Cardinals, bluejays and a host of woodpeckers have reappeared in the yard since using a more locally sourced bird food.
There is a good reason why the old nyger proved unattractive to our backyard birds – it had simply dried out probably before I even brought it home. (For more on Nyger seed, go to my earlier post here.)
A few days after refilling the nyger feeders with this locally-purchased seed, I emptied our regular feeders at our main feeding station that was full of the cheap seed and replaced it with the no-mess blend seed from The Urban Nature Store. I also put one of the store’s seed cylinders up and within hours the feeding station was boiling over with birds lining up for a taste of this new seed. Cardinals, Blue Jays, Goldfinches, Dark eyed Juncos, mourning Doves, sparrows and a mix of woodpeckers including red-breasted and downy, just to name a few.

Dark-eyed Juncos and Goldfinches are devouring the new Nyger seed to the point where I am having to refill the feeder every couple of days.
This was more bird action than I ever really got from even the best seed from my “other” specialized bird store in the next town over. This was truly remarkable.
The mess-mix is packaged in Canada using local and international ingredients, and combines sunflower hearts, peanut halves, dried cranberries and raisin. The mix is perfect for those who want to serve a variety of premium seeds with no messy leftovers. No shells means everything is eaten. The Nature Store reports that the seed mix is very popular with cardinals, chickadees, warblers and finches. Not sure about warblers, since they are primarily insect-eating birds.
And, since I have been using this seed, the number of birds at our feeding stations has only grown steadily.

Even the woodpeckers have returned with the new seed and seed cylinders from the Urban Nature Store.
“So what’s the difference?” you may ask.
Besides being a high-quality seed, an important difference is where it was sourced and the closer to home the better. This happens to be a Canadian-based store that sources much of its seed locally.
Who knows where big box stores source their seeds from, and I know that the other “specialized bird store” I purchased my seed from in the past was American based and likely sourced much of their seed from the U.S.
The closer you can purchase your seed, the more success you are likely to have. If you are based in the U.S., look for seed that was sourced nearby. The same holds true for U.K. based readers.
In the case of nyger seed, which mostly comes from Africa, the critical factors are how old the seed is and, if it has been overcooked in ovens that remove the natural oils that give the seed its nutrients. Purchasing from a specialized bird food store helps guarantee high turnover and is less likely to leave you buying old seed that has not been handled properly.
Not only has the seed from my local Nature Store been a magnet for local birds, the seed cylinder that I purchased is still going strong more than a week after mounting it, despite continued snow and rainfall that often prematurely weakens other seed cylinders I have used in the past. The fact it has held up so well means an extended run for the woodpeckers rather than the seed cylinder breaking up and falling to the ground for the squirrels and other critters.
If you have taken the time to check out The urban Nature Store link here, you will find that it is a wholly-owned and operated chain of Canadian stores with its head offices based in Toronto. It does offer mail-order for some products for anyone who does not live near one of its 9 store locations in
Ancaster/Hamilton
Etobicoke/Toronto West
Kingston
Markham
Mississauga
North York/Toronto East
Oshawa
Pickering
St. Catharines
I encourage all my readers to check out their impressive web site and support a truly Canadian company.
However, I recognize that we have many American and UK followers who cannot or choose not to purchase from The Canadian based Urban Nature Store.
All I am saying is that whenever possible – especially when it comes to purchasing bird seed – buy it from a local supplier. If the results I am having means anything, It really does make a difference.
Fresh bird seed that comes from a locally sourced supplier can make all the difference in the world to your bird feeding success.


Luminar Neo’s AI module shines as an educational assistant
Luminar Neo chooses to us Ai as a learning tool to help beginner photographers.
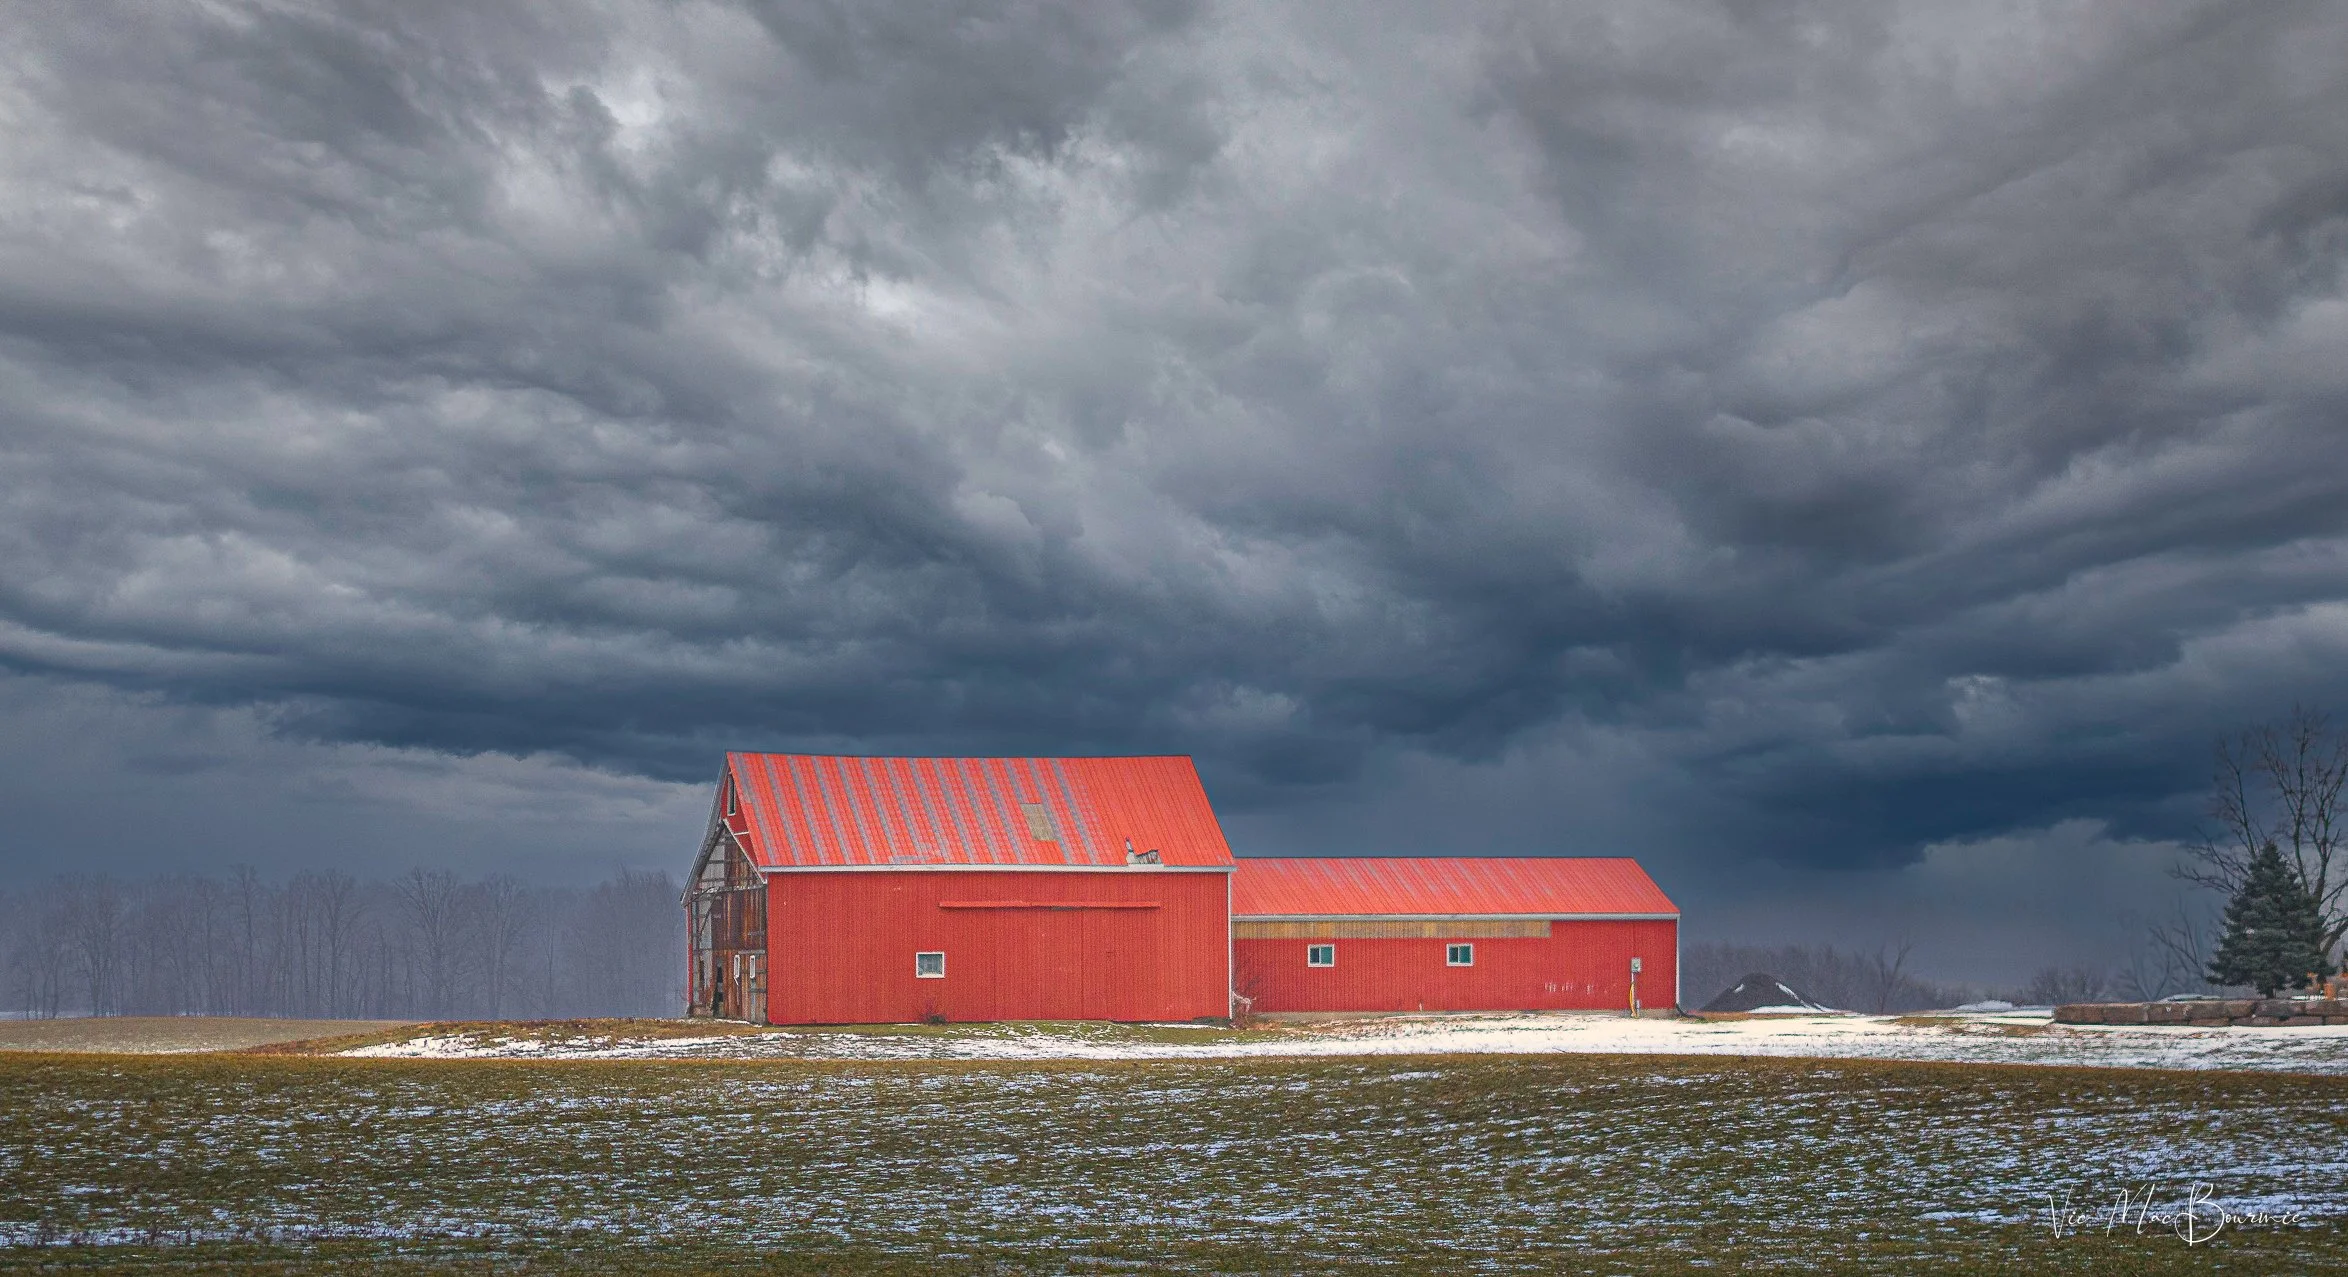
This image of red barns lit up dramatically against a stormy sky was created with a number of post processing modules. It’s important to note that the above image was NOT made with Luminar Neo’s new Ai module. In fact, an attempt to replicate it with the AI module proved fruitless. However, it’s equally important to know that the educational resources Luminar Neo’s new AI tool provides photographers – especially beginners – will help give them the knowledge they need to transform their images and create images like the one above from the original pictured below. The creators of Luminar Neo’s AI assistant believe that It is more valuable to know how to properly edit and create images than expect the computer to do all the work.
Using Ai as a learning tool
Whatever you think of Ai, there’s no denying that it is here to stay. The question many are asking is: Will AI be used for good, or for evil?
The answer to that question is still being written. Luminar Neo, however – unlike many other photo processing programs – is putting its support on the side of good.
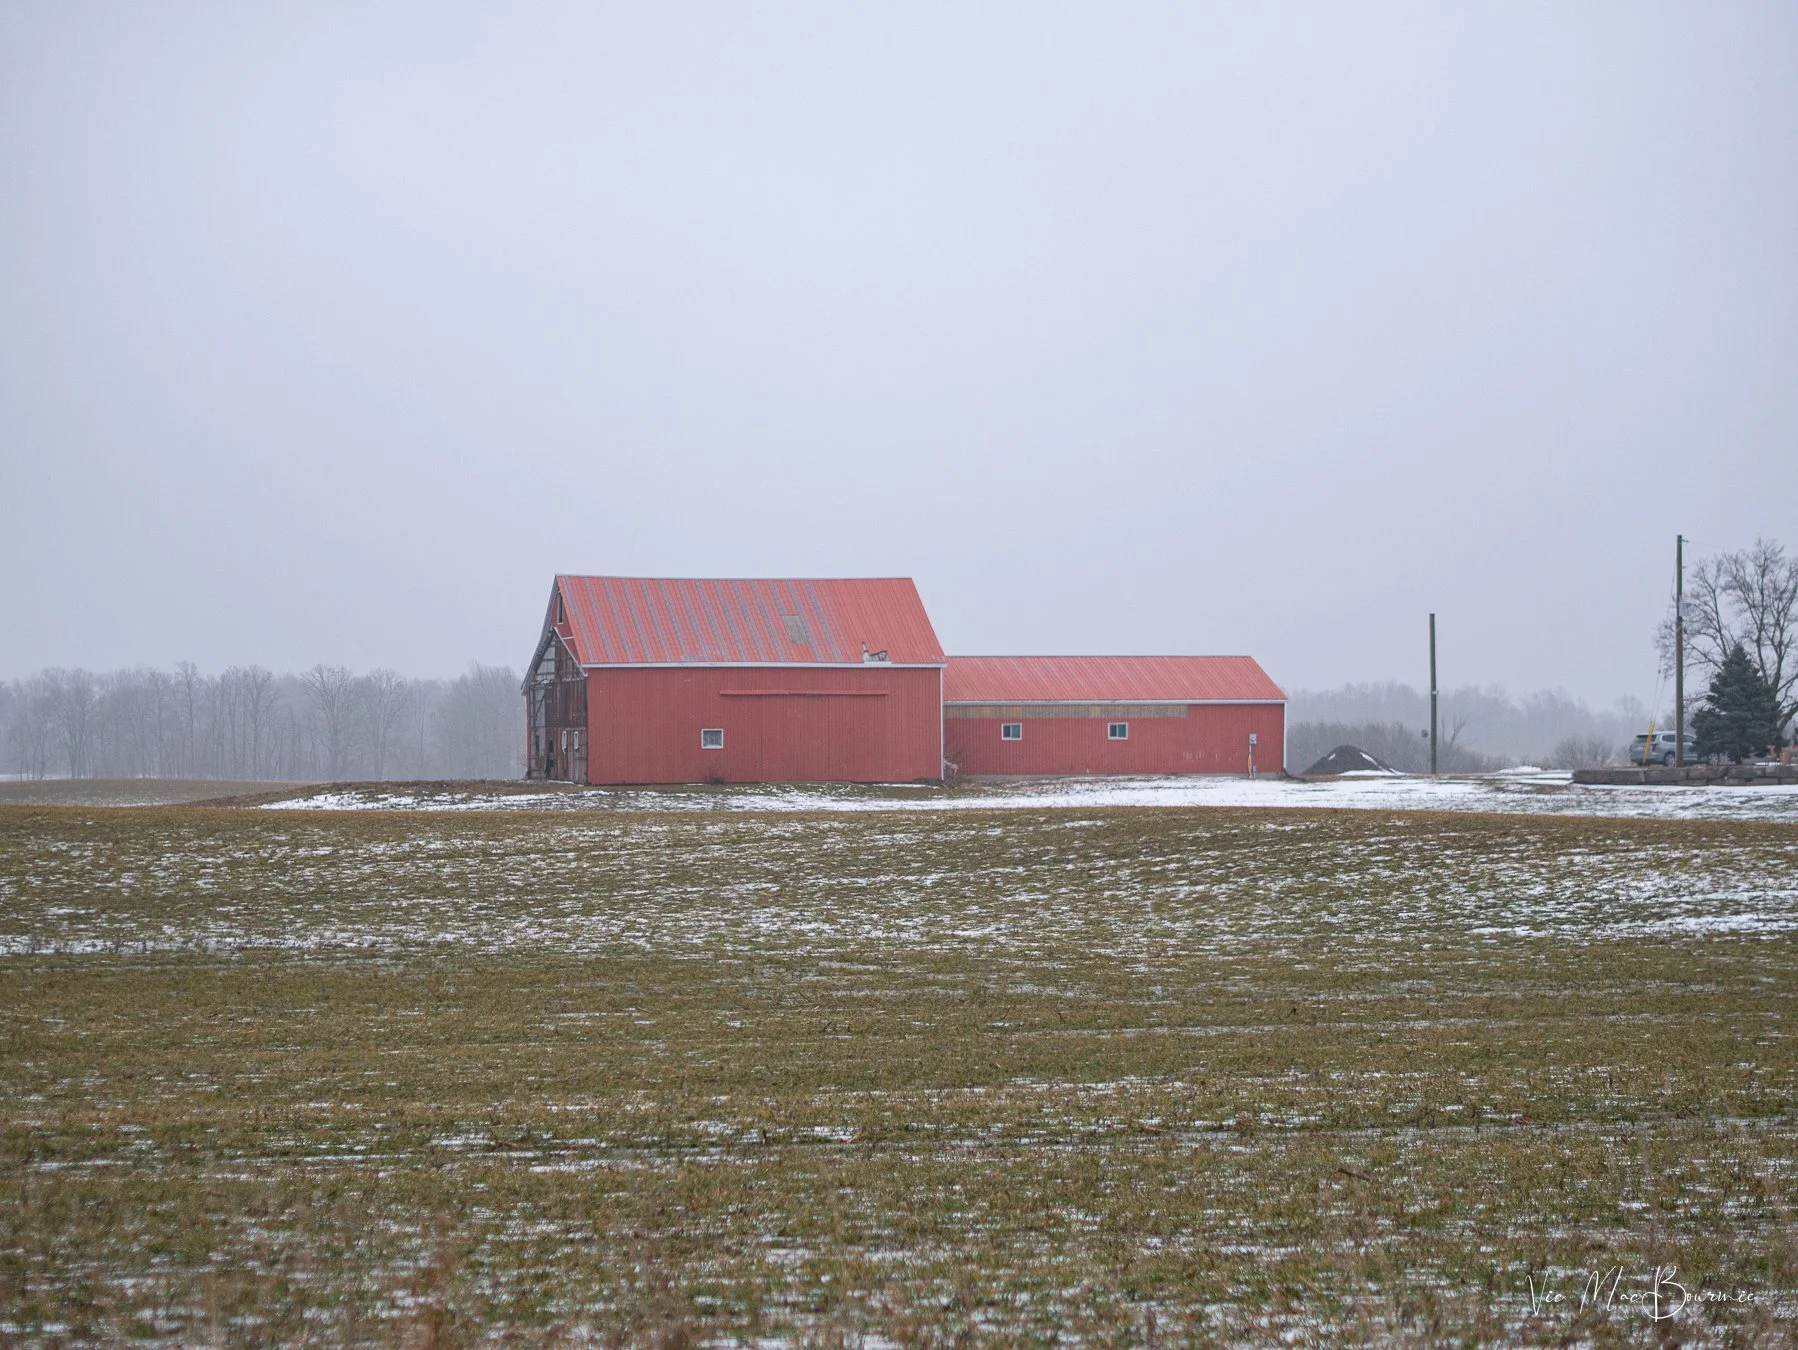
The original image straight out of camera shows distracting elements, a bland sky and uninteresting lighting.
To be more precise, Luminar Neo is tapping into the power of AI to use it as more of an educational and learning tool, than one to dramatically manipulate images.
At least that is my initial impression after putting it to the test with a number of my images. The focus seems to be at least as much about education as it is about transforming images.
Understanding the capabilities of modern photo editing programs and techniques has never been more important.
After all, getting the most out of our images, whether they are from our latest vacation, pictures of our kids, grandchildren or flowers in our garden, is the goal for most of us.
The before and after pictures of the red barns are examples of how, with a little knowledge, we can transform boring images into dramatic ones simply by understanding a little about post processing techniques.
So how does Luminar Neo’s AI assistant help us achieve similar results?
The image below shows one of three suggested edits from the Luminar Neo AI assistant module. The image is much better than the original, but falls short in comparison to the full edited version at the top of the page.
Over time, however, we the AI assistant teaches us how to achieve desired results by explaining what tools were used and making suggestions on how the image can be improved.
The above image is one of three suggestions Luminar Neo’s AI assistant suggested. You can see the suggestions and a detailed analysis of the above image in the Edit 1 description. You can also see that the suggested improvements are still rather subtle compared to the top image. Similar analysis are provided for Edit 2 and Edit 3.
How it works
Luminar Neo’s AI Assistant is available in both the Presets and Edit tabs and users can simply input text prompts to get AI Assistant’s editing suggestions.
There are two types of prompts.
Action prompts, like “Enhance this photo,” provide tailored recommendations with three adjustment sets and live previews, while How-to prompts, like “How do I remove this object?,” offer step-by-step guidance and buttons to quickly find the right tools in Luminar Neo.
It’s like having a personal editing advisor at your fingertips, helping you explore creative possibilities and discover the best tools and workflow for every image. You can use text commands in all Luminar Neo languages.
Back to our discussion about using AI in our work flow.
Knowledge about the tools available helped me create the top image. The original image’s sky was replaced and dramatic lighting was added in Luminar Neo’s Light Depth module.
“For the beginning photographer who has not yet perfected the art of post processing, this AI module is a tool that promises to transform their images over time and equip them with the knowledge they need to “make” outstanding images.”
In the past, we took pictures, today we make images
In photography, we often talk about “making” images rather than simply taking them. In the past, that most often was referring to “making” images in-camera during the analogue era of photography. Making images today with modern post processing can be taken a step further to include anything from minor enhancements to the photograph and removing distractions, to completely changing the image by adding elements not in the original image.
I’m not here to debate the validity of the different “levels” of enhancement, except to say that every photographer has to define the line they are not willing to cross. If you take a photojournalist approach to your photography, only minor enhancements are appropriate. If, however, photography is more a creative outlet for you, the same restrictions would not apply.
Important note: If you are looking to dramatically transform your images using ai, chances are you are not going to find those capabilities in this version of Luminar Neo’s AI module.
What you will find, however, is the ability to make positive, yet more subtle, changes to your images, while at the same time getting a thorough education on, not only what the program is doing to the image, but how the photographer can take control of the post processing and add their own creative effects using Luminar Neo’s wide range of creative modules.
For the beginning photographer who has not yet perfected the art of post processing, this Ai module is a tool that promises to transform their images over time and equip them with the knowledge they need to “make” outstanding images.
It might be the best use of Ai in any photographic post processing program. Understanding how to use post processing tools is much more important than just telling your computer to do the work. Luminar Neo does exactly that by adding three informative text-based explanations of changes it suggests for the particular image.

How to choose
This image is the result of rather subtle changes made in Luminar Neo’s new ai module. See edit 2 for the list of enhancements added to the image by the ai module.
A good illustration is this image of a baby picking flowers at a local garden.
Once the Ai module is opened in Luminar Neo, the photographer is faced with two questions: 1) Typing in a command to enhance the image; or, asking the ai module how to use the tools available in Luminar Neo to make changes to the photograph.
The first suggested prompt is a simple one and a good starting point: “Enhance this image.”
If you choose this prompt, the program goes into action generating three different suggestions to enhance the image.
For this image the suggestions range from boosting the highlights and shadows and adding more golden light, to increasing depth of field and making colour harmony adjustments.
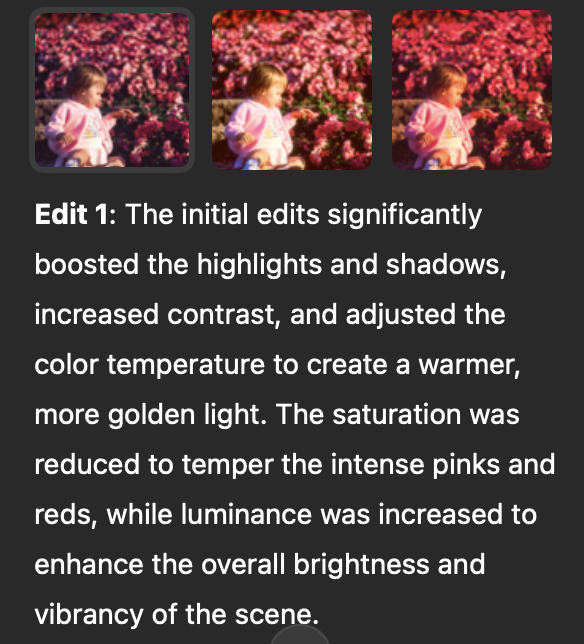
By explaining the enhancements, the beginner photographer gets an understanding of what is being done to improve the image and can take that knowledge to use with their other images.
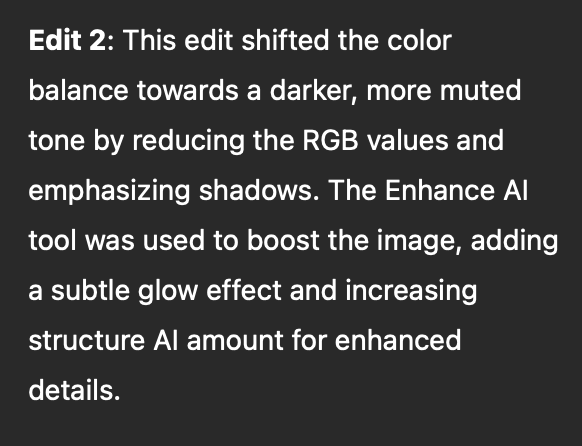
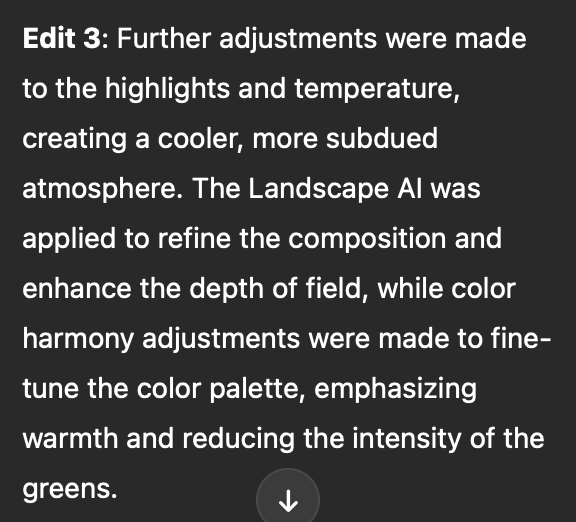

Here the ai program responds to my request on how to get the best skin tones on the baby.
Other simple commands that are available to users include changing the photograph to a B&W image.
More important are commands to teach the user how to change the image. Questions such as: how do I remove distracting elements in the image, or how do I improve the skin tones in the image?
The result is a list of suggestions the program makes to guide the user to the appropriate modules to make the changes themselves. The result, a better understanding of the capabilities of the program and how to use it to make the images you originally envisioned.

Here is an original image of a rusty car before asking Luminar Neo to enhance the photograph. Below is the result after asking Luminar Neo’s AI to enhance the image.

The enhanced version of the rusting car and the explanation (below) of what was done to the photograph.
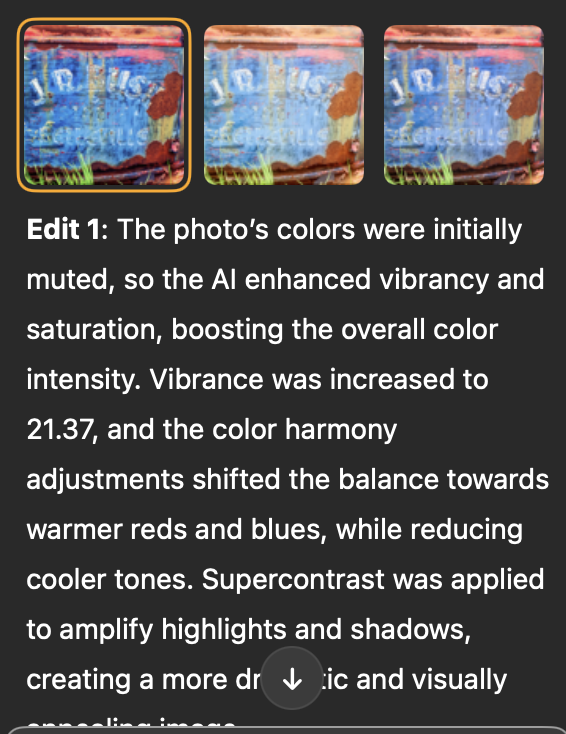
Luminar Neo is continually improving their Ai features and will certainly further refine many of the features in their recently released AI module.
Meanwhile, beginner photographers have a built-in assistant to help them learn the intricacies of the program and expand their post processing knowledge with the end goal of creating images anyone would be proud to share with friends and family.
If you are interested in further exploring Luminar Neo and its features, please use my link here.
Luminar Neo and Lensbaby combine for the ultimate in creativity
Adding a creative touch with Luminar Neo and Lensbaby lenses.

Our spring dogwood proved to be the ideal subject for the Lensbaby Composer and Sweet 50mm lens with a macro filter attached. Combine this soft, ethereal image with two subtle textures using Luminar Neo’s layering and blend modes and the existing photograph is turned into a painterly image that I’m betting most would be proud to call their own.
Textures add painterly effects to ethereal images
Ansel Adams once said you don’t “take a photograph, you make a photograph.”
Back then, Adams used the traditional darkroom to create magnificent Black and White images of the natural world, often times spending days in the darkroom “making” these images.
Today, the traditional darkroom has been replaced with the digital darkroom, turning the concept of “making” images rather than just “taking” them accessible to every photographer who chooses to explore their creativity and take their photography to new heights.
In this post, I am going to explore how, combining the inherent creativity built into every Lensbaby lens with the creative tools available in Luminar Neo, can change how you approach garden and flower photography as well as portraiture and landscapes.
• Go to the bottom of this post for the latest HOLIDAY offering from Luminar Neo
In case readers are unaware of the magical qualities of Luminar Neo post processing software and Lensbaby’s creative line of photographic lenses, let’s take a moment to familiarize ourselves with these creative photography tools.
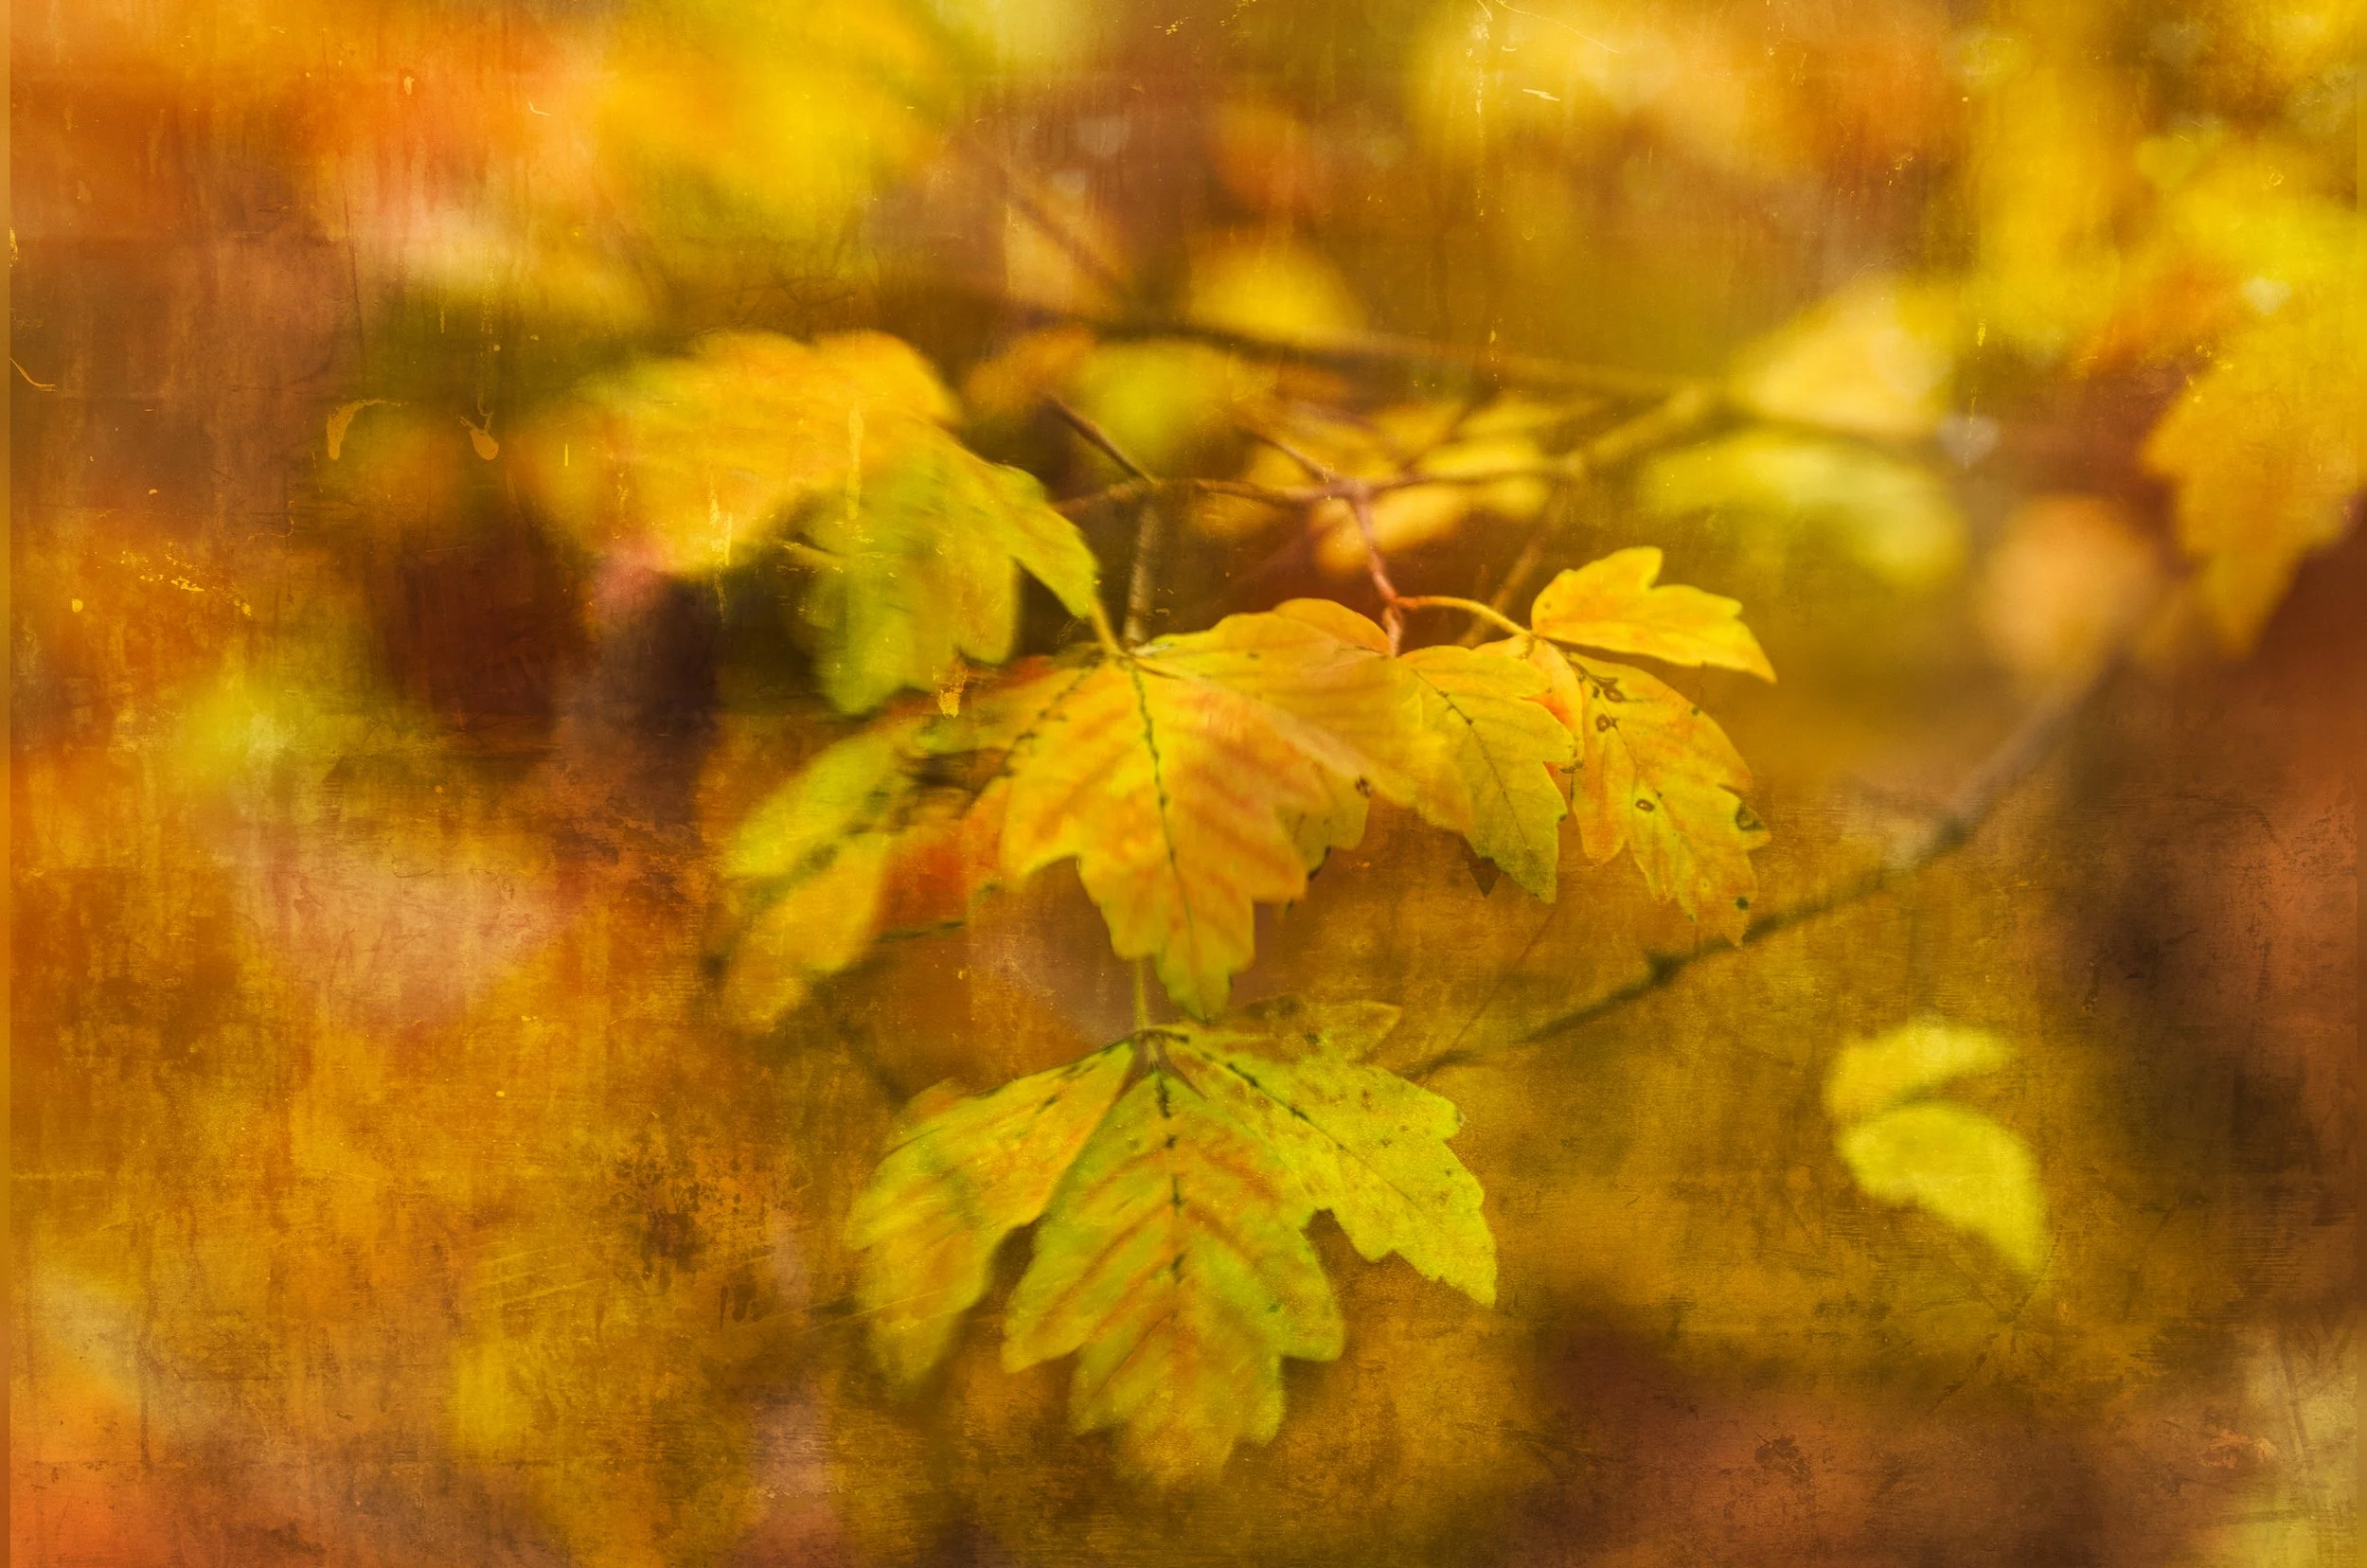
While the first image of the dogwood flower is rather subtle, this image of paperbark maple leaves in fall shows what can be achieved with heavier textures applied through Luminar Neo’s layering and blending modules. The original image was taken with the Lensbaby 2.0 and sweet 50mm lens.
Luminar Neo is a photo editing software package that combines ease of use with the power of Ai to assist photographers, who may have been hesitant to dive into more complex photo editing software in the past, to embrace the ease and convenience of a more simplified, yet powerful, editing program.
Lensbaby is a lens manufacturer that embraces and encourages photographers to push creativity by offering lenses with unique characteristics that create elegant, soft-focus effects, beautiful colour blending and soft ethereal results that enhance almost any image, especially in the garden, with flowers and portraits.
In the final days leading up to Christmas, Luminar Neo is offering a special “creative” Advent Calendar package just in time for photographers to give themselves a special gift for the season.
The lowest price is available now, but once the doors officially open, the cost will range from $119 to $159 depending on if you are a new or existing user.
The Advent Calendar includes 12 unique surprises, each hidden behind a daily window. Photographers can discover a new gift every day, such as:
🔸 Luminar license
🔸 Marketplace items (Skies, bundles and more)
🔸 X-membership subscription
🔸 Educational courses
There are different surprises depending on the Luminar Neo package you choose or currently own.
Check out the information at the end of this post for details on the special creative and educational packages.
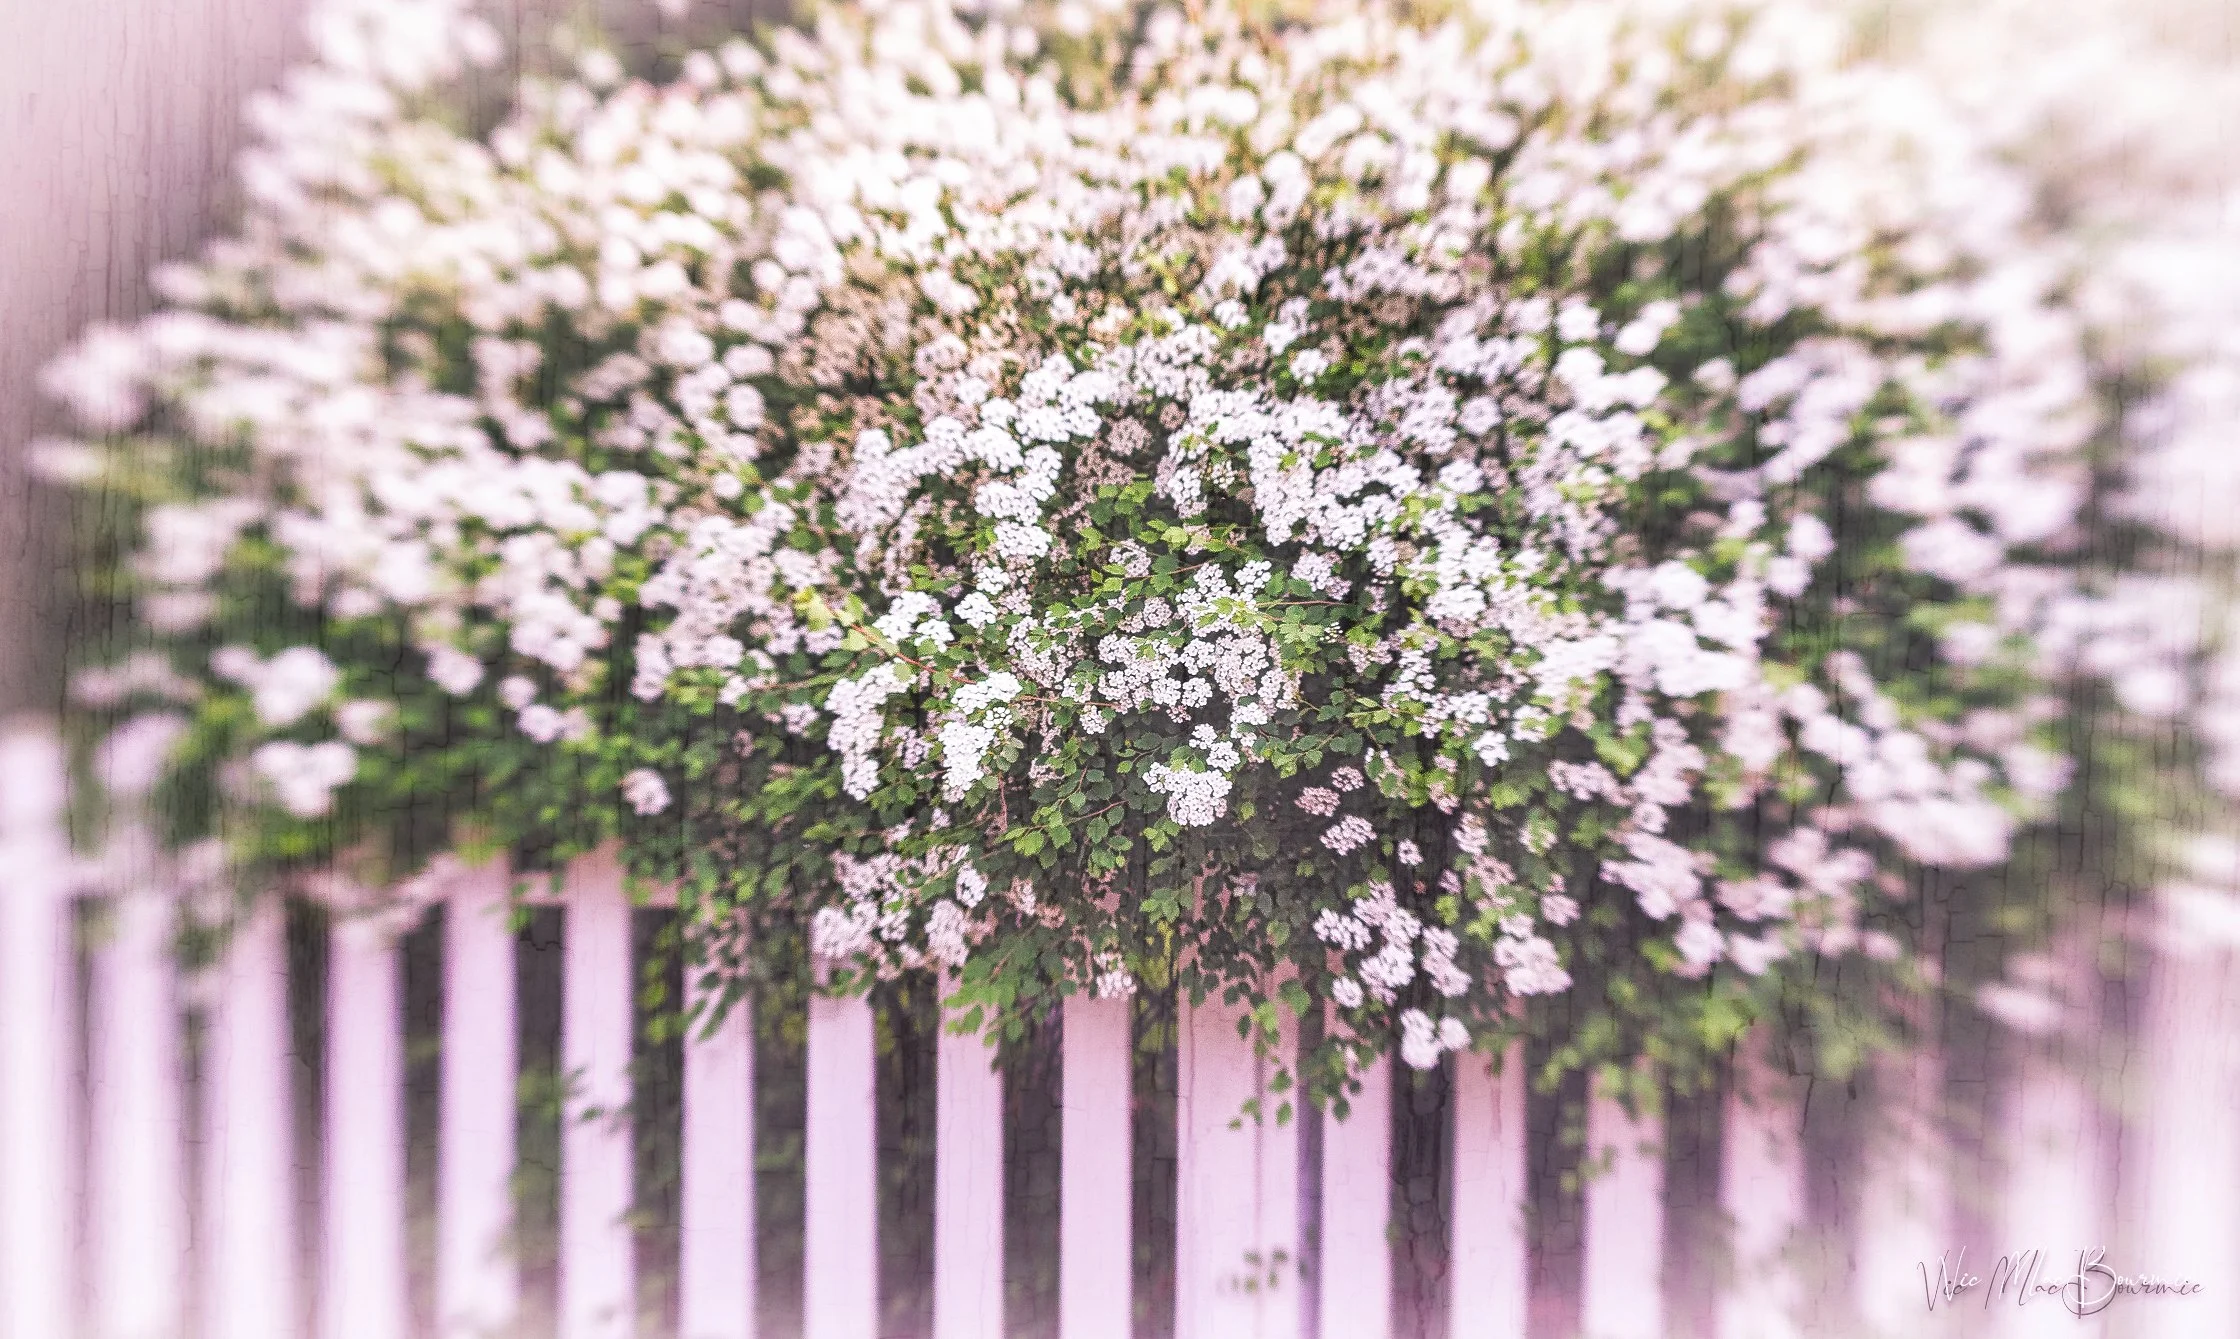
This image was taken with the Lensbaby Composer and sweet 50. It was then brought into Luminar Neo where a number of textures were applied creating a more painterly effect. One of the textures was also used to add the lovely, subtle pink tone to the image.
Adding textures to existing images is rather simple with Luminar Neo’s intuitive photo editing program. It’s as simple as dropping a textured image on top of your main image and then choosing from a host of blend modes from a drop-down menu. Once the texture is applies and the blend mode chosen, it is up to the photographer to decide if they want to go farther using masks or a host of other editing modules within Luminar Neo.
One of my new favourite modules is Luminar Neo’s incredible “Light Depth” module that is capable of transforming flat, boring images into beautifully lit, three-dimensional images. Check out my earlier post here, for more on using the Light Depth module in Luminar Neo.

These Northern Sea Oat grasses photographed with a Lensbaby 2.0 was given added interest by using a Luminar Neo built-in golden dust texture effect. You can create your own textures, find free ones on line or purchase more professional textures through Luminar Neo. Their latest creative package might just include some of their professionally produced creative tools.
If you are interested in exploring Lensbaby lenses further, you can check prices here (Amazon.com) or here (KEH used camera exchange.) If you are interested in exploring Lensbaby lenses further, check out the offering of books available through Alibris used books here.
My earlier posts on Luminar Neo
Adding textures, manipulating lighting, or even repairing old family photos are just a few of the incredible bonus features offered by Luminar Neo’s comprehensive editing software. For more of my posts on the benefits of exploring Luminar Neo, I encourage you to check out the following posts.
• Exploring Luminar Neo mobile for your phone: click here.
• Exploring Luminar’s incredible photo restoration module: Click here.
• Can Luminar Neo act as your only photo editing program. Click here
Subtle textures were added to this macro image of a Hydrangea blossom taken with the Lensbaby composer fitted with a Lensbaby macro filter.
Of course, garden flowers are not the only subject for Lensbaby lenses and Luminar Neo textured effects. Below is an image taken recently of our new flat Coated retreiver, Colby. This image was taken with the Lensbaby Velvet 56. The Velvet series of lenses are capable of truly beautiful results with an ethereal glow that is magnified depending on the f-stop used (from quite sharp at f5.6 through f16 and getting softer from F5.6 through to F2.
Two B&W textures were added to the original image to maintain the overall B&W, painterly effect.
The image below and the above images represent just a few of the creative approaches available to photographers using special effect lenses and/or filters, and combining them with the creative effects available through Luminar Neo. Please explore the links provided for my earlier posts on Luminar Neo and be sure to click below to check out all of the special deals on creative assets, tools and educational resource materials Luminar Neo is adding for their “creative advent calendar.”

Our rescue Flat-Coated Retriever with his baseball stuffy taken with the Lensbaby Velvet 56 with two textures added for a painterly effect.
Luminar Neo’s holiday calendar of gifts explained
From December 13th to 24th, open a new surprise every day and discover creative tools, content, and inspiration worth more than $1000.
The calendar can also be gifted to friends, family, or photography enthusiasts, making it a thoughtful and creative holiday present.

Here’s what all the excitement is about. Unlock your treats every day leading up to the big day.
Calendar Timeline:
December 10: Presale begins with lower prices
December 13–24: Daily windows open (one per day)
December 16–25: Calendar available at full price
Luminar Neo brings treasured family memories back to life
Restoring vintage family photos has never been easier with Luminar Neo’s new Ai restoration module.

Luminar Neo not only took this outstanding vintage black and white image of my mother, father and aunts posing with our cousin Audrey and her husband, acclaimed singer of the Ink Spots, Bill Kenny, but modernized it with an extraordinary colour rendition using the “Full” module in the post processing photo program. (see BW image below.)
Restoring, colourizing vintage photos
Not long ago, fixing old family photographs involved bringing them to professional photo retouchers and paying a week’s salary to have a handful of them restored.
Those days are gone thanks to a new, incredibly impressive new feature in this fall’s Luminar Neo release.
With a single click of your mouse, you can transform a faded, scratched, blemished old black and white photograph into a perfect reproduction of the original Black and White version.
And that is just the beginning.
The simplicity of the “restore” module is almost too good to believe.

Rediscover treasured photos
This prized family group portrait of the acclaimed lead singer for the Ink Spots Bill Kenny and wife Aubrey pictured here with my mother (2nd left and father far right) at a club in Halifax Nova Scotia. Luminar Neo was able to repair any scratches and blemishes on this BW image with the simple click of a single button. Another button colourized it (see above).
Restore module is the essence of simplicity
In fact, there are just three buttons to choose from to transform your vintage images: “Full” which repairs scratches, blemishes and colourizes the image to modern standards; “Colour” which simply colourizes the image without removing scratches and blemishes for a more authentic Lomography look; and “Scratches” which leaves the image either in its original BW or colour state and simply removes any scratches or blemishes on the photograph.
It’s so simple and effective that it is difficult for me to go into much more detail than – choose what you want to do and press the appropriate button.
If you are interested in trying Luminar Neo, please consider using my affiliate link HERE to purchase the program. By doing so, I receive a small payout that does not affect your purchase price.

This is the restoration module in Lumina Neo. Simply drop the image into the box and choose Full, Color of Scratches. Then hit the Restore button. The final image will show up in a separate folder within Luminar Neo called “Restoration.”

My sister and I on large format negative inverted.

The same image of my sister and I ran through the full module which colourized the photograph as well as adding some interesting vintage touches. Running the images through the module can result in slightly different results, which makes the entire process even more exciting to see the results.
Obviously, you will have to have a way to get the old images into Luminar Neo. I choose to use a flatbed scanner, but you could easily take digital pictures with your phone or, even better, a digital camera with the ability to take close-up images.
Once the images are on your computer or phone, import them into Luminar Neo, drop them into the restoration box, choose the appropriate button – either Full, Colour or Scratches – and Luminar Neo will drop the finished photo into a separate folder named restoration.
It’s as simple as that. The following are just a few examples’s of what the “restoration” Ai module can do in just a minute or two.
For more before-and-after images, check out my new “Spaces” gallery from Luminar Neo here.

The original BW image prior to any post processing.

A “Full” colorized version of the vintage image.
The following is a good example of what the Luminar Neo “Restoration” module can do for heavily compromised images by not only restoring them by removing scratches and even missing parts of the image, to colourizing them to create authentic-looking images.
The following shows the original scan, a repaired scan and the final colourized version.

This is the original, untouched image of my uncle and his dog.

The same image ran through the restore module – a single click of a button in Luminar Neo.

The final restored and colourized image. Note that the ai changed the dog’s profile slightly.
If you are interested in trying Luminar Neo, please consider using my affiliate link HERE to purchase the program. By doing so, I receive a small payout that does not affect your purchase price.
If you are a new user to Luminar Neo, use this link.
If you are a current user of the program, use this link
Prices below: Black Friday is Coming:
Dates: October 24 - December 1
Discounts: Up to -75% on the Luminar Neo Ecosystem - the best prices of the year!
Prices for new uses:
Luminar Neo Desktop Perpetual: $99
Luminar Neo Cross-device Perpetual (Desktop + Mobile): $139
Luminar Neo Max Perpetual (Desktop + Mobile + Spaces): $159


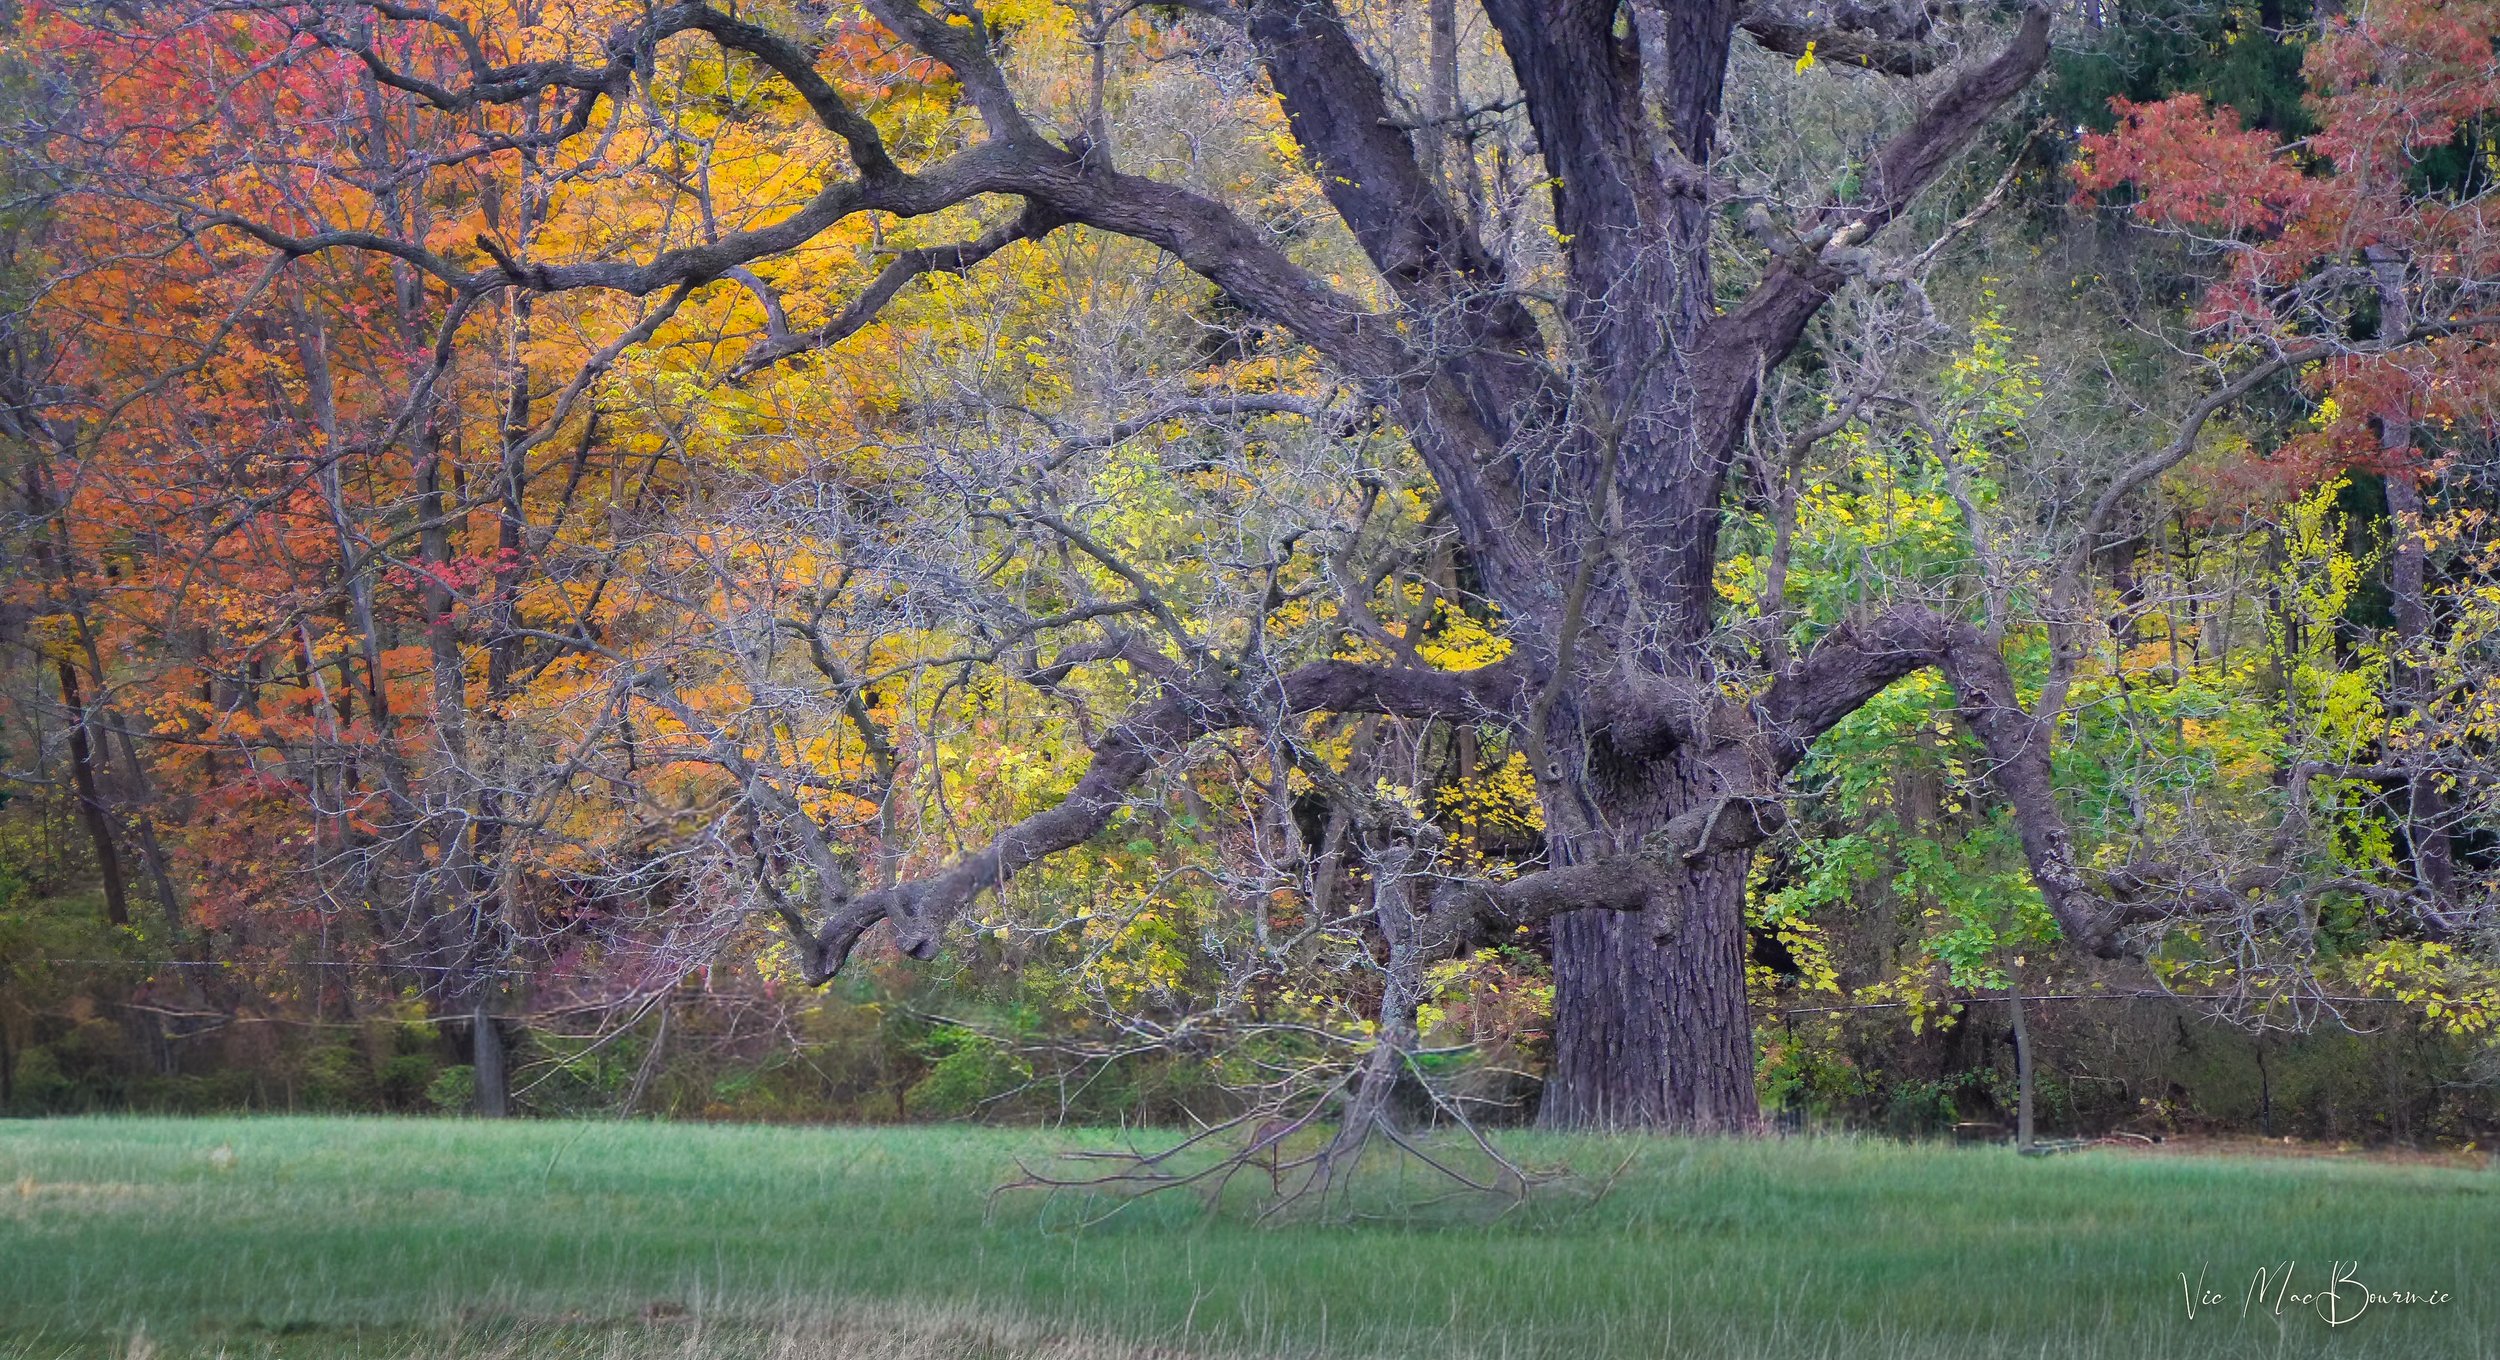
Luminar Neo takes lighting to another level
Luminar Neo has changed the way we see light forever.
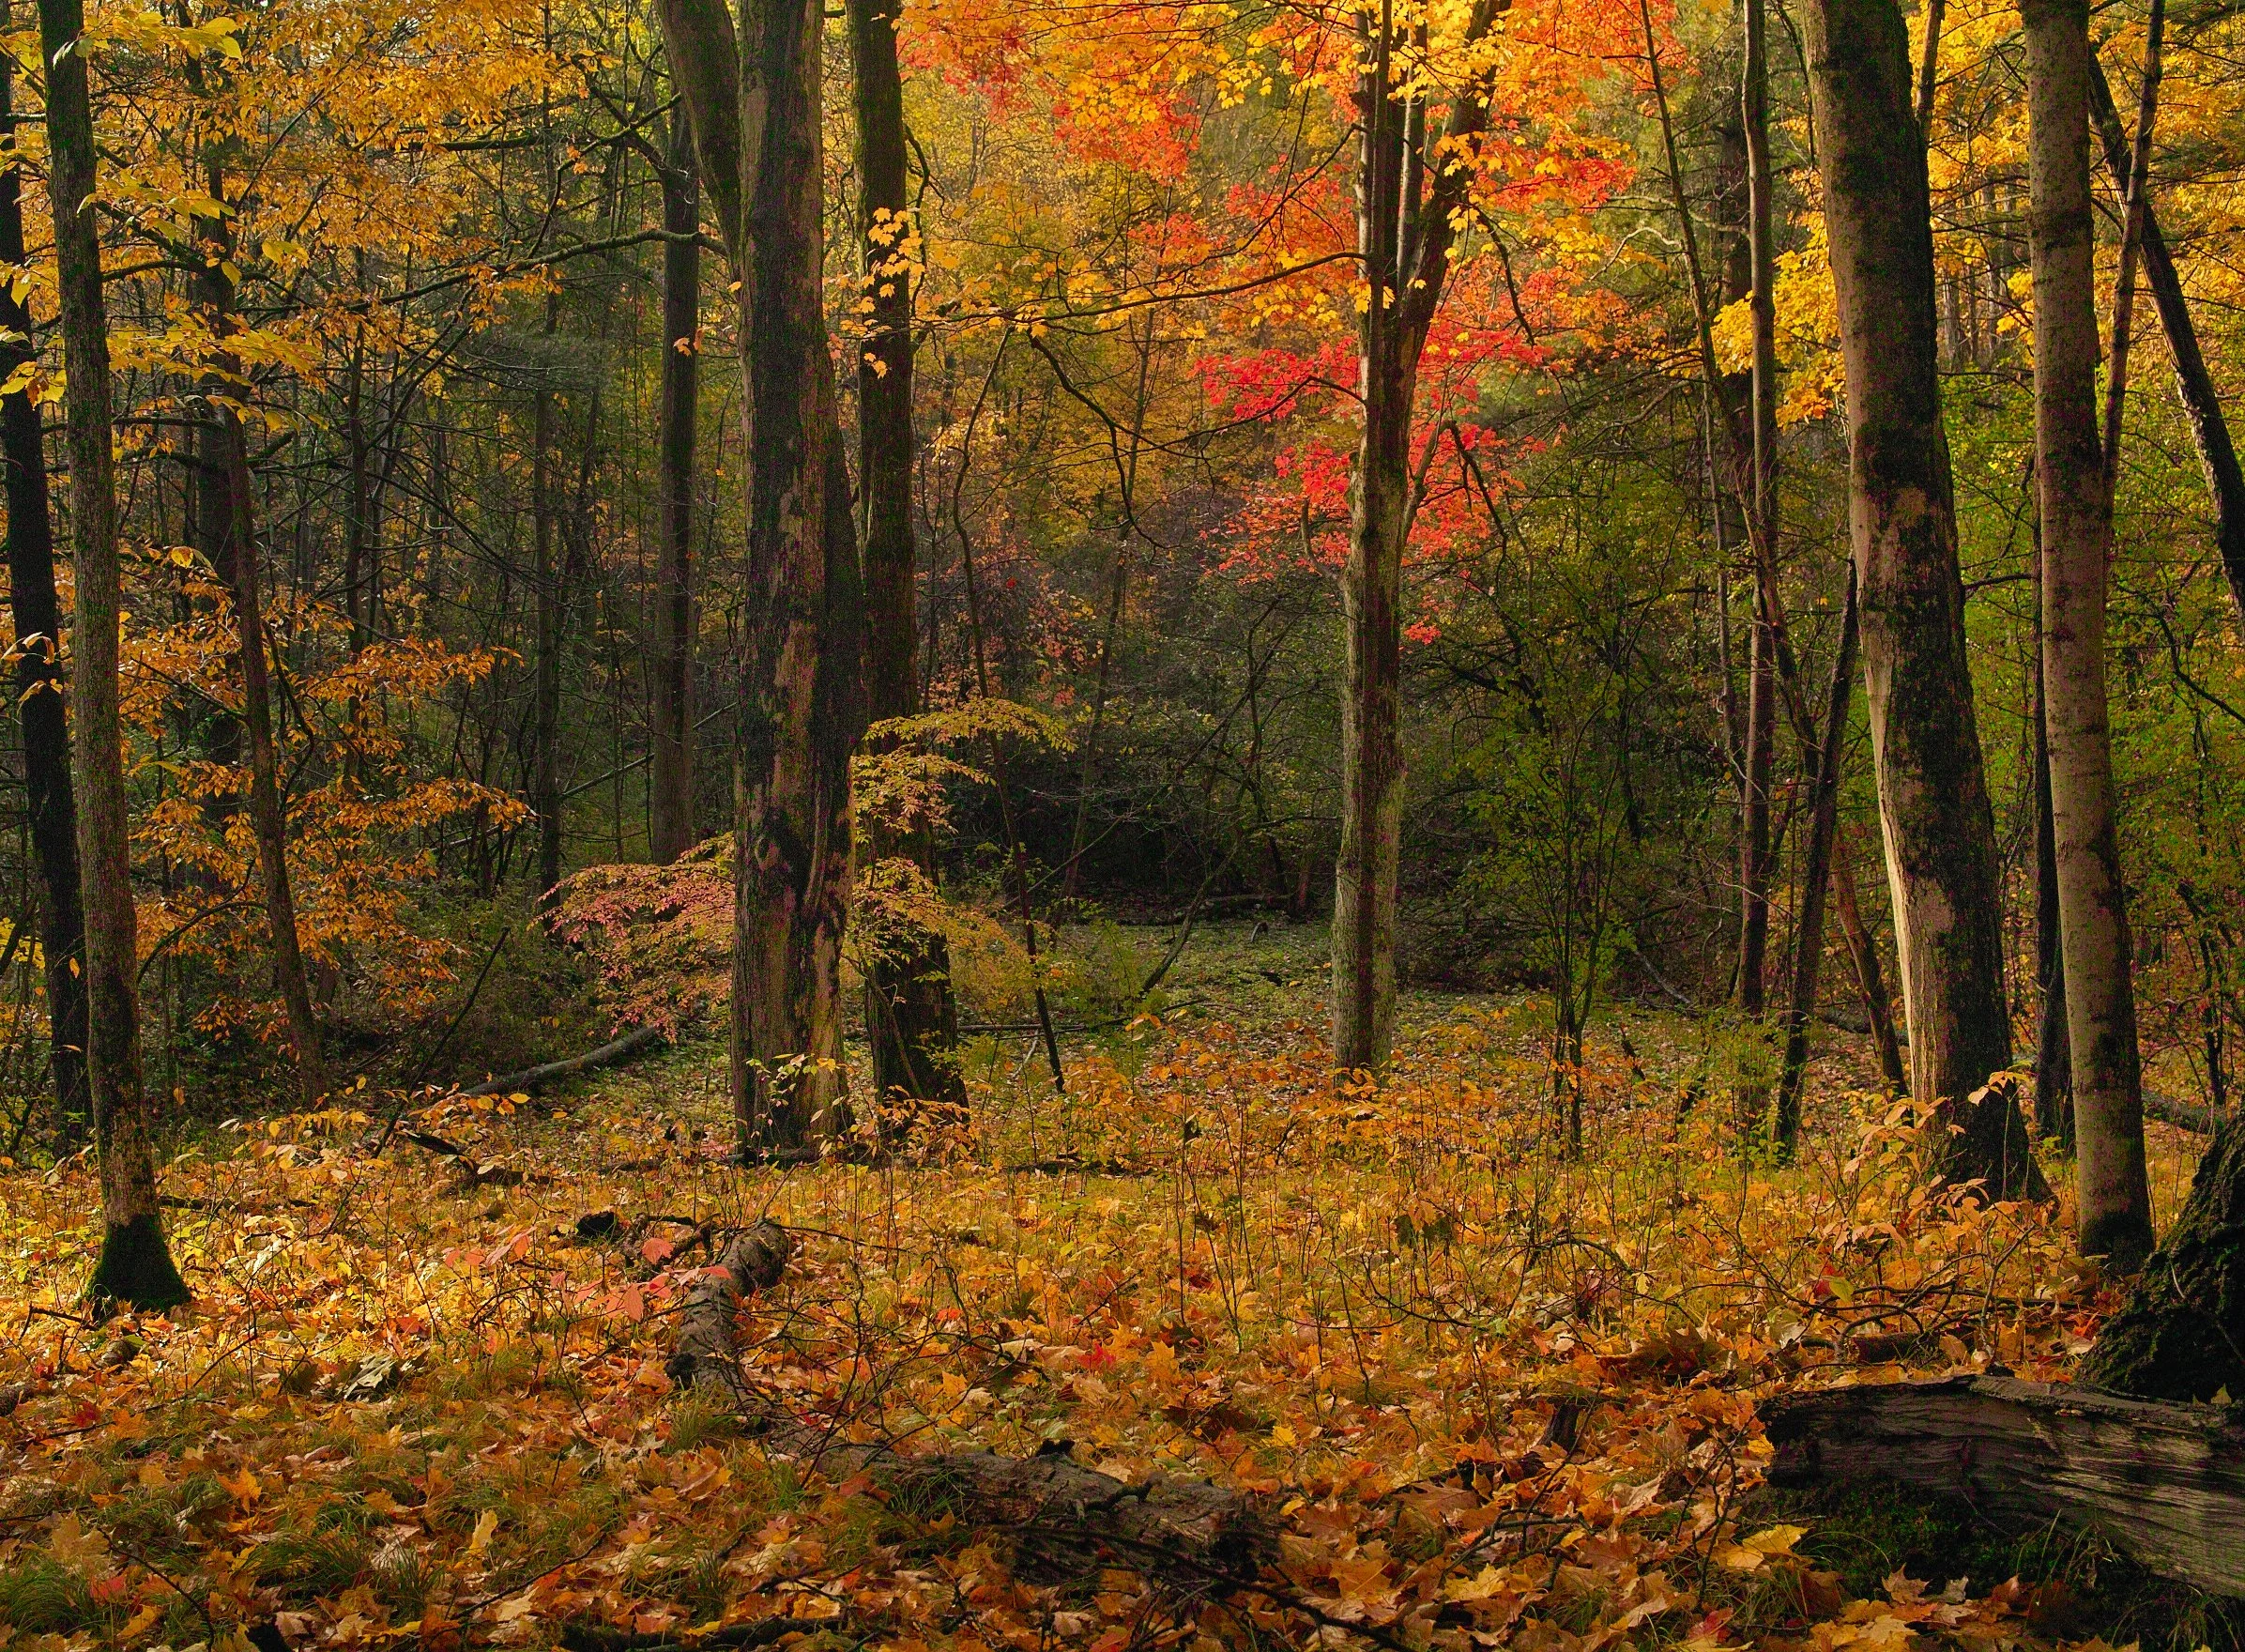
This woodland fall scene is an example of how Luminar Neo’s new light-depth module can transform a relatively flat image into a more three-dimensional one. The smaller inset photo below shows the original image.
Transform your fall images with newest tool
If photography is all about light, Luminar Neo may have just rewrote the future of post processing.
I can’t think of a single feature, besides Ai erase and replacement, that has excited me quite as much as Luminar’s new Light Depth module.

Subtle but sweet
The change in the photos is subtle unless you know where to look. The light in the first image is moved forward to create a strong foreground band of light that lights up the brush in the front as well as the tree trunks. The effect helps to give the entire image added depth.
This module can take a good image to greatness in seconds and create a completely controllable, three-dimensional-lighting effect that is unmatched by any other post processing program I have experienced.
And, if used carefully, it can be beautifully subtle, or, not so subtle at all but always believable.
It’s just one of the new features unleashed in Luminar Neo’s fall package that includes a host of outstanding additions from improved mobile/desktop compatibility, to a highly useful photo restoration module that also has the potential of changing the way photo restoration is done both for amateur and professional photographers. And all of this added to an already impressive package of features for a very low price. For pricing details, go to the end of this post.
For more of my images showing Luminar Neo’s new Light Depth module as well as their free galleries for members, click here.
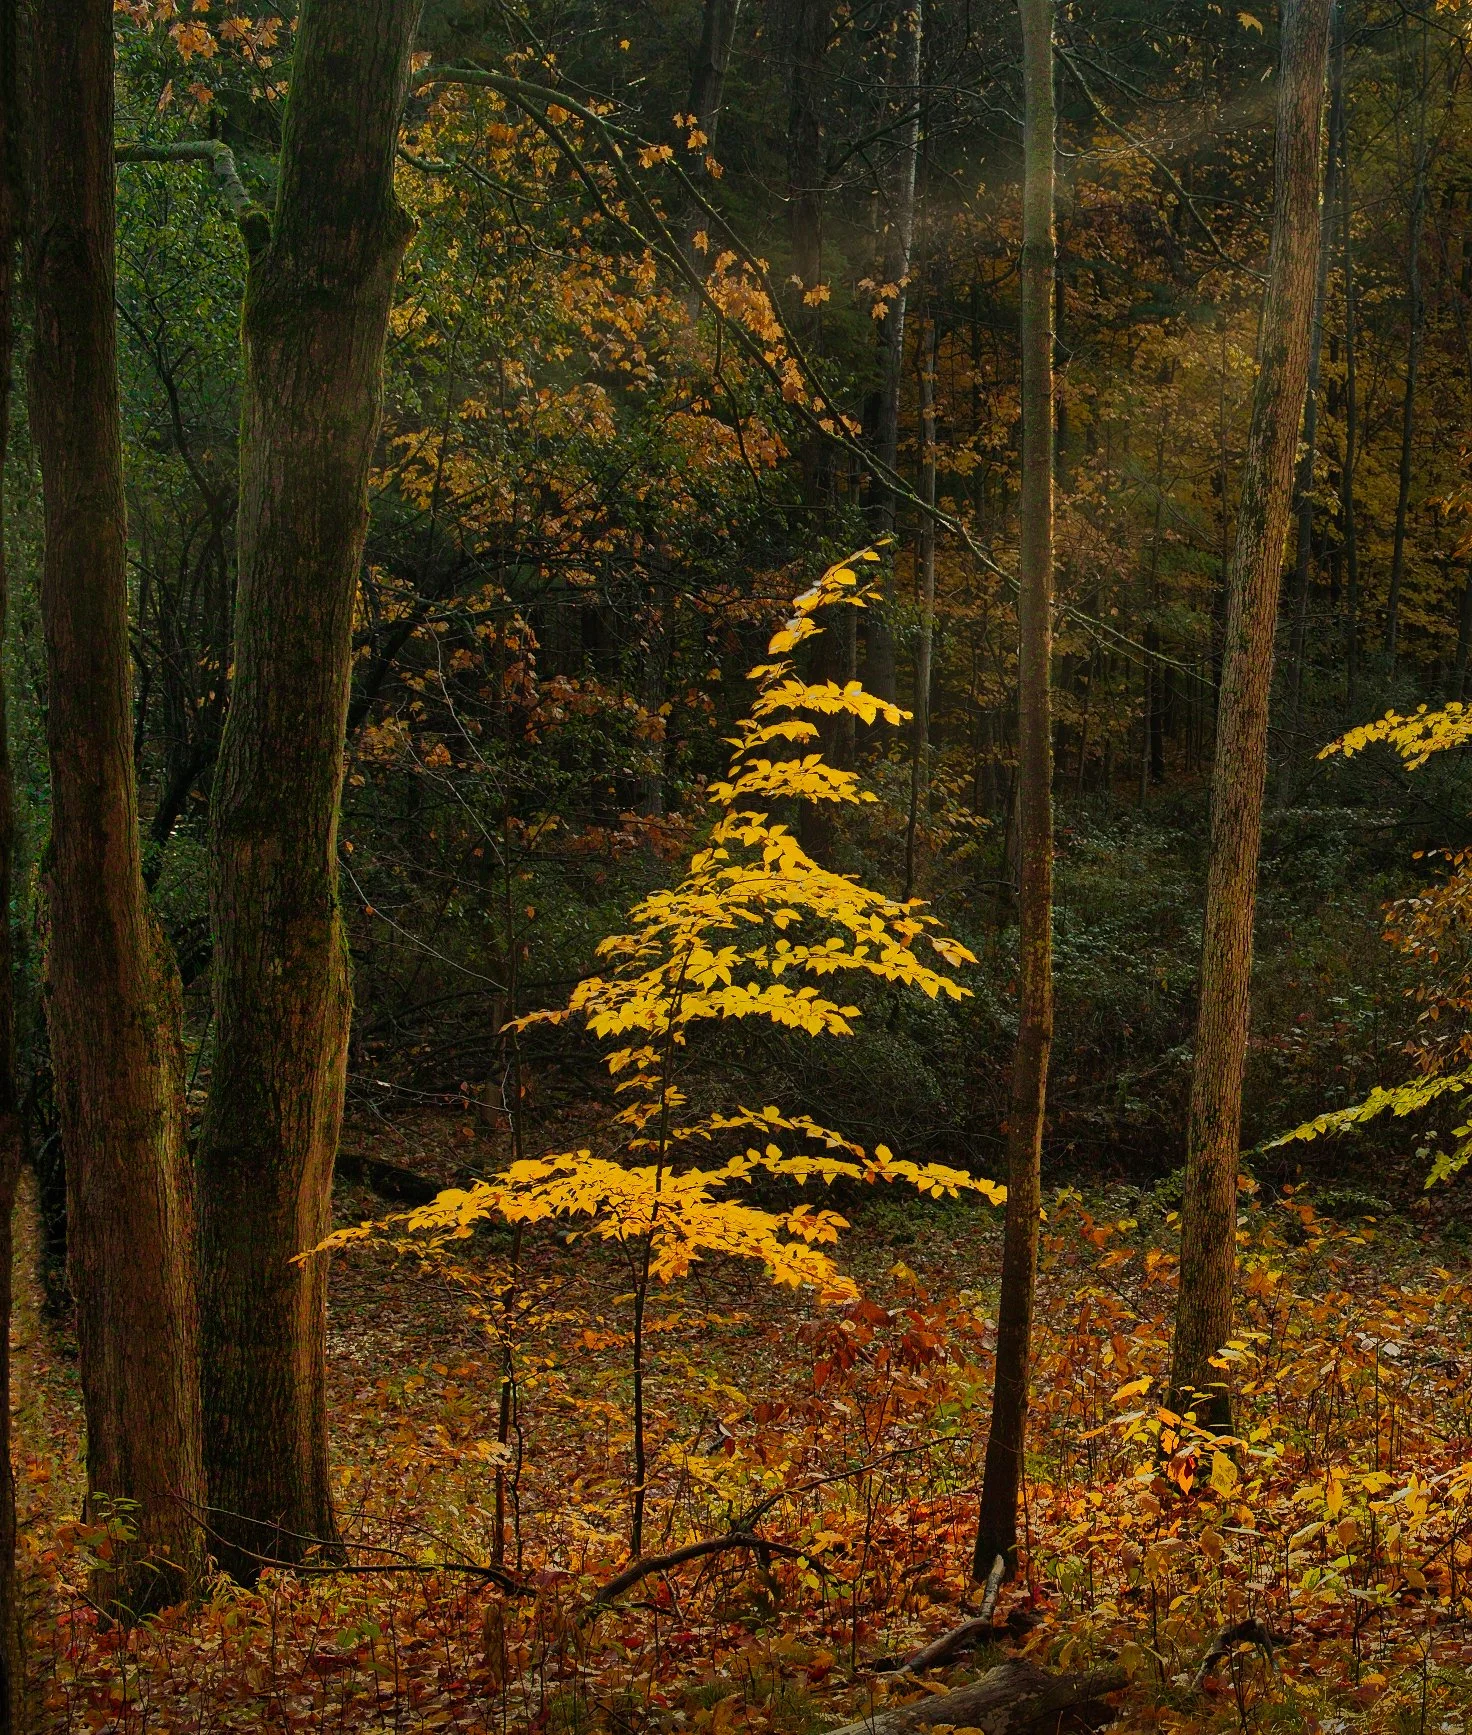
Although the Beech tree was also “lit up” in the original image, by manipulating the light depth module settings, I was able to darken the background and create a much more dramatic image. In addition, I used Luminar Neo’s light ray module to emphasize sunrays coming in from the right side of the frame.
If these three additions were not enough to convince anyone sitting on the fence about diving into this Ukraine-based post-processing photography package, this extremely innovative company is adding personal galleries to their repertoire of features to allow Luminar Neo users to share their best work with family, friends, clients and other Luminar Neo users.
I’ll be making separate posts on these features in the future.
If you are interested in trying Luminar Neo, please consider using my affiliate link HERE to purchase the program. By doing so, I receive a small payout that does not affect your purchase price.

Added drama
The before-and-after shows the dramatic difference created by darkening the background by shifting the light in the depth module. Luminar Neo’s new feature helps to create a more three-dimensional look.
Luminar Neo Light Depth module: Painting with light
But back to the reason for this post: The incredible “Light Depth” module.
I am not going to try to explain how this thing works, but suffice it to say that it’s an example of how ai can transform your images in subtle, yet incredibly useful ways. The module does not add anything to your image, it simply helps the photographer to manipulate the lighting in the scene.
How it all works in real life
In short, the module allows you to control the light “near” the front of the image, and the light toward the back of the image. Sliders give the photographer control of the amount of light, the warmth of the light and the softness all the while providing a map of the scene to help the user control the light in quite fine detail.
The module’s secret sauce can transform your images from flat, evenly lit scenes into more three-dimensional images with much more depth.
Below are a few before-and-after images I took just recently of fall colours in the woodland around our home showing the results. I try to keep most of the edits subtle, but you can choose the amount and quality of light you feel is needed to create the images you are trying to achieve.

This spectacular old oak tree set against the colours of fall literally stopped me in my tracks. Pulling the oak tree away from the background proved to be relatively simple in Luminar Neo’s Light depth module. without it, the scene (see below) is rather flat and the beautiful oak tree dissolves somewhat into the overall scene.

The rather flat lighting seen here, does not put the beautiful old oak tree in its best light.
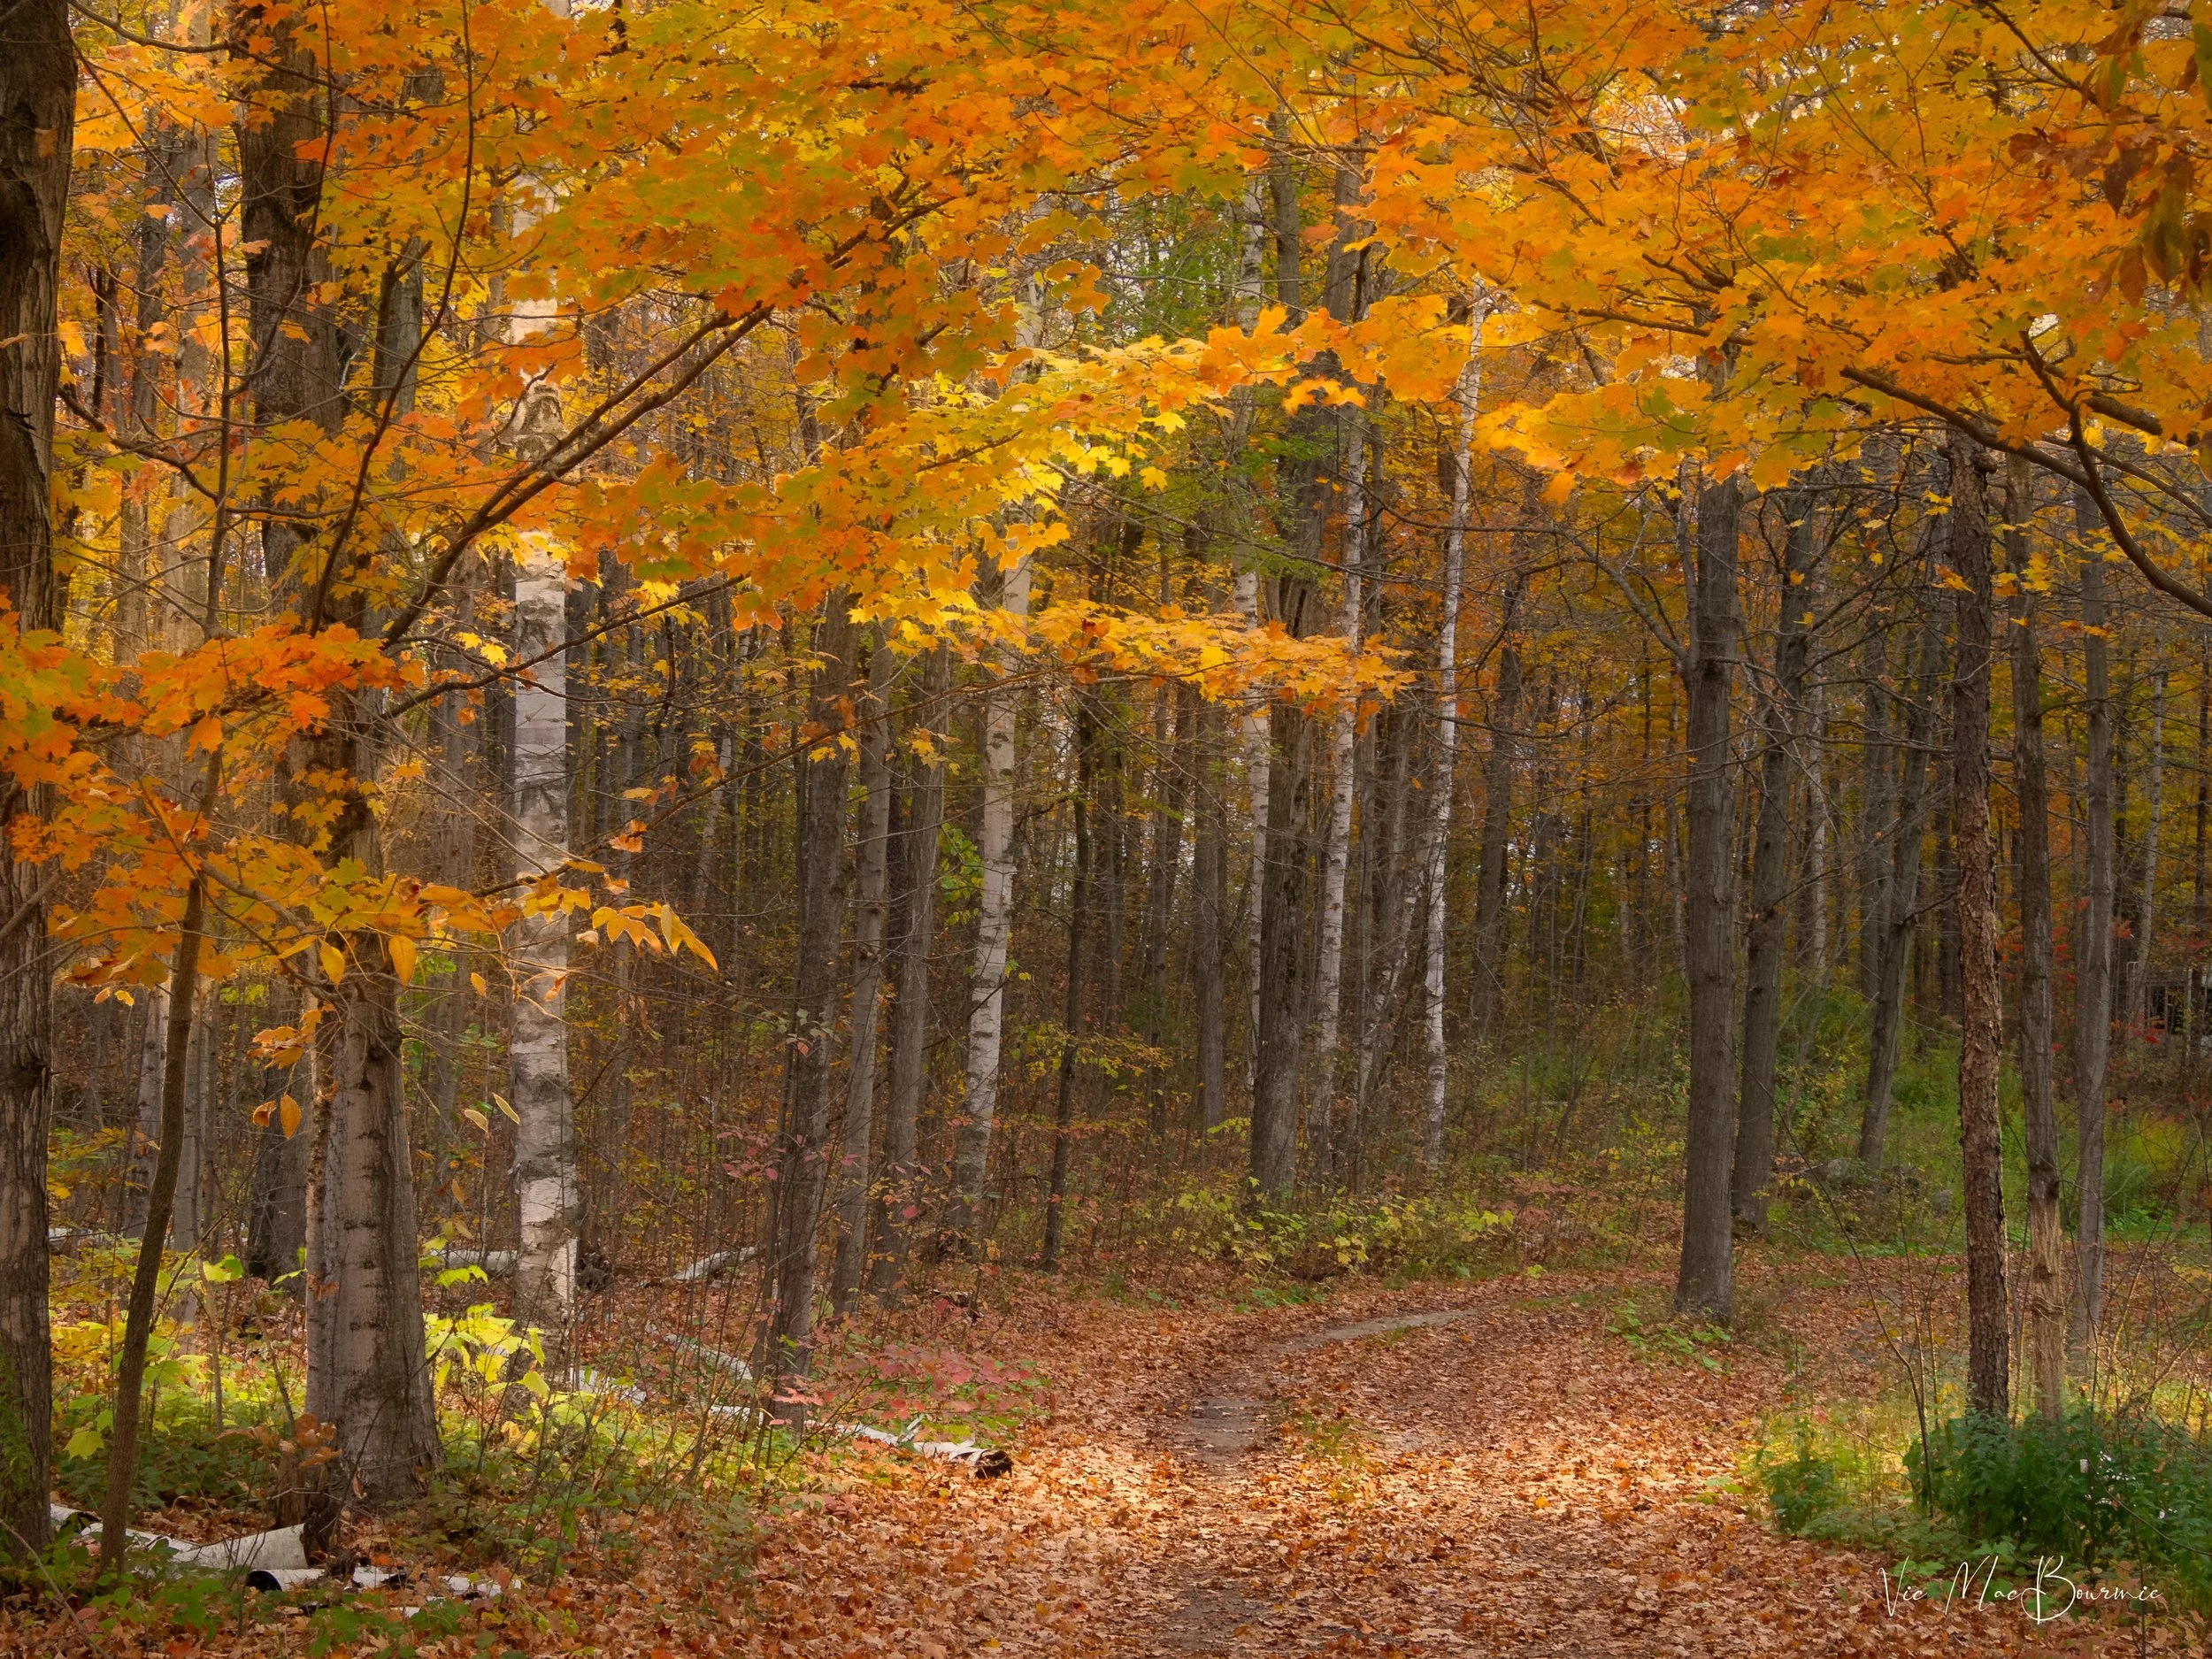
Although I loved the birch trees and the leaf-covered pathway in this image, the lighting in the original proved to be very flat. Luminar Neo’s Light Depth module created the ray of light across the pathway and into the tree canopy as well as adding a subtle light to the birch trees. The result is a more three-dimensional image with a whole lot more interest. This result probably could have been achieved with other post processing software, but certainly not this easily and with this amount of control.

Adding depth to flat lighting
The before picture is rather flat in comparison to the edited version. Of particular note is the absence of the ray of light that cuts across the leaf-covered pathway in the edited version,.
Luminar Neo’s new tool will help transform your fall images
Fall is a spectacular time to get out and capture the rich colours all around us. However, no matter how good the colour is, lighting plays an important role in the success of your images. Getting out at different times of the day including early morning and late afternoon improves our chances of capturing great light, but there are no guarantees.
Luminar Neo’s new Light Depth module helps photographers improve their chances of creating images with interesting light by giving them control of the light in post processing. The results can be subtle, yet very effective.
If you are interested in more of my posts on using Luminar Neo, check out the following links:
• Luminar Neo in the woodland.

Fall colour and birch trees using Luminar Neo’s Light Depth feature.
If you want to see more of my fall images using Luminar Neo’s Light Depth module, be sure to check out my new Fall 2025 Gallery brought to you by Luminar Neo as part of their fall rollout of features. Check it out here.
If you are considering adding Luminar Neo to your existing photo processing packages such as Lightroom and Photoshop, it should be noted that the programs work seamlessly together. You can even open Luminar Neo from within Lightroom.
If you are wondering about the cost of this exceptional photo editing program, let me share some information and a couple of images that might help convince you to make the jump.
This image taken with a Lensbaby and the Light Depth module creates an interesting effect that I think works nicely.
If you are interested in trying Luminar Neo, please consider using my affiliate link HERE to purchase the program. By doing so, I receive a small payout that does not affect your purchase price.
If you are a new user to Luminar Neo, use this link.
If you are a current user of the program, use this link
Prices below: Black Friday is Coming:
Dates: October 24 - December 1
Discounts: Up to -75% on the Luminar Neo Ecosystem - the best prices of the year!
Prices for new uses:
Luminar Neo Desktop Perpetual: $99
Luminar Neo Cross-device Perpetual (Desktop + Mobile): $139
Luminar Neo Max Perpetual (Desktop + Mobile + Spaces): $159
Prices for existing users of Luminar Neo:
Ecosystem Pass: $69
Upgrade Pass: $49
Prices for legacy users of previous Luminar versions:
Luminar Neo Cross-device Perpetual (Desktop + Mobile): $89
Luminar Neo Max Perpetual (Desktop + Mobile + Spaces): $109

Why I chose the Pentax Q7 to capture a European river cruise vacation
Is the Pentax Q system the ultimate travel camera? Decide for yourself after checking out the results on our European river cruise.

An example of the images the Pentax Q7 was able to achieve during our vacation along the Rhine River. (Pentax Q7 ISO 400, F4 with the standard 02 zoom at 13.1mm.)
Convenience, quality wrapped in a tiny package makes Pentax Q series the perfect travel cameras
Okay, before you start laughing, let me explain.
Yeah, the miniature 20-plus-year-old, Q7 mirrorless camera with its tiny 12.3 megabyte 1.17-inch backlit CMOS sensor would not be many photographers first choice to document a once-in-a-lifetime family Rhine river cruise vacation.
In fact, I’d bet I’m probably standing pretty much alone here, with maybe the exception of all but the most die-hard Pentax Q users.
And that’s fine with me.
Pentax Q: Tiny and terrific
The Pentax Q with its fine collection of proprietary lenses, just might be the best travel companion for those simply looking to document their vacation with a high-quality camera and lenses that is small enough to fit into a coat pocket.
The purpose of the vacation was not to capture incredible images, rather it was to spend time with my wife and adult daughter. In other words, I felt the experience was going to be more important than the images I was going to make on the vacation. Afterall, time limitations and tourists getting in the way makes serious photography difficult on these types of vacations, to say the least.

I worked hard not to make typical tourist images by looking for more intimate scenes that captured the spirit of the moment. (Pentax Q7, ISO 800, f3.5, with 02 lens at 8.5mm.)
Complete system fit nicely in a coat pocket
I figured the Pentax Q system was, at least, better than relying on my phone for capturing memorable moments, and, being able to fit the miniature camera and all three lenses into a coat pocket would allow me to grab the odd shot without having to lug around a full system of cameras and lenses. I’ve made that mistake too many times in the past and was determined not to make it on this vacation.
So, after much thought prior to the trip, I convinced myself that, because of the limiting factors of time and an abundance of tourists, at best I was going to get a couple of nice snapshots.
Boy, was I wrong and more than a bit surprised..
But more on that later. Let’s continue this talk about the interesting camera decision.
For more on the Pentax Q system, check out my other posts below:

The tiny Pentax Q7 fit nicely in my coat pocket and could be easily retrieved at a moment’s notice to capture an iconic scene like this one of a man walking down a deserted street in the heart of a quaint German town. (Pentax Q7, ISO 1600, 1/125 sec, F5, with 02 standard zoom at 14.9mm.)
Sigma DP2, Fujifilm X10, Olympus and Lumix micro 4/3 cameras all stayed home
My camera choice certainly wasn’t because the Q10 and accompanying lenses were the best I had available to me. I’ve got Olympus and Lumix M4/3 systems, A Pentax APS K5 system, the venerable Fujifilm X10, the Lumix LX7, even a Sigma DP2 as well as a host of other cameras to choose from. (I know I have a problem.)
But when it came down to it, I chose the Q7 along with the 50mm (01) equivalent, 28-80mm (02)kit zoom and the weird little fisheye lens. I meant to take the 80-200mm equivalent (06) to give me some pull-in power, but in my haste to pack everything, I grabbed a second 28-80mm kit lens instead.
I should say that I also packed a Fujifilm EXF660ER travel camera with a 16mp CMOS sensor and 24-360mm zoom lens, which I had purchased a few weeks earlier from a thrift store for $12 Canadian. Its 360mm reach easily took the place of the 80-200mm 06 lens for capturing distant scenes. However, the Fujifilm was used only sparingly and often when the Q10 battery died while out on the town.
Would I do it again? In a heartbeat.
But, rather than explain my decision and trying to justify it to an audience that can’t imagine bring the tiny Pentax instead of a larger format system, let me show you why.
I think these images speak for themselves.

Montreau, Switzerland taken with the Pentax Q7 from the Lake Geneva boat cruise. (Pentax Q7, ISO 100, at 320 sec at 9.1mm.
From past experience, I knew the Pentax Q system was capable of capturing exceptional images. Despite the tiny sensor, the camera boasts the ability to shoot both high-quality JPEGs as well as RAW (DNG) files, has very capable image stabilization built into the camera and no anti-aliasing filter to soften the image. I believe the lack of anti-aliasing filter is often overlooked by many, but accounts for the very sharp images achievable straight out of camera.
The results point to a surprisingly capable camera system more than up to the task of capturing extremely sharp images with the array of dedicated lenses. This is not even taking into consideration the huge number of third-party lenses that can easily be added to the system from the diminutive 110 lenses (see story here) to a host of manual lenses via a simple adapter. (seee story here)
Before the trip, I added a step-up ring which, in turn, allowed me to use a polarizing filter to deepen the blues in sunny skies and remove unwanted reflections from water, windows and other reflective surfaces.
After going through almost 2,000 images, I think I can safely say that I was not disappointed. In fact, once again, this little camera system managed to impress me even more than I expected.

We kicked off the vacation in Switzerland, where we spend a few days in Lausanne on Lake Geneva. During an afternoon cruise of the picturesque lake, I was able to take advantage of the Pentax Q fisheye lens to capture this image, which includes the front of the classic lake cruiser and the impressive shoreline.
I was careful to photograph everything in both Jpeg and RAW formats and, although the JPEGs were more than useable, I chose, in most instances, to work with the RAW images in Lightroom to pull out fine detail and a wider exposure range. The RAW DNG files proved to be incredibly easy to manipulate and arrive at the results I was wanting to achieve.
To my surprise the kit zoom (02) that gives a zoom ratio of approximately (28-80 range) with the Q10, was used for maybe 80-90 per cent of the images. Most of the images included the polarizing filter, if nothing else to cut glare.
Eight dedicated lenses to choose from
For a little background, Pentax introduced a total of 8 miniaturized lenses beginning with the excellent 01 standard Prime with a focal length of 8.5 mm (47mm equivalent for the Q, Q10, and 39mm for the Q7, Q-S1 with the larger sensors.) More lenses followed: 02 standard zoom (27-80 range equivalency, 23-69mm), 03 Fisheye (17.5mm, 16.5mm), 04 Toy wide angle lens ( 35mm, 33mm), 05 Toy lens (100mm, 94mm), 06 Telephoto zoom (83-249mm, 69-207mm), 07 Shield mount lens (63mm, 53mm) and finally the 08 Wide Zoom (21-32mm, 17.5-27mm). For more complete story on the hard-to-find O8 wide angle lens click here.

The lake cruisers traditional looks and almost silent motors made the Lake Geneva cruise a real joy. (Pentax Q7, ISO 200, 02 lens at f4 and 5.5mm.)
One of the weaknesses of the Q system is their tiny batteries which do not hold the best charges. I carried two batteries most days, but was able to get through the majority of days with a single battery by conserving the power by turning off the camera immediately after using it and keeping chimping (checking the images on the back LCD screen) to a minimum.

Keeping an eye out for interesting “street” images adds more depth to your typical vacation photographs and helps to capture a greater sense of the local character.
Ideal system for capturing street scenes
As a former journalist, capturing interesting street scenes was a prime focus whenever I was wandering the small towns and cities where the river cruise ship stopped. Nothing screams professional more than a large 35mm camera and an array of lenses cascading out of the camera bag. That’s not the image I wanted to convey while wandering the back streets trying to capture street scenes.
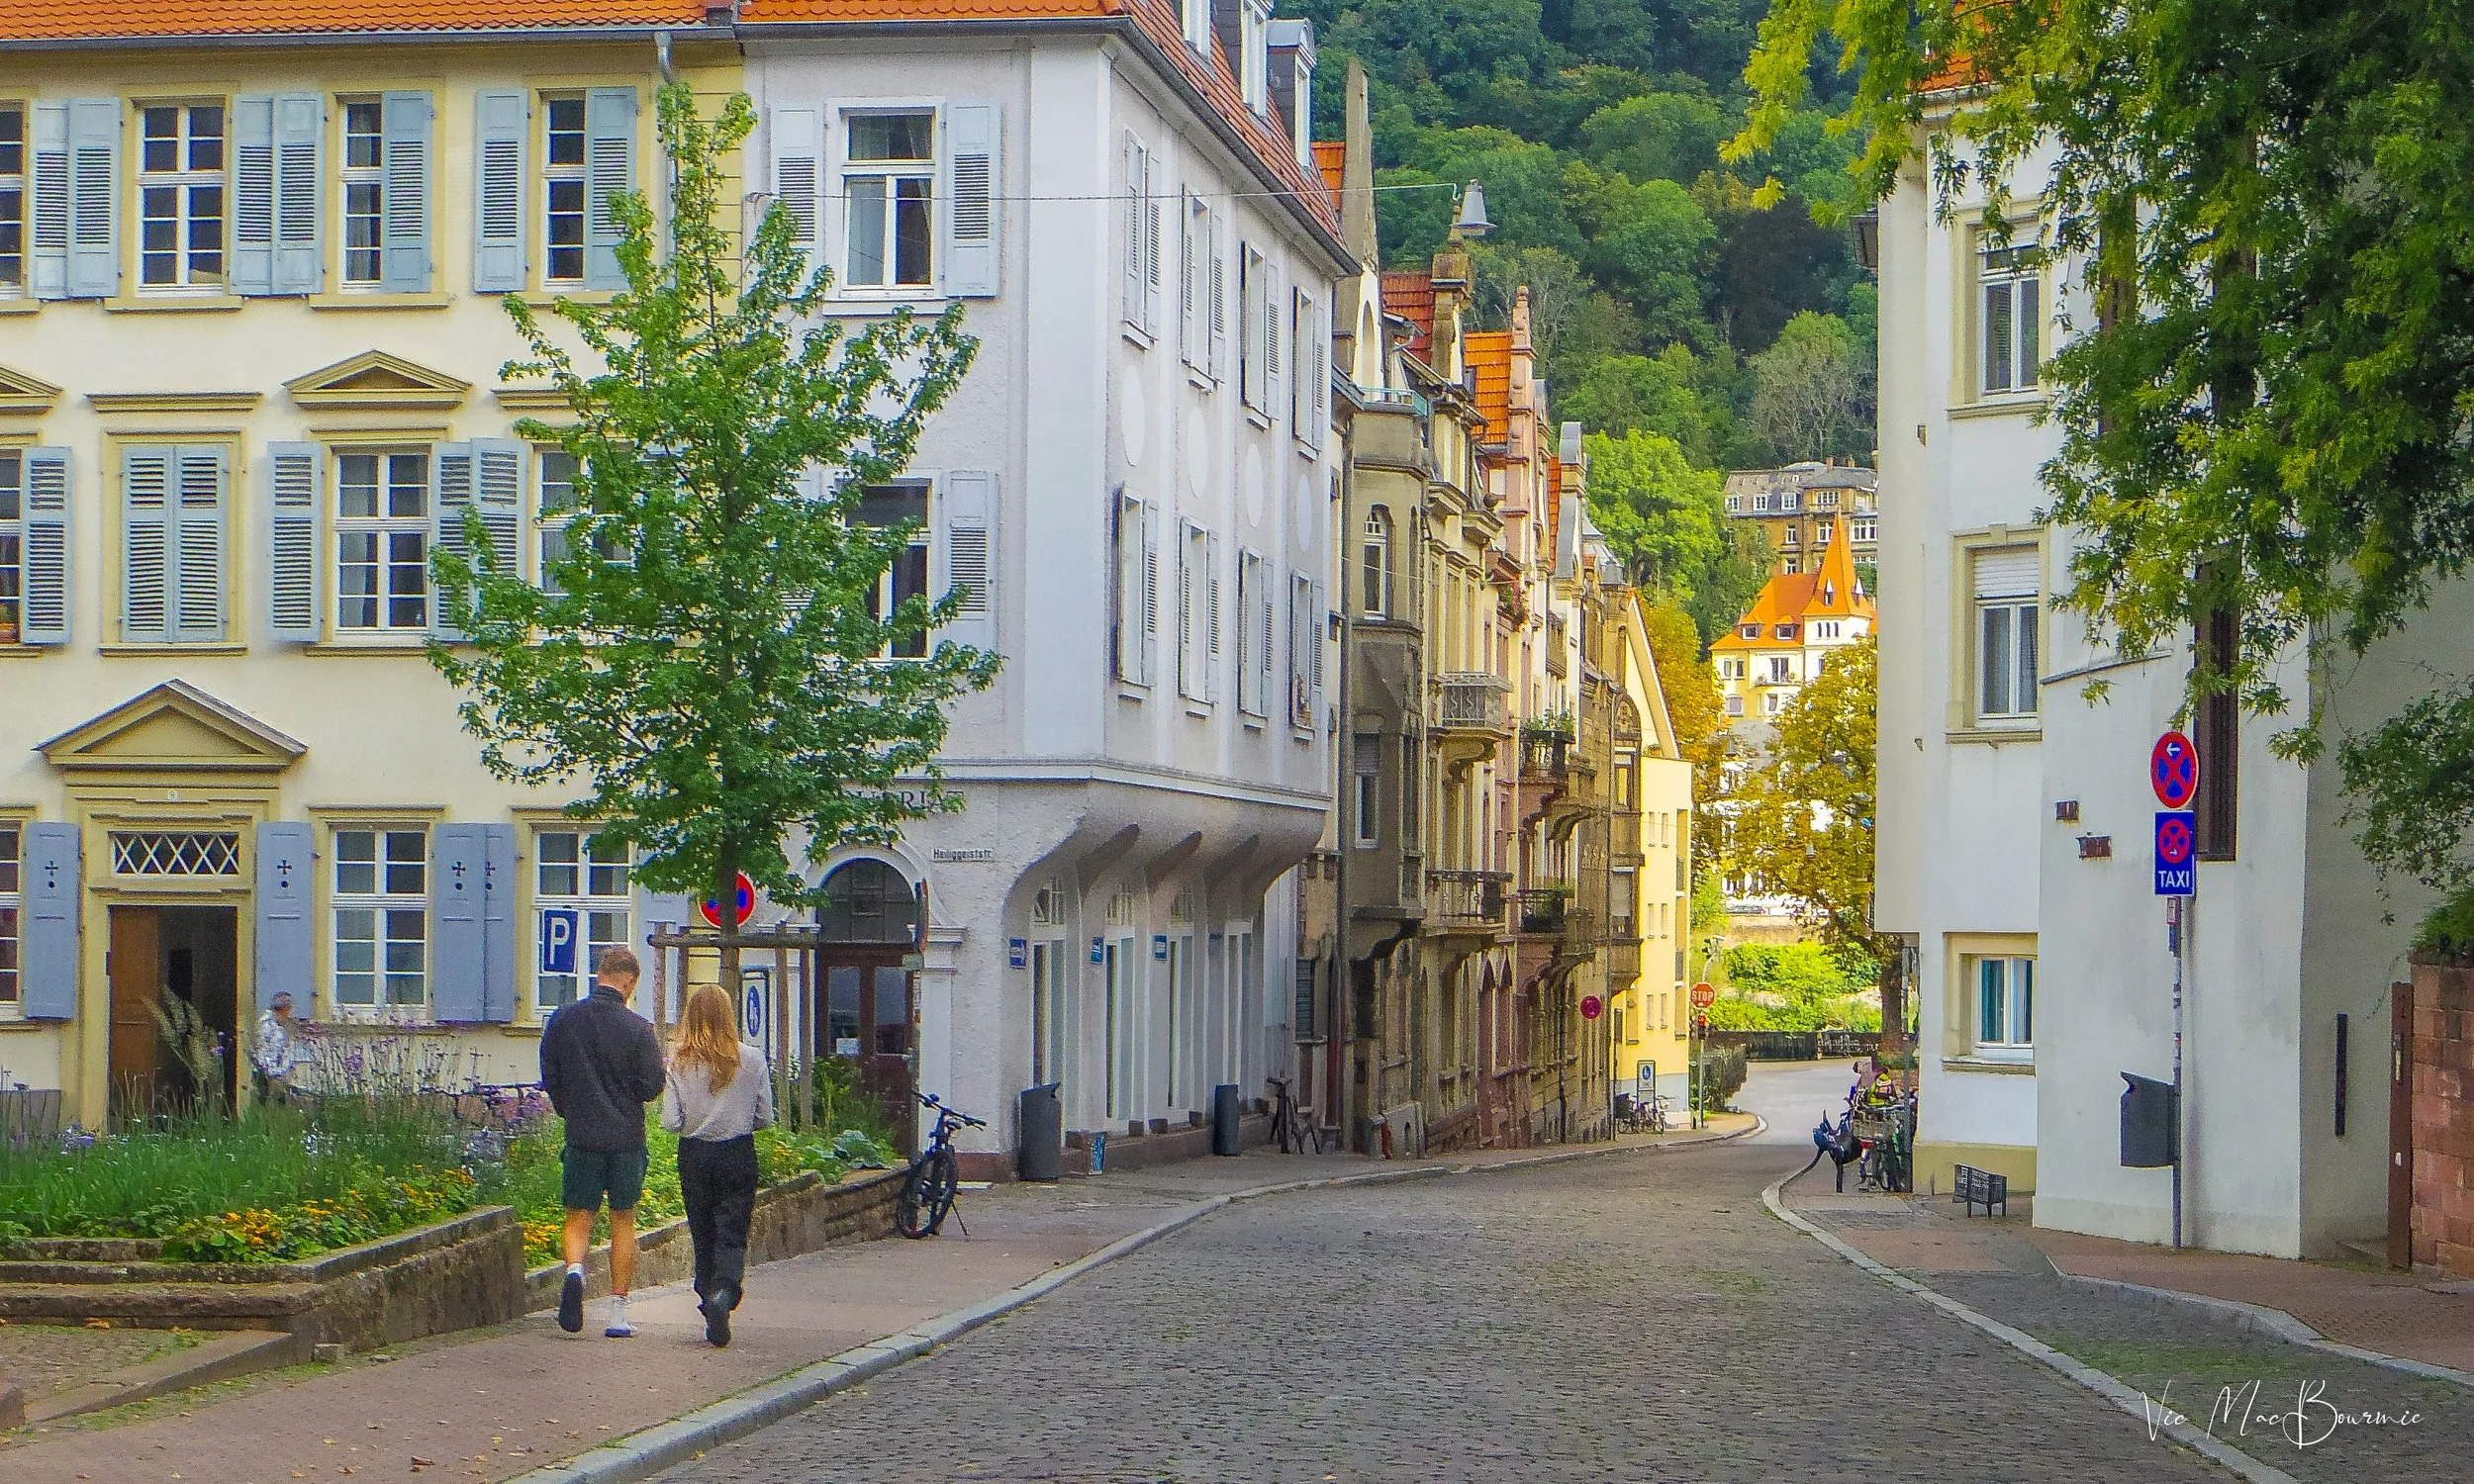
A couple strolls down the quintessential European street in the heart of a quaint German town (Heidelberg I believe). (Pentax Q7, ISO 400, F4, with 02 standard zoom at 11.2mm.)
Nothing could be more inconspicuous than the miniaturized Pentax Q system. Even with the 80-200mm f2.8 mounted on the camera, no one is going to mistake you for anything more than an annoying tourist, if they even notice you are photographing them at all. The whole package is so small that, if you are shooting from the hip, I can guarantee no-one will take notice.

This well-dressed woman seemed to be taking a moment to do a little people watching or maybe waiting for a friend, but I could not resist capturing this captivating scene.
These are just a few “street scene” images taken during our two weeks in Europe. I hope to write a separate post on capturing more authentic images on vacation rather than just your family members posing in front of typical tourist destinations, which will include capturing street scenes.

Getting a grip on the Sigma DP series cameras
The incredible Sigma DP series of cameras with their minimalist approach to design combined with an outstanding foveon sensor makes them a true cult camera. Adding a third-party 3-D printed grip only makes the cameras even better.
Walking a dog and taking pictures is not always easy, but with the 3-D printed grip and thumb rest, it’s possible to use the Sigma DP cameras like a real street shooter.
Third-party grip takes street photography to a new level
Let’s start by saying I love the minimalism of the Sigma DP1 and DP2. Their simplicity, along with their incredible foveon sensors give them special status among the many high-end point-and-shoot cameras in my arsenal.
My Sigma DP2’s brick-like look and feel is perfect when I’m using it out of a camera bag or from a tripod capturing landscapes in the woodland. However, when it comes to street photography, I like a good grip to give me the assurance I’m not going to accidentally drop one of my favourite cameras.
That’s when Shutterspeedblog’s creative expertise comes into play with its outstanding grips for the Sigma cameras as well as a host of other high-end cameras from Leica, Canon and Lumix just to name a few.

Sigma Hand grip
The 3-D printed grip has been meticulously designed to incorporate both a grip and thumb rest, while allowing access to the battery and SD card.
There is something comforting about walking around town with the Sigma DP2 hanging off your fingertips ready to capture anything that catches your fancy. Of course, I use a simple wrist strap for a little added insurance, but the camera sits nicely in my hand with just the grip. The built-in thumb rest is added security and helps me to hold the non-ibis camera still during longer exposures.

Grip and build-in thumb rest
This overhead view shows the grip and build-in thumb rest that helps to make street photography style shooting with eh Sigmas that much easier.
The meticulously 3D printed grip also allows access to the battery (and we all know how important that is for the battery-eating Sigmas) and SD card, to make the entire experience seamless.
Want to remove the grip? Unscrew it from the tripod mount. Want to still use the camera on a tripod? No problem, there is a separate, yet very sturdy tripod mount built into the grip.
There is no doubt that the very reasonably priced grip significantly improves the handling of the camera. Depending on the size of your hands, some of the buttons on the back of the camera might be a little more difficult to reach, but that is a miniscule price to pay for the convenience the grip provides.

Lumix LX7 grip
Similar grips are made for Lumix, Leica, Canon and other high end point and shoot cameras.
I decided to give it a good workout during a walk with our new dog down the Main Street of our small town. Walking a dog and carrying a camera loosely in your hand is not always recommended, but the new grip on the Sigma made it not only possible, but immensely enjoyable. All I had to do is raise the camera and shoot away like a real veteran street-shooter.
I can only imagine how much easier it will be to use the grip on the cameras for someone who regularly shoots from the hip, whether they are using the camera in manual focus mode or autofocus.
The following are just a few more images from my morning walk with our Flat-coated retriever, Colby and the Sigma DP2 and grip from Shutterspeedblog’s eBay store.

Colby goes to church
A quick grab shot of Colby in front of a gothic church door. The grip just makes stealing images like this much easier with the Sigma series of cameras.

Catching a quick shot in front of Trails Cafe on the Main Street of our small town.
The combination of the hand grip and thumb rest transforms the Sigma DP2 into a very competent and comfortable walk-around camera ideal for high quality street photography.

Luminar Neo to the rescue
Let’s put Luminar Neo post processing software to work to try to rescue a roll of long-expired film.
Trying to save terrible negatives from long-expired film
It was a dumb mistake. In my hurry to test out a new film camera I had received, I failed to check the film I had loaded in it and went off to run a test roll through it to ensure the camera was working properly.
Turns out the roll of “Black’s Camera film” was likely at least 10 years old and stored inside the camera (not a good idea unless the camera was in a fridge for 10 years. I had not set the camera for any compensation for outdated film (Not that I could easily over ride the ASA setting with this point and shoot camera anyway.)
It wasn’t until I pulled the finished roll of film out of the camera that I realized this was likely long expired film that was given to me along with the camera.

This is an example of one of the better rescued images from the decades-old film post processed with Luminar Neo’s extensive editing modules. The original straight out of camera (SOOC) is pictured below.
I could have asked the lab to push the film a stop or two, but decided to ‘let it ride,’ as they say.
The results were far from perfect. In fact, they were downright awful. Still, I hoped, salvageable with a little (well maybe more than a little) work in post processing.
So, I decided to put my newest post processing software, Luminar Neo, to the test.

This is the same image as the one pictured above before and post processing was applied.
Let’s just say it would have its work cut out for it trying to rescue this old outdated film.
The negatives had a dark, almost eerie appearance to them that looked like they had been run through a bath of black ink. They were dark and murky and just plain ugly. A few were completely unreadable, but most had enough of an image to make scanning them on the Epson flatbed a worthwhile endeavour.
These were originally taken as test images, so there was nothing I couldn’t live without. They were mostly early spring garden images.
If they were priceless family pictures, I would have taken more time with them in post processing and probably would have been able to squeeze out a little better results. Given that they were simply test images, I wasn’t prepared to spend a lot of time trying to rescue these image. With that said, it’s probably wise not to expect miracles.
The lesson I’m hoping to provide readers is that, even if you have very old, faded or extremely underexposed images, there is still hope, especially if you are willing to put in the time to rescue them from the trash bin. These are not images you want to put up on social media, but if they are historical family documents, they would probably be worth rescuing and might even become cherished family keepsakes.
Below are a few of the before-and-after results after running the negatives through Luminar Neo’s comprehensive post processing modules.
It’s difficult to explain everything I did to try and rescue these images. Each image was treated separately and needed varying degrees of editing.
One editing module that I did find extremely helpful was a feature in the Creative Module called “Color Transfer".” This module is rather unique and lets the editor choose an existing photo (either one of the provided ones or one of his/her own) and “transfer” the colours from that image into the image being edited.
This technique – using one of my own garden images – helped me retrieve many of the original greens in the expired images.
The results vary considerably and it’s safe to say that these are not social-media-worthy images. But, as I said, if you have severely degraded negatives that are important to you, there are ways of rescuing them to a respectable level.
Or, maybe it’s best that you be the judge. Before-and-after images below.
All of these images were post processed using the Ukraine-based Luminar Neo. I have partnered with the company and can offer readers a 10 per cent discount at checkout with my code “FernsFeathers.” Using the code will not cost you anything, but I get a small amount of money to keep me writing articles like this one.
If you are interested in exploring Luminar Neo further, check out my posts here (Luminar Neo in the woodland garden and nature) and here (Is Luminar Neo the only software I will need) and here (exploring a film camera and Luninar Leo)
Happy shooting.

In this image I tried to bring back some of the original greens in the image and bring up some of the clarity in the image by removing the veil over the original image below.

Original image SOOC prior to post processing
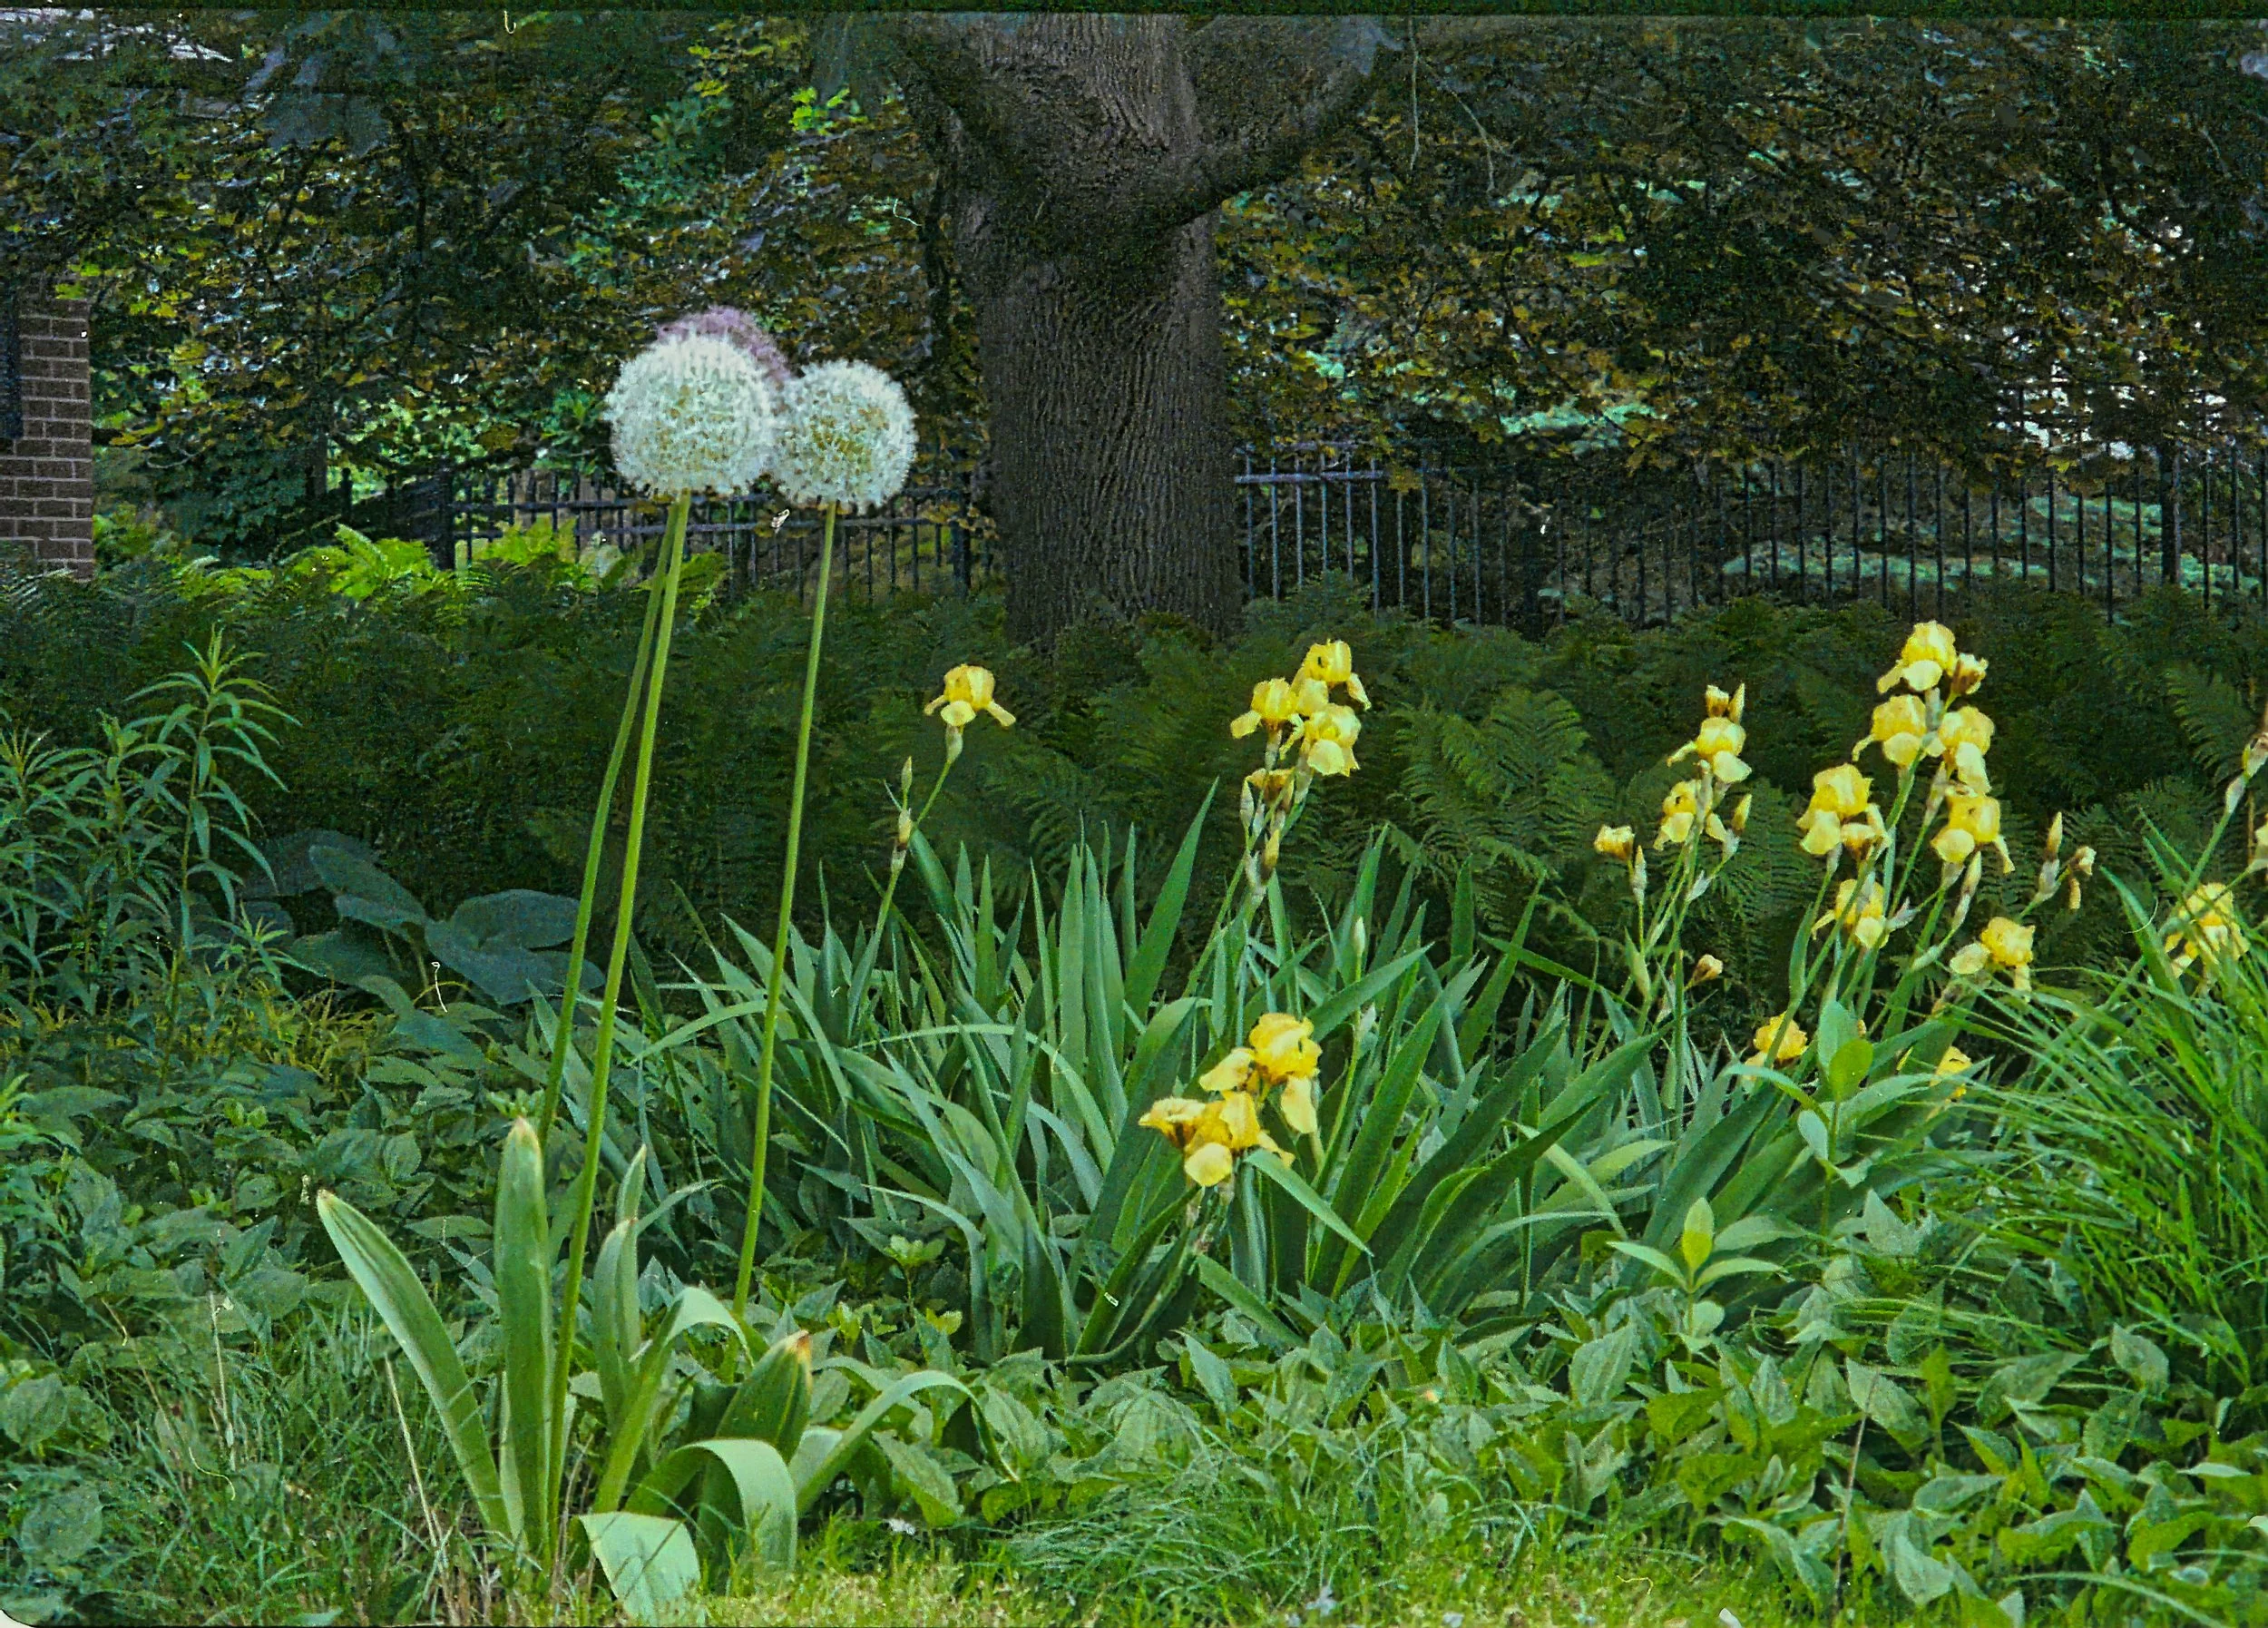
Another successfully rescued image thanks to the post processing power of Luminar Neo

Garden image of yellow irises prior to post processing by Luminar Neo.
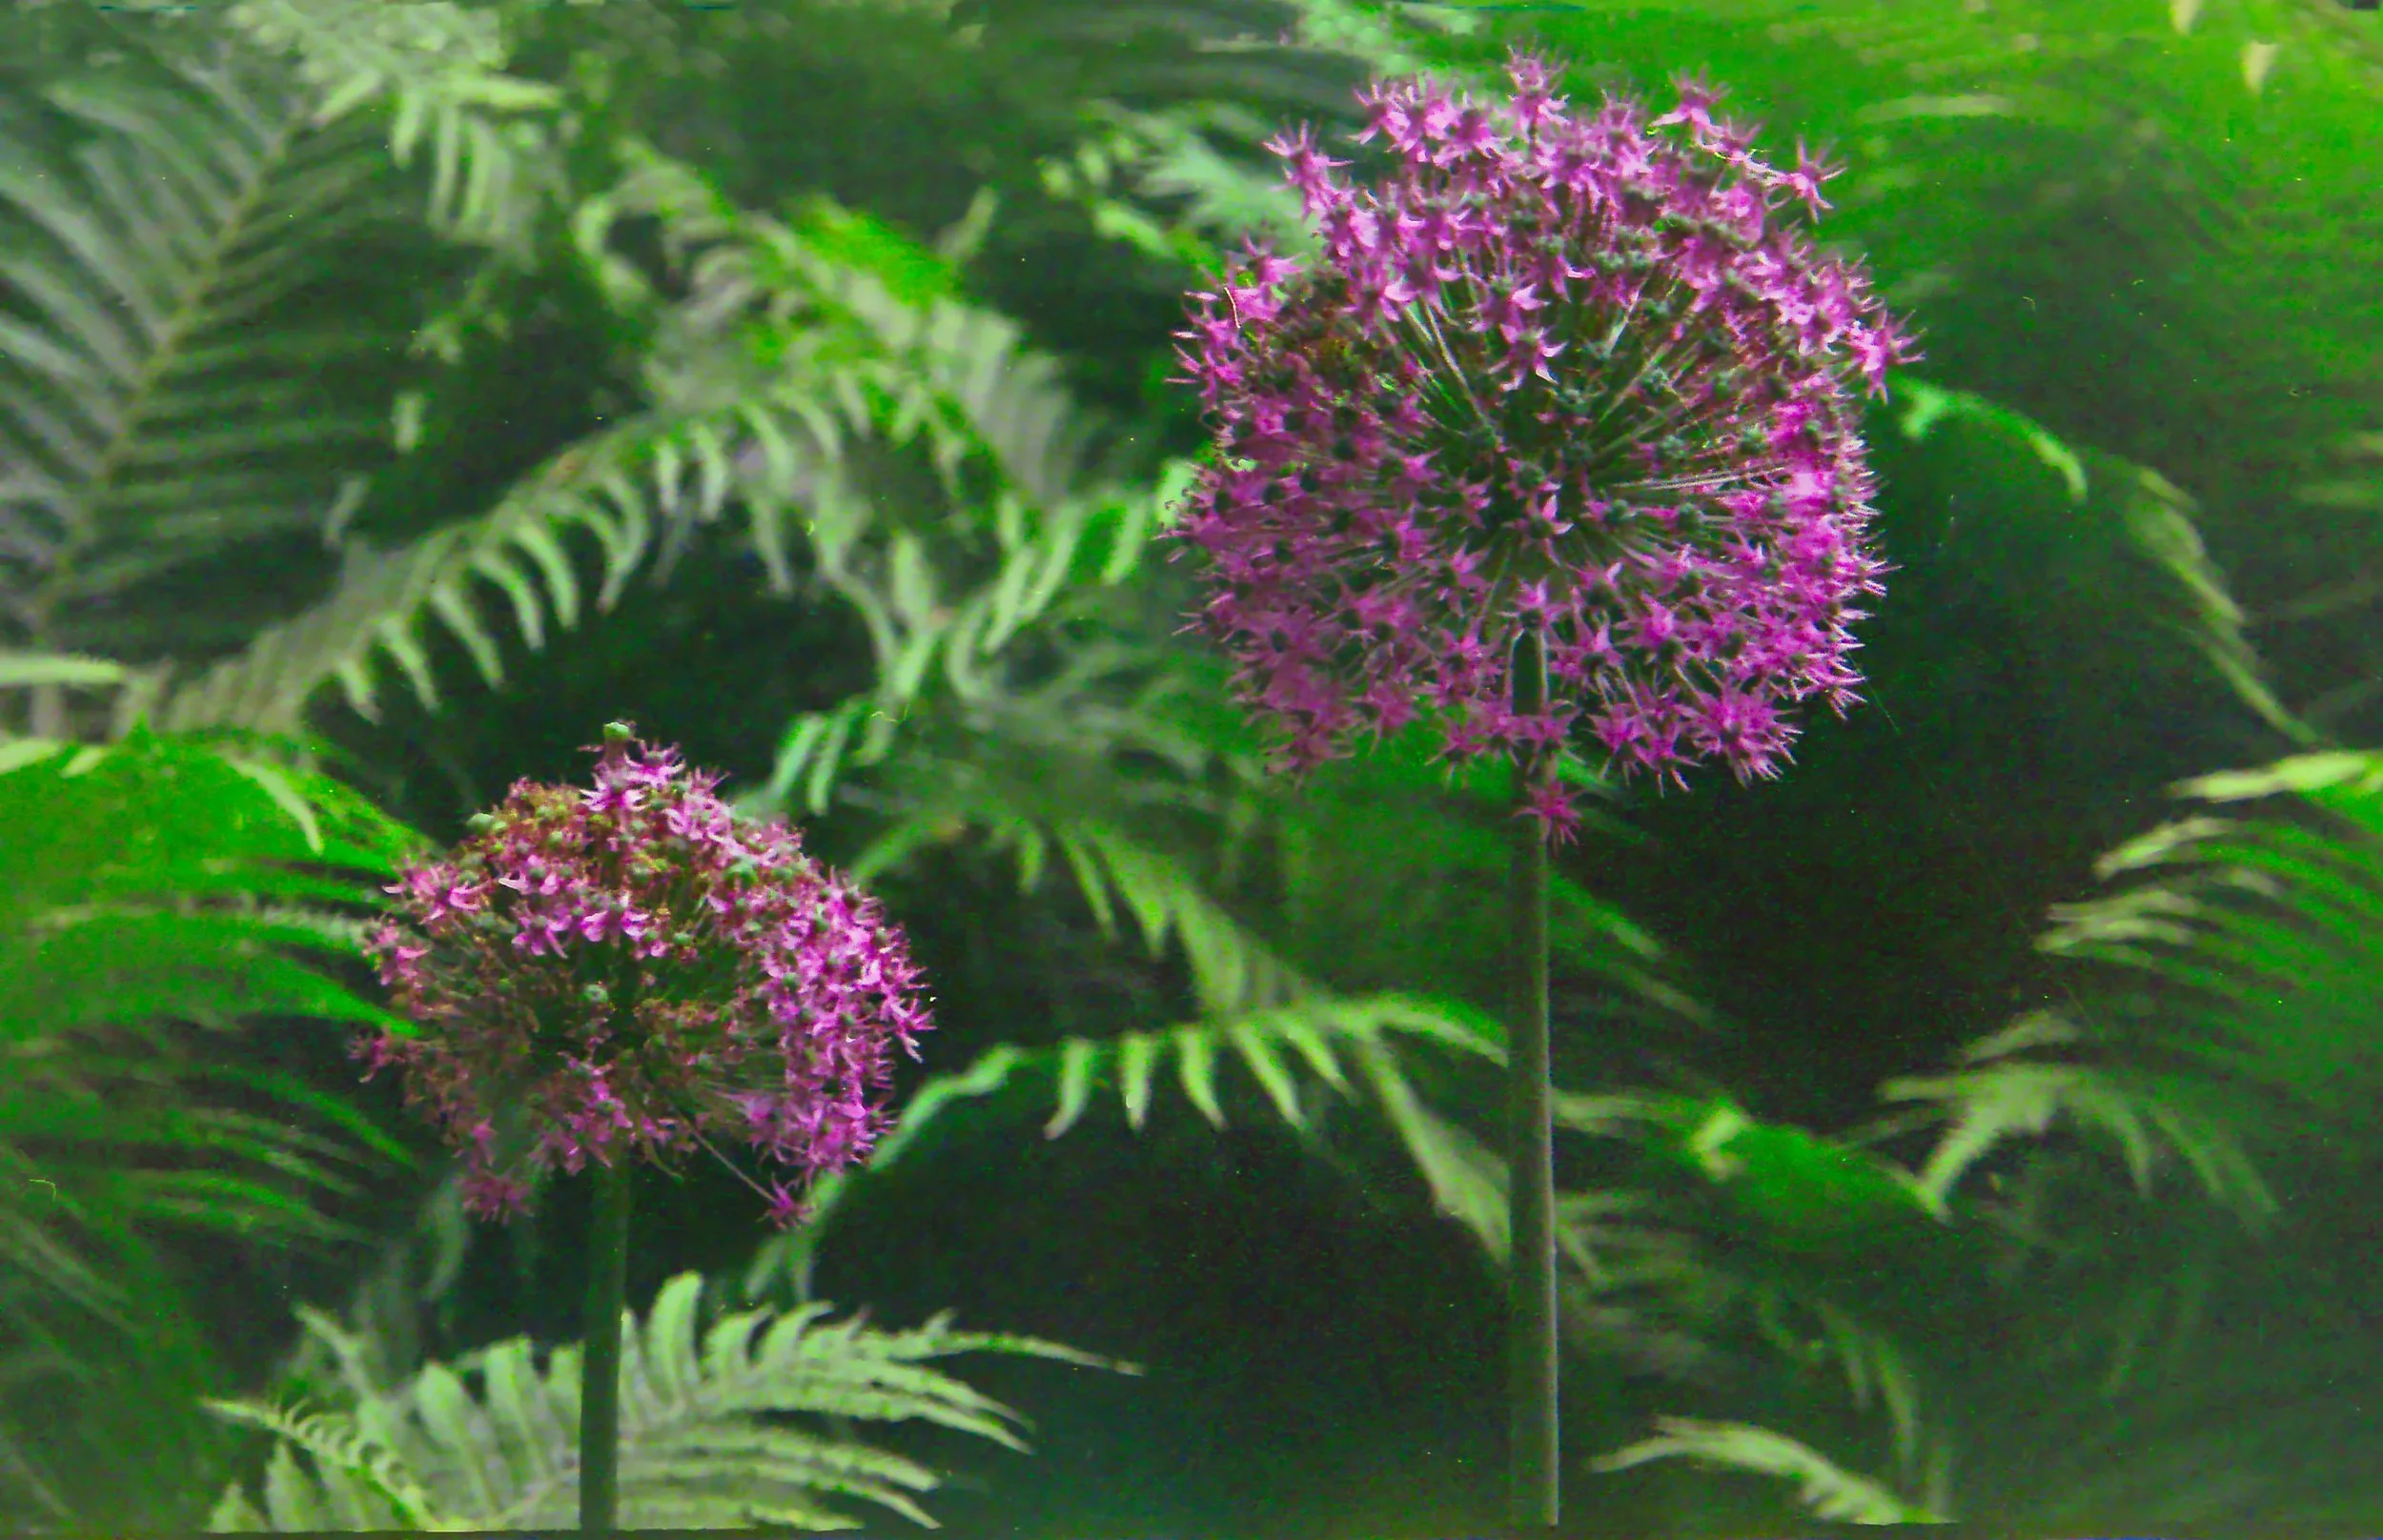
I probably should have given up with this image shot on expired film, but I was determined to get the most out of it. Here is the result. While it looks pretty bad, it’s a massive improvement from the original image SOOC pictured below.
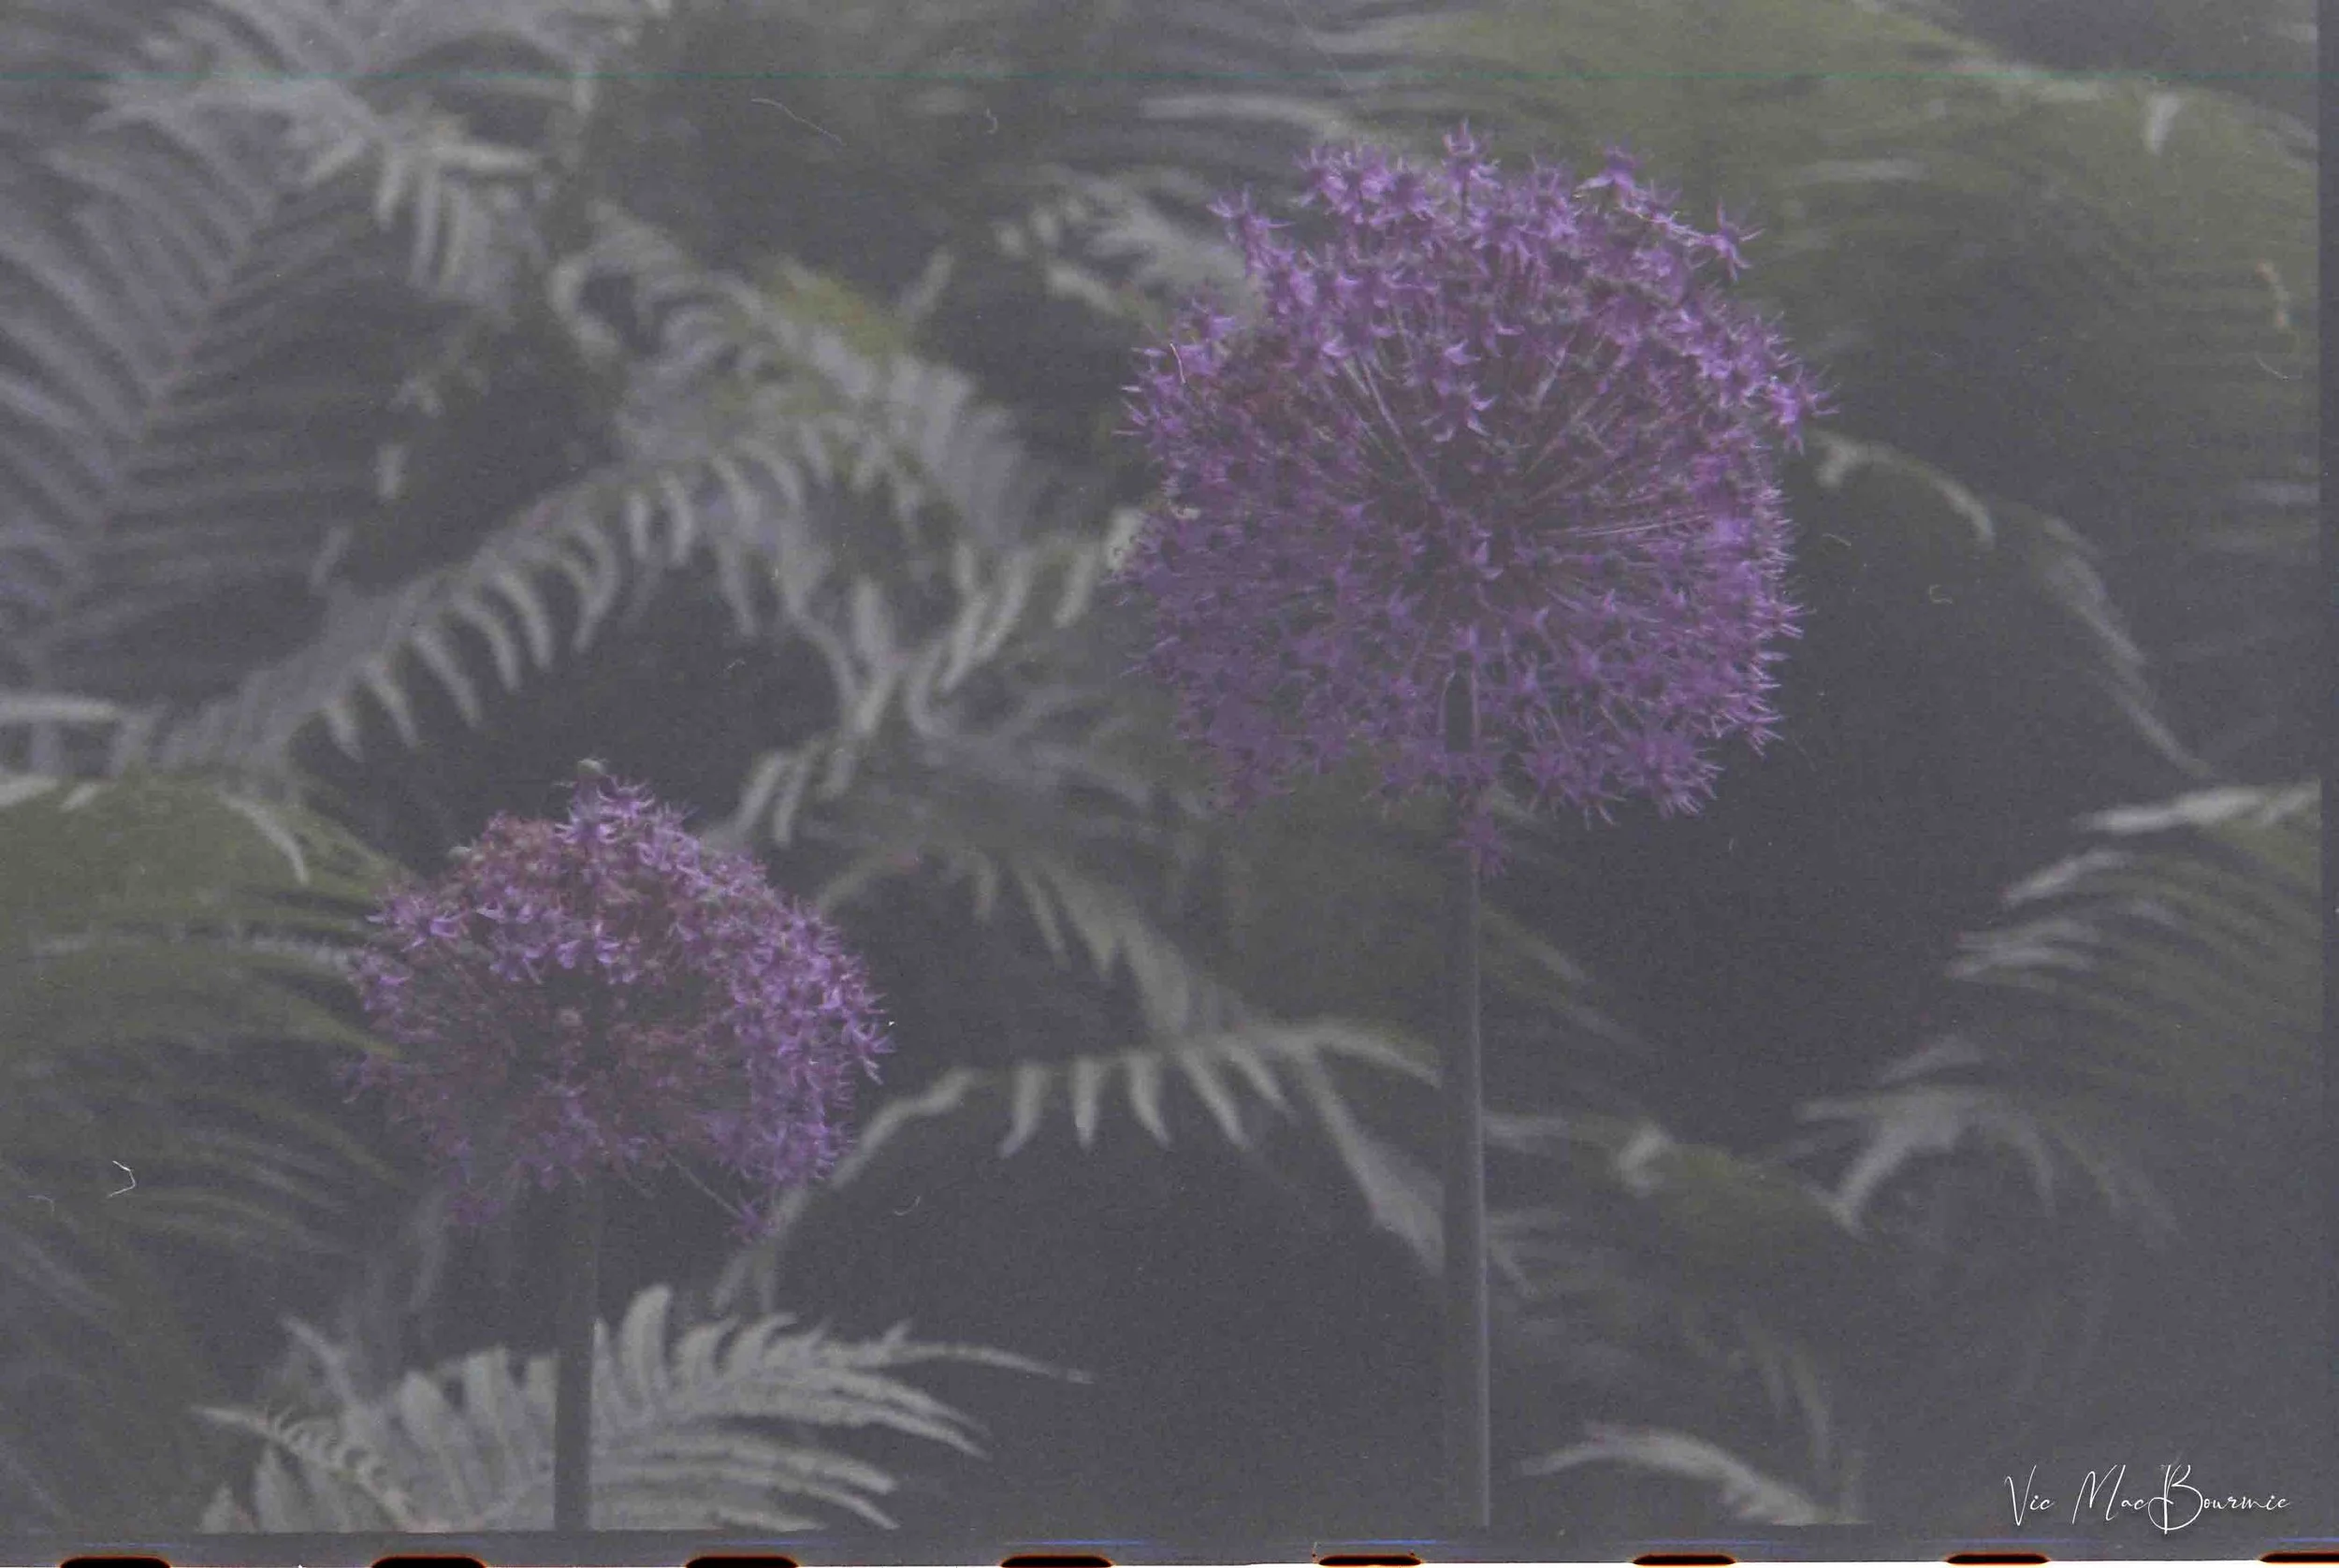
This image SOOC shows the extreme degradation of the long-expired film. Although the above corrected image is far from stellar, if it were a cherished family picture, it would at least be a major improvement.

Minolta 125 film camera: A classic point-and-shoot
The Minolta 125, point-and-shoot, 35mm film camera is ideal for a new photographer or one interested in experimenting with Lomography.

This garden scene was post-processed with Luminar Neo bringing out the colours.
Beginner photographers and Lomography aficionados will love this little gem
This post is a combination of a review of the Minolta 125 film camera as well as a focus on post-processing using Lightroom and Luminar Neo. I hope the post illustrates the importance of post processing your images, whether they are from a digital camera or a film camera. Learning this skill does not have to be difficult. Luminar Neo developers have gone to great lengths to simplify the process so that excellent results are more easily achievable. Please take a moment to check out my other posts on Luminar Neo listed at the end of this post.
If you’re looking for a 35mm film camera that just works with little to no fuss, this little compact Minolta might fit the bill.
Forget about setting it on manual, adjusting apertures or shutter speeds, this is a genuine point-and-shoot camera from the year 2000.
It has a lovely high-quality look to it with a champagne and silver exterior combination that might make you think it’s a very high quality all-metal Contax or Rollei. Pick it up, however, and you’ll know it’s not in that league. It does appear to have an all-aluminum front and bottom plate, but high-quality plastic abounds in the back and in other parts on the camera.
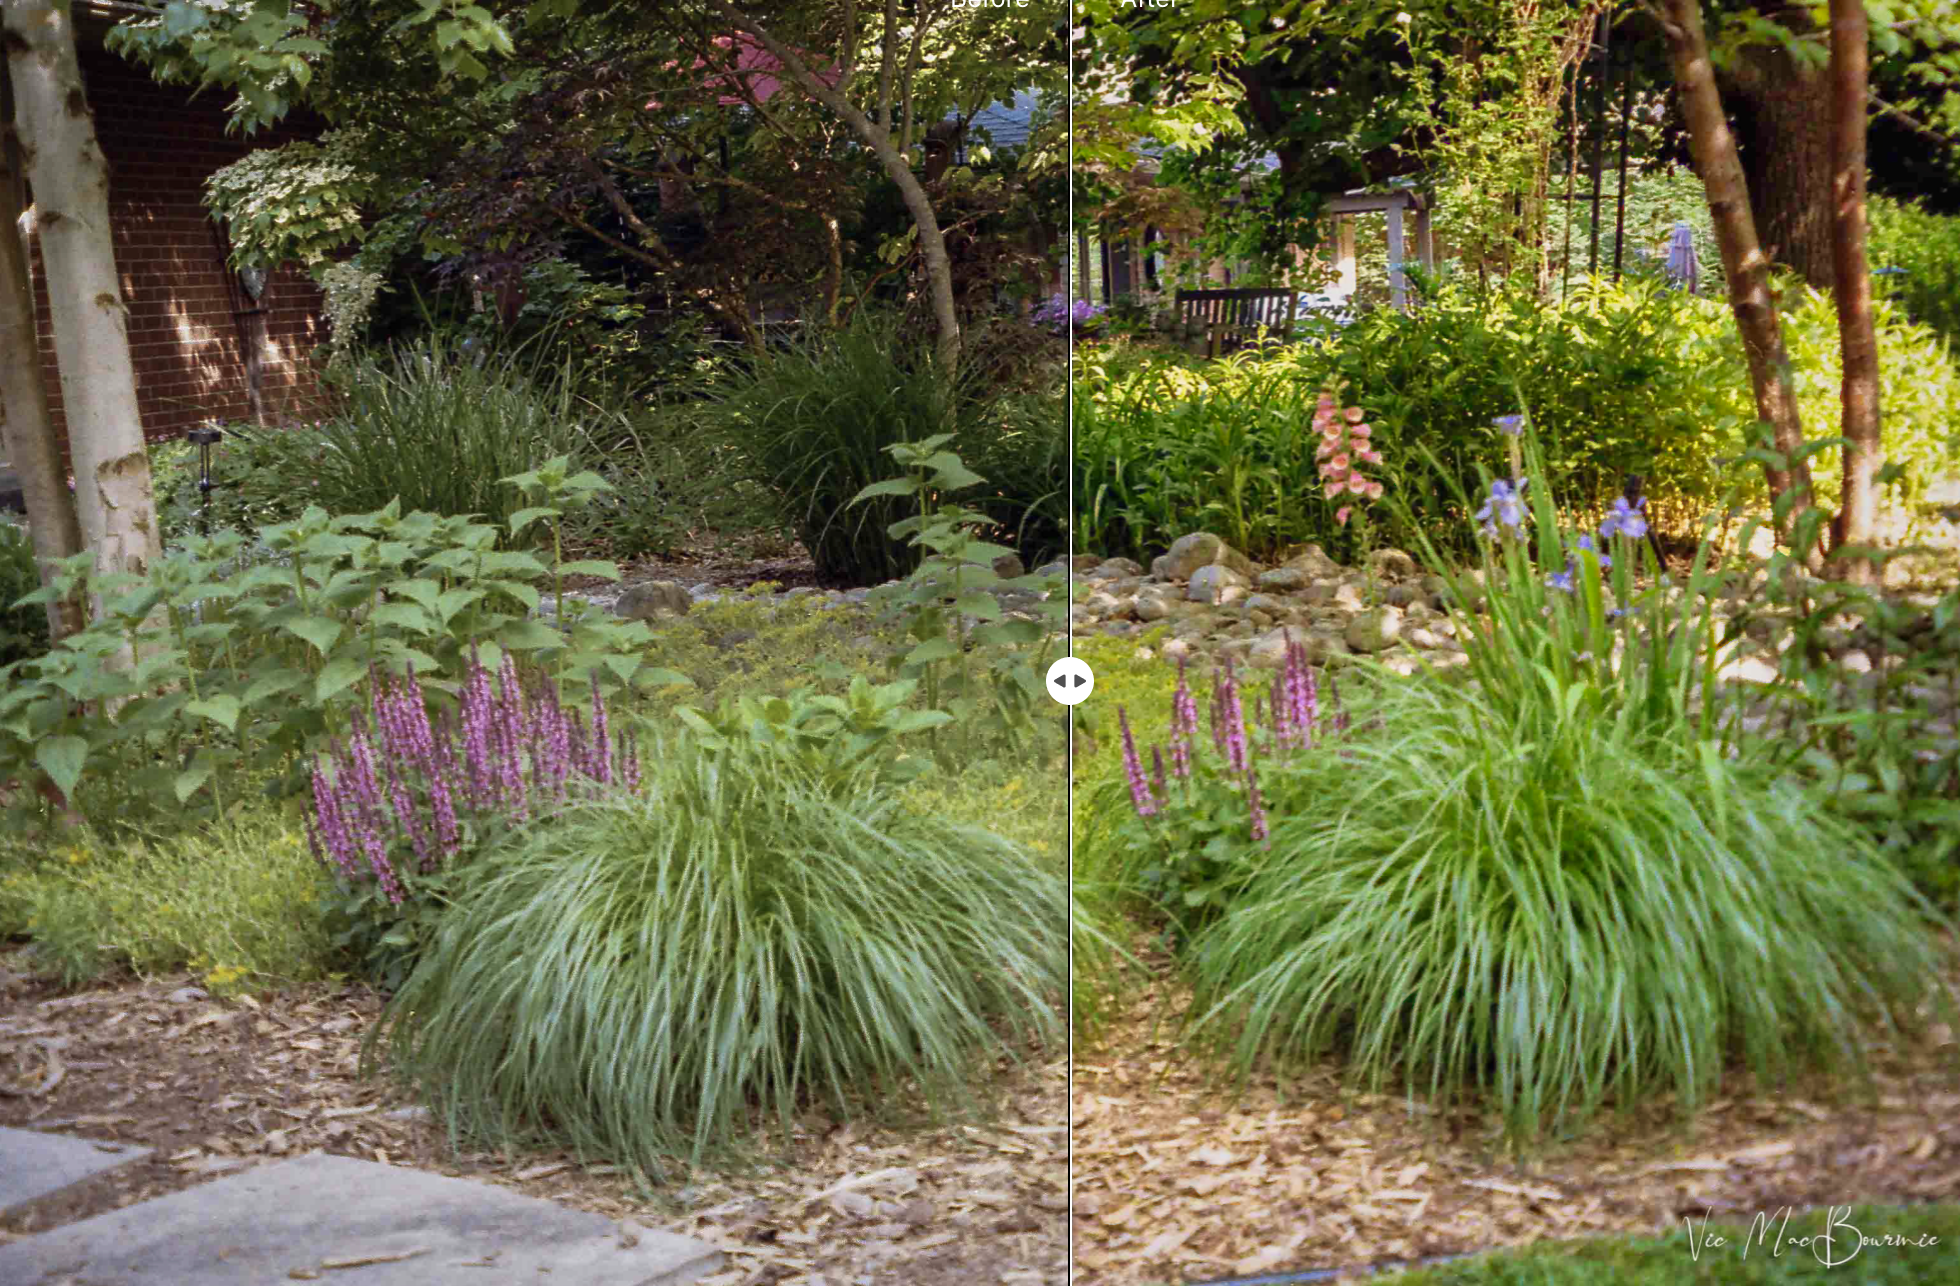
Before and After
Image shows the Before-and-after following some work in Luminar Neo. Notice how the colours, especially the greens and magentas pop in the Luminar Neo image at right.
Mind you, the Minolta Riva Zoom 125 is a fine example of an autofocus, DX-coded, film point-and-shoot camera that can deliver very pleasing results without a lot of thought on your part. It will read film from ISO 25 (think Kodachrome) to 3200 but the recommended film is ISO400. In my tests, I shot ISO 200 for a finer grain, and used a tripod to reduce the chances of motion blur.

This farm scene was heavily edited in Luminar Neo to increase the colours in the grasses and punch up the reds in the barn. In addition, I replaced the sky in Luminar Neo to add a little more interest. Replacing the sky involved little more than a click of the mouse and a little masking around the barn’s roofline. Below shows the before-and-after image.

Before and After image
This shows the before-and-after image. The photograph on the left is the Lightroom image and the image on the right is after additional post processing with Luminar Neo, including a complete sky replacement.
How it performs
Would it be the only camera I would take on an important shoot? Absolutely not. But, for a very lightweight, simple camera that can fit in a pocket, it’s certainly one that most film shooters would be happy to carry around as a back-up, or one to take with them to grab shots at a party or fun family event.
For students of Lomography, this little Minolta will allow you to focus on getting the images rather than the technical aspects of photography.
A highly competent flash (with red-eye reduction and a fill-flash feature), and superior lens doesn’t hurt either.
What sets the Minolta apart from many point-and-shoot cameras is that sweet Minolta lens that starts at a convenient wide angle range of 37.5mm and stretches to 125mm.

This little Minolta has a nice finish, a great lens and easily fits in your pocket.
Not particularly fast at f4.5 -f10.3, but the built-in flash comes in handy to stop motion and a tripod with the electronic self timer can be used if you are working a landscape. For those who care, the lens is a 6 elements/ 6 group construction with a close-focusing capability of about 2 feet.
Minolta added an ingenious electronic zoom lever that is actually set up to give the user access to the most poplular focal lengths – five to be exact. At the widest end you are at the 37mm focal length – consider it a sweet little 35mm. One click and you are in the 50mm focal length. Hit it again and you’re at the perfect portrait setting 85-100. One more click and the lens zooms to its max at about 125 – close enough to the popular 135mm focal length.
Buy these lenses separately, and you’ll be paying 10 times the cost you could probably pick up one of these on the used market these days.
An orange flashing LED on the viewfinder provides several warnings from; flash will fire, flash charging, and camera-shake warning, depending on the blinking speed. Above the orange light is a green light that tells the shooter the subject is in focus, subject is too close or the contrast is too low for accurate focusing.

Stream and waterfalls
Extensive post-processing was to rescue this image, including removing unwanted objects, adding an Orton-effect to some of the foliage and boosting the blues and greens in the stream and waterfalls to give it a more pleasing colour.

Before editing
This image has had only minor edits to it in Lightroom. The above image shows the results after work in Luminar Neo post processing software.
The flash can be set to auto flash, auto flash with red eye reduction, fill-flash, flash cancel, and night portrait (with red-eye reduction.)
For my woodland garden, landscape and flower test shots, I set the camera on automatic, turned off the flash and popped the camera on a tripod. To ensure the sharpest images possible, I also used the built-in self timer with ASA 200 Kodak film.
For close-focus subjects, lines engraved in the viewfinder corrects parallax issues and helps the user get the image they were hoping to capture. That’s a nice touch for flower photographers looking to capture subjects without a lot of complex macro gear.
It takes a relatively inexpensive single CR123A lithium battery that can handle about 12 rolls of 24 exposure rolls with flash for 50 per cent of the exposures.
Four small buttons on the top control the on/off, flash, timer and date functions. (some cameras including the one I used do not have the date button.)
An LED screen on the top plate provides the needed information including battery life and film counter as well as the camera’s other settings – flash, timer etc.
Important notes: Minolta made it difficult to accidentally open the camera back before the film is rewound. That’s a good thing. The back locks until the film is rewound into the spool. It can be over ridden if you want to change film mid-roll, for example. The other point that needs to be discussed is how to load film. It’s a little tricky at first if you are used to loading 35mm film into a typical SLR. With the Minolta, users just have to place the front of the film onto the spool and let the camera take in the film. Hard to explain, but once you get the hang of it, it works beautifully.
So how about the results?
More results of the Minolta 125 can be viewed on the Lomography site here.

Image shows our back garden with ferns and albums.
The cons
This is probably not the camera for an advanced amateur and certainly not for a professional looking for complete control of the settings.
I am thinking the camera is perfect for the upstart Lomography student looking to have some fun with print film at a reasonable cost. Or a photographer looking for a second camera to use as a simple point-and-shoot.
Unlike so many of today’s digital point-and-shoots, this has a decent viewfinder –maybe a little small – but entirely usable.
It’s a fun camera to grab quick shots. For a street photographer, it gives you quick power up and good autofocus with a nice range of focal lengths that are more than capable of getting the job done.
Its compact form is never going to suggest that you are shooting professionally, but its reach at 125mm will give you lots of opportunity to keep a comfortable working distance.

Image of Cornus Kousa bracts converted to B&W with Luminar Neo. I thought the image would benefit from a B&W conversion. The built-in B&W processing power of Luminar Neo is very impressive and includes a number of presets that allow you to convert any image with a single press of the mouse. In this image, I first converted it to B&W and then proceeded to add a number of effects to achieve the finished result here. Before and after below.

Before and After
The before and after shows the original colour image and finished B&W after processing with Luminar Neo.
It’s the camera to pop in your pocket for a fun night out or a party where getting results is more important than capturing fine photographic images. The strength and simplicity of the flash makes it ideal to capture party portraits. The night mode makes getting night portraits with city lights in the background a simple process.
That’s not to say the camera is not capable of great results.
If you are more serious, put the camera on a tripod and use the electronic self timer to capture impressive results with Minolta’s high-quality lens.

The B&H price in 2001 for the Freedom Zoom 150 with an extended zoom range of 150mm, 25mm for than the sister camera the Freedom Zoom 125.
Look for a good used camera and put it to use. For the price you’ll likely pay, there is no need to worry about it either being damaged or stolen.
In its day, it was considered a sweet little point and shoot. Certainly not the most inexpensive camera in the year 2000. It sold at many of the large New York camera retailers for more than $200. The advertisement shows the B&H price of the Riva 150 at $224.00.
Today, you can probably pick one up for easily less than $100.
That’s a steal for a good working copy.
Post processing with Lightroom and Luminar Neo
Today’s print film offers the photographer plenty of exposure latitude. The above images were shot with Kodak 200 film and scanned on an Epson 500 flatbed scanner.
The initial edit from a high resolution TIFF scan to a jpeg was done in Lightroom. (I have included some of these digital images above.)
Then, I brought the jpeg images into Luminar Neo and went to work on transforming the images into the more creative visions I imagined when I was taking the photographs.
Luminar Neo’s modules allow for a more creative approach to editing your work, if that is the direction you want to take your images. That’s not to say that other post processing programs (including Lightroom and Photoshop) are not capable of similar results, it’s just the these creative processes are built into Luminar Neo.
The ability to try the creative filters will inspire you to experiment more and come away with a more creative finished result.
Whether you like to add a creative touch to your images, or prefer to leave them as they are straight out of the camera, Luminar Neo offers the photographer the ability to make that choice.
Luminar Neo post processing software
If you want more information on how I use Luminar Neo to post process my photos, take a moment to check out my other posts listed below:
• The beauty of the woodland with Luminar Neo
• Can Luminar Neo stand on its own as a post processing package?
• A Walk in the Woods: A Photographic Approach
If you are interested in purchasing Luminar Neo, please consider using the code FernsFeathers at checkout to receive a 10 per cent discount. By using this code, I receive a small percentage of the proceeds which helps me to continue producing articles for readers.

Focus on the Pentax Q’s 08 rare and wonderful wide angle lens
Wide angle photography is taken to a whole new level with the Pentax Q and 08 extreme wide angle lens.

This sunset image shows the impressive results that are capable with the Pentax Q cameras and the 08 wide angle lens.
Another tiny but tough-to-beat legendary Pentax lens
Pentax has made more than its share of legendary lenses, but nothing really comes close to the rare and relatively unknown (except to Q-series owners) 08 wide angle lens.
Why? Because it’s so small and sharp that it defies logic.
In December of 2013, Pentax released their final Q-series lens for their diminutive, mirrorless Q-series cameras. This 17-33mm equivalent lens (depending on the Q camera used) originally sold for almost $500 US and could pass for a 50mm, M-series lens, accept it’s probably smaller and lighter.
Today you would probably be hard pressed to find one much cheaper than the original price thanks, in part, to a combination of quality and rarity.

This garden image was photographed with the Q7 and the 08 extreme wide angle lens. Note the strong colours together with the edge-to edge sharpness.
Of course the whole Q-series of cameras and lenses are ridiculously tiny. The 08 wide angle lens in the Pentax Q “high performance” lens series follows in those same footsteps, but it’s still mind boggling that a lens packing this kind of punch can be this small, have image quality that matches and surpasses some of the finest 35mm equivalent lenses, and boasts such a high-quality build standard.
Pity that so few photographers will ever get the opportunity to run it through its paces. Thankfully, I’m not one of them.
I was able to purchase the lens as part of an entire Q7 series that included the 01 (nifty 50mm), the 02 wide angle, the 06 (70-200 f2.8), the fisheye and the mount shield lens. Despite already owning most of the lenses, let’s just say the offer was too good to refuse.

One of several waterfalls images that shows the incredible capabilities of the original Pentax Q camera together with the approximate 17-30mm wide angle lens. This image was shot using an accessory waist level finder (see below) and post processed with Luminar Neo. (see below for details on how you can get 10 per cent off of Luminar Neo with my special code.
“It’s still mind boggling that a lens packing this kind of punch can be this small, have image quality that matches and surpasses some of the finest 35mm equivalent lenses, and boasts such a high-quality build standard.”
This Pentax lens packs a punch
But we are here to focus on one lens only – the Pentax 08 wide angle lens.

Chart provided courtesy of Pentax Users Discussion Group.
First, it’s important to remind Q-series camera users that the various cameras in the lineup have different sized sensors that affect the focal length of the lenses. In the case of the 08 wide angle gem, the different sized sensors mean that the 08’s focal range is equivalent to approximately 21 to 33 mm in the full-frame (24 x 36 mm) format when used on an original Q or Q10 camera, and 17.5 to 27 mm when used on a Q7.
Add to the excellent build quality, wide focal length and miniature size, an image quality that again, defies most logic.
For more Pentax Q-series images with the 08 wide angle lens, be sure to check out my photo gallery here.

This image is one of a series taken on a one-day visit to downtown Toronto. The Pentax Q series of cameras together with the 08 are a great combination for architecture or street photography. Add the waist level finder accessory (see below) and no one would suspect you are taking serious street images.
Sharp throughout; including the corners; excellent distortion control; built-in ND filter, and shutter which prevents rolling shutter and synchronizes with the built-in flash; a built-in autofocus motor that features a quick-shift which allows the photographer to manually fine tune focus without switching out of autofocus mode. There is also a plastic tulip-style lens hood available, (sold separately). The lens mount is made of metal and the front element accepts the traditional 49 mm lens filters.
What more could you ask for in an extreme wide angle lens.
Suffice it to say it’s incredibly wide for such a tiny camera sensor, and with that comes all the challenges the world of wide angle photography presents.
You might think that using an extreme wide angle lens is easy, but that would be a mistake. Even though I have owned the lens for close to a year, maximizing its unique characteristics comes with a whole set of challenges.

This garden image makes use of strong foreground grasses and a misty morning to keep the image simple.
Now, if I lived in an area of epic landscapes, maximizing extreme wide angle lenses would be a whole lot easier. Unfortunately, epic landscapes are hard to come by where I live. Successful extreme wide angle photography begs for simplicity and finding natural images that work with a wide-angle lens takes time and a whole lot of patience.
Nevertheless, in time, I’ve collected a decent selection of images exploring the potential of the lens. I’m sure the lens will be put to the test many more times in the near future and I will try to add them both to this post as well as my photo gallery of Pentax 08 images here.
What others are saying about the Pentax 08 wide angle lens
The following are just a few comments from Pentax Q-series owners who have made images with the 08 wide angle lens.

Tiny but Tough
Pentax’s Q-series 08 wide angle lens is both rare and wonderful with exquisite image quality and very high build quality. Image provided by the Pentax Discussion users group.
From the Pentax Forums discussion group:
“In 2019, I still do not know what beats the Q-system with this and the 06 tele-zoom. As for sharpness, this lens is as good as it gets on the sensors in the Q's. Bokeh is impossible: shoot in BC mode if you need that, but, really, just bokeh in post if you need that. This lens is crazy unique, which alone makes it crazy good.”
“After a few test shots, I believe that this is the perfect lens for the Q system. It's as sharp as the 01, yet incredibly small for an ultra wide. It's almost unbelievable how Pentax has made such a marvelous feat of a lens! Now, if only Ricoh did not scrimp on a hood. With a 06 on Q, and 08 on Q7, and 01 on standby, I'm all set.”
“I was a bit hesitating before purchasing this lens due to the steep pricing (nearly cost as much as I spent on 01+02+06 all together). However, once I received my copy and started shooting with it, all my concerns went away. What a lens! It is certainly compact, quite a bit smaller than 02 or 06 lens. The amazing thing is the IQ, corner sharpness smashed my DA* 16-50. In fact, it is one of the sharpest wide angle lens I have ever seen. Colour reproduction is great, which makes RAW file super easy to work with. To sum up, for any one who owns a Q system camera, this lens is a must_have!”

Waist level finder
This waist level finder accessory from Temu allows the photographer to get the camera at a lower angle or use it more like a view camera. It has no electronics to hook into the camera but is handy to get a different perspective.
Add a waist level viewfinder to your Pentax Q
For most of the waterfall images shot with the Pentax Q and 08 lens, I used an ingenious accessory that allowed me to to get very low and better use foreground elements in the image.
The accessory brings back memories of my beloved Pentax LX with waist level viewfinder, except it can be used on any camera with a hot or cold shoe including the Pentax Q series of cameras. No information is transferred from the camera to the finder, so it is only for compositional purposes. I purchased it primarily for my coveted Sigma DP2 with its 42mm fixed focal length, but it allows me to get a good feeling for what’s in the frame of any camera, especially one that lacks a flip-up digital screen.
I purchased this waist level finder from Temu for less than $60 Cdn. That amounts to about $44 American. I also purchased some very nicely made camera straps at the same time.
Similar waist level finders are also available on Amazon.
For more on both the waist level finder and camera straps, click on the above links.
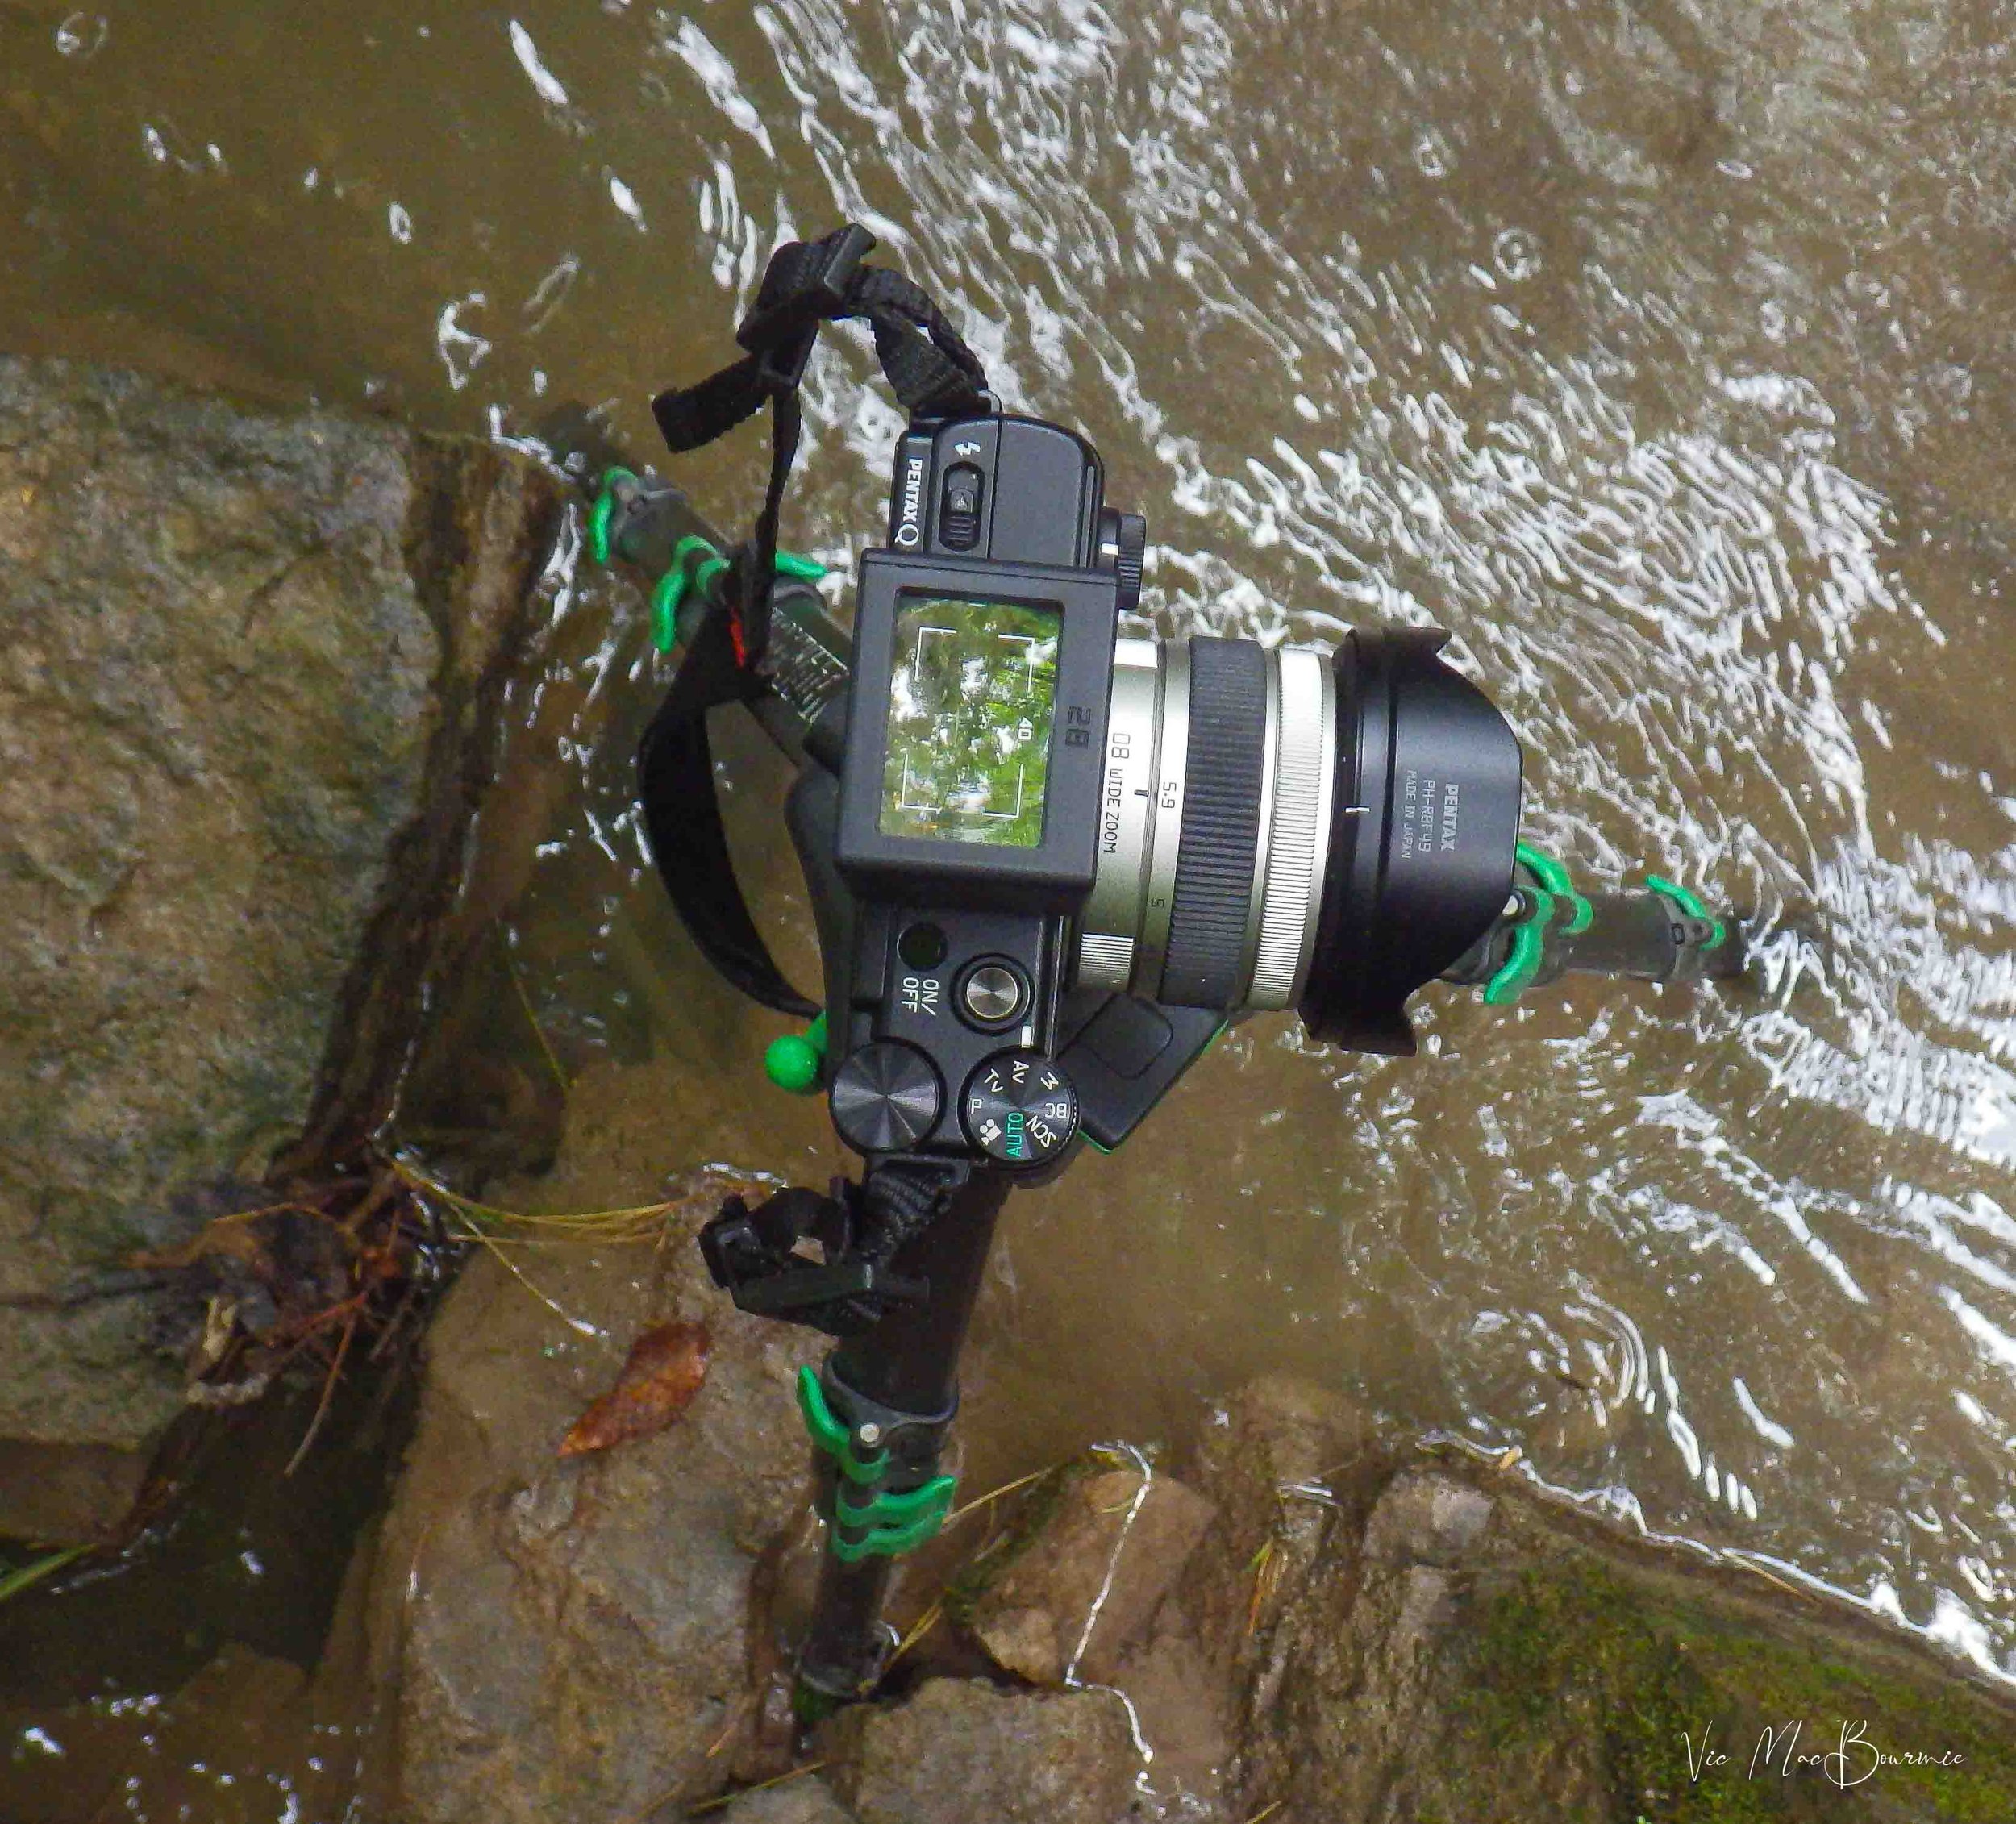
Finder is ideal fit for Q-series
The accessory waist level finder is handy for all sorts of photographic situations, especially if you want to get low and see the image in a top-down view..
The well-built, waist level finder has markings for a 40mm lens but goes out to about 28mm. It’s a far cry from the 17mm available on the Q-series 08 lens, but it gave me a good idea of the image I would obtain when the camera was set so low that I could not use the back LCD screen with any success.
It is ideal for the 02 lens and the 01 lenses, but will get called on for a number of my digital point-and-shoot cameras when I need to get low or just want to have some fun with the waist-level finder.

The extreme wide angle lens allowed me to take advantage of strong foreground objects including the small waterfalls and rocks.
Conclusion: It’s not always about size
Imagine heading out for a day of photography with a Pentax Q, the 08 wide angle, the 01 nifty fifty and the 06 telephoto slipped into your jacket pocket. Heck you might as well add the 02, a couple of toy lenses and the mount shield lens to round out your gear since everything fits nicely into two pockets or a small camera bag.
Just having a capable camera with you whenever you go out can do wonders for your photographic development. I love my cell phone, but give me a camera with a couple of sweet lenses any day over a phone. And that’s where the Pentax Q line of cameras and lenses really can’t be beat.
These things might be tiny but they aren’t toys. In fact, without the anti-aliasing screen that Pentax chose to eliminate on these cameras, you can shoot them in RAW DNG format with sweet Pentax lenses and get excellent results.
I’m hoping some of the images in this post and on my 08 photo gallery will inspire Q shooters and disbelievers to rethink what is possible with these exceptional mirrorless camera systems.
If you are interested in purchasing Luminar Neo, please consider using the code FernsFeathers at checkout to receive a 10 per cent discount. By using this code, I receive a small percentage of the proceeds which helps me to continue producing articles for readers.


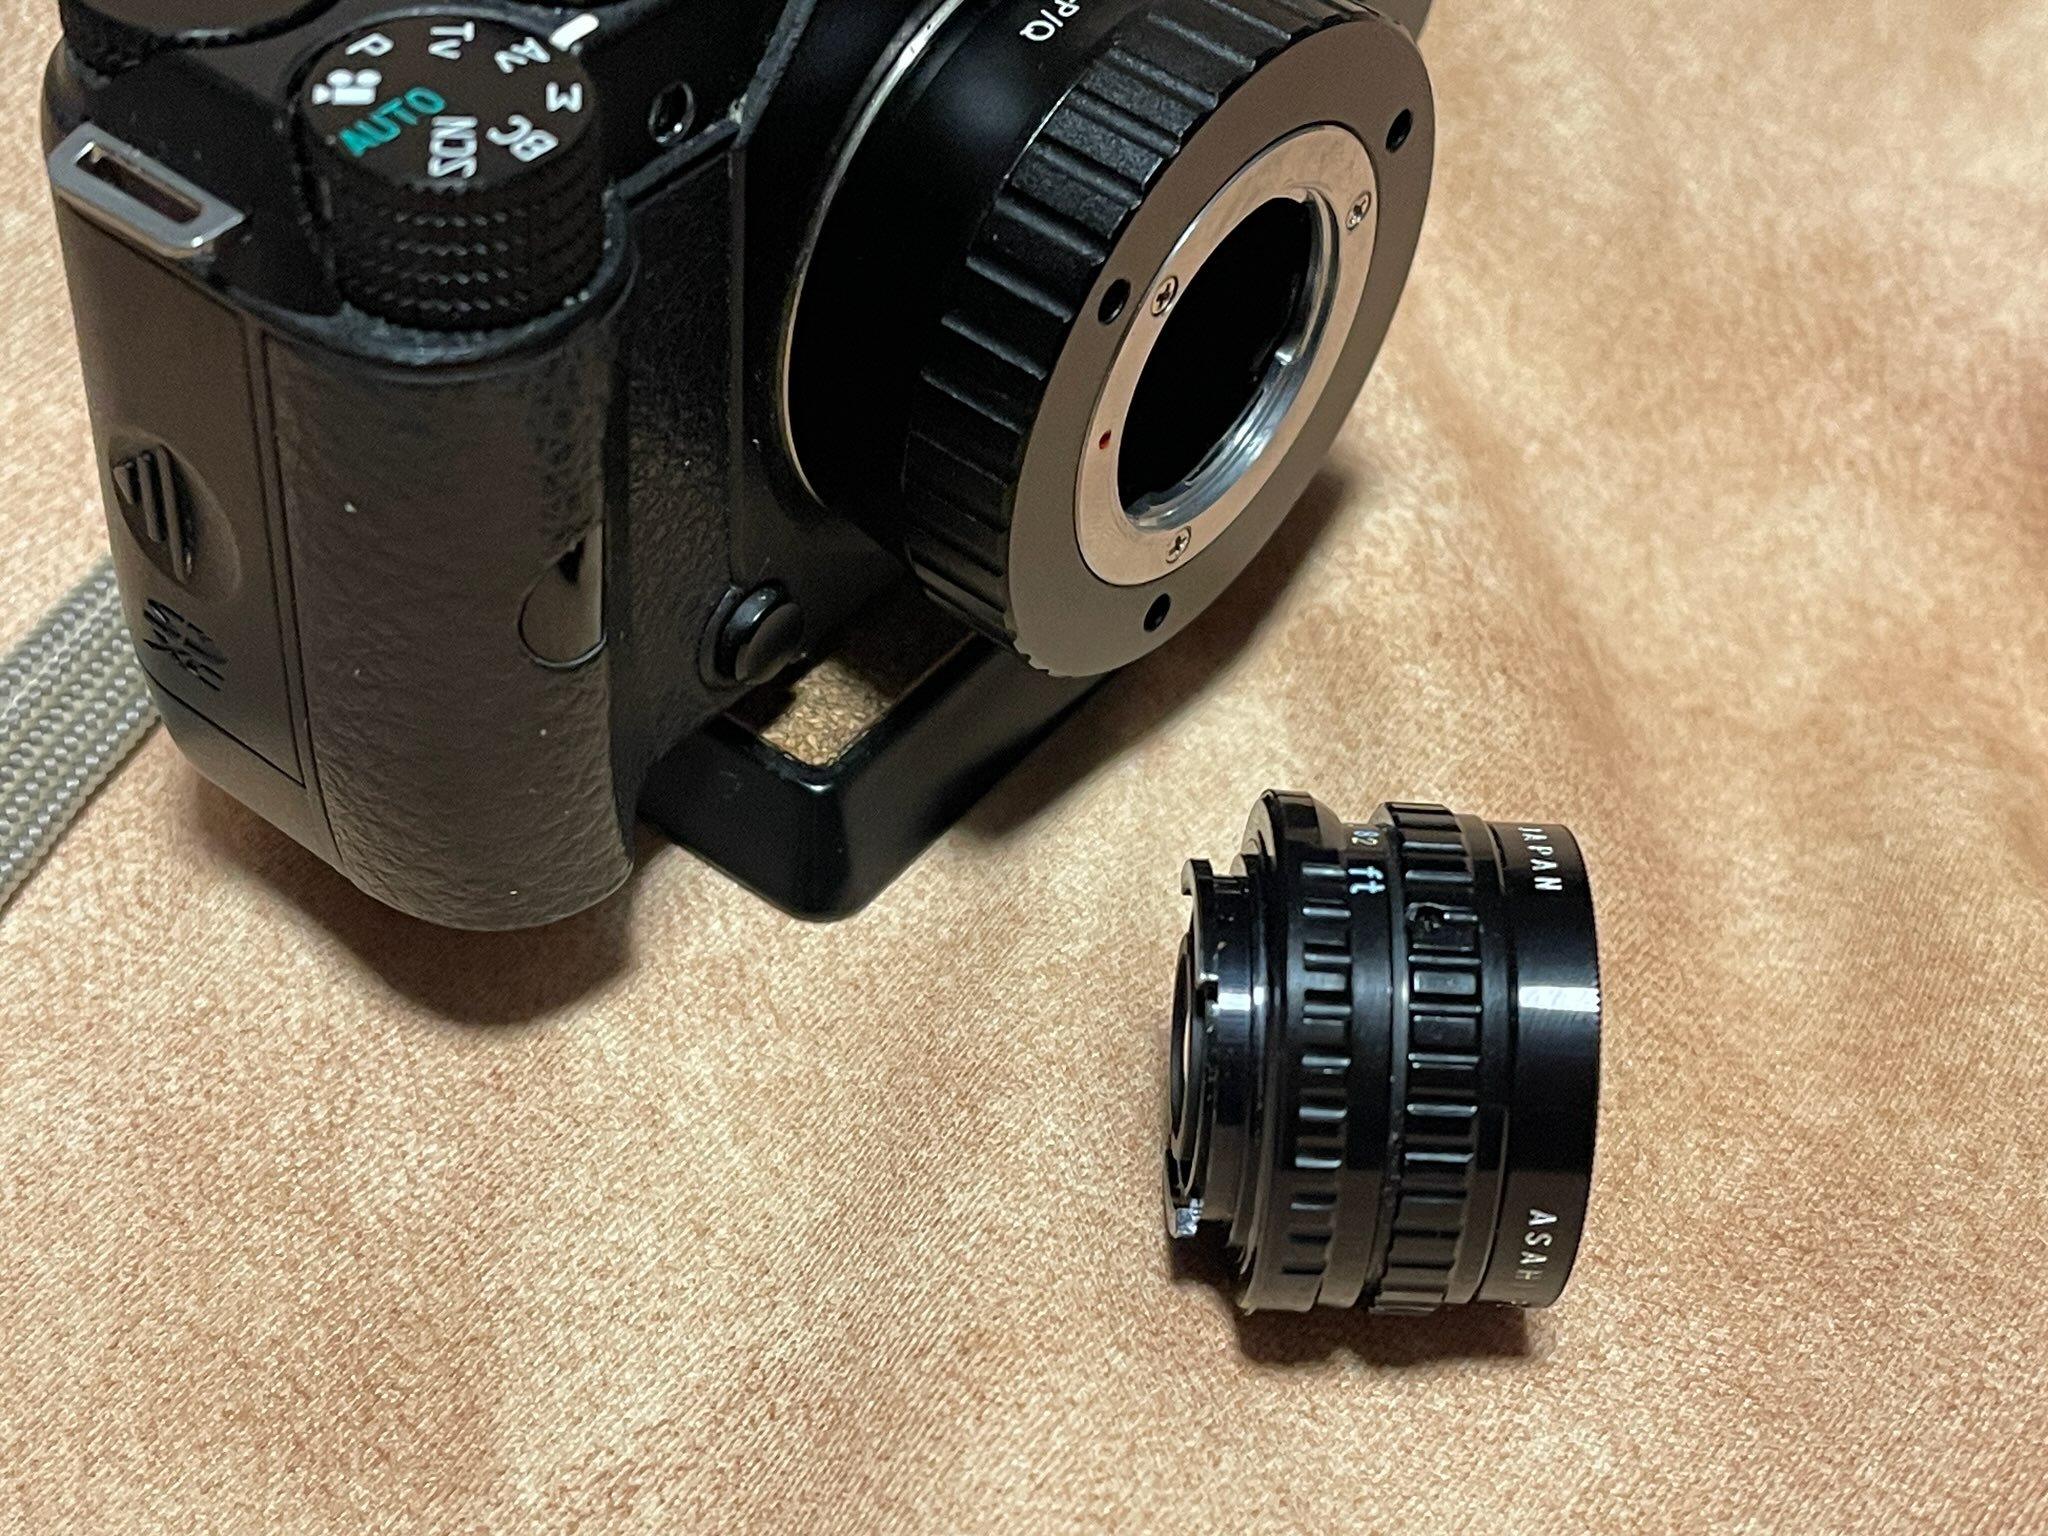


Sigma DP2: Capturing unrivaled detail with a compact camera
Sigma’s DP2 enthusiast camera has a cult following of photographers looking for the highest quality images in a simple point-and-shoot camera.

This image made with the Sigma DP2 shows the incredible detail and colour that the Foveon sensor is capable of recording. Film-like reds and blues and greens that are difficult to create with non-foveon based sensors, including CCD sensors.
It’s a love-hate relationship based on the Foveon sensor
If you know anything about Sigma Foveon cameras, you’ll understand the love-hate relationship owners develop with these coveted little point-and-shoots.
We love them for the quality of the pictures that are possible with such a simple point-and-shoot camera. At the same time, however, we hate them for just about everything else.
For me, love of the final results wins out every time.
It’s almost always about image quality.

Sigma DP2 is a high-end point and shoot camera complete with an APS-C sized foveon sensor.
I have to admit, however, I’m growing to love the quirky little “features” of this camera – from its noisy start-up to its minimalist design. That simple design is hard to ignore, and you can’t help but compare it to the simplicity of the iconic Leica cameras. Even the back buttons’ black-on-black design (making it impossible to read the button functions) is divine. (Although I have read many reviews from photographers unable to appreciate the minimalist approach.)
All you have to do is watch this interview with Sigma CEO Kazuto Yamaki to get a better understanding of Sigma’s approach and direction to minimalist design.
Please take a moment to check out my Gallery of Images taken with the Sigma DP2 here.

The Sigma DP2 and foveon sensor was used to capture this magical forest scene.
Sigma Foveon pros and cons
For those who may not be familiar with these very specialized cameras, let’s explore for a moment what makes them special.
It’s the sensor!
Just like the older, CCD-sensor-based cameras are highly sought after, the Foveon-based Sigma sensor cameras are coveted by those photographers looking for the best possible images out of a pocketable, point-and-shoot camera.
And the Foveon sensor built into these cameras truly delivers.
‘Why, what’s the big deal,?’ you may ask.

A Sigma DP2 with foveon sensor was used to make this image of Cornus Kousa flowers in the woodland garden.
Without getting into all the complexities of how a sensor is made, suffice it to say that the Sigma’s very unique Foveon sensor is actually three sensors sandwiched together to extract the red, blue and green (RBG) colours that combine to give us the full spectrum of colours.
Other cameras use a single sensor to extract the red, green and blue spectrums of light. Sigma uses three sensors in its Foveon-based cameras.
The result is a very complex system that maximizes not only the colour, but the fine detail and micro contrast in the images. Most photographers will agree that the Foveon sensor is the reason the images have the most film-like look right out of the camera.
You may or may not agree, but it’s difficult to argue that these images don’t have a special quality to them that is hard to ignore and even harder to replicate with other, non-foveon sensors.

A simple comparison between the DP1 and DP2 shows similarities in all but the lens size, battery life and ISO capabilities.
Why do so many photographers dislike Sigma cameras?
What are the cons of this love-hate relationship?
I have the Sigma DP2, so this review is based on that camera.
This love/hate relationship starts when you turn it on. The camera makes some weird squeaky grinding noise that can be quite concerning when you first hear it turn on and the lens pops out. The first time I turned it on, I was sure it was broken. However, that’s just the sound of a DP2 turning on. I can certainly live with that. In fact, the more I hear it, the more I’m even beginning to like that sound.
If that was the only negative, we would have little to complain about. But, of course, it’s only the beginning.

Heavily cropped image
This heavily cropped image shows the capabilities on the RAW images. Despite the extremely heavy crop, the image holds together showing incredible detail and colours.
Let’s start with the focus – it’s not the fastest or the greatest. The writing speed is the slowest I’ve ever experienced in a camera. Even with the fastest SD card you can get, it’s slow.
Speaking of slow, the startup time is also slow.
If that’s not enough, you really need a separate Sigma-based software program – Sigma Photo Pro – to work with the RAW files (although that has changed somewhat with the latest Lightroom release).
The lens is a fixed focal length 42mm lens (35mm equivalent), and there is no built-in shake reduction. Oh, did I mention that you really want to shoot this camera at 100 ISO for best results. Anything over 400 and you probably want to consider converting the image to B&W for best results.
Noise at higher ISOs is a problem.
So, maybe dig out that tripod you have buried in the basement.
The interface is simple enough, but very different than most other cameras I have used. Thankfully, the easily accessible “Quick Menu” makes it quick to change on the fly, once you get used to how it works.
And I would be remiss not to mention the lack of a viewfinder and the rather poor back LCD screen for viewing images.
And, if you are purchasing one of these, consider buying additional batteries. One battery is good for only about 80 images before it needs changing.
There’s probably more I’ve forgotten about, but I think you get the point.
For more on the Sigma DP2, check out my post A misty morning with the Sigma DP2.
This camera is not for everyone.
For those who appreciate slowing down, who don’t need all the bells and whistles, and who enjoy a slow, thoughtful methodical approach to making images, the Sigma series of cameras (and there are a few to choose from) are a perfect choice.
I would not make it my one and only camera, but as a secondary choice for those times when it’s the best choice, it’s almost perfect.
“No other camera can match its performance for sunsets and colour reproduction. ”
And, if you own one of these sweet little cameras, you may be sitting on one of the last of the breed of affordable Foveon sensor cameras. Sigma has seemingly announced that any additional Foveon-based cameras could be more of a custom order than a mass-produced piece. They are currently doing research on the Foveon sensor to “modernize” it but that research and development is apparently moving slowly.
All this usually means serious coin for a camera that was never inexpensive to begin with.
Although the camera can be quite pricey because of a combination of high quality images and rarity on the used market, good deals are still available for now if you keep watching on-line market places.
I was fortunate to purchase a Sigma DP2 in mint condition at a very good price. No battery and no charger included, but that was rectified by a quick search on the internet that landed me on Aliexpress where I was able to purchase a couple of batteries and a charger for a very reasonable price.

Minimalism at its finest
The Sigma FP is the company’s most recent example of minimalism at its finest. The FP takes the minimalist features of the the DP1 and DP2 to new heights

The third-party grip and built-in thumb rest for the Sigma DP1 and DP2
When Sigma’s minimalism is just too much
If Sigma’s minimalist approach is just too much and you love the camera but find it uncomfortable in your hand, there is an incredibly simple solution that is both elegant and incredibly useful.
Jim Rinner at Shutterspeedblog, has used his incredible engineering skills to design the most exquisite hand grip complete with an integrated thumb grip. No longer do you have to put up with the minimalist block-design of the Sigma DP1 and DP2.
This image shows the Sigma DP1 complete with the exquisite grip and thumb rest that completely transforms the already outstanding DP1 and DP2 cameras.
This single piece of equipment, that can even incorporate a Swiss Arca mounting plate, will transform the look and feel of your favourite Sigma DP1 or Dp2 camera.
Jim is a retired professional photographer and inventor with 75 (currently) US patents and with dozens more pending. In his spare time he puts is skills, along with $5,000 in CAD software, five 3D printers, and a love for photography to work creating exquisite camera accessories for a multitude of cameras ranging from the Sigmas, to Lumix, Leica and a host of cameras in between.

This image from Jim’s Ebay store shows the built in thumb rest on the back of the camera.
One look at he grip, and it’s not hard to see the attention to detail that Jim puts into these accessories. In the case of the grip for the DP2, not only does it sport an exquisite finish, it also leaves openings to replace the battery without removing the grip. The built in thumb rest is an excellent addition to the camera helping the photographer to use the camera with one hand for street photography without fearing the camera will slip from their grasp.
The accessory wraps around to the back where it enables the photographer to access all of the controls without getting in the way.
One only needs to check out his incredible EBay store to see the work he has done in the creation of so many photographic accessories.
A bird’s eye view of the grip for the Sigma DP1 and DP2.
When was the Sigma DP1 and DP2 released?
The original Sigma DP1 was introduced in May of 2008 followed by the DP2 in September 2009.
Although Sigma made very minor changes to the DP2 from the DP1, the main difference centred around the lens’s focal lengths. The original DP1 sported a 16mm, f4 lens (28mm equivalent), while the DP2 had a 41mm f2.8 equivalent lens. The latter offered a little more depth of field control with its more traditional field of view.
As You tuber Mattias Burling points out in his comparison of the two cameras: The “DP2 is not a better performer or an upgrade to the DP1, it’s just a different focal length. DP1 was a 28mm f4 equivalent, and the DP2 is a 41mm f2.8. providing a more shallow depth of field if needed.”

Sigma DP2 was able to capture the fine detail in the flowers of this climbing hydrangea.
The X3f RAW files out of my camera are usually between 17 and 17.7 megabytes but the sensor’s unique construction underestimates the quality that can be pulled out of these APS-C-sized sensors.
I’ve included heavily cropped images in this post and in the accompanying photo gallery to illustrate the incredible capabilities of the foveon sensors.
What users say about the DP2
And don’t just take it from me. On-line opinions from other photographers illustrate the love that is out there for these cameras and sensors.
“I have been using the Sigma DP2 as my everyday camera for the past 2 weeks, and I have mixed feelings about it. The camera is slow and frustrating to use, with a confusing focus and a tendency to crash. However, it takes some of the best pictures I have ever seen, with vibrant colours and a clear, 3 dimensional quality. It’s not great for low light or flash photography, but excels in street photography, making subjects more natural. Overall, it’s a temperamental but impressive camera that I hope will be improved in the future.”
And another user says:
“The files from the camera are “officially the sharpest and most detailed I have ever used with no competition from Bayer systems ccd or cmos, nor Fuji’s X-trans (sensors). No interperlation or anti-aliasing filter. It’s simply bizarre to see the sensor in action… images are simply too sharp. ... It’s simply surreal. … The micro contrast is so high it feels life-like.”
Another said it all:
“No other camera can match its performance for sunsets and colour reproduction. I do recommend it for someone looking for something truly special.”
YouTuber spells out five reason to own the DP2
Well known YouTuber Mattias Burling spelled out his five reasons why you should own the Sigma DP2
pointing out the price of these cameras on the used market (not sure how long they will remain inexpensive), the high quality finish, the controls - “the buttons are nice, nothing special but the “manual focus wheel is simply genius. I could probably go on and on about it and how useful it is for street shooting, so let’s just leave it at being the best thing ever in a camera. It’s also been given a nifty quick menu …. a nice addition and well implemented.”
Mr. Burling wraps it up with the number 1 reason you need to own a DP1 or DP2 or any Sigma foveon camera - the incredible colours. “They are so film like and so organic and just so awesome. It is why putting up with the shortcomings of a Foveon sensor totally worth it.”
In conclusion
I agree wholeheartedly with Mr. Burling on his five points. It’s the reason I’ll be shooting this DP2 every chance I get.
More Sigma cameras with Foveon sensors
In this review, I am focussing on the Sigma DP2 and to a lesser extent the DP1 because I own a DP2, but there are several other Sigma cameras with Foveon sensors that are exceptionally good cameras, though priced appropriately.
If you are interested in exploring Sigma cameras and the Foveon cameras still further, be sure to check out the Merrill line of DP cameras here.
In addition, there are the four Sigma Quattro series cameras. Like the DP series, they differ only in the fixed lenses they sport.
DP0 (14mm or 21mm on a 35mm camera)
DP1 19mm (equivalente to 28mm on a 35mm)
DP2 30mm (45mm equivalent on 35mm)
DP3 50mm (75mm equivalent) f2.8
The waist level viewfinder is made for a 28mm focal length lens, but the lines in the finder are for a 40mm lens. Perfect for the Sigma DP1 and DP2 cameras.
Add a waist level viewfinder to your Sigma DP camera
I recently added an ingenious accessory that allows me to either get a very low angle in my images or see the image much better when the sun makes it difficult to see the back LCD screen. It’s also just a fun addition to the Sigma DP line of cameras or any camera with a hot or cold shoe. It is shown here with the Pentax Q camera.
Waist level finder
Another angle of the waist level finder that is almost made for the Sigma DP2’s 42mm lens. Here it is seen with the diminutive Pentax Q camera.
The accessory brings back memories of my beloved Pentax LX with waist level viewfinder, except it can be used on any camera with a hot or cold shoe. No information is transferred from the camera to the finder, so it is only for compositional purposes. I purchased it primarily for my coveted Sigma DP2 with its 42mm fixed focal length, but it allows me to get a good feeling for what’s in the frame of any camera, especially one that lacks a flip-up digital screen.
I purchased this waist level finder from Temu for less than $60 Cdn. That amounts to about $44 American. I also purchased some very nicely made camera straps at the same time.
Similar waist level finders are also available on Amazon.
For more on both the waist level finder and camera straps, click on the above links.

Pentax PZ20: A modern, classic film camera?
The Pentax PZ20 is a modern film camera and when teamed with Luminar Neo is capable of magical results.

I could not resist the red barn with its window wide open. Scanned and post processed with Luminar Neo photo editing package. (see below for details)
PZ20 and Luminar Neo take simplicity to creative new heights
The PZ20 is a simplified camera wrapped up in fine heritage and capable of some serious professional work.
But, what the heck was Pentax thinking when they released this workhorse in 1993?
A that time, film photography was in a good place. Digital was still a distant dream and camera manufacturers were working hard to encourage beginner photographers, who were comfortable using point-and-shoot cameras, to graduate to 35mm SLRs.

The PZ20 has the look of a modern digital SLR.
First Pentax released the truly dumbed down but still capable PZ10. Then they introduced the Pentax PZ20. Both were considered stepping stones from simple point-and-shoots to just slightly more complicated but very capable and impressive SLRs complete with a host of interchangeable lenses and packed with modern features capable of making professional-calibre images.
If the professionally-spec’d Pentax PZ1-P was the ultimate camera for wanna-be professionals, the PZ20 was the little sister who could stand alongside her big brother and get the job done with a whole lot less fuss. In truth, the big brother is probably much more capable, but the learning curve for average photographers was off the charts, and the results, well they were pretty much the same for most average users.
Click on the link for my full review of the Pentax PZ1-P.
“If a camera is nothing more than a conduit to capture a properly exposed image, which can then be scanned and manipulated beyond our wildest dreams in 1992, then the PZ20 and cameras like it, are a steal.”
Pentax, like other camera manufacturers at the time, took a professionally-spec’d camera, dumbed it down and said “go take great pictures for a fraction of the cost of your big brother.”
Dit it work? Well, it sure worked for a while as SLR camera sales soared along with film. The film era was doing just fine, thank-you.

Screech owl just hanging out
A heavily cropped image shot with the Pentax PZ20 on Kodak 200 and post processed with Luminar Neo.
The days of beautifully crafted, all-metal cameras might have ended for all but the highest-end cameras, but as everyone knew from The Graduate, “plastics were the future.”
And we’re not talking cheap plastics like the type that often followed in cameras after the PZ line of cameras. These plastics were meant to last, with a feeling of quality that continues with many of today’s better digital offerings.
“Post processing to this extent was literally non-existent when the PZ20 was manufactured, but the digital age has re-imagined the possibilities of these cameras.”
Is the PZ20 still good in 2025?
Okay, but what about this PZ20. Are they any good in 2025?
Damn right they are.
Why, for example, would anyone buy a Pentax Monochrome digital camera when you can buy a PZ20 for under $50 and eat up B&W film like it was 1960?
For the Monochrome lovers out there, I know they’re great cameras and capable of some lovely B&W images, but unless you’re shooting professionally, the PZ line of cameras, a couple rolls of Ilford, a high quality scanner and top-notch photo editing software like Luminar Neo, gets the job done.
Click here for my post on the Pentax Monochrome camera.
But we’re not just talking B&W. I loaded my PZ20 with some off-the-shelf Kodak 200ASA colour film and took it, along with my digital cameras, to see how it measures up.
The results: Pretty damn nice.
“Take a simplified SLR like the Pentax PZ20 and team it with Luminar Neo – an Ai-based post processing program ideal for beginners – and you have the perfect combination of simplicity and creative possibility.”
Now, I like to think that post processing had a lot to do with the results. Negative film is very forgiving so getting the image on film and converting it to digital with a simple scanner, opens a world of possibilities not available in the early ‘90s.
Post processing software opens doors no-one could dream about in 1993 when the PZ20 was introduced. In those days, everything had to be done in-camera when the image was captured. Today, for many of us, that is just the beginning of the process.
Take a simplified SLR like the Pentax PZ20 and team it with Luminar Neo – an Ai-based post processing program ideal for beginners – and you have the perfect combination of simplicity and creative possibility.
And, if a camera is nothing more than a conduit to capture a properly exposed image, which can then be scanned and manipulated beyond our wildest dreams in 1992, then the PZ10 and cameras like it, are a steal.
I think I paid $20 Cdn for mine. For American readers, that’s probably, like the cost of a roll or two of film. And it’s mint and came with an electronic shutter release to boot.
It takes all the Pentax lenses but is really at home with the M and A series of lenses and the F and FA series of autofocus lenses.
As one Pentax enthusiast wrote on Pentax Forums: “If you shoot film-only, this can be a fantastic main camera. On the other hand, if you also have a Pentax DSLR, this camera can also be a fantastic companion, if your lenses are full-frame you can use them even if they do not have an aperture ring (which is the case in most modern lenses).
The autofocus is fast and accurate. It has Hyper Manual and Hyper Program modes in addition to the usual Av, Tv, M, B and P modes. It also has many other fully automatic modes. In manual mode it has spot metering. Actually, it has many functions of more advanced (and heavier) cameras.”
Another reviewer wrote: “Using it, it's actually more enjoyable then it's bigger brother (PZ1-P). Less settings to scroll through, I don't even mind the lack of second control wheel.”
He went on to explain: AF confirmation works too with M, K, A glass. Focus screens are not inter-changeable, but plenty bright enough… . The info screen inside the viewfinder on the right of mine is crap and hard to read, no matter, the meter is present on the top lcd and that works nicely to get the exposure close. Using M42, M, K's glass it's less of a worry as you only have to pay attention to the shutter values….”

Redwing in early morning light
Early spring image of a Redwing blackbird post processed with Luminar Neo photo imaging software.
One user explains that, although the PZ20 lacks AE Exposure lock, it has Hyper Manual and Hyper Program modes which can be used in a similar way. And, unlike the big brother PZ1-P, the PZ20 does not have two dials (one for aperture and the other for shutter speed), instead it has a button to chose which parameter to modify and a rocker switch to change these values.
This is a simplified explanation but the camera certainly gives us the control most of us need to capture a properly exposed, in-focus image.
I’m not really one for the details, you can get them all over the web, but here is a spec sheet from Pentax Forums that may help those inclined.

Thanks to Pentax Forums for the PZ20 digital Spec sheet.
Once we get the images, unlike life in the early ‘90s when we were more or less stuck with what the camera produced, the magic really begins.
I’d love to show you hundreds of images I’ve shot with the camera, but frankly I’ve only put through one roll to date. Many more to follow, including some B&W.
One roll, however, is enough for me to draw some conclusions.
Like I said, the magic begins when the digital images are in front of me and I get to work exploring the creative potential.
Creating presets with Luminar Neo
After some work on the image below, I decided to create a preset to use on all the other images of the abandoned antique truck. The preset helped to create a unified effect for the entire series of images.
For more posts on Luminar Neo click here for a Walk in the woods with Luminar Neo, and here for the question: Can Luminar Neo stand on its own as an image processing package?
The same preset was used on the red-barn-and-window image at the top of the page.

Abandoned truck takes on a mystical look after being post processed with Luminar Neo.
Luminar Neo goes to work on abandoned antique
Above are a few images from that first roll. Below are a few more of my abandoned roadside antique truck that are given a stylized look through post processing entirely with Luminar Neo photo editing software.
The software provides all the necessary tools that other professional photo editing programs provide, but with the addition of some truly exceptional Ai tools that make photo editing – even for the beginner – much simpler than the traditional post processing programs.
Here are just a few examples from the combination of the Pentax PZ20 film camera and Luminar Neo.

Exploring this abandoned truck with a creative eye and the PZ20 helped me to focus on details, which were later manipulated in Luminar Neo photo editing program to create these stylized results.
Luminar Neo, a Ukraine-based photo editing program, allows the photographer to literally have fun adjusting the effects of the filters until they find the perfect setting. For these images, a “mystical” module was called upon to give the images a soft, glowing effect that I thought worked well for the subject.

The front grill shows the GMC logo together with the peeling paint and lovely rusty colours.
Post processing to this extent was literally non-existent when the PZ20 was manufactured, but the digital age has re-imagined the possibilities of these cameras. Many young photographers who have discovered the joys of Lomography are experimenting with cheap film cameras and lenses, but there is no need to resort to the cheapest new film cameras when high-end film cameras and modern software is capable of creating magical images. For images made with the PZ20 by Lomography’s talented creators, you can go here.

Searching out details like this door handle on the truck provided a focus of interest. I later emphasized the details and vibrant colours through post processing after the film was scanned into a digital image.
If you are interested in purchasing Luminar Neo, and exploring the program’s creative possibilities, please consider using the code FernsFeathers at checkout to receive a 10 per cent discount. By using this code, I receive a small percentage of the proceeds, at no additional cost to you, which helps me to continue producing articles for readers.
The program is already a great value, whether you buy it outright or pay on the monthly plan. In addition, you would be helping a Ukrainian-based company in Kiev that we all know is experiencing extremely difficult conditions.
If you are interested in exploring Luminar Neo’s creative possibilities, please consider using my 10 per cent off discount code “FernsFeathers”.
• Looking for a slick new camera strap for your classic camera? I just ordered one of these beautiful braided straps for under $10 Canadian from Temu.
The Japanese culture has its own way to describe and experience the joy of spring greens. We too can learn from their enlightened perception of the woodland.