
Pentax Auto 110 vs The Pentax Q: A study in B&W
Comparing a tiny trio of digital and film cameras in the garden using B&W images.
Film vs digital in the garden
I’ve always admired the Pentax Auto 110 camera system. Back in 1978, Pentax released the tiny 110 camera along with three lenses – 18mm, 24mm and 50mm. It was followed in 1981 by the Auto 110 Super and three more lenses including a zoom and an all-metal 70mm telephoto. They are fast f2.8 lenses.
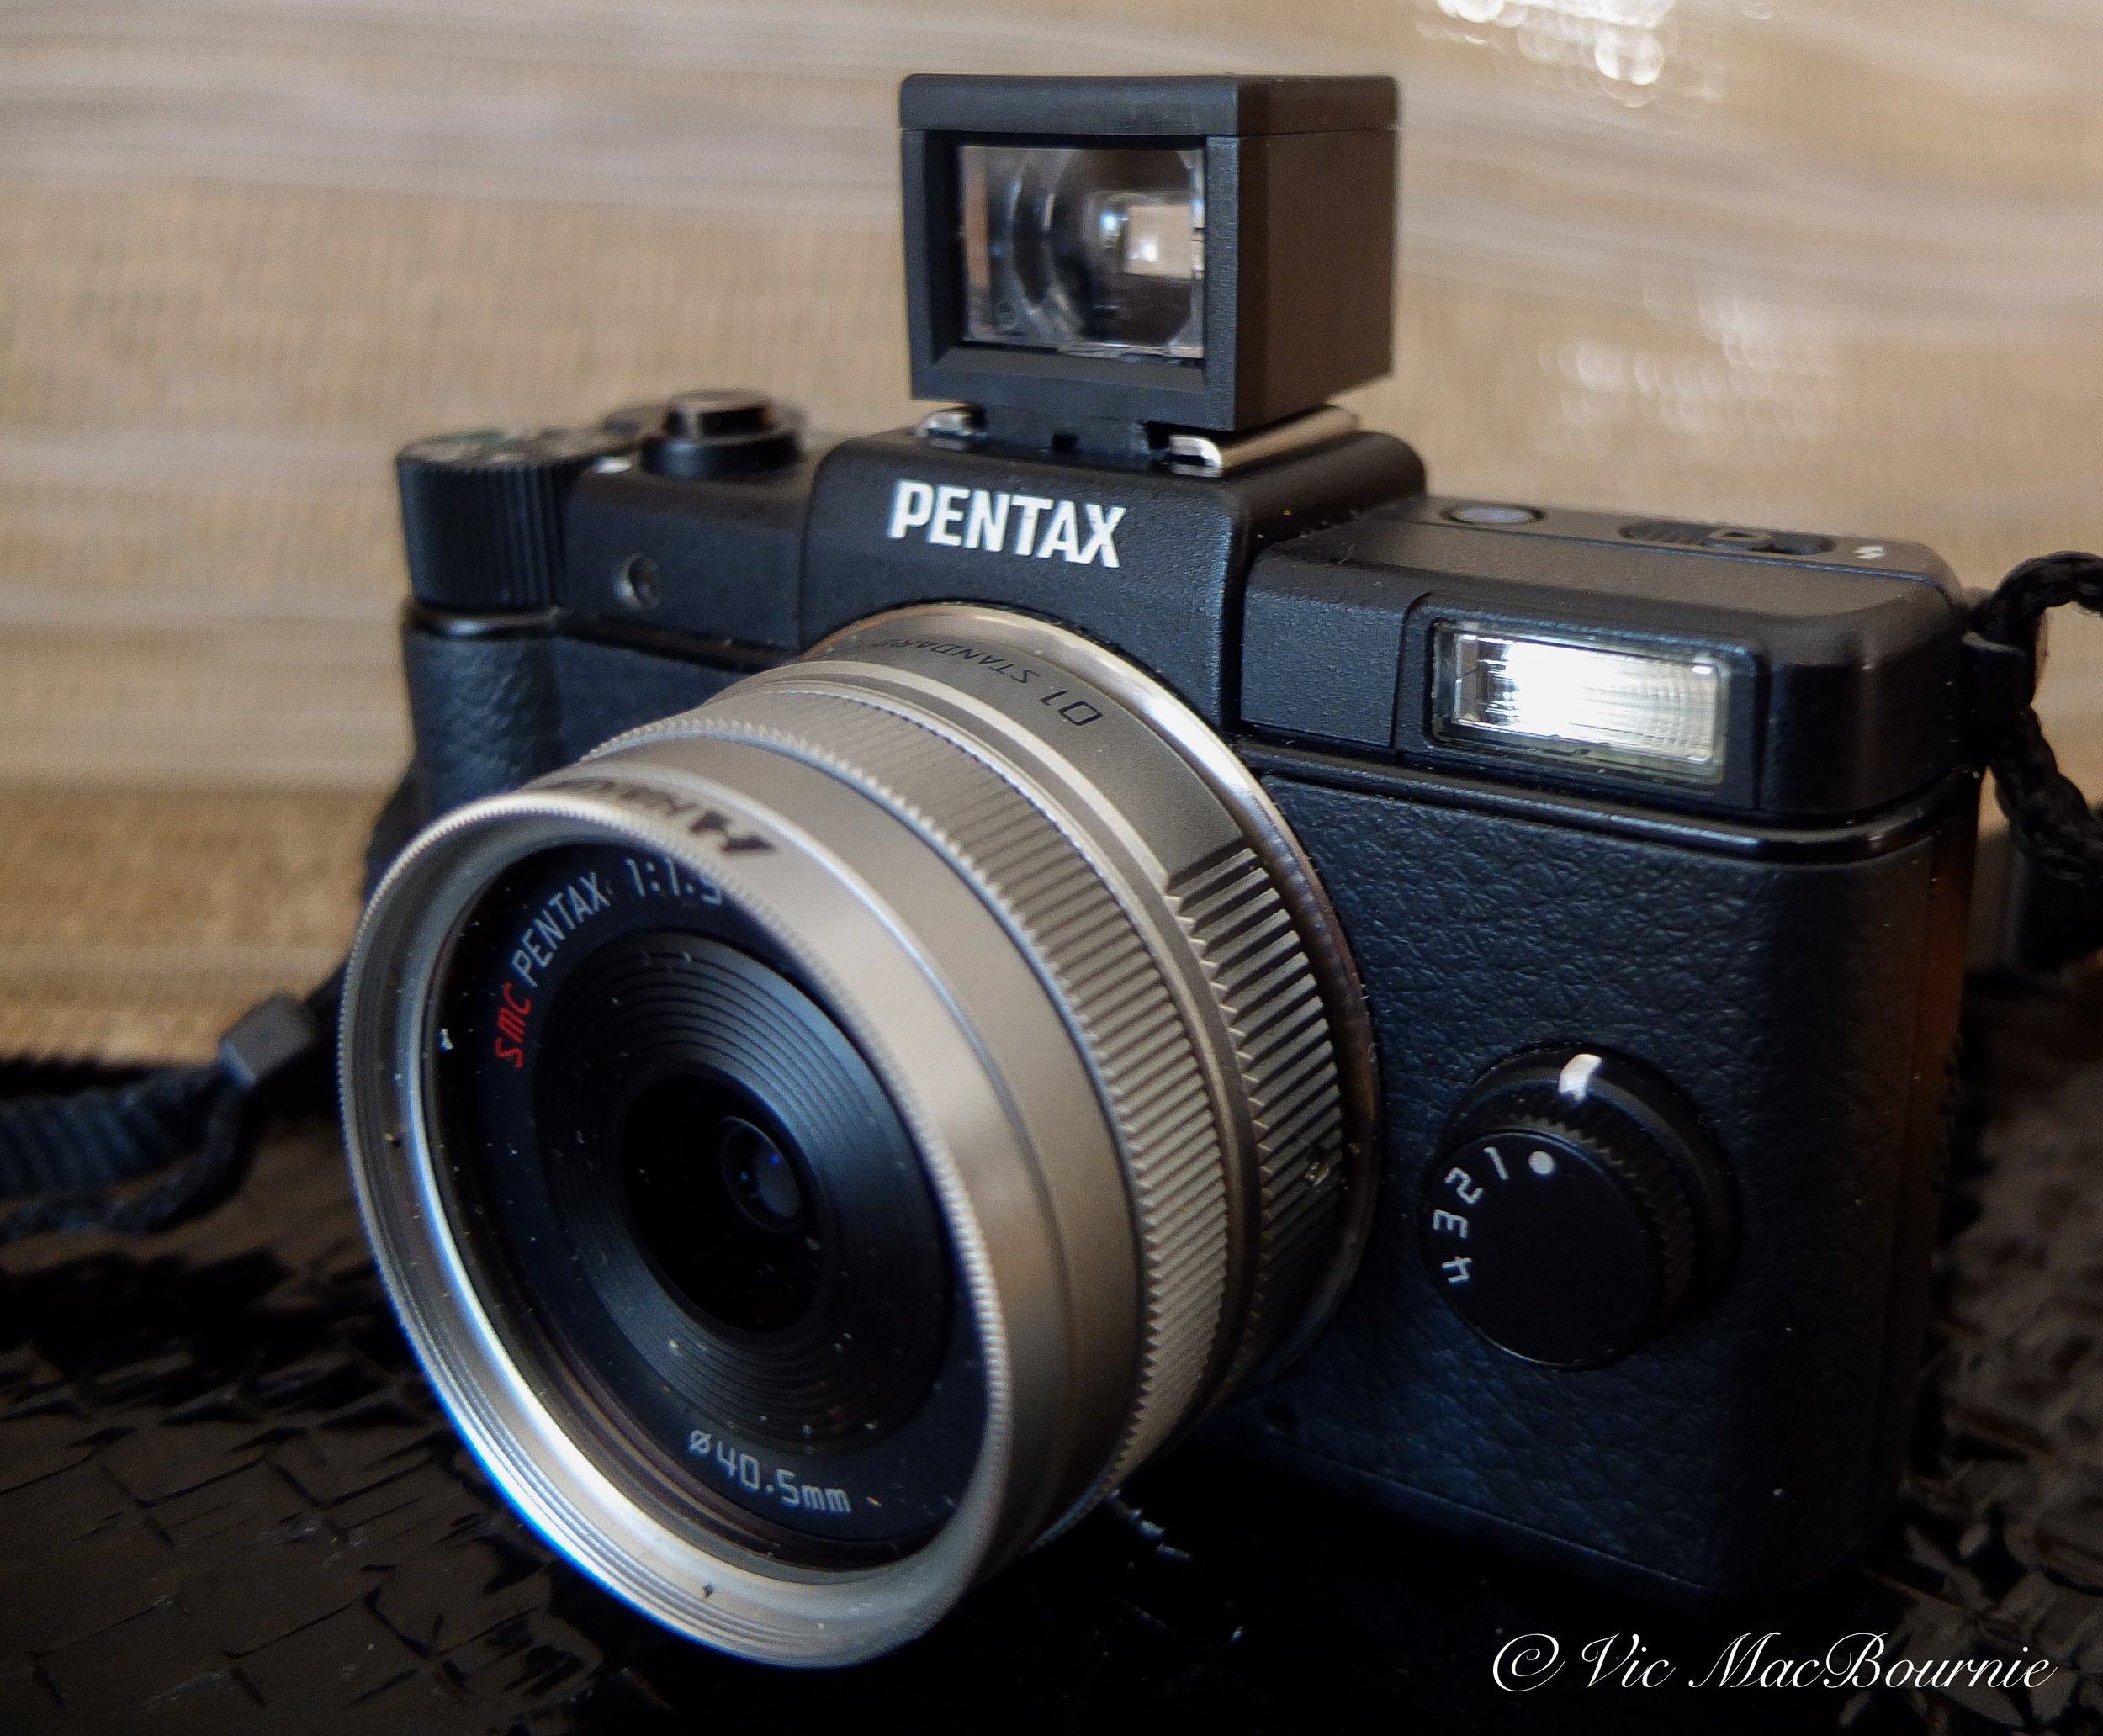
Fast forward to 2011, when Pentax drew from its rich history of tiny, high-quality cameras and lenses and released the incredible Pentax Q digital camera. Little did the Pentax engineers and designers know back in 1978 that their tiny 110 camera lenses would make a comeback 30-40 years later on a miniaturized digital camera.
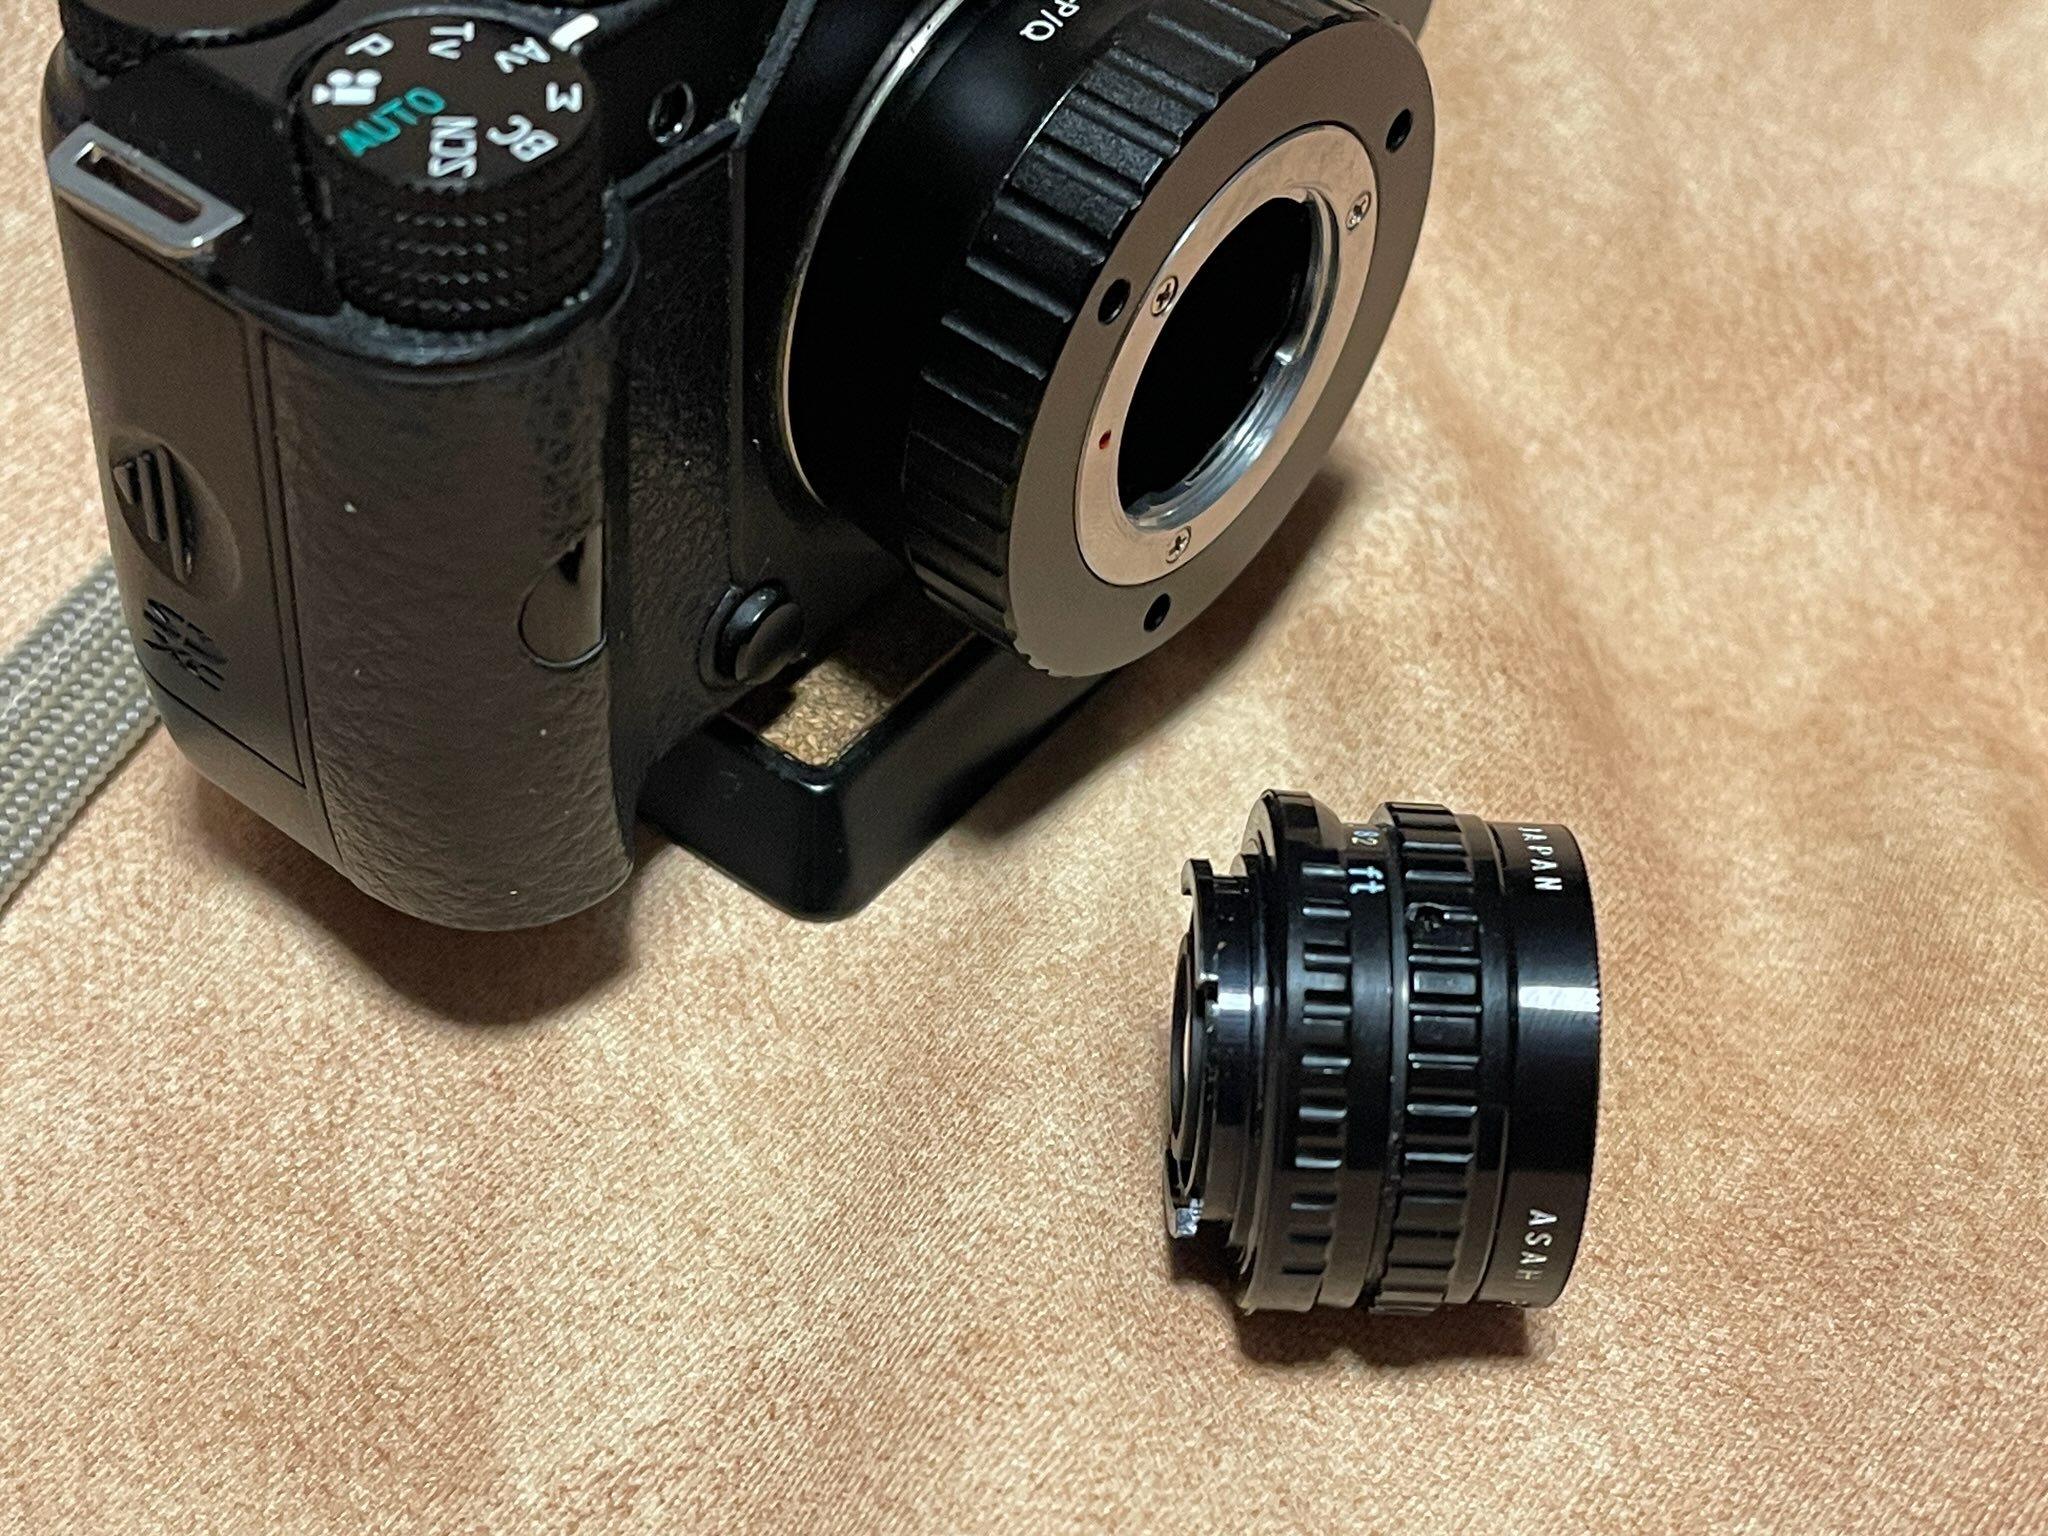
A simple, inexpensive adaptor is all that is needed to fit the tiny 110 lenses onto the Pentax Q. And theses tiny, manual focus lenses work beautifully on the 110-comparable-sensor size of the Pentax Q line of cameras.

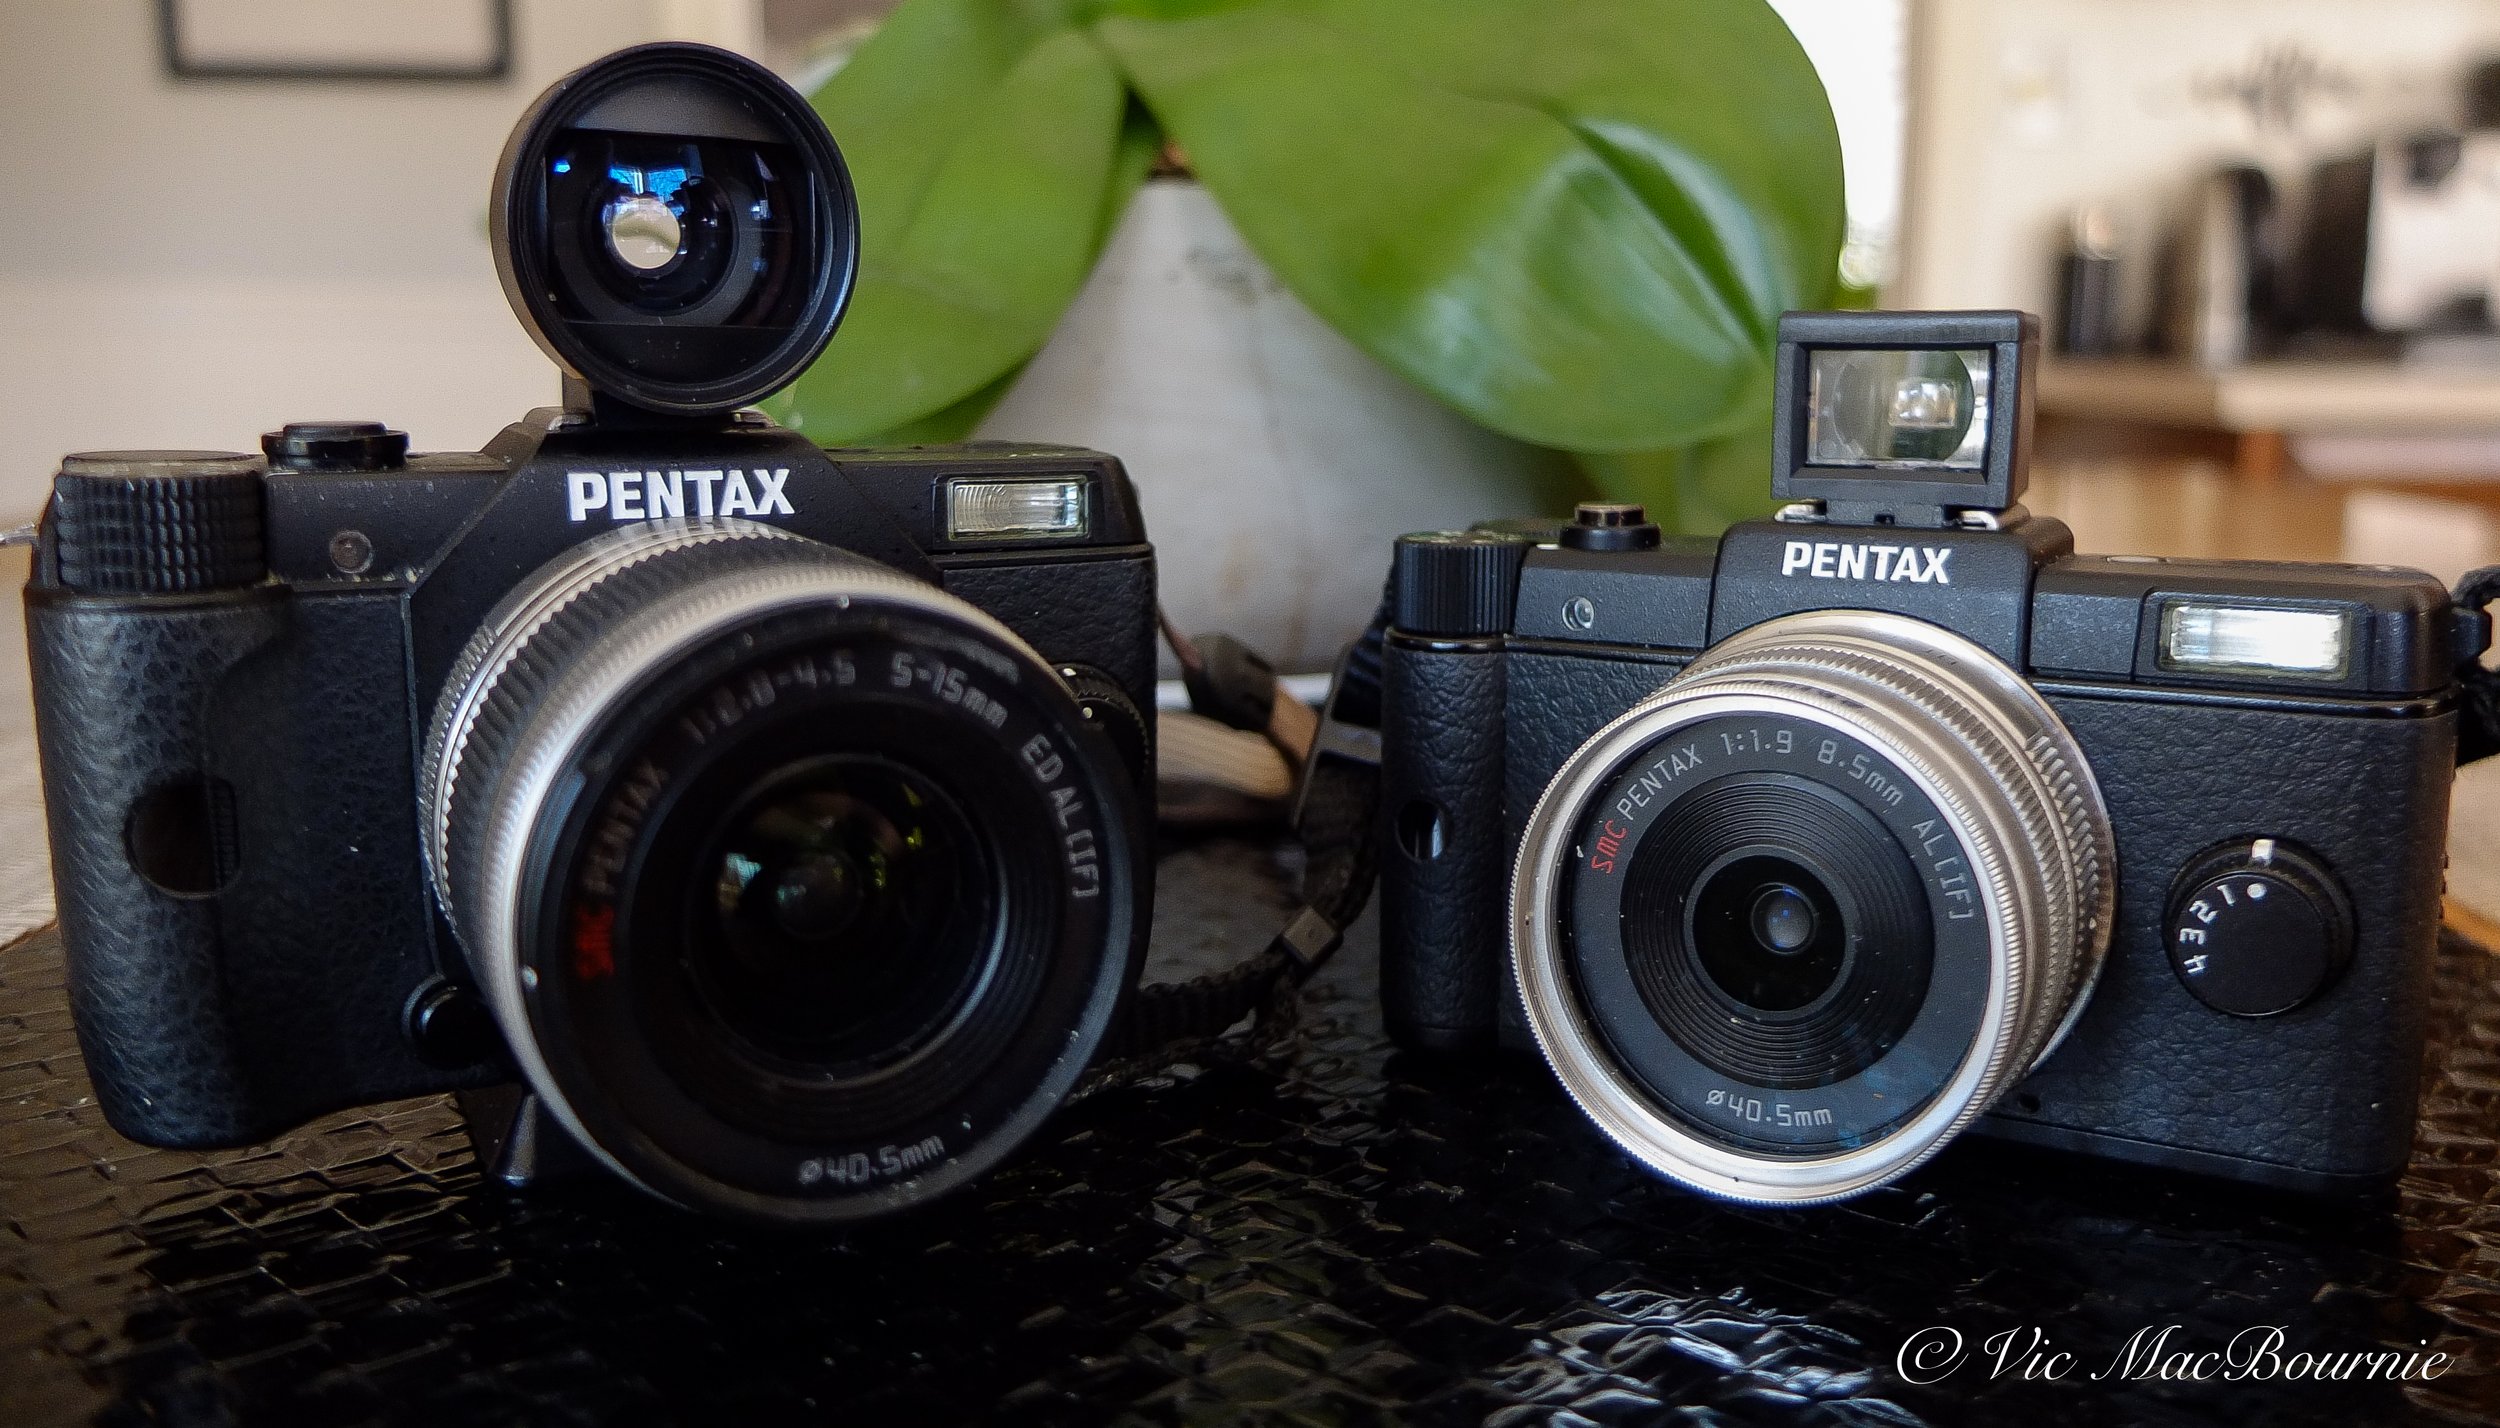
The miniature Pentax Auto 110 film camera, left, compared to the tiny Pentax Q. Notice how the film size is similar to the digital sensor making a comparison totally appropriate.
I purchased an almost complete 110 system with four lenses, a camera and flash, with no intention of ever using the camera to shoot film. But, after some thought, decided to at least run a few roles of film through the camera to compare the miniature Auto 110 with the tiny Pentax Q.
The decision led me down the road to Lomography, which is the company behind the resurgence of shooting film with vintage cameras. I purchased three rolls of film from Lomography – a B&W stock, a roll of colour print film, and a roll of Lomography’s specialty film that I’ll unveil in the final of this three-part series. The Lomography Orca 110 Film can also be purchased through Amazon.

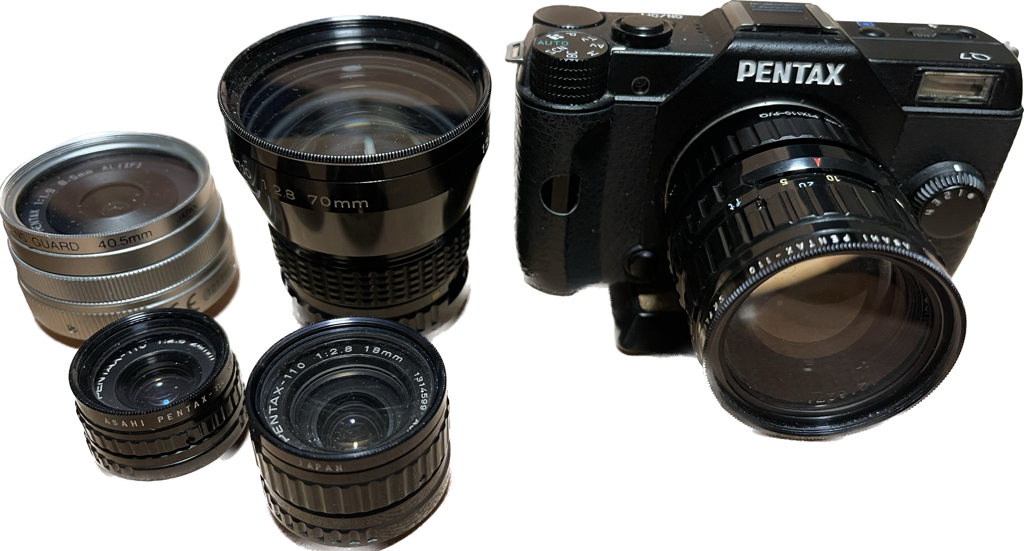
The Pentax Q fitted with the adaptor and a 110 lens together with the remaining Pentax 110 lenses and the Pentax Q 50mm for size comparison.
Garden showdown with 110 lenses
Using 40-plus-year-old lenses on a digital camera is great fun, but how do they compare in a shootout between the digital Pentax Q and the original Pentax 110 film camera?
In a three-part feature, I’m comparing the two cameras using the original 110 lenses – the Auto 110 using film and the Q series taking digital images.
And, what better way to start than with a comparison between black and white images – digital vs 110 film.
Be sure to read to the end for a special comparison involving a third tiny Pentax camera.
A word of note: Although both cameras used the original 110 lenses, different crop factors created by using the lenses on both cameras resulted in different images. As a result, I used primarily the 18mm on the Pentax Q digital camera and the 24mm on the Auto 110 film camera. No metadata is available with the film camera images and, because the camera decides the f-stop and the shutter without revealing that information to the photographer, there is no way of knowing the data.
Mounted to the Auto 110, the 18mm wide-angle lens has the equivalent angle of view to a 35 mm lens on a 135 mm format, the 24 mm (50 mm equivalent), the 50 mm (100 mm equivalent) and the 70 mm (150 mm equivalent).
If you are wondering how these lenses translate in the world of traditional 35mm on the Pentax Q series, consider the 5.35 times crop factor of the original Pentax Q and you are left with the following: 18mm = 96mm, 24mm = 128mm, 50mm = 267mm and finally the 70mm = 374mm. The same lenses on the Q7 or Q-S1 – with a larger sensor and a crop factor of 4.65 – results in the following: 18mm = 83mm, 24mm = 111mm, 50mm = 232mm, and finally 70mm = 325mm. These numbers are rounded off, but you get the idea.

Lomography’s Orca, 200 iso, B&W print film can be expensive to process.
I used Lomography’s 200 ISO Orca film stock in the Pentax Auto 110, and set the ISO to 200 on the Pentax Q. On the Q, a fixed F-stop was used with the introduction of a home-made rubber washer inserted into the adaptor. (See earlier post here for more information.)
First impressions: Not the best results?
My first impression of the film images was not favourable. I felt the amount of grain overpowered the image and made them almost unusable. That, of course, was simply an over reaction on my part after having used digital cameras for so long. The scanned film’s grainy images soon grew on me and, with a little tweaking in Lightroom, I began to appreciate the scanned images more and more.
The small size of 110 film has never been a favourate film for photographers looking for a fine-grain image. And, of course, the more it is enlarged the larger the grain becomes.
(To see all of my Orca B&W images, check out my photo gallery HERE.)
In this post, we’ll explore both the “straight out of camera (SOOC)” images, as well as some that have been developed further in Lightroom and Photoshop.
Let’s take a look at a few images, shall we?

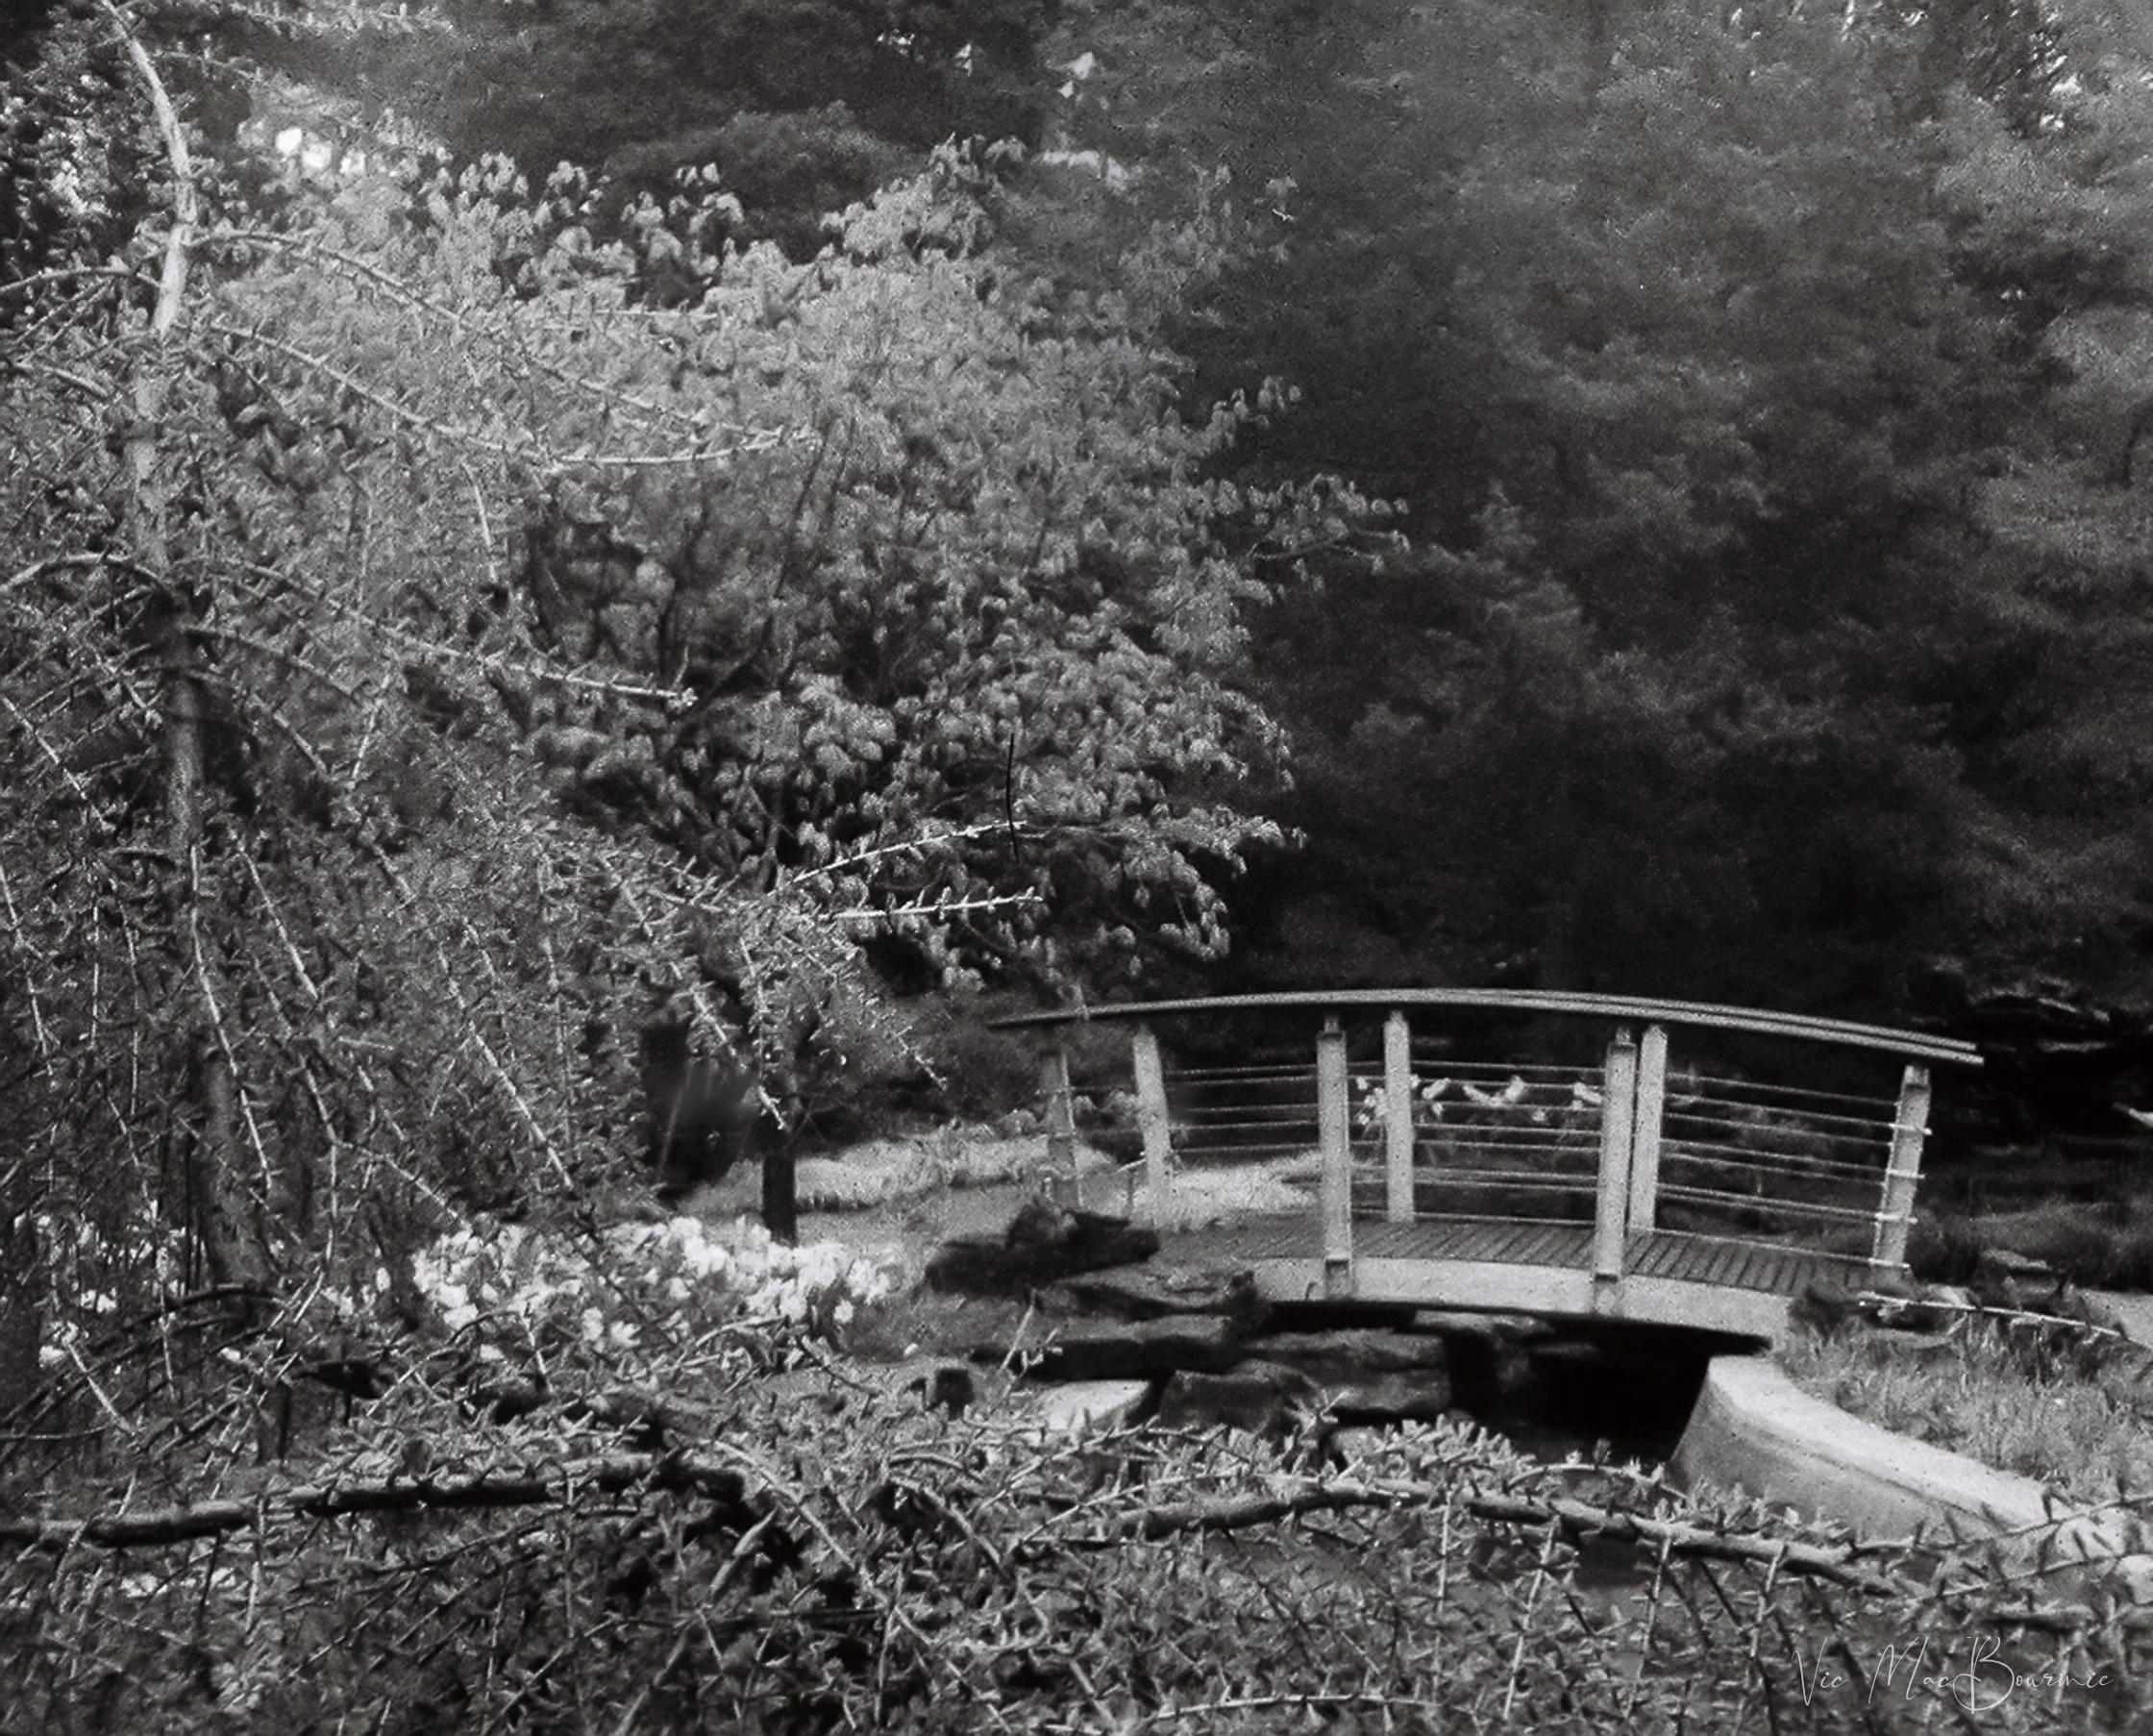
A garden bridge (SOOC) leads to a magnolia tree just beginning to open in a local public rock garden. This scanned film image shows high grain compared to a similar digital image below photographed with the Pentax Q and 18mm 110 lens.

The same garden bridge photographed with the Pentax Q and 18mm 110 lens.

The same film image with a little de noise added in Lightroom results in a slightly more pleasant image.

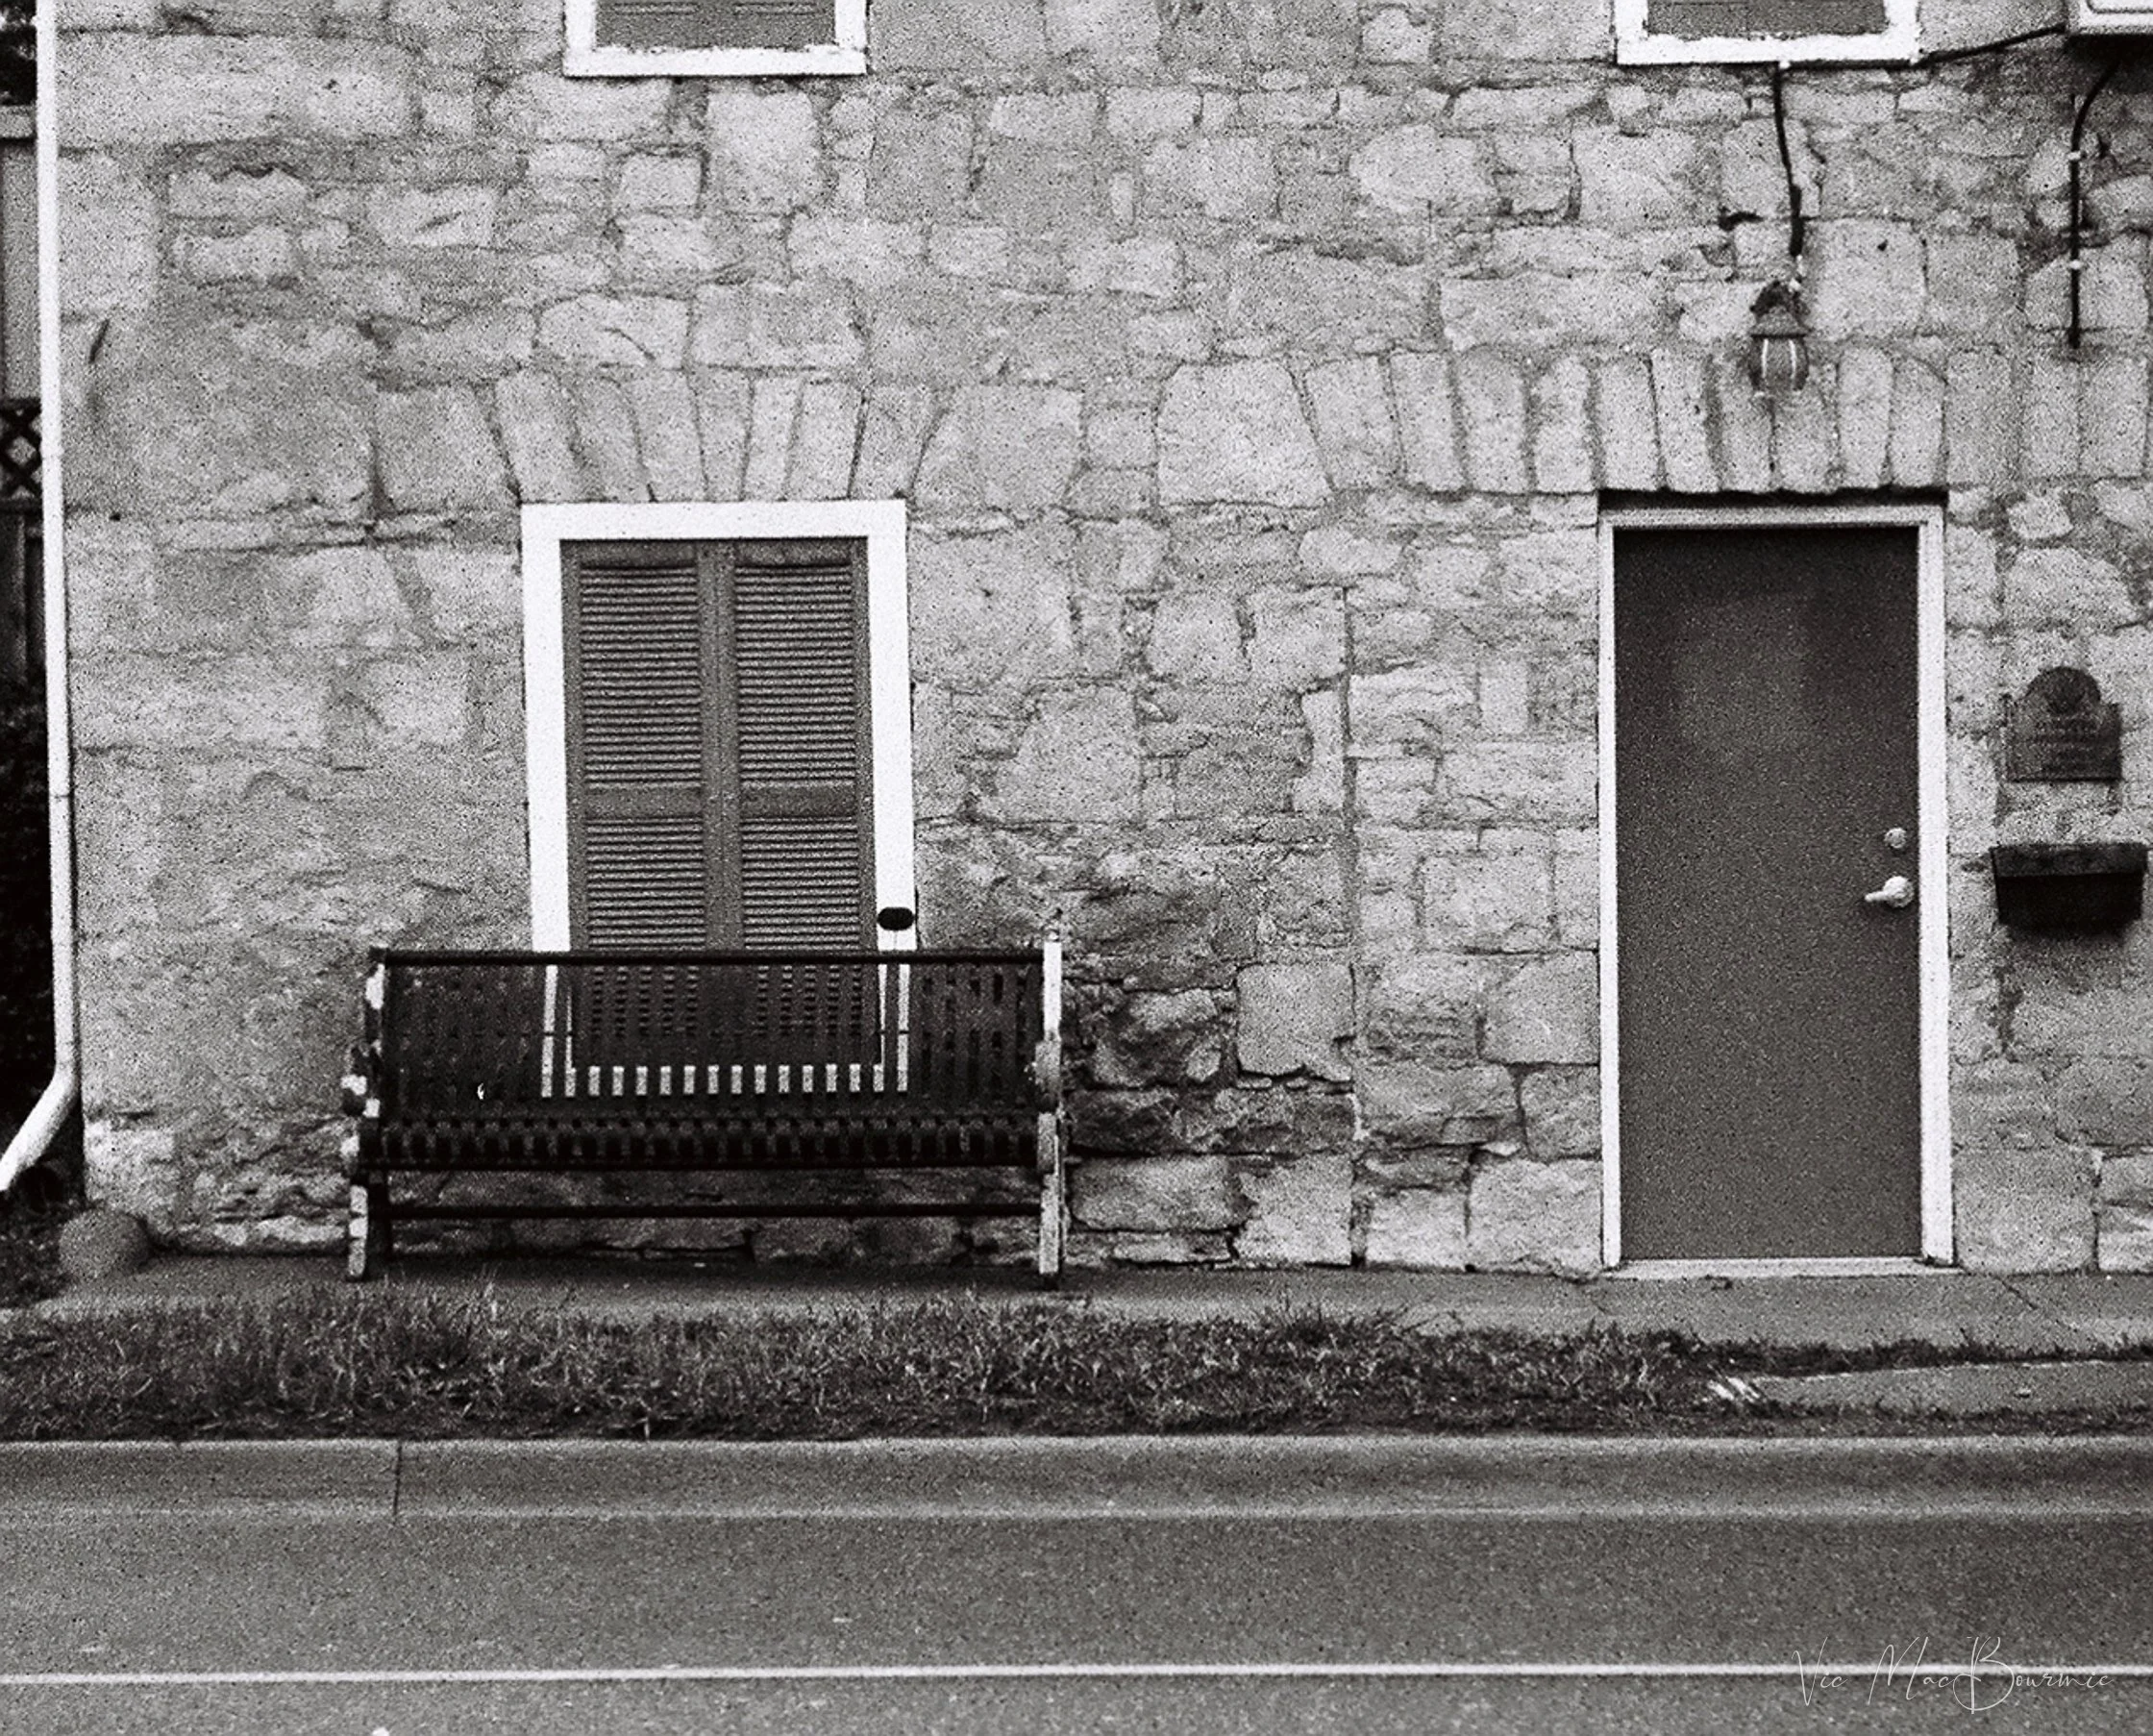
Local historic building photographed with Pentax Auto 110 on Lomography’s Orca film stock. The heavy grain seems appropriate with the subject matter.

A digital image of the same historic building photographed with the Pentax Q. Notice that the image’s grain or noise structure is much softer in this image compared to the one above.
The shooting experience: Pentax 110 vs Pentax Q
The shooting experience between the film and digital camera was really quite different and definitely favoured the much older and simpler Auto 110 film camera.
The combination of the very bright built-in viewfinder on the film camera, together with the split-image focussing screen, made the experience of shooting with the vintage film camera a real joy, not to mention the ease of getting sharp images. (Of the roll of 24 B&W images, about 22 were useable.)

On the other hand, trying to manually focus using the LCD screen on the back of the digital Pentax Q was difficult at times, especially in bright daylight. Although the camera features magnification to assist in focussing, the ability to get perfectly sharp images was often challenging. This is where the Q’s fine assortment of autofocus lenses would have come in handy.
That’s not to say that shooting the 110 lenses on the digital Q was not enjoyable, it was. But, compared to the original film camera that the lenses were made for, it presented some challenges.

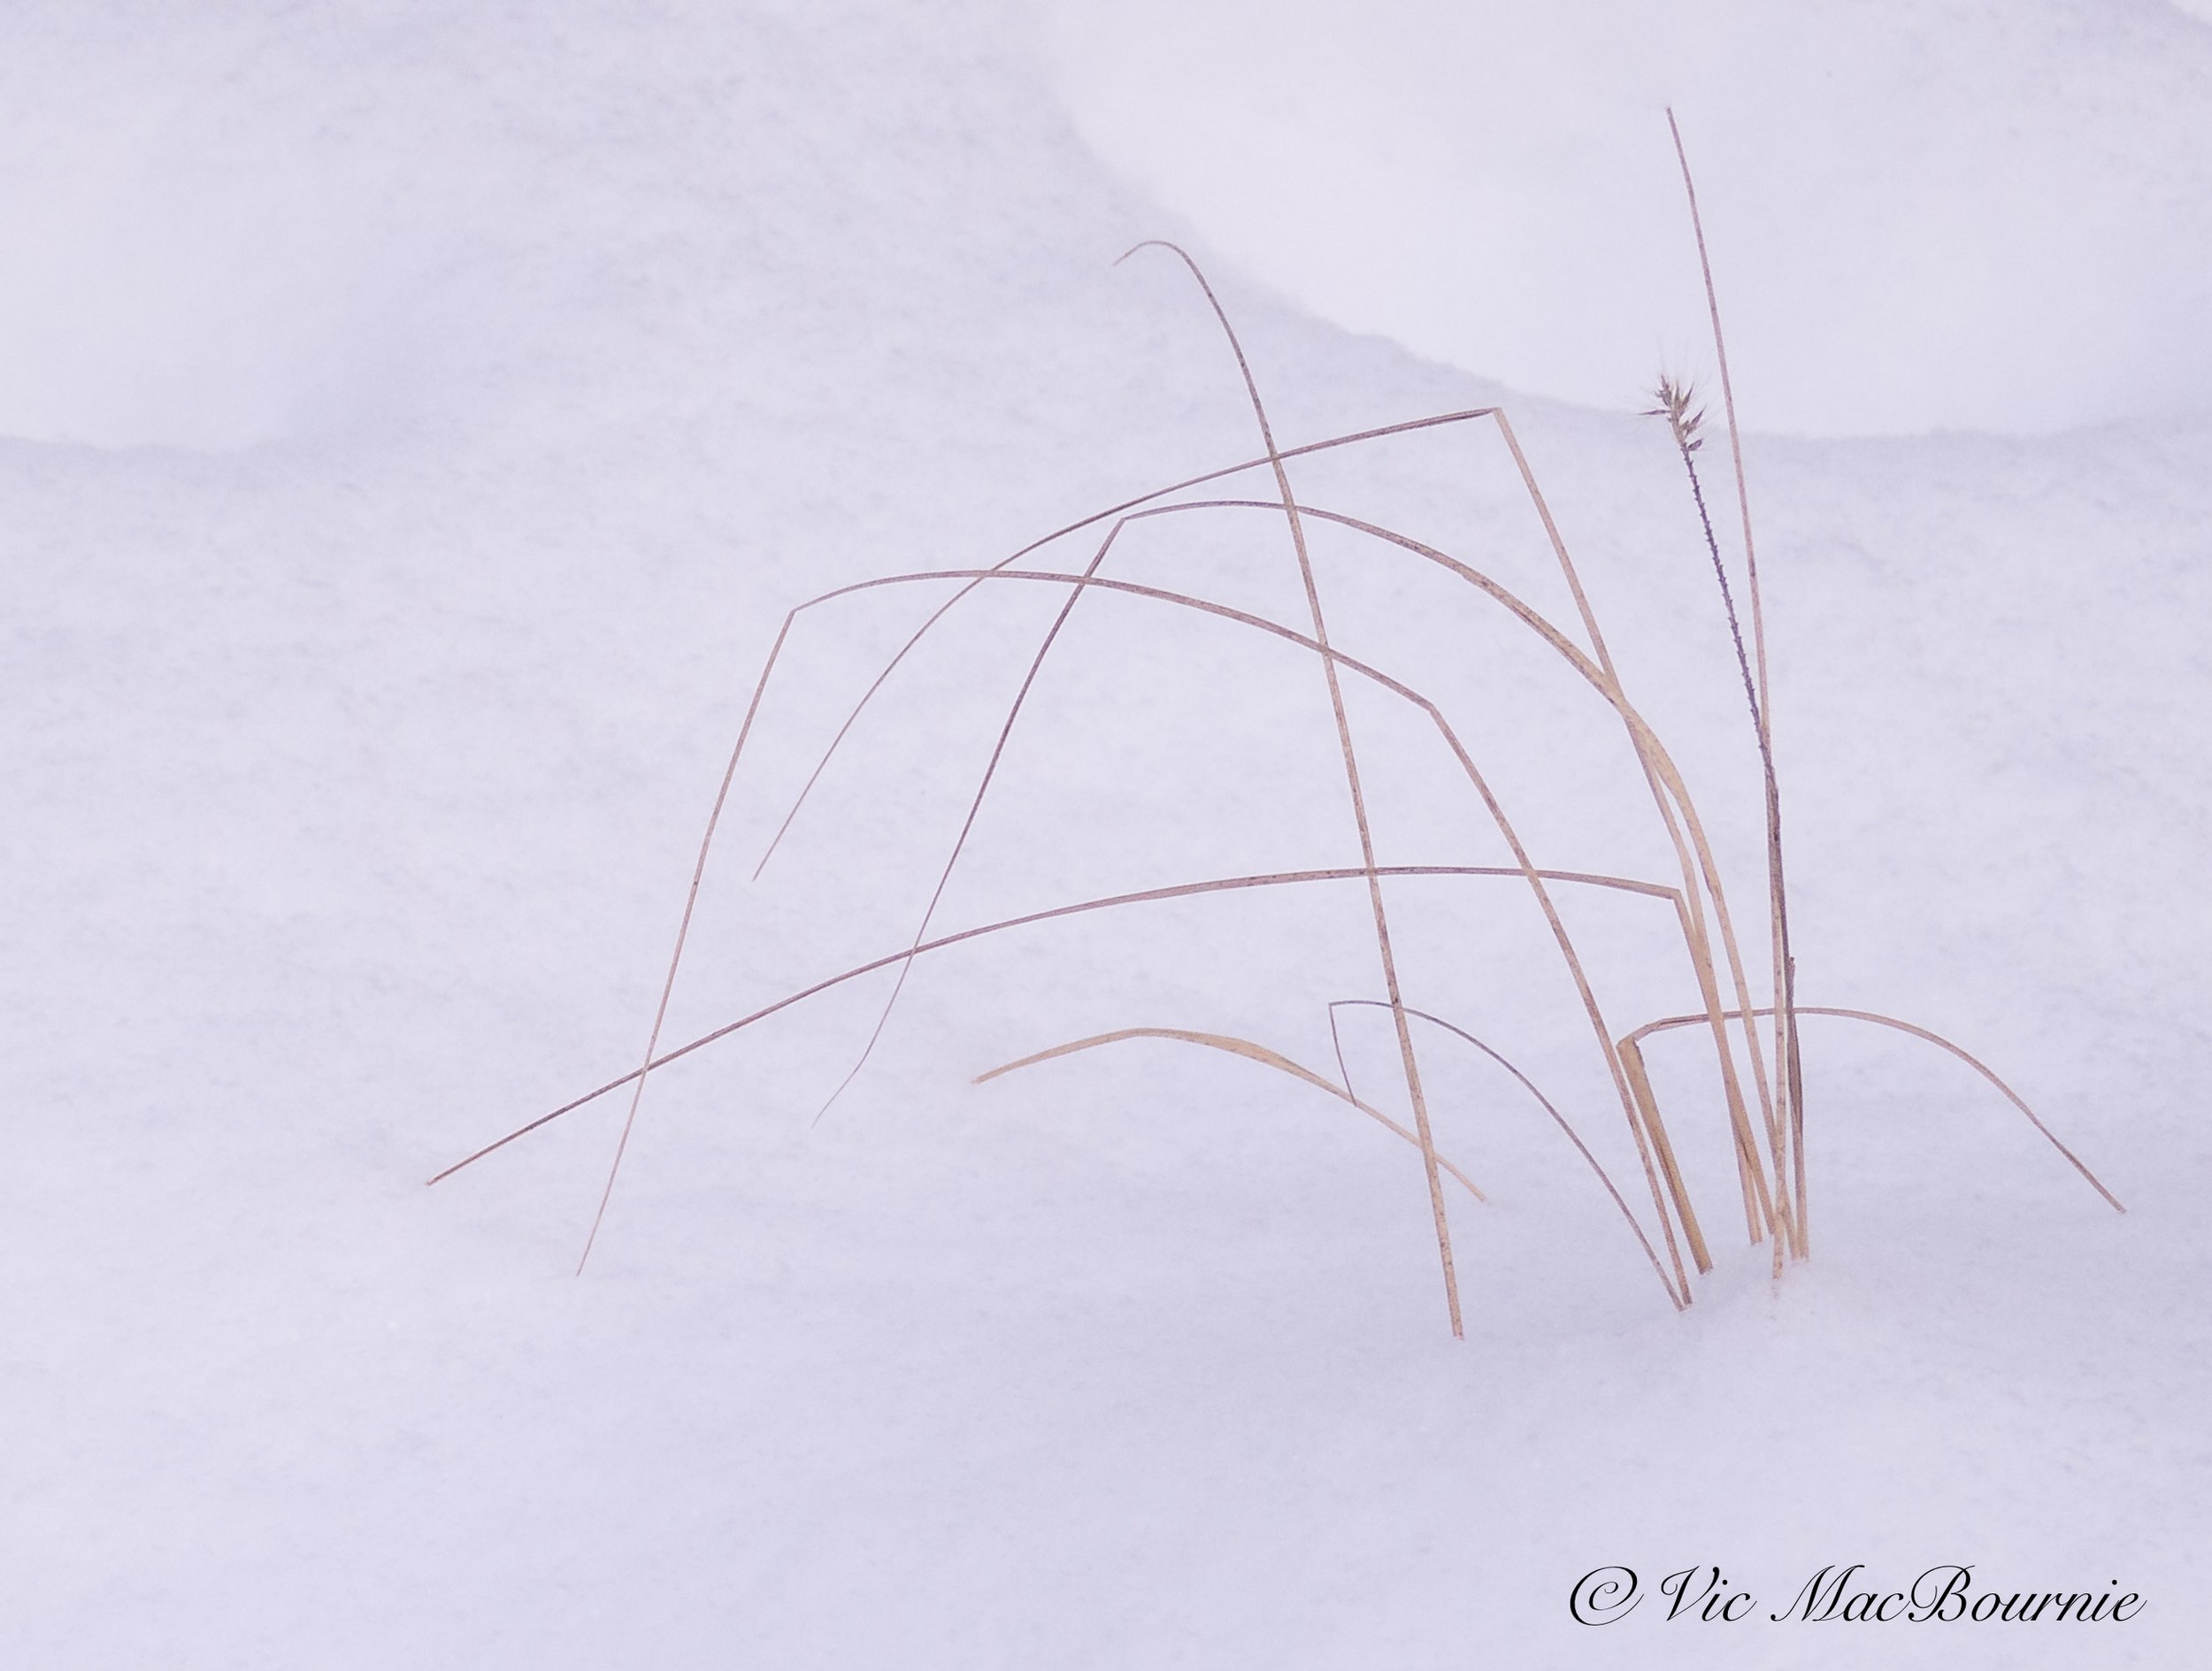
A garden scene with the Pentax Auto 110 film camera.

A similar scene shot with the Pentax Q.

The film image above after some tweaking in Lightroom.
Here are more images taken with the film and digital cameras that illustrate the difference in grain and noise between the two formats.
I’m not going to go into too much detail at this point, preferring to leave more details for part-two and -three of the series comparing the cameras and lenses.
This image shows one of our town’s historic buildings. It is a straight scan out of the camera with no tweaking done in post processing.

A similar image taken with the digital Pentax Q and 18mm lens.

Cherry tree scans straight out of camera.

A similar image photographed with the Pentax Q and 18mm, 110 lens.
Adding the Pentax I-10 to the group
Earlier in this post, I mentioned that I was going to add a third camera to this comparison. The Pentax I-10 is another miniaturized, vintage digital camera produced by Pentax just before the introduction of the Pentax Q, and one that fits into this comparison nicely.

A tiny threesome used in this comparison. From left: the Pentax Q digital camera, the I-10 digital and the Auto 110 film camera.
It has a similar-sized sensor but has a built-in autofocus lens that gives it an advantage over the other two cameras, especially if age makes getting proper focus more and more difficult.
Below, are a few comparison images adding the Pentax I-10 to the group.

Image taken with the Pentax I-10 digital camera with its built-in autofocus lens. You can see the fine detail that has been brought out in this image photographed at at 160 of a sec at f5.3 and ISO 80.

The Pentax I-10 creates a beautiful, smooth image with little to no grain (noise) in this image of a bridge in the garden.

Garden bridge photographed with B&W film SOOC with the Pentax Auto 110.
The same image as above after a little de noise added to the photograph in Lightroom. I also removed some distracting elements in the scene.
The Darkroom tackles processing and scanning the 110 film
The Darkroom was the lab I chose to turn my B&W 110 film into digital scans and negatives. I can say the process and the results were excellent, but the final price tag was not.
I’m not sure of the final cost, but between purchasing the film from Lomography, paying for the mailing costs from the Toronto area to California and then adding the cost of developing, scanning and mailing the negatives back to me, it was not inexpensive. In fact, the cost I’m estimating to be over $60 Canadian, made the whole endeavour something that only the most dedicated film photographers would want to turn into a weekly or even monthly habit.
A few times a year might be something to consider, but digital cameras have certainly turned me into a penny pincher when it comes to paying for images.
I know, however, that there is a growing number of photographers who don’t like or want to be bothered with the whole digital process preferring to have prints in hand rather than digital images to deal with on their computers. And, if you already own the 110 or a 35mm film camera, than the costs may not be too exorbitant.
I’m sure if you live in the U.S. and scan your own 110 film, the final price can be brought down considerably, but the high cost is certainly something that would make me think twice about shooting another roll of B&W, 110 film.
I’m told my next roll – colour print film – is much cheaper. Stay tuned.


Pentax I-10 Digital is forgotten gem with vintage style
Pentax’s tiny I-10 digital is a beautiful little point-and-shoot camera that looks all too familiar to the Auto 110 and the lovely miniaturized Pentax Q series of cameras.

A CCD, feature-rich point and shoot that captures beautiful garden images
The Pentax I-10 might be a tiny camera, but its classical vintage styling and feature-packed offerings make it the perfect carry-around camera for beginner photographers looking for a capable camera while sporting a very real cool factor.
Available in classic black and stylish white, the 14-year-old digital point-and-shoot camera from Pentax’s Optio line, boasts a built-in 5X, 28-140mm lens, along with a long list of shooting modes and interesting filter effects including a BW setting, toy camera, several portrait and macro modes, a soft focus effect filter and a variety of picture frames.
And, while it’s simplicity makes it ideal for beginners, even seasoned photographers wouldn’t mind carrying this stylish, yet pocketable little gem around with them at all times.

The tiny Pentax I-10 is a point-and-shoot camera with a 28-140mm equivalent lens.
There’s plenty of capability here for the average photographer looking to simply capture their gardens, flower and insect photography, kids, pets, vacation and about-town images.
Add to the already impressive feature list a total of 12 megapixels and sensor-shake image stabilization.
Oh, and did I mention that it features a CCD sensor? Yes, that same sensor that photo enthusiasts all over the internet are craving for to create a vintage look straight out of camera.
Not bad for a camera released in 2010.
It’s long out of production, but if you look on eBay and other on-line photo retailers these sweet little cameras come up for sale, often in mint condition for a very good price. I picked up mine on the day of this shoot from a lovely woman on Kijiji for $60 Canadian in mint condition complete with the original box a 6 Gig SD card and even a great little carrying case.

This tiny trio of Pentax cameras illustrates how the company perfected tiny but high quality cameras. The Pentax Q (left), the Pentax I-10 Digital (centre) and the Pentax Auto 110 film camera (right).
Vintage styling based on the classic Pentax 110 camera
If the Pentax I-10 reminds you of a camera you’ve seen before, you are probably right. The I-10 released in January 2010, was based on the vintage Pentax 110 Auto camera, released on June 23, 2011, and was the camera released just before the more modern miniaturized Pentax Q series of tiny Pentax gems.
One look at all three cameras and it’s not hard to see that Pentax builds beautiful tiny classic cameras. In fact, I’ll go out on a limb and say “no one does it better than Pentax.”

The Pentax I-10's rear view shows the 2.7-inch screen.
The Pentax I-10 point and shoot is no exception. Behind its seriously good looks is a 14-year-old point and shoot camera with extremely high build quality right down to the leatherette covering the front of the camera.
When you consider this is a point and shoot from the Optio line the Build quality is even more impressive. I’ve never cared for Pentax’s Optio line of consumer cameras until I saw this one.
“To say I was pleasantly surprised is an understatement. Actually, I was shocked with how well it performed.”
I took all three cameras – the digital I-10, the 110 film camera and the original Pentax Q – along for a walk through a rock garden on a rainy morning as part of a website post I am working on comparing the three cameras.
It was only the first time I used the Pentax I-10 but, after only a few minutes running through the menu system, I was ready to explore what this vintage-looking camera could do and compare it to my much-loved Pentax Q and eventually the Pentax Auto 110.
To say I was pleasantly surprised is an understatement. Actually, I was shocked with how well it performed.

A weeping willow stands guard over the public garden.
Pentax I-10 goes to work in the garden
Behind the cute, retro styling 12MP sensor, 2.7" LCD with 720p HD movie shooting and a 5x zoom covering a 28-140mm equivalent range, is an impressive little point and shoot performer. Mind you it’s not going to give you poster sized prints. Because of the small sensor, its dynamic range isn’t going to blow you away, and severely cropping images might be a little risky. But if you are looking for eye-popping colour from the jpegs right out of the camera, you’ll be impressed. Especially since this camera fits into your pocket or purse with lots of room to spare.
In the garden, I set the camera to landscape mode, set the ISO to no more than 200 and went to work. The landscape mode boosts greens and blue skies and worked well for the subject in hand. I switched to macro mode for a shot I stumbled upon and was surprised with the result, but more on that later.
I’ve been a Pentax fan all my life and the results from the morning shoot gave me no reason to think otherwise. Pentax lenses have always been a selling point and this little lens punched above its class, but especially in the wide-angle range. Telephoto shots were a little soft, but nothing post processing can’t fix in a flash.
Colors were exceptional. This may have had as much to do with the shooting conditions as the lens, but I was truly impressed.
The ease of use is certainly a selling factor for me. Set it on landscape mode and let the camera do the work. I traditionally would not want the camera to make most of the choices, but the choices the camera made suited me just fine in this instance.
Being a point and shoot camera means there is little to no control over shutter speed and f-stops. The camera also shoots only jpegs, leaving RAW to more seasoned photographers. If you can live with these limitations, then this is a camera that might interest you.
For a more complete breakdown of the camera’s features, check out Photography blog’s review here .

I stumbled upon this lovely little image of a pine cone in grasses and used the camera’s macro mode to capture it. Later, I turned it into a lovely black and white image in camera. (inset)
Two macro functions and fun filters on the Pentax I-10
I was particularly impressed with the macro functions on this camera. The first macro setting, easily accessed on the back control button, gets you close-up photography that allows you to focus on a subject that is 8cm away from the camera. The super macro mode gets you even closer to true macro, mind you the camera has to be very close to the subject.

Using the in-camera filter, I was easily able to convert the coloured jpeg into B&W.
I stumbled across a lovely little image along the path of a pine cone in some grasses. The resulting hand-held image was stunningly sharp thanks to the camera’s anti-shake feature, and rendered the colors beautifully thanks in part to the CCD sensor and rainy, overcast conditions.
Once again, the toy-like Pentax came through delivering images that would please most casual photographers.
I wanted to turn the closeup image of the pine cone into a black and white but for the life of me could not find the filter settings in the menu system. It wasn’t until later that I discovered that the filters for this camera could only be used after the image was taken.
By hitting the image review button, photographers have access to a number of very impressive filters including black and white. Once you make the conversation, you can choose to save it separately, make a copy or overwrite the existing image.
This is a great way to reconsider any photograph you took on your outing. By adding a filter, or even a digital picture frame, you can create new images while still having the original.
Not only did I convert the close-up shot to black and white, I also added a frame that gives the image a more of a lomography look. There are lots of silly frames for use with family images as well.

Another image turned into a B&W, but in this image I added one of many frames available in camera.
While flipping through the available filters, I noticed the camera included colour extract filters.
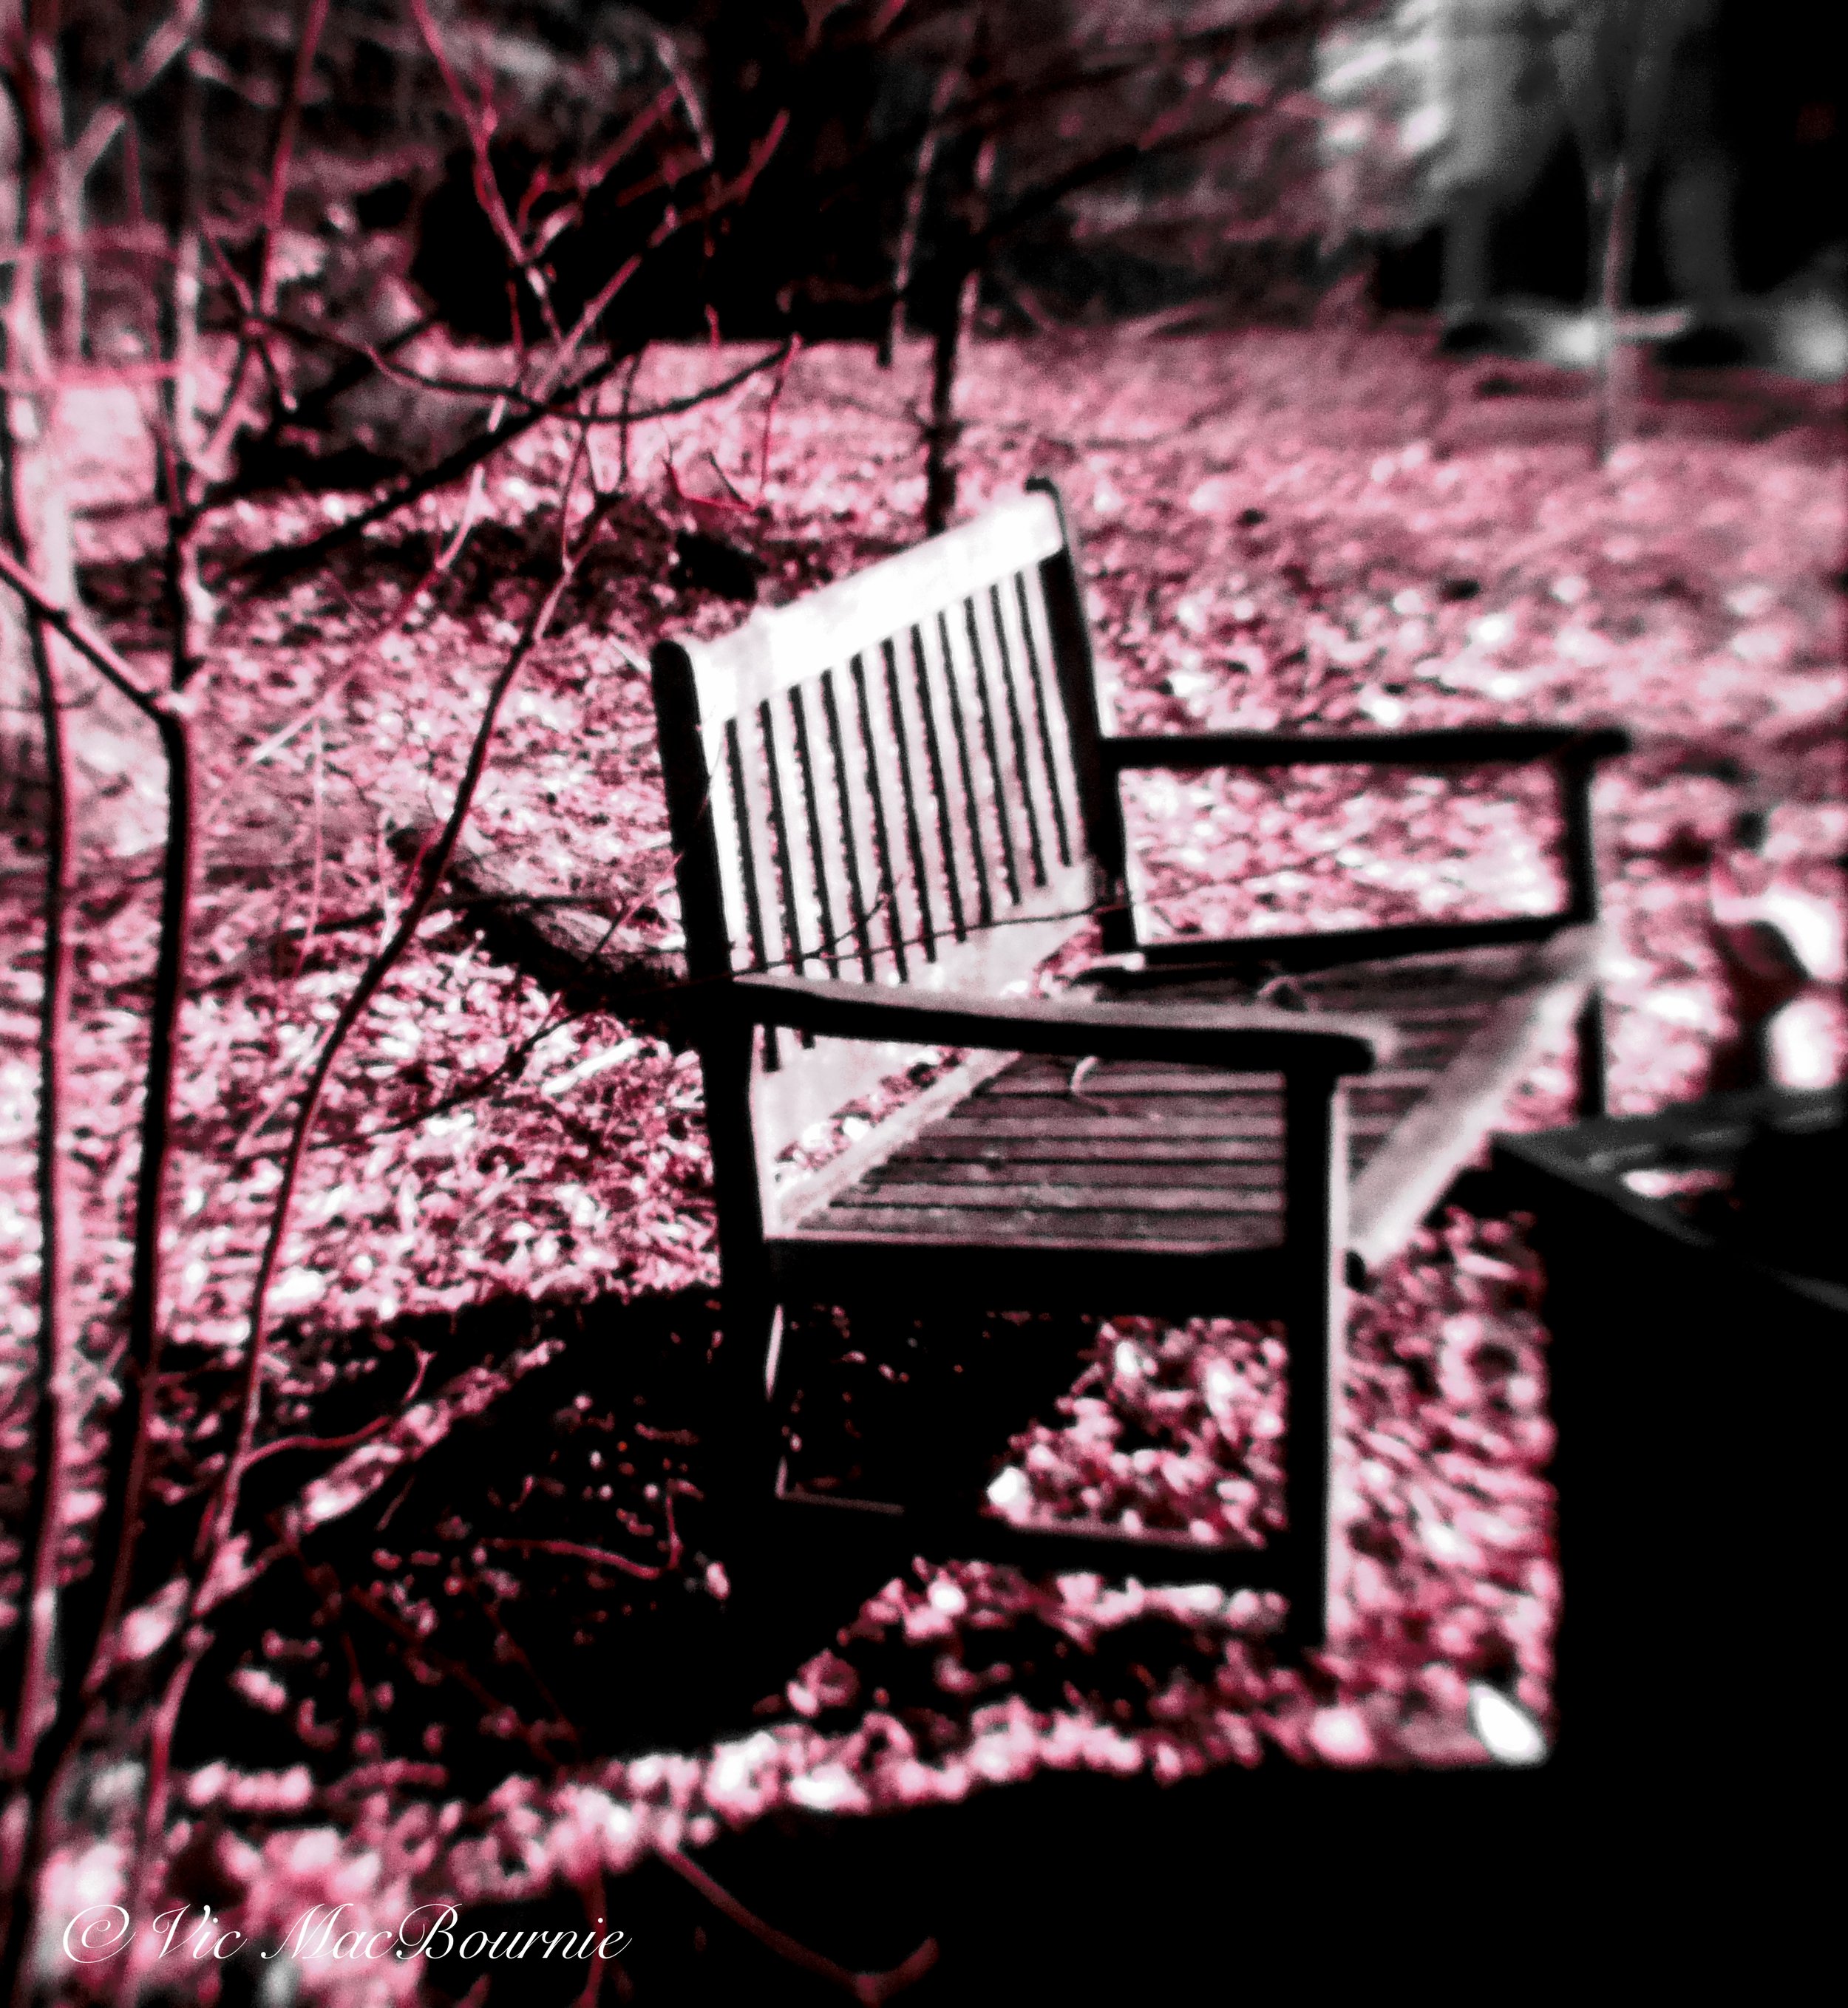
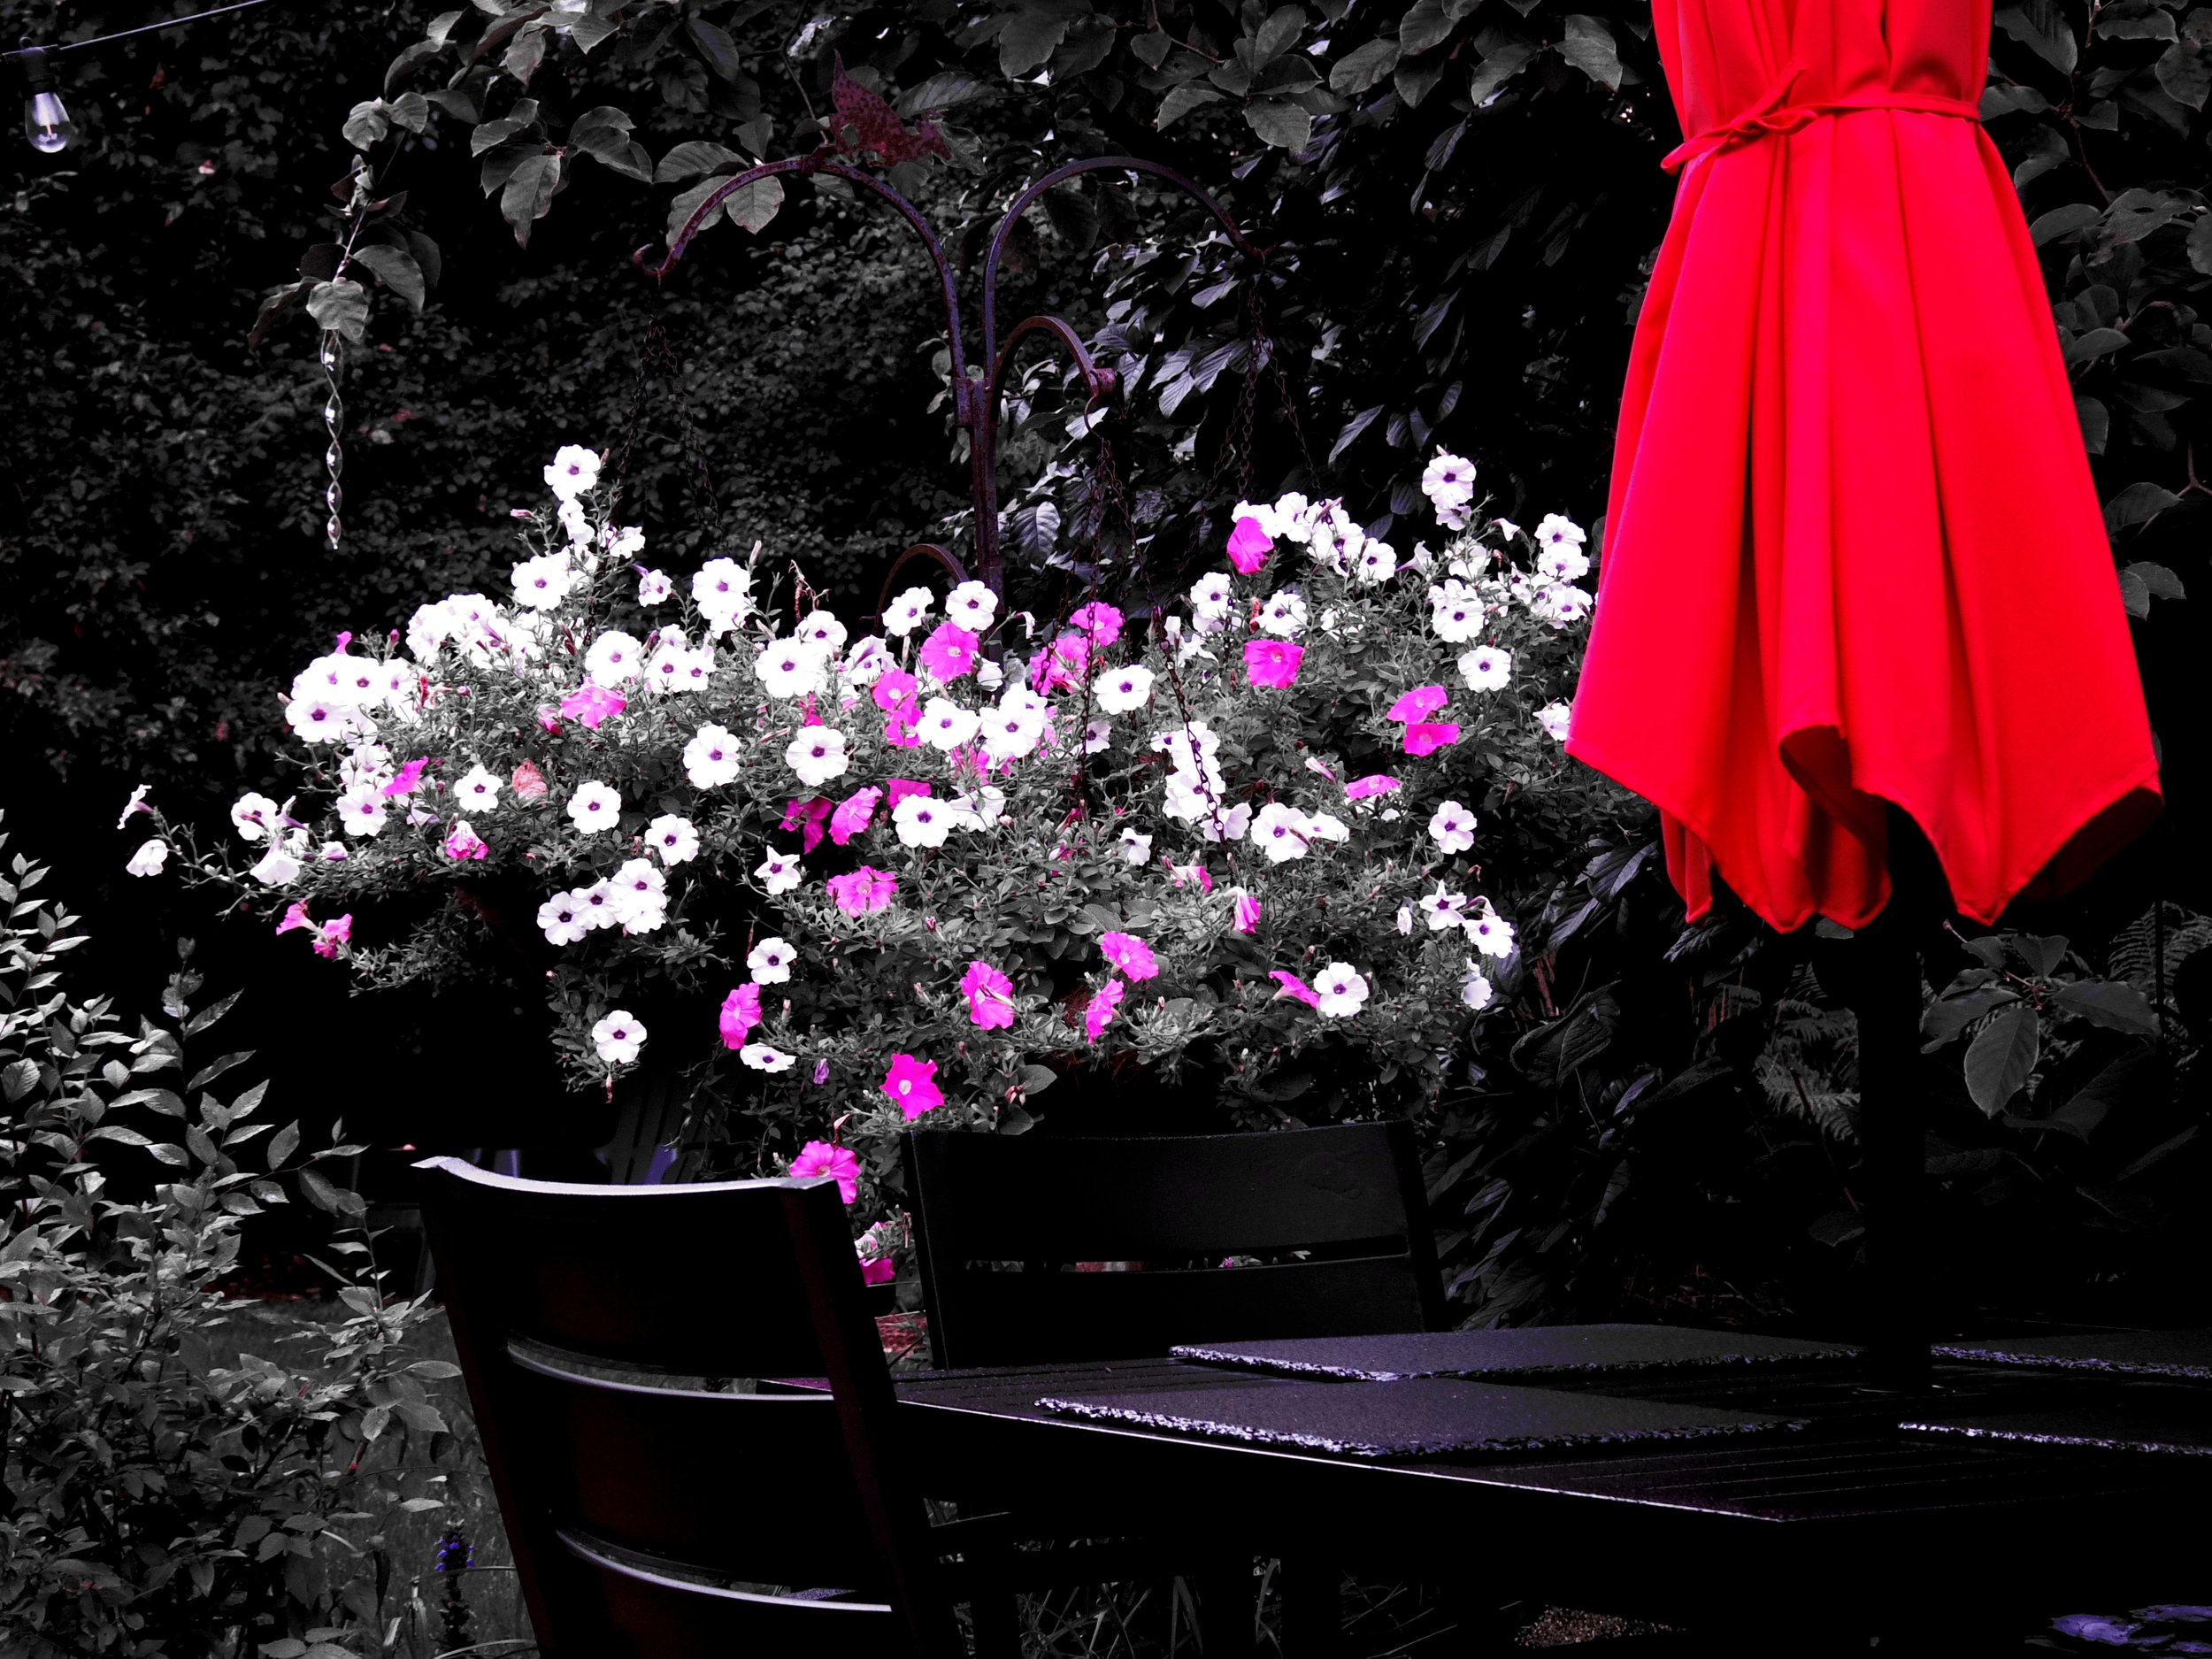
I enjoy looking for images that work with colour extract filters because they can be very effective. The image below shows how effective the “extract” filter can be if used successfully. One of my final images during the shoot was of two bright red Adirondack chairs beside a massive rock overlooking the garden. It was the perfect opportunity to use the color extract filter set to red. The camera turns the image into B&W and then “extracts” only the color the photographer stipulates in the image.
When faced with a situation like the one below, the extract filter is exquisite.
The image, a perfect ending to an overcast day in the rock garden.
For more images from the same outing, check out my post on three garden design tips from a public garden outing.

The Pentax point and shoot includes an extract filter that allows the photographers to choose a color that is extracted from the scene before it is turned into a B&W image. When used successfully, the resulting image can be extremely effective.

Author Profile: Vic MacBournie is a former journalist and author/owner of the award-winning website and newsletter Ferns & Feathers. He writes about his woodland wildlife garden that he has created over the past 25 years and enjoys sharing his garden photography with readers.
Pentax Q and Mount Shield Lens: A lomographers’ dream?
Combining the diminutive Pentax Q and the 07 Shield Mount Lens makes for an interesting lomography camera and lens combination.
This spring image shows many of the unique characteristics of the Pentax Q 07 Shield Lens that takes on the personality of both a Lensbaby and a lomography camera. Although the plastic lens renders the image mostly soft and out-of-focus, it is capable of obtaining extreme sharpness in central parts of the image.
Lens combines lomography and lensbaby effects
Is it possible that the Pentax Q is the ultimate lomography camera?
Purists would scoff at the idea that a digital camera – even one as quirky as the miniaturized Pentax Q – could ever be considered a leader in the world of lomography. But team it with the quirky 07 Mount Shield Lens or any number of vintage lenses, and lomographers might just be forced to take a little closer look.

Flowering Dogwood taken with Pentax Mount Shield Lens.
After all, lomography is all about using cheap plastic film cameras with low resolution plastic lenses together with even lower resolution and bizarre film stocks. It’s inspired by analog techniques of vintage lenses and embraces lens distortions, light leaks, and other quirks as part of the creative process. Lomography encourages playful and spontaneous shooting and values the aesthetic qualities of the photographs that result from these techniques.
All this in the pursuance of creating artistic images with equipment that makes the finished result extremely difficult to predict.
That doesn’t sound much like the traditional Q line of cameras and lenses.

This image taken with the Pentax Mount Shield Lens and some post processing has a lomography look to it that I think works nicely.
• If you are looking for a Pentax Q, the Mount Shield Lens or any other piece of hard-to-find photographic gear, be sure to check out KEH Photographic for an outstanding selection of used equipment at great prices.
The Pentax Q was first released back in June 2011 as a highly refined, extremely well-built miniaturized digital camera in an impressive magnesium body that could be paired with its own line of high-quality lenses. It is capable of capturing incredibly sharp images in RAW or jpeg. In fact, Pentax was so concerned about obtaining the highest quality resolution that it was one of the first camera makers to remove the anti-aliasing filter from the sensor to improve sharpness.
Doesn’t sound much like the cheap plastic Diana cameras from Hong Kong’s Great Wall Plastic Co. and Russia’s Holga cameras that led the charge and resurgence into lomography.
But stay with me and we’ll try to explain the link between the Pentax Q and lomography
In the meantime, if anyone doubts the re-emergence of shooting film and the use of very low-fi film cameras, just check out this lomography.com website. It’ll change your mind in a hurry. It may also introduce you to a new style of photography.
So, how does all this relate to the Pentax Q?

Pentax Q with 07 Mount Shield Lens attached. It’s not hard to see how tiny the combination is and how easy it would be to simply slip into your pocket and take anywhere and everywhere.
Pentax releases Mount Shield Lens
Back in 2013, just about the time lomography was experiencing another resurgence, Pentax released the 07 Mount Shield Lens for the Q series of cameras. This low-fi, pinhole-style body cap lens was an interesting departure from the line of high-quality lenses released for the Q and set the stage for Pentax Q users to begin turning their trusted miniature mirrorless cameras into digital lomography gems.

The Pentax 07 Mount Shield Lens captured these children playing in a fish pond. The overall softness of the image especially toward the edges of the scene helps to give the image a dreamy look.
One look at the Pentax Q Facebook group I belong to and it’s not hard to see that Q users, whether they know it or not, are using the camera to capture lomography-style images with vintage lenses, including the little plastic Mount Shield Lens.
Pentax’s Mount Shield lens (or 07 as Pentax labels it) is certainly a low-cost, low-fi plastic lens that has been described as either the “worst lens ever made or the best body cap lens ever made.” It has a fixed focal length that comes in at 11.5mm (63.5mm equivalent on the original Q slightly wider on newer Q versions). The aperture is fixed at f/9. There’s no need or way to adjust aperture, and the focus is fixed around 0.5m (20 inches), so no need to focus. Since the lens has a relatively small f/9 aperture, Pentax says this allows objects as close as 0.3m (almost 12 inches) to about 2m (more than 6 feet) to be in focus. (Your experience may differ depending on your lens.)
The shield lens may have been one of the first, but the world of mirrorless cameras opened up a long list of vintage lenses that work on the Pentax Q – many of them with dubious quality – but all of them with a quirkyness that perfectly fits the lomography style.
Okay, so what in the world is this “lomography” style all about? Although in its purist form, lomography involves using cheap plastic 120mm film cameras and lenses, there are many iterations that now include using proper – even modern – film cameras with specialized lenses that give odd or pleasingly soft bokeh among other characteristics. In fact, many of these highly specialized, beautifully made lenses are quite expensive( see the art lenses website). Other lomo shooters prefer to use traditional lenses with specialized lomography films which can be purchased at the lomography.com website.

Pentax Mount Shield lens can create some lovely flower images with a Lensbaby look.
We only need to look at the ten golden rules of lomography to begin seeing a connection with the Pentax Q.
Always carry your camera with you so as not to miss chances of capturing spontaneous images.
Shoot in whatever light is available to get more unpredictable and “artsy” images.
Make photography (lomography) a part of your every day life.
Try to capture spontaneous moments like that we see in street photography. Shoot from the hip and have fun.
Don’t be afraid to get up close to your subject.
Try not to overthink your shots – just shoot and check out the results later.
Always be ready to capture moments in time rather than technically perfect images.
Experiment and embrace the unknown without expectation
Take time to assess results at a later time.
Most importantly have fun and break the rules.

So how does the Q-series line up with these golden rules of lomography and make the Pentax Q a digital lomography camera extraordinaire.
The Pentax Q has always been thought of as a fun camera; one that is so small you can take it anywhere and everywhere with you, and one that encourages a creative approach with its myriad of built-in filters including a separate setting for bizarre blur effects. You can play with the colour settings or go bold contrast black and white at the twist of a button. It’s small sensor means noise is likely if the camera is pushed to extremes and, when paired with the Shield lens or vintage lenses, lomography-style photographs are at your fingertips.
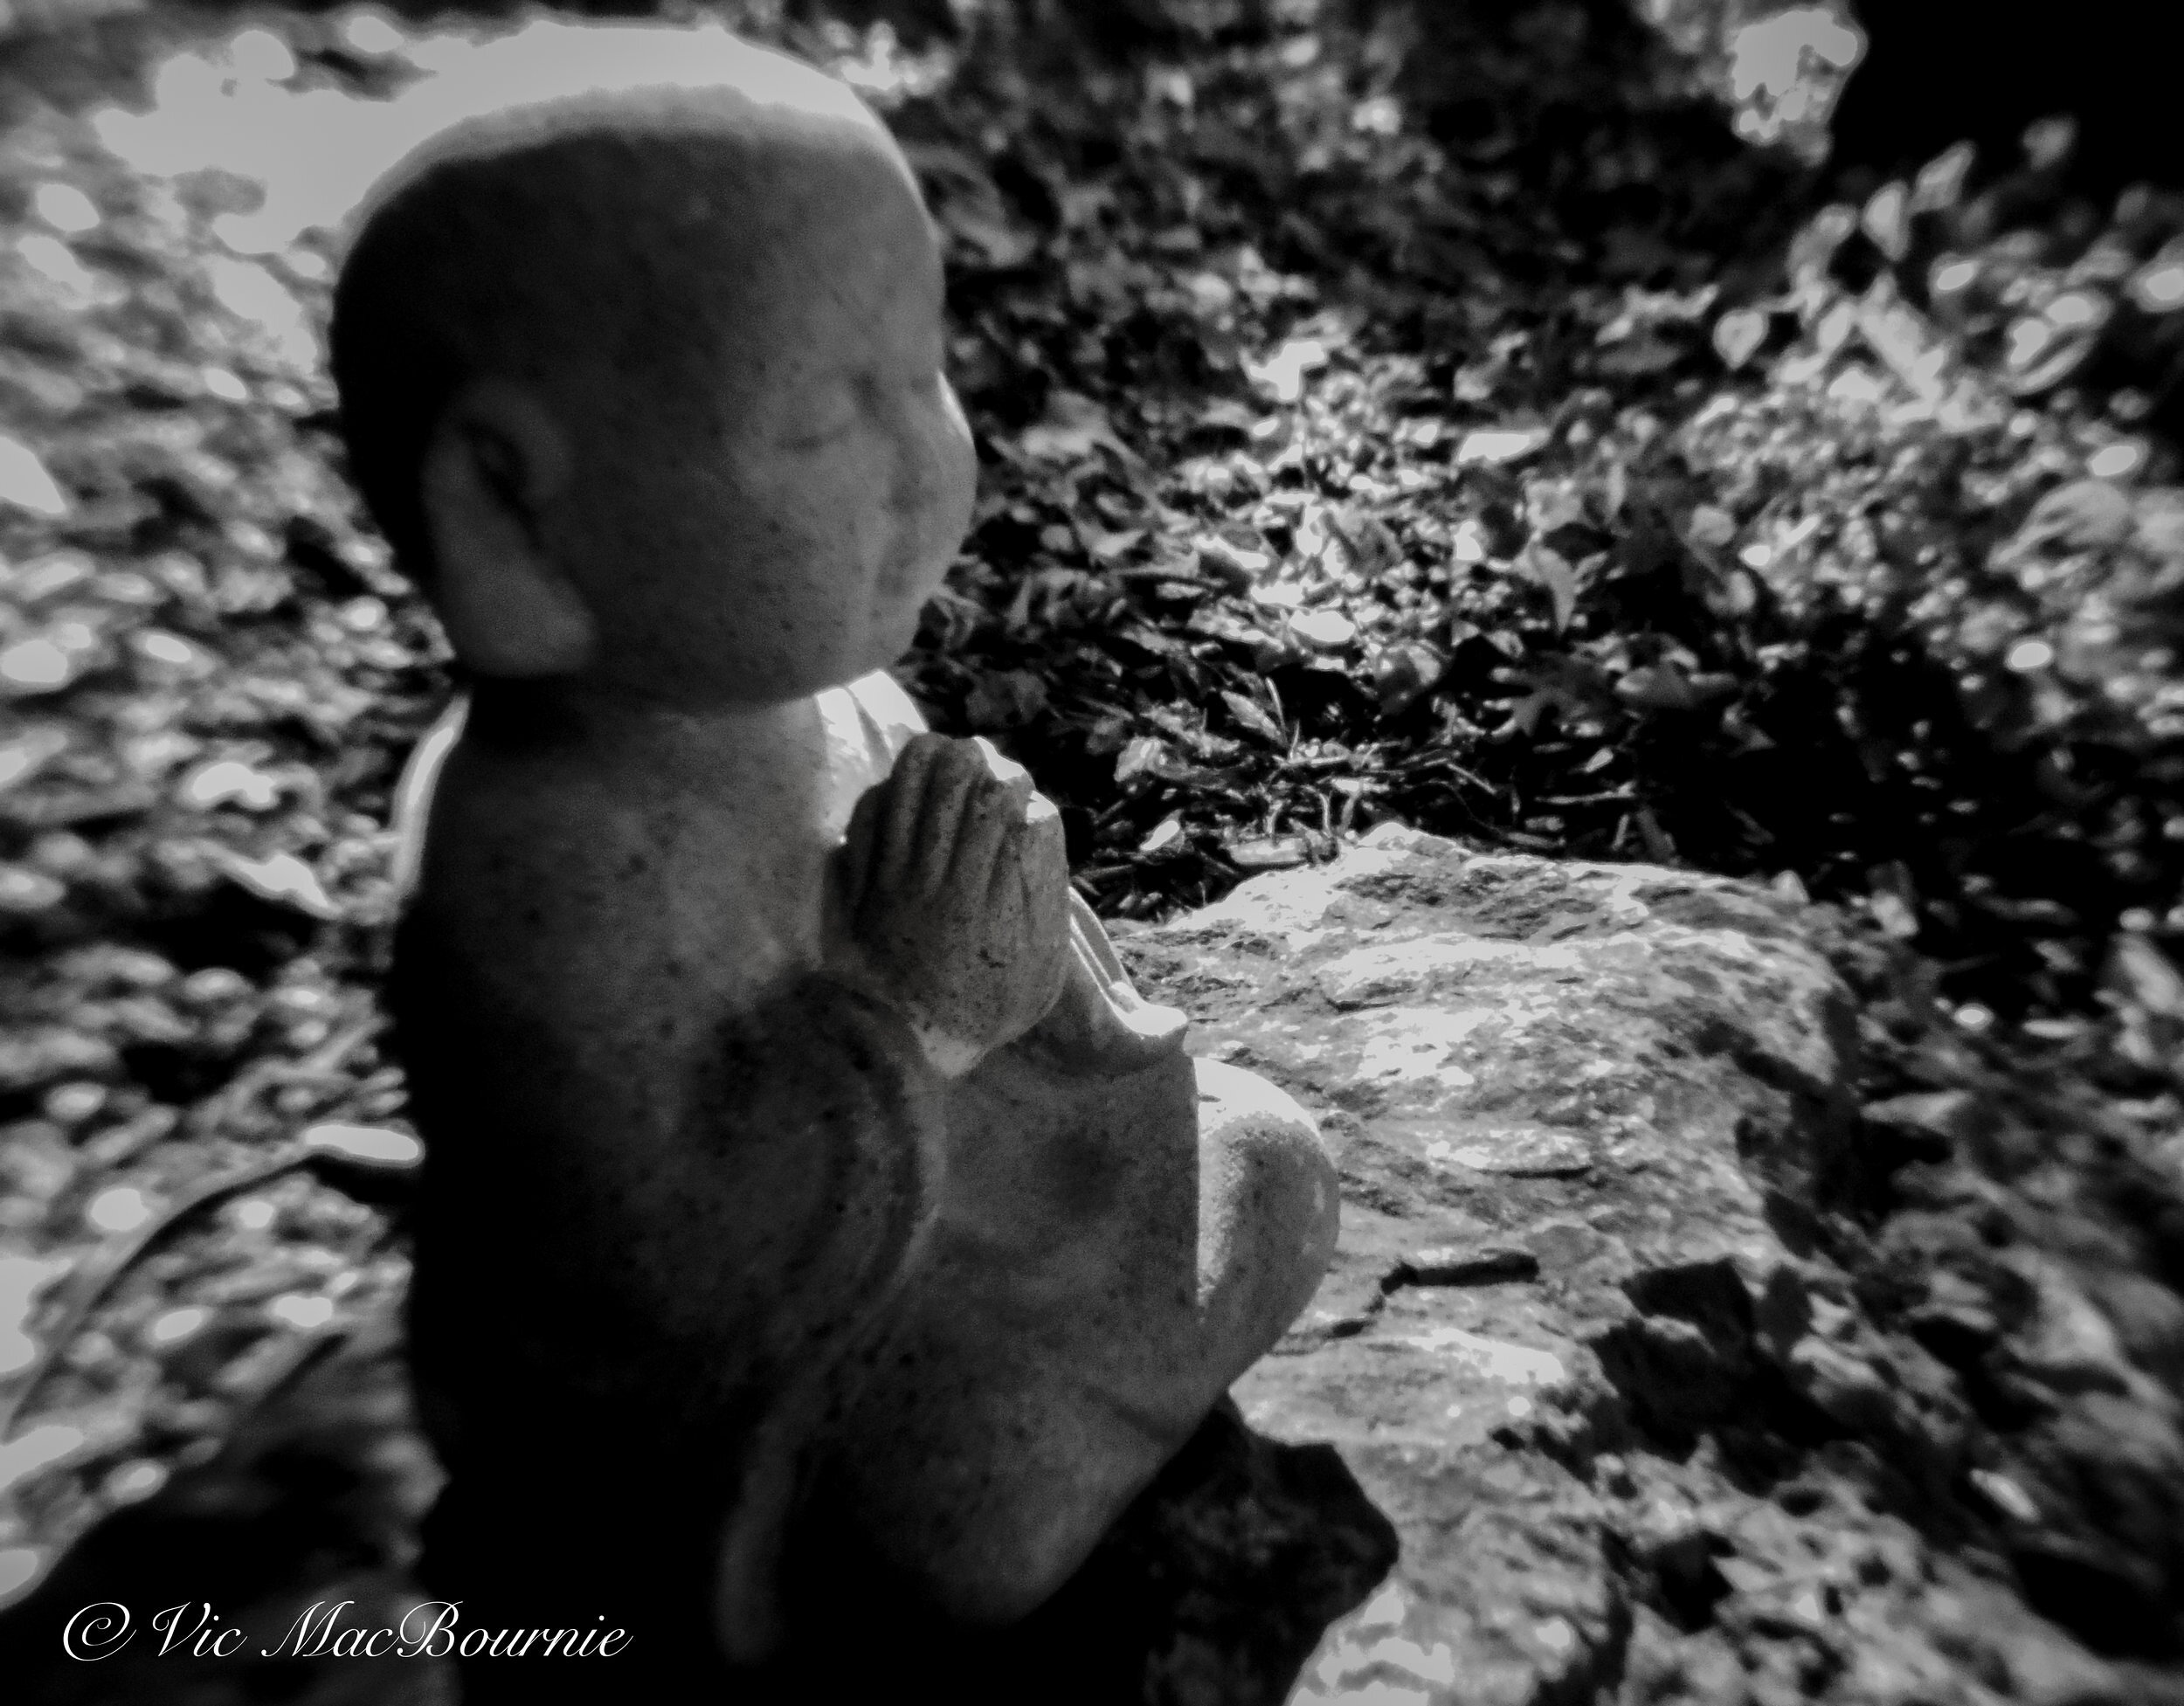
This image shot with the Mount Shield lens on the Bold Monochrome setting of the Pentax Q shows the focus on the hands of the baby Buddha while the rest of the image goes soft toward the edges of the frame.
Like many of today’s specialized lomography film stocks, there are built-in filters to create mono-colour images.
But, most importantly, it’s the ability to mount exquisite 50-year-old cinematic lenses on the camera to capture that highly-sought after vintage look. How about mounting the miniature Pentax 110 lenses released back in 1978 on the Q to capture images with a vintage look.
For more on using Pentax 110 lenses on the Pentax Q check out my extensive post here.
With a few adapters, the list is almost endless.
And, what makes the Q system even more exciting, is that you are not having to pay for the added expense of buying and developing modern lomography film.
Speaking of lenses, if you want to see some exquisite lenses created for lomography, check out these at the Art Lens website.
In this image, one of the many filters was used to create a lomography film effect with the Shield lens.
Shooting with the Shield lens
Everything that makes the Mount Shield lens a lomographers’ dream, also makes it appear difficult to use. Most of us are looking for sharp, technically correct images from edge to edge. That’s not what you are going to get with the shield lens.
Expect the unexpected. Odd, out-of-focus areas on your images, possible fringing, sharp central focus with softness spreading out to the edges… just to name a few. If you are using it for landscapes, chances are the entire image will be soft. Put something close to the lens in the focus zone and let the landscape drift out of focus for cool effects.
If you are taking photos in the garden, move in close to capture interesting effects similar to the style of images you may get with a Lensbaby.
Hello, World!
Combined with the many filters available in the camera and the separate blur control setting opens up a new world to photographers looking to experiment with their images.
And, after all, isn’t that what lomography is all about? Pop the shield mount on a Pentax Q and you’ve got a miniaturized camera that you can take anywhere and everywhere. There is no way to focus the lens, so shoot from the hip in whatever light you have. Experiment with filters – bold monochrome is a favourite. Try the extract colour filter which creates a B&W image that pulls out a single colour out of the image. The possibilities are endless.

This silhouette of a tree was photographed with the Pentax Q and Mount Shield Lens on the Bold monochrome setting.
Experience the joys of lomography
I know that a Pentax Q teamed with the Shield Lens or vintage lenses will never replace the joy purists have of shooting lomography film with a cheap plastic camera and lens. But the experience of shooting with an unpredictable lens in the pursuance of creative images is one that most photographers will surely enjoy and, more importantly, benefit from photographically as they push their creativity to new levels.
The fact that you can easily carry the combo around with you in a coat pocket makes it the ideal combination for photographers looking to capture their everyday surroundings.
Is it a lomographers’ dream camera? Probably not. But can it introduce digital shooters to a new creative process where pixel peeping is unheard of, mega sensors are of no importance and quirky is cool again.
Absolutely.
The Lomography Society International was founded in 1992 to promote the use and appreciation of analog photography. Today, the brand offers a wide range of cameras, films, and accessories and a community of enthusiasts who share their work and experiences online.
Author Profile: Vic MacBournie is a former journalist and author/owner of the award-winning website Ferns & Feathers. He writes about his woodland wildlife garden that he has created over the past 25 years and enjoys sharing his garden photography with readers.
Focus on vintage Pentax 110 lenses on the Pentax Q
The Pentax Auto 110 lenses are capable of some impressive results, especially if you use one of the hacks that help sharpen the lenses and create a greater depth of field.
The 110 lenses also fit micro four thirds and fujifilm cameras
No one could blame you if you thought the vintage Pentax Auto 110 lenses were made for the more modern Pentax Q line of cameras.
It’s just that 46 years ago, no-one would have dreamed that a miniature digital camera would even exist let alone continue to be so popular today.
This garden image, taken with the vintage 18mm lens from the former Pentax Auto 110 system, shows the capabilities of these vintage lenses especially if complementary post processing is used to bring out the best in these old lenses. In this image, I created a moody feeling that I think works well with the image.
These exquisite, tiny, almost miniature 110 lenses could not be more perfect for the Pentax Q line of cameras unless, of course, they offered full auto focus capabilities. However, even the Pentax “Toy” lenses, – the wide angle, telephoto and fisheye lenses – made especially for the Q series – do not offer auto focus capabilities.
For more on using the Auto 110 lenses on both the original film camera and the Pentax Q series of cameras, be sure to check out my post on shooting B&W film and digital using the Original Auto 110 and the Pentax Q.
So, the 18mm, 24mm, 50mm and the outstanding 70mm Pentax 110 lenses are almost too good to be true for Pentax Q users. All that is needed is a simple, inexpensive adapter to convert the lens. These adapters to convert the 110 lenses are also available for Fuji FX X-Mount camera X-PRO2 X-E1 X-E2 X-A2 X-M1 X-T3 X-S10 etc.
Grasses and dogwood with 18mm lens.
The build quality of these vintage lenses is also outstanding. Although the first three are made of plastic, it’s not your everyday plastic found in many of today’s inexpensive lenses.
These are extremely solid lenses that feature weighted almost perfectly silky focus.
• Be sure to check out my full post on using the 07 Pentax Mount Shield Lens on the Pentax Q.

The Pentax Auto 110 from 46 years ago beside the more modern Pentax Q. Notice how the 110 film size is similar to the Pentax Q sensor.
Can Pentax 110 lenses be used on other camera systems?
Just by adding another simple and inexpensive adapter, these vintage lenses can even be used with Micro 4/3rd cameras like those available from Olympus and Panasonic brands.
In fact, the sensors in the Micro 4\3rd cameras fit the rear element of these lenses almost perfectly, meaning there is no lens vignetting.
When used with these camera systems, the crop factor is only 2X meaning the 18mm becomes the equivalent of a 36mm f2.8 lens, the 24mm becomes a 48mm, the 50mm becomes a 100mm and the 70mm becomes a 140mm.
The image shows the four Auto 110 lenses and the #01 standard Q lens for comparison. The 50mm 110 lens is on the camera along with the adapter.
What are the crop factors of 110 lenses on the Pentax Q cameras?
If you are wondering how these lenses translate in the world of traditional 35mm on the Pentax Q series, consider the 5.35 times crop factor of the original Pentax Q and you are left with the following: 18mm = 96mm, 24mm = 128mm, 50mm = 267mm and finally the 70mm = 374mm. The same lenses on the Q7 or Q-S1 – with a larger sensor and a crop factor of 4.65 – results in the following: 18mm = 83mm, 24mm = 111mm, 50mm = 232mm, and finally 70mm = 325mm. These numbers are rounded off, but you get the idea.
All of these lenses are manual focus, fixed f2.8 lenses that do not transmit any information to or from the camera. Just set your Pentax Q on Program, Aperture or shutter priority and let it choose the proper exposure. The over and under compensation button will correct for any unusual lighting conditions.
In addition, with the proper firmware, the camera’s in-body stabilization will work on these lenses after you program the lens’s focal length into camera.

This image shows the resolving power of these lenses.
Pentax 110 70mm is a real gem
The one lens in the group that really stands out to me is the 70mm.
I am drawn to telephoto lenses anyway, so the all-metal 70mm F2.8 Pentax 110 lens that is a made-in-Japan masterpiece is by far my favourite if I need the reach. The 70mm actually translates into almost a 400mm lens (374 mm in 35mm equivalent) on the original Pentax Q.
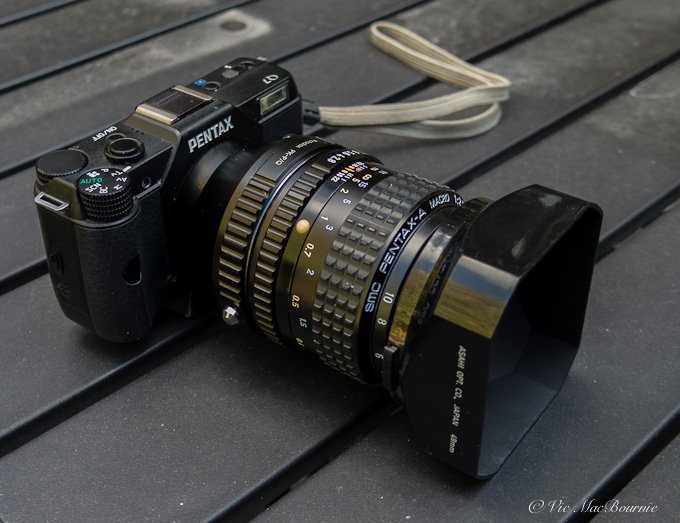
Pentax’s exquisite, all-metal 70mm f2.8 lens from the former 110 Auto system mounted on the original Pentax Q.
The slightly swirly bokeh on the lens can be beautiful and the silky smooth focus reminds me of the old Takumars.
All this in a package that could easily slip into your coat pocket and weighs in at a mere 240 grams (Pentax Q is 80 grams, plus the 70mm 160 grams = 240 grams). This lens has 6 elements in 5 groups and even uses the traditional Pentax 49 mm filters – perfect for standard circular polarizers and even high-quality close-up lenses.

This Blue Jay was taken with the 70mm lens at f2.8. The bird is sharp enough but the background bokeh with the lens wide open is very pleasing.
Speaking of filters. I was lucky enough to get filters mounted on the entire set I purchased on-line, but if you are looking for your own, here is a list of the filters you will require for these lenses: 18mm takes a 30.5mm filter, 24mm takes a 25.5mm filter, 50mm takes a 37.5mm and the 70mm takes a 49mm filter. Of course with step up rings you can use larger filters such as standard polarizers.
How about image quality?
The build quality, aesthetics and fun factor means little if the image quality falls short.
Some users would argue that the image quality of these lenses does fall far too short to take them serious, but others would say that, with a brilliant little hack, the image quality on these lenses can be very good to excellent.

This image of Joe Pye Weed in a natural woodland was photographed with the 24mm with the rubber washer used to create the effect of an approximately F8 lens.
Simple hack helps sharpen focus
What’s the hack that turns these soft, fixed f2.8 lenses into sharp, high-quality glass?
It involves a $1.00 rubber washer and about one minute of your time. That’s it.
If that’s too much trouble, you can always pick up a box of ring binder reinforcements, use a black sharpie to darken them, and simply stick them on the back of the lens’s plastic surround. That will turn the lenses into about an F8 lens with the accompanying greater depth of field and a significant increase in sharpness.


These images show the rubber washer inside the Q’s adapter: first image is from the back of the adapter closest to the sensor. Second image shows the rubber washer just behind where the lens connects to the adapter.
Although the ring binder reinforcements get a lot of praise on-line, the rubber washer works very well and you could create two or three with different hole sizes to give you more access to different f-stops.

Ring binder reinforcement on the back of one of the 110 lenses.
The rubber washer is simply pushed inside the adapter and sits in a concave position from the camera mount and sensor. From the back of the lens, the rubber washer sits comfortably in a convex position. (see images above).
If you want to shoot the lenses wide open, the rubber washer is extremely easy to remove from the adapter and then replaced in just a few seconds.
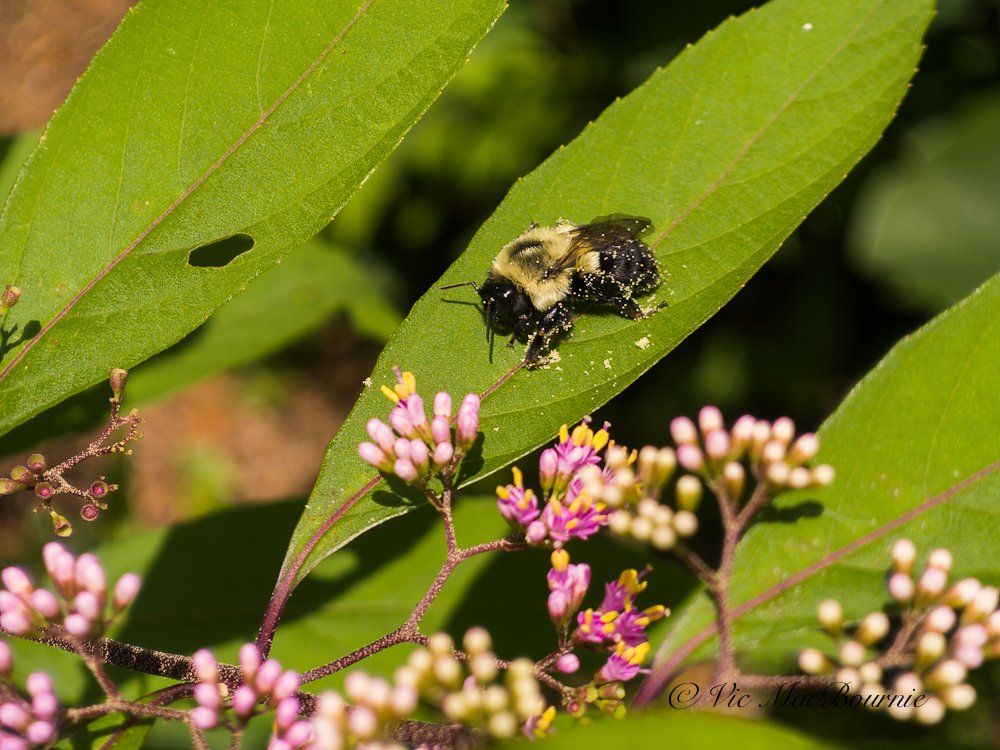
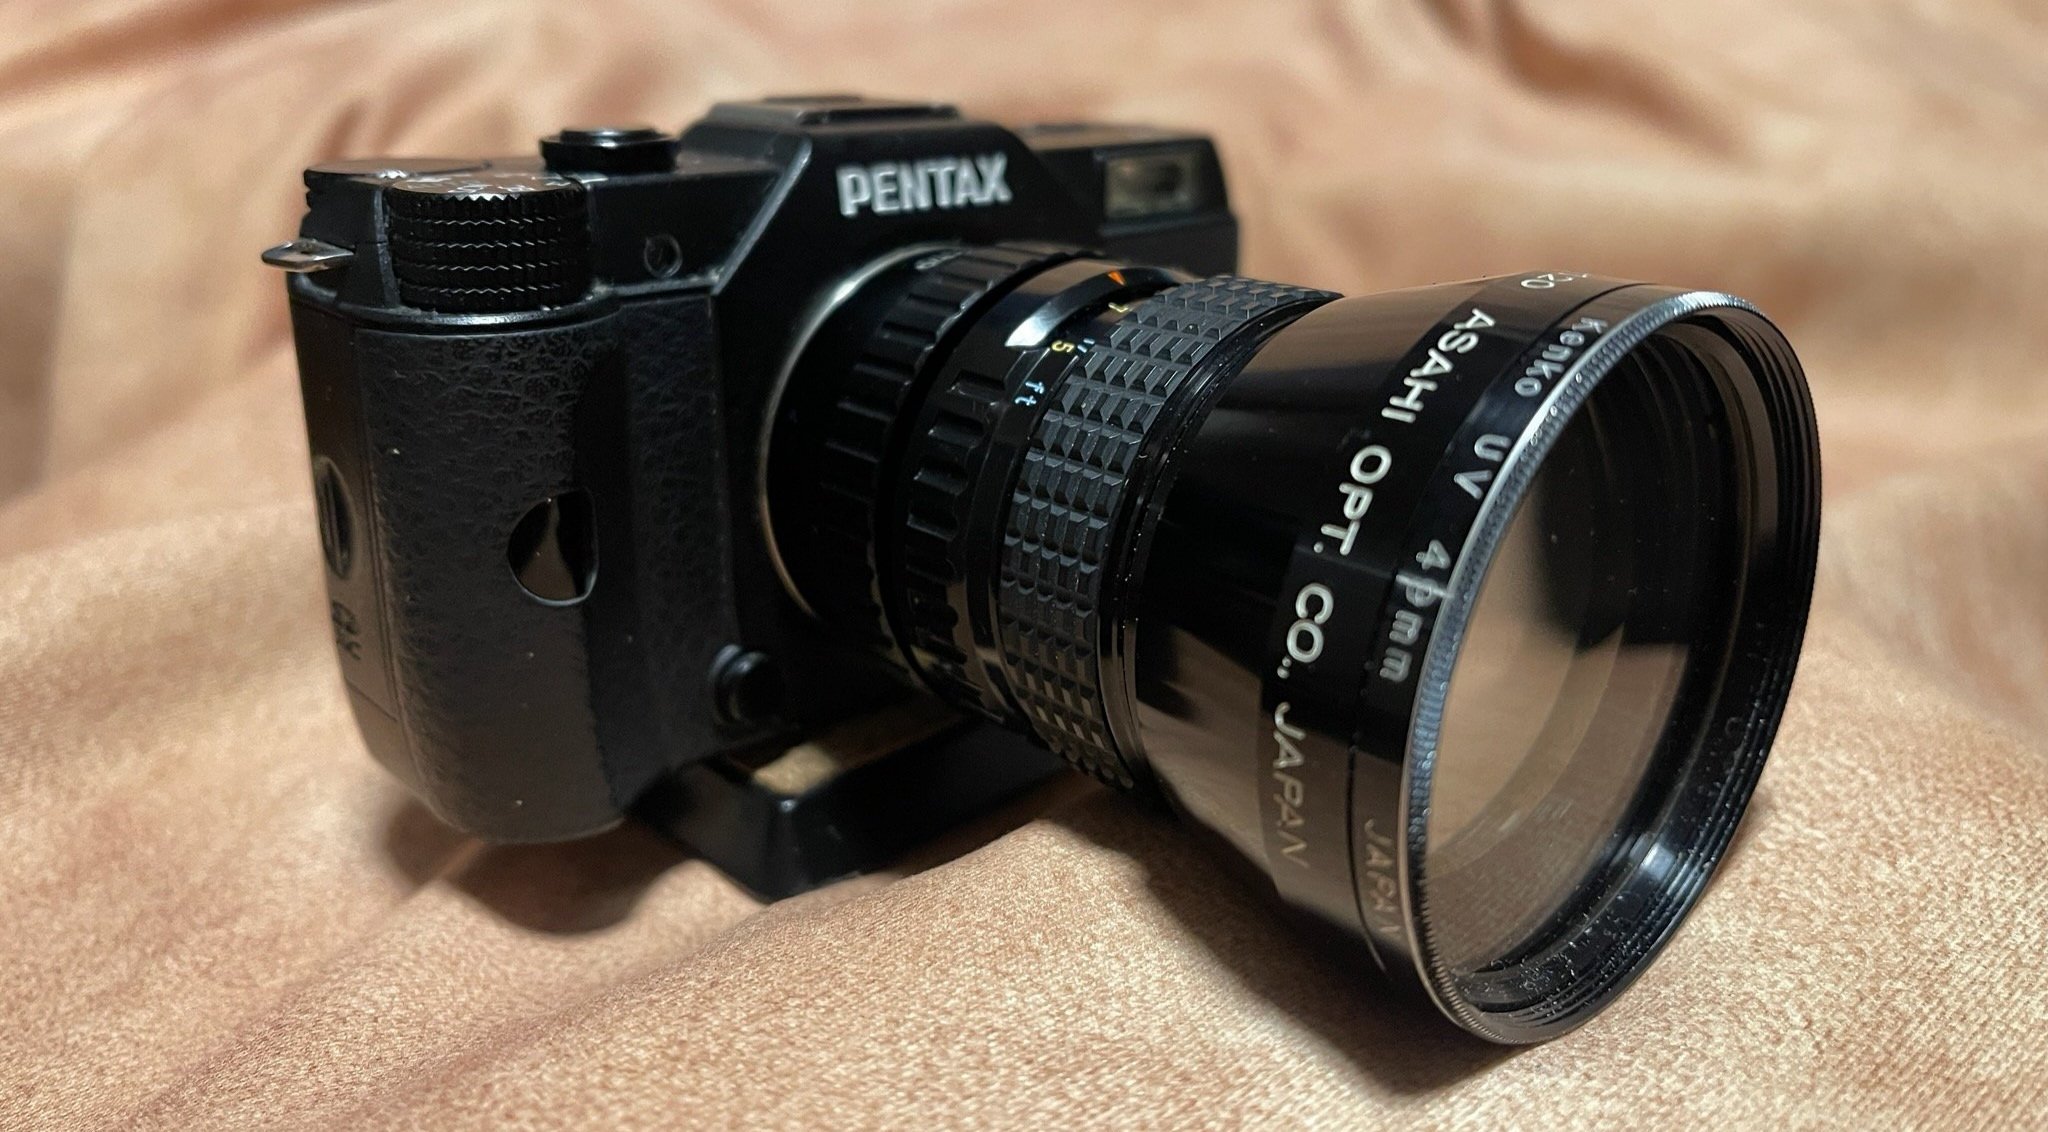
Anyone who thinks these lenses are not capable of achieving sharp focus might be surprised with this shot from the 18mm Auto 110 lens that clearly shows the pollen on and around the Bumble bee.
Using these lenses successfully requires the photographer to slow down.
On the above image and the one below of the bees, I hand held the camera and shot several images to get a sharp one.
However, if you are shooting landscapes, woodlands or your garden flowers, put the camera on a tripod, turn off the anti shake option, use the 2 or 4 times built-in magnifier and focus peaking on the Q to focus precisely on the LCD and use the 2 second delay timer to get the most sharpness out of these lenses.
You will be rewarded for your efforts.

Bumble bee on Blue Lobelia hand held and taken with 18mm lens with rubber washer hack.
Is lens sharpness over rated?
When it comes to lenses, there are those who consider only pin-sharp lenses as acceptable. Others, however, look for qualities in the lenses that give them a look and feel that works with their style of photography whether the lenses are tack sharp or not.
Let’s face it, most images are only ever seen these days on social media where sharpness is already compromised through the social media platform.
I consider these 110 lenses as somewhere in the middle. They are capable of creating very sharp images but the combination of having to manually focus them on the back of the LCD panel and being more than 40 years of age, makes getting tack sharp images difficult sometimes. This difficulty is only increased if you are shooting the lenses wide open at f2.8.

Image of dogwood shot with 18mm lens.
Even with a tripod, sharp images are not the easiest to obtain, especially since so many of us have been spoiled with autofocus lenses.
But, if you use the rubber washer or ring binder reinforcements these lenses really can shine.
The 110 lenses are fun, they fit the Q cameras aesthetic and are usually inexpensive if you can purchase them as a package.
With a little work you can create more than acceptable results, and with a little creativity, you can create masterpieces.
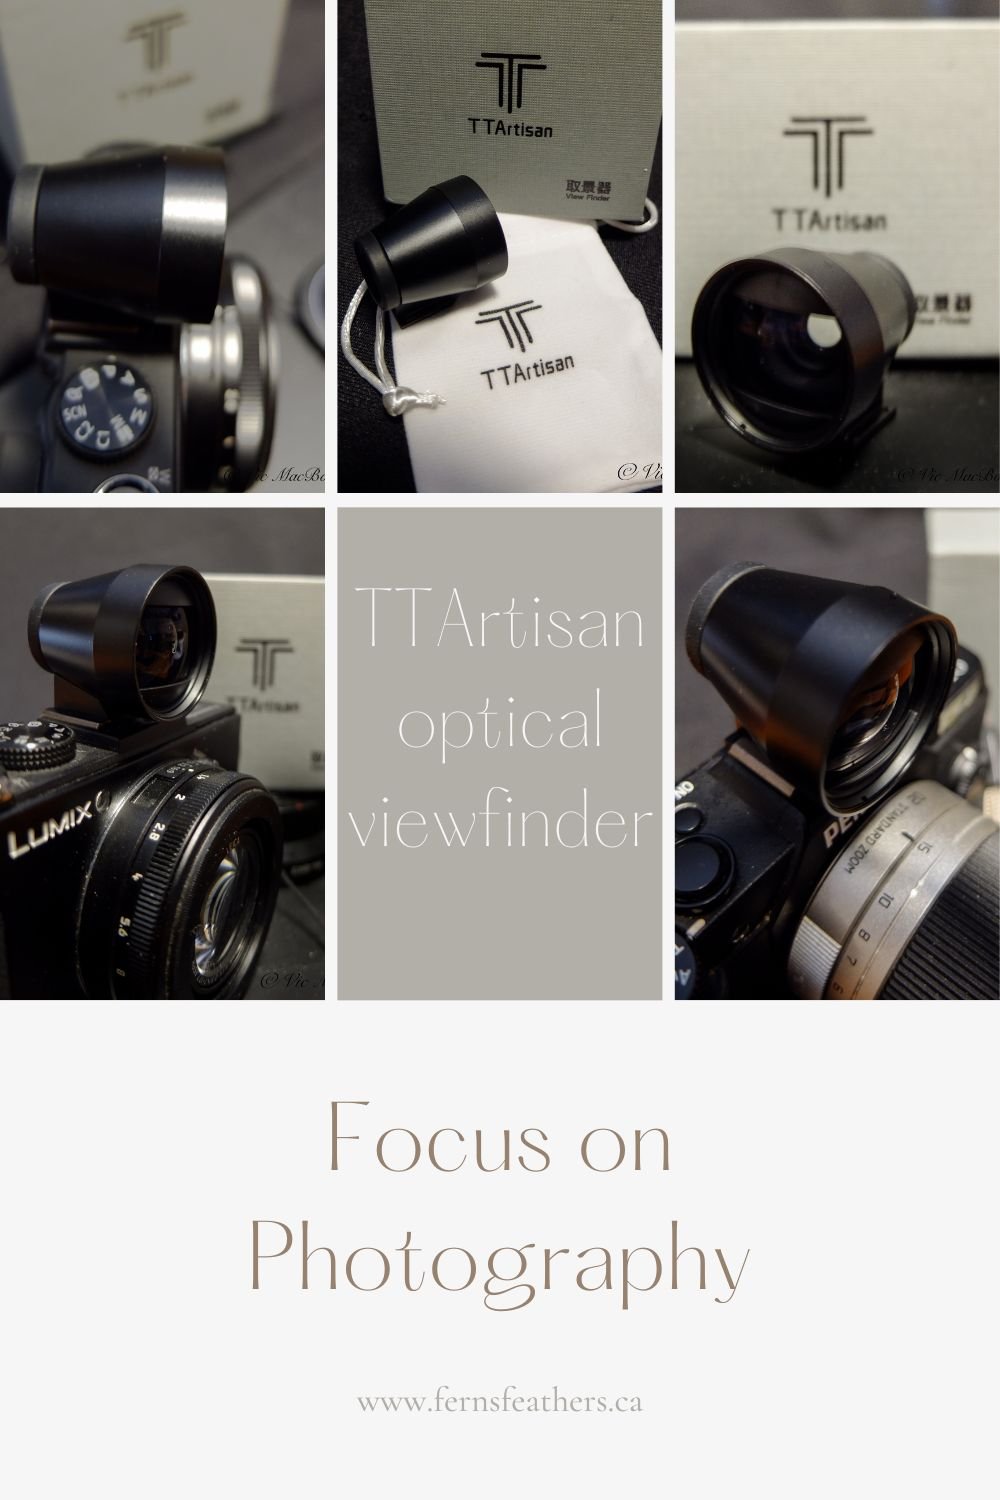
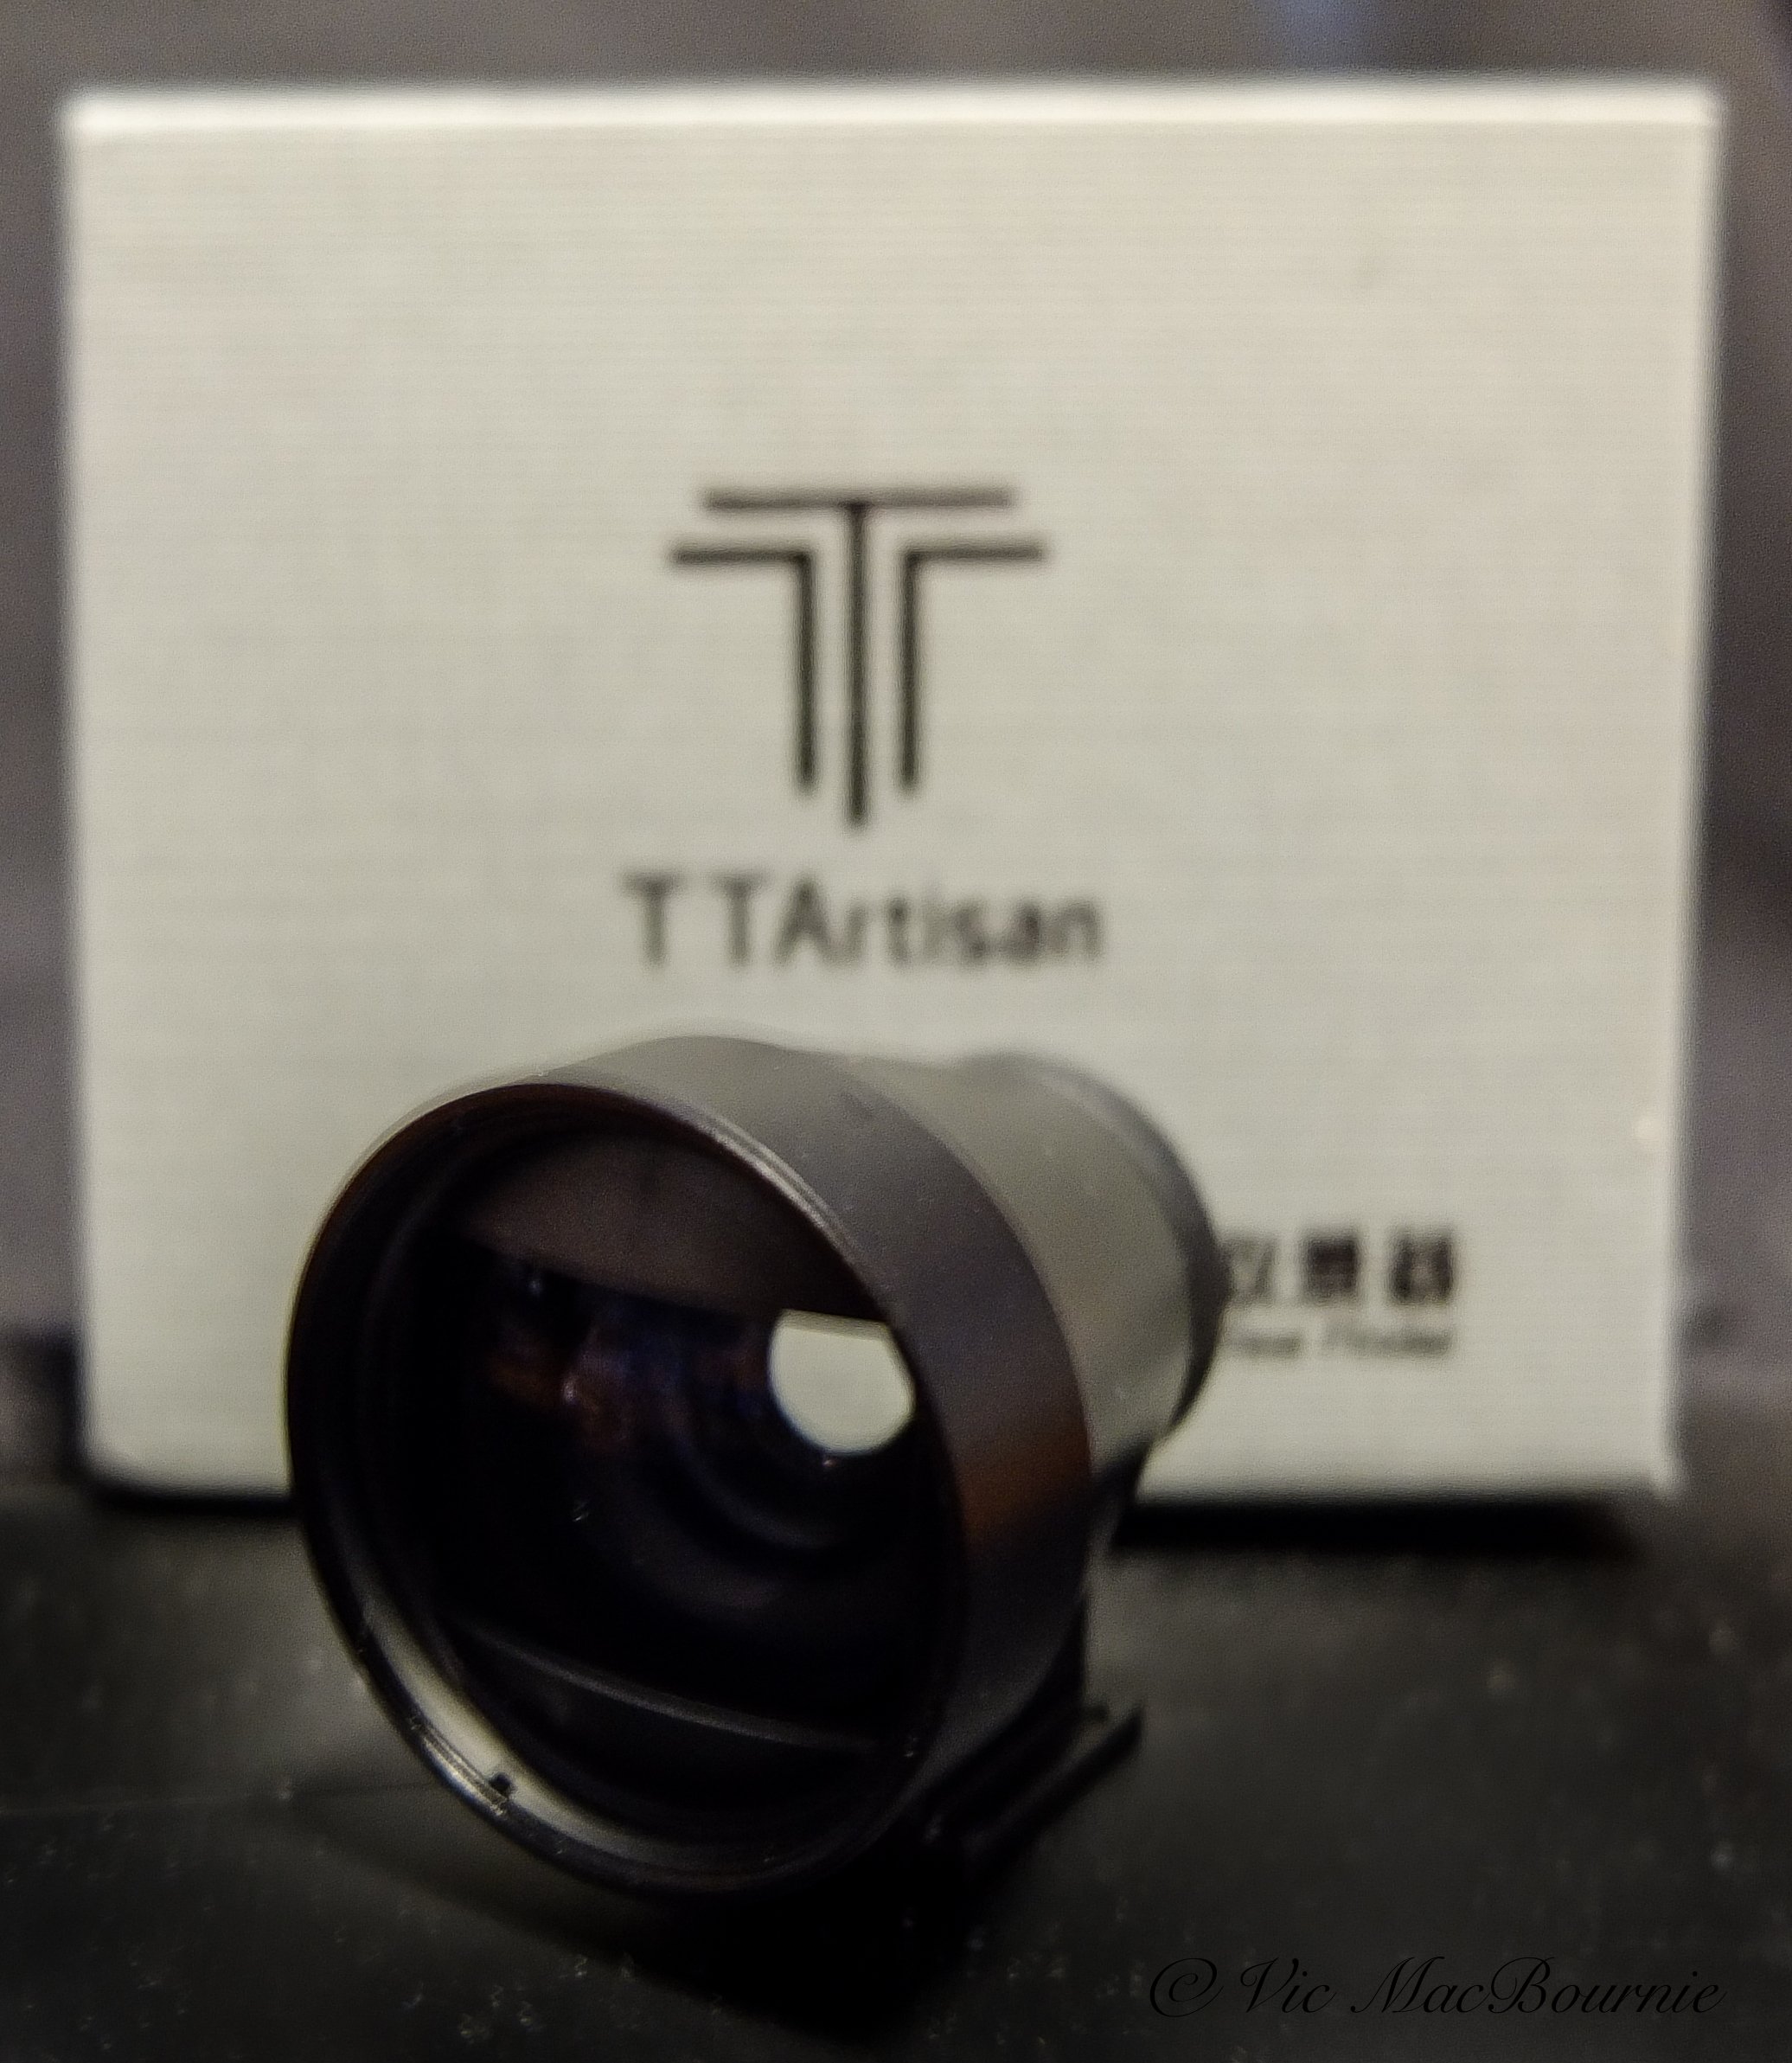
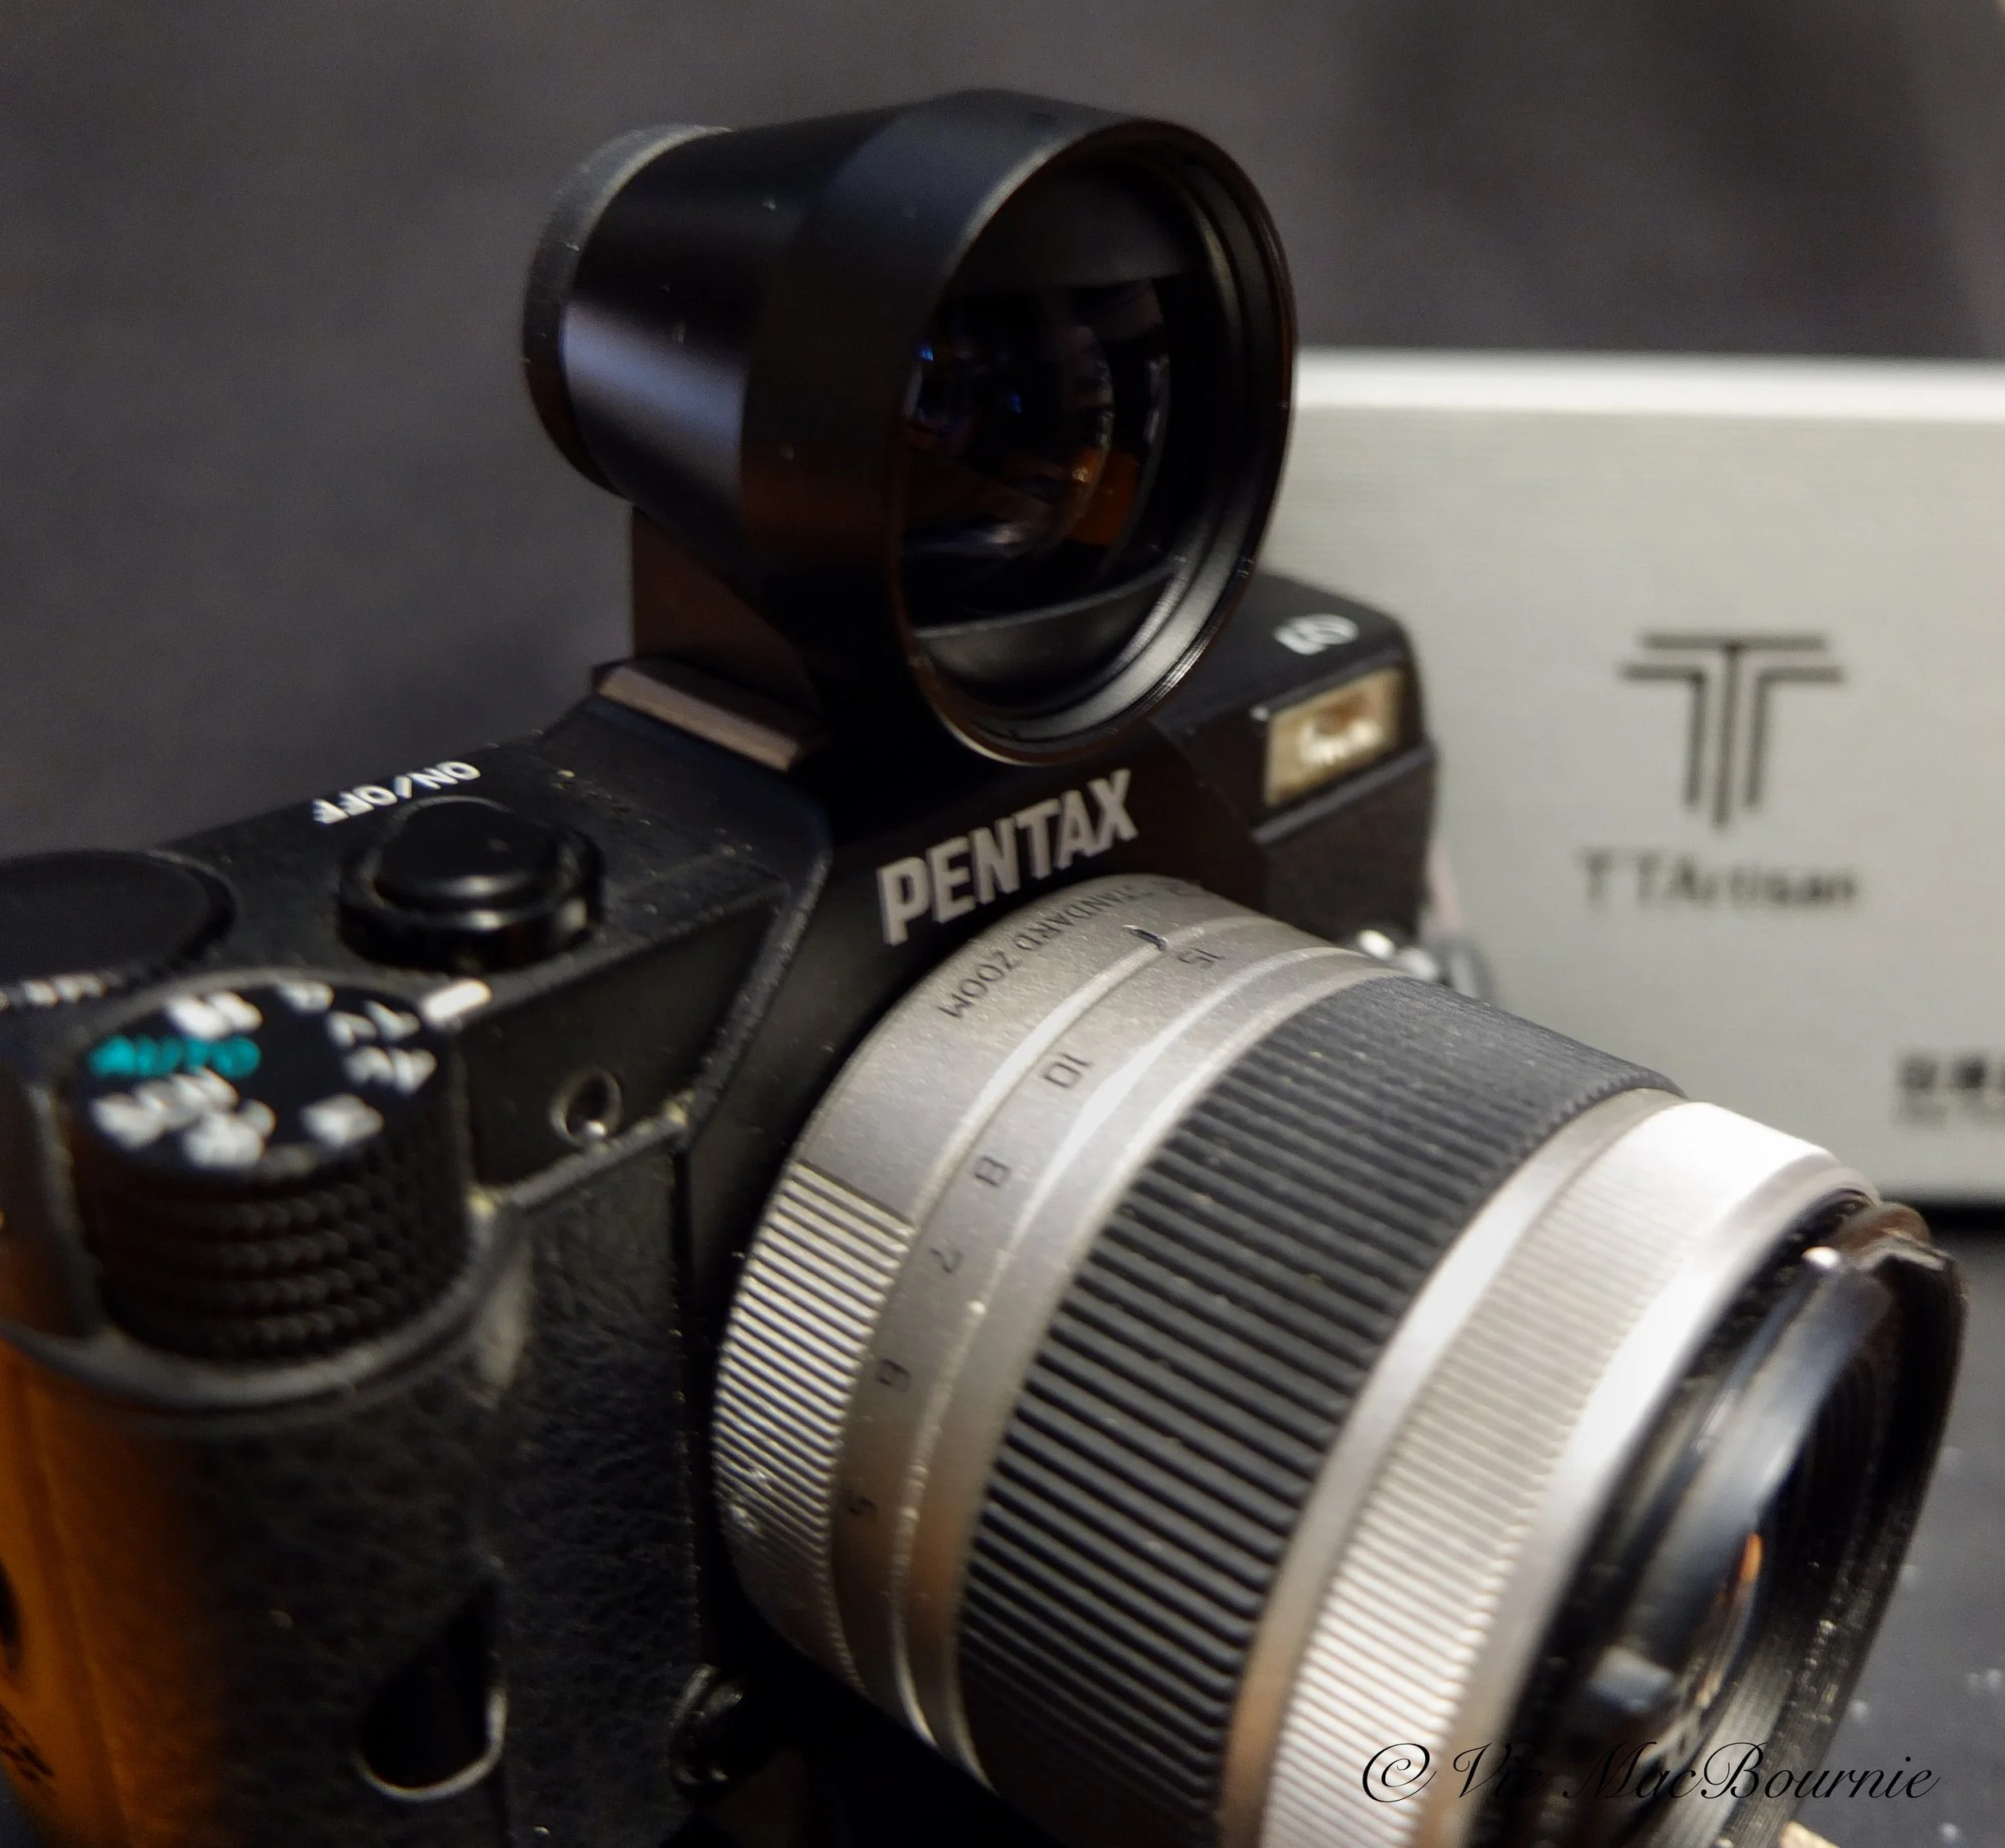
External viewfinders compared: TTArtisan vs Lichifit
External optional viewfinders compared. From the exquisite TTArtisan finder to the inexpensive version from Lichifit. Both have their place.
You get what you pay for with tiny Lichifit external viewfinders
When it comes to the tiny Lichifit external optical viewfinders, you definitely get what you pay for.
For the cost of a couple of fancy coffees from your favourite barista, you can have the tiny, all-plastic optical viewfinder on your favourite digicam setup.
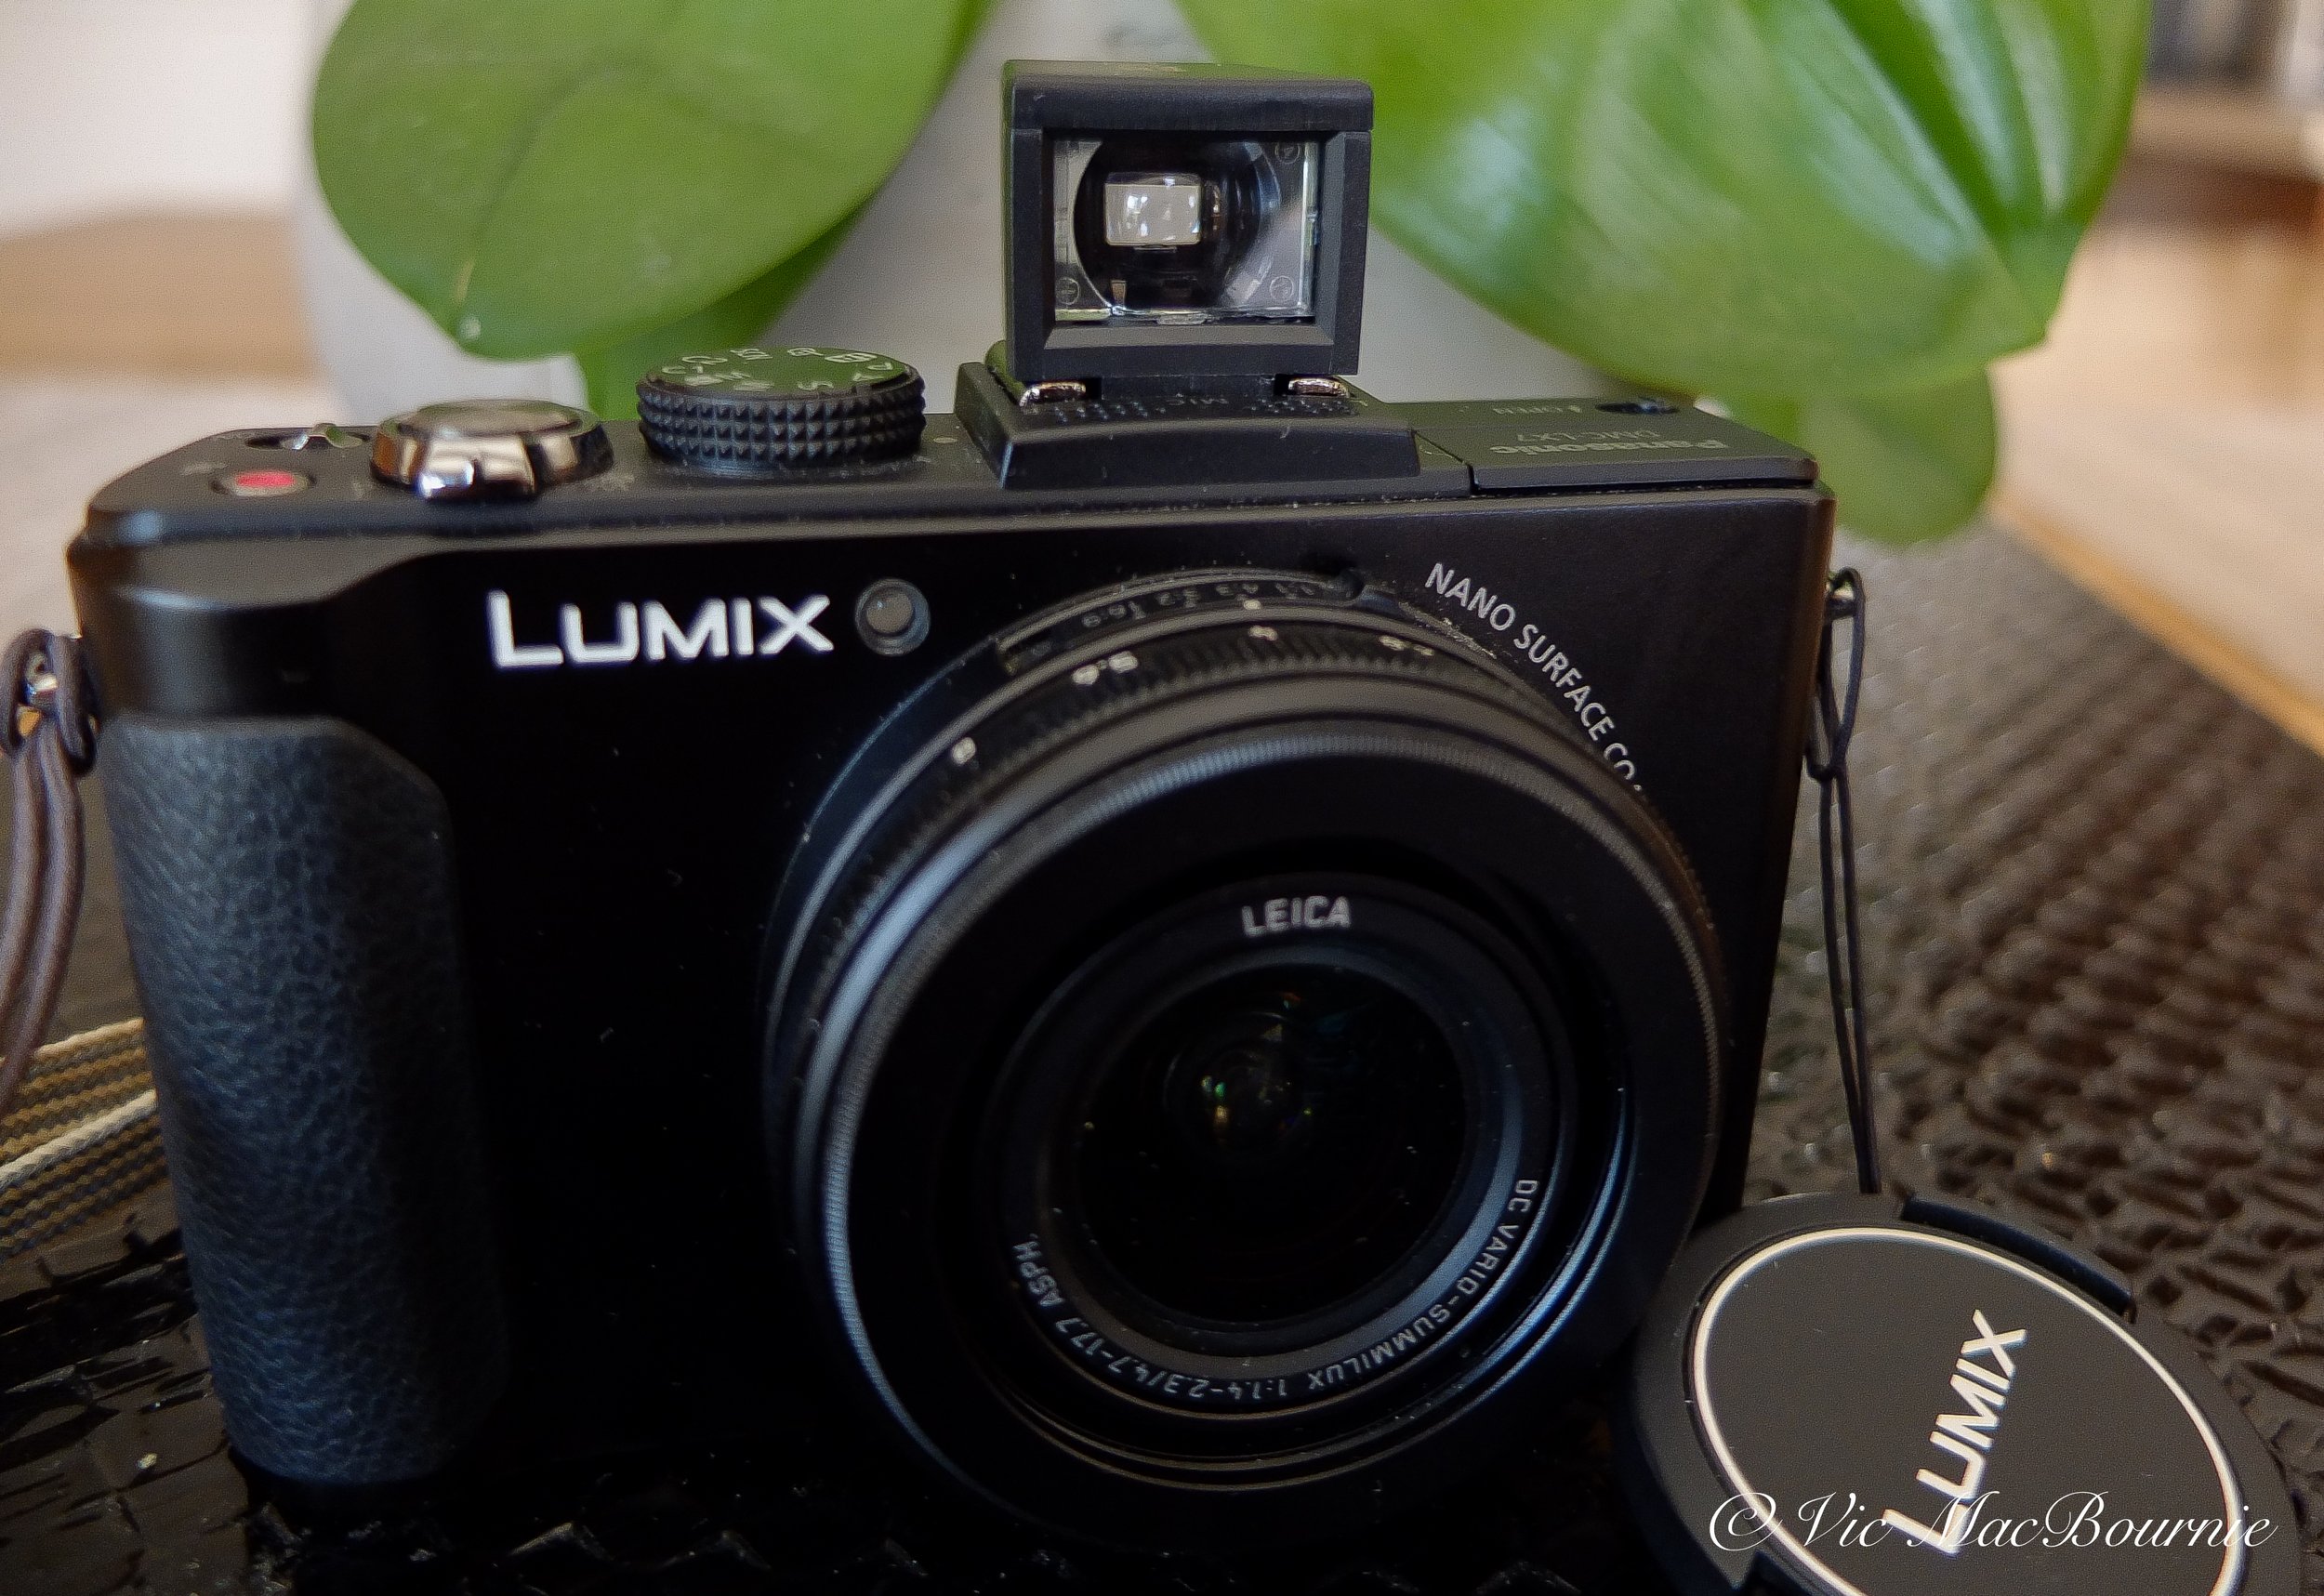
The tiny Lichifit external optical viewfinder looks at home on the compact Lumix LX7.
Some photographers will definitely prefer to save their money to buy the fancy coffees rather than fork out the money for this viewfinder, but there will be plenty of photographers who are satisfied with this inexpensive accessory that fits into the hotshoe of their favourite camera.
Judging from the number of street photographers using these inexpensive finders on YouTube, the viewfinders’ quality levels are not a limiting factor to their usage.
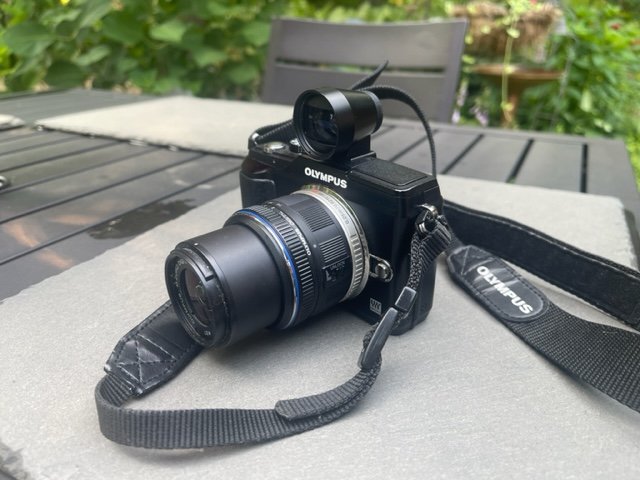
The Olympus Pen E-PL2 with the TT Artisan viewfinder.
For more on using external viewfinders, check out my post on the Olympus PEN series of cameras. Go to the Olympus camera website for more information.
Their popularity may be the result of street photographers not needing the highest resolution in a viewfinder. Let’s face it, many of the images they create are shot from the hip and are not even seen until the photographers review their images at the end of the day.
It’s all about speed and getting the shot rather than taking the time to examine the details in the image.
These viewfinders are perfect, stealth accessories that work well if you are just grabbing a shot and need a quick framing of the scene.
Click on the link for my comprehensive post on the high-quality, TTArtisan 28mm viewfinder pictured below on the left.

The external optional viewfinders on these Pentax Q cameras show the significant difference between the TTArtisan 28mm viewfinder and the tiny Lichifit 28mm viewfinder.
How small are they?
These things are extremely small and super light.
The good news is that they are so small that you can easily slip a digicam with one of these viewfinders attached into a camera bag or the pocket of a jacket. The viewfinder itself (or several viewfinders for other prime lenses) could also be tucked into a pocket of your camera bag or pocket and pulled out when you need one.
The tiny Lichifit 28mm external viewfinder fits nicely on the miniature Pentax Q line of cameras.
It’s hard to imagine how small these viewfinders actually are.
In fact, I ordered the 28mm TTArtisan finder at the same time as I ordered the 28mm Lichifit finder. When the package came, I didn’t even know that the lightweight Lichifit finder was even included in a separate padded bag.
It wasn’t until I went to throw out the packaging that I noticed the tiny viewfinder tucked away in an envelope in bubble wrap.
Small and lightweight is an understatement.

A rear view looking through the viewfinder of the tiny Lichifit 28mm external viewfinder fitted atop the Pentax Q.
Are they good for landscape and garden photography?
I’m not sure these viewfinders work as well with landscape or garden photographers as they do for street photographers. Landscape photographers need to see a higher level of detail through the viewfinder than, say, a street photographer.
The slightly blurry image and distortion that these finders deliver would be, I believe, frustrating for some landscape, garden and travel photographers.
If given the choice, I would rather save my money and purchase the TTArtisan viewfinder even if it is probably triple the cost of these cheap, mini, plastic viewfinders.
For these photographers, investing in a higher quality viewfinder like the TTArtisan is something you may want to consider.
The good news is that the Lichifit finders are so inexpensive to purchase, that it might be worth it to try one out and decide for yourself if you can live with the slight blur and distortion caused by the plastic in the viewfinders.
If you are looking to add a camera or lens to your arsenal, be sure to check out KEH Camera Exchange. You can replace your older equipment and trade in some of your equipment to help fund your new gear.

This image shows the Olympus Pen system with the viewfinder attached.
Why you might want a Lichifit viewfinder
• If having an inexpensive, quick look is more important than seeing a crystal clear image through the finder, then one of these may work for you.
• If you are looking for a tiny, extremely lightweight viewfinder, then you might like this accessory.
• Or, if you need a large selection of viewfinders to match up with your many prime lenses, a set of these inexpensive finders may just work well for you.
• They are available in a range of funky colours that might work with your camera, especially if you are the owner of one of the Pentax Q custom coloured cameras.
It’s important to note that, like the TTArtisan viewfinders, no information is transmitted from the camera to the viewfinder. There is no f-stop, shutter speed or focus confirmation in these viewfinders. They are used to get a view of the image at times where you either don’t want to use the camera’s LCD or are unable to use it because of excessive glare on it from the sun.
Two Pentax Qs show the size and style differences of the optional external viewfinders.
If the TTArtisan line of optical viewfinders are exquisitely made, stylish accessories with high-quality optical glass, these Lichifit finders can almost be described as the exact opposite.
In other words, the Lichifit finders are tiny, cheap and not very sharp.
They also lack the highly-desirable vintage look that the TTArtisan finders exude with confidence.
Add to that, there is much less of a coolness factor using one of these whether you are out in the field or at the coffee shop reviewing your images.
I do like the tiny footprint, especially when I use it on my miniature Pentax Qs and the equally small Lumix LX7. They look good on these cameras and I can live with any parallax problems that might occur.
The company says the viewfinders are “small transparent and bright, and are very coordinated to install on various side axis cameras.”
They advertise the finders, which come in 28mm, 35mm and 40mm options, are good to “replace an old, broken or non-working optical side axis viewfinder, easy to use and stable performance.”
The company does not recommend they be used with high SLR cameras because of the potential for parallax problems.
Unfortunately, where these quick-and-dirty viewfinders fall far too short are the optical qualities. Looking through the viewfinder’s results in a slightly blurry image that is probably just a little too soft for my liking, even considering the price.
Does that mean I can’t or won’t use the little 28mm? No, not by a long shot. It’s usable, but it won’t be anywhere near as enjoyable to use as the TTArtisan viewfinders.
If given the choice, I would rather save my money and purchase the TTArtisan viewfinder even if it is probably triple the cost of these cheap, mini, plastic viewfinders.
Why you need the TTArtisan optical viewfinder(s)
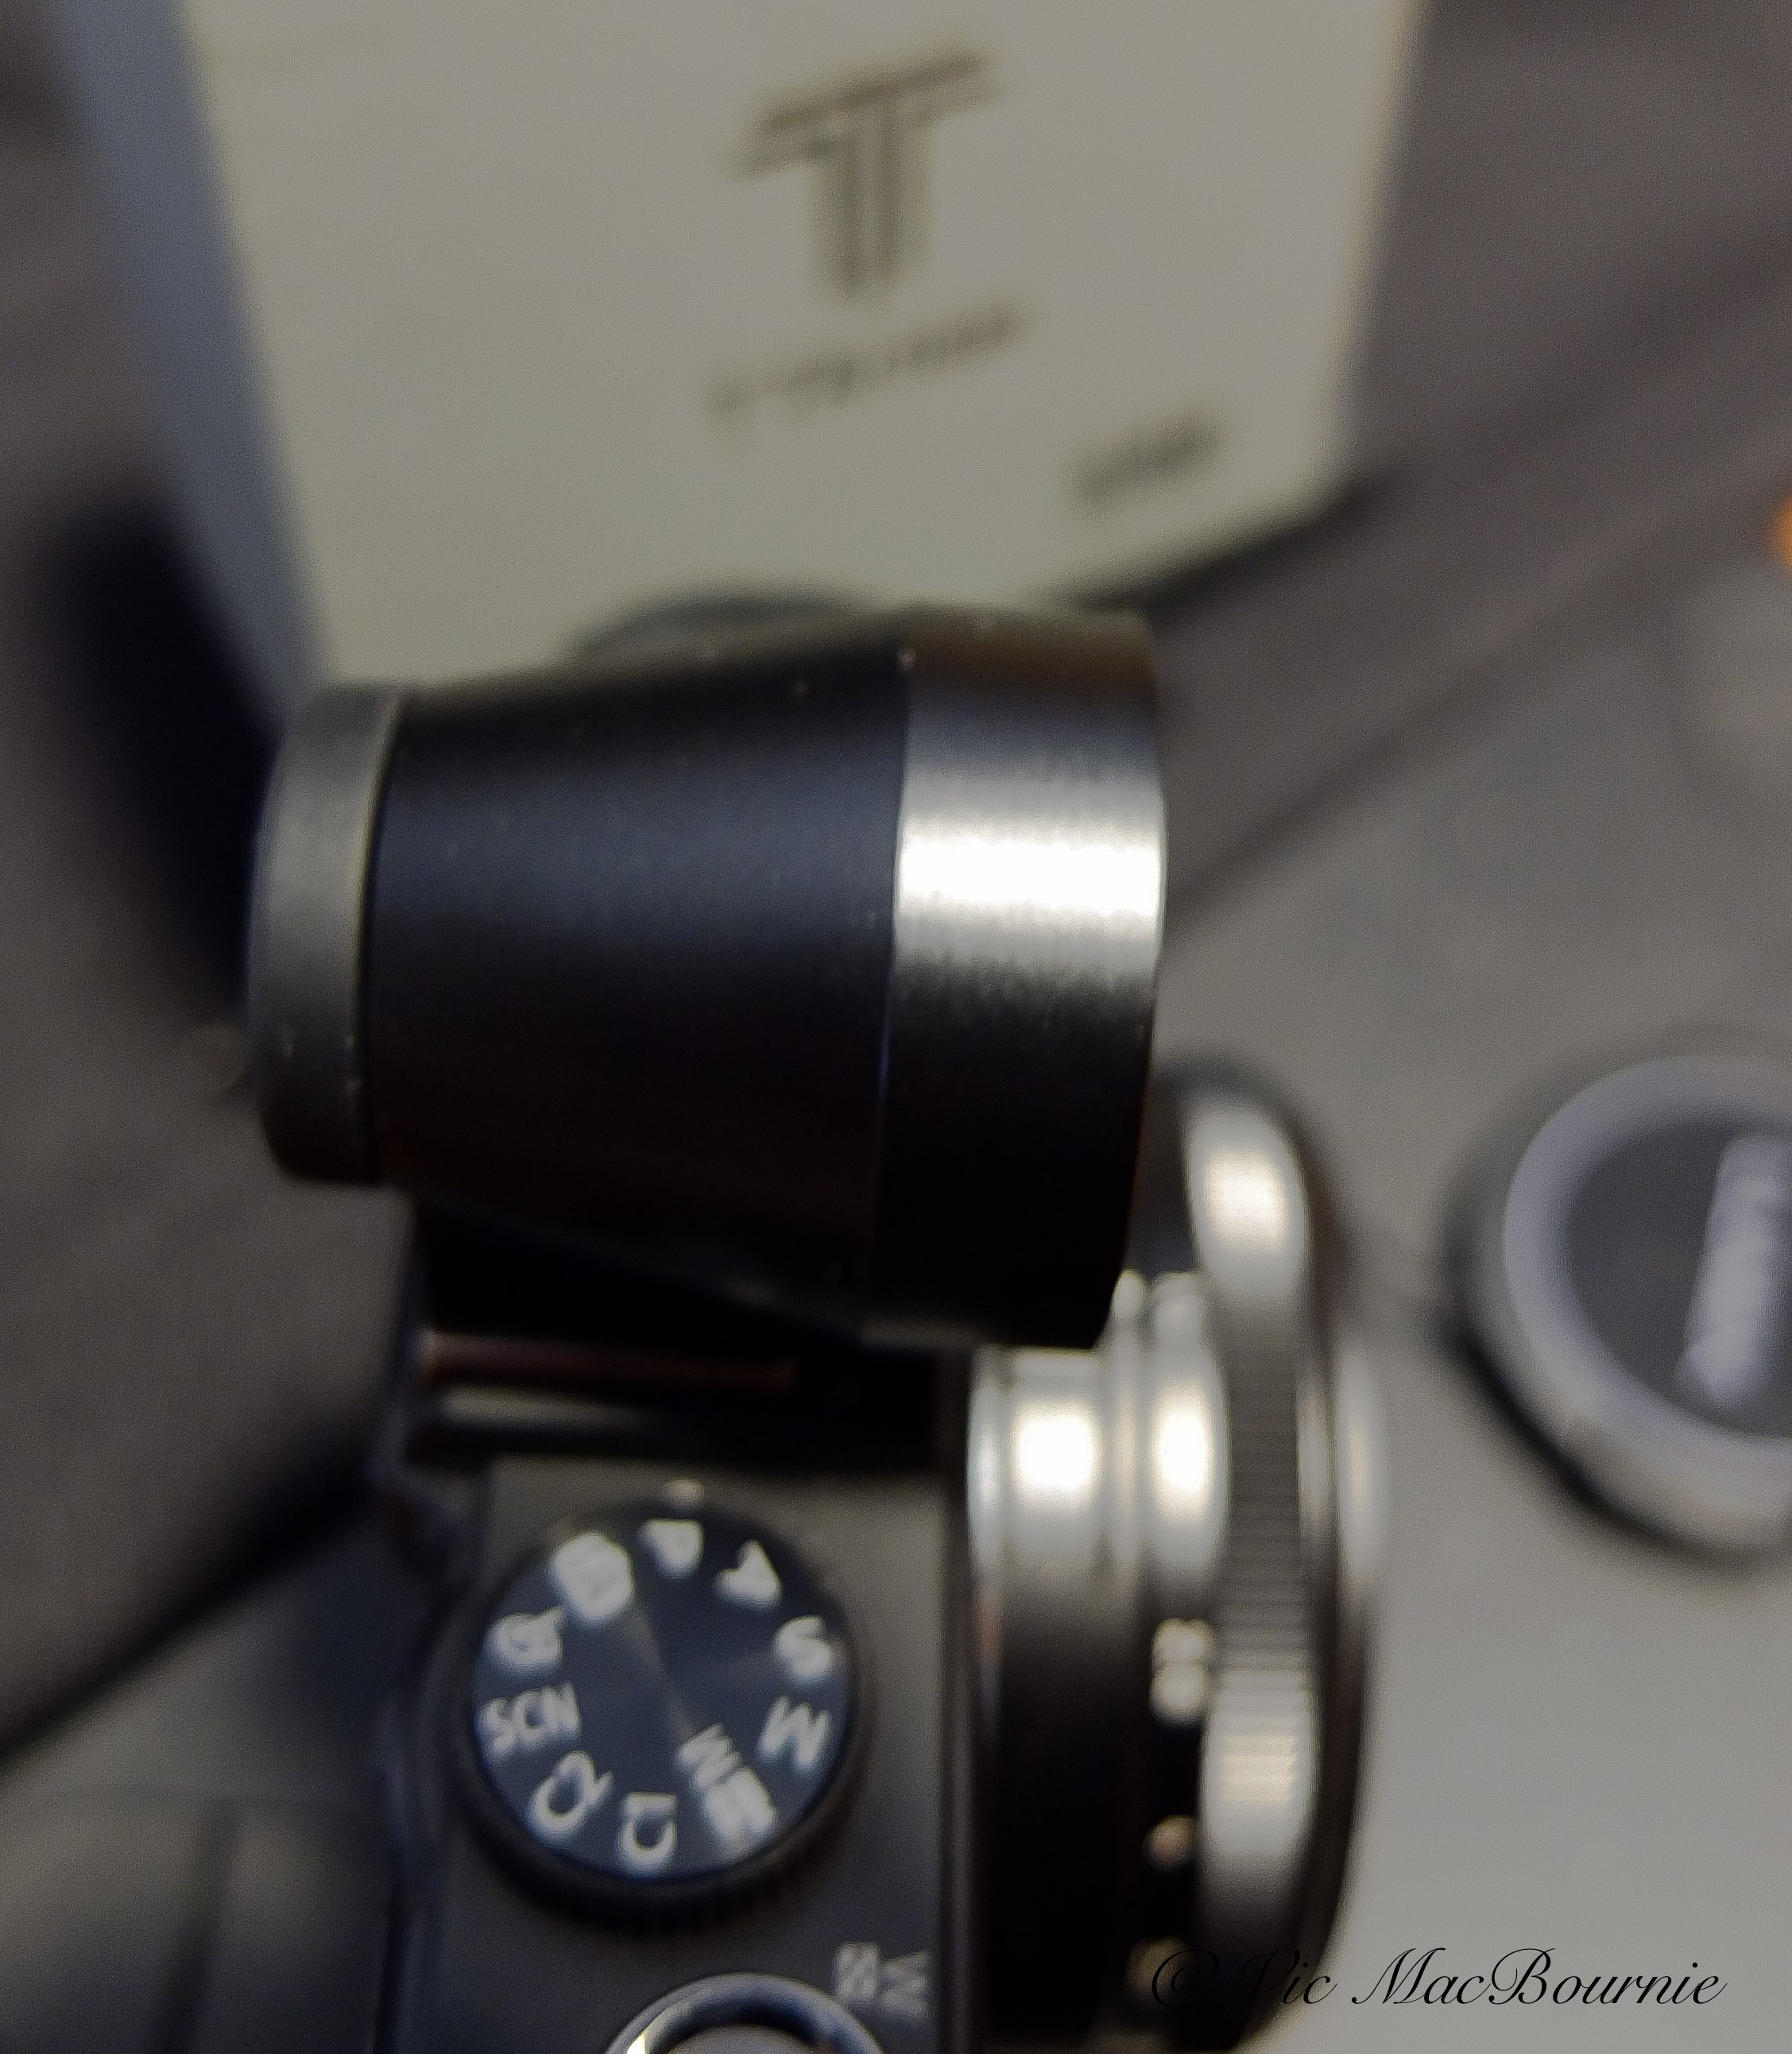
The 21mm and 28mm TTArtisan viewfinders combine fine craftmanship with a sophisticated look to enhance any viewfinderless digicam or traditional film camera.
Exquisitely made, exceptionally beautiful: And they work great

The TTArtisan optical viewfinder makes the perfect addition to any digital or film camera that lacks an optical viewfinder. The viewfinders, available in both 21mm and 28mm are exquisitely made, elegant to look at and an ideal companion to anything from a Leica to a Pentax Q.
If a viewfinder on your camera is important to you, but you are stuck with one of the many modern non-viewfinder digicams, you owe it to yourself to check out one of the TTArtisan optical viewfinders.
And, if looking sophisticated while you’re out photographing in the field or checking out your images at the local coffee shop ranks right up there with your photographic results, then you need to run out immediately and pick up one of these little gems as fast as physically possible.
For more on the TT Artisan, check out my story on the Olympus PEN camera system.
Are there parallax correction problems? Of course. Without the highlight lines in the finder, it’s difficult to get exact framing. And, if you look into and to the right or left in the viewfinder you are able to see much more of the view. My response: by using the viewfinder regularly, you’ll get a good feel of how the it performs and, unless you are a real stickler for details, you’ll be happy with its performance.
“Like the sound of a Leica shutter in action, there is something simply elegant about a beautiful camera with an exquisitely designed viewfinder that makes you want to bring it up to your eye and use it at every opportunity possible. ”
The TTArtisan optical viewfinders are an elegant photography accessory to any camera but especially those that lack their own viewfinders forcing the photographer to use the LCD screen on the back of the camera.
Whether it’s the 28 or the larger 21mm optical viewfinder, these exquisitely made glass and black anodized aluminum viewfinders made in China are an absolutely gorgeous addition to even the most expensive digital or 35mm film cameras. Leica comes to mind, but I’ll be pairing my 28mm TTArtisan viewfinder with my Pentax Q and Lumix LX7 cameras. Panasonic does sell it’s own very similar optical viewfinder for a considerably higher price.
It’s important to note that none – not a bit – of the information like F-stop, shutter speed or focus indicator is passed through to the finder. There are no electrical contacts on these viewfinders.

The TTArtisan optical viewfinder pairs beautifully with the Pentax Q system of miniature cameras.
The company’s information points out that: “The TTArtisan viewfinder can be used on cameras with cold shoe mounts, such as the Ricoh GR, the Leica rangefinder cameras, old-fashioned film cameras, etc. For cameras with the original viewfinder, the TTArtisan viewfinder can be used as a great decoration.”
My recommendation is: Just get one. You won’t be disappointed. Heck, pick up both the 28mm and 21mm while they are still reasonably priced.
I got mine on sale from AliExpress for a good price, but you can also purchase them from Amazon and some of the better photographic outlets.

The TTArtisan 28mm optical viewfinder pairs beautifully with my Lumix LX7. While lacking all of the communication available with the Panasonic electronic viewfinder, the TTArtisan is still useful at the wide end and adds a touch of class to the camera.

This image from the TTArtisan website shows the viewfinder being used on the very popular Ricoh GR digital camera.
Trust me, you’ll love using it and, as a bonus, look incredibly cool in the process.
I have to admit that, while I need a viewfinder for those bright sunny days when trying to read the back of the LCD screen on my cameras is next to impossible, it was actually the cool factor that really got me to pull out the credit card.
Not that I need to look cool. Thankfully, I’m well past that time in my life. What’s cool, however, is the camera – any camera – with one of these mounted on the flash hotshoe.
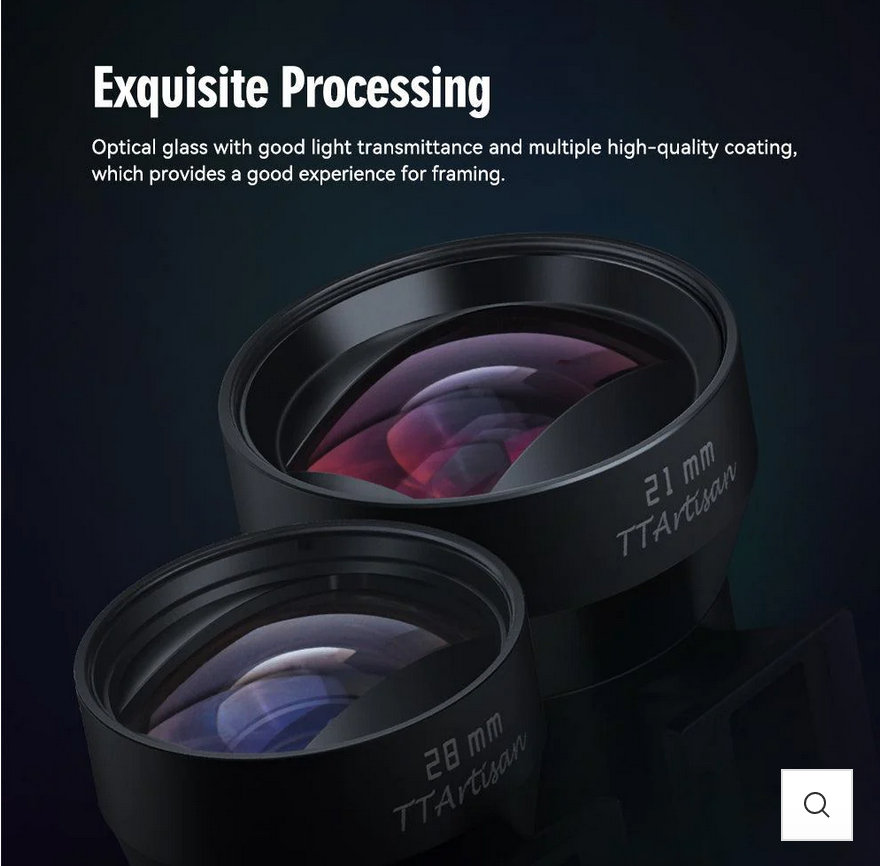
Image shows both the 28 and 21mm TTArtisan viewfinders. The 21mm is significantly larger than the 28mm.
Why does adding a viewfinder even matter?
It matters for two reasons.
First is that using a viewfinder rather than the LCD on the back of the camera will almost always give you a sharper image. The viewfinder acts as a point of contact with your face and can be an important factor in getting a sharper image.
The second reason a viewfinder matters is because a camera that you fall in love with is a camera that’s going to get a lot more use. Holding the camera, bringing the viewfinder up to your eye, and looking through the optical glass can be truly inspirational if not a little nostalgic.
There is no denying the joy I get from using the finder. It just makes you want to take the camera out on the streets and into the garden to put it to use.
The 28mm TTArtisan veiwfinder is an elegant addition to everything from a Leica film camera to a modern digital camera that lacks a viewfinder.
Like the sound of a Leica shutter in action, there is something simply elegant about a beautiful camera with an exquisitely designed viewfinder that makes you want to bring it up to your eye and use it at every opportunity possible.
And, let’s face it, photography for most of us is about enjoying the process, being inspired and making works of art that satisfy our creative needs.
We all know, however, that looks aren’t everything. In the end, the product needs to provide some semblance of utility to make it worth purchasing, carrying around in your camera bag and taking the trouble to attach it to the hotshoe.
How do the TTArtisan viewfinders perform?
Do the TTArtisan viewfinders perform as expected. Absolutely.
Are they perfect? Absolutely not.
To be a little critical, the viewfinder’s biggest problem is the lack of lines on the glass that allow the user to compose the image accurately. Higher-end viewfinders will include engraved lines that show the user what they can expect to capture with say a 21mm, 28mm or even 35mm … lens.
The 28mm TTArtisan viewfinder adds a sophistication to the Lumix LX7 digicam.
My 28mm viewfinder, for example, should have lines showing a 28mm point-of-view and maybe even a 35mm view. That would make it the perfect optical finder, and allow me to use it with greater confidence that I would capture the exact image I was trying to capture at both the 28 and 35mm focal lengths.
As one reviewer wrote: “Good looking, excellent optics and build. BUT... Guys, why no bright frames inside !?!?
You can’t make accurate framing and composing – can’t tell the actual frame border without help of bright frame inside viewfinder!..”
A fair comment. Most of us, however, don’t use a viewfinder like the TTArtisan for precision framing of our images. On the street, we’re using it to get a very quick, general idea of the image we are taking without having to look at the camera’s LCD. In the garden, we just need a general idea of the image and any cropping needed can be done in post processing.

Even the packaging that comes with the TTArtisan viewfinders hints at the quality of the item.
If the sun is bright and the reflective glare off the LCD makes it difficult to view, we just need to get a good idea of what we are photographing. This viewfinder delivers under those circumstances.
I think that a high precision optical viewfinder complete with focal length lines was much more important when photographers were shooting only film. With the evolution of digital photography, where images can be cropped easily in Lightroom, Photoshop or another post processing tool, the ability to see precisely what we are photographing is less critical. And, if we have a situation where it is critical, we can always use the LCD on the back of the camera.
So, unless you can’t live without critical information showing the exact image you are photographing, the TTartisan 21mm and/or 28mm optical viewfinders are a perfect addition to your viewfinderless digital or film cameras at a very reasonable price.

Two external optional viewfinders compared. The TTArtisan viewfinder on the left compared to the tiny, inexpensive Lichifit 28mm finder on the right. For the complete comparison post, go to external viewfinders comparison.
A rubberized surround makes it easy for photographers to use the viewfinder with glasses and a convenient carrying pouch helps protect the viewfinder when it’s tucked away in your camera bag. I have not experienced it but apparently the rubber surround can be easily knocked off the viewfinder. If this becomes a problem, a little supper glue will probably solve the problem.
The company also notes, in its on-line literature, that the “optical glass has good light transmittance and multiple high-quality coatings, which provides a good experience for framing.
• Rubber Eyepiece: The side of the eyepiece is wrapped with a circle of odorless rubber, which protects the eyes well.
• Compact and Portable: The viewfinder weighs only 51/33 grams
• Anodized Aluminum: Elegant design complete with aviation aluminum material
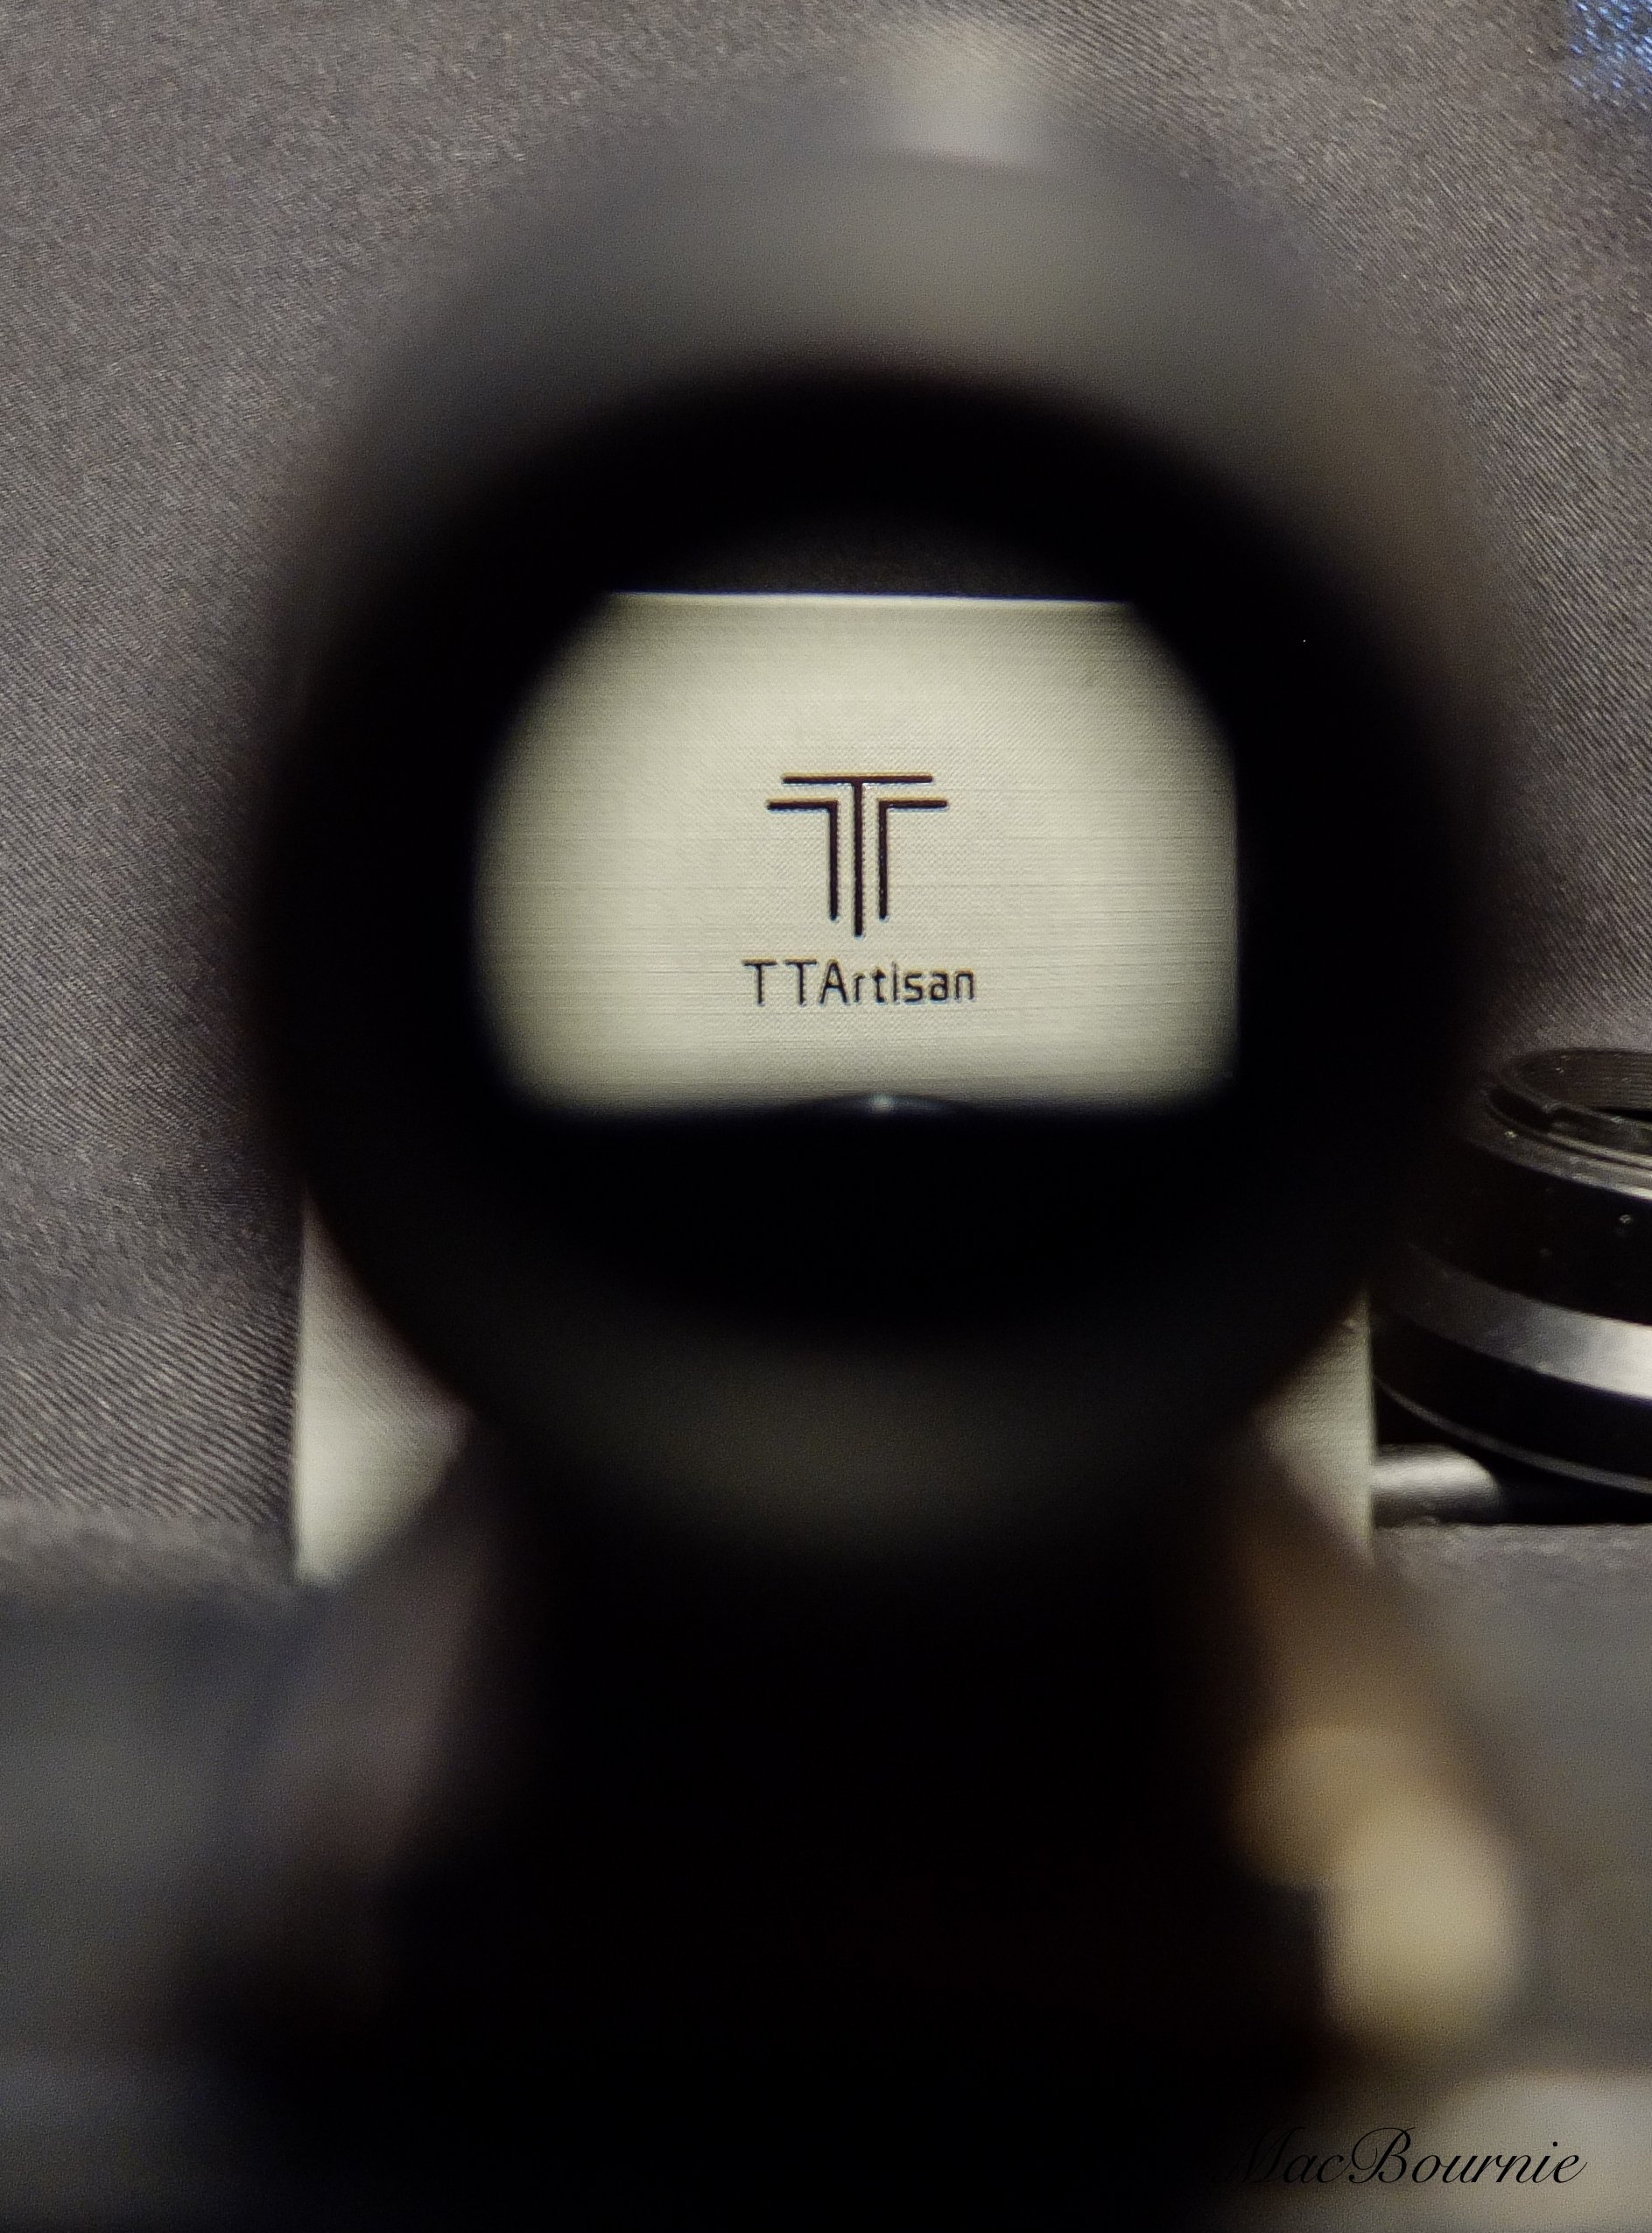
The optical glass in the TTArtisan viewfinders provides excellent clarity.
Lens and optical viewfinder - the perfect combo
I am planning to use my viewfinder with zoom lenses that include the 28mm focal length, but the veiwfinders are ideally meant to be paired with prime 28mm and 21mm lenses including, of course, the very affordable TTartisan lenses sold for various camera manufacturers from Leica to Sony, Fuji and the like.
Pairing the optical viewfinders with their lens counterparts make for exquisite combinations that create the ideal photographic experience while increasing the “cool factor” off the charts.
Pentax Q review: Why you need one in 2024
Just how small is the Pentax Q? This image of the camera being dwarfed by a chipmunk is a good indication of the size of the camera.
Fun camera for garden and wildlife photography
The Pentax Q might be tiny, but it takes a back seat to no camera in its class.
This full-featured miniature camera, first released in 2011, boasts a very nice interchangeable lens system ranging from a fisheye all the way up to the 35mm equivalent of a 70-200 f2.8 telephoto zoom lens. Even the 70-200 fits in the palm of your hand, but has the telephoto pull to capture wildlife in the garden.

This sunset image was taken with the Pentax Q7 and hard-to-get 08 wide angle lens.
The entire system fits into a tiny package. And when I say tiny, i mean tiny.
If that’s not enough, these cameras come complete with a set of features, filters and shooting modes any full-sized DSLR or mirrorless camera would be proud to boast about. Add surprisingly good ergonomics for a miniature camera that was originally advertised as looking completely at home on the end of a keychain.
Sounds weird right? Maybe, but keep reading to find out how this camera went from a weird distraction in 2011 to one of the coolest camera in the years that followed.
For more images taken with the Pentax Q, check out my Pentax Q photo gallery.
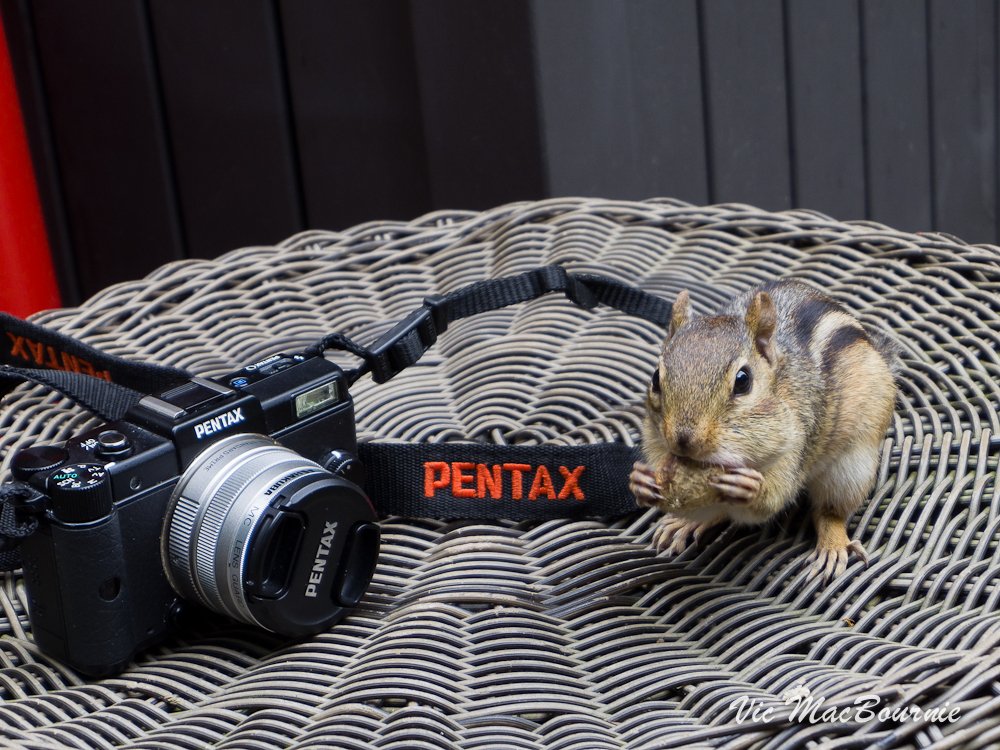
Image shows how small the Pentax Q is beside this tiny chipmunk.
What more can you ask for with the Pentax Q?
How about a system so small that you can fit two Q camera bodies, at least three lenses ranging from wide angle to a 70-250 f2.8 telephoto, filters and even a Fuji X10 and Lumix point-and shoot camera in a Lowepro camera bag meant to handle a single DSLR camera body and a small wide angle zoom.
Forget the camera bag, a Pentax Q complete with the 70-250mm f2.8 lens equivalent will slip into a coat pocket or a woman’s purse. Heck, throw in the 50mm equivalent fast F1.7 prime and a miniature wide angle or fisheye lens into the purse or coat pocket too – there’s still plenty of room.
• If you are looking for a Pentax Q, or the many lenses in the system, or any other piece of hard-to-find photographic gear, be sure to check out KEH Photographic for an outstanding selection of used equipment at great prices.
The Pentax Q combined with the exquisite TTArtisan optical viewfinder is the perfect combination. For more on the TTArtisan viewfinder, check out my full story here
TTArtisan optical finder is the perfect accessory
If the lack of viewfinder on the Pentax Q is a little annoying, the TTArtisan optical viewfinder is an exquisite accessory that not only adds utility to the camera system but also makes the setup look awesome taking it to a whole new coolness factor. For my complete review of the TTArtisan 28mm finder, check out my comprehensive review here.
Click on the link for my comparison post between the two viewfinders pictured below.

Two external optonal viewfinders on the Pentax Qs. The viewfinder on the left is the TTArtisan 28mm finder and the one on the right is the tiny Lichifit 28mm finder. Both have their place on the Pentax Q line of cameras. Click here for my post comparing the two viewfinders.
And what about the photographic results?
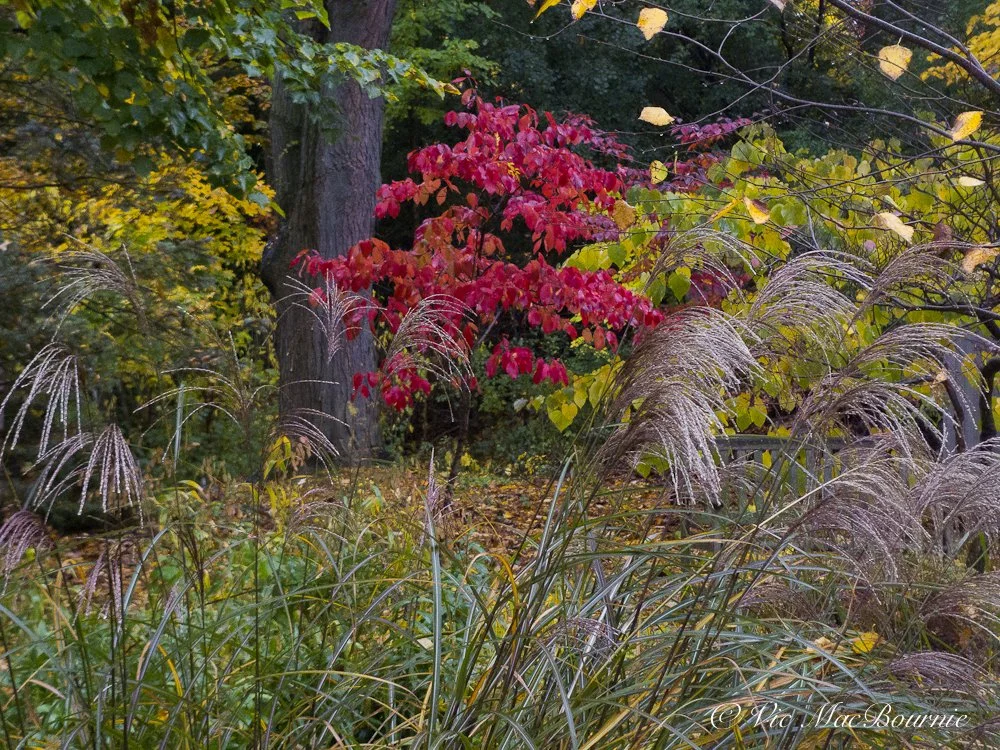
Well, I think the results here speak for them self. I took the Pentax Q and three lenses out for an afternoon of fall photography and came away with more than a few keepers.
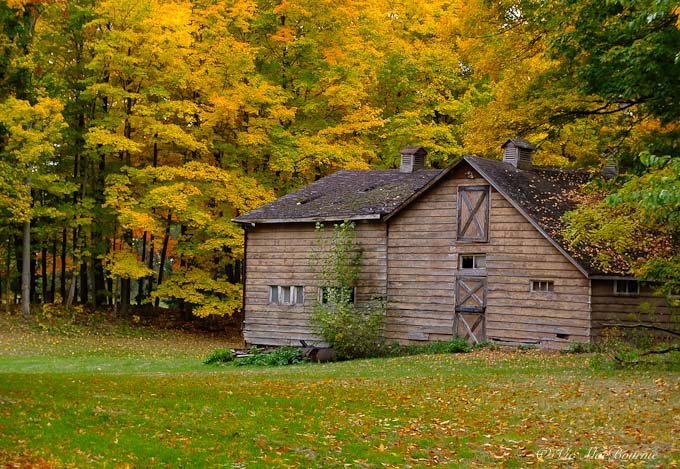
Image taken with the Pentax Q of an old home set among the fall colours.
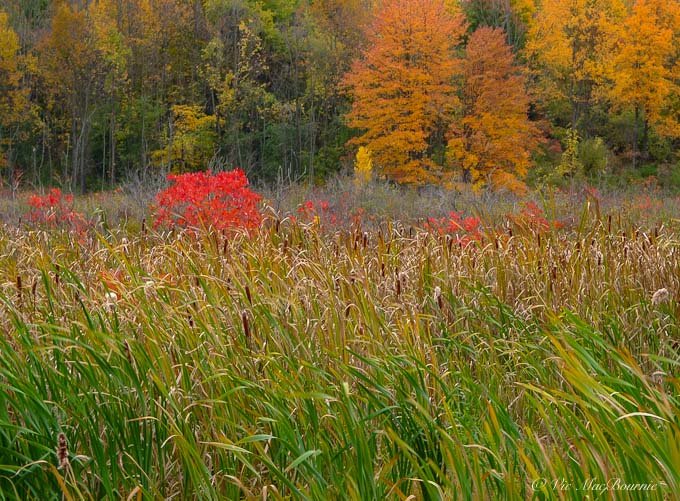
Fall colours in a wetlands taken with the Pentax Q.

Fall leaves ablaze in vibrant colour.
Are these fall images of high enough quality that you would want to supersize into posters or murals, or use for professional work with a client? Probably not.
But, for everyday use with the end result of making prints in the 4X6 to 11X14-inch range, or – more likely these days – posting on social media accounts or on web sites – these images can stand up to the scrutiny. They are sharp, contrasty with great colour even at moderately higher ISO settings.
Maybe it’s the fine Pentax lenses or the fact that Pentax took the bold decision to remove the anti-aliasing filter from in front of the sensor that resulted in this sharpness, but whether you are viewing jpegs right out of the camera or Pentax’s RAW images, after a little post-processing, there’s no short changing the results here.
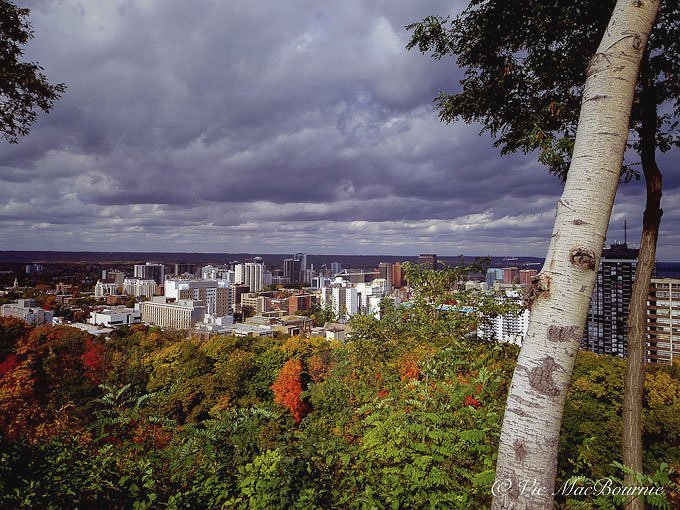
A view from Hamilton Mountain over the city during fall with the Pentax Q.
But let’s not kid ourselves. The sensors on these cameras are tiny.
Tiny sensors but great results
In fact, the original Q’s sensor was a back-illuminated CMOS, 1/2.3” (6.17 x 4.55 mm). The Q7, introduced later in June 2013, uses a larger 1/1.7” type sensor (7.44 x 5.58 mm). Both fell into the point-and-shoot-sized sensor and many critics in those days simply wrote the camera off as nothing but a toy.
Heck, even some of the lenses were called “toy” lenses. Probably not a great marketing decision by Pentax at the time.

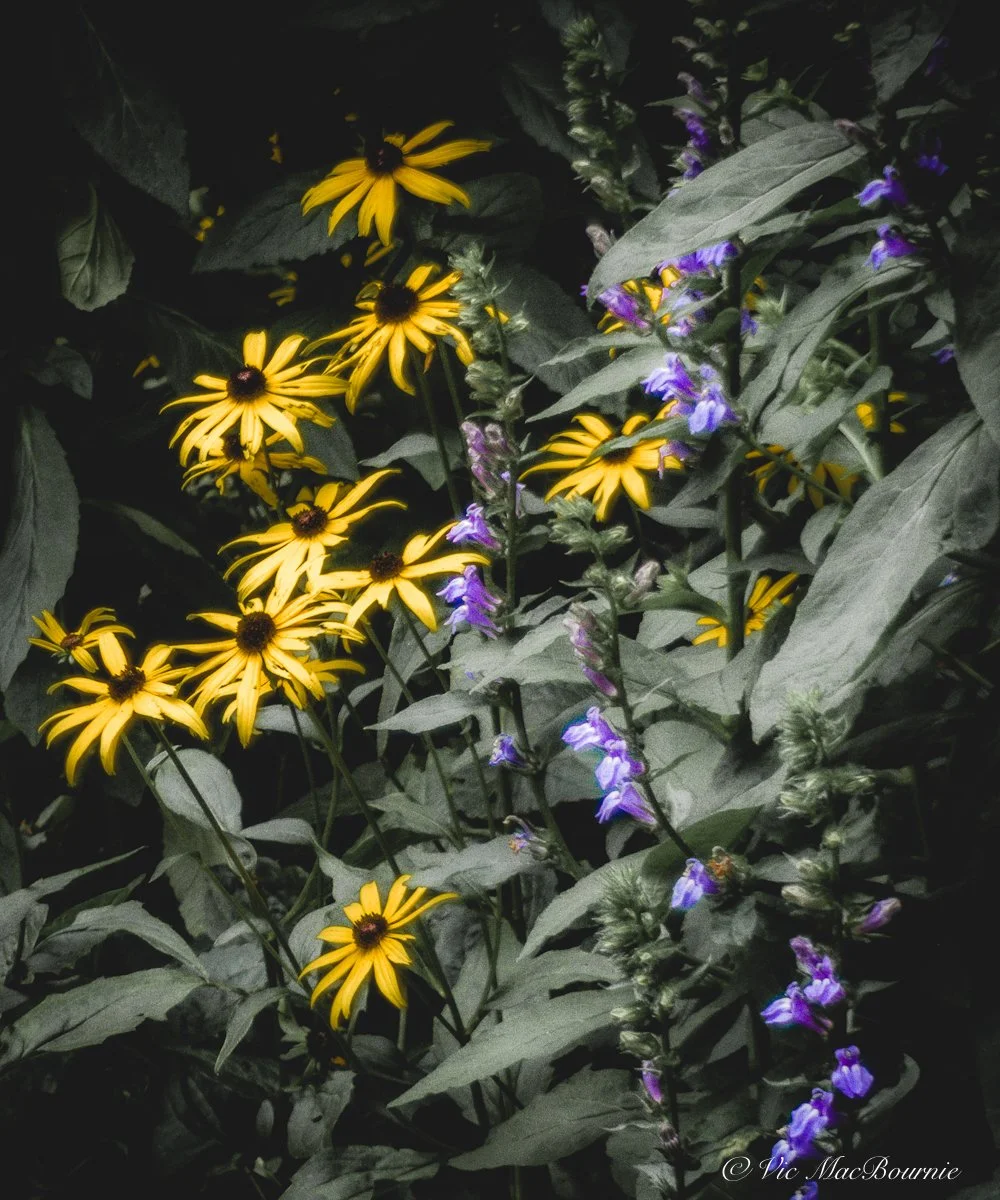
The colour extraction filter (set to purple) helps to isolate this salvia flower petal against the grey leaves. The Pentax Q allows you to choose from a host of colours to isolate in your image. You can even choose to isolate two separate colours.
Pentax Q boasts big features in a tiny package
There isn’t time to get into all the features packed into these tiny cameras. Besides, I’m not really big on all the gimmicks camera manufacturers pack into their cameras to convince buyers they have to buy the camera. But, there is no denying that the features in this camera would be welcome in some of the more expensive DSLRs offered at the time.
It sports a 12.3mp sensor, it’s own dust removal system, ISO settings from 125 - 6400 and a sensor shift shake reduction system to help users get sharp images even in low light. Some of the lenses even have built-in neutral density filters.
This is an extreme crop of at least 50 per cent with the Q 06 lens. I think the image stands up well despite the crop on the small sensor.
How about HDR, a built-in intervalometer, creative “bokeh” blur settings, single and multiple colour extraction filters, and highly adjustable B&W capabilities to name just a few. It shoots RAW, has fully manual settings and for Pentax lovers the green button will bring you back to normal exposure no matter how far off you may have wandered.
Another image taken with the Pentax Q and the 06 lens with a minimal crop.
Are you thinking these cameras might make for a nice street photography package? I took the Pentax Q with the 01 Prime lens (47mm equivalent) to an emergency animal hospital, while I waited for my dog, Holly, to get her new pacemaker checked by the cardiologist. (Yes you read that right).
• Here is a gallery of results of that one-hour wait at the Emergency Animal Hospital shot with the 01 prime (50mm) in a photojournalistic style with the camera’s B&W mode.
• For my full story on The Pentax Q as a lomography camera with the 07 Mount Shield Lens go here.
• For my full story on the Pentax Q and 110 vintage lens.
This thumb grip link works nicely on the Pentax Q and makes the camera even more ergonomic. The one linked to does not block the dial and your thumb clears the LCD so it does not block your view.

Five reasons to buy a Pentax Q today
Even today it remains among the smallest and most competent mirrorless cameras with interchangeable lenses.
They are now very inexpensive on the used market. If possible, buy an entire package including several lenses to get the best bang for your money.
You are already sitting on some great Pentax or other manufacturer’s (Olympus, Canon, Nikon) vintage 35mm lenses and all you would need to use them on the Q is an inexpensive adapter.
You love small, exquisitely built cameras and lenses and don’t care about mega sensors.
You love the idea of turning your 50mm macro into a 250mm macro or the 100mm f2.8 portrait lens into a 500mm super zoom for about $35.
You have a set of the exquisite Pentax Auto 110 lenses and are itching to use them on a modern digital camera. See my full review of using Auto 110 lenses on the Pentax Q
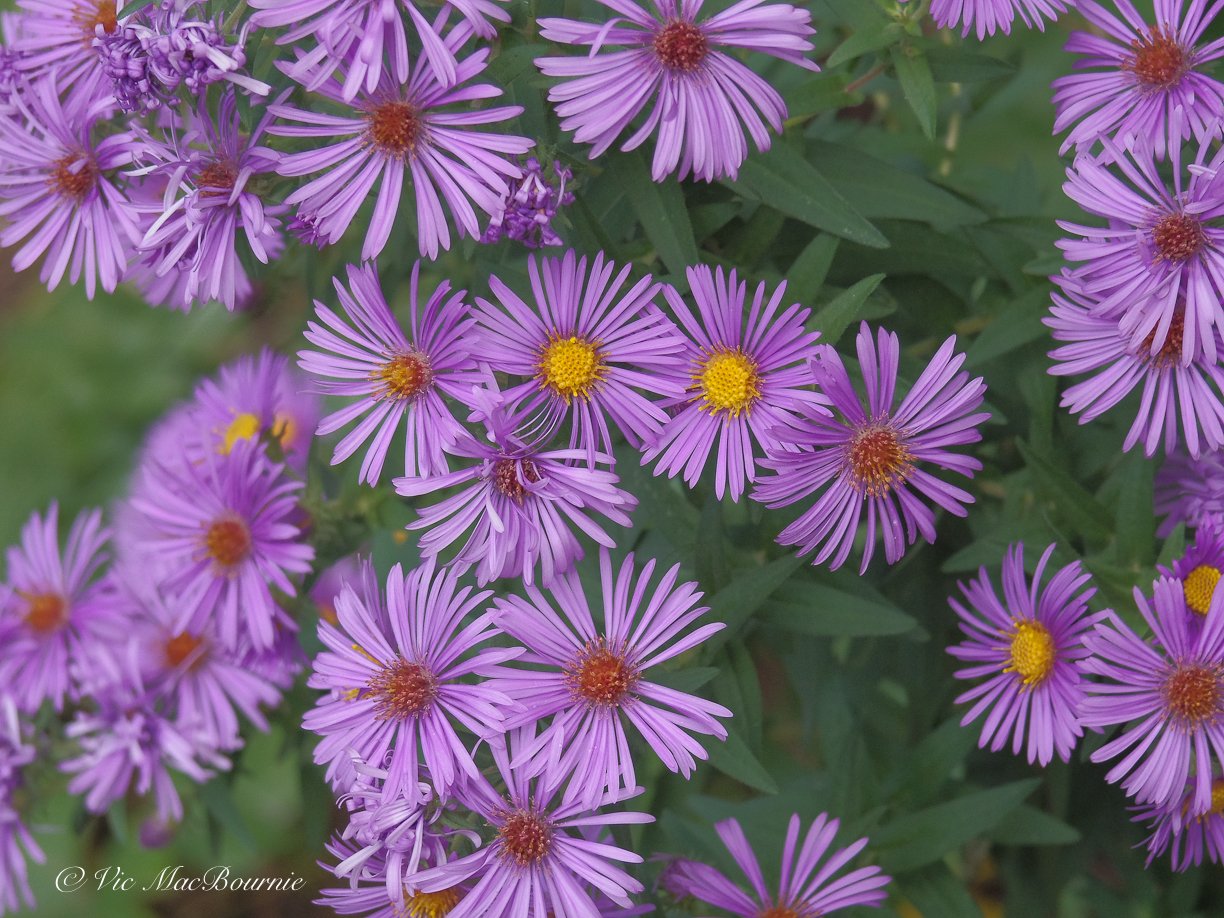
New England Asters taken with the Pentax Q's blur mode that allows you to control bokeh in the images.
Even the pop-up flash is cute, cool and quite useful.
Lot’s of fun, creative and artistic stuff here to keep even the most bored photographers, inspired.
Did I mention the fully customizeable creative wheel thingy in the front of the camera to control favourite creative settings fast and conveniently. Yea, there’s that too.
(I’ll put a link at the bottom of this post from Pentax Forums for anyone who wants to get into the fine details of the camera system.)
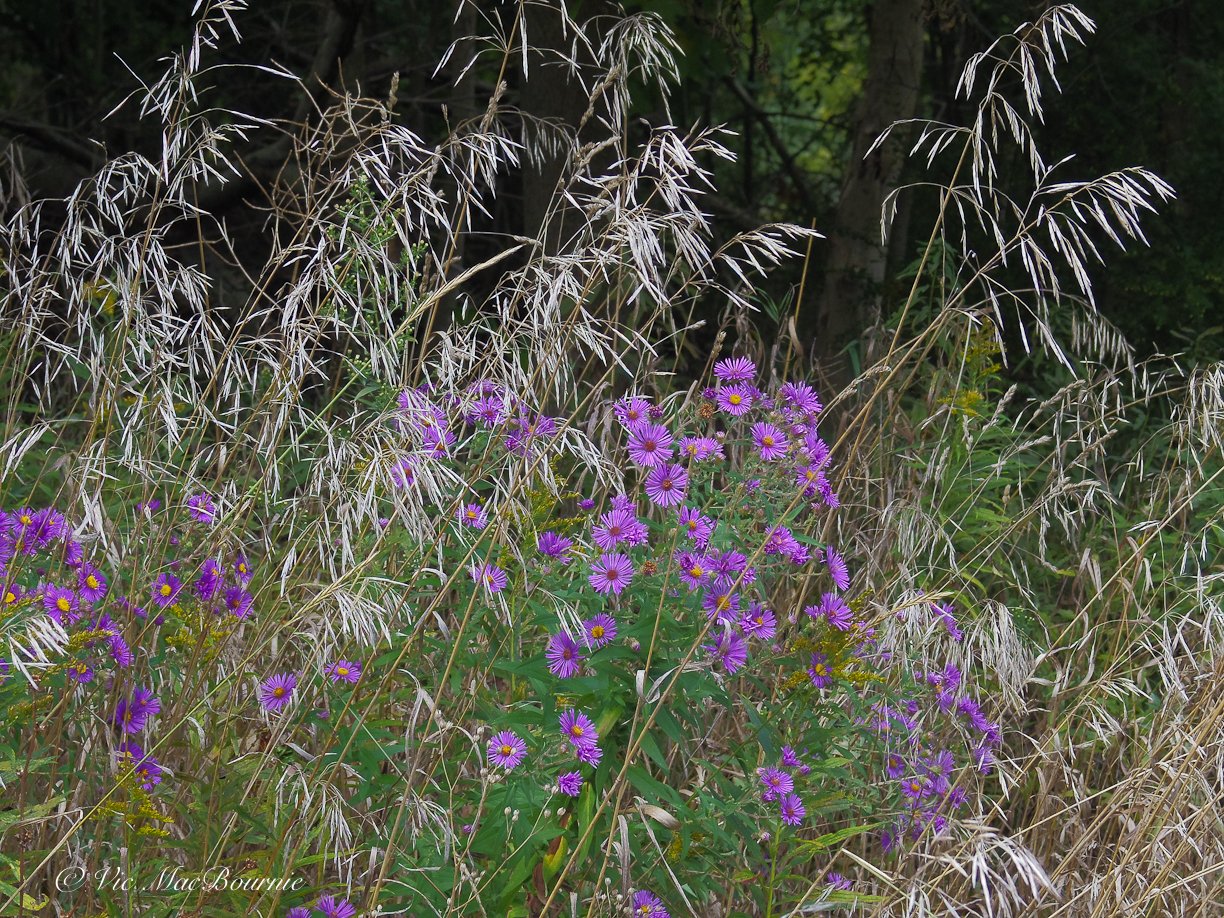
This image of native New England asters and grasses shows the detail that the Pentax Q is able to achieve.
How long was the Pentax Q manufactured?
Over the years this miniature camera system, that had a relatively short life span ranging from the original Q’s introduction in 2011 to after the release of the Q-S1 in 2014, gained a cult-like following.
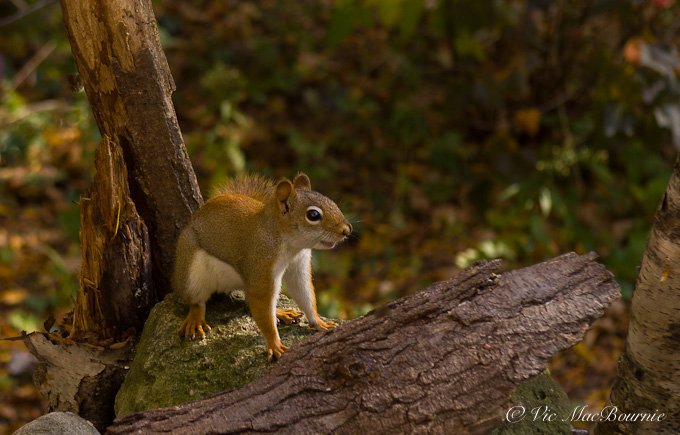
This Red Squirrel was photographed with the Pentax Q and the 06 telephoto lens wide open at F2.8. The lens can deliver soft backgrounds if the subject is far enough away from the background.
Eight Pentax Q lenses deliver top quality results
Pentax introduced a total of 8 miniaturized lenses beginning with the excellent 01 standard Prime with a focal length of 8.5 mm (47mm equivalent for the Q, Q10, and 39mm for the Q7, Q-S1 with the larger sensors.) More lenses followed: 02 standard zoom (27-80 range equivalency, 23-69mm), 03 Fisheye (17.5mm, 16.5mm), 04 Toy wide angle lens ( 35mm, 33mm), 05 Toy lens (100mm, 94mm), 06 Telephoto zoom (83-249mm, 69-207mm), 07 Shield mount lens (63mm, 53mm) and finally the 08 Wide Zoom (21-32mm, 17.5-27mm).
The final lens, the 08 wide angle, is a quality-built lens but extremely expensive. It still remains a highly sought after lens with a big price tag even on the used market, if you can find one. I have just recently acquired this lens and can confirm that it is an outstanding lens both in its photographic qualities as well as its build qualities. (See image below.)
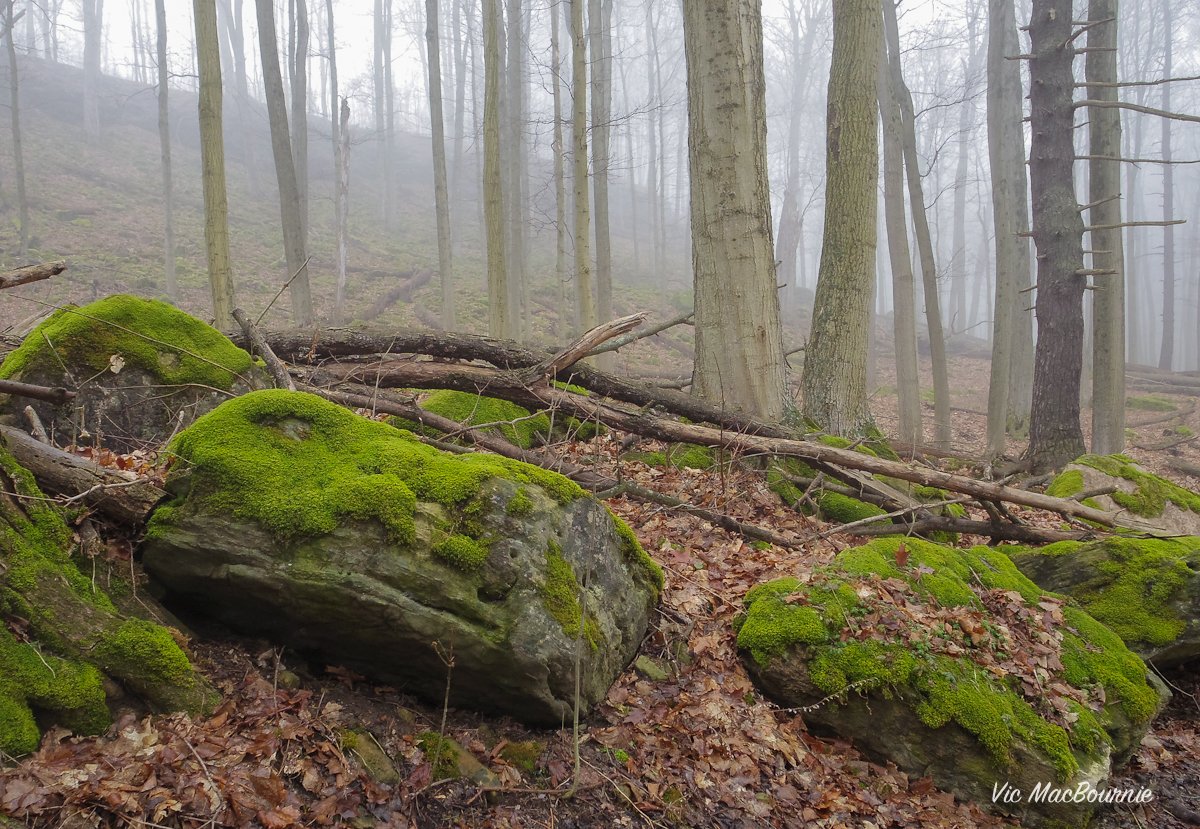
Moss on rocks in woodland taken with Q07 and 08 wide angle zoom lens.
I should not forget another group of lenses that were made for the Q years before Pentax engineers even knew digital cameras were ever going to be a thing, and that’s the Pentax Auto 110 line of lenses. With a simple adapter, these tiny lenses look like they were made for the Pentax Q. For my complete story on using these lenses on the Pentax Q, be sure to check out my story here.

Blue Jay photographed with the Pentax Q and the 06 telephoto zoom, which is approximately 70-250mm in 35mm equivalence.
What happened to the Pentax Q cameras and lenses?
Was the Pentax Q system made of simply inferior products meant for the trash heap almost from the day it was announced?
Far from it.
In true Pentax style, these cameras were not only ahead of their time, but engineered to the finest Japanese craftmanship. The result was a hefty price tag (about $700 plus with a basic lens), one that most serious amateur photographers – who they were originally aimed at – just weren’t ready to spend for such a small-sensored camera. That initial cost would rise as you add other lenses to make the system more complete.
In those days, not unlike today, the size of the sensor meant everything. This was before social media took off so photographers were more focused on obtaining the highest resolution images possible.
Fast forward to today when 95 per cent of all digital images never get past Instagram, Facebook and Vero, where the size of the original image plays only a small part in the camera-buying decision.
Our cell phones are just one example of how the size of sensors mean less and less to the end user. Convenience and the coolness factor are far superior to size these days.
The Pentax Q colour extraction filter can pull out colours out of an otherwise B&W image. Here, I pulled out red and purple.
Where can you buy the Pentax Q?
One quick look on Ebay.com and you’ll find your share of Pentax Q cameras and lenses. Most are from Japan where the Pentax Q has always been a very popular camera. The difference is that on today’s used market, you can pick up the camera and a couple of lenses for a fraction of what you would have paid back when they were available in stores.
In fact, when I purchased my Fujifilm X10 back in 2011, the Pentax Q had just been released. The owner of the camera store urged me to get the Pentax over the Fuji. I loved the little Pentax camera but could not justify the cost of the system. The Pentax Q cost as much as the Fuji but the X10 came complete with the excellent 28-112mm equivalent built-in lens. By the time you added a few of the Pentax Q lenses, you were into a large financial investment and one I was not willing to make at the time.
I suspect, I wasn’t alone.
Today that close to $1,000 investment can be had for maybe $200 for a camera and a couple of lenses. I was able to purchase an Original Pentax Q and standard O2 lens on Kijiji for $60 Cdn. – a real sweet deal. And Ebay is full of great deals – maybe not quite that good but still very reasonable.
But that is just the beginning.
The Pentax Q shown here with the Q to Pantax K adapter and a 50mm f2,8 macro lens which becomes a 250mm macro lens with the 5.6 crop factor of the Q's tiny sensor.
Adapters make the Pentax Q useful in 2024
A lot has changed since Pentax first introduced their miniaturized mirrorless little gem.
If it was great then, new, inexpensive adapters have turned the Pentax Q into one of the coolest little mirrorless cameras on the market.
In 2012 Pentax announced the Adapter Q for K-mount lenses with a 5.6X crop factor. This little device changed everything, but it took time for other manufacturers like Fotodiox and K&F (amazon link to list of adapters) to follow and change the world of Pentax Q owners.

The 50mm f2.8 macro lens on the Pentax Q making it a 250mm with the crop factor.
The small sensors and the fact it is a mirrorless camera makes adapting vintage – even ancient lenses – to the camera simple and inexpensive.
There are adapters to mount classic Pentax, Olympus, Nikon and Canon 35mm lenses to the Pentax Q. But it doesn’t stop there. There is an inexpensive adapter for Pentax’s venerable classic 110 camera with its interchangeable lenses. These sweet little miniature lenses will fit the Pentax Q now too.
This image shows how much magnification the 50mm macro can achieve on the Pentax Q. And, just look at that lovely background. Not bad for a tiny-sensored camera.
Oh, and did I mention those ancient miniature D-mount lenses from your dad’s or grandfather’s 8mm cinema camera. Yep, they have an adapter too. Cost me $3 for the adapter and I have four d-mount lenses I found attached to old 8mm cameras I had been using as paperweights that I can now attach to the the Q and explore the world around me.
I will be doing separate posts looking at these lenses as well as breakdowns of some of the Q-mount lenses.
And, if you are looking for cinematic quality in your images, what better than a lens from the 1930s-40s to create the mood.
Oh, and did I mention C-mount cinema lenses…
You get the idea.
A $30 adapter and a couple of my classic Pentax K and Ka lenses together with the Pentax Q turns the system into one that we could only dream of a few years ago.
The crop factor is about 5.5X which means normal lenses become telephoto equivalents and telephoto lenses become super telephotos.
Let’s do some quick math.
My older 50mm f2.8 macro becomes a 250mm f2.8 macro lens. My 100mm F4 becomes the equivalent of a 500mm macro. My 40mm pancake becomes a 200mm pancake lens. My 300mm F4.5 A* becomes a 1500mm F4.5 telephoto. My old 75-150mm zoom becomes a 375mm to 750mm zoom.
Just imagine the possibilities.
I remember always wanting the A* 200mm macro lens in its day, but it was the price of a small used car. Today, I can mount a 50mm F2.8 A manual focus macro lens on the Q and get a 250mm macro F2.8 equivalent lens. It’s like I’ve died and gone to heaven.
I’ve included a few example images above of of the Pentax 5omm in action just to get readers thinking about the possibilities. Notice the beautiful soft background the lens was able to achieve even on a point-and-shoot-sized sensor.
Stay tuned for future posts on the Pentax Q where I’ll provide more specific insight and examples of what can be done with these ancient lenses.
If you are into fine details (and after you finished reading this complete post, of course) check out this post at Pentax Forums. It’s all here in fine detail.)
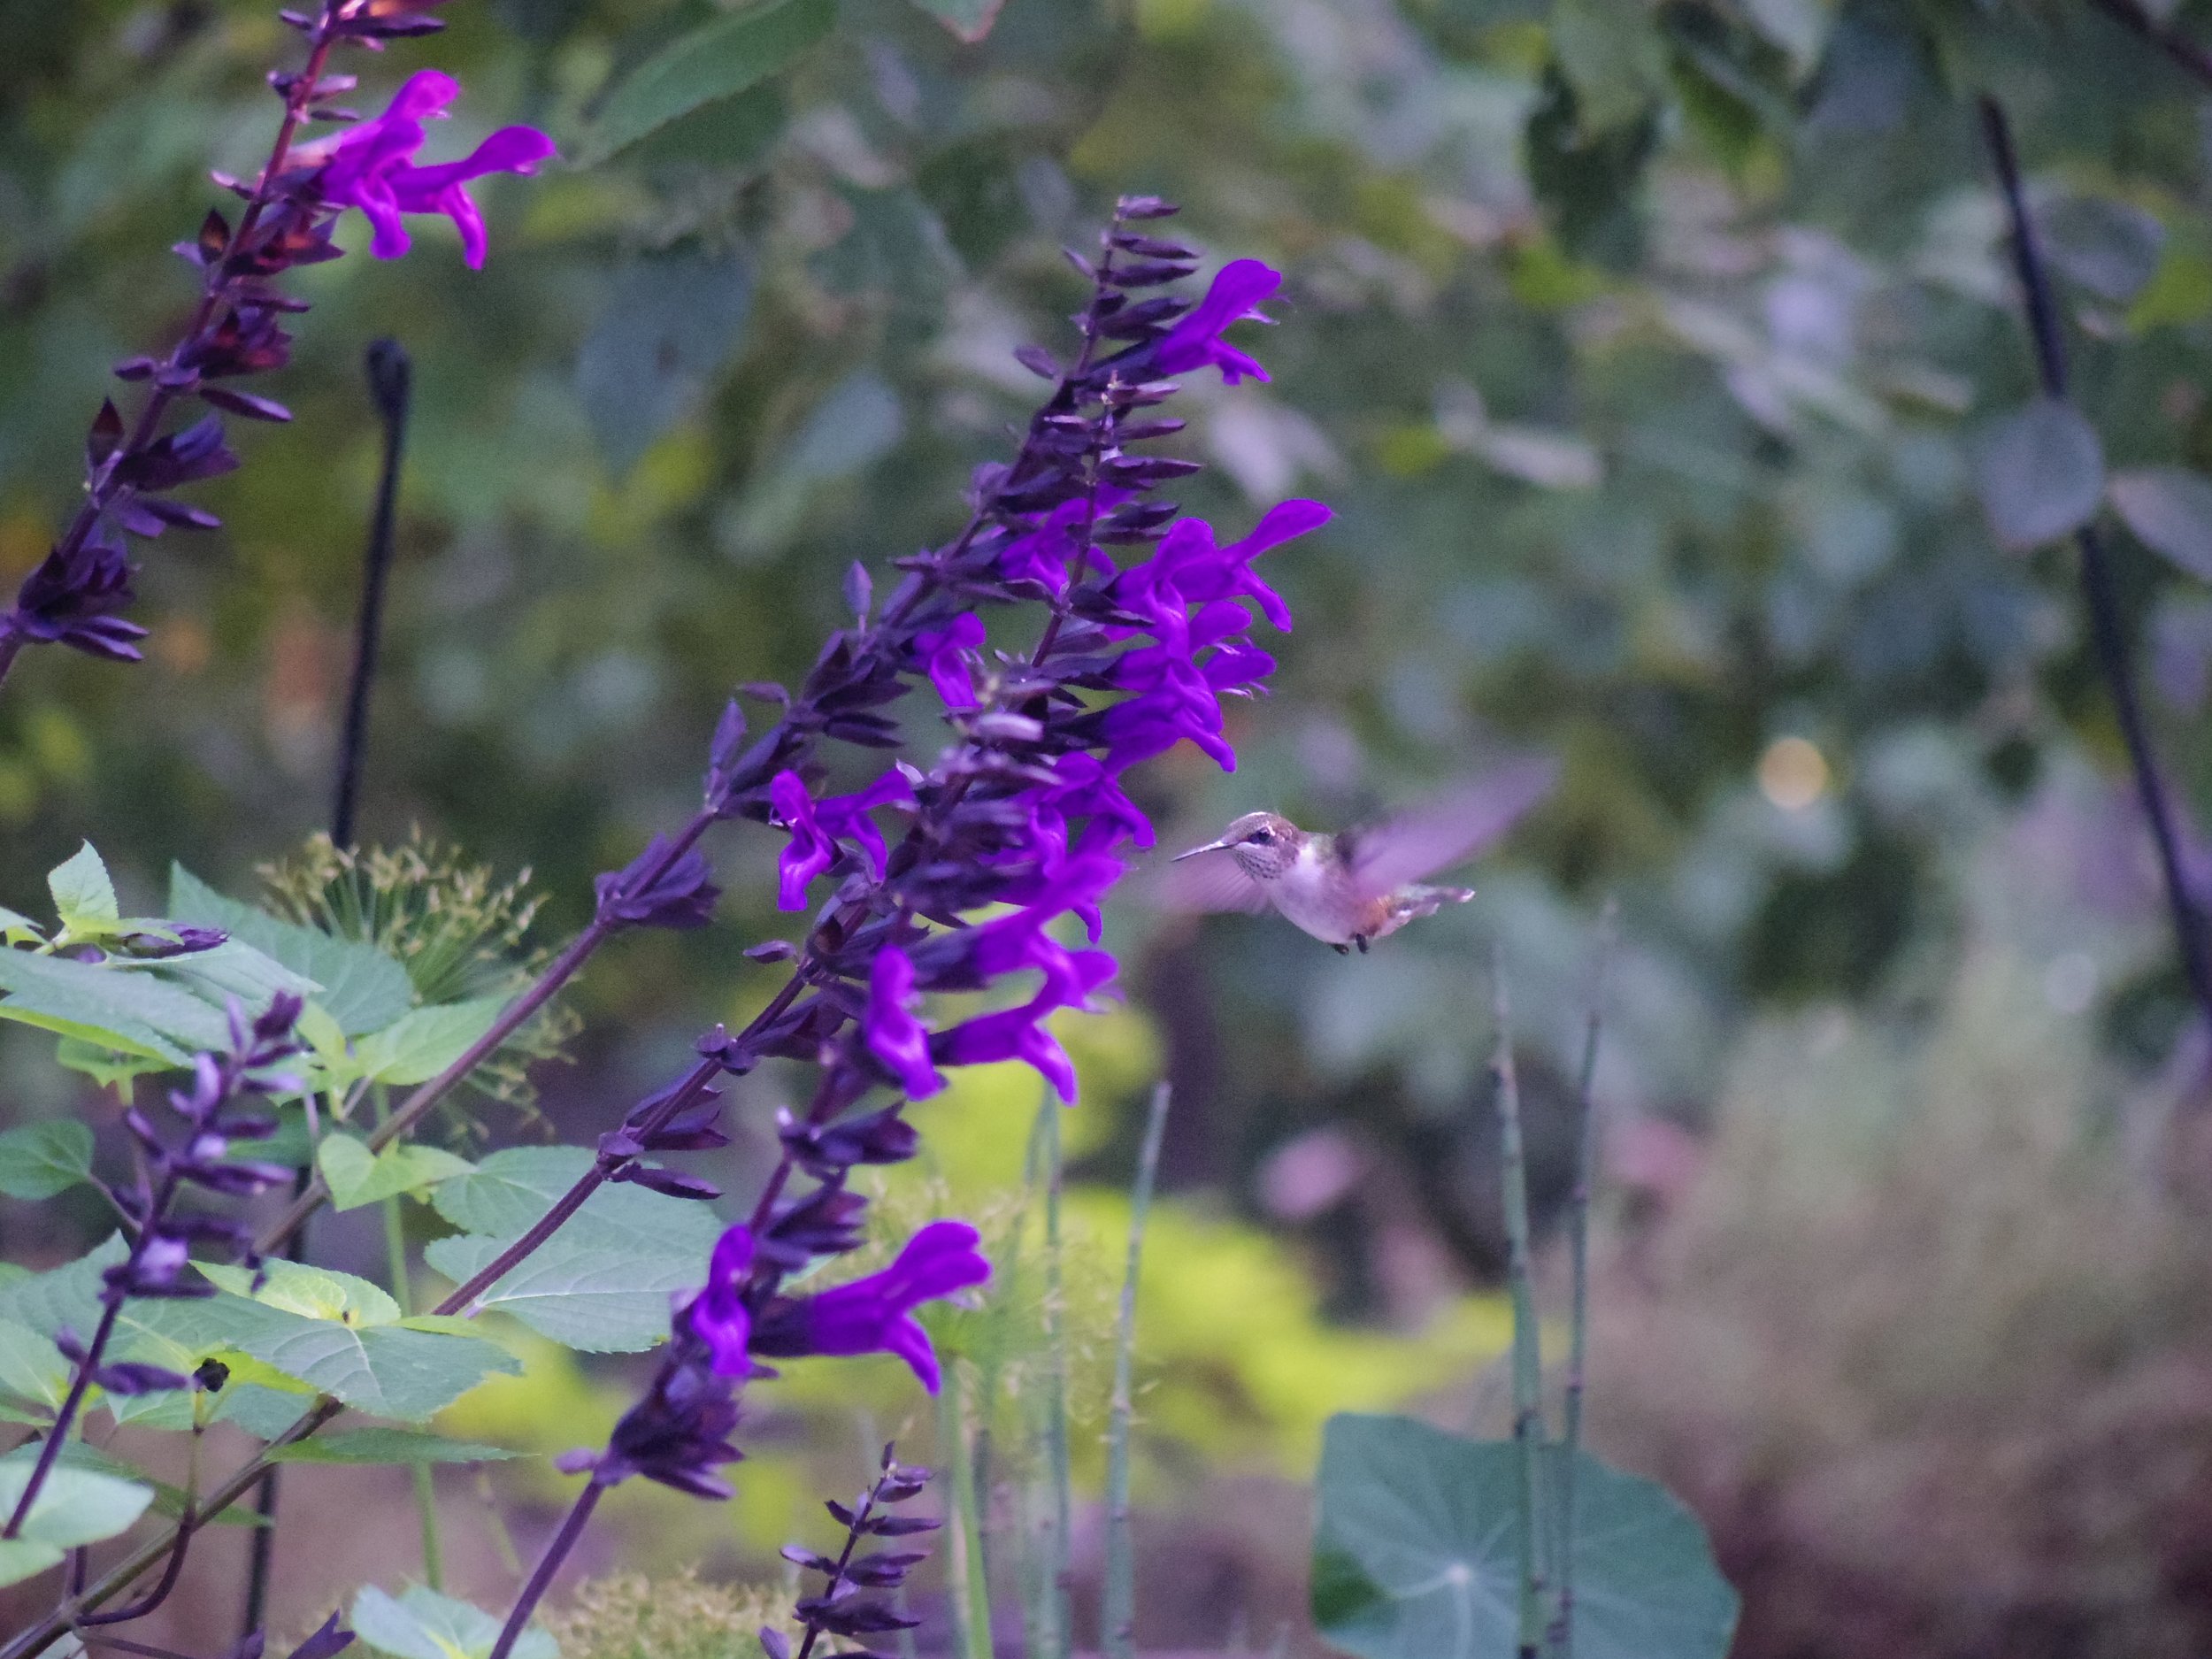
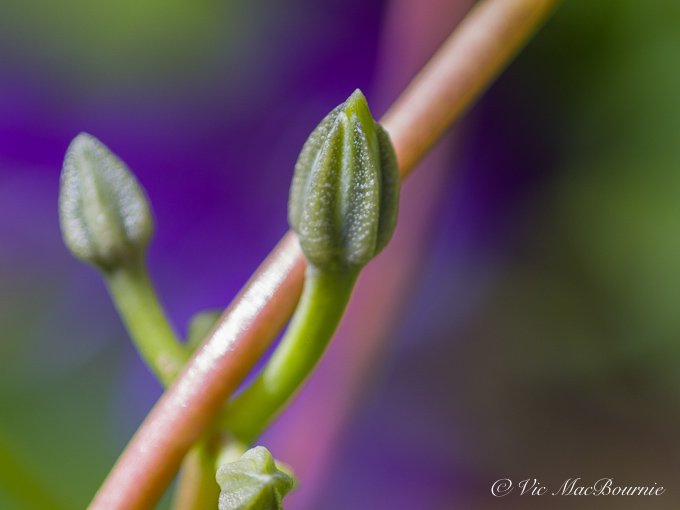
Hummingbird and salvia shot with Pentax Q and 06 telephoto zoom.
Is the Pentax Q worth buying in 2024 and beyond: Pros and Cons
Is the Q worth it in 2024?
Absolutely.
Is it the only camera you should pack in your arsenal?
Probably not.
Is it capable of getting great images for social media like Instagram, Vero, Facebook etc?
Absolutely.
Hello, World!
But the Pentax Q is far from perfect. It’s certainly beginning to show its age when it comes to focusing and where it lacks the latest technology. Trying to see the back LCD screen in bright light is near impossible and, although using the classic 35mm-style lenses with at adapter is super fun and cool, don’t be surprised if you struggle nailing the focus.
Yes, the Q has focus peaking and magnification factors to help with focus, but if you struggle to be able to even see the back LCD, you are not going to have an easy time focusing.
There is no built-in LVF (fiewfinder) to help frame the image. Well, I should not say there is no viewfinder. There is an optional viewfinder that works with the 01 Prime lens, but it’s expensive and not really all that great, according to users. It does look cool on the camera, however, giving it a real rangefinder look.
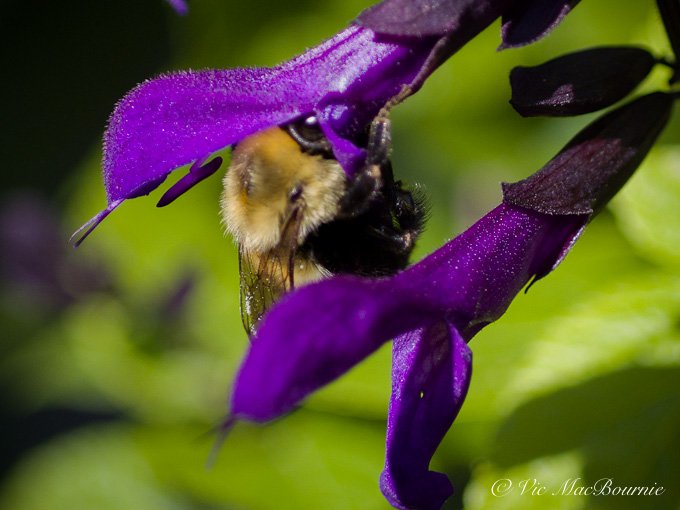
Bee on salvia taken with Pentax Q and vintage 50mm macro.
There are more issues with the camera and lens system that some users may think are worth noting, but with the price of these sweet, miniature cameras coming down as much as they have, it’s too easy to overlook the minor problems and just enjoy the camera and all it has to offer.
For a fraction of the price of a new smartphone, you can walk into a party with your Q and turn some heads.
At the same time, take it out on the street and you can virtually go unnoticed with this tiny camera.
Slip it in your purse or pocket and you’re ready to go anywhere. Even out in the garden for a morning of shooting. Heck, these Pentax Qs even have a macro feature on them for capturing our favourite flowers, bees and butterflies.
Author Profile: Vic MacBournie is a former journalist and author/owner of the award-winning website Ferns & Feathers. He writes about his woodland wildlife garden that he has created over the past 25 years and enjoys sharing his garden photography with readers.
Comparing a tiny trio of digital and film cameras in the garden using B&W images.