

Attract birds all winter with DIY heated birdbath
Providing a reliable winter water source for backyard birds begins with an electric water heater. But it does not have to end there. Check out the DIY outdoor photo studio and reflection pond that birds are flocking to as winter approaches.
A goldfinch stops for a drink during freezing temperatures at our heated birdbath.
Water is critical for wildlife during extreme cold
A dependable source of water can be a critical factor deciding whether your backyard wildlife make it through extreme cold conditions.
The temperatures, often freezing overnight, make it difficult for our backyard birds – especially when it comes to obtaining water. Even those of us who are vigilant about keeping our feeders full, too often underestimate the importance of a reliable water source.
Ensuring a reliable source of fresh water is probably more important to our backyard birds than a source of food. Birds naturally store seeds leading up to winter and they can forage in our gardens for additional sources of food throughout winter.
But, having access to water becomes much more difficult.

A heated birdbath can be the difference between life and death for our backyard wildlife.
So, when our bird bath heater stopped working during a recent cold spell, I didn’t hesitate to go in search of another one. That led me directly to the Urban Nature Store where I had a choice of a number of heated bird bath alternatives from simple units that drop into existing bird baths to more extravagant bird baths with the heating element is embedded in the bird bath.
The selection was truly impressive. It’s important to note that heated birdbaths do not remain on at all times. Most have a thermal regulator on them that turns the unit off and on to maintain a water temperature just above freezing. This means the heater is not using electricity 24-hours a day.
I chose the K&H heater at $69 Canadian, but any of their offerings would have likely got the job done.
I must say, however, that this unit has performed exceptionally well, even in the record-cold temperatures we have experienced over the past couple of weeks.
We are lucky enough to live near a small, fast-flowing stream that provides emergency water sources to all our neighbourhood birds and wildlife that can easily access it.
However, I like to help out by ensuring a reliable water source in the garden. Not only does it make their lives a little easier, it attracts a wide variety of birds including many that may not regularly visit the feeders.
Squirrels are also regular visitors to the DIY birdbath.
For my other posts on bird baths, check out adding water to your garden and a DIY solar drip conversion.
Why water is critical for birds especially in winter
Water is critical to birds in the heat of the summer and even more important in the winter when traditional water sources are frozen over, including ponds and puddles. Bathing is an important part of a bird’s feather maintenance.
Wetting the feathers in a bird bath helps to loosen dirt and makes feathers easier to preen.
When preening, birds carefully rearrange the feathers and spread oil from the preen gland so they remain waterproof and trap an insulating layer of air underneath to keep them warm. That’s vital during cold winters where I live, especially when temperatures and wind chills can reach a bone chilling -30C and beyond and stay that way for days.
In fact, this has been a particularly bad winter in our area with prolonged periods of well-below freezing temperatures even during daylight hours. As I write this at around 11 am on January 31st, the outside temperature stands at minus 15 Celsius with a windchill of minus 23C. For those still using farenheit, that’s 5F and minus 10F with the windchill.
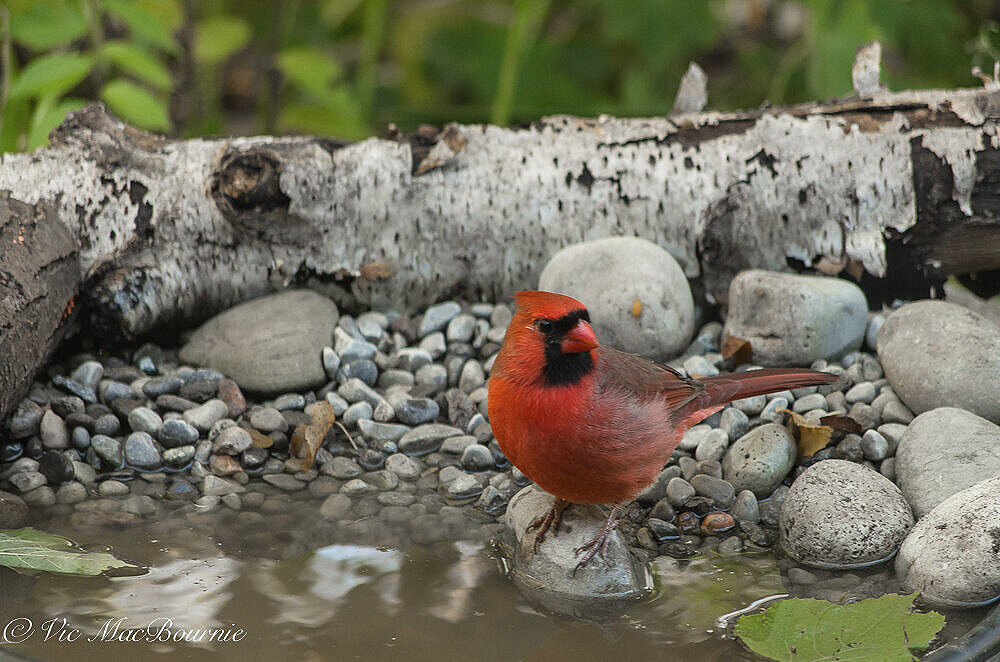
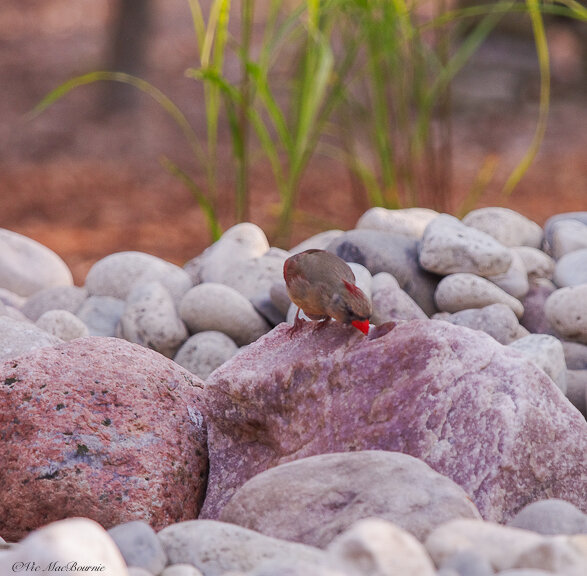
A cardinal stops for a drink among the stones in the heated bird bath and outdoor photo studio refection pond.
Birds lack sweat glands, so they traditionally need less water than mammals. They do, however, lose water both through respiration and in their droppings. Many insectivorous birds get most of their water from their food, but seed-eating birds, which are our most popular visitors in winter, have a dry diet and need to drink several times a day.
The appeal of a reliable water source may even be a stronger draw to birds than a well-stocked feeder, especially if there is no other reliable water source in the area.
Attract birds to your heated bird bath
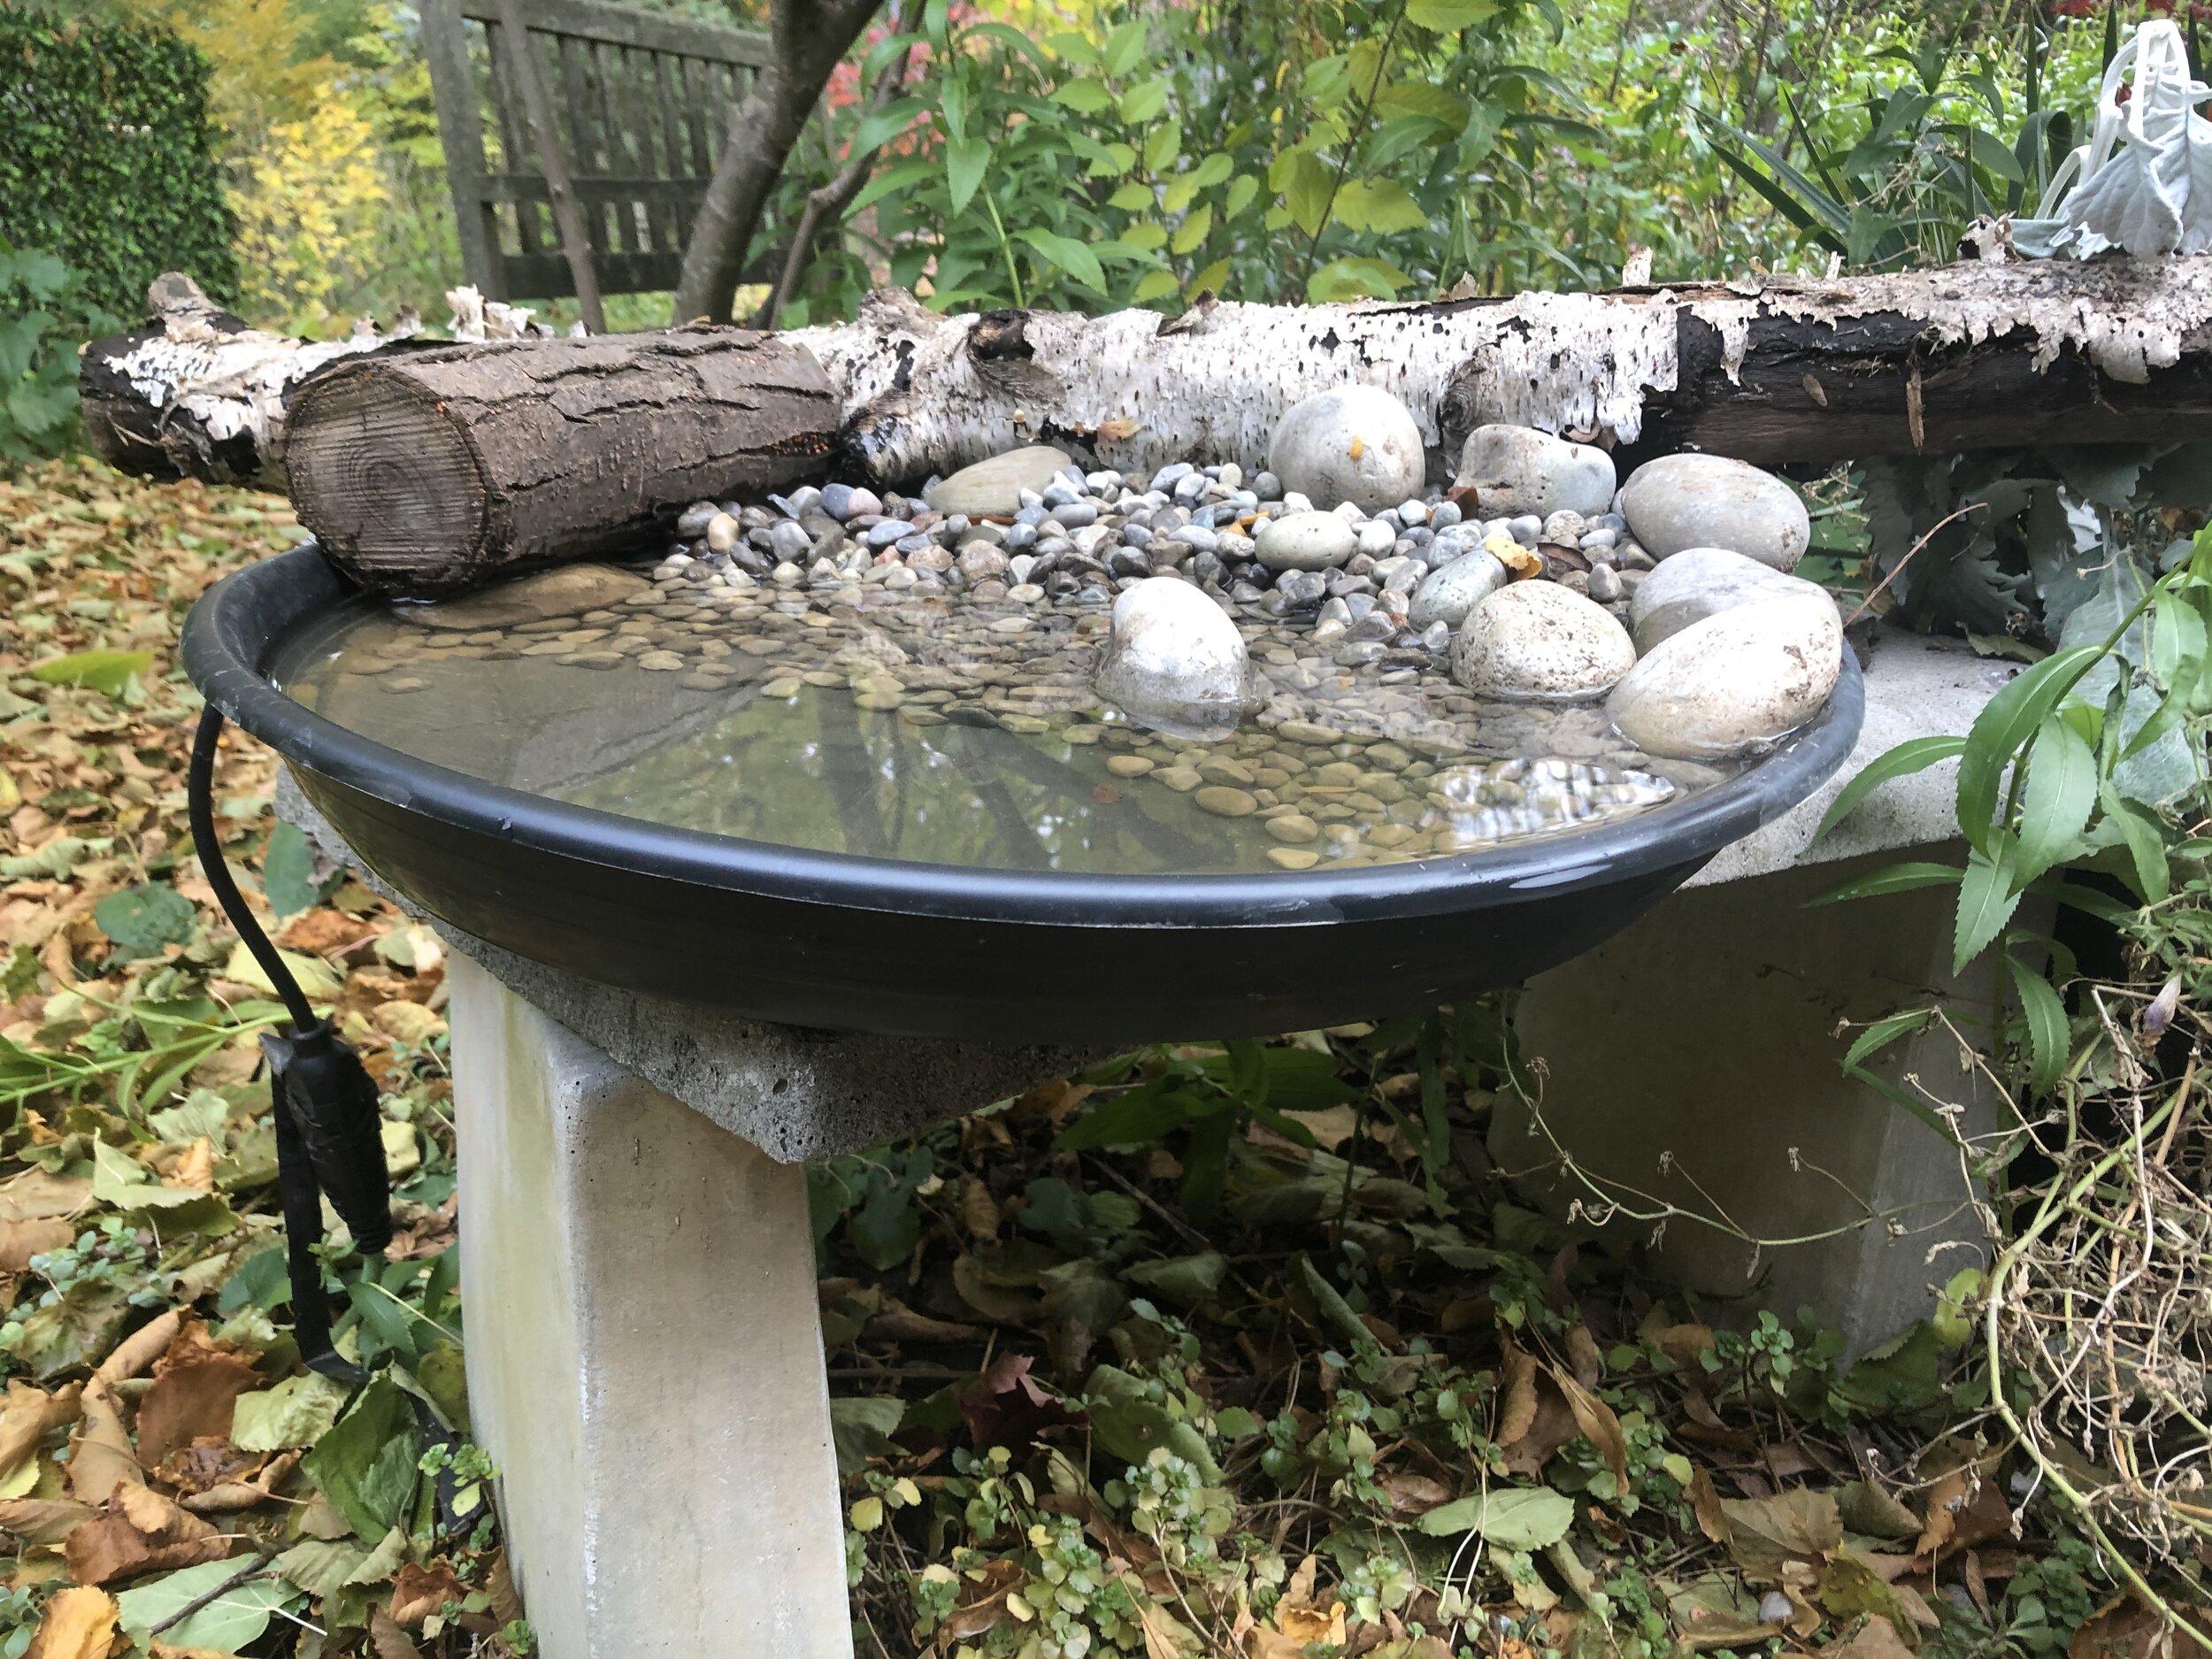
The heated bird bath ready for winter.
If you set up your heated bird bath in a separate area to where you normally have your bird bath, or your heated bird bath is entirely new to your garden, don’t be surprised if it takes a while for the birds to discover and be comfortable using it.
I have a couple of small feeders in the dogwood just above the heated bird bath, so there are always lots of birds around. Be sure to locate the feeder far enough away from the bird bath to ensure that the seed does not fall into the water.
My feeder is located just outside of our French door allowing me to photograph the birds from the comfort of our home. Consider locating yours near a window where you can both appreciate and/or photograph them.
To encourage birds to use your heated birdbath, be sure to set it up in a safe area of the garden. In winter, birds need even more cover in case of attack. We have a Coopers Hawk that visits regularly looking to make our birds into a meal.
Include perches above the bird bath to allow the birds to come down and check out the bird bath from a short distance. Include stones or landing spots inside the bird bath where smaller birds can either drink from or wade into the water slowly.
The stones also help hold the heat in the birdbath and offer birds more of an ice-free area to drink from the birdbath.
Build your own photo studio for the birds
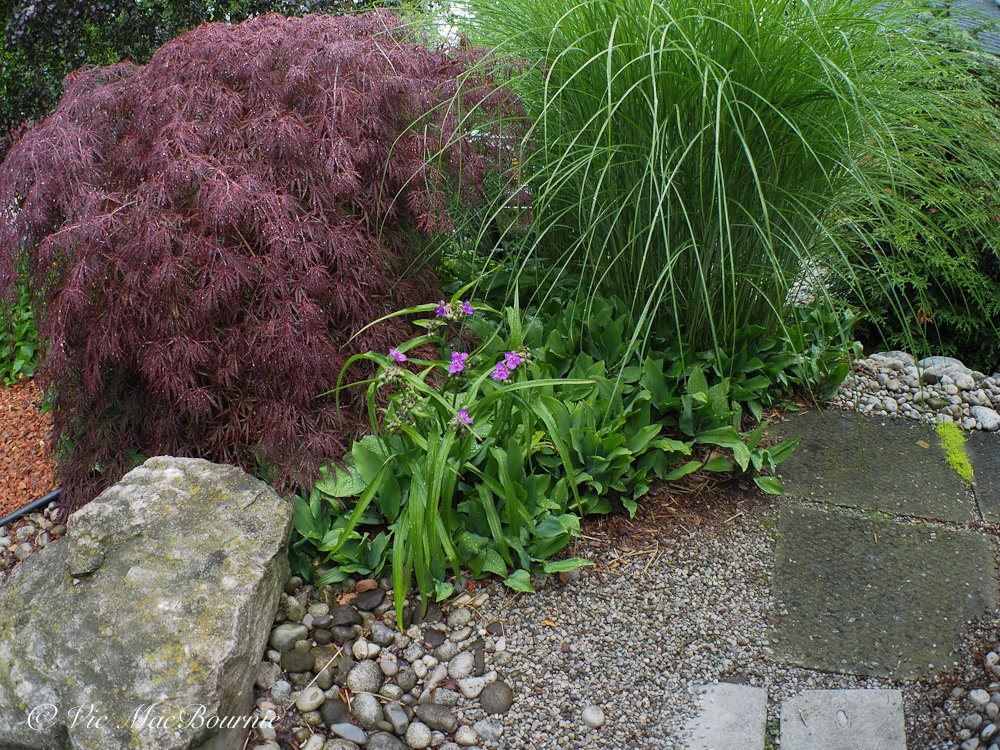
With this in mind, I set about creating both a reliable water source and a backyard photo studio and reflection pond. In fact, I have two: one large reflecting pool and a smaller heated pool that will be the main source of water in the yard when the temperatures turn to freezing.
Our DIY project started with a round, medium-size black plastic basin that I picked up from a local nursery for just over $10.00. It’s a couple inches deep, so it’s perfect for small- and medium-sized birds to use safely. Larger birds, like jays and robins, will not hesitate to create havoc in the bath as they splash about, but we’re all good with their daily antics.
This bird bath is quickly becoming the gathering place for our backyard birds.
It sits on a concrete bench just outside our family room French door where I can easily monitor the water levels. At the same time, it’s close enough that I can use it to capture photographs of our feathered friends enjoying a bath. And, I can do it from the warmth of our family room.
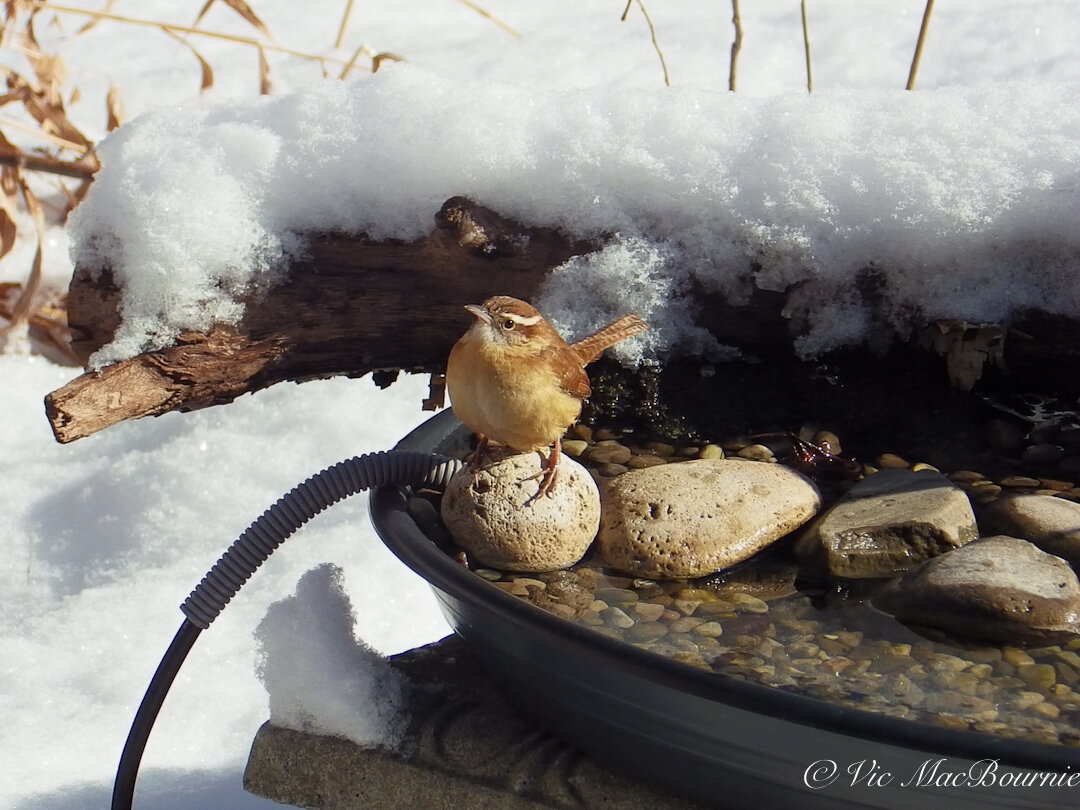
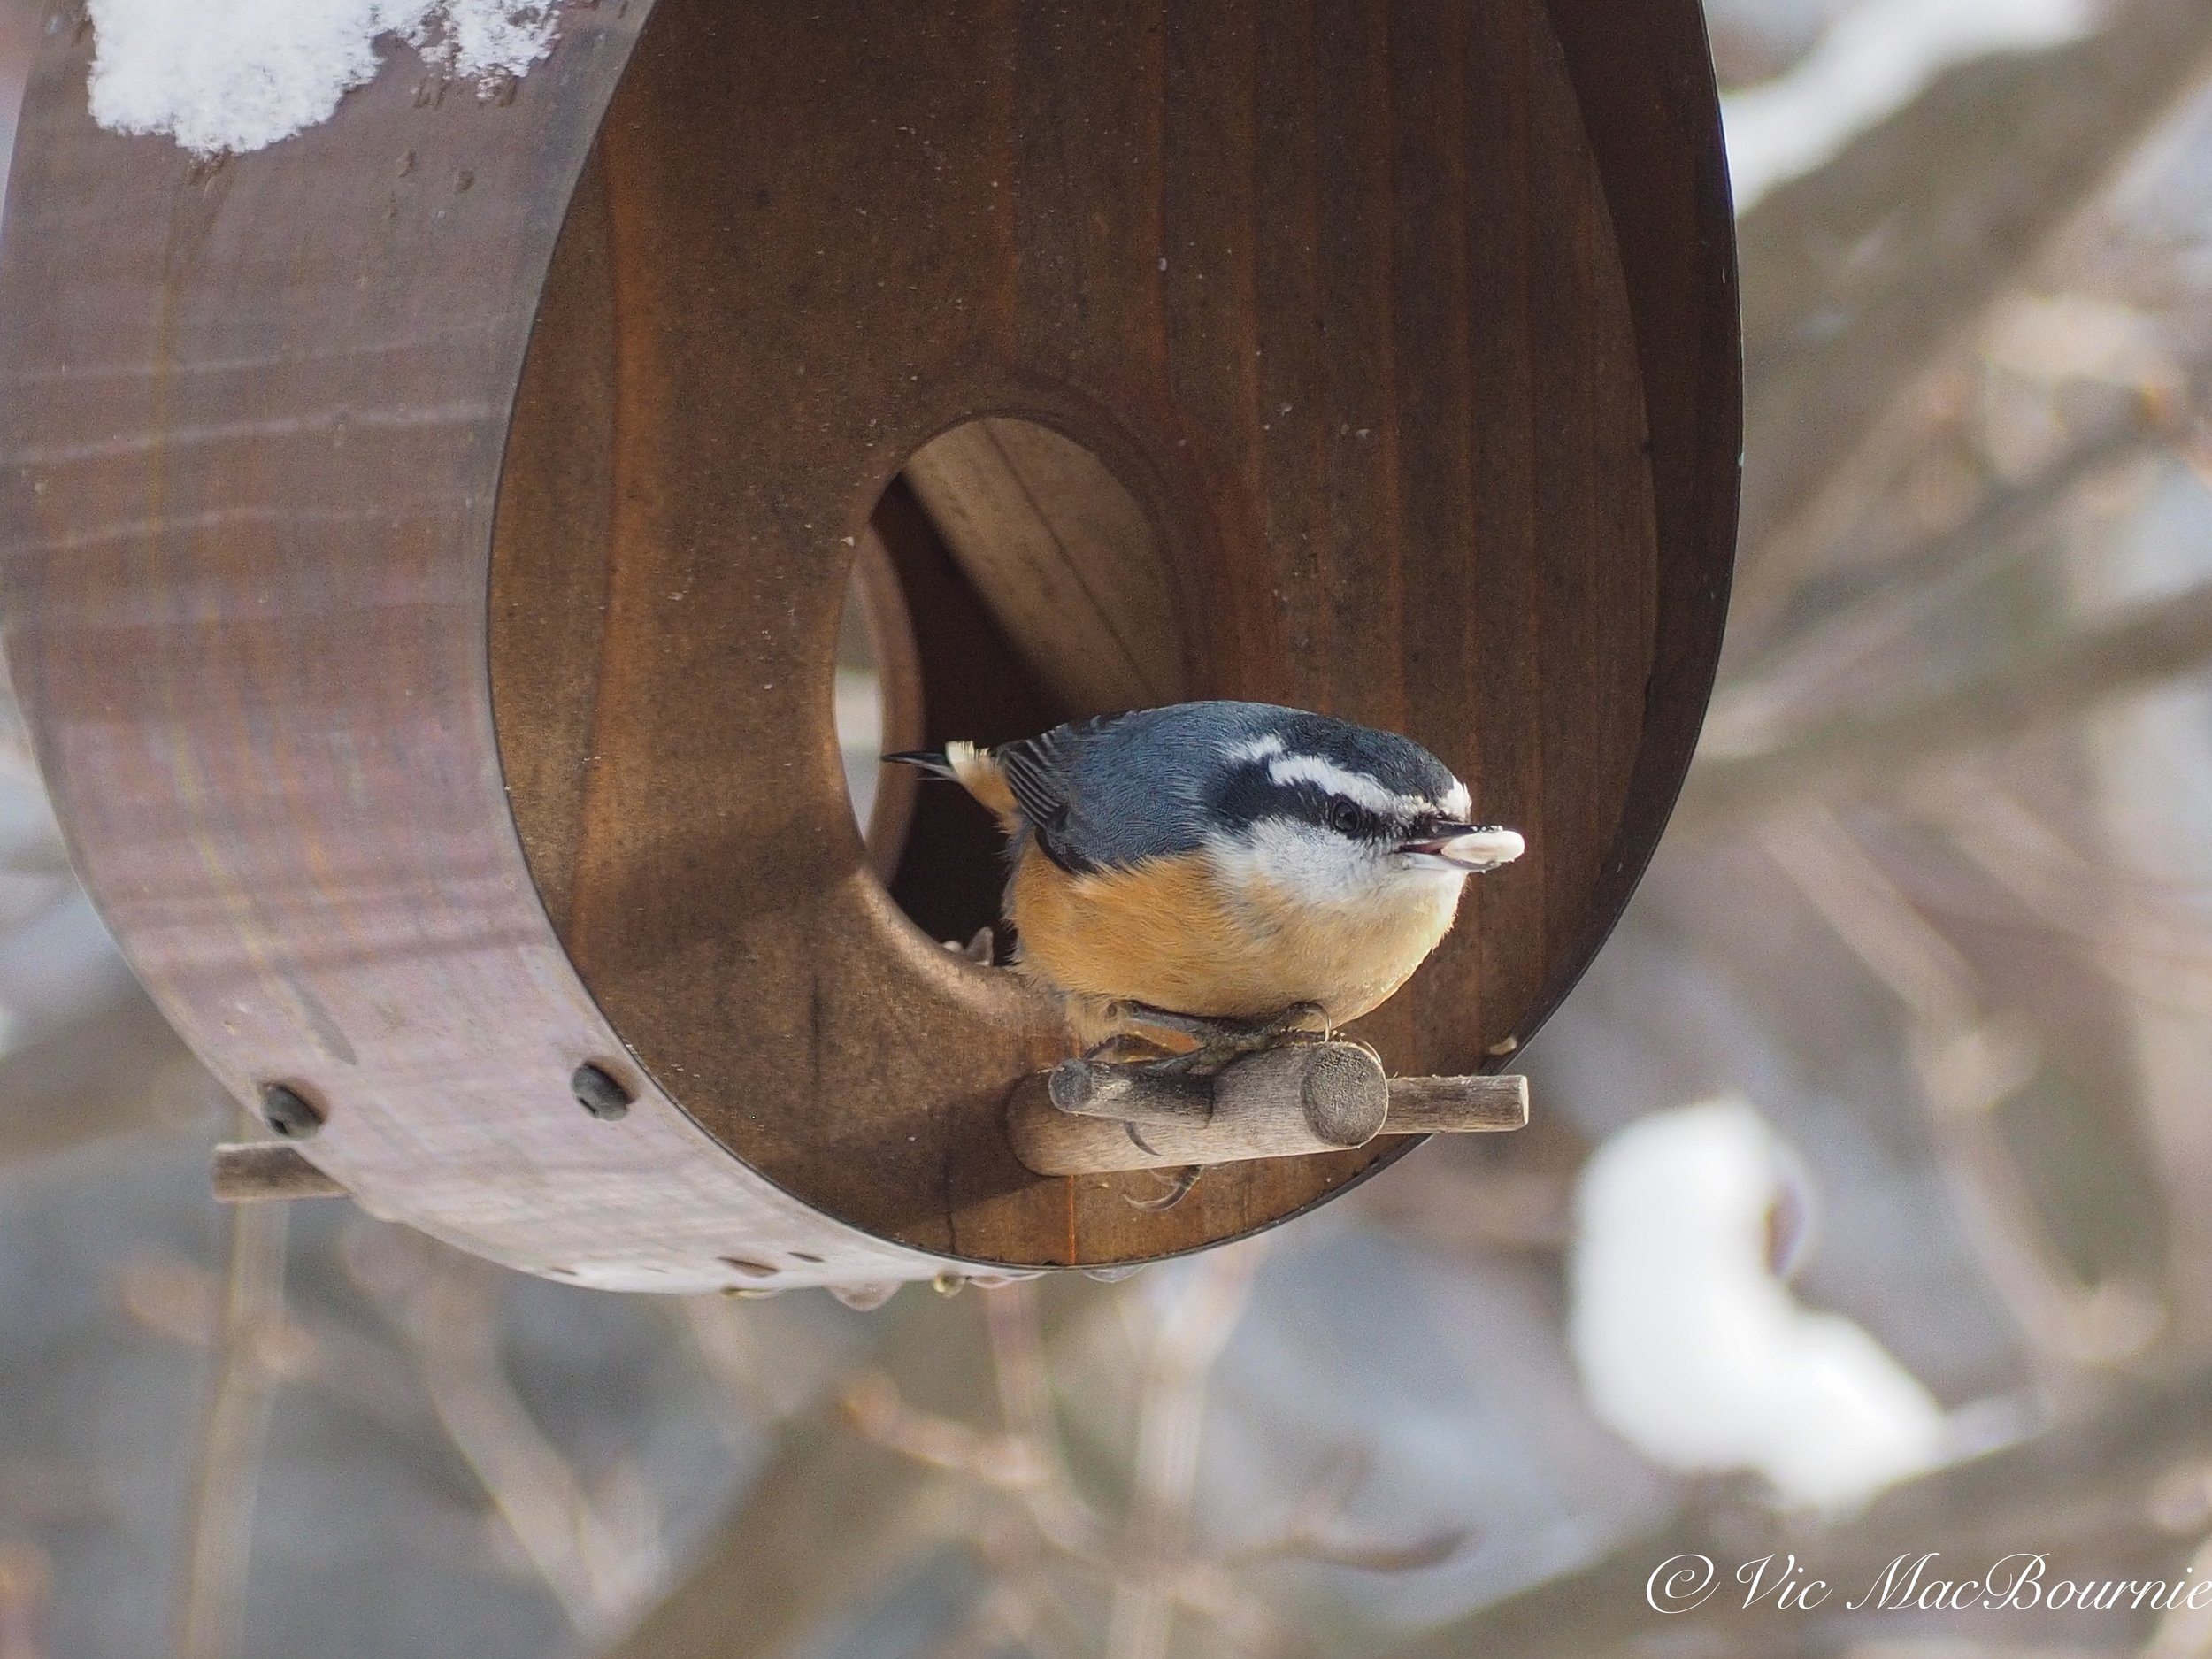
Cute little Carolina Wren taking advantage of the heated bird bath to get water during winter.
An electric heater from was carefully placed in the bird bath and hidden with a thick layer of pea gravel and a few larger river rocks to give the birds a landing spot.
A birch branch across the back will help to stabilize the bird bath in case a large bird or animal decides to use it as their personal bath tub. It also creates a lovely background for the birds using the feeder. A few other branches help to hide the edge of the plastic tray, give it a little more stability and add to its natural appearance.
The heater, buried in pea gravel, keeps the bird bath ice-free in the coldest temperatures but remain hidden under the gravel.
The heated pea gravel also plays a role in helping to keep the water ice-free, but, if necessary, adding a kettle full of hot water on particularly cold mornings will keep the water open.
The pea gravel also provides birds with a gradual slope into the water much like a sandy beach. This allows birds of all sizes to enter the water to a comfortable depth, and put them in a position that creates good photographic opportunities.
Although the goal was to create a reflection pond that doubles as a heated bird bath, the round plastic dish comes up a bit short to capture perfect reflections of the birds on a regular basis. It will work nicely for a small bird on the pea gravel, but the reflection will likely fall just short for a larger bird like a blue jay or cardinal.
Garden Assistants: Don’t be afraid to hire some help
Creating a backyard escape has never been more important than it is today. Hiring unemployed students or part-time gardeners could be incredibly rewarding both for homeowners as well as students and small business people who learn new skills and appreciation for the importance of gardens.
Hiring garden helpers: best decision I could make
Sometimes a gift comes knocking and other times we have to go looking for it. When it comes to garden help, I’ve had it both ways. And, both times, hiring individuals to help with the garden has been one of the best decisions I’ve made.
I’m NOT talking about a landscape company to come and cut the grass, blow leaves, prune trees to within and inch of their lives and generally cause a bigger commotion than is necessary.

Our dogwood in full fall colours stands out in the woodland garden and adds a little pop to the landscape.
I am talking about two types of garden help: First a young man with little garden knowledge but a strong back and a good work ethic; and two, a young very knowledgeable woman who makes gardening her full time work.
Consider hiring a student to help fulfill your vision
My first foray into hiring help for the garden came just as Covid began to kick in. As stores and restaurants closed, jobs became quite scarce for young people. Finding work was difficult to say the least.
It was about that time that I got a text message from a young man – home from university – and looking for work. I had hired him the year prior for some garden work so I knew the type of young man and worker he was.
And, so the gift that came as a message on my phone: “Hi Vic… If there is any outdoor work that you would like to get done this summer I would be very happy to come and help out. If you are not comfortable with it, I completely understand, though I could come with my own gloves, water etc and stay outside to ensure proper distancing. Let me know what you think, no rush.”
Keeping everything tidy in the Japanese-inspired garden is just one of the benefits of having a little help around the garden.
It was a gift from heaven. I had ideas and together with his young, brute strength we managed to transform the back garden that year.
His timing could not have been better.
Like most of us, our backyard garden became our refuge during the most difficult days of the pandemic. It’s always been a place my wife and I retreat to when we need some peace from the world, but it has never been more important than it was then.
(For more on gardening on a budget check out my in-depth here.
Our garden was looking a little shabby. The projects were piling up in my mind as fast as my right hip was disintegrating and making the simplest of these projects an extremely painful exercise.
And along comes the answer to our problems in the form of a young man looking for summer work to help pay for his university.

This image shows some of the work our student finished be removing most of the grass and covering the ground with mulch and stepping stones.
Sometimes you just need a little muscle
I am sure we are not alone. Those of us lucky enough to have homes and gardens to retreat to, who are still employed or living comfortably in retirement, owe it to our youth to help them get through difficult times.
I had a garden vision, I just needed someone to make it happen and hiring a student in this case was much less expensive than hiring a landscaping firm.
Just two weeks later and our backyard was transformed by this young man.
Bringing the garden vision to life
Nine yards of natural cedar mulch plus an additional 15-20 bags have replaced huge swaths of grass and over-run gardens that are now perfectly edged.
Trees have a new home, hostas and grasses split into multiple plants and moved to new locations around the garden.
A massive woodpile was created to provide a home for chipmunks, birds, snakes, salamanders and a host of insects.
Patio stones lifted and straightened after years of slowly sinking into the ground and making the patio look shabbier than it was. Stone edges were added to the patio. Old composters and BBQs disposed of and, in some cases, replaced after laying new patio stones.
Stepping stones placed strategically around the garden to help bring it all together.
When the work was completed, I could tell he was almost as pleased with the results as I was. There was a lot for him to be proud of here.

By working with a garden helper, those little things are easier to take car of and the garden can look its best for a longer period over the summer and fall.
Together, an old retired guy with a bad hip and a young man with a quiet disposition and a fierce work habit, got together to create something extremely important – a garden.
My vision, his muscle all came together in just a few weeks of work.
And I barely lifted a finger.
Truly a gift my wife and I will enjoy for years to come, and, who knows, maybe our Woodland garden inspired a young man to take a real interest in the environment, gardening and one day creating his own Woodland retreat some time in the future.
A young woman with expertise and a vision
Fast forward to this year and that hip I mentioned earlier was only getting worse. Garden work was not an option. Heck, walking from one end of the garden to the other proved too difficult some days.
That’s when My Garden Helper, Michelle, came into the picture. Michelle operates her own gardening business aimed at helping seniors stay in their homes longer by taking care of all the garden work that gets more and more difficult as age and old bones take over.
This was the year I needed someone like Michelle more than ever. After years of having to do all the work ourselves, my wife and I were able to find someone to make life just a little easier.
From her first visit, I knew we were going to make a great team. It wasn’t just her eagerness, but when we toured the garden and I explained my non-traditional approach to gardening, I could tell she got me and my vision of a garden for wildlife rather than a pretty picture of plants lined up in a row.
Not only did I see that she got my vision, but I knew quickly that I could benefit from her garden vision and experience.
From the back half of summer, through to fall, Michelle would drop by for about four hours every second week to help out. She split and moved plants, cleaned up a couple of wilder areas, planted bags and bags of bulbs that I can’t wait to see emerge this spring and helped with a little fall cleanup.
She’ll be back in spring to begin on some of our new projects and together we’ll create a garden to dream of.
If you have been putting off hiring some help, now is the perfect time to line up your Garden Helper for next season.
Gardening on a budget links
Ten money-saving tips for the weekend gardener
DIY Bark Butter feeder for Woodpeckers
DIY reflection pond for photography
Click & Grow is ideal for Native Plants from seed

Nature’s garden art (Five tips and DIY ideas)
Garden art comes in many forms in a Woodland Garden, from nature in the form of a moss-covered boulder or a fallen tree branch to a rusty buck standing watch over the garden. Garden art can be subtle or add a little whimsy to your outdoor space.

This late winter image shows how garden art like this Easter Island head, can add interest to the garden even in late winter when the garden is not at its best.
Mother nature provides its own artistic touch
If you are looking for garden art to enhance your woodland, look no further than Mother Nature – a mossy boulder, an elegant tree branch rising out from a bed of ferns. This is nature’s art at its finest.
If we take the time to really look carefully, nature often provides her art to us for free.
Fallen pine cones that “litter” the ground are works of art in themselves.
The moss-covered tree trunk works perfectly placed along the woodland pathway.
These are the gifts nature gives us if we look for them.
Look for natural materials that get better with age
But relying entirely on natural elements as art may not be enough to satisfy every gardener’s desire to inject a little sophistication and a touch of elegance into their woodland.
If you are looking to purchase artistic elements for your garden, consider investing in natural materials that age gracefully. Almost anything made with copper will improve with age.
That patina copper takes on with age is just too beautiful not to invest in if given the chance.
I think garden art works best when it is not only elegant and sophisticated, but serves a useful purpose.
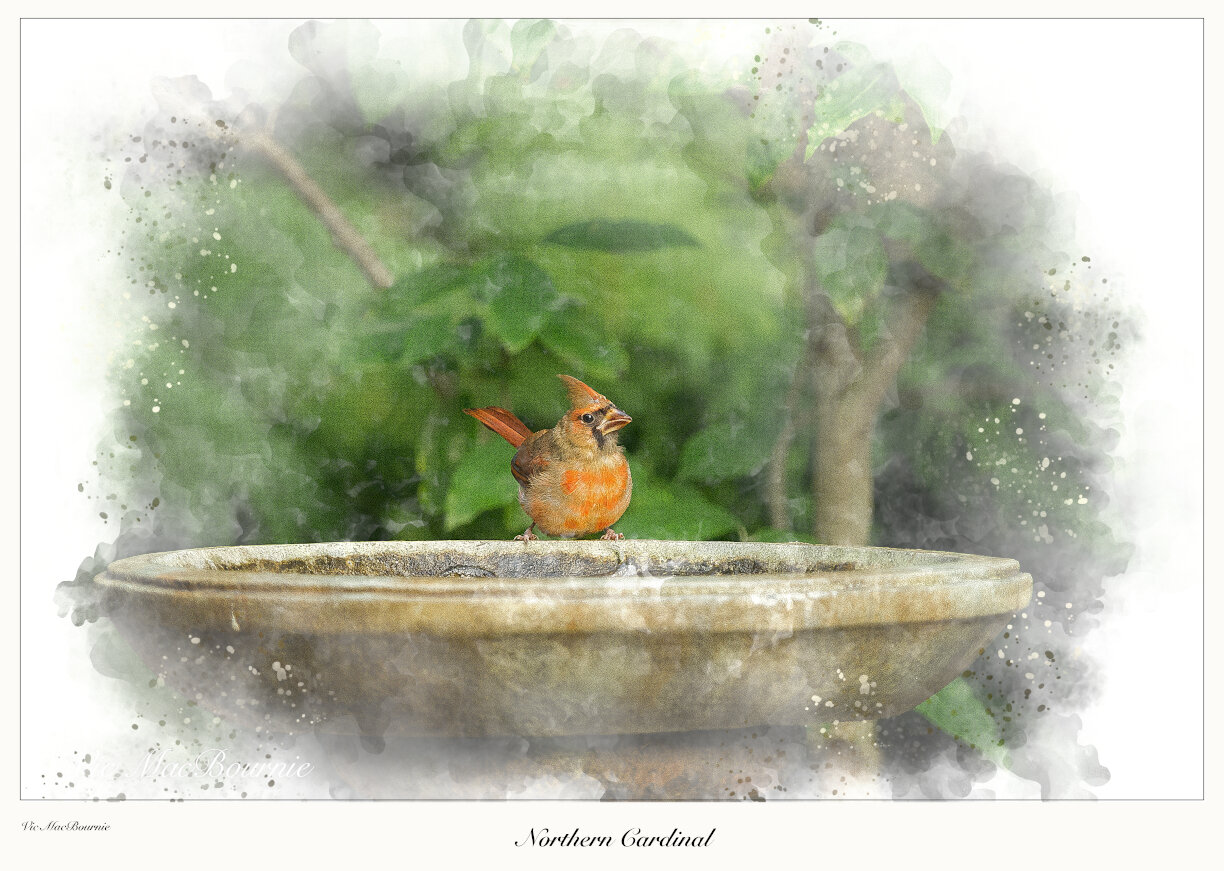
An elegant birdbath is itself a piece of garden art. But, when a cardinal is added to the scene, nature’s art truly shines.
Copper birdhouses and birdbaths ideal for the woodland
Birdhouses and birdbaths are perfect examples of garden objects that, if chosen well, can not only add sophistication to a corner of the garden, but attract our feathered friends – one of nature’s finest work. How can we resist a cardinal on a birdbath or a goldfinch at a beautiful feeder?
Many of the finest bird feeders are being made by artisans and can be found on places like Etsy. The copper-enhanced Baltimore Oriole and hummingbird feeders found on Etsy are just two examples of how artisans are recognizing the value of garden art and meeting our needs for a more sophisticated approach to garden art.
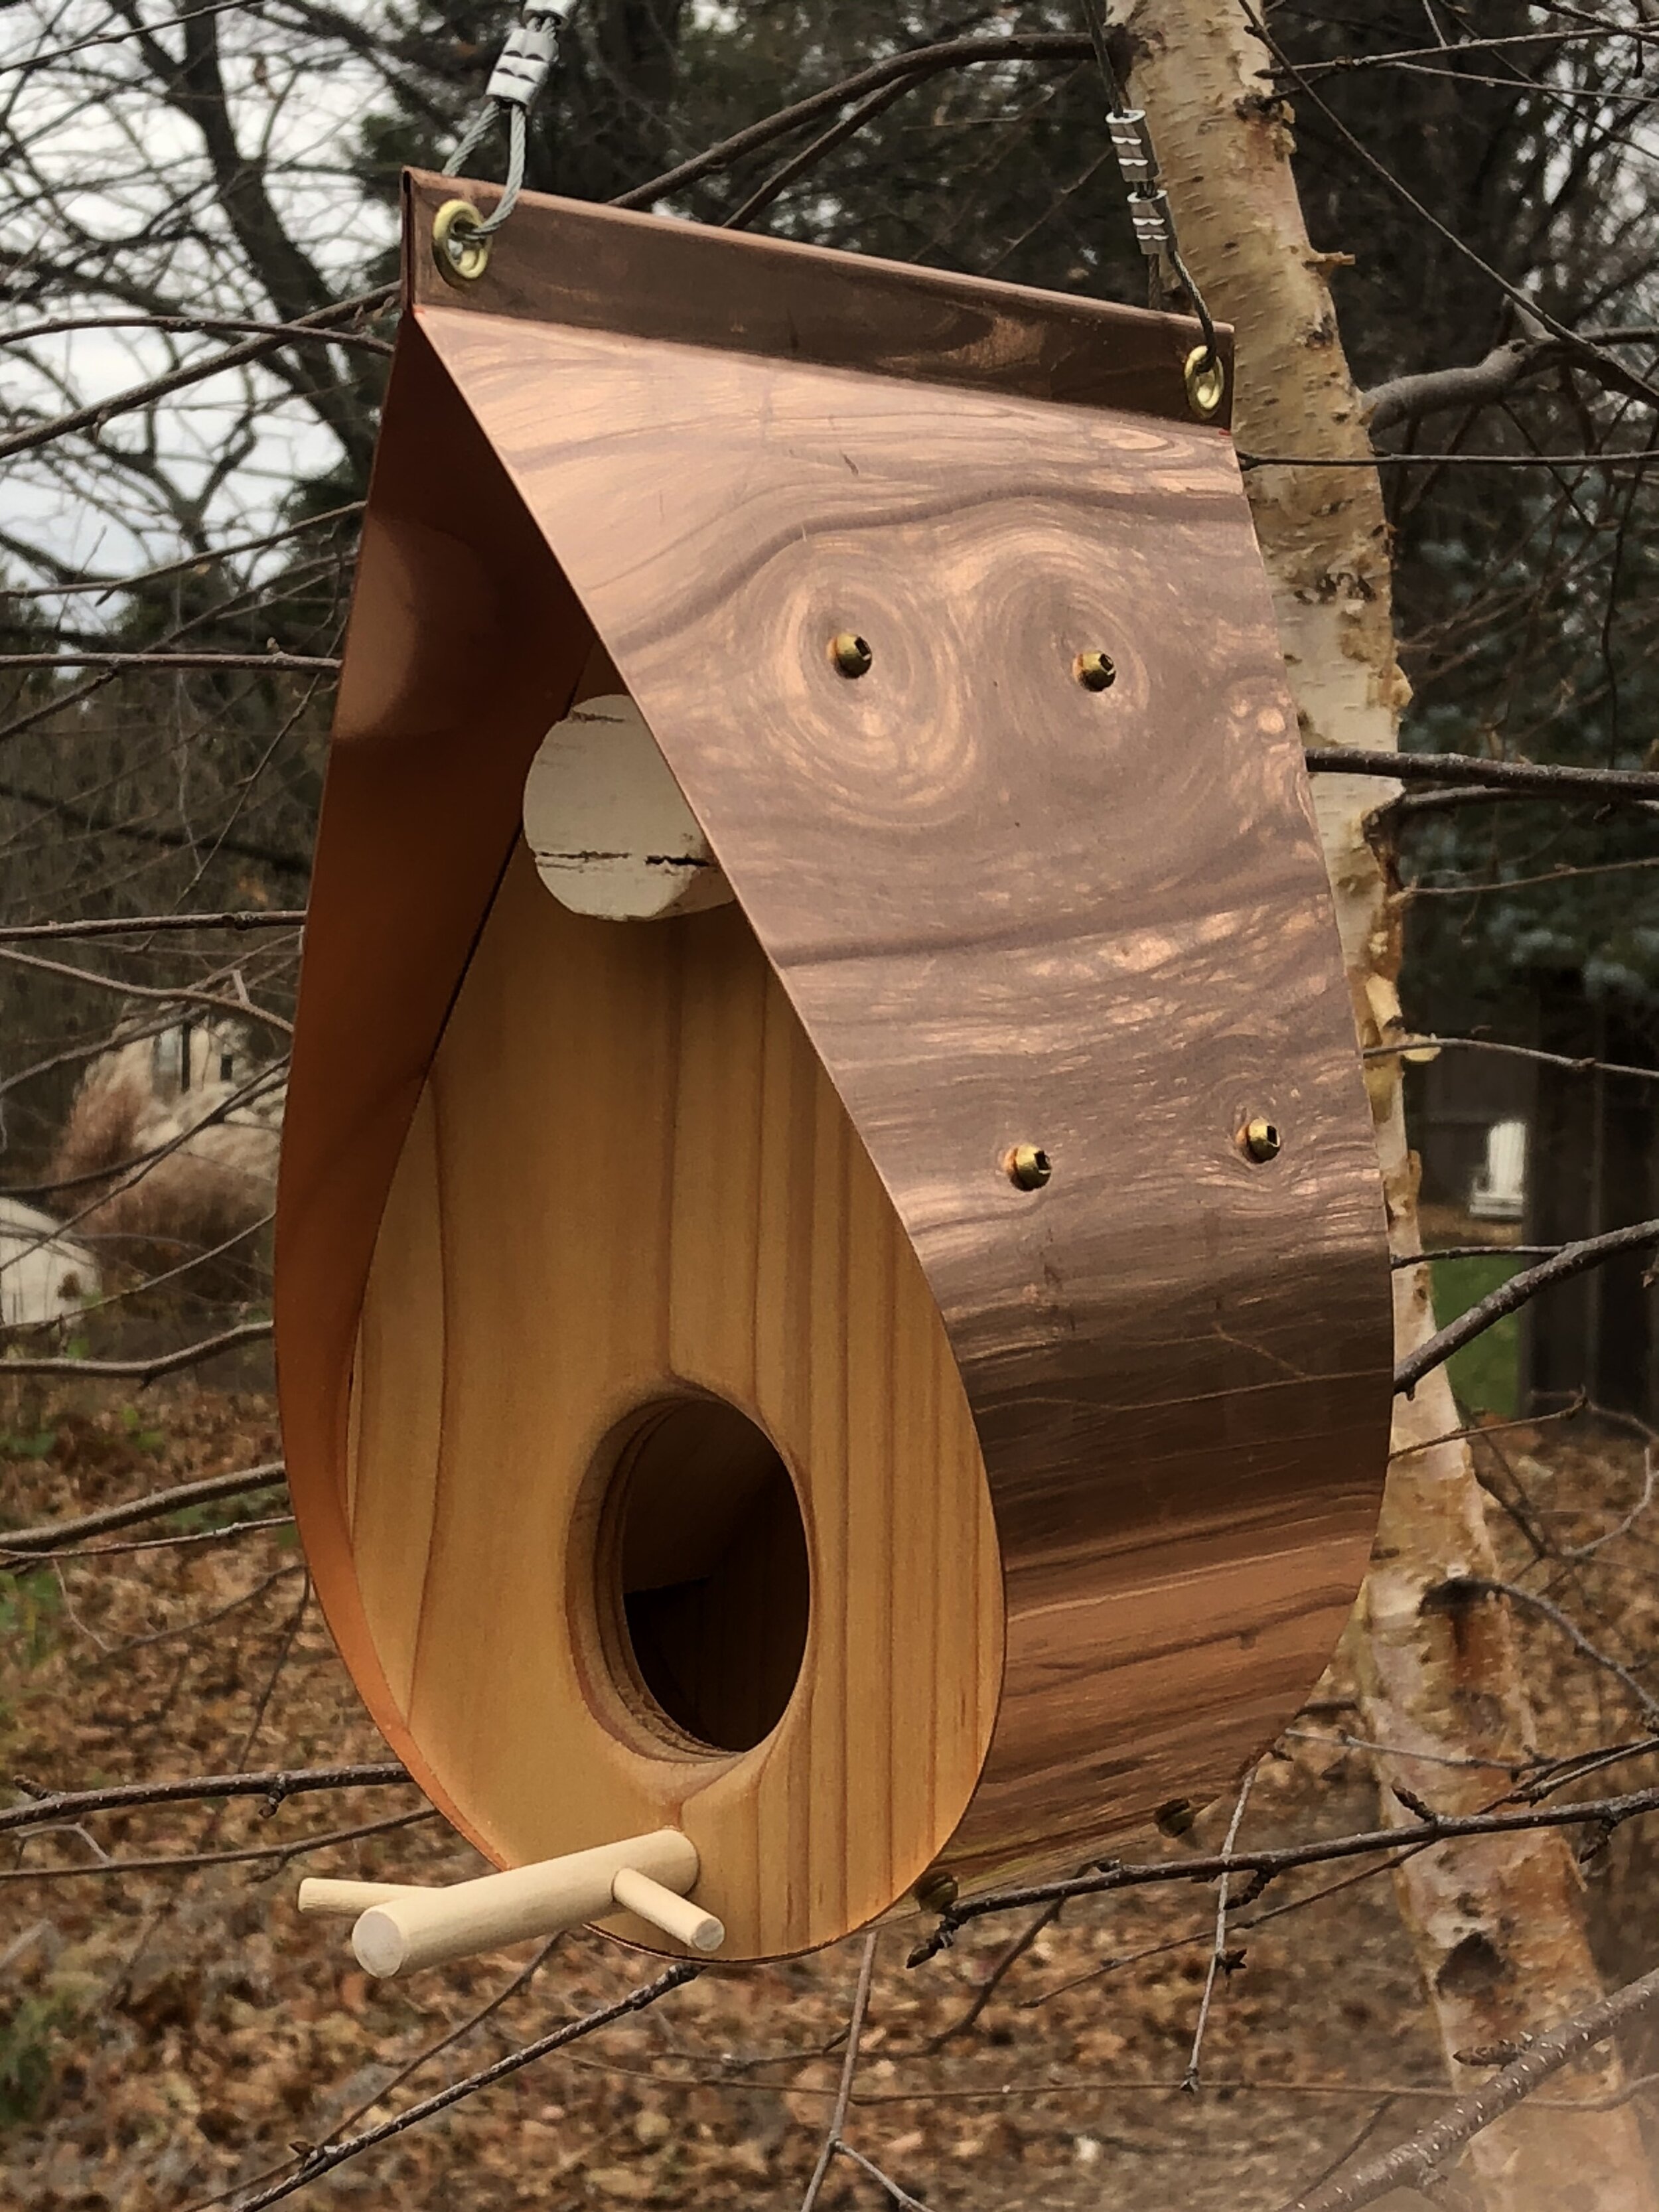
The ultimate bird feeder made with copper and cedar.
There was a time not too long ago when the only garden art available amounted to plywood cutouts of an elderly husband and wife from ‘behind’ out weeding in the garden. You remember them. Everyone had a good laugh at the couple’s expense.
But those times have changed.
I wrote a post about an architect couple from France who moved to Toronto and started a business combining their architectural skills and love of natural materials to create an exquisite bird feeder made from copper and cedar. (see picture) This feeder, although expensive, will provide a lifetime of joy and can be passed on to your children. It is available in new copper (as illustrated) or copper that has already been chemically aged with a lovely verdigras patina.
There are, of course, other bird feeders that are works of art, but don’t expect to find them at your discount store.
The copper and cedar bird feeder has aged nicely and taken on a lovely patina in only a few short years. And the birds love it too.
Although a finely aged concrete bird bath has been a staple in so many gardens, copper birdbaths not only look beautiful, they have natural microbial benefits that can make them a better choice.
I wrote about an elegant copper bird bath available at a fine garden and home boutique, but similar ones are available at many bird and home stores.
For more on growing your garden on a budget, check out my in-depth article here.
Use the iconic garden bench as art

The garden bench – especially an older, moss and lichen covered bench – can be a beautiful, yet useful addition to the garden.
Many years ago – certainly more than 20 years – I was desperate to get a garden bench. We lived in a typical subdivision and I was working diligently to create a mini woodland garden in the yard. The bench represented a destination along a simple path in this tiny garden. I wrote an earlier post on designing a woodland garden in a small yard and focused on the importance of a pathway in a small garden to help the viewer experience the garden as they walked through it.
Not only did our traditional garden bench provide a destination for the visitor, it offered the gardener a place to rest and enjoy the garden from a different perspective.
It’s another excellent example of how we can turn a utilitarian garden object into a wonderful piece of garden art.
Creating your own garden art is always the best approach.
Five tips and DIY ideas to add art to your backyard landscape
Look for naturally-aged garden objects such as birdbaths, birdhouses and garden benches that people are selling either at garage sales or at on-line sites such as Kijiji. I have picked up some of my favourite “art” pieces this way.
Use techniques (like the one described below) to age newer items rapidly so they better fit into your woodland setting
Most “artistic” elements are best discovered rather than presented for everyone to see. Consider using vegetation to hide your art, especially more whimsical pieces that, when unexpectedly discovered, will bring a smile to your visitor.
Purchase lasting pieces that incorporate natural materials like copper, cedar and even rusty steel that will add a rustic element to your garden.
Whenever possible, look to nature for its existing art forms. The beautifully coloured rock, an old cedar tree root, an elegant piece of driftwood. These are often found objects that add a natural element to the garden and be combined with bought items to create a lovely juxtaposition of old and new.
In those days garden art, even a nice garden bench was not easy to find. I did, however, find an inexpensive wooden bench at a discount department store and bought two. More than 20 years later they still form a focal point in our woodland garden. Never, however, do I actually sit on them. These inexpensive garden benches have taken on an incredible aged look, covered in lichen and mosses. After a spring rain, they more or less turn a soft green as the thick moss bursts to life from its more dormant state.
Our two benches now hold large black containers that are planted with colourful, hard-working annuals that create a hit of colour in the garden and draw attention to the beautiful wooden benches.
In another part of the garden, we have a small cement garden bench that is beginning its aging process. Letting it age naturally is a slow process. It might be time to help it along a little using the following method. It’s perfect for quickly aging cement containers, benches and garden statuary.
How to give concrete a mossy, aged patina
A quick search on the internet provides several alternatives to creating an aged look for new concrete. It works on statuary as well as concrete containers. Mother nature and time does most of the work naturally, but some simple steps help to hurry the effect along. What might take mother nature years to create, can be done in a few weeks or months by following these steps.
• Start by mixing a weak solution of water and black acrylic or water-based paint and apply it to the cement statuary. Let dry and apply a second or third coat. The effect is simply to give the statuary a ‘dirty’ look rather than the stark white one it often has when it is new.
• Mix yogurt or buttermilk in a bucket with equal amounts of water, compost or soil and even some manure. You can add in some crushed moss at this stage as well. The result should be a thick spreadable paste.
• Paint on the mixture to the cement statuary or container ensuring you cover all areas especially creases where moss would naturally take hold.
• Take a handful of moss and rub the surface of the concrete to spread the moss spores into the concrete.
• Finally, store the concrete statuary or container in a moist and shady spot to encourage the aging process and keep it moist for a number of weeks until you see the moss get established.
Our gardens need to be inspirational places and what better way to achieve that than to add a few pieces of garden art, whether they are nature’s art like the boulder or store-bought statuary.
Statuary is great addition for the woodland garden
Garden statuary has always been a part of the garden and works well as it ages, often taking on a mossy patina.
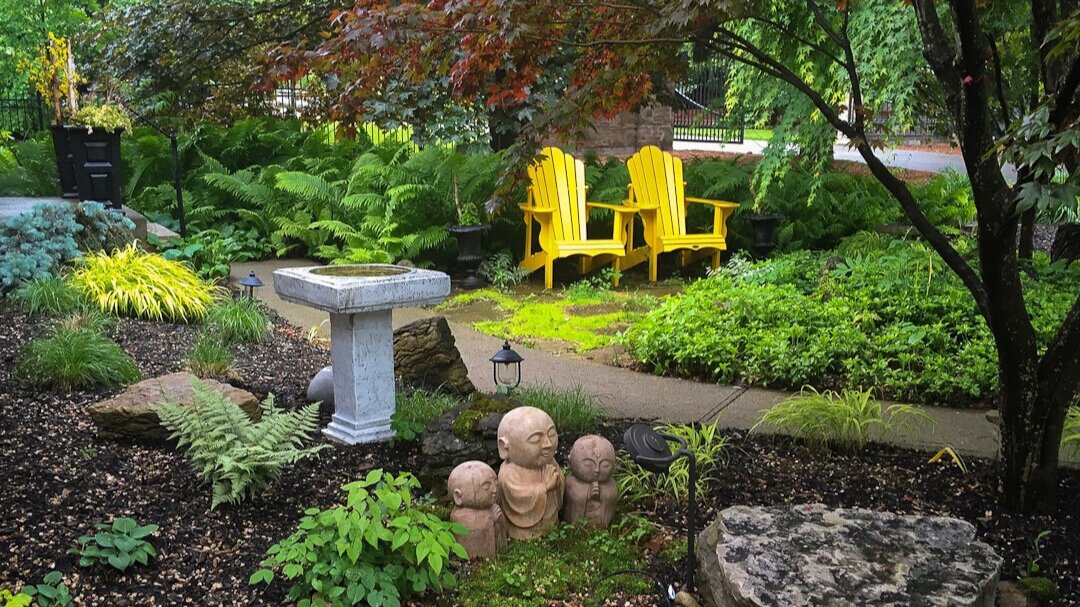
In my Japanese-inspired woodland garden, we have incorporated traditional Japanese statues praying together surrounded in a patch of moss. With a little encouragement, I am hoping they will take on a mossy appearance for a truly aged look.
In another area of the garden, a statue of Saint Francis, the patron saint of animals, would be a perfect addition.
We have a number of aging cement statues of small animals tucked away throughout the garden. For much of the growing season they are mostly hidden from view, tucked away in the vegetation. It would be easy to miss them on a walk through the garden.
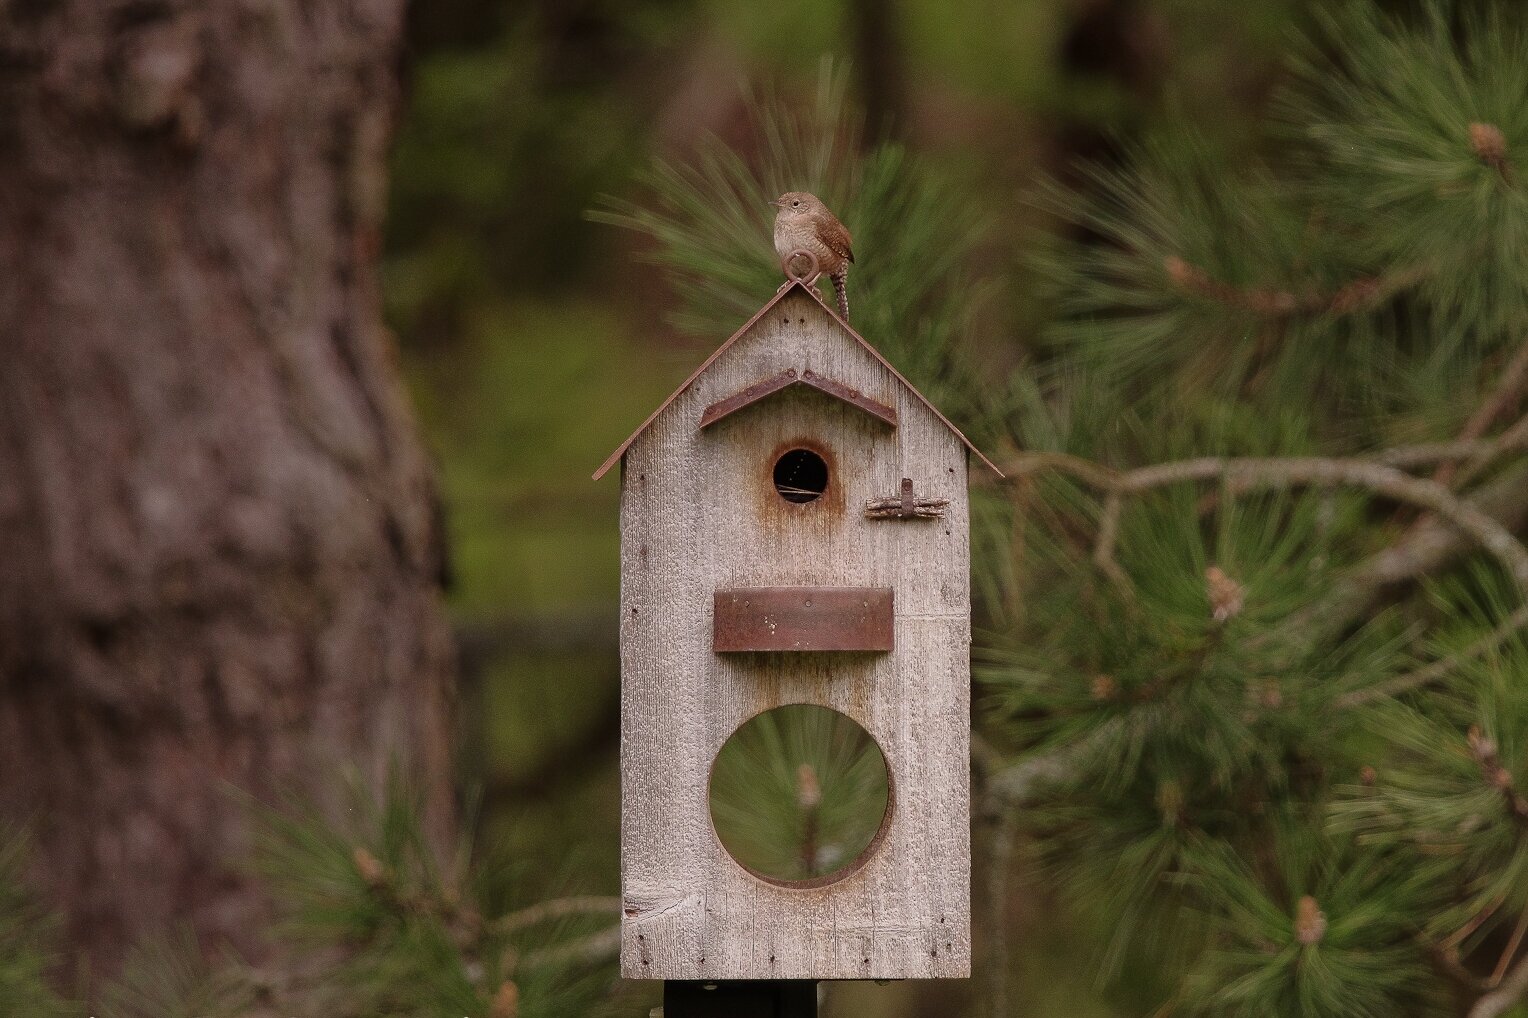
This rustic bird house and feeder fits the woodland theme and provides the ideal home for this Carolina wren.
In most woodland gardens, however, garden art should be more subtle. Consider a trip to your local nursery or rockery in the spring and scour their new moss-covered boulders to find the one that works perfectly in your woodland setting.
In another area, a gnarly branch that fell from a tree can serve as art. Place it somewhere in the garden where it’s natural beauty can age gracefully and work its way back into the soil while it provides homes for insects, small reptiles like red-backed salamanders and toads.
The moss-covered rock or twisted branch may also form the perfect natural landing spot to catch some great photographs of birds in your garden. Encourage moss and lichens to grow in the cracks but leave enough room to tuck in a few sunflower seeds to attract the birds to the exact spot you want to photograph them.
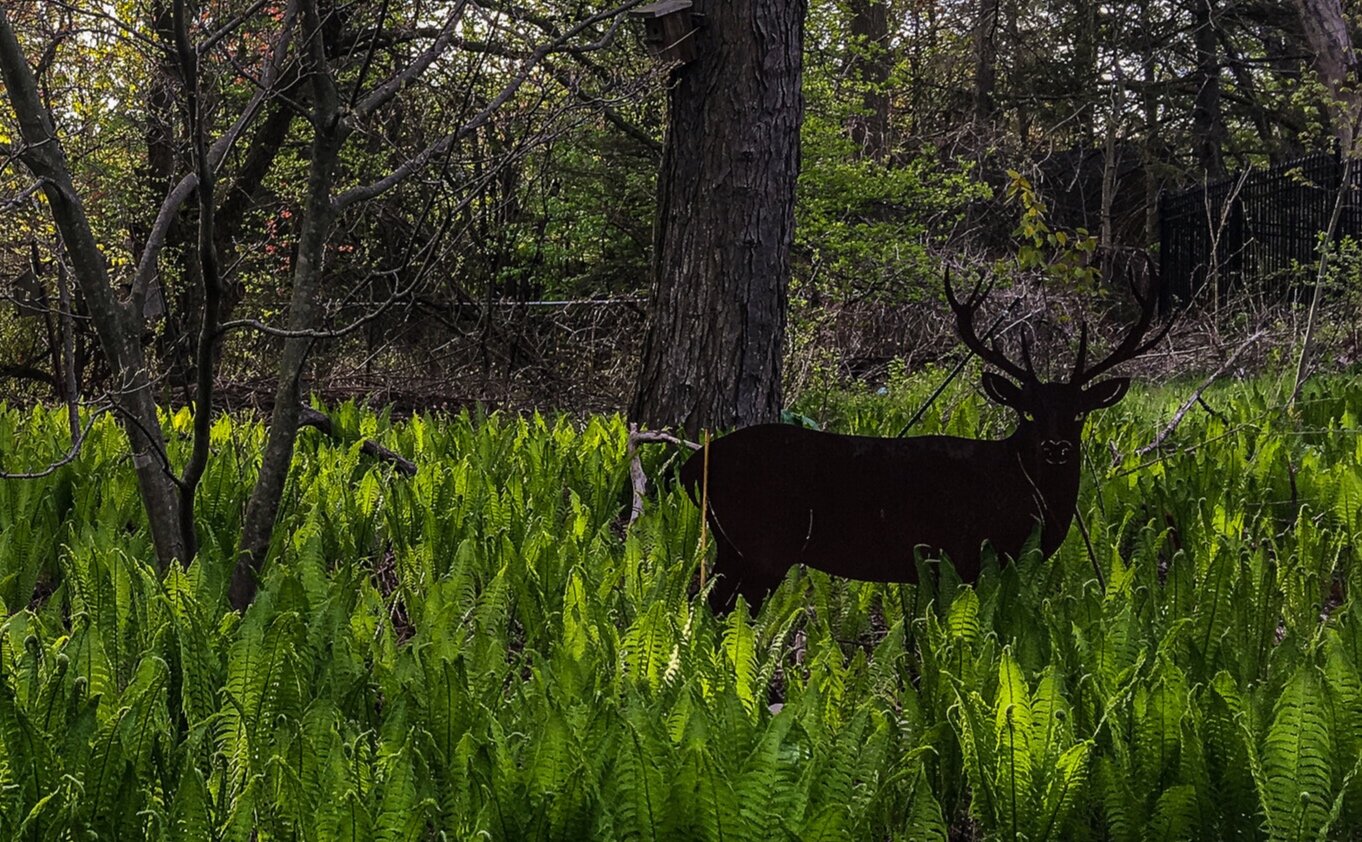
Rusty Buck standing guard in the ferns ties in to the rustic theme of the garden art in this section of the garden.
The rusty buck as garden art
Probably our favourite piece of garden art my wife and I purchased was from a boutique garden store we noticed on a day-outing. The store was tucked away in a small Mennonite community about an hour and a half drive from our home. We both noticed it as we drove by and immediately turned around to check it out. It’s another example of a piece that gets better with age. Now every time we see our rusty buck tucked in the ferns, it brings a smile to our face. Not sure what the native male deer think when they see our rusty buck, but it’s been knocked over on the ground in the morning more than once. Could be the wind, could be a jealous buck. We may never know.
Gardening on a budget links
Ten money-saving tips for the weekend gardener
DIY Bark Butter feeder for Woodpeckers
DIY reflection pond for photography
Click & Grow is ideal for Native Plants from seed

DIY: Turn a birdbath into a succulent planter dish (step by step guide)
This DIY succulent hummingbird feeder is a fun gardening idea that is easy to build and beautiful to look at.
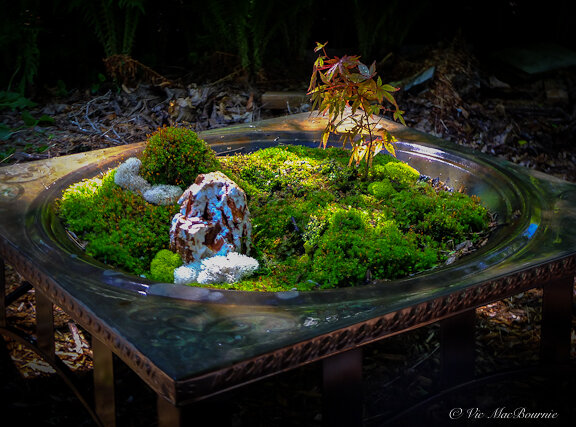
How to make a succulent dish garden (with a twist)
Here is a Do-it-yourself project that is both easy to create and results in a lovely succulent dish garden.
I’ve added a little twist by creating a mini photo studio with the addition of a small hummingbird feeder. All you need to complete the project is an old bird bath, some cactus soil, crushed clay stone and a small hummingbird feeder.
The project can be completed in less than an hour and will surely brighten up your backyard and add a great spot to photograph hummingbirds coming to your garden.
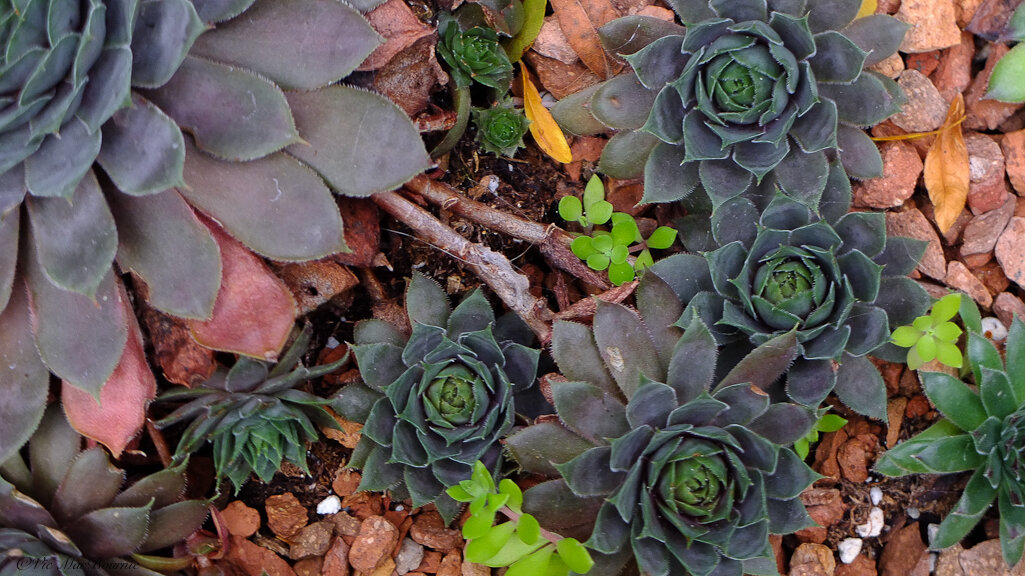
Succulents have certainly become popular recently. Here I have used a series of hens and chicks to make the project more hardy to stand up to our cold winters.
The popularity of succulents, however, is for good reason. Today’s succulents are outstanding. Large, small, colourful, tiny, easy to grow and even easier to maintain.
After all, the plants really don’t need a lot of care. Plant them in gritty, well-draining soil mixed with a little stone or pea gravel. Water them in extreme drought if necessary otherwise, just let them take care of themselves.
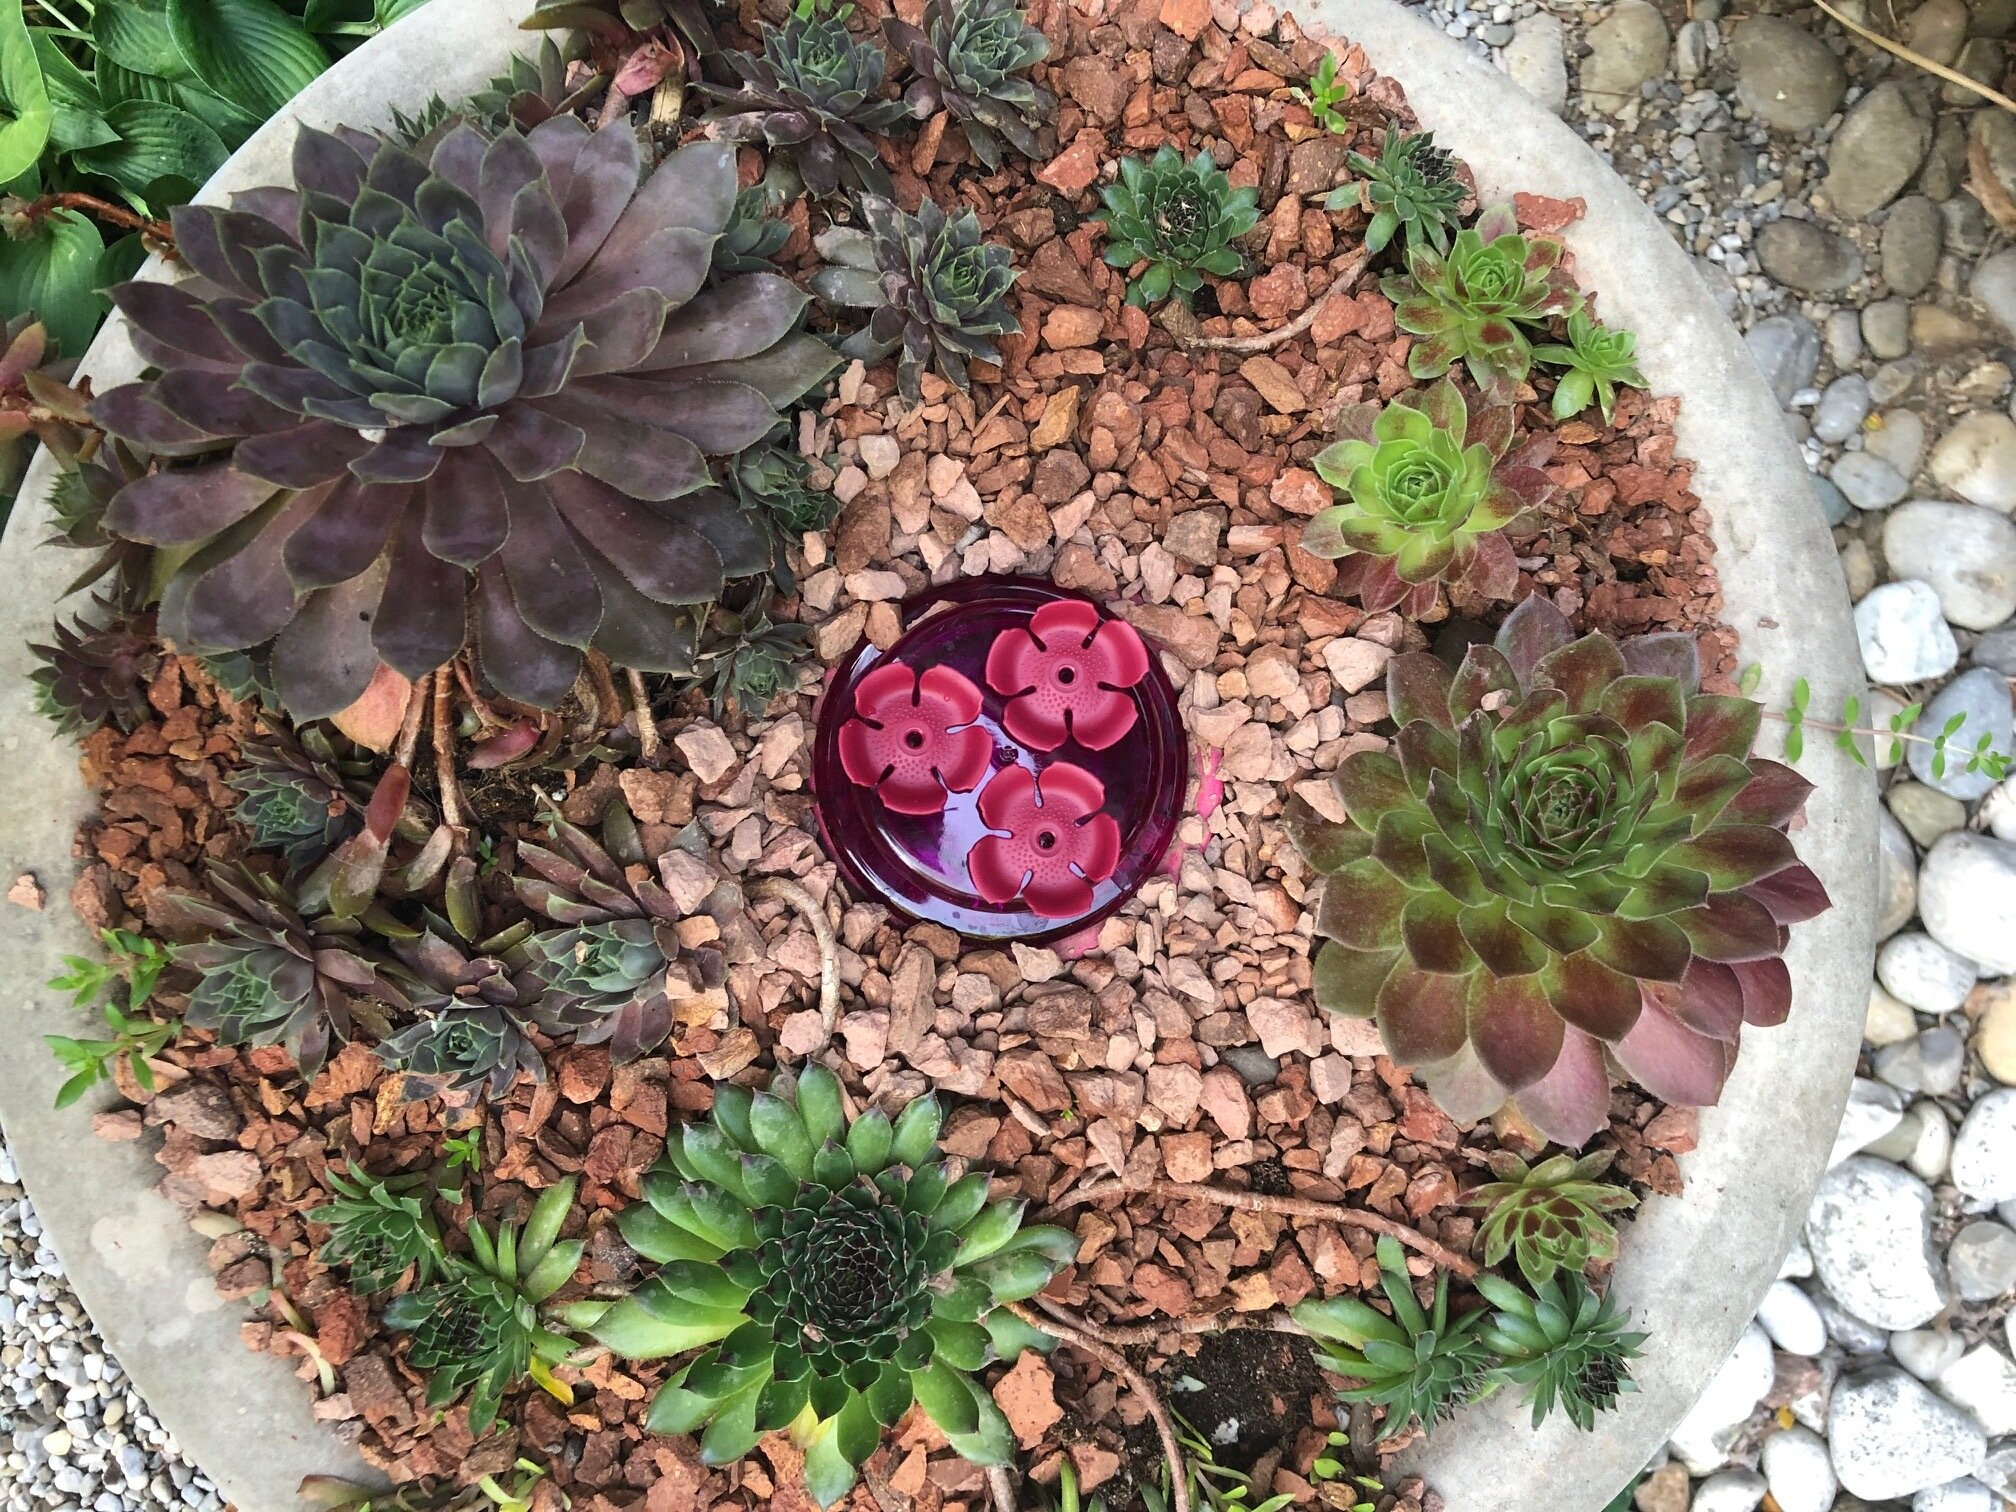
An old bird bath converted to a succulent planter with a twist – a Perky-Pet handhold/tabletop hummingbird feeder is buried in the stone. The set-up was designed as a potential stage for hummingbird photography.
So with all this in mind, and with an old leaky bird bath sitting empty in the yard, I figured it was a good time to create one of these popular planters.
We’ve had the planter for several years and, besides replacing some of the succulents last year after a brutally cold winter, it has become a focal point along our pathway. I can’t say that it has attracted many hummingbirds over its time, but I’ll keep experimenting with different hummingbird feeders to find one that keeps them coming back.
This small round hummingbird feeder fits the succulent dish perfectly.
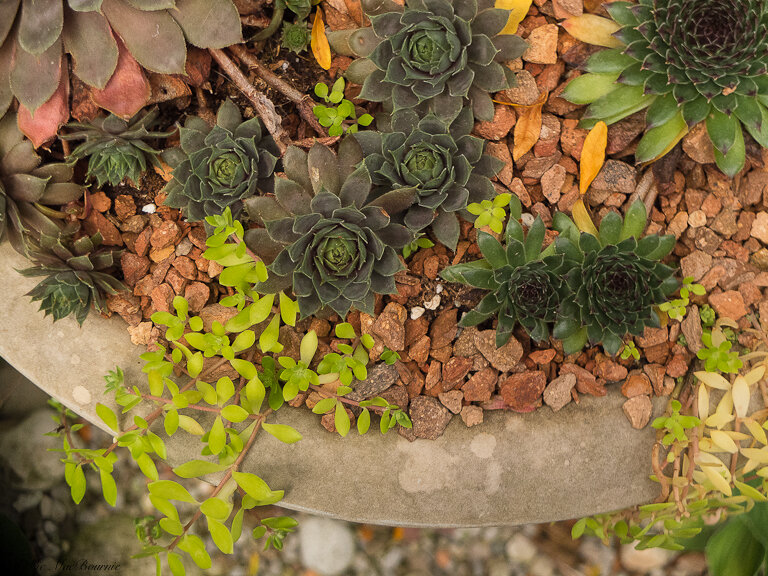
A more detailed shot shows the vibrant colours of the stone, succulents in the DIY birdbath conversion.
I happened to have the small hummingbird feeder designed to teach the tiny birds to eat out of your hand.
Converting birdbath into succulent planter
The project was simple and involved just a few items that I had around the house, and an electric drill.
1) First, I drilled about five holes through the bottom of the fibreglass bird bath to allow good drainage.
2) Then, add pea gravel in the middle area where the hummingbird feeder sits.
3) Next, surround the pea gravel with store-bought cactus soil and mix it with pea gravel to keep it loose and well draining.
4) Now it’s time to plant the succulents around the edges of the bird bath, mixing large and small.
5) I added some sedum that was already growing in the garden
6) I also had a curved wire that looked perfect as a hummingbird resting stop, so that was placed in the container but far enough from the feeder not to interfere with any hummingbirds that might be feeding while in flight.
7) I filled the little hummingbird feeder and placed it in the middle of the succulent container.
8) Finally, red chipped clay stone was placed over the soil as a mulch and a nice clean backdrop for the succulents. The stones help to keep water from splashing up dirt onto the succulents and gives the whole container a more desert feel.

How to care for a succulent dish (birdbath) garden
Caring for a succulent dish – in this case a birdbath – is simple. Succulents do not need a lot of water. In fact, too much water would be the main reason for their demise.
Think desert landscape and you’ll know how much you’ll need to water your dish. I rarely water our succulent dish. Instead, allowing our summer rains to get the job done with the occasional watering works well.
Providing good drainage is probably the most important step you could do to ensure the survival of the plants.
Ours is planted is an area close to the house that gets mostly morning sun into early afternoon.
For more on gardening on a budget, check out my in-depth article here.
Gardening on a budget links
Ten money-saving tips for the weekend gardener
DIY Bark Butter feeder for Woodpeckers
DIY reflection pond for photography
Click & Grow is ideal for Native Plants from seed
Remove your turf and save money
Hiring students to get your garden in shape
If you are interested in backyard birds, please consider signing up for my backyard birds newsletter. The sign-up page is at the bottom of my homepage. Not only will the newsletter provide in-depth articles on attracting, feeding and photographing backyard birds, I am also working with local artisans to provide discounts on incredible bird-related feeders, houses and other goodies backyard birders will love. In addition there will be regular giveaways , including gardening books and birding items.
This page contains affiliate links. If you purchase a product through one of them, I will receive a commission (at no additional cost to you) I try to only endorse products I have either used, have complete confidence in, or have experience with the manufacturer.

Is battery power better than gas in the garden?
Is it time to switch to battery-powered garden tools? Certainly there are good reasons to purchase battery-operated lawn mowers, chainsaws, trimmers and leaf blowers. Rechargeable batteries have come a long way and their electric motors have become more powerful making these tools effective choices for gardeners.
Battery-powered lawn mower makes grass cutting a joy
I figured it was time to give nature and my neighbours a break from the noise and fumes that have dominated our neighbourhood for too many years. I only wish more of them would do the same for me.
The time has come to replace gas-powered garden tools with the more eco-friendly battery-powered models. I have been purchasing battery-powered garden equipment for a number of years now and could not be happier with the results.
Battery power is the way to go. Get rid of the gas lawn mower, leaf blower and even the chainsaw and adopt the more eco-friendly and neighbourly battery-powered equivalents. For those looking to cut costs, The battery option will even prove more budget friendly for average gardeners over the long term. It will certainly make the tasks more enjoyable.
The sound of chainsaws hacking away at neighbourhood trees has always made me uncomfortable. Despite that, one of my most recent purchases is one of the new battery-powered chainsaws and I love it.
But it’s a chainsaw my neighbours have probably never heard, and, unless they are standing beside me watching me trim dead branches, they probably never will.
They certainly won’t be forced into their homes just to escape the noise of the chainsaw like so many of us are forced into when neighbours fire up their gas-powered machines.
The new battery-powered chainsaw barely disturbs the silence of the neighbourhood.
If you have decided to buy a chainsaw for garden chores, do yourself, your neighbours and most importantly the environment a favour and consider one of the newer battery-powered, eco-friendly models. They have more power than you will likely ever need, startup is a mere click of a button and they are quiet and environmental friendly.

My Ryobi battery-powered chainsaw cut through this large branch in seconds.
The days of the gas-powered behemoths are long gone. Not only are they loud and obnoxious, their two-stroke engines kick out more pollution than most of today’s cars.
For more suggestions and some of my favourite garden things, be sure to check out my Favourite Things post.
If you have not checked out the latest battery-powered garden tools you owe it to yourself (and your neighbours) to give them a chance. Over the past few years, I have said goodbye to every gas-powered garden tool in the shed and replaced them with battery-powered models.
And I have never looked back.
Tucked away in the basement is a charging station for the batteries and I have to say I feel a lot better about a charging station in the basement than I do about a couple tanks of gas in my shed.
The new electric tools have never let me down and I’m sure the neighbours appreciate them almost as much as I do. In fact, my immediate neighbour has joined me in the conversion from gas- to battery-powered garden equipment.
I think I sold him on it when I said I could cut my grass at 5 a.m. and the mower is so quiet that not a single neighbour would know I was cutting the grass. (Not that I would ever do that.) He asked to borrow my Ryobi battery-powered mower to cut his grass and then immediately went out and purchased one of his own. And, unlike me, he is very particular about his tools and his lawn.

The basement battery charging station (a small Ikea work desk) for our growing number of battery-powered garden tools.
Battery-powered lawn mower convinced me to go gasless
My first battery-powered purchase was a lawnmower. After years of battling with gas lawnmowers that required mixing oil and gas every time I wanted to cut the grass, or ones that wouldn’t start after a winter of storage, I began researching the pros and cons of battery-powered machines.
It didn’t take long to realize the benefits of battery-powered mowers.
• They are quieter than traditional mowers
• Better for the environment
• They are extremely light, easy to manipulate
• No gasoline to store in the shed
• No sparkplugs to change
• No fuel filters to change regularly
• Much cheaper to operate over the long term
There are a few drawbacks to battery-operated models
• Batteries may have to be replaced over the years, although I have used ours for four years without a problem.
• In high, damp grass the mower can bog down and throw a circuit switch which shuts it down. A simple click of a button puts it back into production, much like flipping the circuit breaker in your home.
Depending on the brand of mower you purchase, you can expect about 10 years of service out of it and about five years life on the removable batteries. The average battery should give you about one hour’s worth of power or enough juice to cut half an acre of grass.
Ryobi, STIHL offer complete lines of battery-powered tools
We purchased a battery-powered Ryobi model that has worked flawlessly. It came with two rechargeable batteries that have always been enough to cut the turf on our half-acre lot. Since we removed most of the grass on the property, a single battery is more than enough to get the job done.
Ryobi is just one of many respected companies that are offering entire lines of battery-operated garden products. Many of the tools conveniently share the same batteries.
In the Ryobi line, for example, they offer a hedge trimmer, string trimmer, chain saw, pole saw, several mowers and a snow blower just to name a few.
My neighbour chose to go with the excellent-quality STIHL line of battery-operated cordless tools.
STIHL says their “36 V cordless machines combine innovative motor and battery technology with first-class mechanical engineering to produce a brushless, electronically controlled electric motor.” STIHL explains that their “motor is extremely energy efficient … and the power from the lithium-ion battery packs is optimized to achieve a high degree of efficiency and enhance the performance of the machine.
And, like many other systems, STIHL’s powerful lithium-ion battery pack is compatible with all their cordless machines.
The success of the lawnmower resulted in the purchase of a Ryobi grass trimmer and leaf blower that operate on the same battery.
I have never been a huge fan of noisey leaf blowers. Unfortunately, leaf blowers have earned their bad reputations from the lawn companies that come into neighbourhoods armed with massive machines, so large and loud that they are forced to carry them on their backs.
Battery-powered models are much quieter and, if we all started using them, peace might return to our subdivisions.
So, when I decided it was time to make the jump to a chainsaw, the Ryobi model was a natural choice.
The battery-powered chainsaw shares the same benefits that the battery-powered lawn mower enjoys: Push button start, quiet, environmentally friendly, no gas\oil mixing. (Did I say no rip chord to exhaust you before you even begin your task.)
Our battery-powered chainsaw has made many difficult jobs around the garden much easier. This week I used it to remove a massive branch from our Linden tree that was crowding out one of our Cornus Kousa dogwoods. It also made quick work of pruning some lower branches in a maple and tulip tree as well as some wild grape vines as thick as my arm.
The chainsaw, although not used that often, has easily proven its worth around the garden.
I also use it to create brush piles on the property. Everything that gets cut stays on the property to become habitat for birds, mammals and reptiles.
The chainsaw also comes in handy to cut branches to be used as suet feeders around the property.
Obviously any chainsaw can be dangerous so proper cutting techniques and precautions need to be followed.
Oh, I should add that the success of the lawn mower, chainsaw and other power tools resulted in our purchase of a battery-powered snow blower that may lack the power of today’s huge gas-powered blowers that come out once or twice a year, but it gets the job done and doesn’t wake the neighbours.
As an affiliate marketer with Amazon or other marketing companies, I earn money from qualifying purchases.

Ten Money-saving tips for the weekend gardener
Ten tips to create your dream backyard on a budget with both a long- and short-term approach. One of the keys is to create a garden landscape design that can be both built and maintained in small increments on weekends.
Weekend Gardener: Take a long- and short-term approach to saving money
Let’s face it, this hobby of ours can get expensive unless we are constantly looking for ways to save money. Rather than spending our weekends at the nursery buying more and more plants, consider staying home creating more plants through division and seed planting, and finishing that landscaping project that has been staring you in the face for so long.
Becoming a weekend warrior is the answer for so many of us with full-time jobs. It’s certainly one of the keys to long- and short-term saving when it comes to building our dream gardens over time. Set aside a few weekends in the spring, during the cooler months to tackle the bigger landscape-related jobs, and then take advantage of the remaining weekends to continue to get smaller jobs done. Before you know it, your garden design will take shape, you’ll be gathering more and more confidence in the garden, and you will be using the weekends to save money rather than spend it.
For more money-saving tips, be sure to check out my in-depth article on creating a buget-friendly garden.
The good news is that gardening in itself can be a money-saving venture, especially if you add plenty of veggies, fruits and nuts to your landscape plans.

The above picture shows the result of hard work and the benefit of time. I hired a local student to help with a lot of the heavy lifting. The photo below was the beginning of the project that involved installing a solar powered bubbling rock and a dry river bed, surrounded by three clump birch trees that creates the feeling of a forest glade.
But to really cash in, we need to make long- and short-term approaches to saving money a top priority. Saving money in the short term, means we can have more of what we want in the long term, and get us to our desired goal faster and for less money.
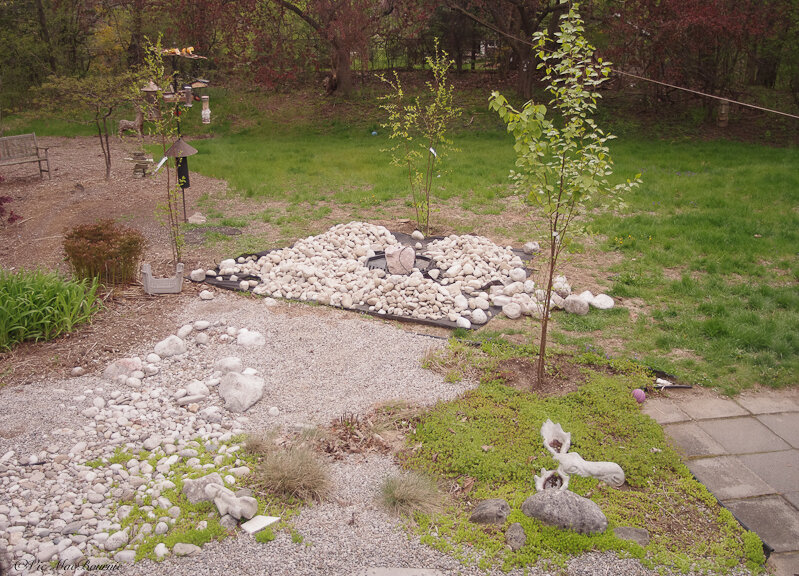
The beginnings of a design that finally pulled this rather unkept area together with the installation of a dry river bed below a birch grove. The main picture above shows how a few years of growth has transformed this area into a positive rather than a negative.

Several years later the small birch trees have grown to more mature trees and their upper storeys are beginning to form a ceiling over the bubbling rock.
Short-term saving, including starting plants from seed, dividing perennials, taking advantage of spring and fall sales and buying products used on line, can add up quickly to big savings.
Long-term savings requires a plan to complete major landscape projects with a view of saving money through the use of our own hard work and learned skills and the value of time. That’s where working the weekends really begins to shine.
Let’s take a look at how a short-term savings plan can work with a real-world example.
If I plan a garden bed with three drifts of three perennials, I can get to that end in several ways.
Start the plants from seeds (definitely the most frugal method.)
Purchase one plant of each variety leaving lots of room in the garden bed to add the remaining plants as the original plants are divided.
Purchase all nine plants for immediate impact. (certainly the most expensive option.)
If growing plants from seeds appeals to you, this is by far the best short-term saving choice potentially costing you almost nothing.
My choice would be to purchase one plant of each with the expectation of future divisions. By purchasing one perennial of each variety and knowing that we can divide them in a year into two or three plants, we can reach our goal in a couple of years. In the end, we save 2/3 in the short term to achieve the same result in the long term.
So, in the short term we save money by using time and smart gardening techniques to get to our desired result. By taking this approach over and over again with smaller projects we create substantial long-term savings.
“Be realistic about what you attempt to accomplish each season. If you are overly ambitious and attempt to renovate your entire property all at once, as we unwisely began to do at our present house, you’ll probably never get anything completed.”
Don’t overlook time as one of the biggest factors in the creation of long-term value in our landscapes.
Consider the potential savings acquired over time just by staying home to enjoy and work on our gardens rather than paying for expensive holiday resorts that offer little more than what could exist in our own backyards over time.
If being a weekend warrior pays high dividends, using a week or two worth of vacation to tackle a large problem is like winning the pot of gold and the end of the rainbow.
A staycation used to be a bad thing. Today, it’s a term used to describe those lucky enough to have a backyard they enjoy. I’m sure the pandemic has had a lot to do with it, but more and more of us are happy to stay home and enjoy the fruits of our labour.
If you love your garden, I’m guessing, you will much rather stay home with a good glass of wine in the backyard watching the birds than spend thousands of dollars to go to a resort to sip pricey drinks around a noisy pool.
Call my wife and I cheap, but our favourite vacation spot is our backyard.
A cardinal takes advantage of the cool water from the solar-powered bubbling rock. The bubbling rock setup was another Kijiji find that helped me to keep the costs of the project on a tight budget.
These long-term goals are made possible by taking advantage of short-term money-saving tips that make it possible to create the very best backyard experience possible at a price we can afford.
Five long-term money saving tips for gardeners
Buy your trees and shrubs as immature specimens and use time to let them mature into large, highly-valued investments. If you are young, and time is on your side, consider planting bare root specimens for mere pennies. Whips of many trees can be purchased for peanuts. Not all trees need to be planted as immature specimens. Key trees in your landscape can be purchased as larger specimens, while understory trees and those on the edge of your woodland can be grown from bare root and whips.
Learn to do your own landscaping whenever possible. Use the winter months to read books, blogs and magazines not only to get ideas but to learn how other gardeners create your favourite spaces. One of the biggest mistakes homeowners make is to think they need to hire professionals to install huge concrete patios or large decks. The sheer size of these projects is enough to scare off the most ambitious DIY gardeners. It is usually much better, and quite frankly aesthetically more pleasing, to create smaller, more intimate settings that are more manageable and certainly easier to create on a budget. Replace the thought of installing a bright white concrete patio with a much more sophisticated rough-cut flagstone patio set in screenings and surrounded by a couple of large rocks for seating. Unlike the concrete that will not age well, eventually begin to crack and have to be replaced in time, the flagstone patio will take on a beautiful patina, moss may begin growing in the cracks between the pavers and any shifting over time can be easily corrected in spring. And, most important, you can do this yourself.
Consider hiring a student, a young family member or a neighbourhood teenager to help you with a lot of the heavy lifting. When we were young, my wife and I did all of the work ourselves. Today, hiring a student allows me to use the skills I have developed, after completing so many of my own projects, to guide them in more simple tasks. (See earlier article about hiring students)
Break down your landscaping into weekend projects. Many years ago I picked up a book by Susan A. Roth called The Weekend Garden Guide, Work-saving ways to a Beautiful Backyard. In the book she explores ways to design easier yards and lawns, creating low-maintenance flower gardens and the creation of easy-care natural landscapes like woodland and wildflower gardens in such a way that most of the work including maintenance can be completed over one or two weekends. If her book did nothing, it pointed me in the direction of learning to downsize major tasks and attempt to break them down into weekend DIY projects. “Homemade versions of grassy meadows and fields of flowers, woodland wildflower walks, gurgling streams, and rough-and-tumble- mountain peaks fall within the reach of the imaginative gardener,” she explains in the book. “Many of these naturalistic landscapes or gardens, especially woodland and meadow gardens, turn out to be ideal for weekend gardeners, because the sites require little maintenance. After all, whoever heard of a tidy woodland? Mother Nature doesn’t sweep up, so why should you?”
Create your own long- and short-term landscape plan or hire a landscape designer to do it for you. If you have a genuine interest in creating the garden of your dreams, then it is likely that creating a plan (or several smaller plans) is entirely within your capabilities of completing over time. It’s possible that your backyard can be divided into several smaller zones or rooms that can be tackled one at a time. Remember to look at your yard as a long series of weekend projects over many years.
For many of us, however, this process is overwhelming or the project is just too large to tackle on our own. In these cases it can be money well spent to find a professional who truly understands your vision and can put it down on paper to help you create the garden over time.
If you are dealing with a highly complex site, or your dreams are so grandiose, then it is probably a wise investment to hire an expert to help you solve these problems.
If, for example, your dream is to have a natural stream winding down into a massive pond, this might be something you need to hire an expert to design and create. That does not mean that you cannot design the rest of the property on your own and leave this area until you are able to tackle it in the future. By following a budget-friendly approach in the years leading up to this expensive installation, the money saved will enable you to hire a company to create the pond, stream, waterfall of your dreams.
Take it Slow
As Ms Roth explains in her book The Weekend Garden Guide: “Don’t attempt too much at once. Renovate your yard slowly. That’s the most valuable, cautionary word of advice you can follow, and it comes from someone who ought to know (me). Be realistic about what you attempt to accomplish each season. If you are overly ambitious and attempt to renovate your entire property all at once, as we unwisely began to do at our present house, you’ll probably never get anything completed. Make a long-range plan and space out your projects over several years, if necessary. The work will wait – it (unfortunately) won’t go away!”
“Many of these naturalistic landscapes or gardens, especially woodland and meadow gardens, turn out to be ideal for weekend gardeners, because the sites require little maintenance.”
Five short-term budget friendly tips for gardeners
If you are just starting out, consider investing in high quality tools, especially the ones you know will be used extensively during your weekend projects. Shovels, picks, a wheelbarrow (or even better and garden cart see my earlier story here) will be in regular use.
Search in places like Kijiji and other used outlets for good-quality landscaping tools. There is no need to spend hard-earned money on brand new expensive shovels, axes, and gardening utensils. Not only are many of these items available on the used market, but many are older, higher quality products that should last you a lifetime.
Check with parents, friends or relatives and ask if they have any good garden tools they are no longer using. Chances are their sheds are full of rakes and shovels they are not using. Electric or gas-powered garden tools are also available on many on-line outlets. Try to always buy high quality because there is a good chance these tools will last a lifetime and save you money over the long term. Take care of the tools, keep them sharp and rust-free for best performance.
Plan now to get rid of as much, if not all your grass, as soon as possible. There is no better way to throw away money than to begin to obsess over a non-native monoculture groundcover that is estimated to suck up $500-$600 a year just on water alone. Add in hundreds of dollars a year more for fertilizer and whatever killers lawn worshippers feel they need to spread over their properties.
Then there are the lawn mowers, rollers, aerators, lawn replacements, lawn companies…. It never ends. Trust me, eliminate what you can and save yourself a lot of money over the long term. (Check out my full story here.) Consider planting native ground covers in place of the grass. They will require less care, less chemicals and help local wildlife that have evolved with these plants to survive in our gardens.
Grow your perennials and annuals from seed if possible. You don’t need to invest in all the lighting and other accoutrements if it’s not something you are really interested in doing. There are many seeds you can sow directly into the ground. Some perennials and annuals are self-seeding which can make the whole process even easier. Learn to recognize the seedlings as they emerge and transfer them to other parts of the garden once they are large enough to be moved.
Pay attention to what other gardeners are growing in the area and, if any plants strike your fancy, tell them you would be interested in any divisions or seeds they would be willing to share. Free plants are always good. Neighbours, friends and relatives can get together for plant swaps, or you can keep an eye out for your local garden club’s annual spring sale. For the past several years, that’s been one of my go-to places for inexpensive trees, shrubs and plants. Many of them are expensive or rare plants that would cost considerably more at your local nursery.
Whenever possible, plant native plants rather than expensive hybrids. There are many positive reasons to move in this direction in your garden. Not only are they of enormous benefit to local wildlife, from insects, to butterflies birds and even larger predators like fox, they create a natural habitat in our yards that usually requires less upkeep and costs. That’s not to say they require no maintenance, but, if planted in the right location and soil requirements, they will grow, reproduce and survive in our gardens with minimal care. In the end you should be left with a garden that requires less care and money while enticing native fauna to your yards and gardens that, in turn, help to control invasive species of plants and insects that can harm the natural ecosystem.
Consider installing a high-end, off-grid solar power system
If you are like me and don’t have electricity in your garden, or at least don’t have it in the far reaches of the garden, consider installing a complete off-grid solar-powered electrical system like the American-based Shop Solar Kit company.
Maybe you have a pergola in the back of the garden, or even a she-shed that you would like to have full power running a small refrigerator, sound system or full-size lamps and lighting. If you need to run pumps and lighting to a garden pond, you can do it with one of these highly capable systems that, once installed, operate at no cost to you at all.
There are complete DIY kits available for approximately $1,500 and up.
Gardening on a budget links
Ten money-saving tips for the weekend gardener
DIY Bark Butter feeder for Woodpeckers
DIY reflection pond for photography
Click & Grow is ideal for Native Plants from seed

Keter Artisan shed review: Contemporary flair and top quality build
The days of your dad’s old garden shed kits made of tin with flimsy doors that keep falling off, are long gone. Today, homeowners can choose garden shed kits constructed of wood, resin and steel that all have a place in our yards. Why did choose a contemporary resin design over a traditional wood shed? There are several key reasons that may surprise you.
Why I chose prefab resin garden shed kit over a wooden shed
The search for a stylish, well-priced garden shed kit for our Woodland garden sent me down many paths, but it all came to an abrupt end when I stumbled across Keter’s Artisan contemporary design.
So what makes the Keter Artisan shed a great product? The shed is available in different sizes, but we went with the largest 11X7-foot design with double door entry and a series of small windows across the front and down the sides to let in plenty of light during daylight hours. Its sophisticated and stylish look allows it to fit into any garden style. It’s easy to build yourself, offers double-door entry and is a quality, steel reinforced product that can stand up to tough Canadian winters.
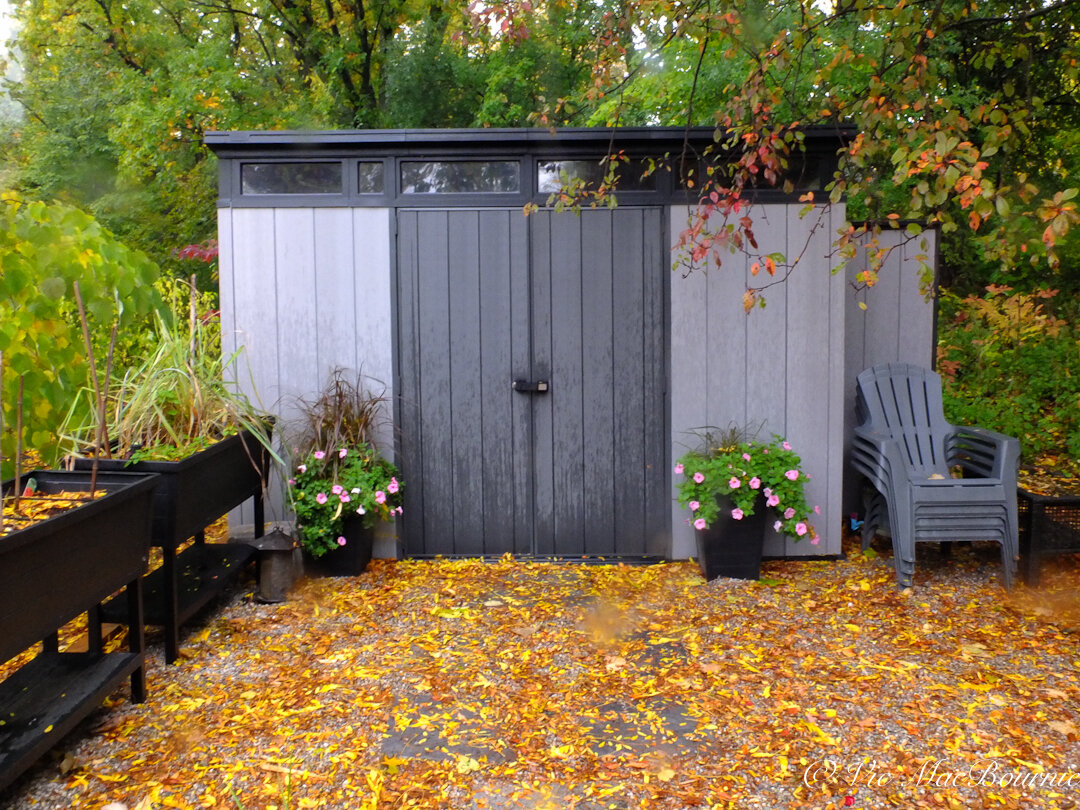
We also added a Keter High-Store Shed on one side of the Artisan shed for additional storage (seen in the photo above on the right side). Together, the two stylish sheds blend together and have a sophisticated appearance with their beautifully weathered cedar-look finish in that highly sought after silvery grey colour. They combine to give the appearance of one large shed with a bump-out not unlike those you may see on a mobile home or trailer. The amount of storage these two sheds provide is astonishing.
You can also add the matching impressive Keter Denali box for extra storage. It has the same grey weathered cedar look to match the other products.
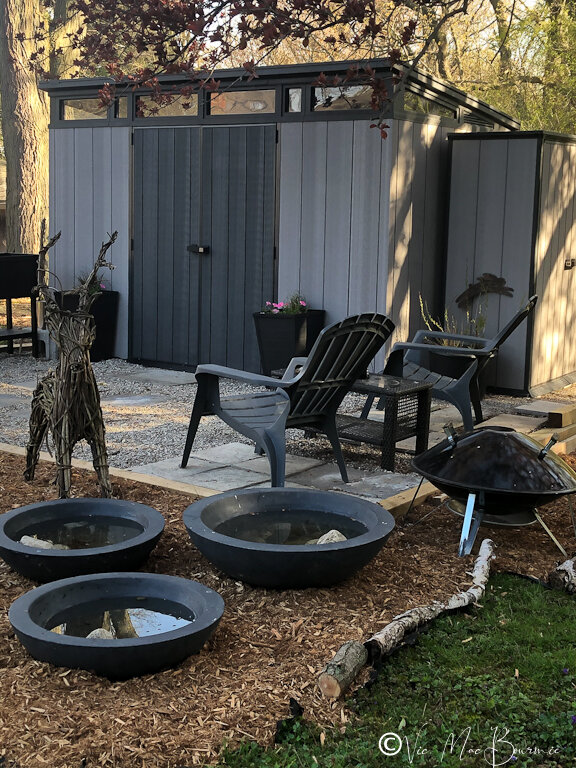
Keter’s Artisan shed together with the High Store shed on the side provide an elegant, sophisticated contemporary look together with the three water bowls.
So why did I choose a prefab contemporary vinyl shed over a more traditional wooden one?
The answer to that question is difficult. In short, however, the Keter shed provided extremely high quality at a reasonable price with a sophisticated look that really would have been difficult to match in a wood product. The silvery-grey finish would have taken years to occur naturally, if ever.
An unstained wood shed in the dampness of a woodland garden would most likely have taken on a dark grey mold rather than the silvery look of sun-bleached cedar. At the very best, a wooden shed would need regular maintenance including regular cleaning and staining to keep that natural silvery-grey look.
In addition, the texture and quality of the exterior hard-wearing durable resin makes it difficult to distinguish whether the siding is actually a wood product or vinyl/resin. In many ways, the vinyl siding looks and feels more like rough cut cedar than the real thing.
In fact, nothing really comes close to the look and feel of Keter’s innovative DUOTECH siding that offers a real wood texture with the durability and all-weather resistance of resin. It’s also easy to clean, requires zero maintenance and is fade free. But more on that later.
Five reasons I chose a resin shed
Contemporary design with a sophisticated look that works well in our Woodland garden.
Maintenance-free exterior and interior with easy-to-clean washable Duotech panels.
Steel reinforced framing for durability and a roof that can handle heavy snow loads.
Easy assembly with basic tools making it a DIY job if you are up to a little hard work.
Plenty of storage space, and because of the design, lots of headroom. The floor panels are an added bonus that keeps everything clean and dry.
To be fair, I must have looked at hundreds of wooden shed designs prior to purchasing the Keter shed. My plan was certainly to eventually buy a wooden shed and have the company construct it for me either on a deck or concrete slab. They were all well-built and quite nice. Most had a rustic look to them and all involved some kind of construction either by myself or by a crew who would come in and put up the shed in a day or two.
The real nice ones were a little expensive for my taste and the ones I felt I could afford were, quite frankly, kind of boring and predictable.

While a rustic shed in a woodland setting seems totally appropriate, I could not help but be drawn to the more contemporary sheds that I often came across while looking at pictures on Pinterest and other sources. Their simplicity was attractive to my aesthetic and I knew I could landscape around it to make it fit in to the woodland experience.
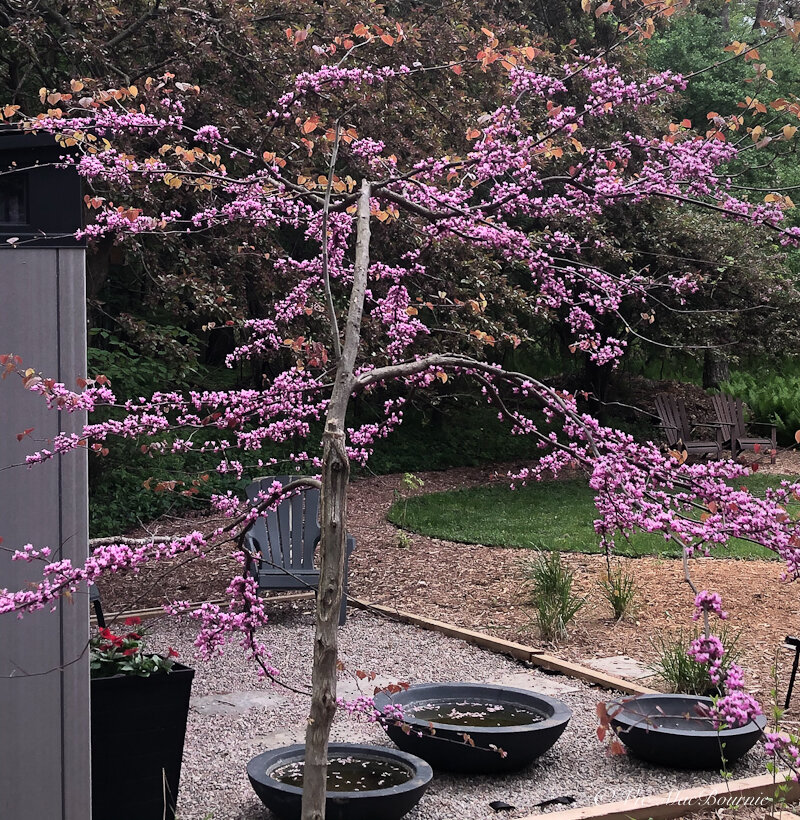
I was also interested in creating the feeling of a separate garden room where I could view the woodland from a different perspective than it is usually viewed from. Part of that involved incorporating three large, black water bowls into the landscape design in front of the shed and I knew the three water bowls would create a contemporary feel to the design not completely in keeping with the rustic aesthetic of the wooden sheds I had seen.
And then I came across the Keter Artisan shed. Instantly, I liked the look. The silvery-grey colour reminded me of the elegant and sophisticated wooden structures I had seen years earlier during vacations to Canada’s western provinces, especially Vancouver and the Victoria area. I knew it would work perfectly with the water bowls and other design features I had planned for the area.
I had already purchased other Keter products and was impressed with how easily they went together and how sturdy they were once completed. Think, the highest quality Ikea products, but for the garden.
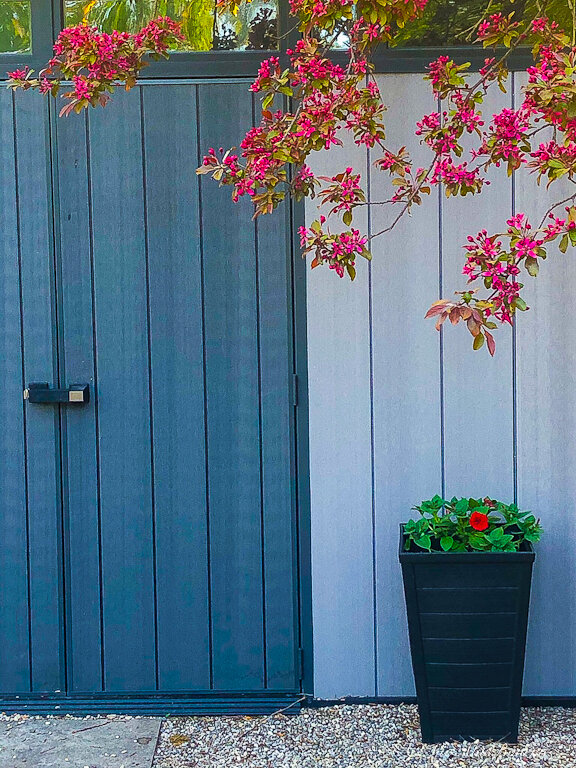
We were so impressed with their products that we eventually added two black Keter raised planters on the left side and two Keter planters on each side of the double doors. (See photo at bottom of article.)
The Keter Artisan shed was large, much easier to construct than wood products, and the double doors made it easy enough to pack away many substantial garden products from lawn mowers to BBQs if necessary.
My plan was always to save money and build the shed on my own. We ordered both sheds, but because the Artisan model was on back order, we received the High Store shed weeks earlier. I was impressed with it from the beginning. It went together quickly and easily in an afternoon and the Duotech finish was exquisite.
Then came the big boy. It came in several large boxes on a couple of skids in a large truck. It even needed to be unloaded with a fork lift. It was around that time that I began to wonder what I had gotten myself into. I didn’t expect it to be so large and heavy.
The first task was to create a platform for the shed. My plan was to use a base of screening to level off the uneven ground in an area of the garden. It was more difficult than expected for an old guy lacking the skills necessary to get the job done in a timely manner without having a heart attack. In the end, I hired a local handyman to help with the construction of the both the base and the shed.
In just one full exhausting day we were able to build the platform, spread the screenings and have the shed 90 per cent built. All that was left for me to finish on day two was the construction and installation of the two front doors.
We are now preparing for the second full summer with the two sheds, and I could not be happier with the results.
They have performed admirably all year. There have been no problems and the sheds continue to look as good as new.
What makes the Keter Artisan so special?
Let’s take a quick look at why this shed has proven to be a winner.
The Keter web site lists only two sizes the 7X7-foot and the 9X7-foot, but the larger one still appears to be available. It is certainly still listed on Amazon.com.
The shed’s positives attributes begin with the contemporary architectural design that makes the sheds stand out from the crowd. The silver-grey Duotech walls were the selling point for me. But the steel-reinforced double-wall construction and an extra-strong roof that can withstand serious snow loads ranging from up to 200-150 Kg/sqm is an important selling factor – especially in Canada where snow is a guarantee.
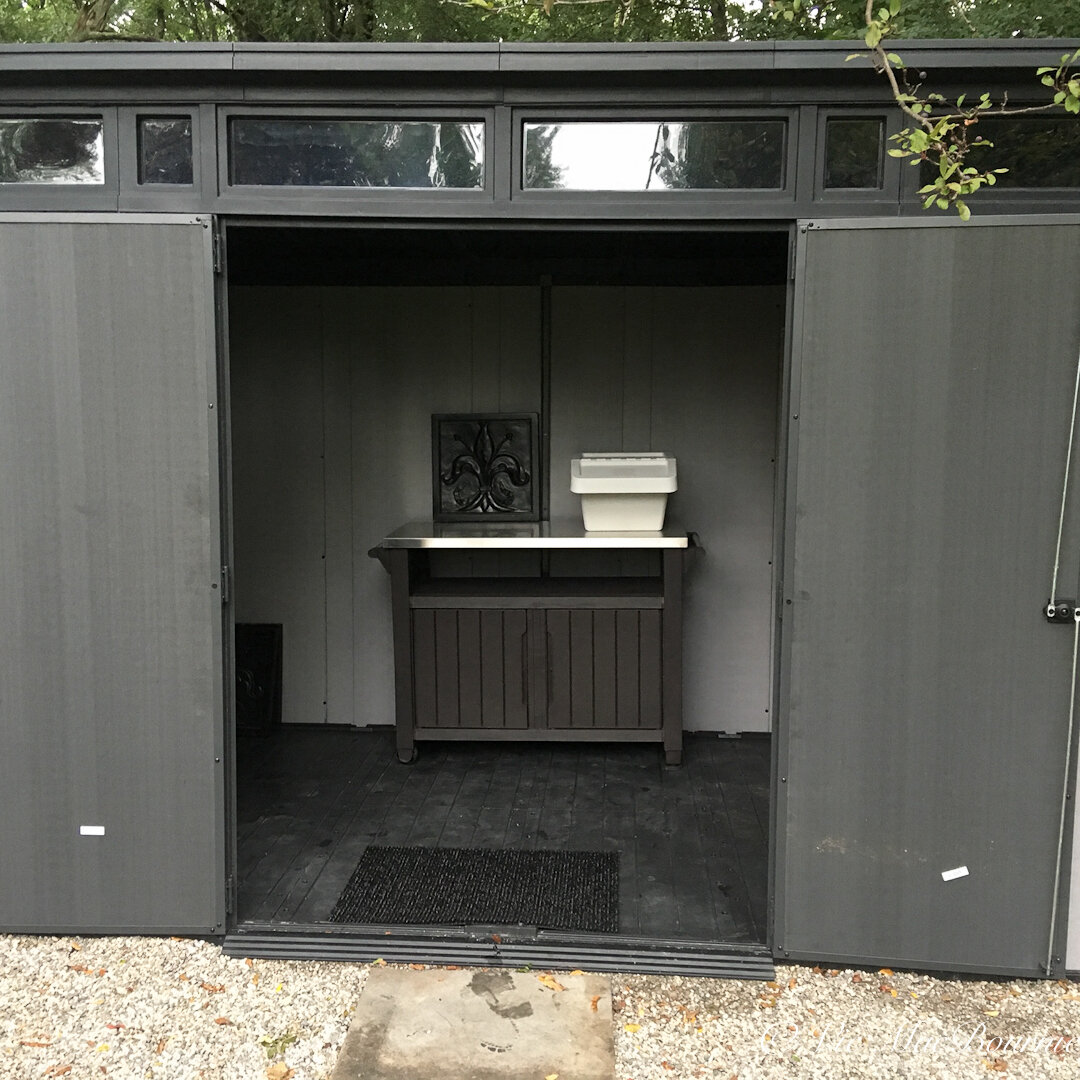
The Keter XL Utility Entertainment Storage Unit and cart was one of the first things we put inside the shed. Although it’s advertised as a BBQ cart, it can work nicely as a potter’s table.
In case you were wondering, it also features heavy-duty floor panels that keep out critters and protects the interior from a muddy floor and rainwater seeping in from underneath. The easy access double doors, clear windows and a lock on the door for added security are just additional bonuses.
The Duotech walls are as elegant on the interior of the shed as they are on the exterior. But if the silver-grey colour does not appeal to you, the interior and exterior walls are paintable any funky colour your heart desires.
The paintability of the walls make the Artisan sheds perfect for the creation of a she/he shed complete with funky interior wall colours.
The walls are also drillable, (although I would recommend using the special wall hangars provided by Keter) making hanging anything from pictures on the wall to tool organizers a simple task.
I could go on singing the praises of Keter but one more key factor that is always important are warranties. Keter advertise that their sheds come with warranties from 5 years to lifetime guarantees.
In fear of sounding like a commercial, we have purchased several Keter garden products before and after buying the two sheds. All the products, from the raised planters (earlier post I wrote about them), the large container planters that now flank the doors of the Artisan shed, a large deck box and two small balcony boxes, have proven themselves time and time again.
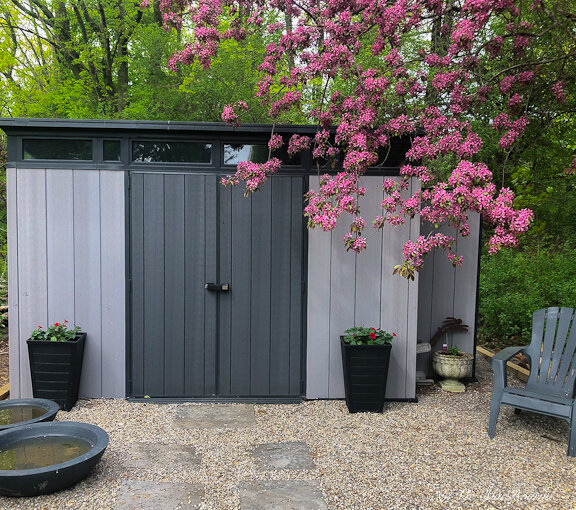
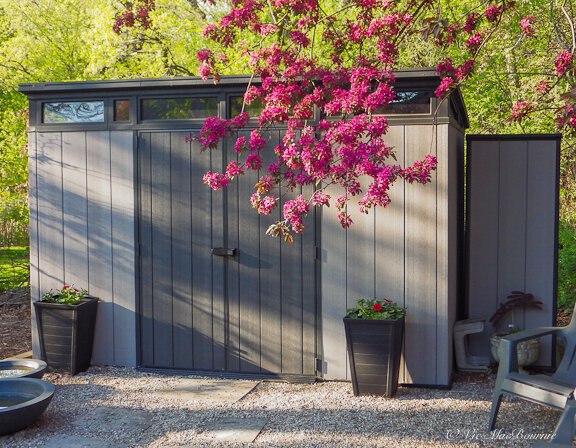
Our Keter sheds, raised planters and containers flanking the doors all work together to create unified look in the garden.
A potter’s table to match
One final Keter product that I can recommend wholeheartedly is the Utility XL Entertainment Storage Unit. Keter describes the Unity XL Entertainment Storage Unit as an all-in-one solution. It’s made out of a strong, weather-resistant resin with an appealing wood-like texture and has a durable steel top for cooking, serving and other hosting duties.
That might all be true, but gardeners might want to know that this storage unit is actually an ideal little potter’s table with its stainless steel top and under-cabinet storage. Right now it lives inside the shed (see above photo) but because it’s on wheels, it can be easily wheeled out whenever there is a need.
Ontario Native Plants: Taking back nature one garden at a time
Reyna Matties and Ontario Native Plants is saving our natural environment one garden at a time. The Hamilton-based native plant on-line store offers more than 100 plants, shrubs and trees native to Ontario and the Carolinian Canada forest zone to shoppers on their informative on-line catalogue.
McMaster grad brings native plants to Ontario
Reyna Matties knows her native plants, and she knows how important they are in urban revitalization, restoration and sustainability.
The 30-year-old manager of Ontario Native Plants (onplants.ca) is using that wealth of knowledge in her mission to bring back native plants to Ontario one garden at a time.
For my article on why native plants are important in the garden, go here.
What is Ontario Native Plants?
Ontario Native Plants (onplants.ca) is a Southern-Ontario mail order company, based out of Hamilton, that specializes in providing an impressive selection of native plants, shrubs and trees to Ontario residents. They offer more than 100 varieties of native plants. To ensure clients get only the hardiest plants native to their agricultural zone, Ontario Native Plants only delivers to Ontario residents.
It all started for Matties at McMaster University in Hamilton, Ontario where she earned a bachelors of Science (Environmental Science) and a Masters of Science (Biology). But it wasn’t until she embarked on her Masters thesis project that her love of native plants took root.
Her thesis focused on analyzing the success of a new parking lot restoration project on the McMaster campus. Part of the restoration involved the extension of a riparian buffer to protect a creek habitat from water runoff of a large campus parking lot.
“Being able to provide habitat and a food source for the local wildlife that visit your yard is such a beautiful and important motivation.”
The creation of the buffer called for the extensive seeding with a mixture of hardy prairie native plants (rye, bergamot, rudbeckia, etc.). Plant and soil studies were done to assess the success of the restoration (i.e. proportion of native to non-native plants).
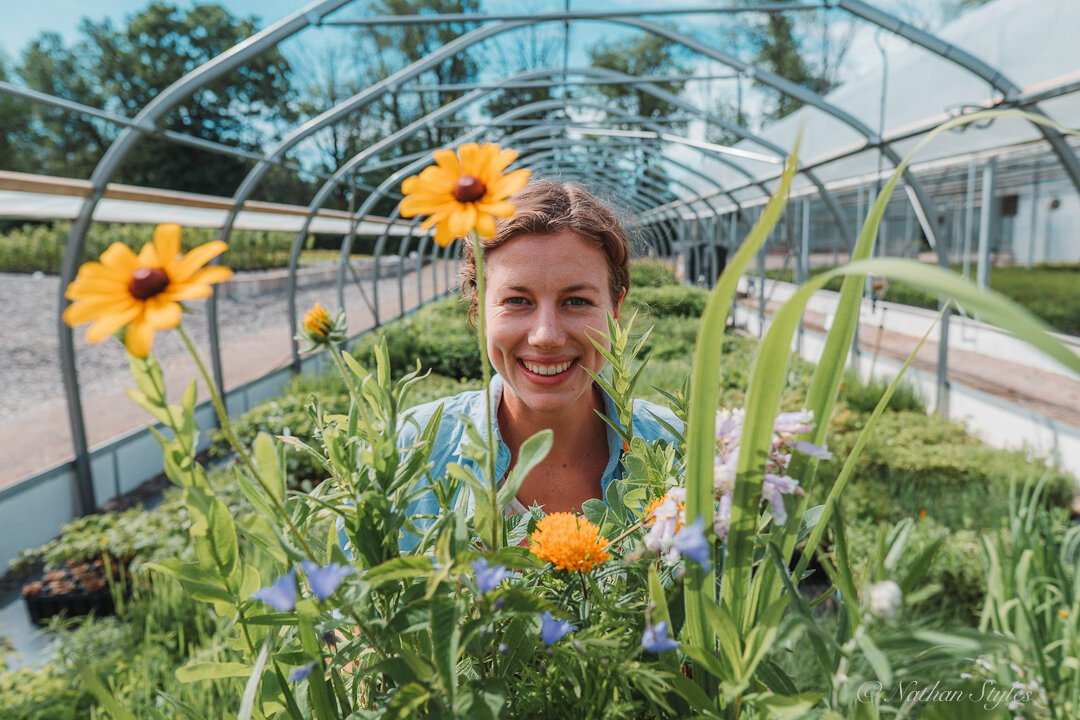
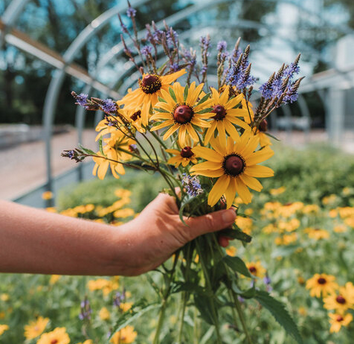
Reyna Matties with a selection of native wildflowers from the ONP greenhouses.
The research created an impressive native-plant knowledge base and she landed the manager’s position for the small upstart company in 2019. Ontario Native Plants actually started in 2017, the same year Reyna graduated from McMaster. The job seemed too perfect to be true, combining her education with a desire to make a significant environmental impact.
The McMaster project, Reyna explains, “grew an interest of mine in urban planting and green infrastructure in cities. More specifically, I became interested in how people perceive restoration work and planting native in general.”
“I wanted to work at a plant nursery or business that helped with ecological restoration, or connecting home owners to native plants. The ONP manager job ticked all my boxes of what type of work I wanted to be involved in, and also provided a diversity of roles to learn from in a new small business.”

A bouquet of wildflowers from ONP.
Needless to say, the business literally took off after Reyna came on board in the spring of 2019. Today, the on-line mail order business is enjoying great success with a strong on-line social media presence and word-of-mouth advertising.
In 2019, ONP had a crew of about four people during the busy period between May and June. For 2020 that number almost doubled to about seven people and Reyna says that number is expected to grow again in 2021.
“The last two years (2019 and 2020) have been very important for our growth as a business,” Reyna explains.
She has great praise for the staff that have played a key role in ensuring the success of the business.
“The crews have all been such amazing individuals that enjoy working with plants, and bring so much energy to each day,” she explains.
Part of that success is the result of a growing awareness of the environment and the loss of habitat being experienced worldwide. “The interest for planting native is growing,” she explains. “Being able to provide habitat and a food source for the local wildlife that visit your yard is such a beautiful and important motivation.”
The Covid pandemic is also creating more awareness of gardening and the environmental affects of planting native flowers, trees and shrubs.
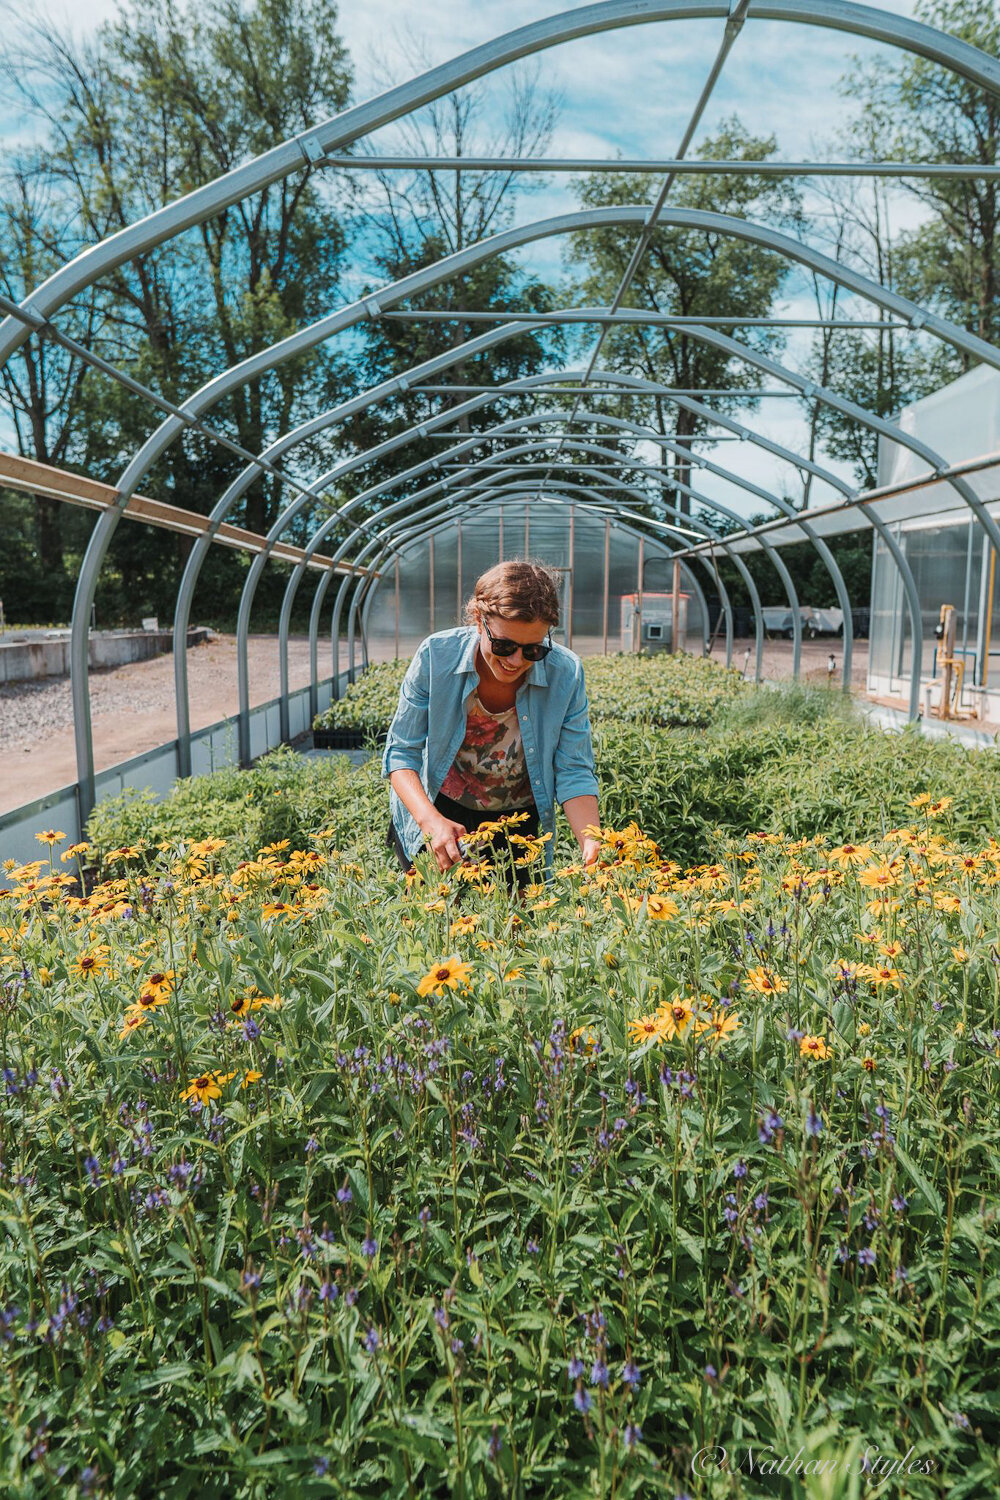
Reyna looks over some of the many wildflowers in one of the ONP greenhouses.
“With people staying home more in 2020, there was another natural surge in gardening with homeowners having more time and interest in gardening,” Reyna explains. “The physical and mental benefits are mentioned frequently by our customers.”
“With our store being completely online and contactless, we have been able to provide a very efficient way for people to purchase plants for their gardens. We are excited for 2021 and are busy updating our website and getting organized for our opening on March 1, 2021.”
But taking an upstart, online native plants nursery to new heights takes more than good timing and a growing interest in using native plants in the typical backyard garden. It takes both a knowledge of plants and first-rate service.
Ontario Native Plants seems to have found the perfect combination.
I can attest to this after a work colleague and I placed an order with the company last year. Not only were the plants shipped in a timely and obviously caring manner, the product was vigorous and extremely healthy. It transplanted well and produced in its first year. The cardinal flowers I planted proved to be a simply outstanding addition to our garden and helped to draw in a number of hummingbirds and hummingbird moths that worked the flowers from early to late summer providing me with endless chances to capture excellent photographic images in a natural setting.
“Since we are only an online store, we have been able to focus on creating a very streamlined ordering process. Customers can simply create an account, and then add different plants to their cart. The check-out is also very simple, and payment is processed by credit card or Paypal. (Website: onplants.ca)
By delivering only to Ontario, clients can by assured they will receive only the hardiest plants native to their agricultural zone.
“We only ship within Ontario as our business model is to keep the plants in their native range. We also only grow our plants from Ontario sourced seed, so you can be assured that the plants will be well adapted, and also genetically unique. We provide information on each plant’s hardiness zone for you to determine whether it can grow succesfully in the zone you live.”
Success certainly breeds more success, much to the benefit of their clients.
“We have also been able to add a handful of new species each year and, in 2021, we are offering more than 100 species of flowers, grasses, trees, shrubs, and ferns. Pretty exciting stuff!”
An important part of the ongoing success of the business is a growing awareness of the importance of using native plants in typical urban and suburban gardens rather than more showy hybridized versions of the same plants.
“We work to provide as much information in the plant descriptions about the benefits of each plant to the local wildlife, often an important nectar or food source for a variety of butterflies, caterpillars, moths, etc. We also share articles or information on Facebook and Instagram that highlights the importance of native plants,” Reyna explains.
Three reasons to use native plants
What does Reyna consider the three main reasons for using native plants in our gardens?
1. Food source/habitat for local wildlife. From the nectar from a Blue Lobelia flower, to the acorn of an Oak tree, native plants provide a diverse buffet for local wildlife in your garden. Especially in urban areas where green space is limited, bringing native plants into your yard provides “food along the road” for migrating insects, birds, and other small mammals.
2. Ecological connectivity – pockets of native plants in homeowner gardens help weave back together ecosystems that have been removed. This once again could benefit wildlife with corridors for movement or food, habitat, etc. Native plants also contributes to climate resiliency by cooling urban areas with connected patches of trees, shrubs, flowers, etc.
3. Mental and Physical benefits for the gardener – Digging in the soil and taking time to observe the beauty around you. Noticing the small insects that feed on your plants. Moving compost all day and the satisfaction of the physical labour. There are so many ways to enjoy your garden, and then, in turn, benefit from that enjoyment.
This season ONP is adding 19 new plants to its on-line catalogue of more than 100 plants, shrubs and trees. The on-line catalogue lists 59 perennial species, 48 tree and shrub species (For this year’s new plants, look for the ones listed in bold).
A quick look at the website shows perennial flowers ranging from Wild Columbine (see my earlier article here), Wild Ginger, three types of Milkweed, two types of Joe Pye, Asters, Wild Strawberry, Bottle Gentian, Woodland Sunflower, Rose Mallow, False Solomon’s seal, two types of Beebalm, Yellow Coneflower and Black-eyed Susan.
Grasses listed include Big and Little Bluestem, Switchgrass, Bottlebrush Grass and Indian Grass. Carexes include Bebb’s sedge and Fox sedge. Four ferns are listed including Lady Fern, Marginal Wood Fern and Sensitive Fern.
ONP has an impressive list of 23 trees listed for sale, including Alternative Leaved dogwood, Tulip tree, Eastern Red Cedar, Paper Birch, Paw Paw (see my article here), Eastern redbud (see my article here), Eastern Hemlock, Tamarack, White Cedar and Bur Oak.
There are 25 Shrubs listed including Serviceberry, Black Chokeberry, Flowering Dogwood, two types of Sumac, Elderberry, Lowbush Blueberry and Nannyberry.
Besides individual plants, shrubs, trees and grasses, the catalogue also offers gardeners “plants packs,” perfect for gardeners planning to plant a larger area with more specialized needs. For fern lovers, there are a number of packs offering assorted ferns, or packs of four specific fern types such as lady fern, sensitive fern or wood fern.
In addition, there is a plant pack focused on rain gardens.
The catalogue is organized to provide plenty of assistance to seasoned gardeners as well as novice native gardeners. Not only are the plants broken down according to light requirements (partial shade to shade, full sun, sun to partial shade…) it is also broken down according to moisture requirements and soil type.

Reyna works in one of the greenhouses at ONP headquarters in Southern Ontario.
New gardeners or gardeners new to ordering through ONP should be aware that many of the plants sell out over the course of the spring and summer, so they may want to get their orders in early.
Last season Lowbush blueberry, Elderberry, Pawpaw Tree, Butterfly milkweed and Wild lupine sold out.
In addition to native plants ONP also sells trees and shrubs. In Spring they offer 1-year-old plants, and then by late summer start selling a 4-month-old crop from that year. So trees and shrubs don't sell out as quickly throughout the year.
“With perennials (Flowers, grasses, ferns) there is only one crop seeded either in the prior fall or Spring, so we are able to order more as quantities permit, but those are more in demand. This is why we emphasize ordering as soon as you can to ensure you get the variety you were hoping for in Spring.”
How to place an order
ONP start taking orders on March 1st. Then, begin to ship orders with ONLY trees and shrubs in mid April. All other orders begin to ship in early May. It is essentially a queue so the earlier you order, the earlier your plants will likely be shipped in May.
Ontario Native Plants offers an updates page (https://onplants.ca/updates/) where they post information on what order numbers are shipping and good tips on making up your order.
Western Canada readers should check out Saanich Native Plants
Ferns & Feathers readers in Western Canada, specifically British Columbia, should check out Saanich Native Plants. They grow plants and produce seeds native to a variety of habitats in the Victoria area, including meadows, woodlands, forests, wetlands, beaches and more.
Their impressive website states they aim to inspire and empower people to restore and conserve nature by providing native plants, seeds, education and expertise.
“We’ve built our business on the core principle of valuing nature. We try to continually work with integrity and excellence and value collaboration greatly.”
More links to my articles on native plants
Why picking native wildflowers is wrong
Serviceberry the perfect native tree for the garden
The Mayapple: Native plant worth exploring
Three spring native wildflowers for the garden
A western source for native plants
The Eastern columbine native plant for spring
Three native understory trees for Carolinian zone gardeners
Ecological gardening and native plants
Eastern White Pine is for the birds
Native viburnums are ideal to attract birds
The Carolinian Zone in Canada and the United States
Dogwoods for the woodland wildlife garden
Bringing Nature Home by Douglas Tellamy
A little Love for the Black-Eyed Susan
Native moss in our gardens
As an affiliate marketer with Amazon or other marketing companies, I earn money from qualifying purchases.
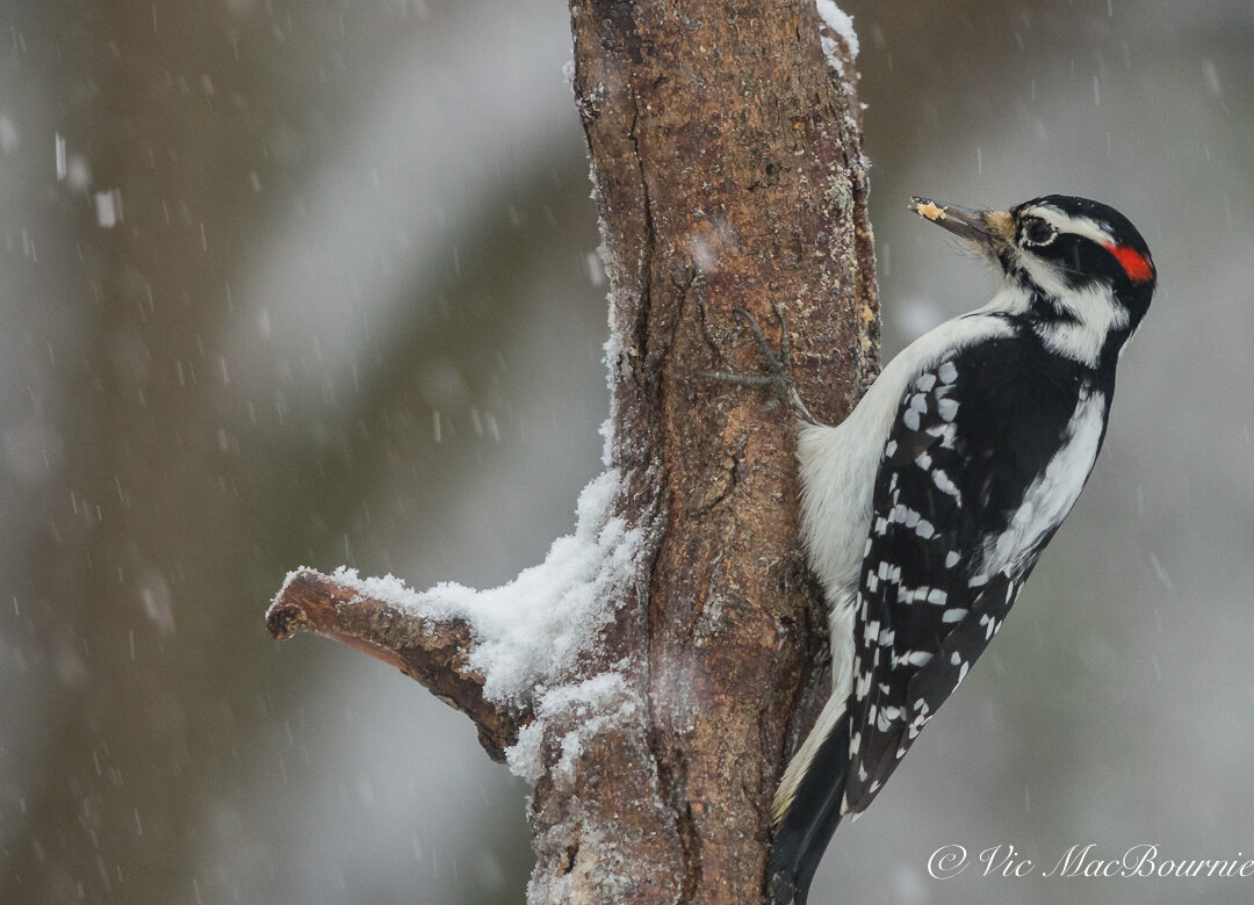
Bark butter and DIY bird feeders
The combination of a DIY feeder and WBU’s Bark Butter is an irresistible draw for more than 150 species of birds. If attracting woodpeckers, nuthatches and chickadees along with warblers sounds good, check out this simple and easy to make feeder and food combination.
Natural feeder is irresistible to 152 species of birds
Combining Bark Butter with a DIY bird feeder has become my favourite combination for attracting woodpeckers, nuthatches and chickadees to my wildlife, woodland garden.
It has also quickly become my favourite feeder combo to photograph birds in a natural setting.
So if you are like me and love either photographing backyard birds, or simply watching woodpeckers, nuthatches and other suet-loving garden visitors as they peck away gathering food for the winter, then you will love the simplicity of creating this DIY branch feeder. The feeders are so easy to make and appreciated by out feathered friends that I’ve already made two and plan on making many more in the near future.
But before digging in on how to make the DIY feeder let’s talk a little about Wild Birds Unlimited Bark Butter.
There are other spreadable-suet products available that might suit your needs. I just can’t speak to them. I do plan to order some of these products from Amazon and will report back.
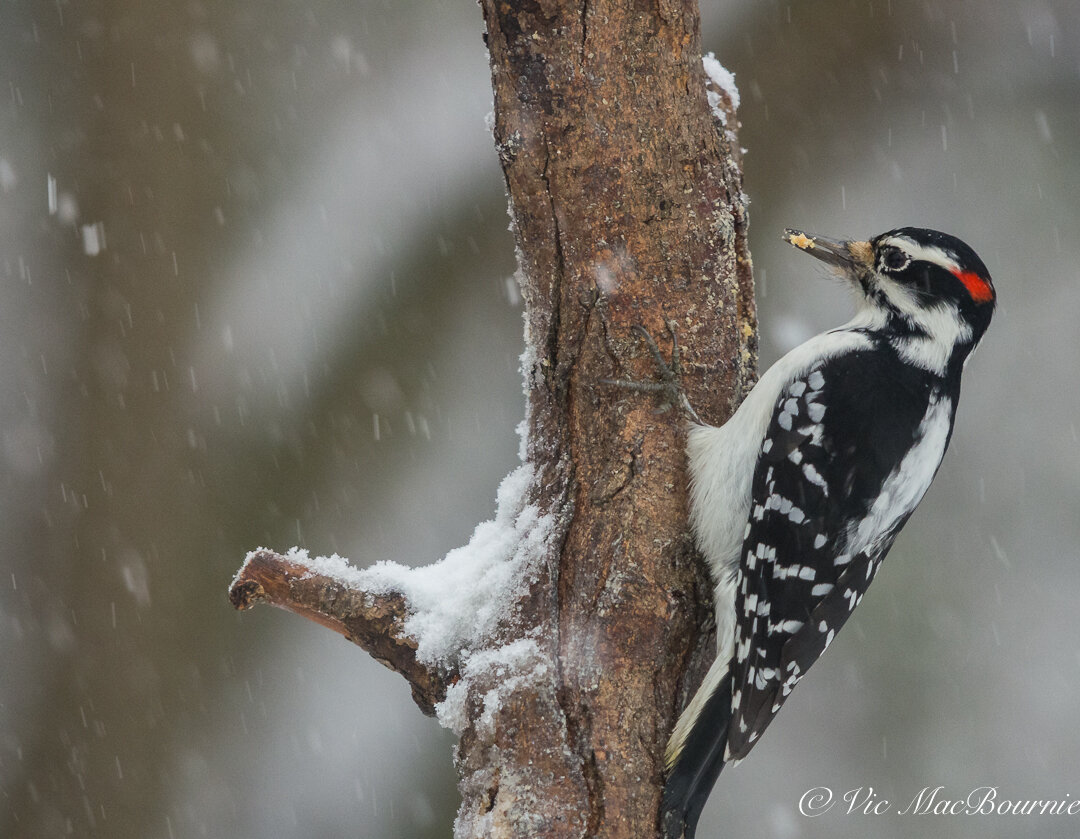
A woodpecker removes a piece of Bark Butter from the DIY branch feeder.
What’s Bark Butter?
Bark Butter is a spreadable suet-peanut butter and corn blend that can be easily spread on a rough surface like tree bark or stuffed into holes or small crevices that are easily accessible to many birds. It is especially accessible to those birds with long beaks that can reach into cracks and areas where squirrels may have difficulty reaching. It is sold, in many different forms, through Wild Birds Unlimited stores and on line throughout Canada and the United States. The formula for Jim’s Birdacious Bark Butter is said to be created by Jim Carpenter, founder of Wild Birds Unlimited. It is advertised as a food source that attracts a greater variety of birds than any other food source including regular suet.
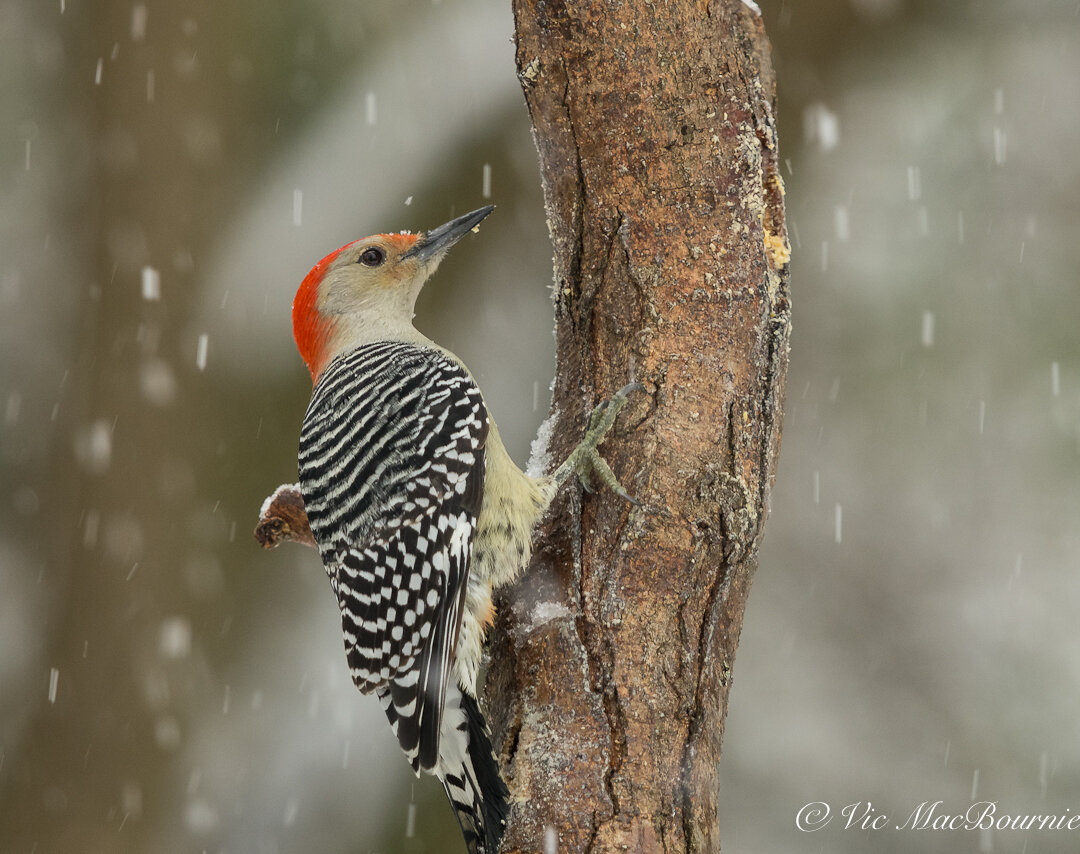
This Flicker is working one of the many Bark Butter pockets in the DIY branch feeder.
I can’t verify the claims that it attracts more than 152 species of birds, but I can verify that this stuff is a joy to use. Its peanut butter base makes handling it enjoyable. In fact, I mostly just scoop it out of its plastic container using my hands and stuff it into the holes I’ve drilled into the DIY feeder tree branch. Any access bark butter that gets on my hand is simply rubbed into the crevices of the branch’s bark.
Getting back to those 152 different species that Bark Butter is said to attract. I have no doubts that the claims are true that Bark Butter attracts everything from woodpeckers like Flickers, Downies, Hairy and red-breasted woodpeckers, to Brown Creepers, Chickadees, Jays and even warblers. As many know, attracting warblers to our gardens is not always easy. Anything that brings warblers into the yard is a good thing and, since Warblers are big insect eaters, the bark bits with insects would be a good choice to attract them.
Bark Butter is not inexpensive so care should be taken to use it wisely and do everything possible to keep squirrels and other mammals from feasting on it.
Although it is recommended to be spread on tree bark, if squirrels discover it before the birds, there’s a good chance they’ll devour most of it before the birds get to it.
The DIY feeder helps solve this problem. Because it can be hung from a feeding station complete with squirrel baffles and placed is an area of your garden that makes access difficult for raccoons, squirrels and other garden critters, it’s easy to maximize the benefits of the butter.
As an experiment, I have created two of these feeders. One is hanging off the feeding station and therefore protected from squirrels. The other feeder is part of a large tree branch that has been dug into the ground and allows easy access to red and grey squirrels among other backyard wildlife critters who discover it.
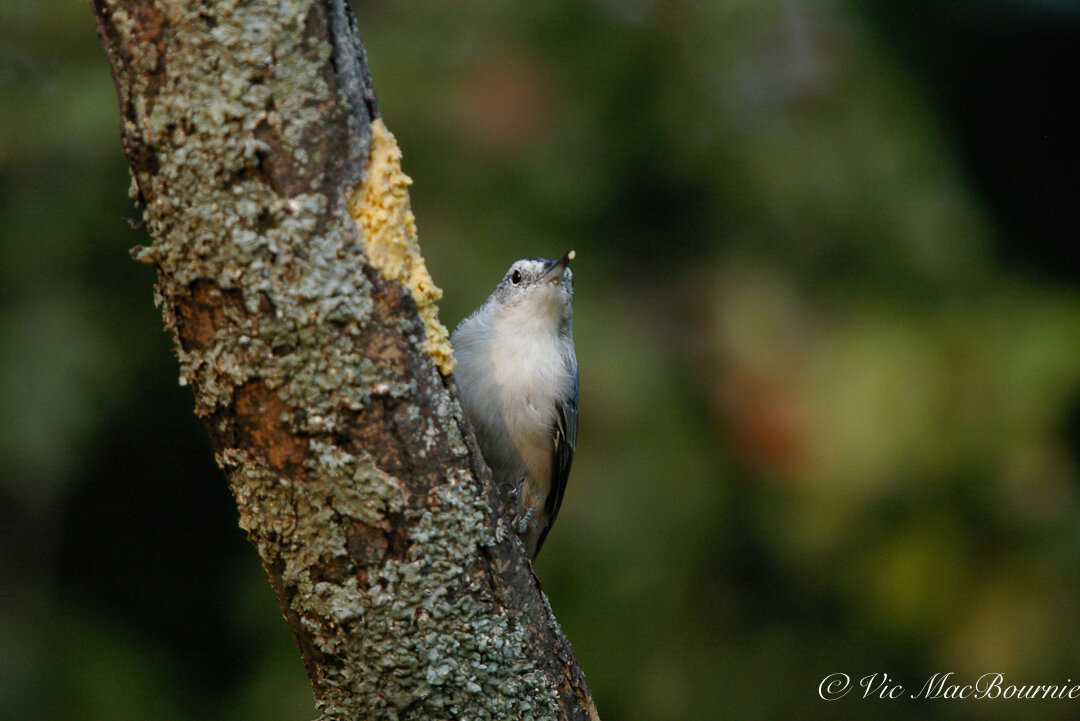
A Nuthatch feasts on Bark Butter at the lichen-covered DIY branch feeder.
As a result of the experiment, I can attest to squirrels’ love of Bark Butter and the importance of making access difficult for them. Once loaded up, the Bark Butter feeder on the feeding station remains available to the birds for several days, while the branch feeder is more or less devoured in a day or two. I suppose using the hot pepper mix is appropriate in this circumstance to keep squirrels away, but after my fair share of hot wings, I’m not a fan of teaching the squirrels a hard-earned lesson.
In the end, I like both feeders. If saving money is important to you, however, it’s probably wise to make it difficult for squirrels to get access to your DIY feeders.
The bark butter is available in plastic tubs in both regular and a hot pepper blend that helps detract squirrels from feasting on the rather expensive feed. It’s also available in a Bugs and Bits blend, which incorporates small pellets of bark butter together with insect parts including meal worms. The same pellet-shaped Bark Butter Bits are available without the insects and with hot pepper. There is also Bark Butter quickbites and a large no-melt suet cyclinder. Both are available in regular and hot pepper.
Be aware that some Wild Birds Unlimited locations choose not to sell the hot pepper Bark Butter.
For more on Building your Garden on a Budget go here.
While I get great enjoyment from my bird feeding stations, providing natural food sources to our feathered friends is always the goal we should aspire to in our gardens. I have written a comprehensive post on feeding birds naturally. You can read about it here.
Simple, easy-to-create DIY feeders
There are many different ways to use Bark Butter. One of the simplest ways is to gather pine cones from the garden and smother them with the bark butter. These can be hung from tree branches throughout the garden especially during or just before a snowfall.
But my favourite method is to use a one- or two-foot branch cut from or left over from a tree pruning, either from your own tree or a neighbours’. My feeders are a little thicker than a man’s wrist, but larger, heavier branches can be used for larger woodpeckers like the Pileated woodpecker.
These feeders are so simple to make that the process is almost not worth describing. But here is a simple description of the process.
• Drill a hole through the branch maybe an inch or two down from an end to insert string or preferably wire, which will be used to hang the feeder.
• Then, using a larger drill bit, start drilling several pockets or holes in the branch at regular intervals.
• If there is a side branch, leave some of it to act as a small perch for the birds. Then drill a hole above the perch to act as a convenient location for birds to get easy access to the Bark Butter.
• I use a combination of drilled pockets that go half way into the branch, full holes drilled right through the branch to provide birds with different length beaks access to the butter.
• Once the wire is attached and the Bark Butter applied, you can hang the feeder. Leave room around the feeder to give visitors access from all sides.
• Refilling the tree branch with suet is just a matter of taking a clump of the Bark Butter and stuffing it into the holes. I do it with my hands but you could use an old spoon. Wild Birds Unlimited says to use a fork for the final application because the rungs leave a criss-cross pattern in the butter that birds can easily pick off and eat.
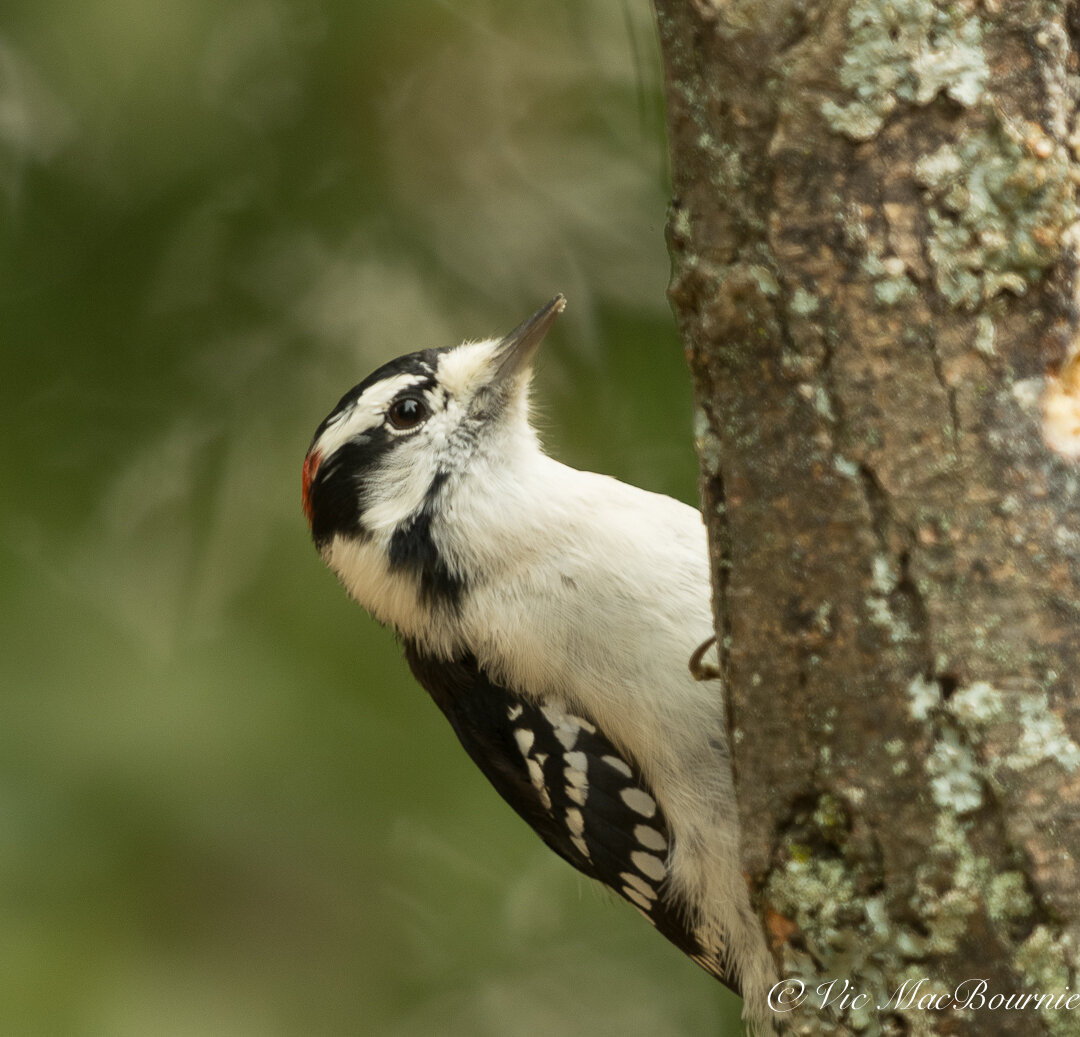
Create a free-standing feeder for all garden visitors
• Our other Bark Butter feeder is nothing but a larger 8- to 9-foot branch partially buried into the ground a couple of feet.
• Once stabilized in the ground, drill several holes and pockets in the branch at various heights to provide birds with several feeding areas up and down the branch.
• Smaller holes can be drilled into the branch to insert perches for birds or long screws to hang smaller feeders from. This is an ideal spot to add Bark Butter-infused pine cones.
• I like to fill this bird feeder an hour or two before going out to photograph the birds to give me another potential photo location.
Branch feeders are ideal photographic stages
This larger branch has become a favourite location for birds and squirrels who enjoy taking up a position on top to scan the garden. It has only been up for about eight months and I’m sill waiting for a large hawk or owl to discover it and use it as a hunting perch.
But I’m confident that time will come and I hope to be there in my Tragopan V6 photo blind ready to capture the image.
In the meantime, I’ll enjoy the large variety of backyard birds providing me with endless photographic opportunities on my two natural feeders.
The lure of the DIY branch feeder and Bark Butter is irresistible to so many birds. This makes it ideal for photographers to capture natural images (much like the ones featured in this article) of the many varieties that visit. The DIY feeder combined with a photographic blind like the Tragopan V6 one-person blind, makes it easy to get up close to some of your favourite species. The feeders and the blind are also portable enough to move them around the garden to obtain the background of your choosing.
If photographing birds is one of your primary goals behind creating the branch feeders, be careful to drill your holes strategically to hide as many as possible from the camera lens. By keeping the suet pockets on one side and shooting from an angle that keeps the suet more or less hidden, the resulting photos can look very natural.
I like to look for branches from older trees that already have lichen and moss growing on them. A chainsaw makes creating several lengths of feeders easy and quick work.
Gardening on a budget links
Ten money-saving tips for the weekend gardener
DIY Bark Butter feeder for Woodpeckers
DIY reflection pond for photography
Click & Grow is ideal for Native Plants from seed
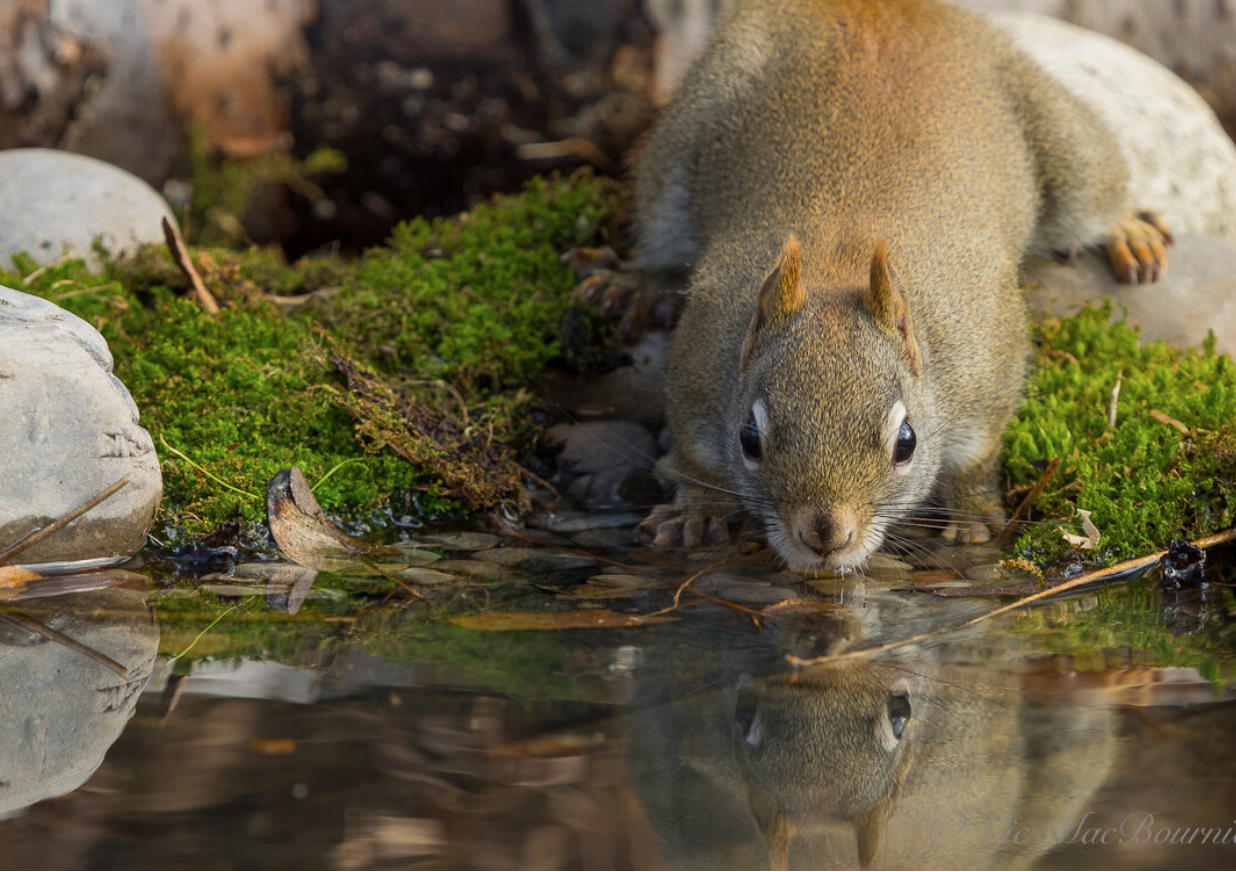
Garden photography: Build a portable DIY reflection pond in three simple steps
How to create a reflection pond in three simple steps. It begins with purchasing a rubberized boot tray. Then add some natural materials such as moss, river rock, pea gravel, pine needles and, in the fall, colourful leaves. The last step, add a little water and you are ready to start capturing professional looking reflection images of birds and mammals.
Create professional looking wildlife photographs
Ever wonder how photographers get those beautiful reflection shots of birds or animals?
It should come as no secret that many of those images are made with a well thought out reflection pond and a photographic blind.
In this post I am going to show you how to create a reflection pond in three simple steps and about ten minutes of your time.
I've always admired the incredible image of a lion drinking by the water hole in the evening – Its pink tongue and focused stare perfectly reflected in the water.
Without the mirror-like reflection, the image is just another impressive safari shot.
Our woodland and wildlife gardens can’t compete with an African watering hole, but that doesn’t mean we can’t create exciting reflection images in our own backyards. I know the red squirrel in the picture above isn’t quite a lion, but with a little work we can all imagine the possibilities.
Many of us have seen elaborate reflection ponds created to photograph birds and mammals. Some reflection ponds in Europe are so popular that photographers are willing to pay to use them to obtain outstanding photographic images of birds and mammals.
But here’s an epic hack of a readily available commercial product that makes creating a reflection pond as simple as possible and for under $50 Canadian. It’s so simple that, provided you have a few materials at hand, building it should take less than ten minutes.
(If saving money is your thing, check out my in-depth article on Building Your Garden on a Budget.)
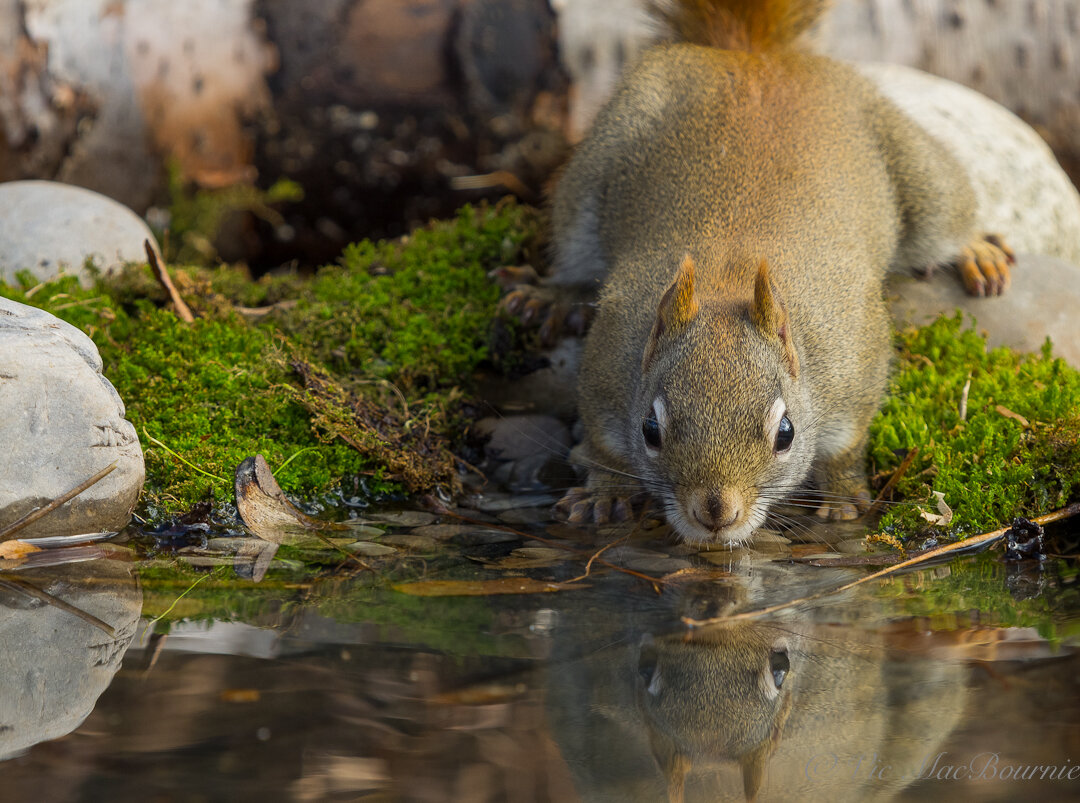
This reflection of a red squirrel at the pond is made to look natural with the addition of moss, pine needles, river rock and submerged pea gravel. This DIY reflection pond is extremely simple and inexpensive to create.
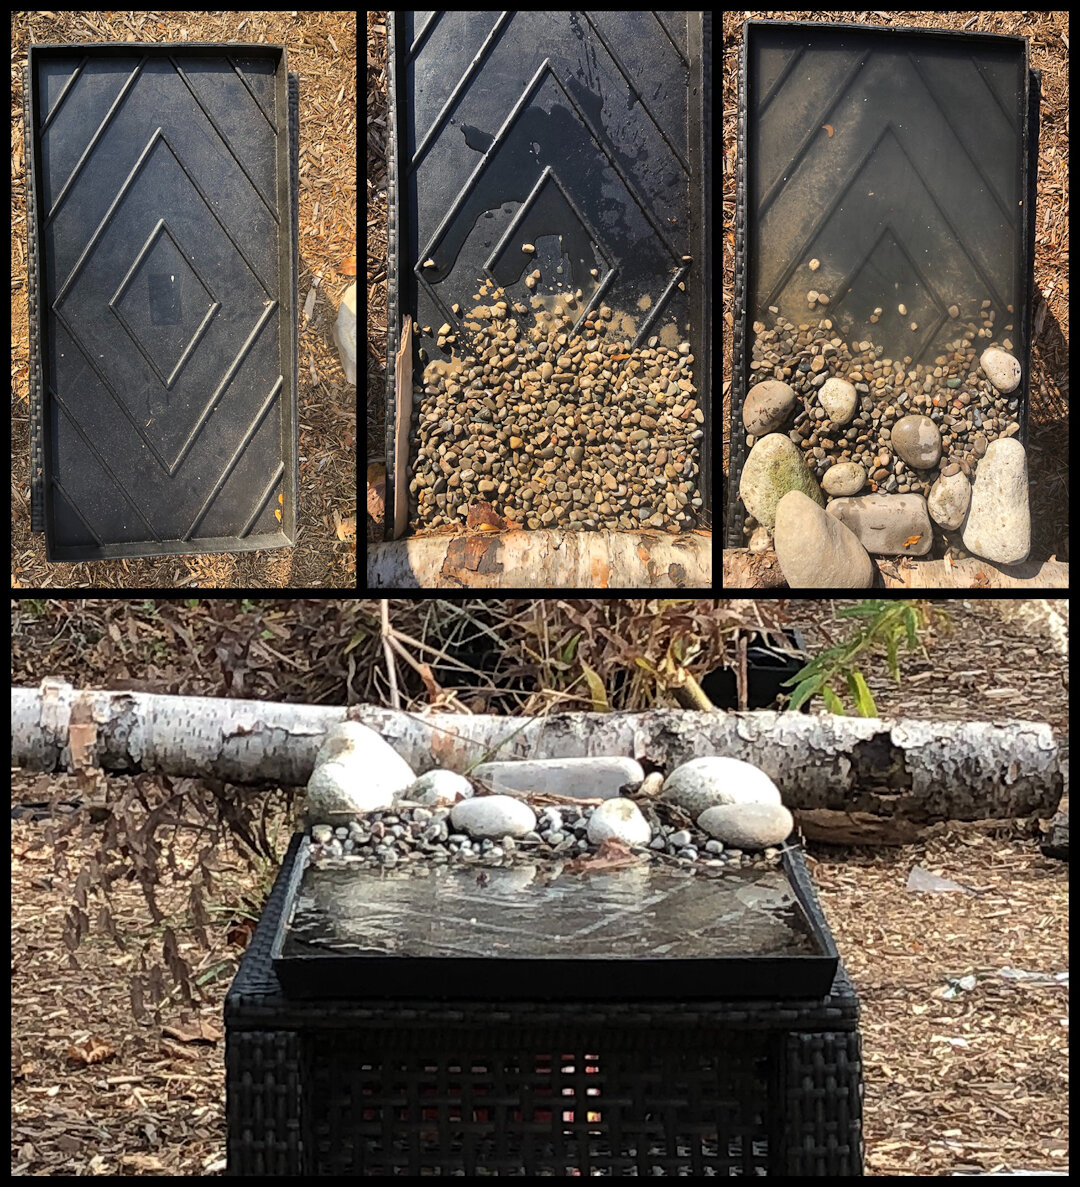
A step by step visual illustration of the creation of the reflection pond made from a rubberized boot tray.
Three simple steps to creating a reflection pond
1) Purchase a black rubberized boot tray. Mine was purchased from Lee Valley Tools outlet here in Canada and place it on a small table.
2) Add a few large river rocks, a couple of handfulls of pea gravel, maybe a birch log and moss, pine needles etc to your taste.
3) Add a couple pitchers of water to fill the tray and voila.
The reflected image of the red squirrel is just one example of what can be done with this simple, backyard reflection pond.
A little planning goes a long way in the creation of memorable backyard bird and mammal images. With that in mind, I went to work creating an outdoor studio to provide the inspiration to create my own “lion image.”
It's not uncommon for photographers to set up a few branches near a feeder as perches to guide birds to the best photographic locations.
My plan was to take that a step farther with the creation of a small reflecting pond to entice birds during the winter, when a reliable water source is a priority.
It all started with with the purchase of a 32-inch by 16-inch by 1.25-inch deep black rubber boot tray. It’s the perfect ready-made base to use as a reflection pond.
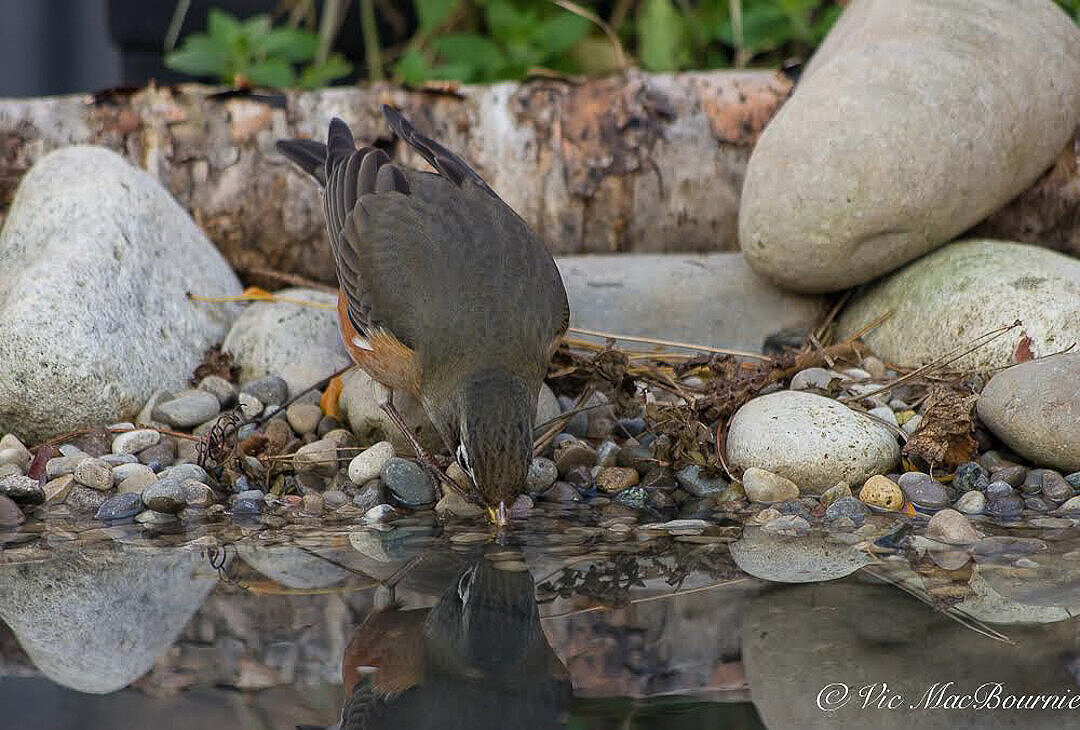
A robin stops by the reflection pond to steal a drink.
This boot tray, in case you are not familiar with it, is no cheap plastic flimsy tray that will crack in the cold. It’s made from a virtually indestructible rubber compound that is also non-skid and heavy enough to stay put even in high winds.
Placed on a similarly rectangular patio table that sits about two feet high, it's at the perfect height to capture reflections of the birds and mammals from my Tragopan V6 photographic blind or, if I put it close to a window in my home, from the comfort of my home.
Once I had the boot tray, the next step was to simply add some pea gravel, a couple of medium-sized and larger river rocks, maybe some pine needles, moss and a birch branch to give the outdoor photo studio a more natural look from behind the camera lens.
These natural materials will form the backdrop for the images and can be changed or manipulated to create different looks from one season to another. In summer, for example, moss and small wildflowers could be added. In fall, fallen leaves, pinecones, even an acorn or two.
Once the natural materials are in place, add a few pitchers of water to fill the tray to the top. Once the water is added, ensure that the tray is level by placing small stones or pieces of wood under the table’s legs.
Now, you are ready to begin photographing. It's really as simple as that. The birds will need time to get comfortable with the reflection pond.
During warmer months, you could slip a small mirror into the water to get a perfect reflection, but I don’t find that necessary. The fact the boot tray is black, will result in good to excellent reflection qualities provided your camera is set at the right angle to the water. A little experimentation here will help you get the results you want.
For the winter, set it up outside a back door on your deck or near a full-length window, so you can capture images in the comfort of your home.
With the Tragopan photography blind placed 7-10 feet from the reflection pond, I am able to use a very basic, inexpensive lens to capture the images.
By creating these types of lures to bring birds and mammals in close to either a photographic blind or a window in your home, you are much more likely to get outstanding images without having to purchase expensive photographic lenses.
It's important to note that to get a proper reflection, the camera should be at the same level or just above the height of the reflection pond. Some trial and error is necessary to get the best results.
I'll admit that the rubber boot tray falls a little short. It’s not perfect. If it were a little larger it would capture more of the reflection of larger birds or mammals, but it works beautifully for smaller- and mid-sized birds and mammals.
The fact it is black not only helps to create the perfect reflection, it also absorbs the light and works as a natural solar heater during the colder months. It will not keep it ice free in the coldest months, but it will help warm the water on sunny days.
My cost for the entire setup was about $40 Cdn, which was the cost of the boot tray.
In addition to the rectangular reflection pond, I also created a similar, smaller round version using a plastic planter tray purchased from a local nursery for about $11. That smaller pond is deeper so it allows me to use an electric birdbath heater to keep the small “pond” from freezing over.
For the winter, I have put both reflection ponds side by side in an area of the garden near a full-length glass door which allows me to photograph the birds and animals all winter from inside my home.
(I have taken the reflection pond to new heights by combining it with a natural backyard food table. Click on the link for the complete story about building a DIY feeding table/reflection pond photo studio.)
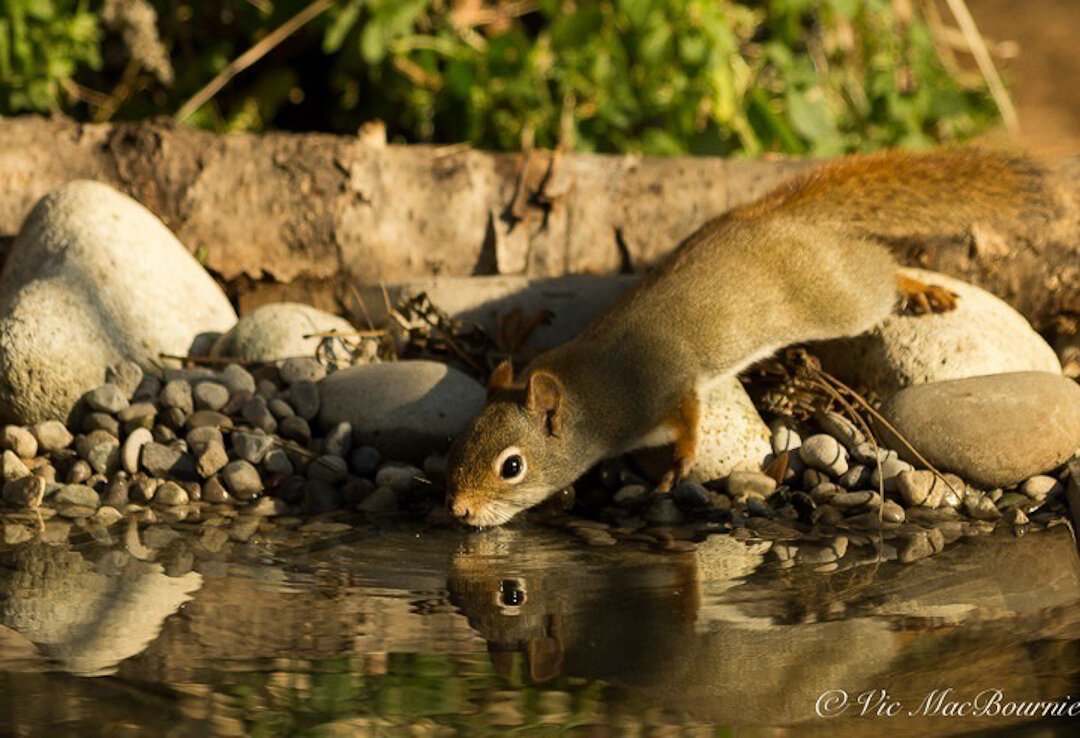
Another image of the red squirrel getting a sip of water from the reflection pond.
Tragopan Photographic blind is ideal companion to reflection pond
A note on using the one-man Tragopan V6 blind with this project. Besides working so well to hide my movements inside the blind, the viewing holes are set at the perfect height to photograph the best reflections.
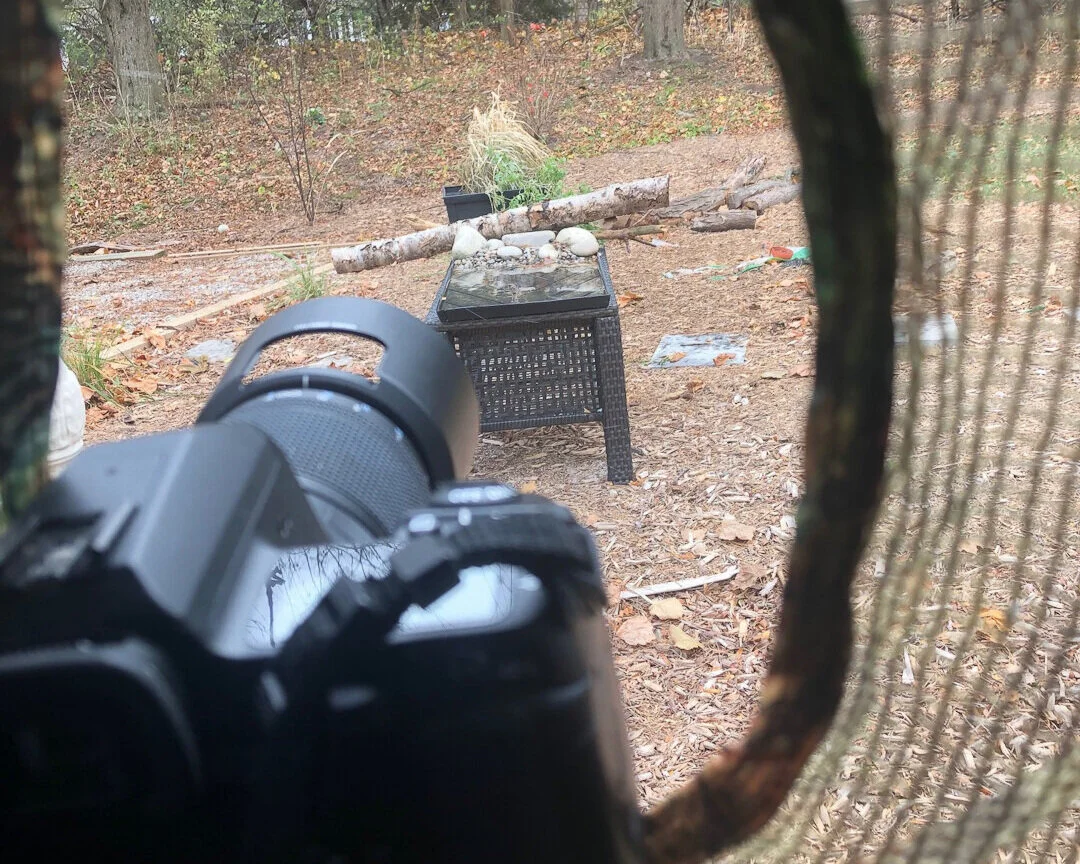
The reflection pond from inside the Tragopan V6 photographic blind.
In addition, both the blind and the reflection pond are extremely easy to move around the garden. By moving the blind around the garden, it’s possible to change backgrounds and even the reflections. For example, in the fall, move the reflection pond around the garden to capture the most intense fall colours. In the spring, do the same to capture spring flowering trees and shrubs.
I have used the blind extensively over the past several months and have grown to really appreciate the convenience of using it to capture images I would never have been able to get without it.
An added bonus to the blind is that as the weather turns cooler, the photo blind, that comes with a thermal lining built into it, will not only help cut the chilling winds and hold what little heat my body generates inside the blind.
The blind makes photographing during the cooler temperatures of late fall and early winter very comfortable for long periods of time.
Gardening on a budget links
Ten money-saving tips for the weekend gardener
DIY Bark Butter feeder for Woodpeckers
DIY reflection pond for photography
Click & Grow is ideal for Native Plants from seed

Review: Click and Grow shines light on native plants
If you are like me, winter can be a long cruel time when all we have is our dreams about what can be come spring time. Growing next year’s woodland plants from seed over the winter is an excellent way to get ready for spring. The Click and Grow system makes growing plants, including native wildflowers simple.
My Click and Grow makes growing from seed simple
If you are like me, gardening doesn’t end with the coming of winter.
In many ways, it’s just the beginning of a new season – the season of anticipation. It’s a long, drawn out time of flipping through gardening books, reading blogs and dreaming of what backyard landscaping ideas are in store for the coming season.
But what do we do in the meantime?
Click and Grow is offering a special “Harvest Season” promotion until October 4 on several of their best Gardens including the Smart Garden 3 and Smart Garden 9. Click on the above link for the special offer.
One solution many of us try is harvesting whatever light we can from windows in our homes and grow what we can. Often we are left with spindly little plants that end up falling over, being ignored and ending up in the composter.
There is a better solution – a simplified grow light system designed especially for people who either don’t have sufficient light to be successful, or have a green thumb that falls off once they move inside. Click and Grow takes all of the guess work out of growing from seed through the use of their innovative system that uses AI to ensure success. What makes Click and Grow perfect for woodland and native plant gardeners is that Click and Grow now provide an easy way to grow native wildflower seeds in their specialized units and pods through their “experimental pods.”
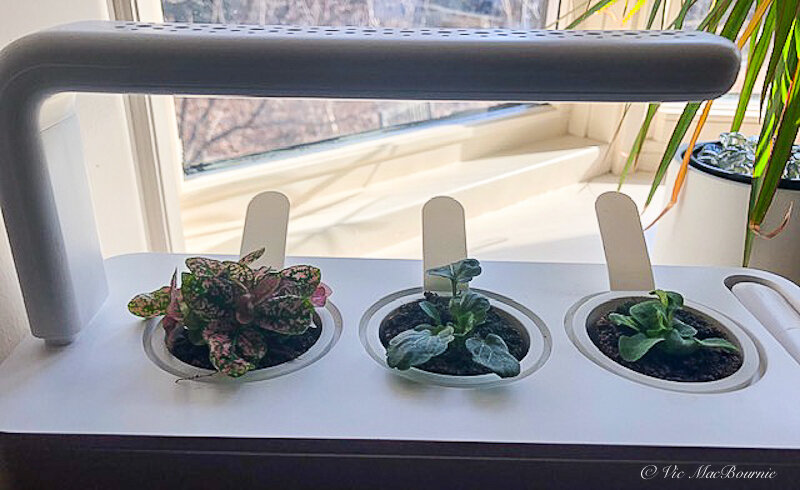
This image shows our Click and Grow with three different plants including a polka dot plant on the left, a black violet, and pink petunia. The violet and petunia are now growing in our window box and the polka dot plant was gifted to my daughter.
In fact, I am currently growing a favourite morning glory in one of our pods.
Introducing Click and Grow – The “smart garden” that turns even the worst winter gardener into a “master” gardener.
I have had a Smart Garden 3 for about two years
I have had one of these for about two years and can report incredible success without much guidance at my end. Click and Grow has become very popular since they introduced their first fully automated indoor gardens that make growing herbs, fruits, vegetables and flowers all year, as simple as adding water a couple times a month and pinching off the growth to keep your new plants from completely taking over your room. They are that good.
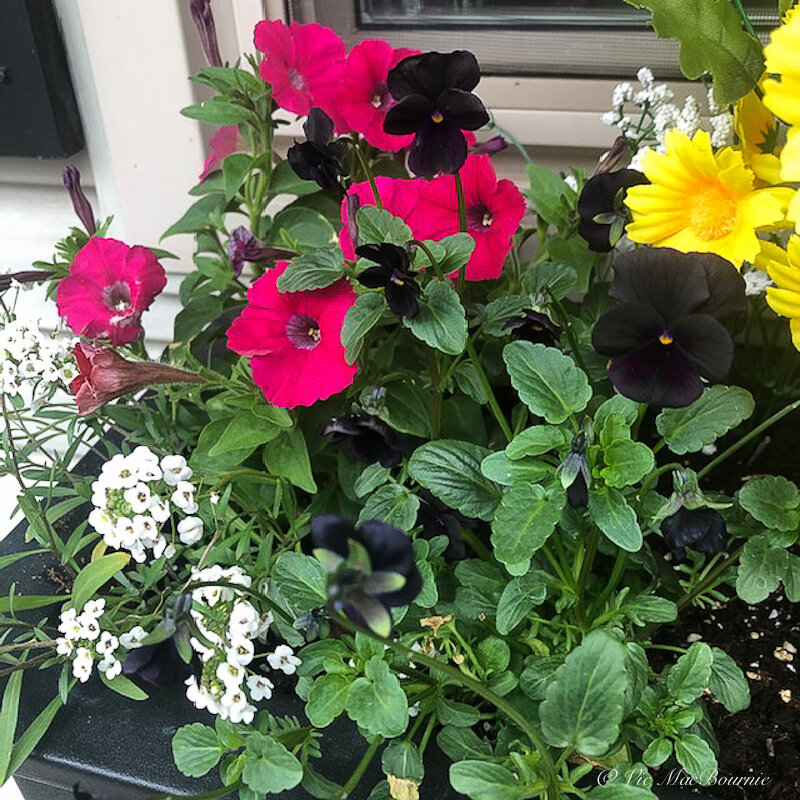
This image shows the black viola and pink petunia grown from our Click and Grow and later planted in one of our window boxes.
What makes these grow lights special?
They are very smart looking, clean and sophisticated. Because they look so good, they don’t have to be hidden away in the basement or a spare bedroom and are at home almost anywhere. They grow as your plants grow. Starting off small and compact, additional pieces are added to meet the size of your ever-growing plants.
But most important. They work and they work well. With little to no fuss.
How easy is it?
You order the pods filled with seeds of your choice and drop them into pockets in the main unit. Add water to the recommended depth, plug the unit in and the timer automatically provides the right amount of light to create the perfect growing condition. No need to turn the lights on and off, the unit takes care of that for you.
All that is required is to keep the water at acceptable levels and add small light extensions as your plants grow.
‘Okay that’s great,’ you may say, ‘but what can you grow.’
Growing native wildflowers could not be easier

Polka Dot plant grown from seed in our Click and Grow.
Well, what would you say if I said “native wildflowers and just about anything else you can think of.”
The native wildflowers would be grown in what Click and Grow call their Experimental pod. You supply the seed and they provide everything else. A word of warning, many wildflowers need stratification and/or a series of freeze and thaws before they will germinate. This too, would be your responsibility. A little research on the germination requirements of your favourite wildflowers and you are good to go.
Click and Grow takes the guess work out. If you go to their website, you can order whatever combination of herbs, plants and fruits you desire.
You can also order pods that are just waiting for you to insert the seeds you collected this fall including, of course, native wildflowers. Imagine, having a number of native plants ready to go into the ground at the first signs of spring.
What are you waiting for, you can start your planning now.
Why some plants need cold stratification for spring planting
Many native wildflowers require a cold stratification which protects them from germinating too early in spring or too late in the summer. It’s a natural protection process that keeps them dormant until the proper time for them to start sprouting. Most of the native wildflowers that need stratification are perennials with a hard coating that helps protect the outer shell from breaking and sprouting too early for the plants to survive.
Go to the link at the bottom of this post to learn how to cold stratify your wildflower seeds.
List of seeds requiring stratification
Milkweed
Lupine
Prairie Coneflower
Pincushion Flower
Wild Geranium
Rubeckia
Coneflower
Primrose
Before you start with the stratification and planting you will have to decide just how big a Smart Garden you want to go. There is the Smart Garden 3 (that’s the one I have), Smart Garden 9, and finally the impressive Smart Garden 27 made to grow enough fresh food to feed the entire family.
Some of the popular plant pods include Mini Tomato, Wild Strawberry, Lavender, Rosemary, Peppermint and Cilantro/ Coriander. But there are more. A Fruit and Veggie mix, Italian Herb mix, Calming Tea mix, Black Pansy mix, Blue Petunia, Catnip, Cornflower and Painted Nettle to name just a few.
I could go on and on about the soil in the pods. I could talk about having the perfect pH-level, how the soil was inspired by NASA technology and creates the perfect environment for your plants to thrive. I could say the soil and pod it sits in keeps water distributed so the plant roots have access to it at all times.
I could say the soil is made of natural, renewable materials, and contains no pesticides, fungicides, hormones or other harmful substances.
But all that really matters is that it works. Trust me. Mine will be up and running again very soon. I need more Cardinal flowers in my garden next year.
For more on growing your garden on a budget, go here.
If you are on the lookout for high quality, non-GMO seed for the Pacific North West consider West Coast Seeds. The company, based in Vancouver BC says that “part of our mission to help repair the world, we place a high priority on education and community outreach. Our intent is to encourage sustainable, organic growing practices through knowledge and support. We believe in the principles of eating locally produced food whenever possible, sharing gardening wisdom, and teaching people how to grow from seed.”
Key links for this blog post
This is a link that takes you to a website with an excellent article on how to cold stratify your wildflower seeds. How to Cold stratify your seeds.
The picture below is a link to the Click and Grow website.
Gardening on a budget links
Ten money-saving tips for the weekend gardener
DIY Bark Butter feeder for Woodpeckers
DIY reflection pond for photography
Click & Grow is ideal for Native Plants from seed
Remove your turf and save money
Hiring students to get your garden in shape
This page contains affiliate links. If you purchase a product through one of them, I will receive a commission (at no additional cost to you) I only endorse products I have either used, have complete confidence in, or have experience with the manufacturer. Thank you for your support.

DIY: A solar drip for the birds
Converting a rarely used bird bath dripper into a solar powered fountain that is used daily, is a simple, DIY project that will please both the birds and the birdwatchers.
Turn a bird bath dripper into a solar-powered fountain birds will love
Birds love moving water and a drip, drop is about as good as it gets for them.
So, when I saw a nice copper bird bath dripper on Kijiji this spring, I jumped on it. The dripper was very high quality and I couldn’t pass it up. A copper drip tube attached to a lovely piece of slate with brass hose fittings.
It just doesn’t get any better than that.
Fast forward to this fall. Back on Kijiji looking for a cheap plastic bird bath to use this winter with an electric heater to provide water for our winged visitors throughout the freezing Southern Ontario winter, and … there it was. A magnificent copper bird bath for a very reasonable price. I remember saying to my wife that “someone in Toronto was going to get a great deal on a used copper bird bath.”
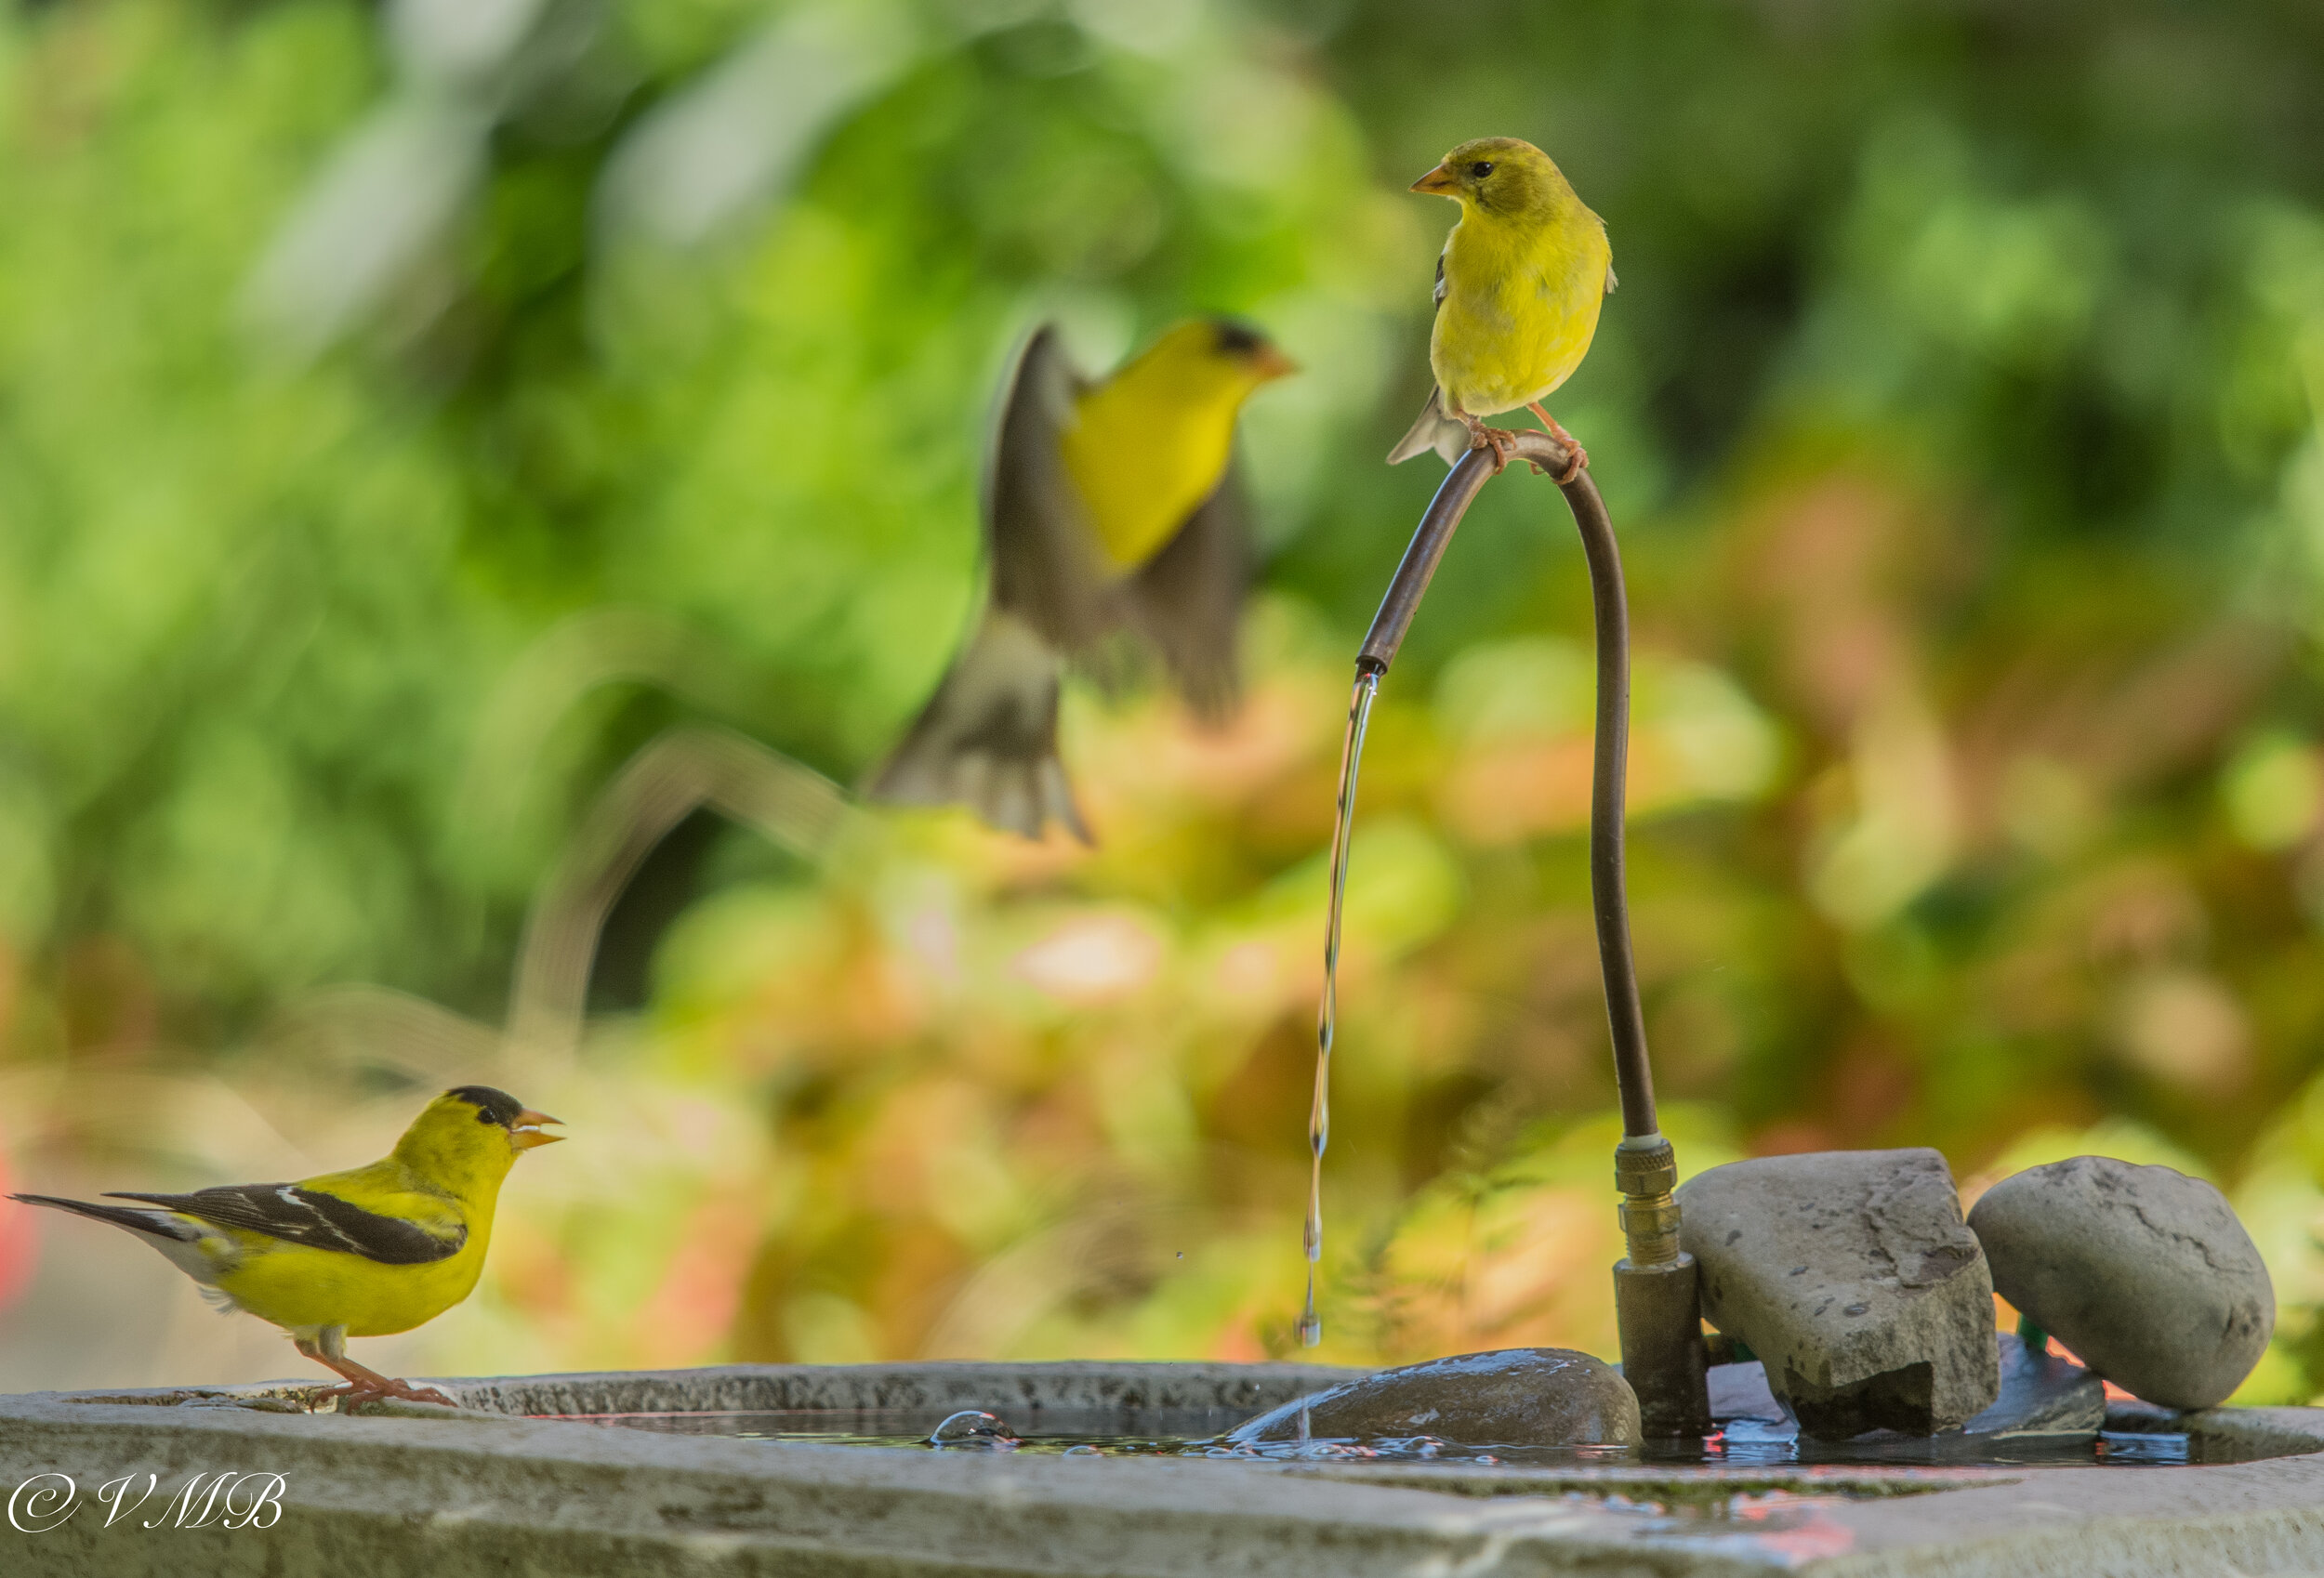
The converted dripper that operates as a solar-powered recirculating pump is certainly a treat for the Goldfinches in the garden.
The cheap plastic bird bath turned out to be an expensive copper one but I couldn’t be happier. The next morning I was on my way to Toronto (about a one-hour drive) to pick up the birdbath. To help justifiy the two-hour return trip, I combined it with a grocery delivery to my daughter who, it turned out, lived just 10 minutes from my prized bird bath.
Keeping an eye open for bird baths, bird houses and bird feeders on your favourite on-line used marketplace sites like Kijiji or Craigslist is a good way to get started with backyard birding or just to upgrade or add to your baths, houses and feeders.
Besides scoring the copper bird bath, I decided to do a slight hack on my already converted dripper to use it with the new bird bath.
For more suggestions and some of my favourite garden things, be sure to check out my Favourite Things post.
Although birds love drippers, the units need to be hooked up to a hose that needs to be left on while the amount of water is controlled to the point where just a drip at a time falls into the birdbath. Eventually, though, if left on and unattended, the bird bath overfills and drips over the edge potentially flooding an area.
I tried to make it work. I really did. Set up a nice deep bird bath that actually had a small leak. So it could handle the constant dripping without really overflowing. Trying to get the right flow was a pain and remembering to turn it off added to my frustration.
If only I could convert it to a recirculating dripper or even use it like a fountain.
Once I got the idea, it didn’t take long to convert the dripper to a solar powered unit. It’s no longer a “dripper” but that doesn’t matter because it is recirculating the water in the birdbath rather than adding to it.
The original dripper unit came with a very long, thin rubber hose that connected to the hose faucet. By cutting that into a short (maybe 6-inch) hose and connecting that to the pump’s outlet via one of the alternative fountain heads provided by the solar pump, the unit works even better than expected.
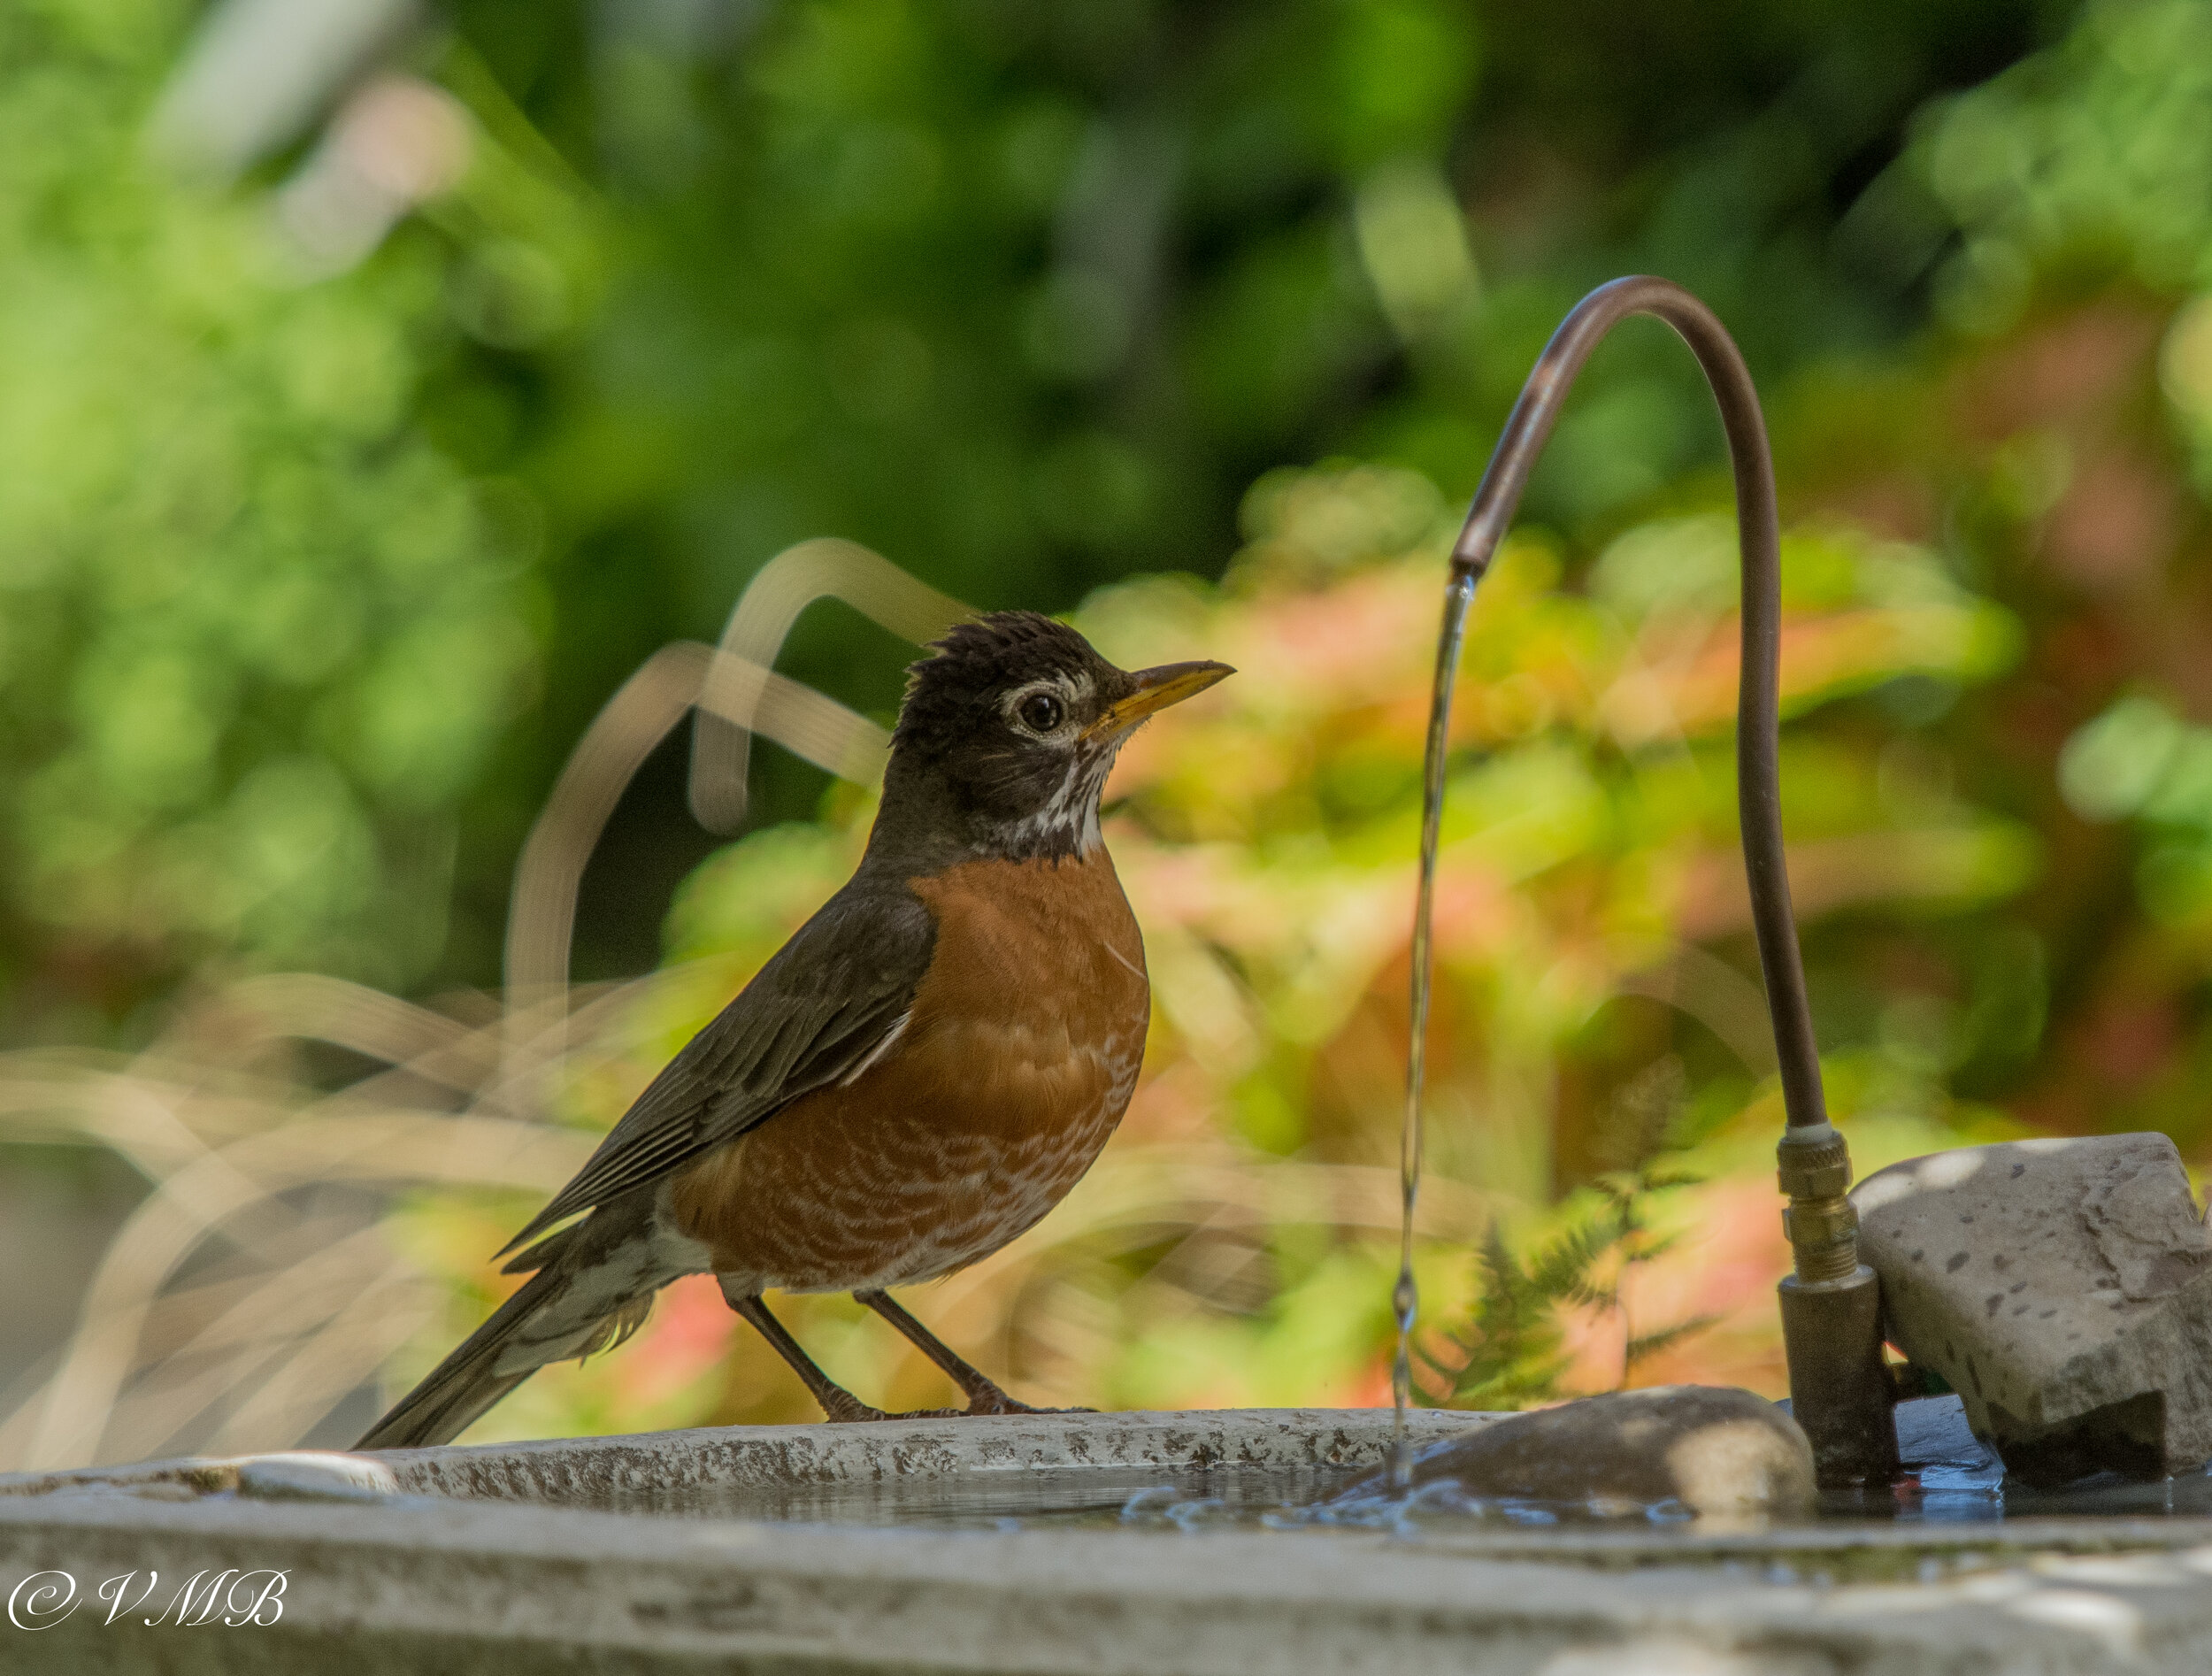
A robin takes a drink from the bird bath with the solar-powered fountain.
When the sun was out, it provided birds with a gentle flow of water recirculated from the bath itself.
This approach worked well but a small problem emerged. Trying to keep water levels high enough so that the small solar pump stayed below water became a daily concern.
The combination of birds using the bird bath, evaporation and some splashing caused by the fountain, created a daily water loss that meant constant monitoring of water levels. Everyday the water had to be topped up for fear of the bird bath running too low on water and potentially ruining the pump.
So, a small change to the original dripper conversion should work well with the new bird bath and its new location. By hiding a large bucket of water near the copper bird bath and sinking the solar pump to the bottom of the bucket, there is no fear of running the pump dry. On sunny days the bird bath will likely overflow a little but it’s placed in an area that does not get a full day of sun and will benefit from access water. A little overflow on sunny days will help to keep the water fresh and the bird bath full. In addition, I can’t help but think that it might be the perfect place to grow a thick carpet of moss around the birdbath where the access water will fall.
We set up the new bird bath and dripper/fountain right outside our family room French door to give us a window into the woodland and our keep an eye on the action at the bird bath. I’ll report back on how it’s working and how much the birds are loving it. It’s always a good idea to place feeders and bird baths so that you can watch them from inside your home. Read my blog on “A window into your woodland,” here.
I want to put a real plug in for these small, inexpensive solar-powered recirculating water pumps. This will be the third solar pump I’m using in the garden and I expect to put an order in for another one. There are so many uses for these small pumps. They come with a number of different fountain heads from a single stream of water to a gentle multi-stream fountain that would be perfect for hummingbirds who like to play in gentle streaming fountains.
A quick look on YouTube under “small solar fountain” turns up numerous DIY projects.
Definitely worth trying out.
For more on Building your Garden on a Budget, check out my earlier in-depth article here.
Consider installing a high-end, off-grid solar power system
If you are like me and don’t have electricity in your garden, or at least don’t have it in the far reaches of the garden, consider installing a complete off-grid solar-powered electrical system like the American-based Shop Solar Kit company.
Maybe you have a pergola in the back of the garden, or even a she-shed that you would like to have full power running a small refrigerator, sound system or full-size lamps and lighting. If you need to run pumps and lighting to a garden pond, you can do it with one of these highly capable systems that, once installed, operate at no cost to you at all.
There are complete DIY kits available for approximately $1,500 and up.

Gardening on a budget links
Ten money-saving tips for the weekend gardener
DIY Bark Butter feeder for Woodpeckers
DIY reflection pond for photography
Click & Grow is ideal for Native Plants from seed
Remove your turf and save money
Hiring students to get your garden in shape
If you are interested in backyard birds, please consider signing up for my backyard birds newsletter. The sign-up page is at the bottom of my homepage. Not only will the newsletter provide in-depth articles on attracting, feeding and photographing backyard birds, I am also working with local artisans to provide discounts on incredible bird-related feeders, houses and other goodies backyard birders will love. In addition there will be regular giveaways , including gardening books and birding items.