

Falling in love with the Olympus 45mm F1.8 and MCON P02
The Olympus 45mm F1.8 teamed with the MCON P02 takes an already outstanding lens and makes it significantly better.

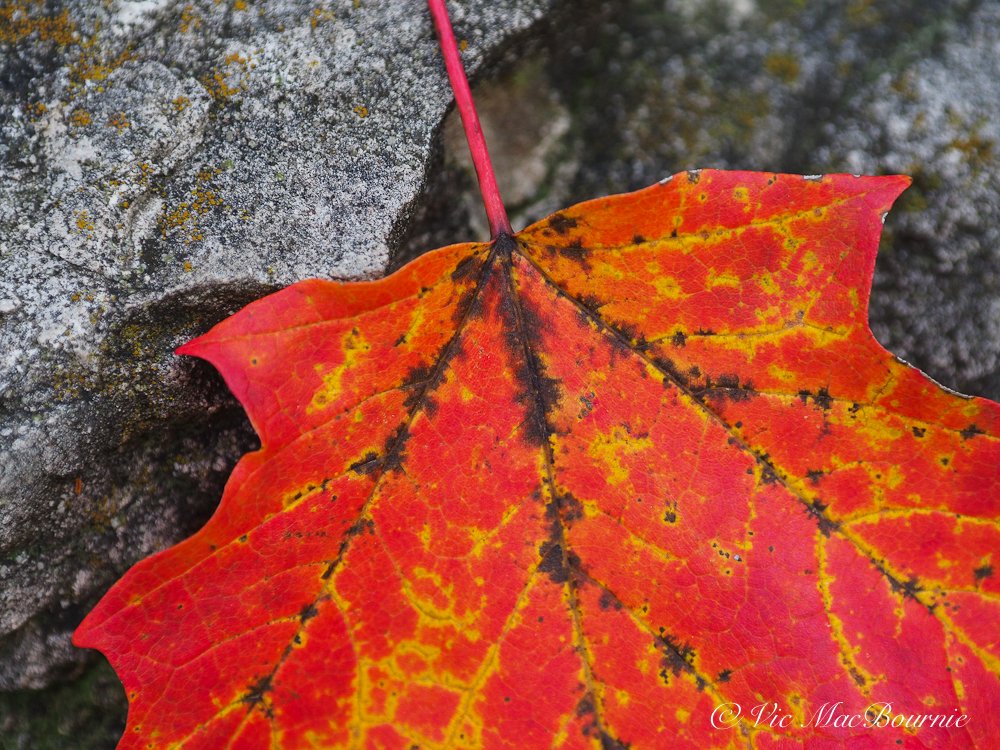
The Olympus 45mm F1.8 captures the fine detail and vivid colours of this front garden in fall with its exquisite grasses and vibrant hydrangeas.
How to maximize the Olympus 45mm F1.8 for macro with the P02
Fall is the perfect time to get out your camera and lenses and fall in love all over again, especially when it comes to macro or closeup photography. Combine the Olympus 45mm F1.8 with the Olympus P02 and it’s a love affair made in heaven.
That love affair may have roots in the wonderful colours of autumn, but it can just as easily extend to some of your finest cameras and lenses. The Olympus 45mm F1.8 is one of those lenses you’ll fall in love with over and over again.
I recently picked up a mint copy of the 45mm silver version for a fraction of its regular price and teamed it up with the magnificent MCON P02 to give me the ultimate walk around lens with impressive close focus capabilities.
This compact Olympus lens – now under the name OEM Systems – was first introduced to micro 4/3rd users in 2011. At that time, it was the fastest prime available on the micro 4/3 system.
Today, it is still easy to carry around, offers some of the sweetest bokeh of any lens, is very sharp and has fine, vivid colours.
It might have earned its reputation as a superb portrait lens, but it more than holds its own as an all-purpose lens, whether you are in your favourite woodlands, on the street or on vacation.
The close up capabilities of the Olympus 45mm F1.8, when paired with the MCON P02 as seen here, is very impressive.
Slip the Olympus MCON P02 macro converter onto the front of the lens and you’ve got an impressive, fast, short telephoto and macro lens.

The Olympus MCON P02 closeup lens also works nicely with the Olympus 14-42 kit zoom lens that was used here to capture these orchids.
What better opportunity to run it through its paces than during the annual fall celebration of colour.

The Olympus 45mm F1.8 captures this lovely fall scene with its vivid colours.
There’s lots to like about the Olympus 45mm lens
Sure, it’s a fast lens that creates tack sharp images even in low-light situations, but that’s just the beginning of what makes the lens a must-have. Focus is both fast and very precise. Build quality is very good, and its 116 grams (0.26 lb) makes the lens easy to carry around at all times.
Video shooters will appreciate the near silent autofocus capabilities of the lens, which benefits from its MSC (Movie-Still-Compatible) technology.
Check out the Olympus official site for the best deals of the day.
What’s not to like?
If you want to get picky, there is the rather expensive lens hood sold as an accessory and the fact that the lens’s minimum focus distance stretches out to almost 20 inches (19.69 to be exact) or 0.50 m for those of us using metric. The result is a magnification factor of only 0.11.
There’s not much we can do about the cost of the lens hood except keep our eye open for a good used one.
The lens’s poor close-focusing capabilities is an easy fix. Add the MCON P02 converter to the front of the lens and the 45mm opens up a new world to users. But more on that a little later.
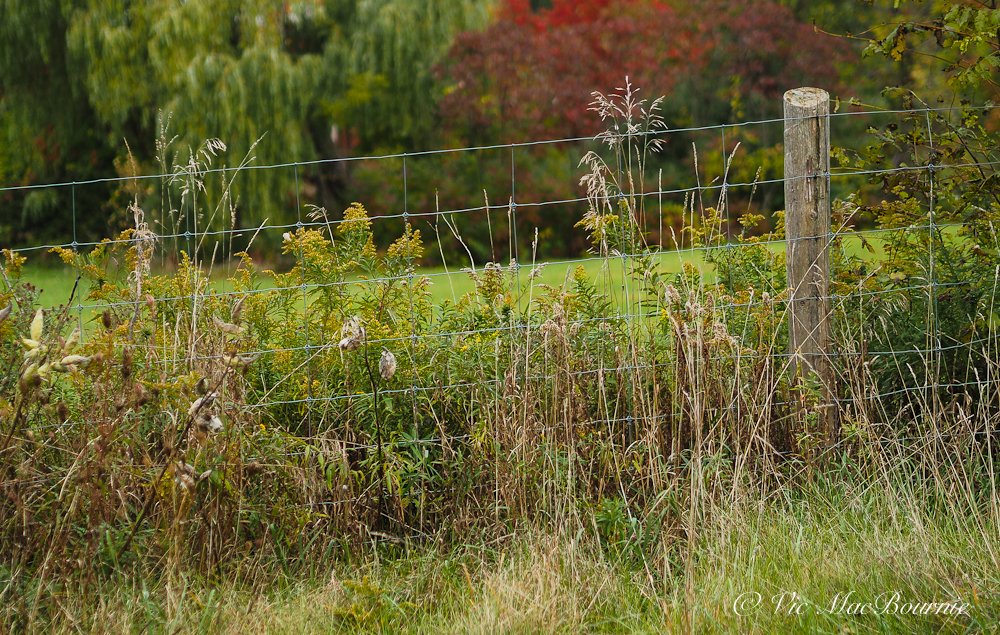
This fence line image was shot with the Olympus 45mm wide open at F1.8. Sharpness is excellent with a nice soft out-of-focus background.
Olympus 45mm F1.8 in the woodlands and in the fields
Lens specs have their place, but until we take the lens out into the field, it’s hard to really appreciate the quality and value of the lens.
So I took the lens out for a morning of early fall color on the roads around my home recently.
I have always prefered a short telephoto approach for most of my fall images. I find the telephoto helps to focus in on the intimate details rather than show the all encompassing view of a wide angle lens.
If you are looking to add a camera or lens to your arsenal, be sure to check out the huge offering from KEH Camera Exchange.

This early fall image of the open farm lands near our home was taken with the highly praised Olympus 45mm F1.8.
First impression of the Olympus 45mm
My first impressions of this lens were more than favourable.
Everything that has already been said about the lens proved true in the first few shots. Sharp even wide open, fast and effective focus, silent, great bokeh and lovely colour rendition.
And you don’t have to take my word for it.
Former Olympus ambassador and enthusiast Robin Wong states: “No matter what lenses I use on the street, I always fall back to this beautiful medium-telephoto focal length, and 45mm just fits my compositional vision almost perfectly.”

Fall in the woodland garden offers several opportunities to capture natural images like these Pagoda Dogwood berries waiting for the birds to finish them off. The medium telephoto lens helps capture the pleasing scene in a natural setting.
He goes on to say: “Being able to blur off the background is something I treasure, and the Olympus 45mm F1.8 does this very well, being a medium telephoto range as well as having a wide open aperture of F1.8. The rendering of the bokeh? Simply creamy and beautiful. Just what I needed to make some portrait shots “pop.”
Rob Trek, YouTuber and Olympus enthusiast, recommends photographers purchase the Olympus 45mm F1.8 as their first prime lens because it will give you “the best bang for the buck in terms of value…in terms of your creativity and your photography and the kinds of pictures you take.”
YouTuber Steven Heise says: “There are a lot of lenses that perform well, but then there are a small handful of lenses that come to the party ready to rock the house. This is one of those kinds of lenses.
“This is hands down one of the best budget portrait lenses you can buy for micro 4/3. When you take into consideration the image quality of this lens, the incredible sharpness, the color, the contrast and the quickness and accuracy of the autofocusing system, the answer just becomes abundantly clear.”
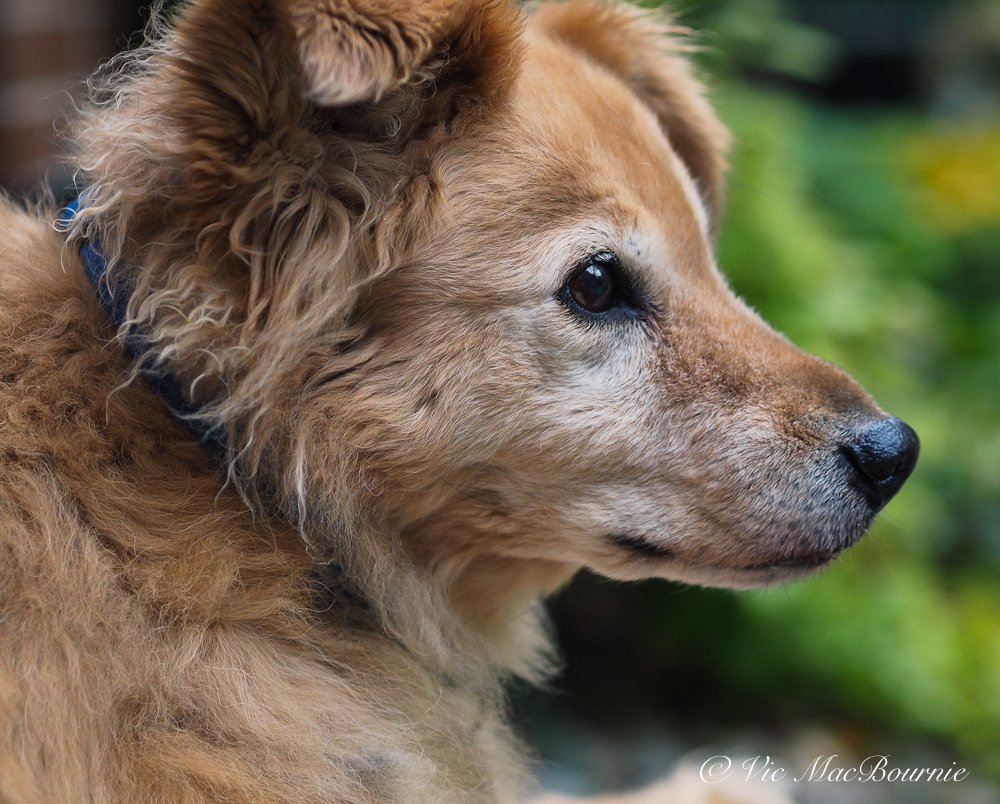
My sweet dog Holly taken with the Olympus 45mm F1.8 close to wide open.
Peter Forsgard, a former Olympus ambassador based in Finland, describes the lens as “One of the best quality money ratio you can get on any M Zuiko lens. I think the 45mm is the one. It’s not very expensive, but the image quality is stunning.”
He calls it the “perfect lens for environmental portraits.”
Steve Huff, another Olympus enthusiast, had high praise for the lens in his review shortly after getting the lens in October 2011. He compared the 45mm F1.8 with the Olympus 12mm F/2 after declaring the 12mm the best micro 4/3 lens ever made. “After using this 45 1.8 for a few days I can say that this lens is equally as delicious. Yes, I said delicious! The IQ from this lens on the E-P3 is nothing short of astounding for the micro 4/3 format. Some of the best quality I have seen from any M4/3 camera/lens combo.”
Here are a few impressions of the lens from Olympus users gathered from forums around the internet.
• “The images are tack sharp, the colours warm and flattering, the focus is both quiet and fast, and the “Bokeh” which all the Olympus haters go on about is feathery soft.”
• “Perfect for portraits, it’s also great for giving a different perspective on landscapes and cityscapes…. Sharpness is the outstanding feature of this lens though. You notice it from the first shot you take. It makes you feel like a pro. Contrast and colour are so good that you’ll barely need to adjust your photos in Photoshop or the like…. The bottom line is that this is a near perfect and therefore essential lens for a bargain price.”
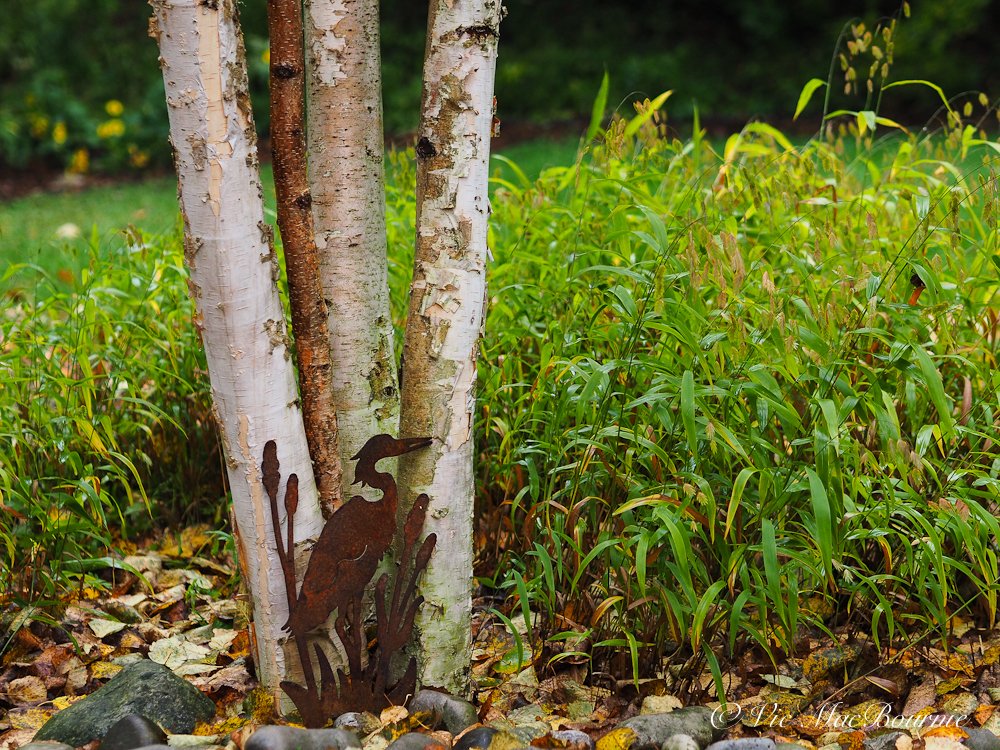
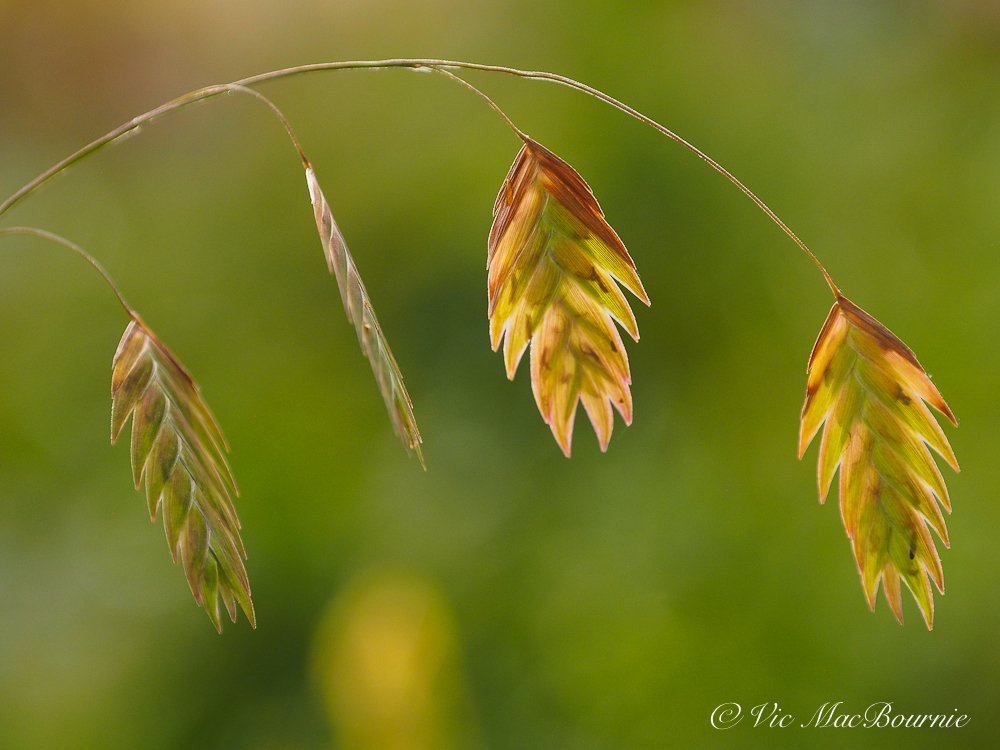
Birch clump with Northern Sea Oats.
I think it’s fair to say that in all my research into the 45mm F1.8, I struggled to find anyone critical of the lens.
Of course there is a reason for all this praise, and it stems from the fact that the lens is among the best in its class.
The short telephoto is ideal for everyday garden and nature photography. It’s probably not long enough to capture most wildlife including birds, small mammals and insects, especially since its minimum focus distance leaves a little to be desired.
But that’s where the Olympus MCON P02 macro converter steps into action.
One weakness of the Olympus 45mm F1.8 lens is its close focus capabilities. Add the Olympus MCON P02 and that problem is easily solved making it the perfect walk around lens. Oh, and just take a look at that creamy bokeh.

Olympus camera equipped with the P02 macro filter.
Close-up photography with the 45mm F1.8
Very few of us really need true macro, meaning 1:1 magnification. What most of us focus on is better described as close-up photography, which is magnification less than 1:1 or lifesize.

The MCON P02 screws on to the front of your lens to reduce the minimum focus distance of the lens.
By adding the Olympus MCON P02 filter to the Olympus 45mm F1.8 you get an outstanding close-focus performer that benefits from having a lovely creamy background.
The high-quality filter that screws on to the front of the lens is constructed in 1 group with 2 elements and weighs a mere 52g. It comes with quality front and rear lens caps and a step-up ring.
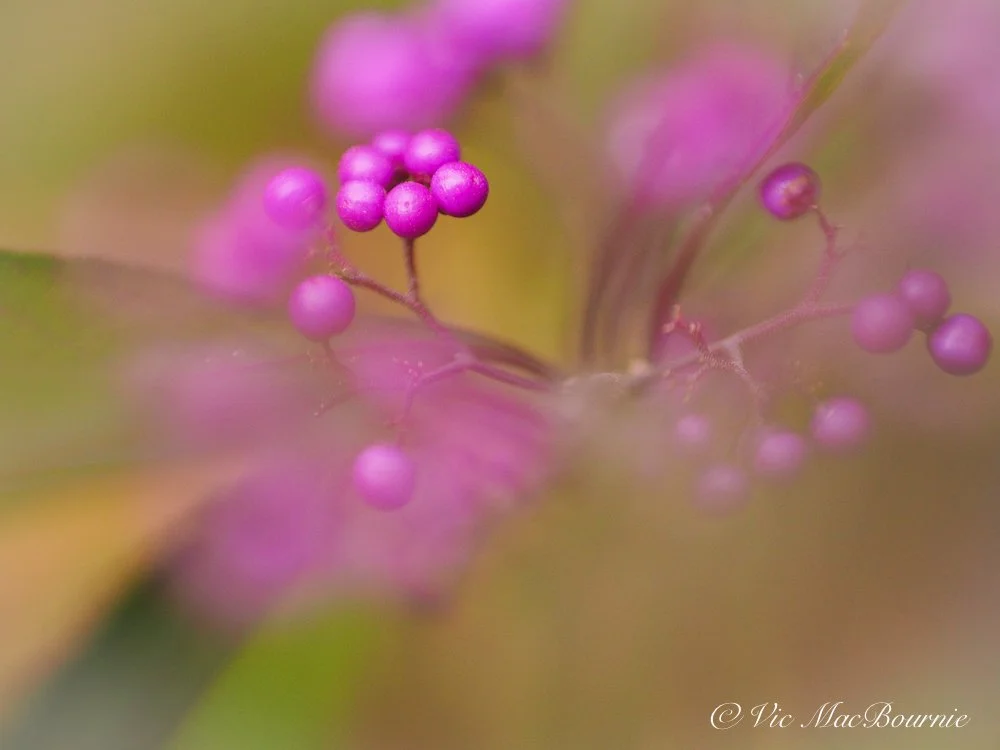
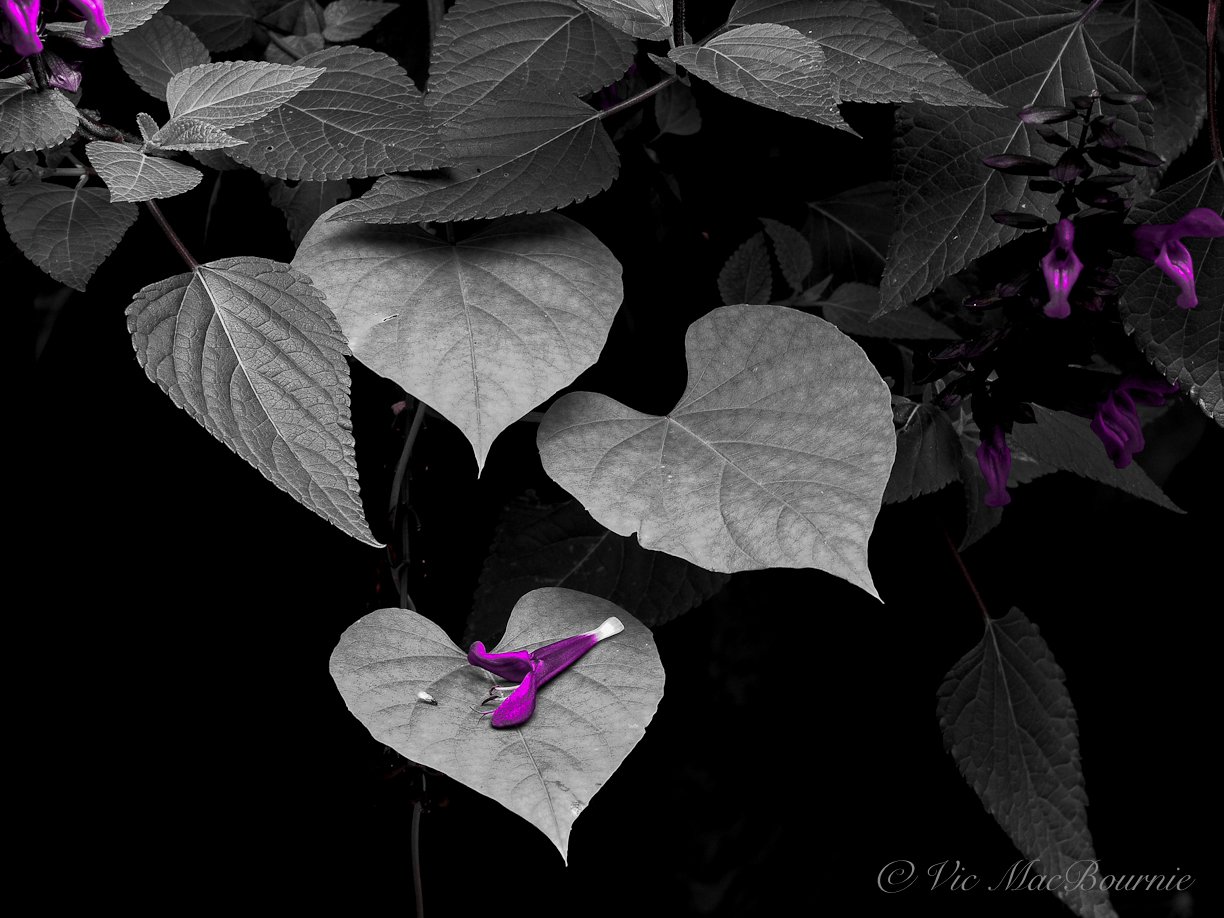
Use it wide open to explore creative selective focus effects like the purple Beautyberries below.
Or, use the lens’s inherent sharpness to create exquisitely finely detailed images like the Northern Sea Oat grasses above.
For more on close-up photography check out my post here.
The lens offers endless opportunities to be creative, including the ability to shoot selective focus images using the macro converter with a large aperature of f1.8.
Why the MCON P02 close-focusing lens instead of a true macro lens?
There are many reasons to go with the P02 over a true macro lens. First, there is the cost savings. You should be able to pick up a P02 for less than $100 and considerably less than that if you are lucky enough to find one on the used market.

Olympus camera with 45mm F1.8 and P02 converter on front of lens.
In comparison, a true macro lens will set you back 5X the cost of the P02 and add another lens to your camera bag. There is something freeing about using a single sweet little lens that can double as an exquisite macro lens.
To screw the filter to the front of the lens, a ring first needs to be removed from the front of the lens.
When used with the 45mm F1.8, the lens’s closest focusing distance is almost cut in half to approximately 24cm. The image below from the Olympus website shows the difference between the close focus capabilities of the lens with and without the P02.
For more on the MCON P02, check out the official Olympus site.

This image from Olympus shows the close focus capabilities of the 45mm lens with the MCON P02.
MCON P02: A versatile addition in the palm of your hand
Don’t think for a minute that the P02 is made only for the 45mm. This little add-on filter is a versatile addition to your camera bag and fits nicely on the 14-42mm kit zoom as well as a number of other Olympus lenses. On the popular ED 14-42 F3.5-5.6 EZ the add-on lens turns the lens into a semi-macro lens with the shortest shooting distance of 18cm and the maximum image magnification of 0.38x (35mm equivalent: 0.76x). It comes with step-up rings to attach it to a 37mm filter diameter lens.
For a complete list, see chart below.
M.ZUIKO DIGITAL ED 14-42mm F3.5-5.6 EZ
M.ZUIKO DIGITAL 14-42mm F3.5-5.6II
M.ZUIKO DIGITAL 14-42mm F3.5-5.6IIR
M.ZUIKO DIGITAL 45mm F1.8
Just add a step-up ring for use on the following lensesM.ZUIKO DIGITAL 25mm F1.8
M.ZUIKO DIGITAL 17mm F1.8
M.ZUIKO DIGITAL ED 12mm F2.0

Why leave ornamental grasses standing through winter?
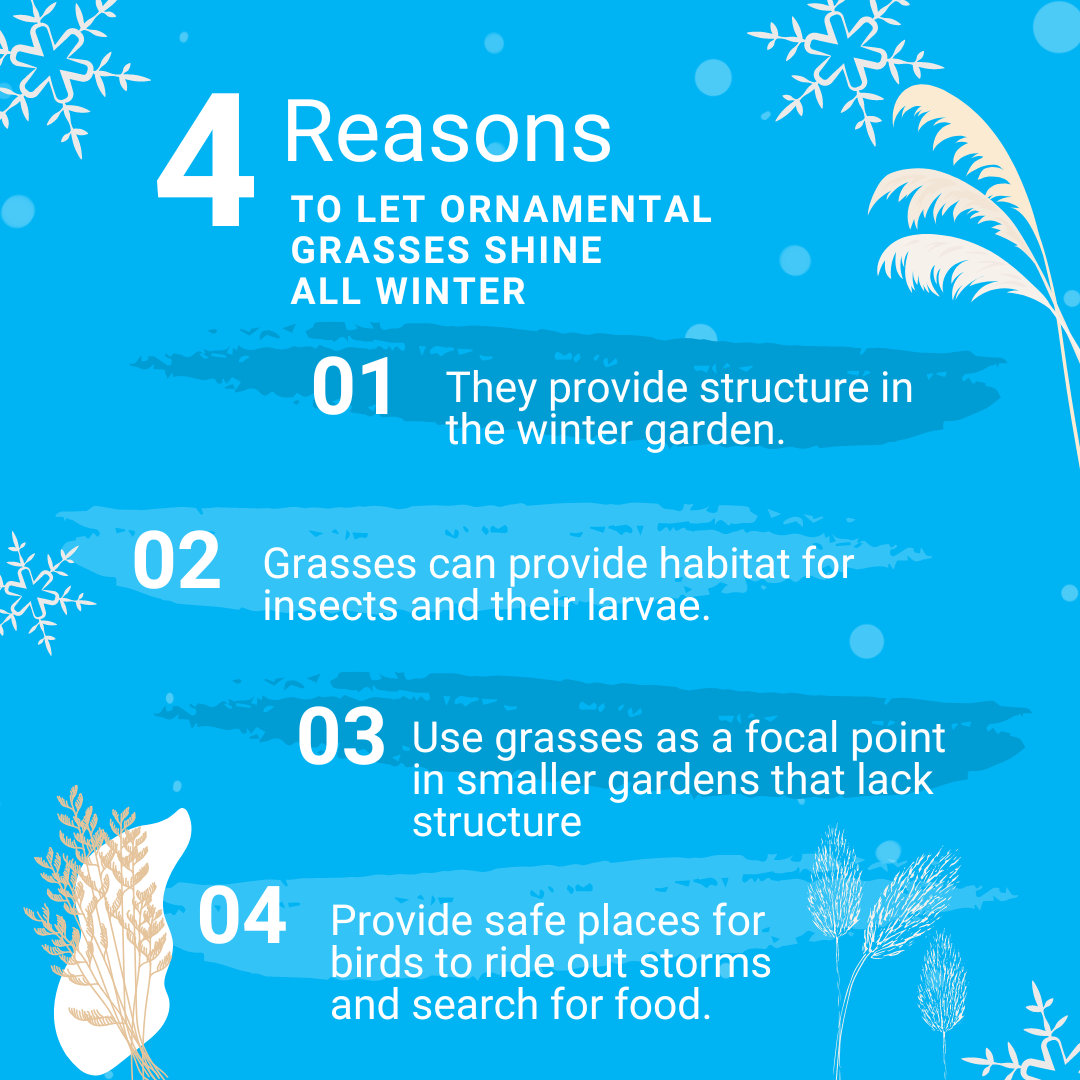
Ornamental grasses have become popular additions to our gardens for summer and fall interest, but they really come into their own in winter where they add structure and even movement in the winter garden.
Grasses provide structure and habitat for the garden in winter
There are two reasons I leave our grasses standing all winter. First, wildlife – from insects to birds – benefit from the standing grasses and second, I just love the look of the wheat-coloured grasses providing structure in the garden from the fall through to the following spring.
There is another important reason to leave the grasses standing, but we’ll get to that in a minute.
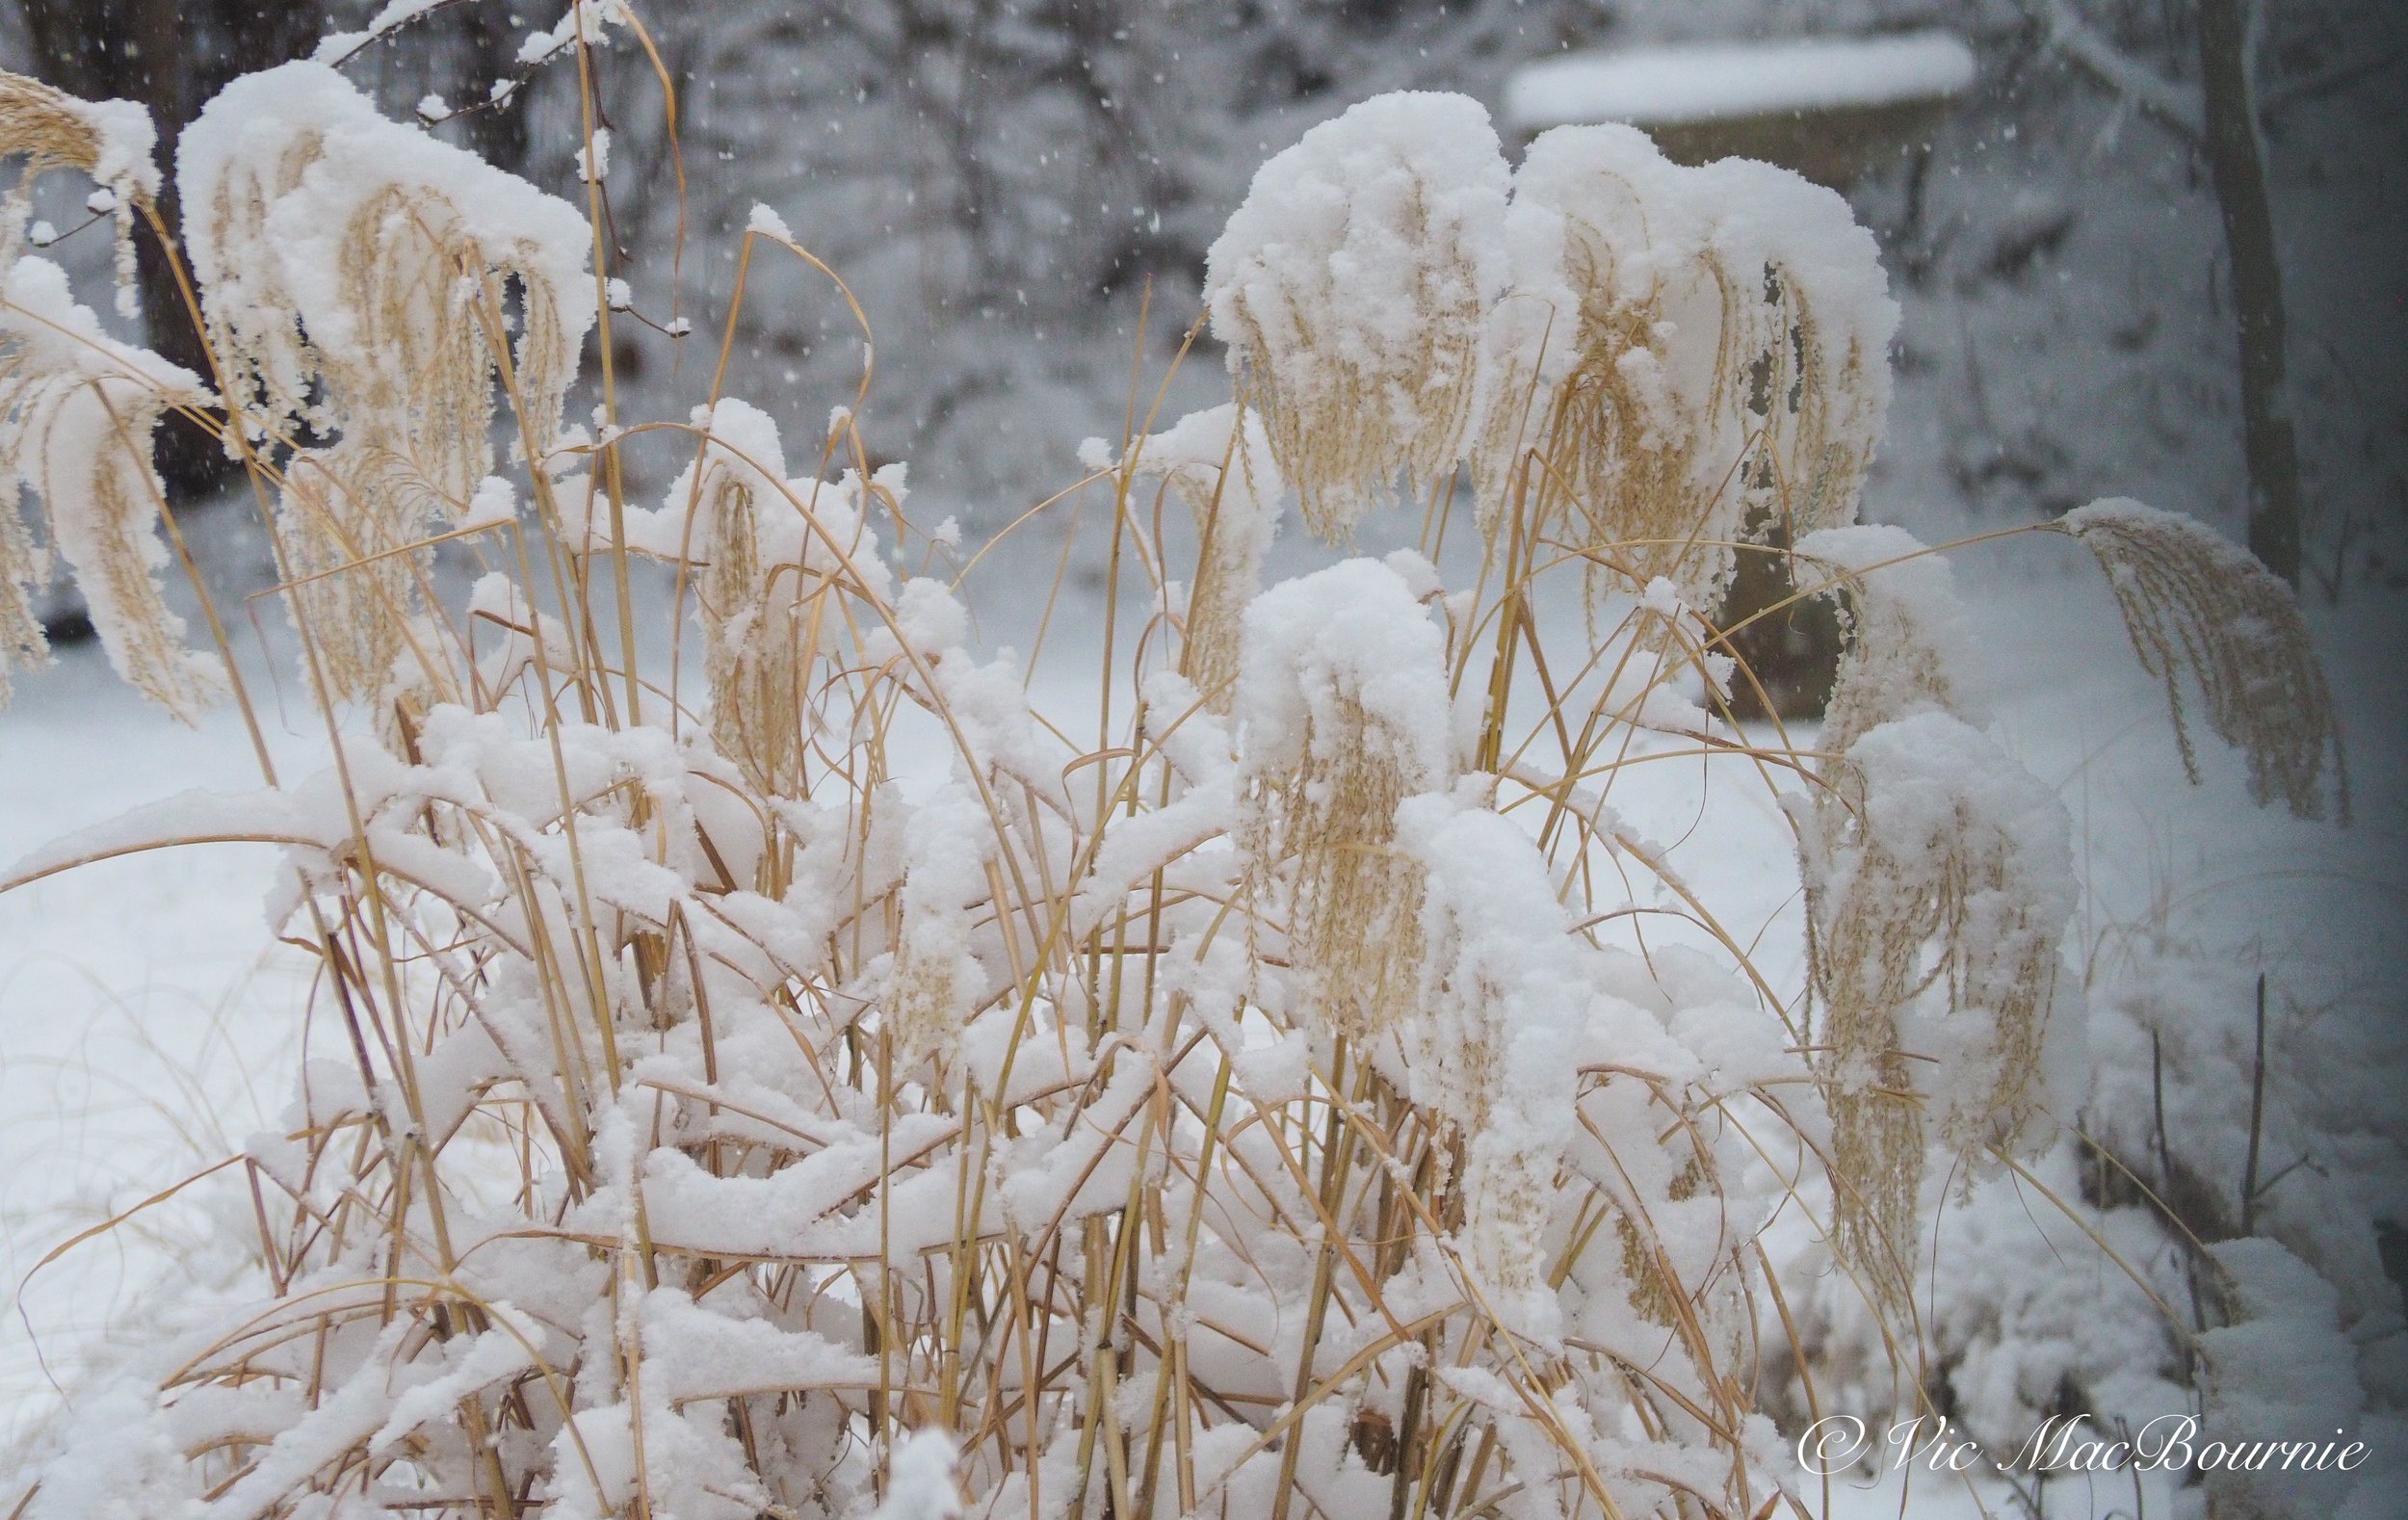
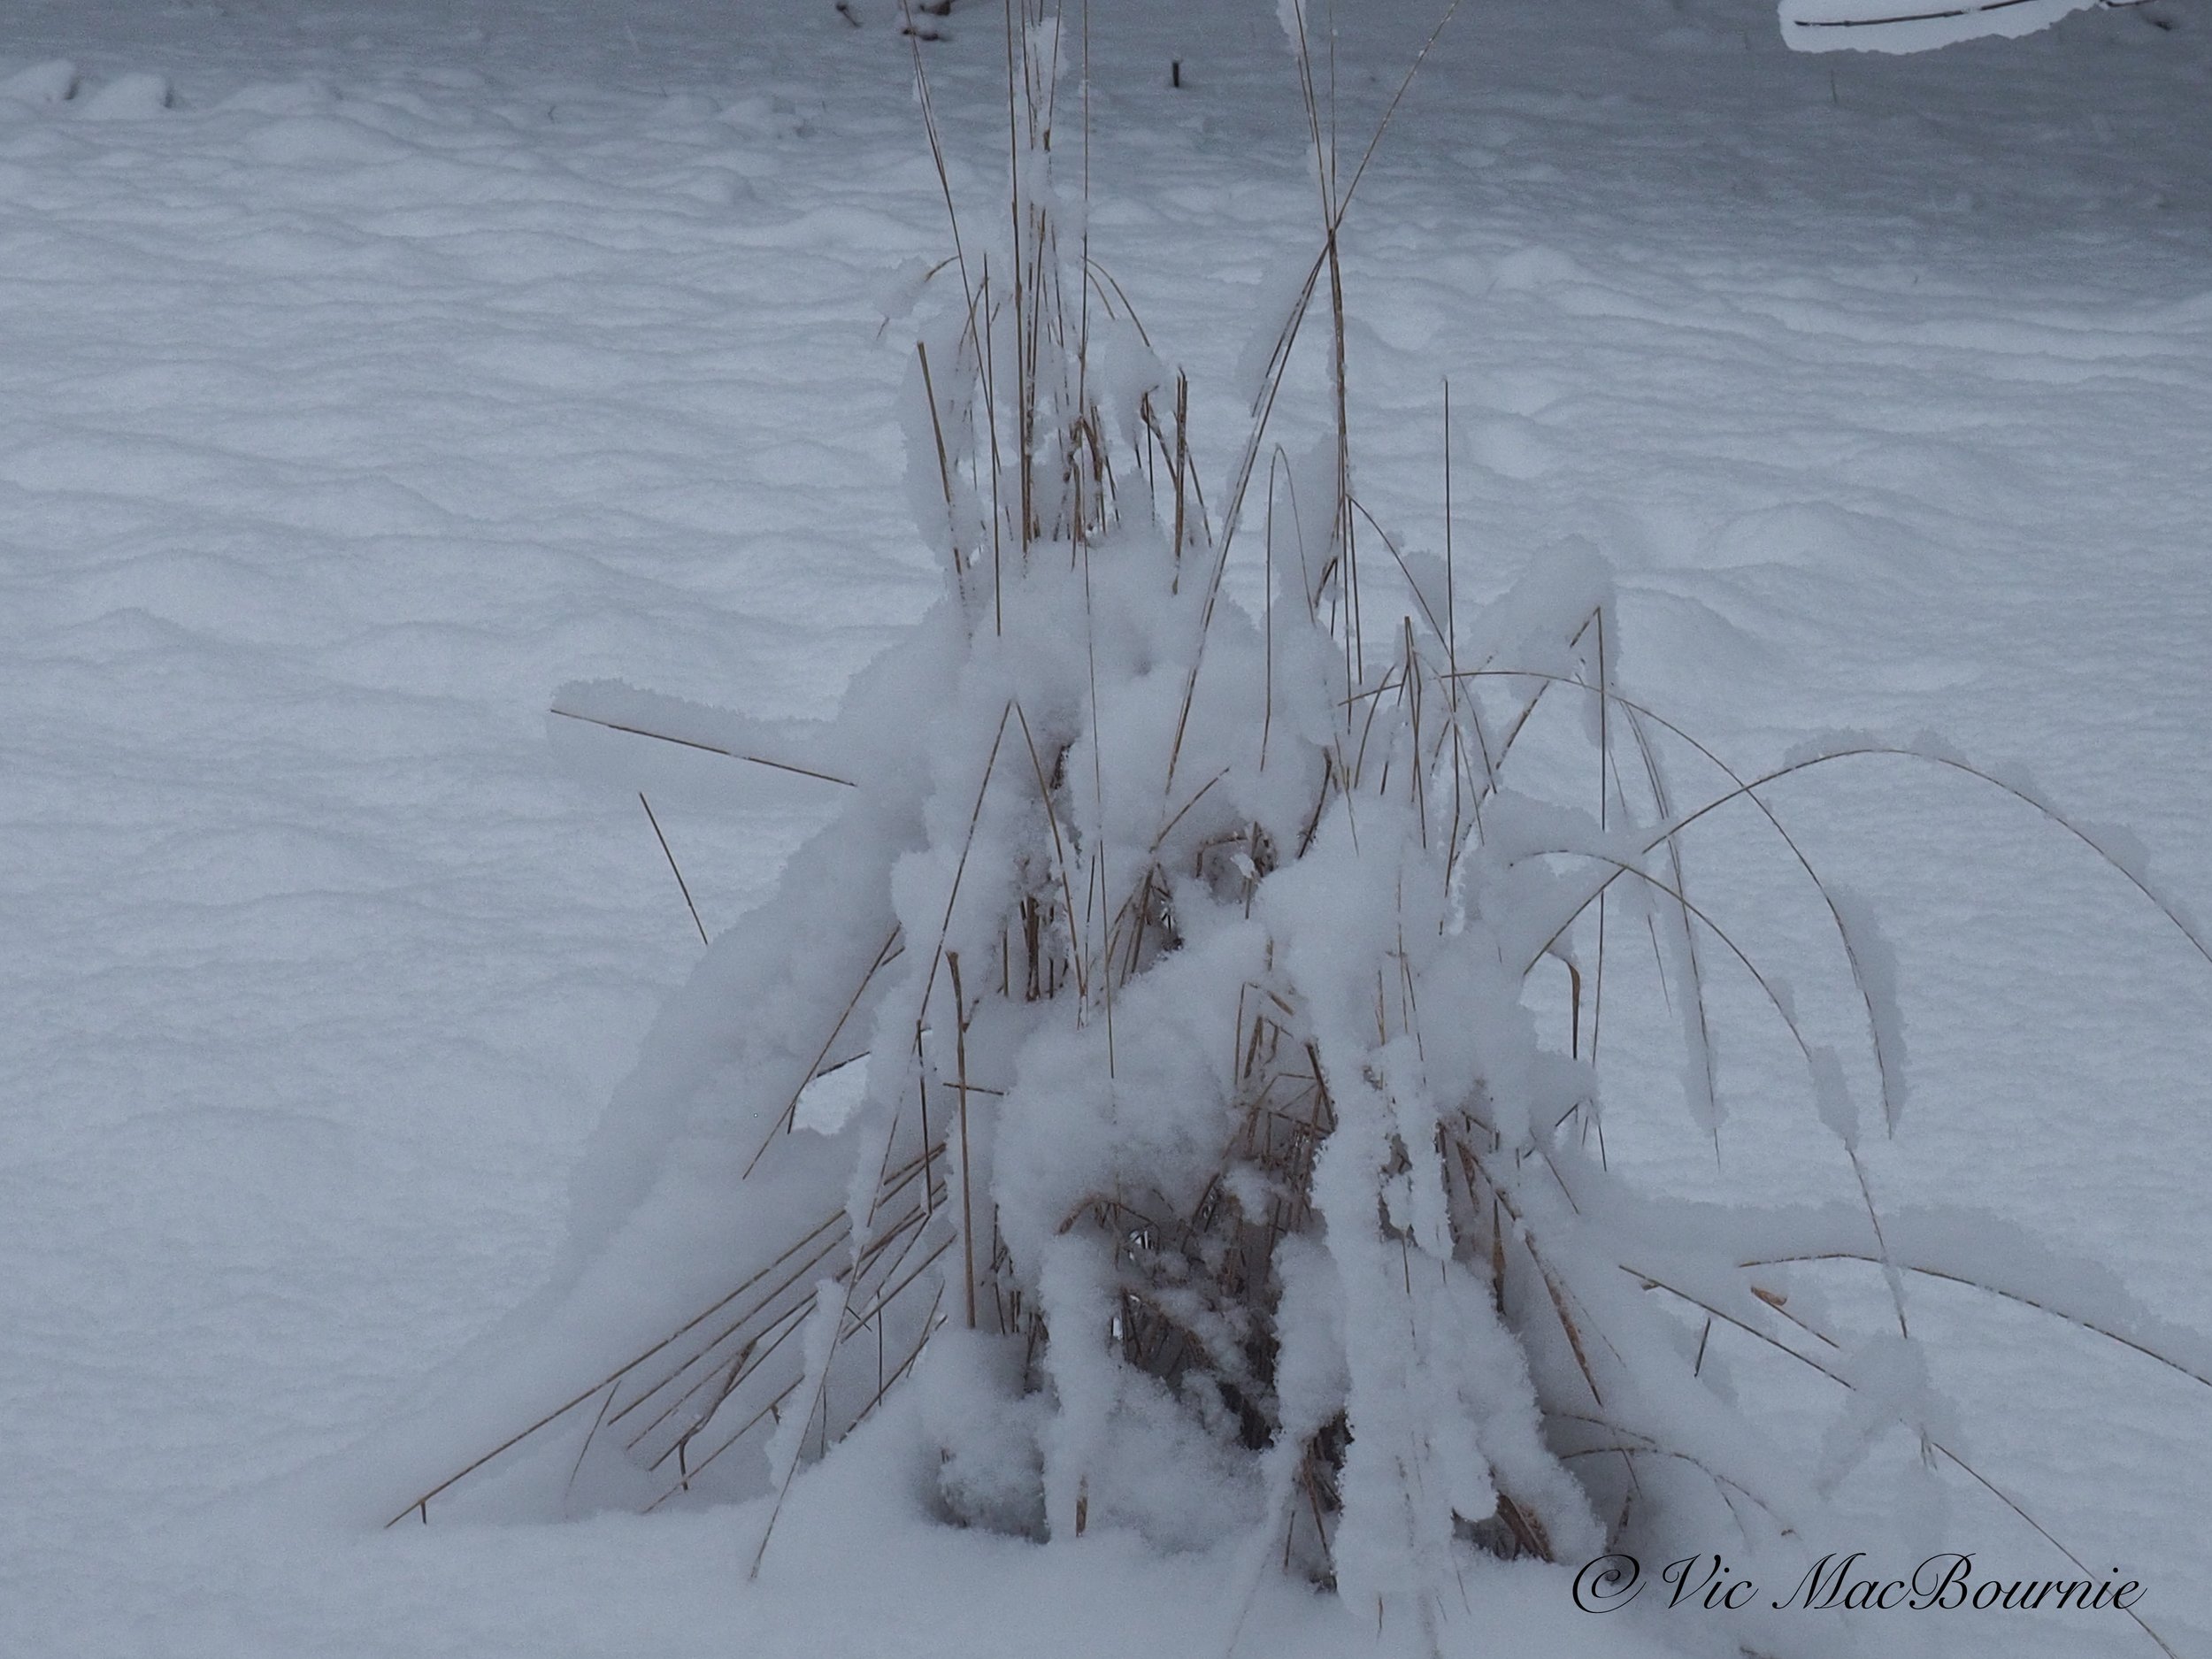
During the winter months, when snow is covering the ground, our grasses provide amazing structure to the garden and are often the first element I focus on when looking for photographic subjects. The results can range from high-key images of the delicate wisps of wheat-coloured grasses against a pure white background, to an image of a bird tucked away in the grasses waiting out a heavy snowfall.
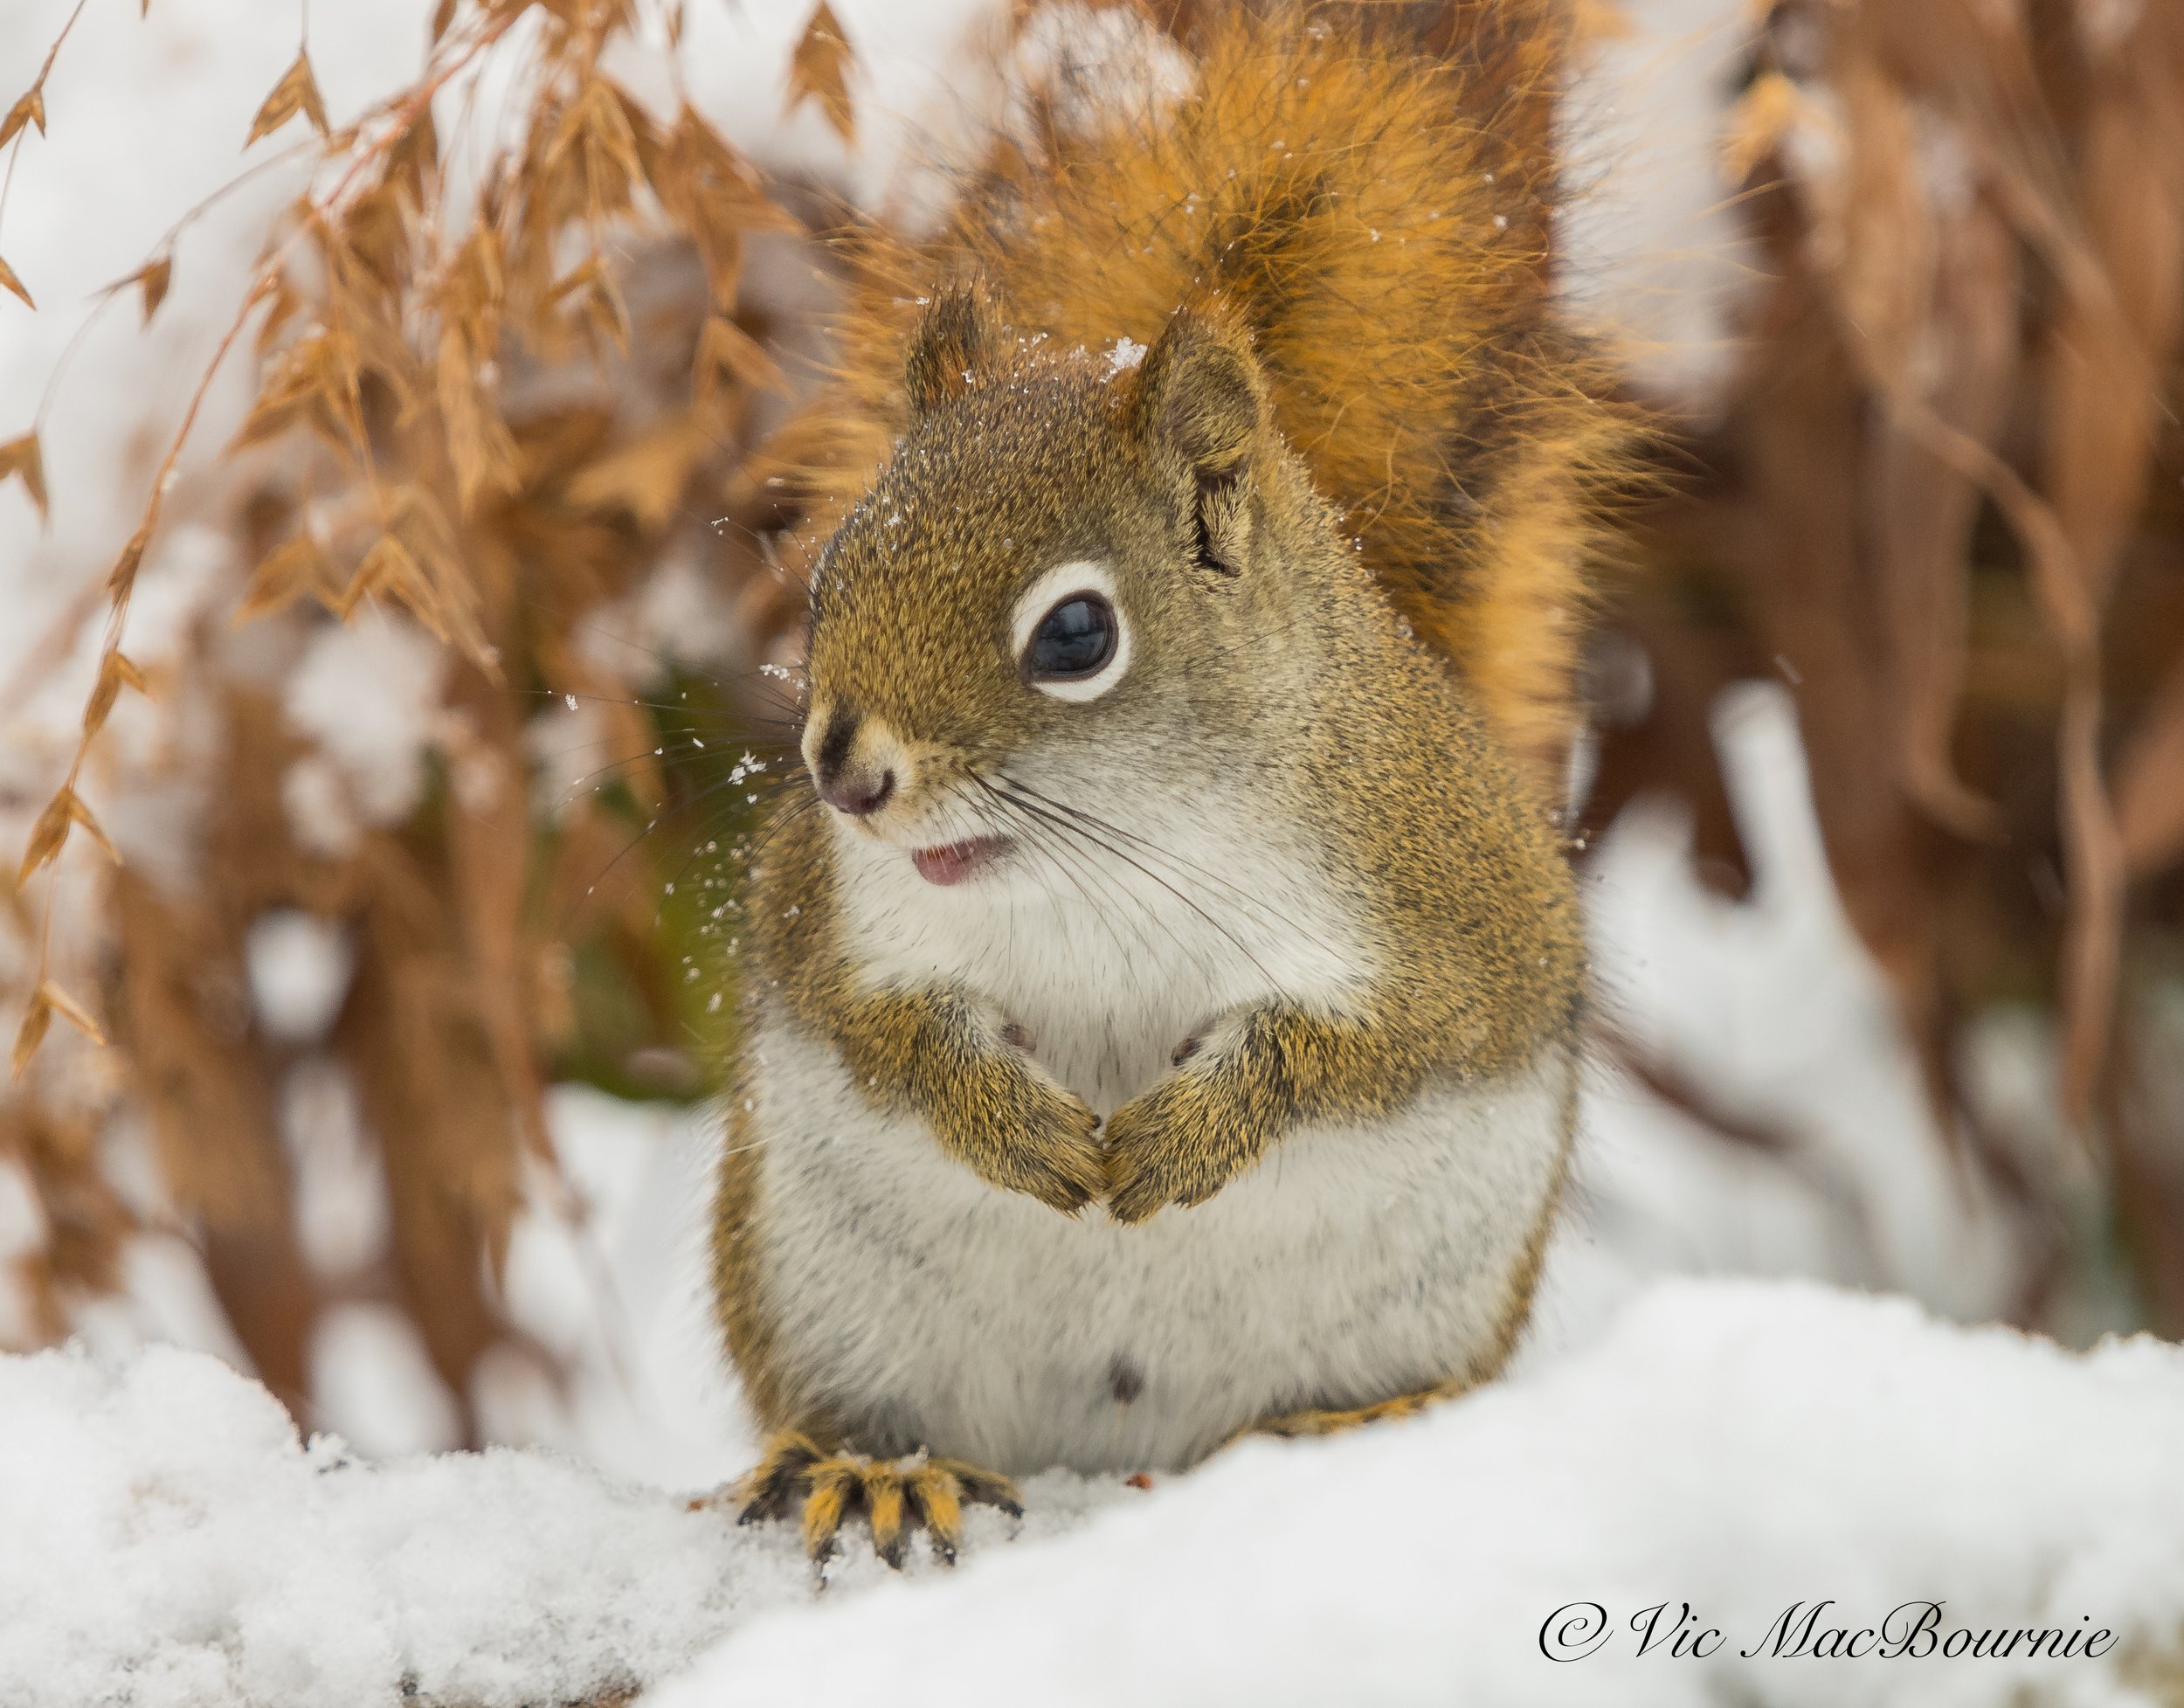
Red Squirrel among the Northern Sea Oats in winter.
In the early part of winter, capturing the seed heads poking out from the snow is a favourite subject, however, as winter draws on, the seeds heads are either eaten by the birds or dispersed from the cold winds.
Be sure to take advantage of the early part of winter to catch images of the seed heads in the snow.
It’s also a good time to capture the spent flower heads from the Black Eyed Susans with snow caps on before the goldfinches strip the seeds from the flower heads.
Are ornamental grasses perennial?
You may ask if ornamental grasses are annual or perennial? The answer is, of course, it depends. But it’s safe to say that most ornamental grasses you purchase are hardy perennials and will return year after year. Most ornamental grasses are very hardy but a few, including the large red- or purple-coloured fountain grass (Pennisetum setaceum) that is popular to use in containers, is a fast-growing – up to 4-feet – annual in most areas. It is actually hardy in tropical zone 9.
Because most ornamental grasses are perennial, they will require cutting down when they have expired. There is no problem leaving perennial or annual grasses up through the winter. Both will provide structure and beauty throughout the cold months.
Annual grasses, including the annual purple fountain grass, can simply be removed and discarded in the spring along with the cuttings of the perennial grasses.
I like to pile them on top of a natural compost heap to give the birds an opportunity to take the grass to build their nests. I also stuff handfulls of the dried grass in the suet holders in spring for the birds to take as nesting material.
More on Ornamental grasses:
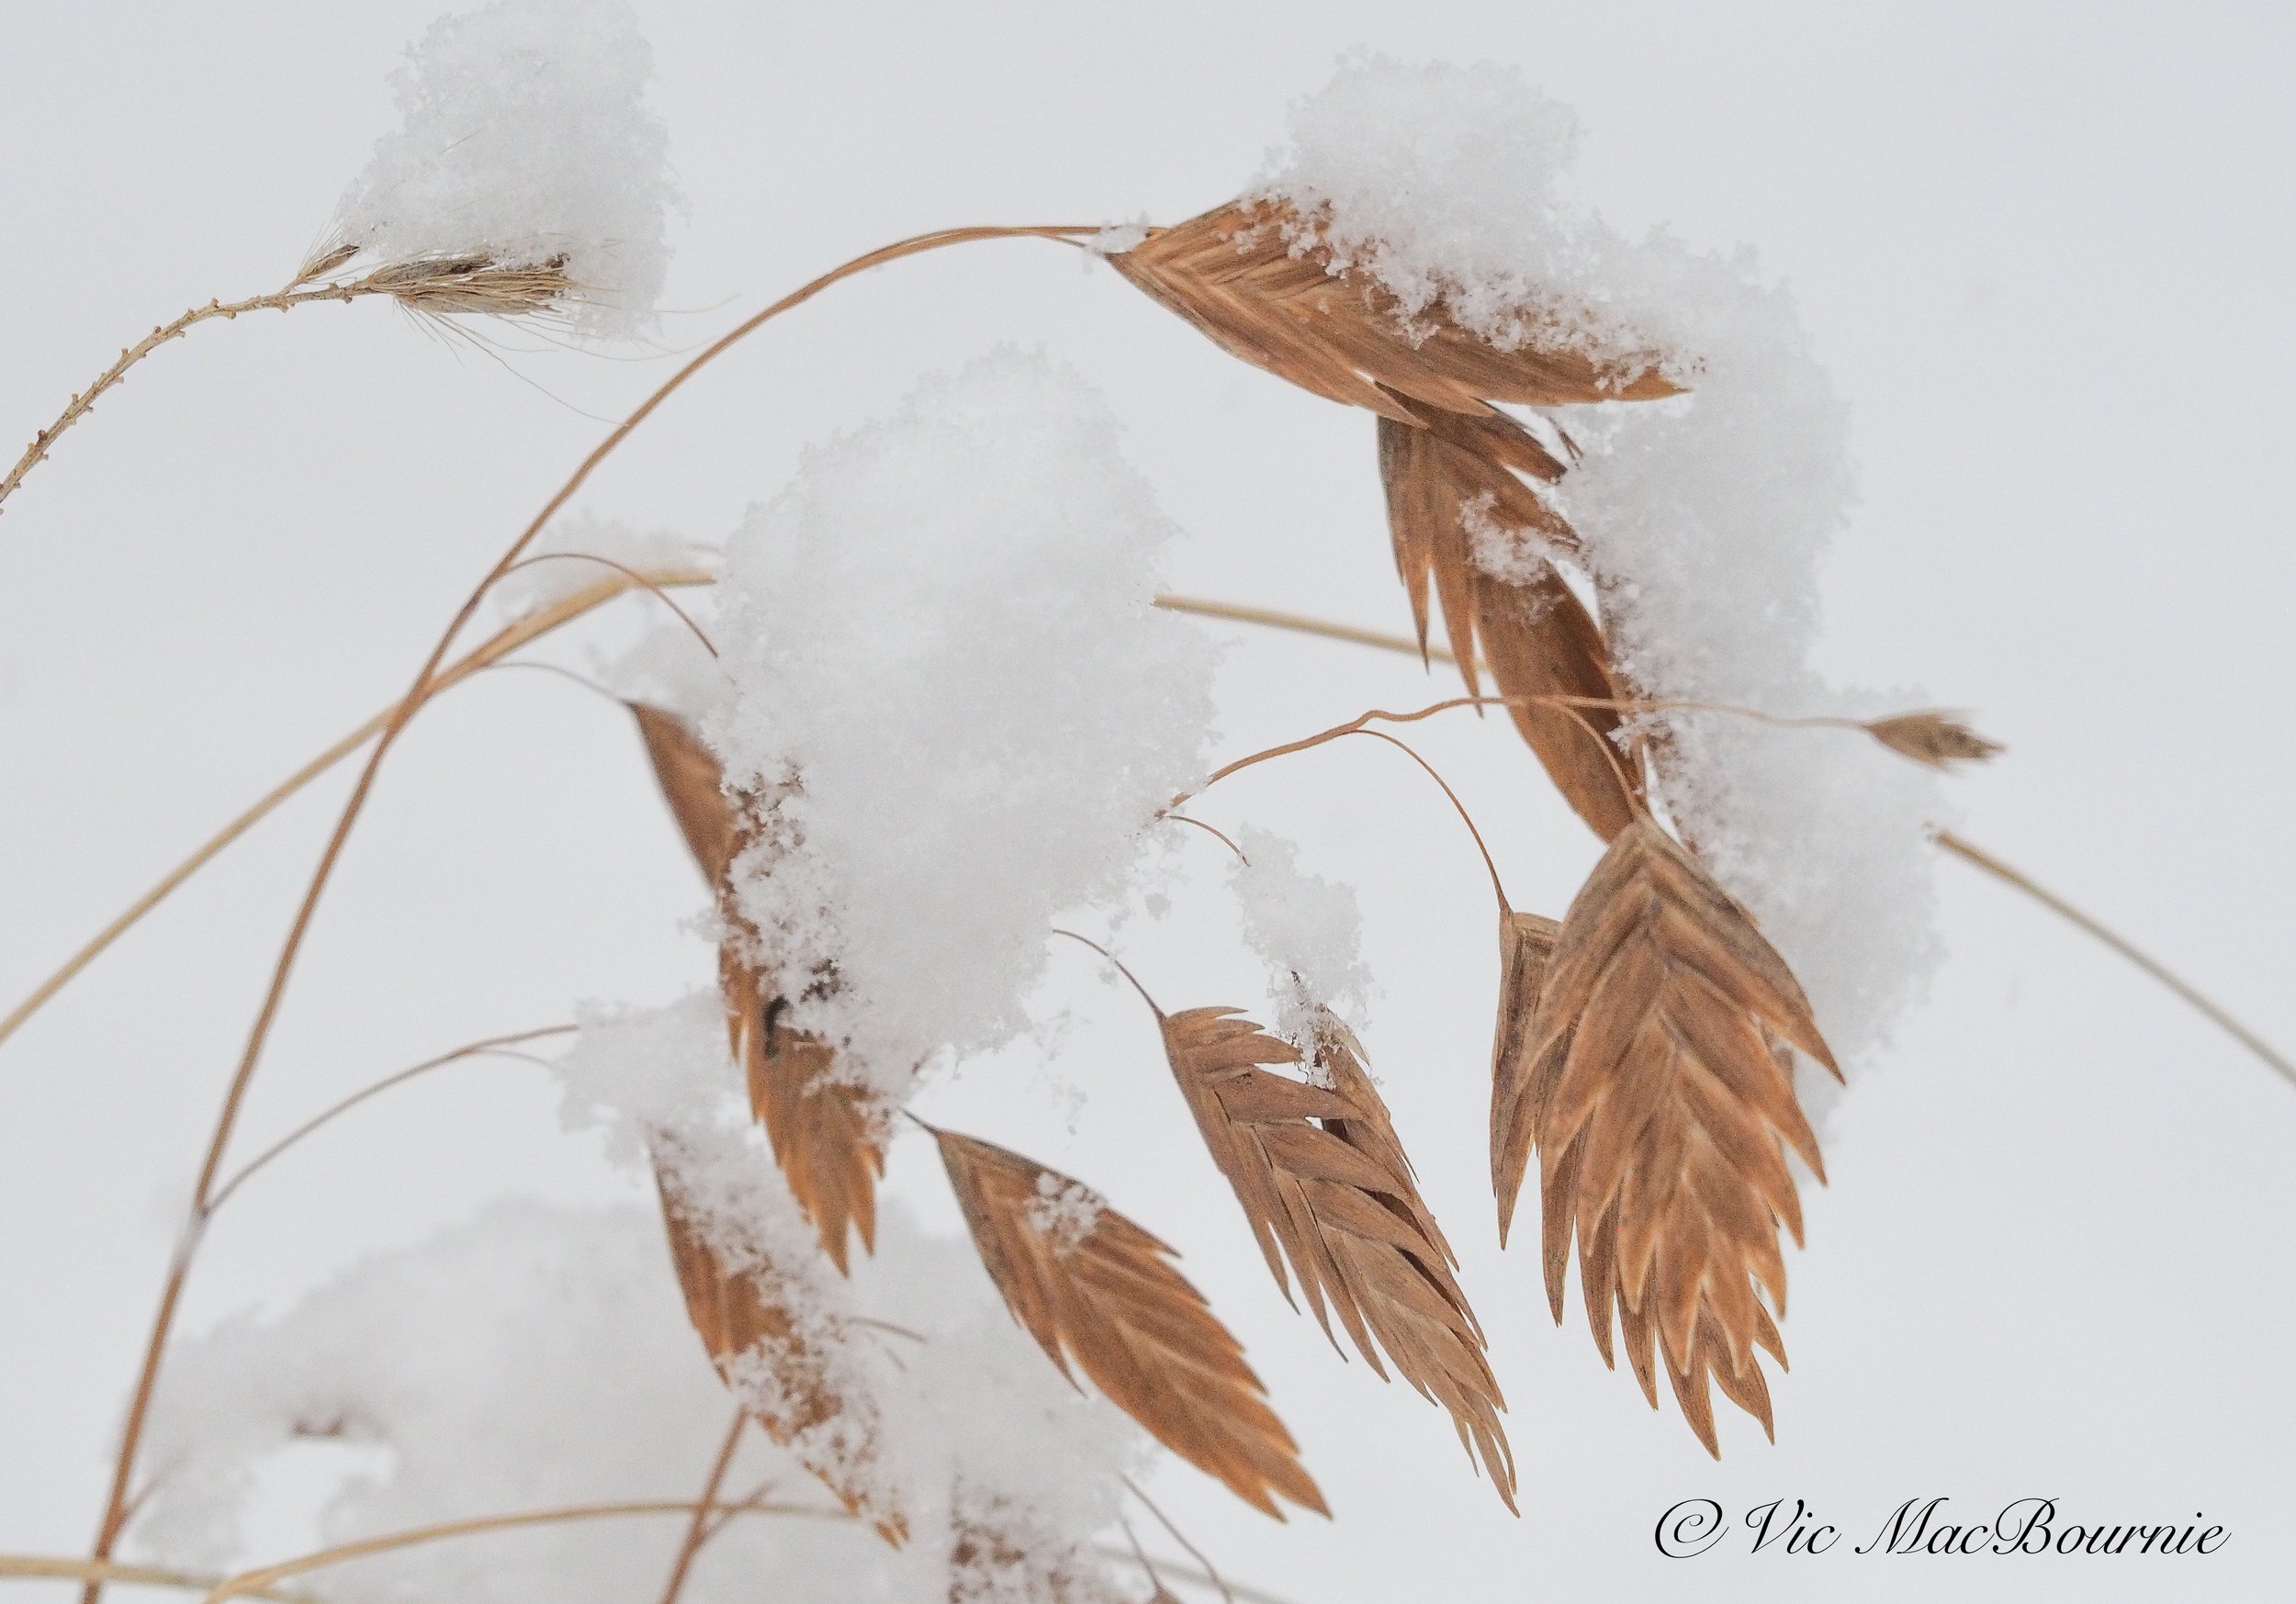
Northern sea oats close up covered in snow.
Grasses help form the structure of a winter garden
Ornamental grasses might be the last thing you think of when looking for winter structure and interest in the garden. Typically, we look to evergreens to form the basic structure of a winter’s garden. Not everyone, however, has room to plant large evergreens such as spruce, pines or cedars.
That’s when ornamental grasses rise to the challenge.
Small enough to suit even the most compact gardens, these grasses can provide four-season interest with winter, arguably, being the time they shine the most. In many gardens, they are the only non-woody plant still standing, and their tan colour helps them stand out against a snowy or just drab winter background.
They can also add movement when the winds of winter blow, and their vase-like structure adds another dimension to our garden.
Miscanthus still standing tall after an early snowfall. Notice the “flower heads” are still intact. Later in the winter birds and strong winds will make them disappear.
A third reason to leave your ornamental grasses
There is another very important reason to leave grasses standing throughout the winter, and that is to protect the roots of the grasses from extreme temperatures, especially the constant freezing and thawing that is common over the course of our winters.
If you are like me and fall garden clean up amounts to putting away the hummingbird feeders, patio umbrellas and garden chairs, then you’ll benefit from a buildup of leaves around the plants which will form a nice layer of insulation around the roots of the grasses. The grasses will often fold in on themselves as well, providing additional “winter mulch” for the plants, wildlife and insects that count on the grasses for protection and habitat.
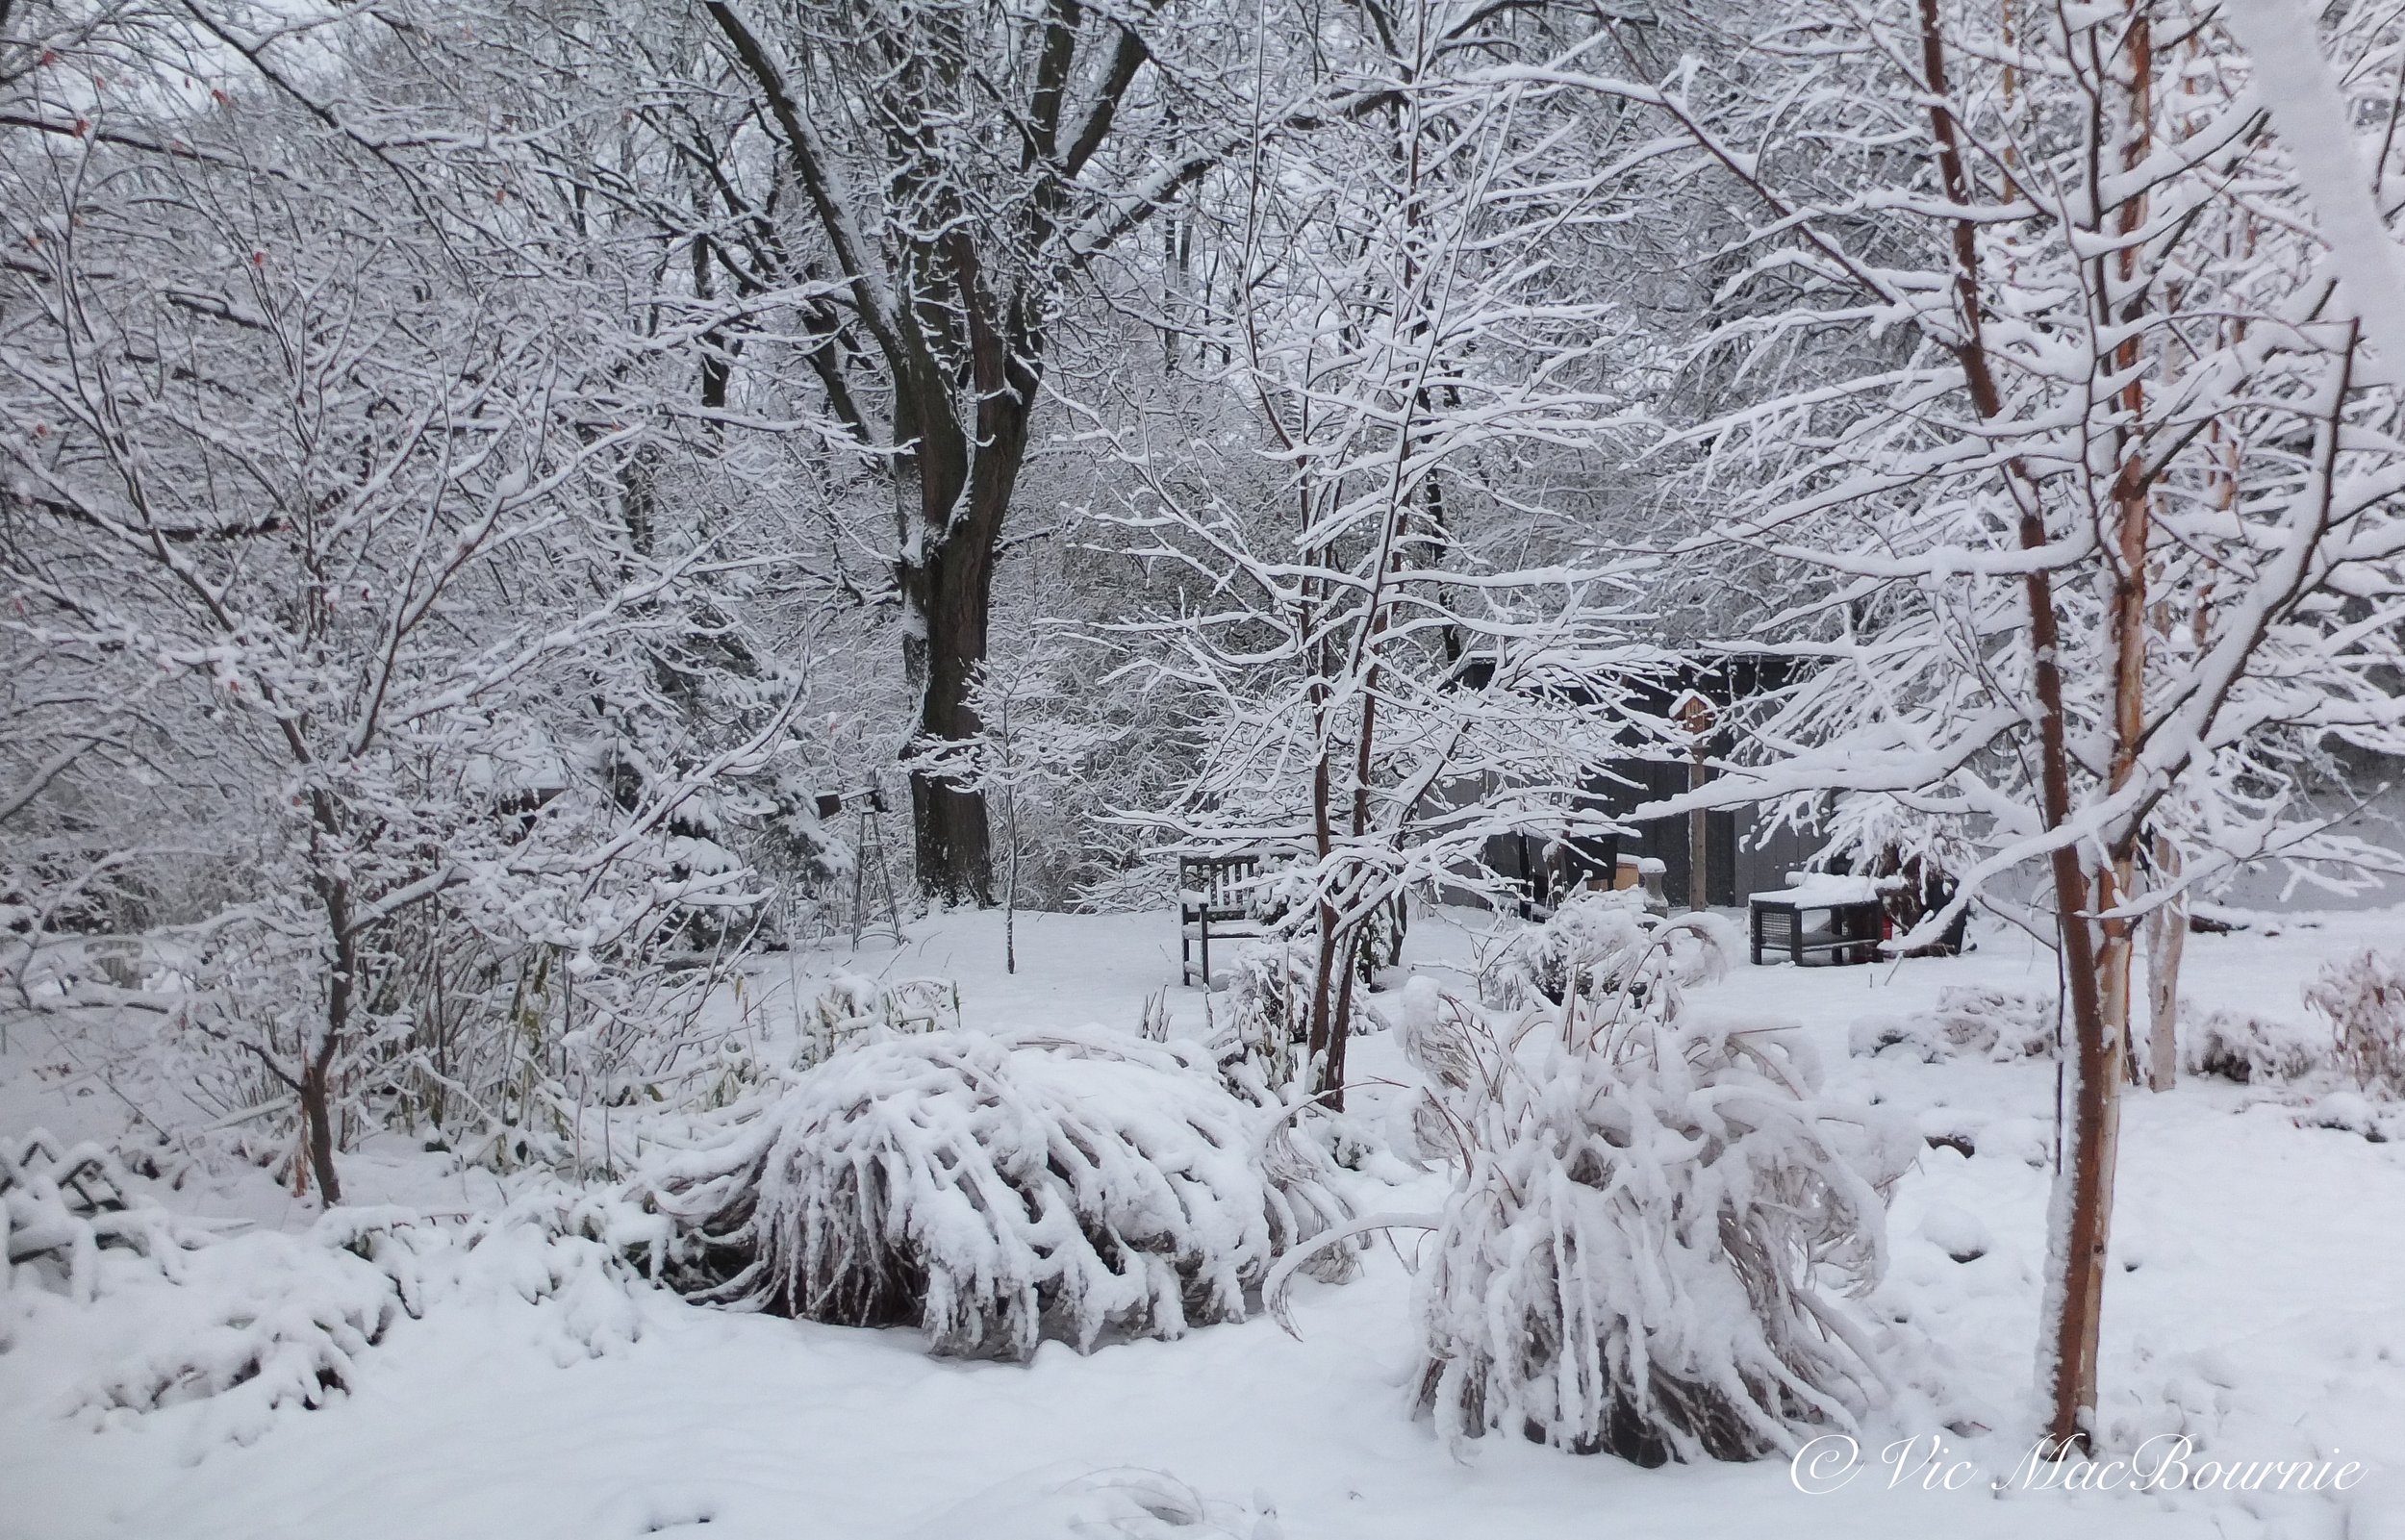
The Miscanthus grasses in the foreground help to give the garden structure and interest even if they are covered in heavy snow.
This insulation layer will help keep the roots from experiencing the freeze-thaw cycles that can uproot some plants, especially if they are newly planted and the roots have not yet set in completely. Or, if you recently planted a clump after dividing a larger clump of your ornamental grasses in the fall.
This is also the area around the roots where insects will burrow in to survive the winter or lay eggs for next spring.
It’s not uncommon to see Juncos and other insect-eating birds foraging around the leaves at the roots of our grasses looking for insects and larvae.
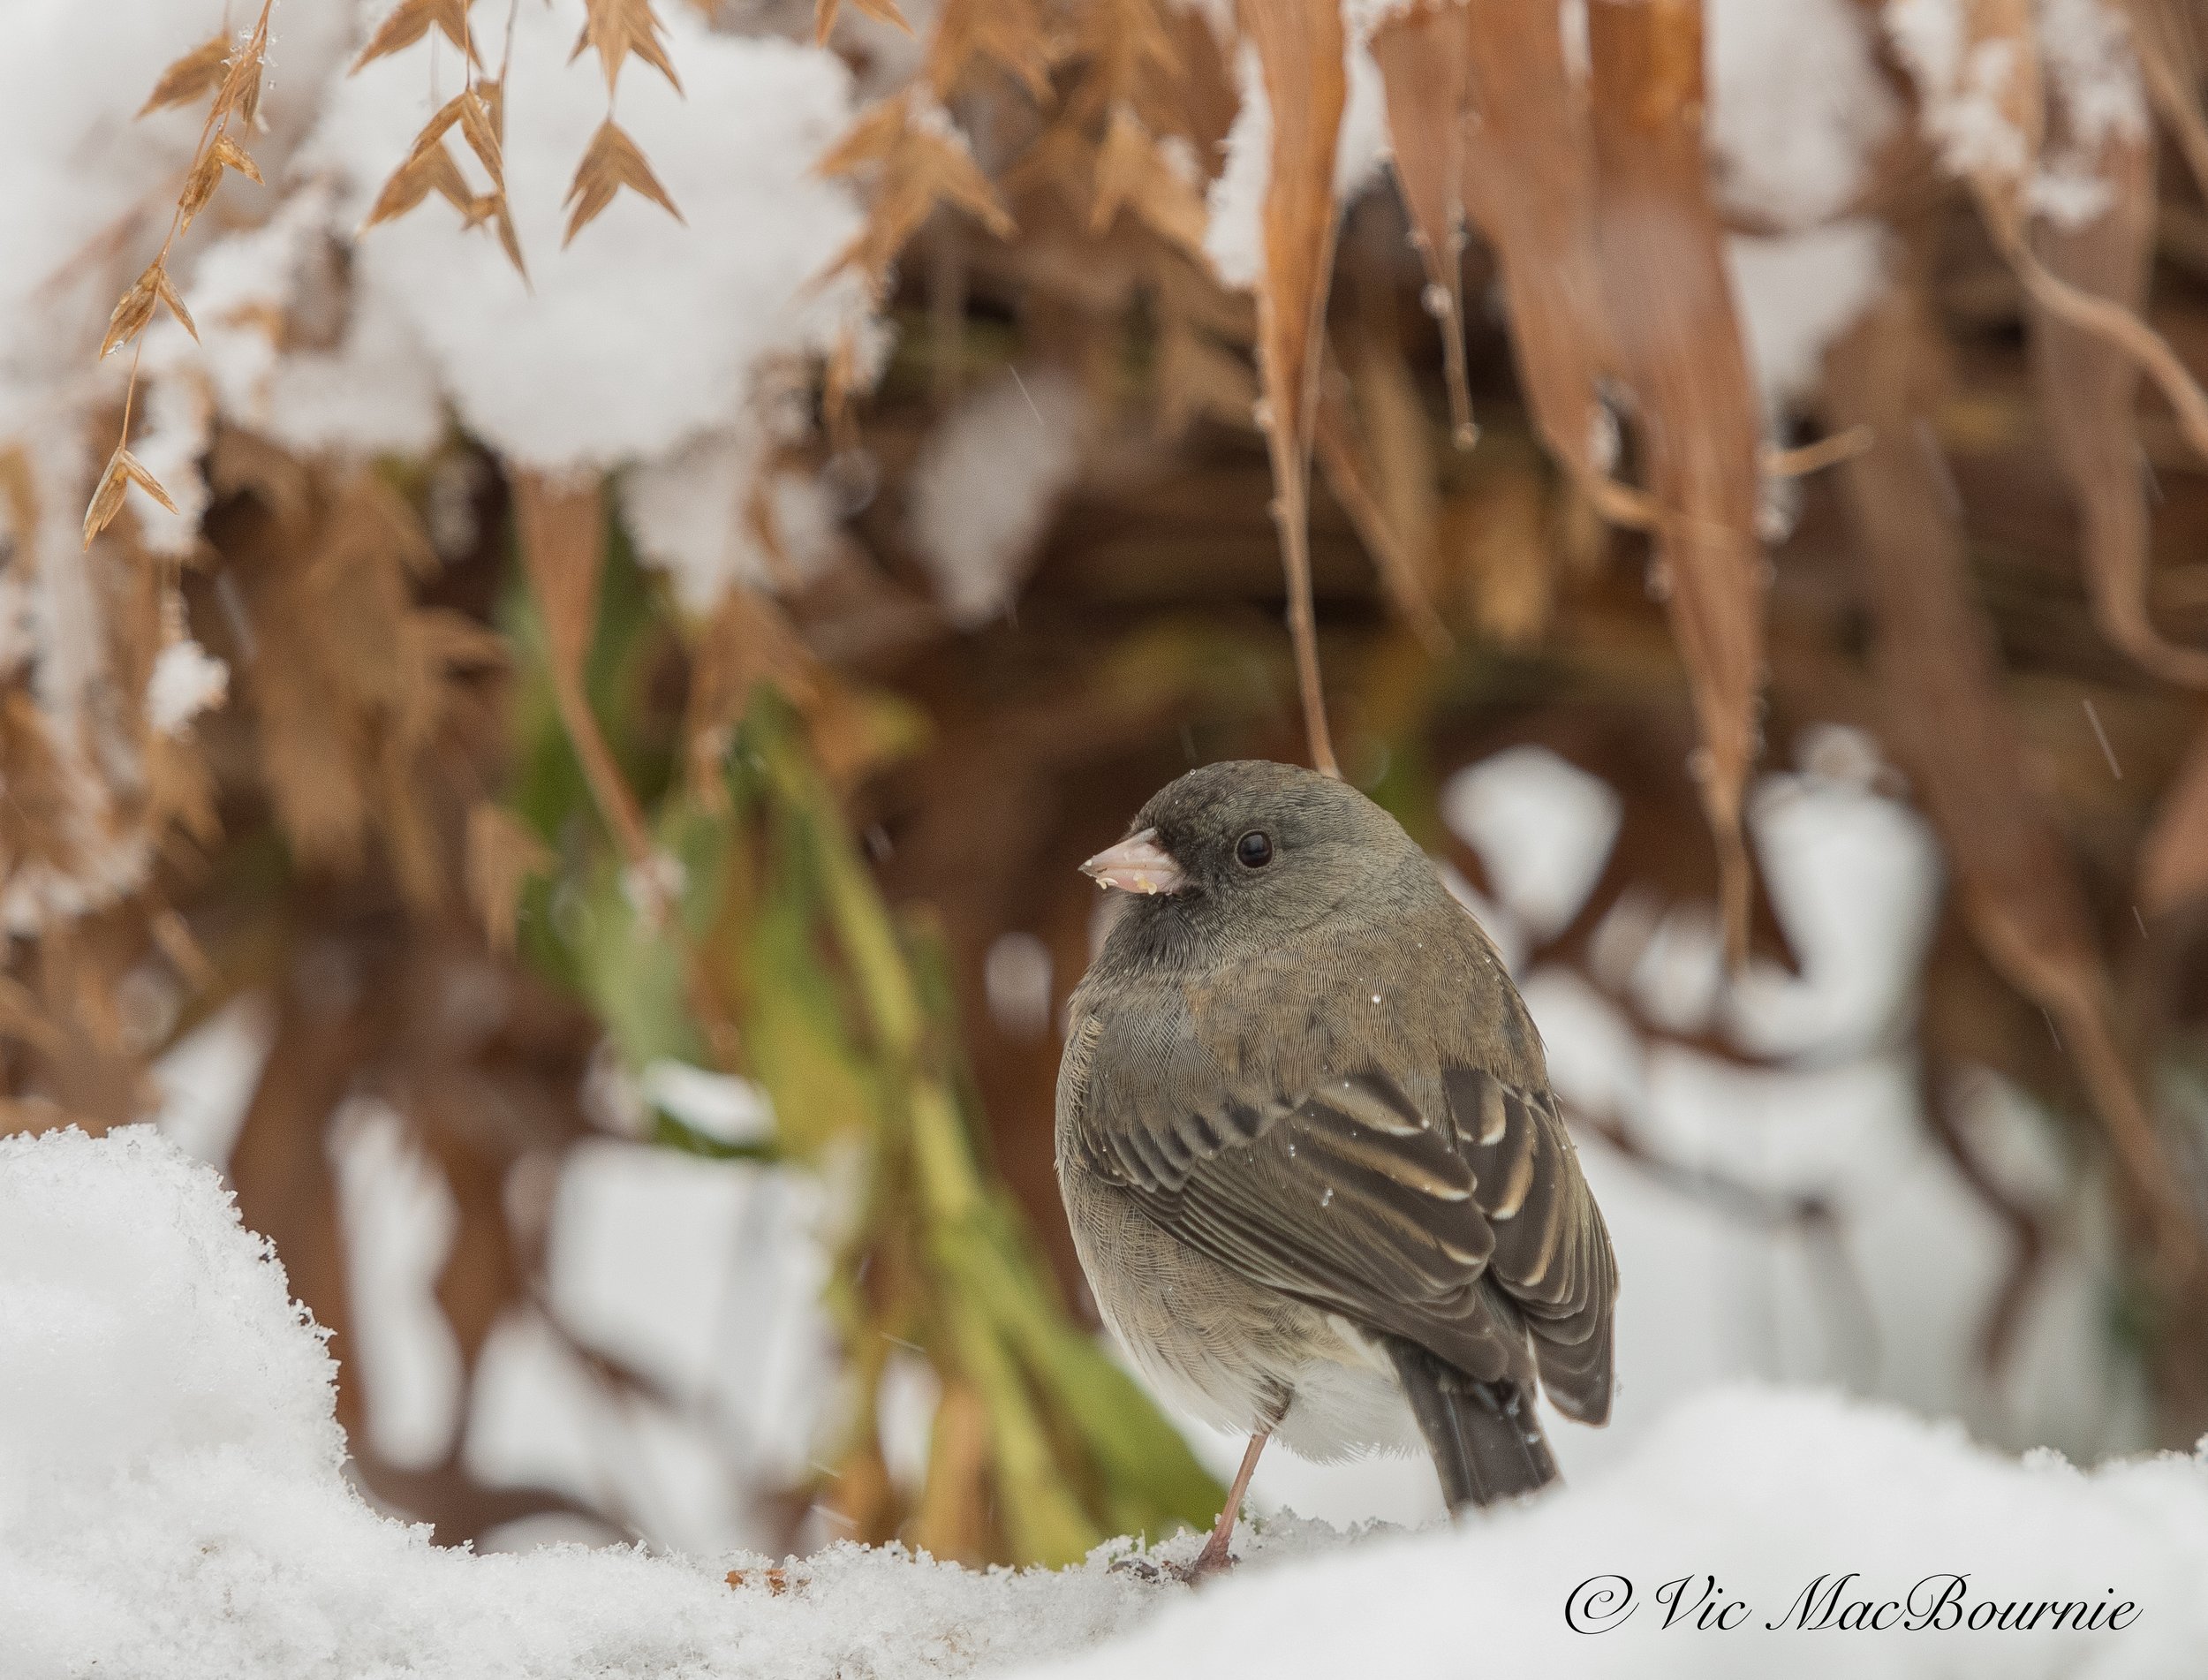
A Dark-eyed Junco among the Northern Sea Oats during an early snowfall.
Ornamental grasses can be a haven for birds in winter
The larger grasses that form sturdy upright branches can provide protection for birds in winter. I have seen birds go into the thick grasses during winter storms to escape the high winds and extreme cold. Some of the grasses get bent over and form a perfect perch for the birds.
Ornamental grasses would not be the first places the birds choose to ride out a winter storm, but if large evergreen trees are scarce in your neighbourhood, tall grasses would probably provide the next best natural shelter.

Snow laden grasses stand out against the stark background.
Best Ornamental grasses for winter interest
Some grasses are definitely better than others for winter interest. Some of the smaller grasses are covered early by snow and others are not vigorous enough to stand up to the harshness of our winters.
Look for native grasses whenever possible to provide the most benefits for wildlife and ensure you are not contributing to invasive non-native grasses spreading into natural areas.
The miscanthus grasses are particularly good for winter interest. They stand over six feet tall in summer with their feathery upright and very attractive pinkish seed heads. In winter, ours usually get knocked down to about four-feet high, allowing them to still stand above even the highest snow accumulations.
The stems turn a lovely beige-tan colour with the beautiful plumes lasting well into winter.

A combination of a garden light and a hint of Japanese Forest grass (Hakonechloa) makes for an interesting winter scene.
I also find our smaller fountain grasses to be excellent in the first half of the winter before the snow gets too high and buries the plants. But even a tiny bit of the grasses peaking up through the snow can result in a lovely, delicate photographic image. If you are searching for images, look for a single grass blade or grouping of three delicate beige grass blades forming an arc in the snow. If the seed head still remains, it’s a pure bonus.
The hybrid fountain grass Karly Rose is a larger fountain grass that carries lovely pink seed heads in late summer and can withstand more snow in winter before it is buried.
Panicum grasses are also a strong performer with great winter interest.
Calamagrotis Karl Foerster, a popular grass used in both commercial and residential landscaping is another grass that works well in the winter landscape. It’s upright habit and dense growth keeps it performing well into winter even in areas with high snowfall.

These grasses poking out of the snow work nicely with the white birch trees.
Photographing grasses in winter
Grasses, either covered in snow or mostly buried in winter’s ground cover, can be a rewarding photographic experience. But it’s usually not as simple as grabbing your camera and snapping a picture.
Successfully capturing the beauty of grasses in winter involves a number of factors that need to be considered.
The key to success is recognizing the amount of snow in the image. If you are photographing wisps of delicate grasses against a background of snow, it’s important to maintain the delicate look of the image. This would be an example of a high key image where the photograph has a clean white background with just a delicate hint of colour.
To create this image we want to “open up” our lens to allow more light into the scene.
What does this mean and how do you do it?
Shooting a snowy (or white sand beech) scene will trick the camera into thinking there is an incredible amount of light available. As a result, the camera will reduce the amount of light hitting the sensor (film) and give you snow that is very blue or, in the case of black and white photography, very grey. We’ve all seen the Instagram images of a lovely snow scene where the snow is blue and the real subject is too dark.
This is just the result of the camera doing what it does and using the metering system to create a “middle grey” image of the scene.
To compensate for this situation, and ensure the snow stays white, photographers say we have to “open up.” What they mean is we have to add back the light the camera wants to take away from the scene.
Today’s modern cameras are very good at recognizing various lighting conditions, but an abundance of snow is too much for most camera meters.
Below is an example of a typical underexposed snow scene. Compare it to the image below with the proper exposure.
An example of an underexposed snow scene where the snow turns grey or blue as opposed to holding its clean white look.

The same image shows a properly exposed scene where the white snow maintains its proper colour.
Escaping the blues: Simple solutions to photographing in the snow
The solutions to getting white snow are simple.
• If you are shooting in a program mode, (SP, AP or P mode) where the camera is automatically determining the proper exposure, try using the +1, +2 or even +3 compensation override to add the light back to the subject and make the snow white.
Be careful not to add too much compensation or you will (blow out) or take away the detail and texture in the snow. (If you are shooting a snow scene with a lot of blue sky, it’s unlikely any compensation would be necessary.)
• Possibly the easiest way to get the proper exposure is to go to the camera’s programmed shooting modes and look for the snow or sand/beach modes. Use these modes to photograph the snowy landscape. These modes automatically account for the brightness and make adjustments to keep the snow white. You may, however, have to use the camera’s compensation function (maybe +1) to tweak the scene depending how much snow is in the image.
In addition to the snow/sand modes, many of today’s compact cameras also include an “art mode” that allows the photographer to experiment with more artsy images. Set the camera to “high key” to create a delicate, ethereal look that might suit your image perfectly. This would work in a situation where you are moving in close on just a few strands of grass with a pure white background.
• Finally, if you are shooting in manual mode, get the camera’s suggested exposure and then use the +1, +2,+3 compensation to find an exposure that looks right. You can just check the back of the camera to get a feel for how the final image will look.
Bracket your snow scenes for best results
Getting properly exposed images in winter can be tricky, so it is probably a good idea to use bracketing whenever possible.
Bracketing is a process where you tell the camera to shoot a series of images at different settings – most often three images – where one image follows the camera’s suggested meter reading, another is a stop over and the final is a stop under. The result are three images where you have the opportunity to pick the one that works best for you.
I would suggest setting up the bracketing function before going outside so that you don’t have to fiddle with it in the cold.
Of course, some of these adjustments can be made in Lightroom or photoshop after you have taken the images, but it’s best to get it right in camera.
With a few simple adjustments to your approach, there is no reason to put the camera away during winter. Your garden takes on a completely different look in winter and its an opportunity to capture the delicate beauty of winter.
It’s also an opportunity to see the potential weaknesses in your garden’s structure. A picture never lies. Use your winter images to improve the garden structure come spring.
It’s just another good reason to buy more plants.
Use a camera with a viewfinder when shooting in the snow
It can be extremely difficult to see what you are photographing if you are using a camera without a viewfinder and being forced to use the camera’s LCD screen. If you are going out to shoot in the snow, either choose a camera with a built-in viewfinder or consider purchasing a separate viewfinder for the camera. The are usually a few you can choose from that would work with the camera.
There are also attachments available that can fit over the back of your camera to shade the LCD screen.
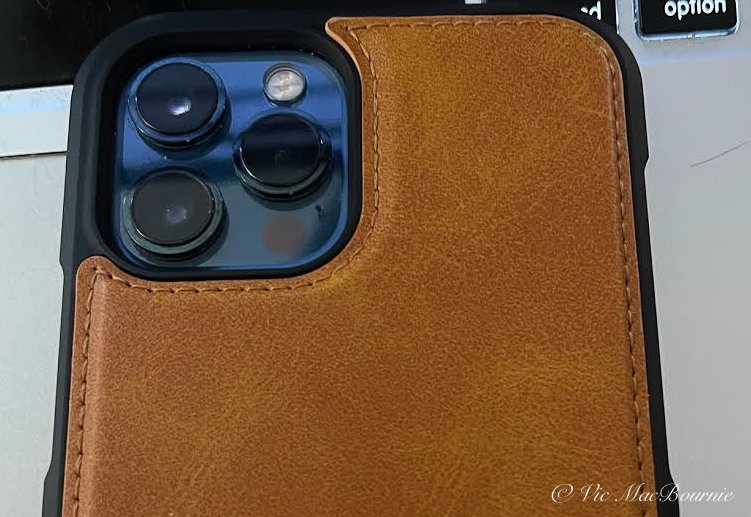
Iphone camera captures Woodland garden in stunning fall colours
The iphone 12 pro max features a 12MP camera and three lenses that give the photographer an opportunity to experiment with a range of techniques. The results are impressive for a smartphone.
Take advantage of ideal conditions to capture your front and back gardens
Can modern cameras on the iphone or other smart phones capture the subtle details of fall colours in the garden?
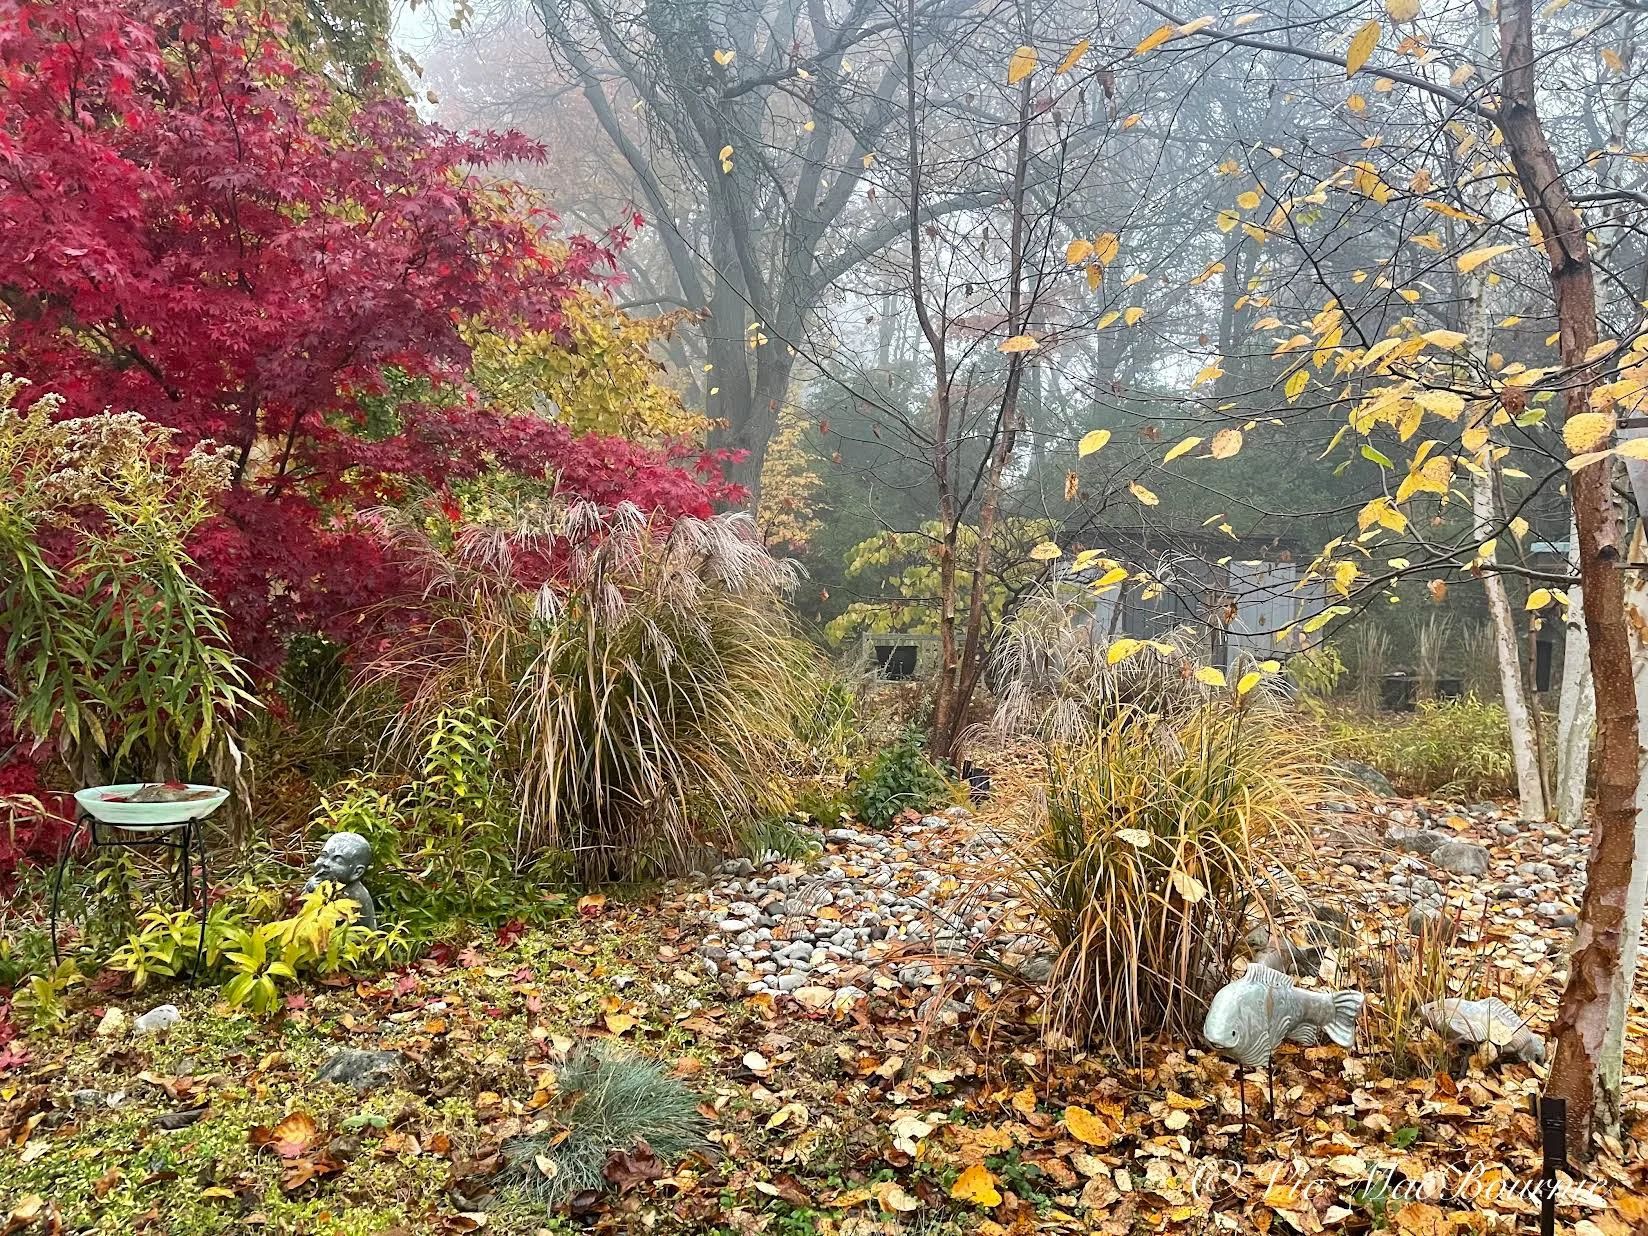
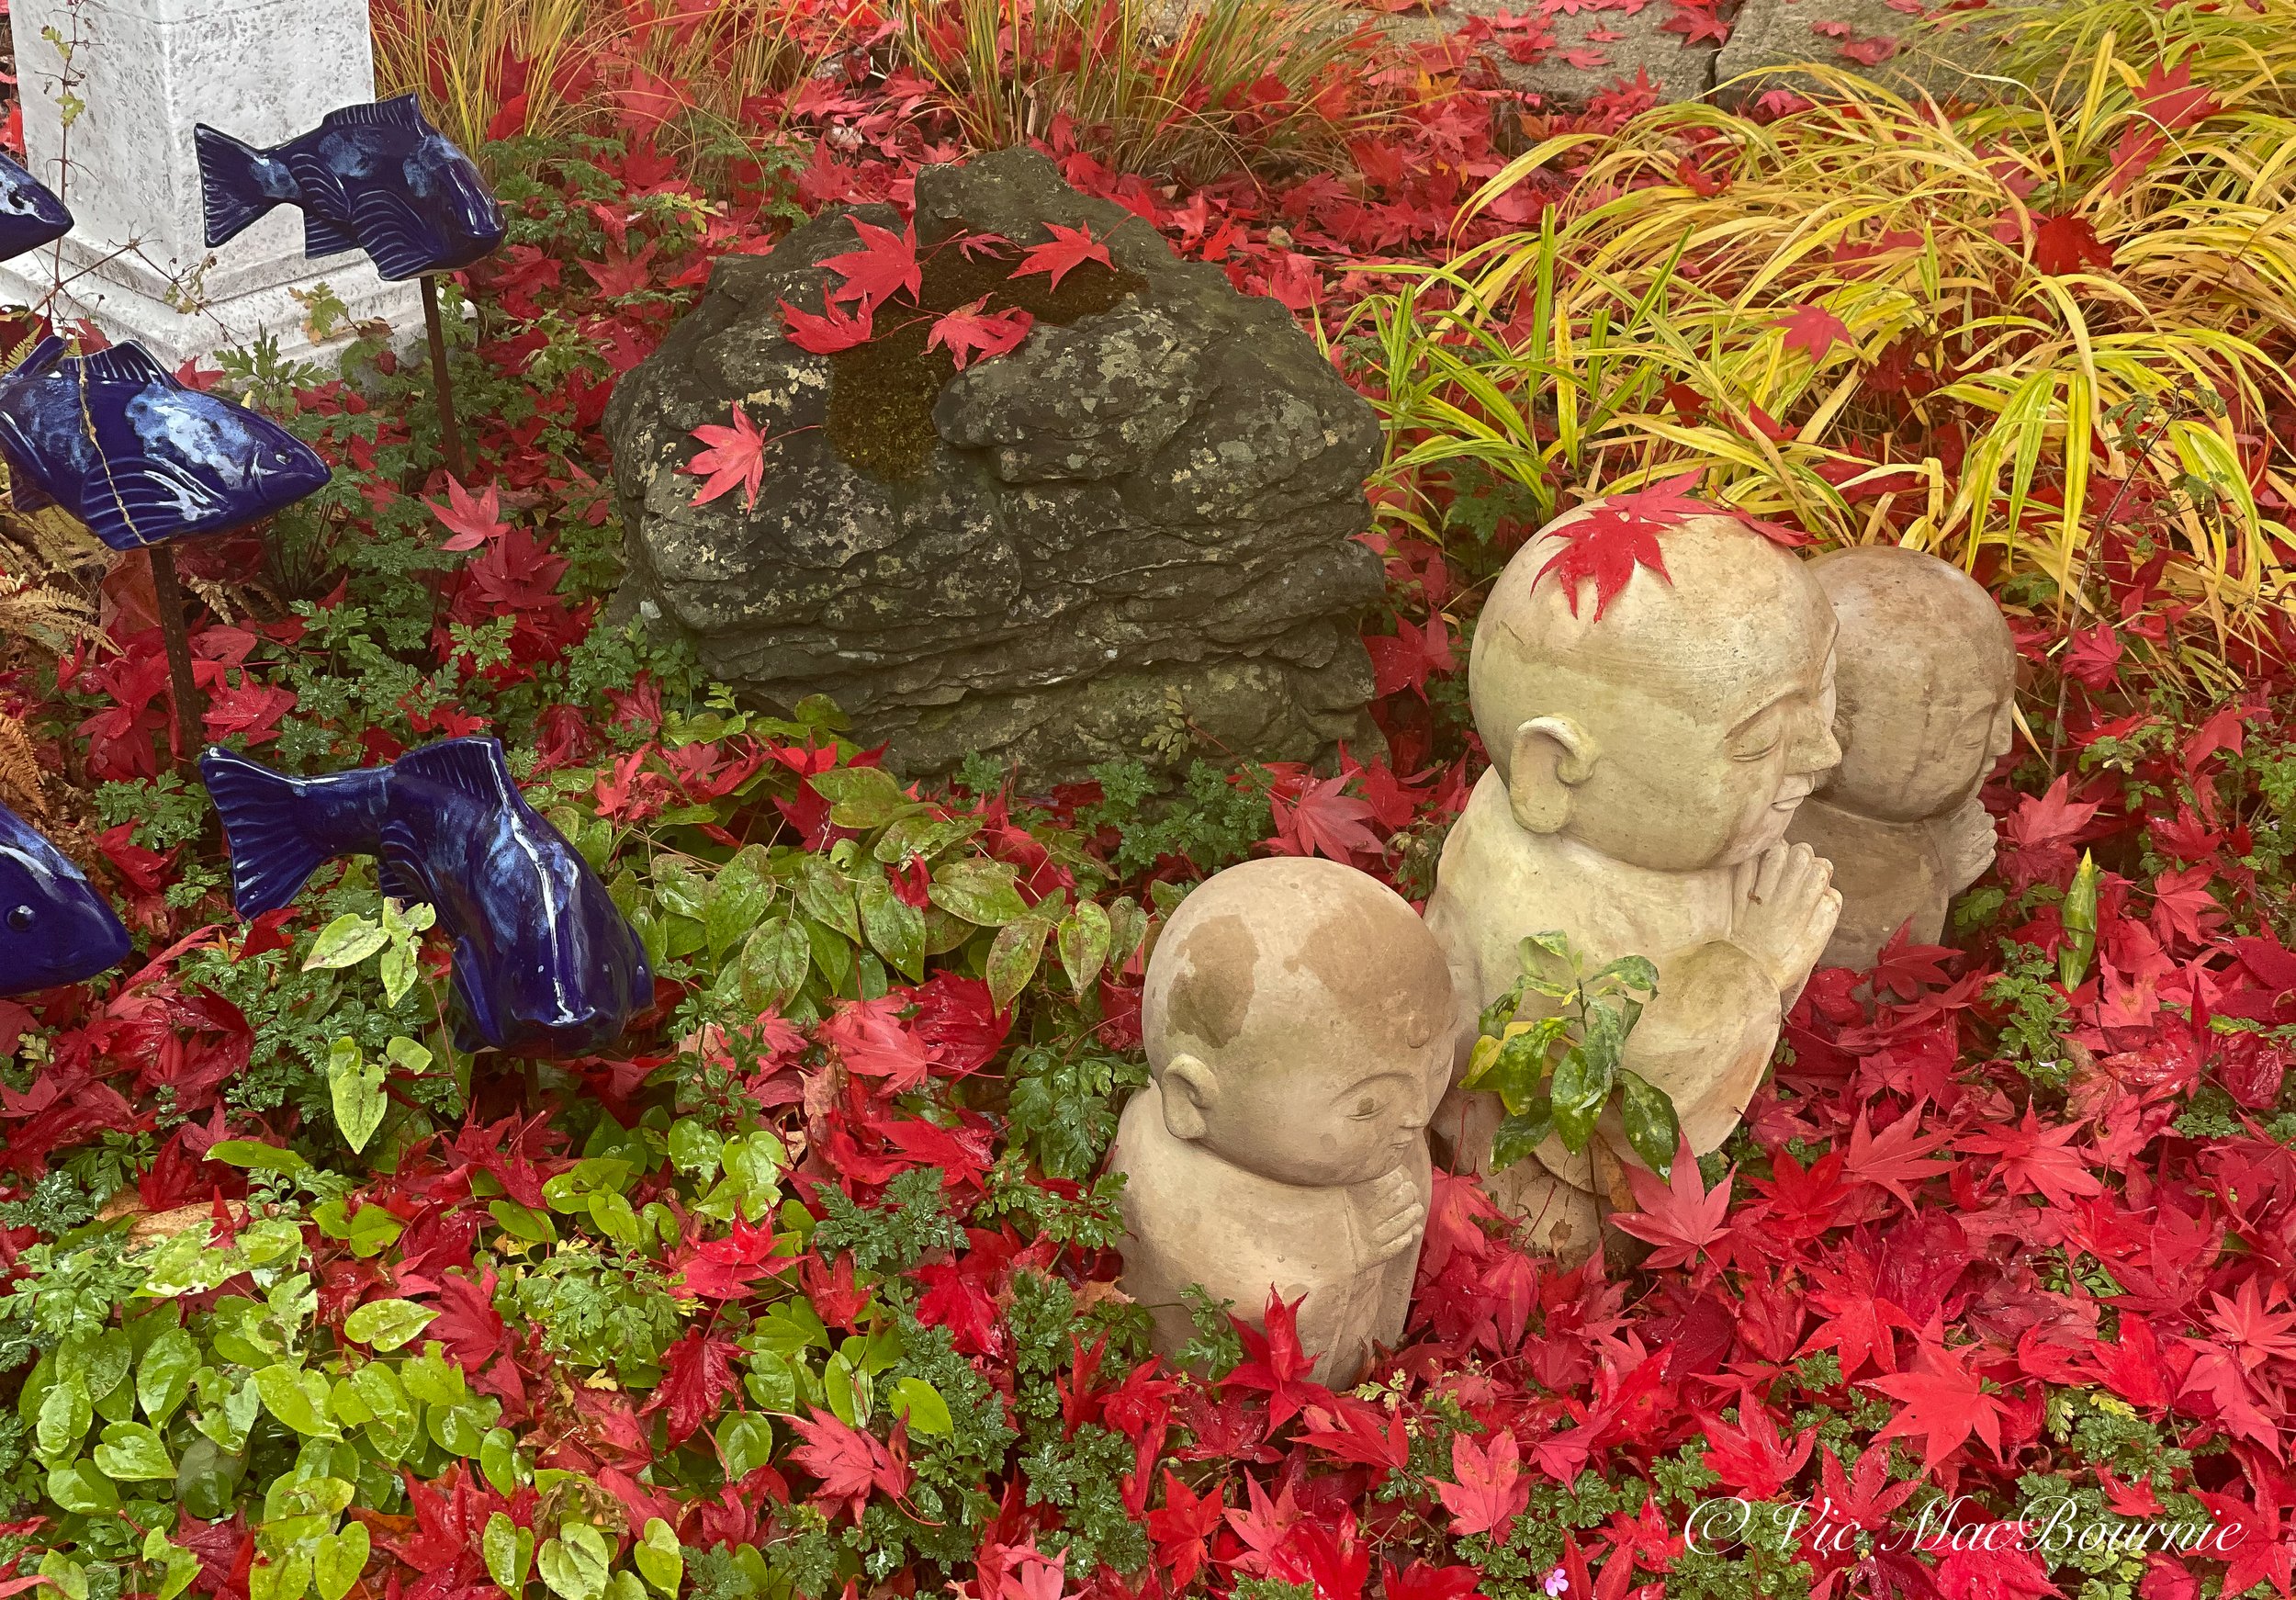
If a recent morning outing in the garden with nothing but my iphone is any indication of the performance of the three camera lenses on the apple iphone, I think the answer is a resounding yes. The images captured on the apple iphone 12 pro max turned out beautifully on an early morning with a lovely fog hanging in the air and wet leaves either still clinging to the trees or turning the ground into a magnificent carpet of colour.
The colours produced by the apple iphone are subtle and delicate where they cut through the fog and vibrant when the camera was turned on the crimson red of the fallen Japanese Maple leaves. Little to no post processing was needed to get these results.
Quite frankly, I was astonished just how good the images came out with little to no effort on my part. Thanks to the shake resistance capabilities built into the iphone camera, I was able to take all of these images handheld without the need of a tripod. If there is any criticism, it would be that the images are too sharp and take on a digital look, especially if the images are cropped.

This image of the woodland garden in fall was taken with the iphone 12 pro max.
Would a real camera (either a DSLR or high-end compact point and shoot) have captured better images? Maybe – well, probably yes – but I had my new iphone handy and it comes with three lenses – an extreme wide angle, a standard, and a portrait lens – so I was confident I could capture everything I needed with the iphone. Besides, I decided I needed to put the smartphone camera to the test to know that I could trust it if I ever really needed it to capture an important image. From what I had already seen, I was confident it could get the job done.
And boy, was I right.
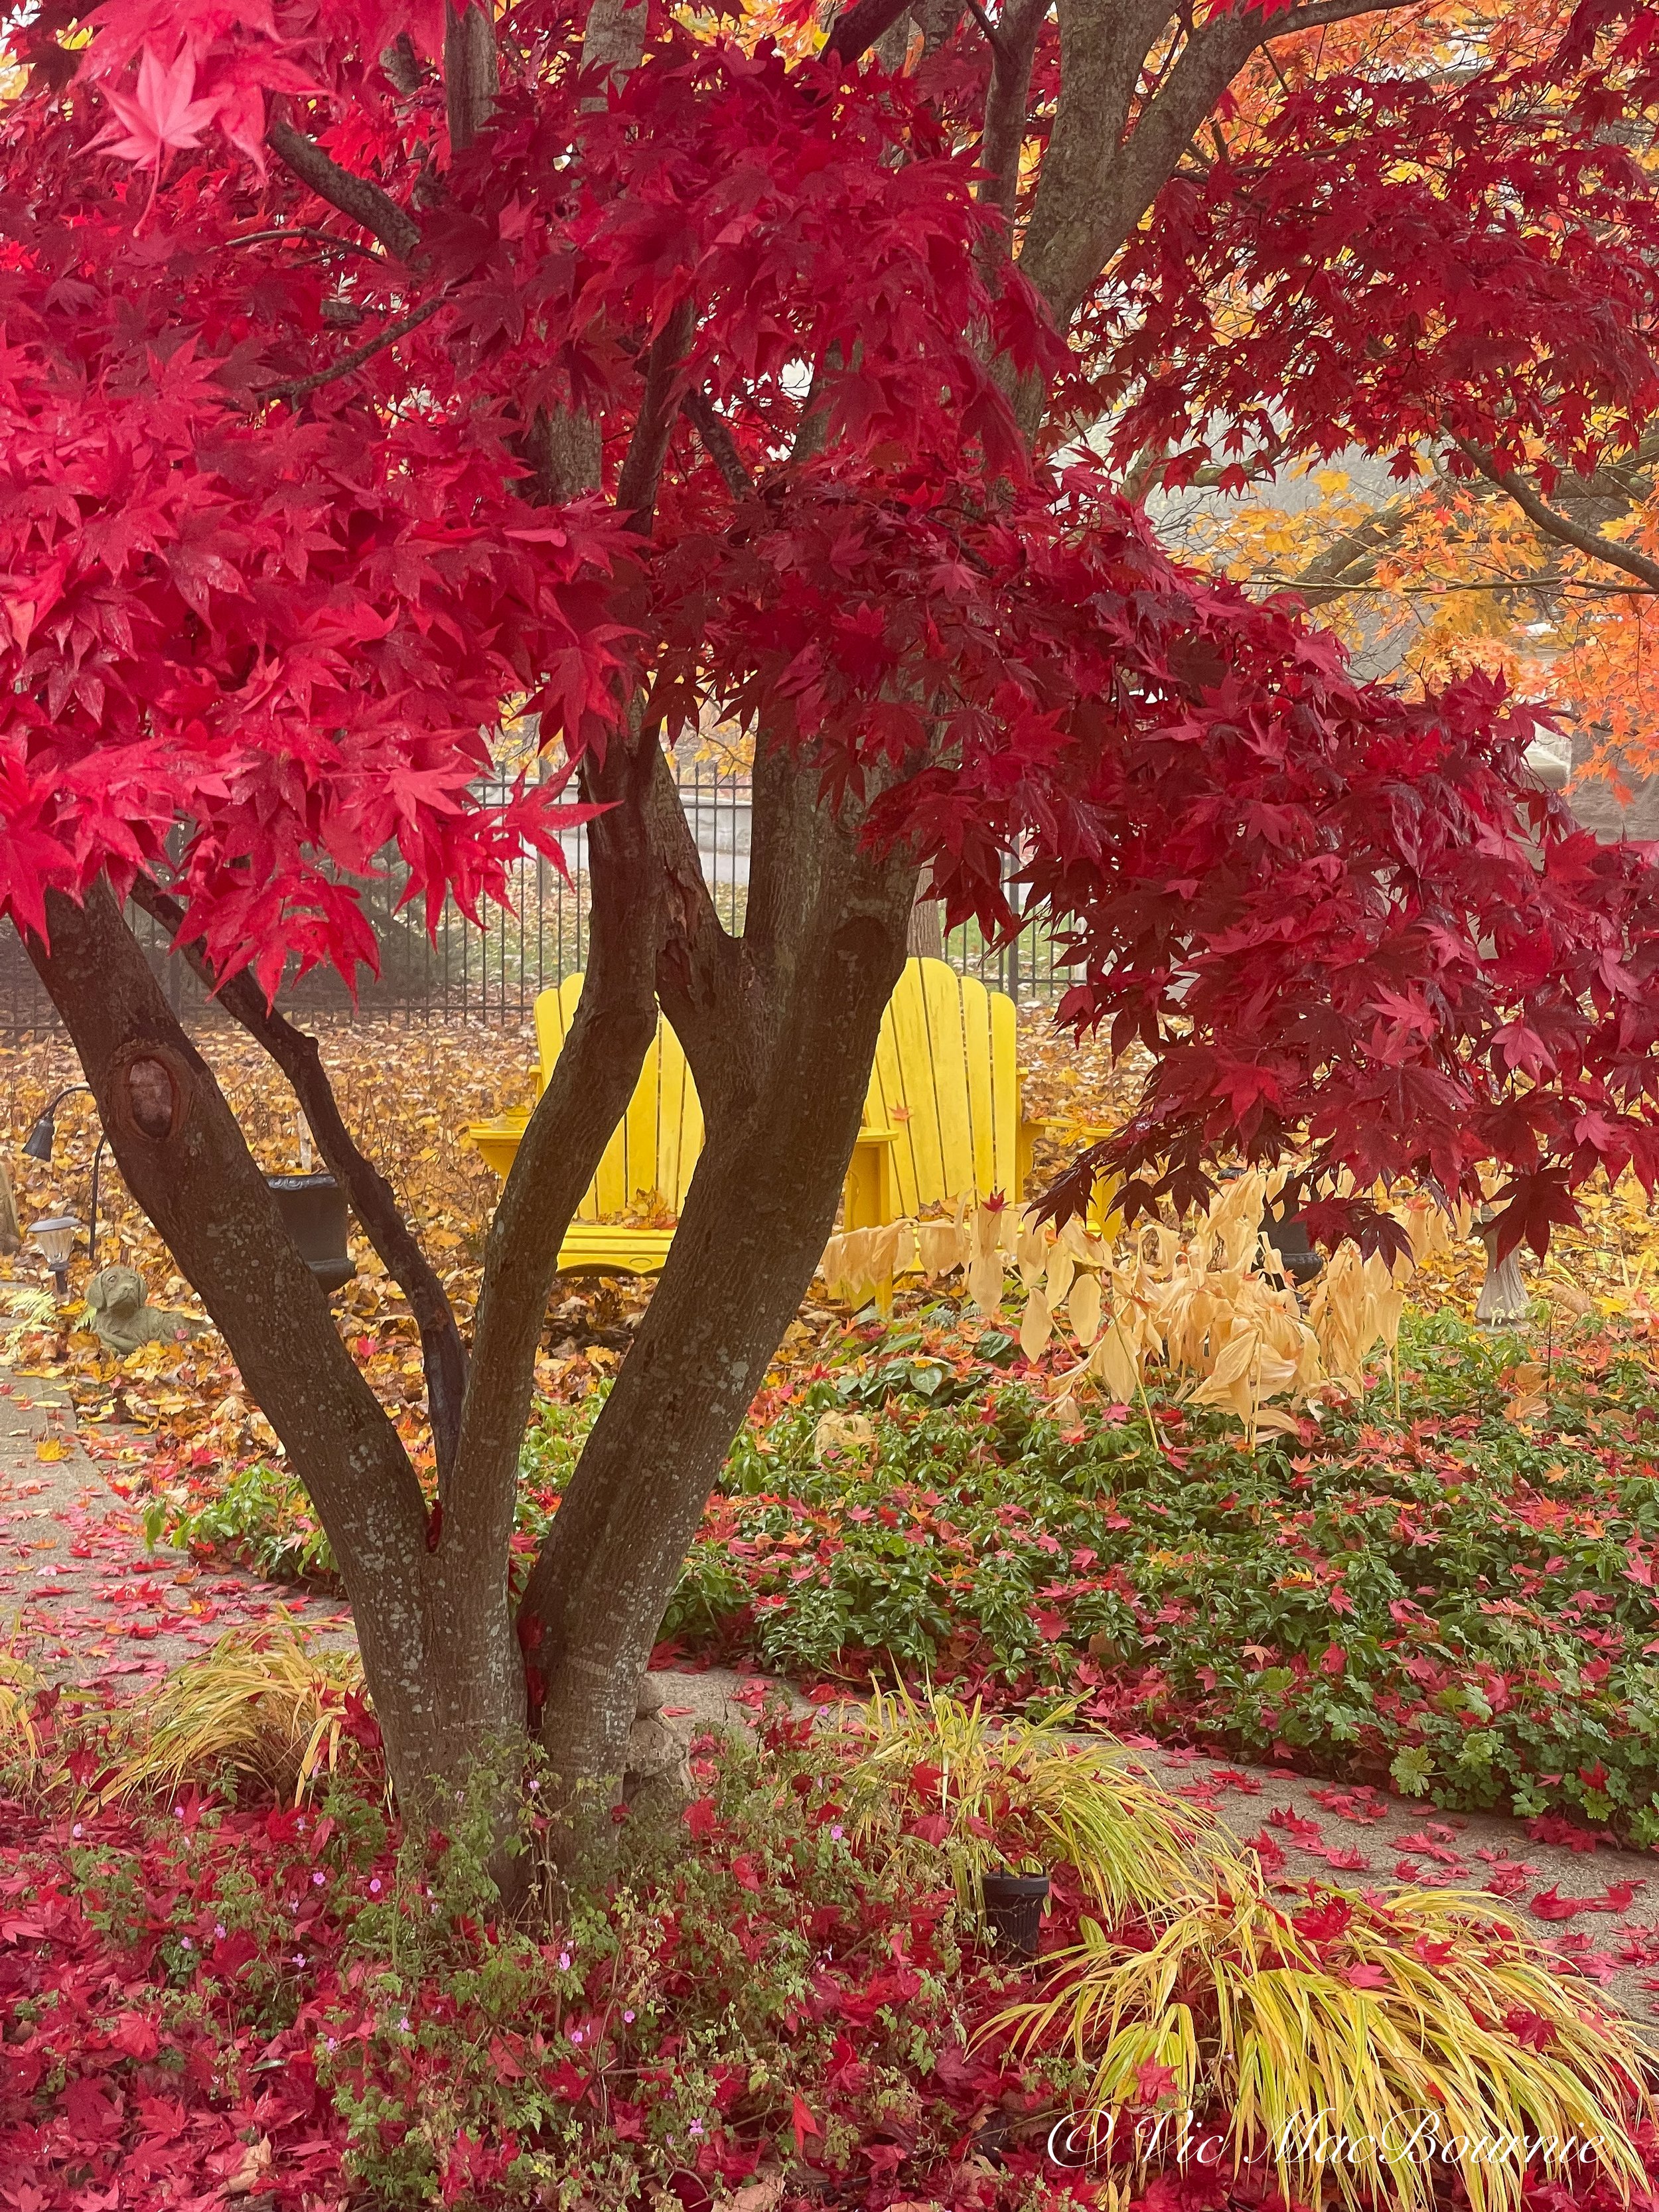
This Japanese Maple was photographed with the iphone 12 pro max.
Maybe it was the outstanding conditions with the early morning fog and wet leaves that helped bring out the beauty in the scenes, but the ease and convenience of using the lenses on the iphone meant I could move quickly to capture the scenes before the light changed.
For more images taken on the apple iphone 12 pro max, go to my Gallery of Images and click on the image at the bottom.

These Cornus Kousa leaves taking on their fall cloakes show the impressive colour and details the iphone 12 pro max is capable of producing.
With a press of the icon on the phone I could easily go from extreme wide angle to normal. And, by tapping into the normal lens’s zoom range, it was simple to move in closer when necessary.
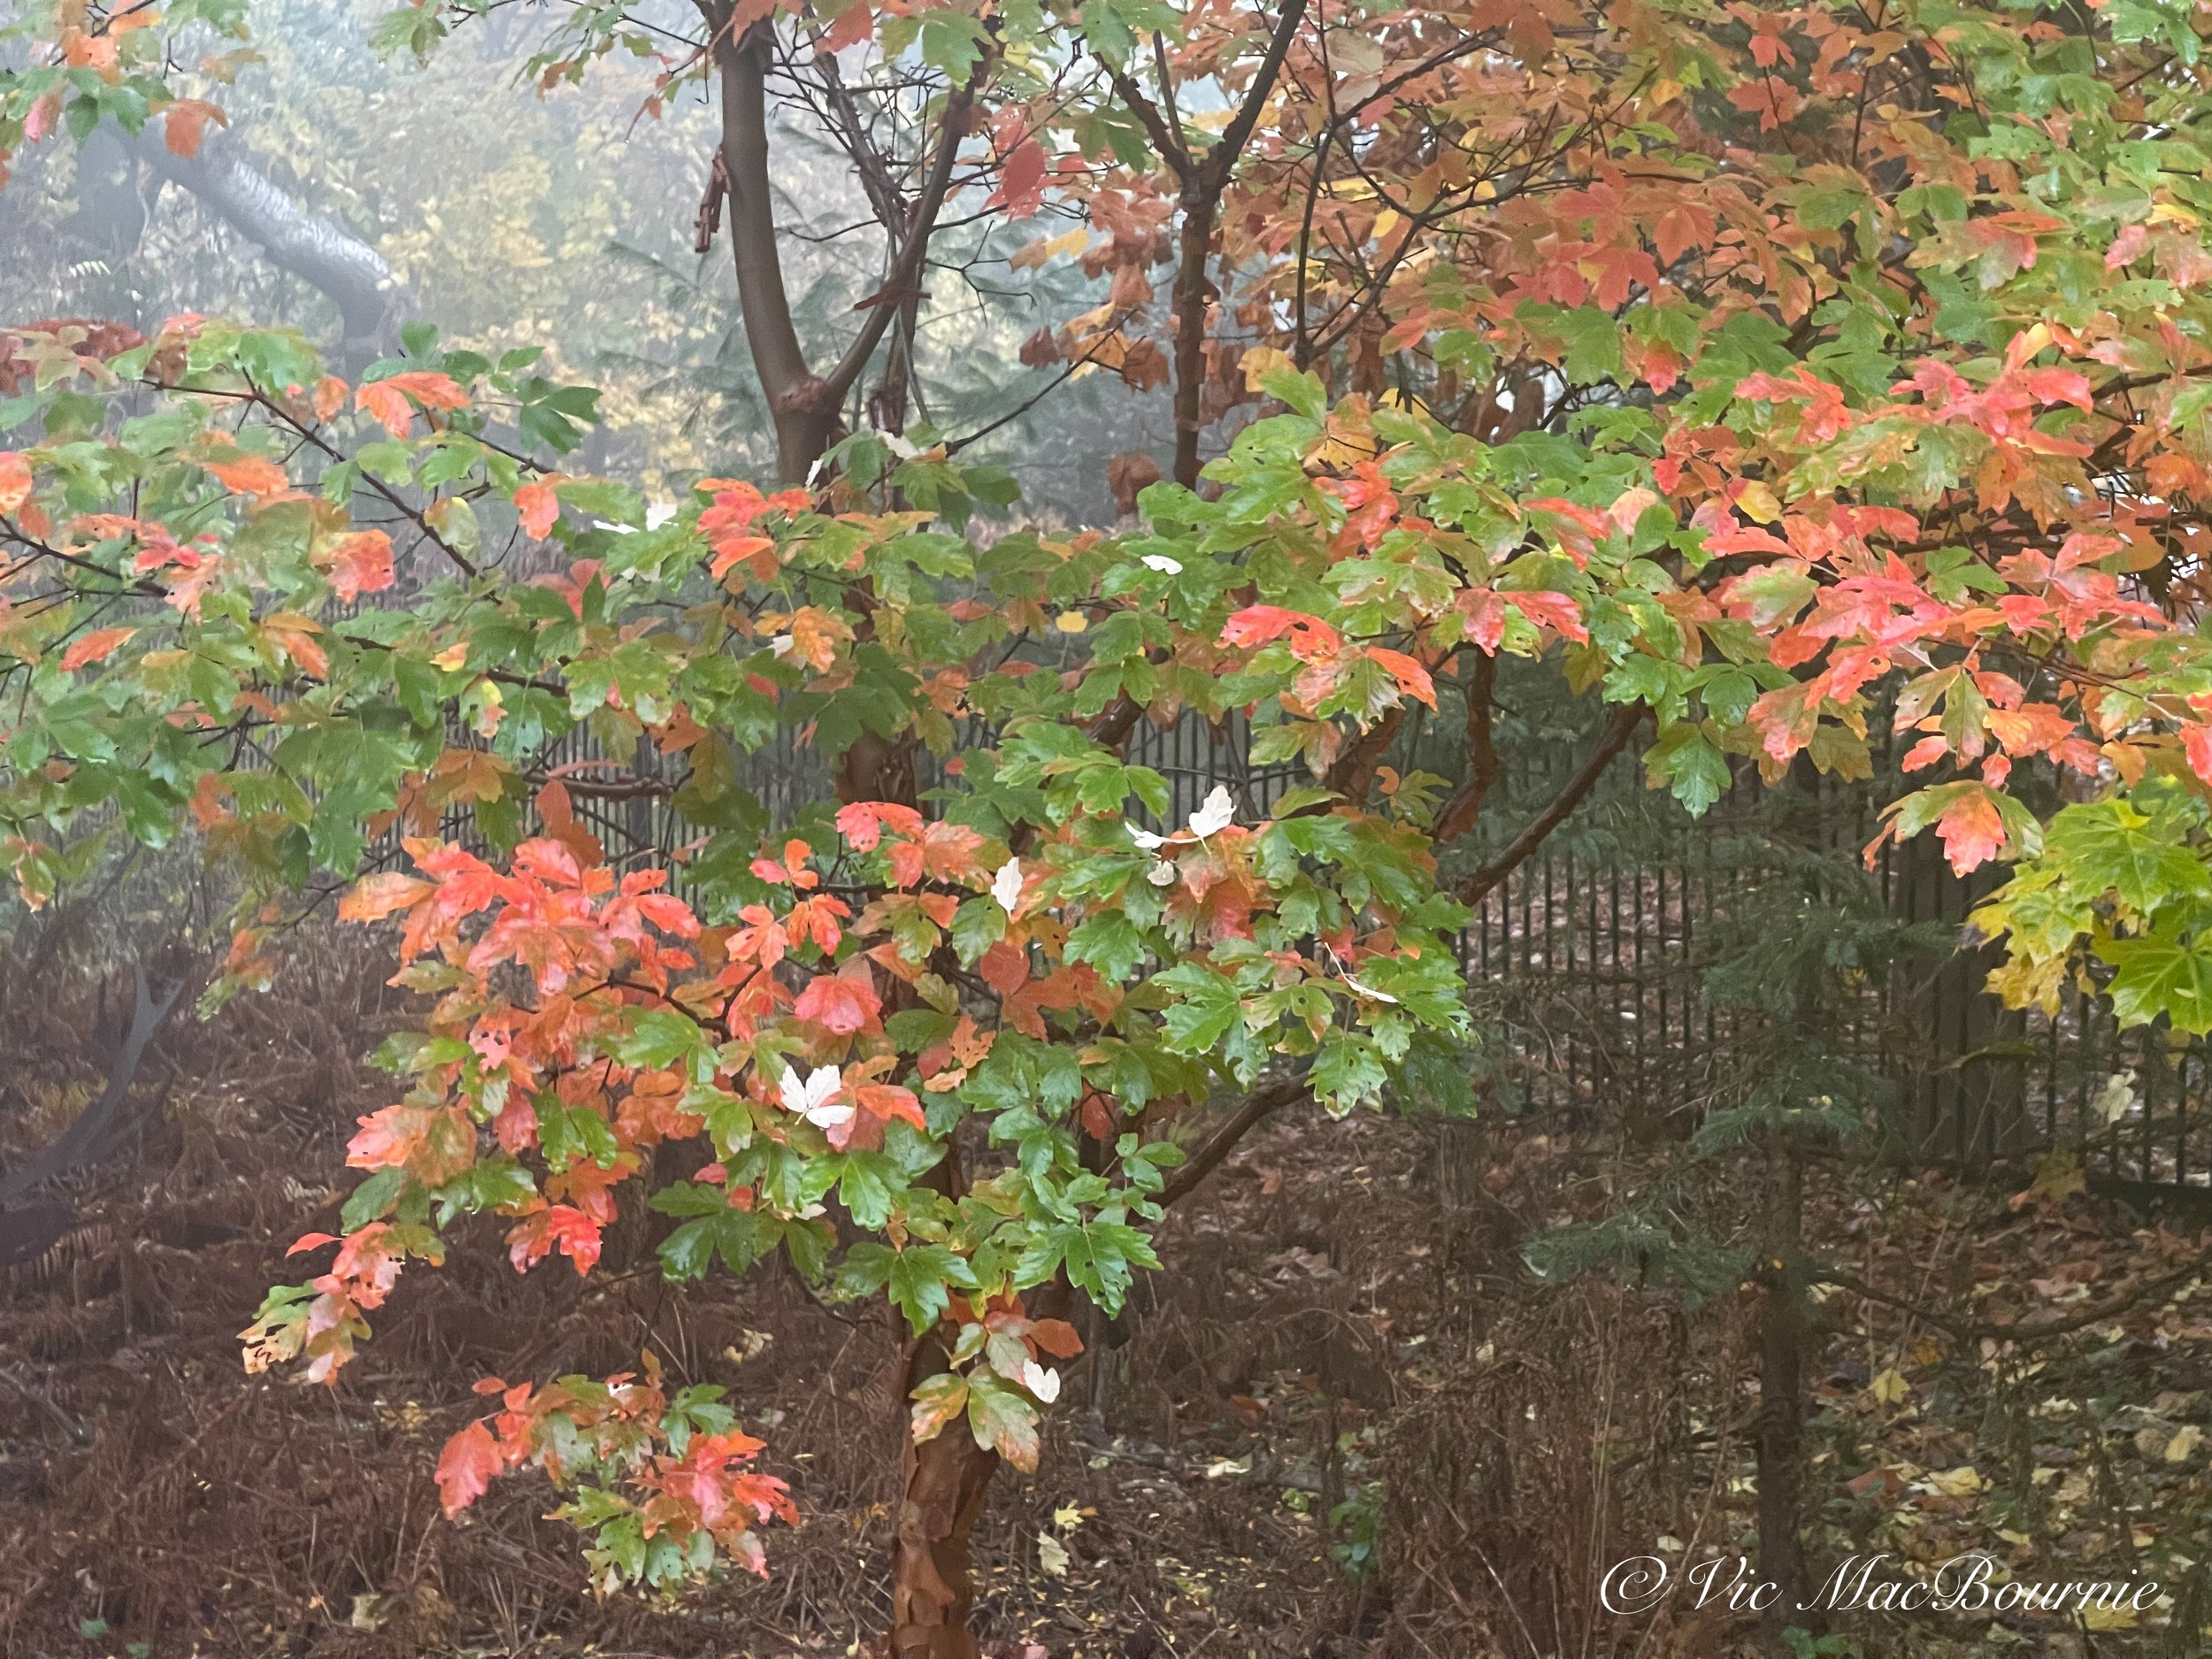
This Paperbark Maple is just beginning to show its fall colour in the woodland garden.
Five tips to get the most out of your iphone camera and lenses
Experiment. Don’t be afraid to use all three lenses to get different views of the same or similiar scenes. You can always edit them later and pick your favourites to put up on social media.
Move in close to flowers, insects or colourful leaves to tell a more complete story about your garden at that moment. The iphone’s close focusing capabilities are excellent and the optical shake reduction system will help you get sharphand held images.
Try different angles. Holding the iphone up above your subject and shooting down on it, or getting low and shooting up will give you different perspective of similar scenes. Try to hold the camera straight (not pointing at odd angles) to keep the proper perspective in the images.
In portrait mode there are a number of different lighting effects that you could try to add more drama to your images whether they are an actual portrait or a garden scene.
The iphone is a very smart piece of technology that uses artificial intelligence to create the type of images it thinks will look best. Experiment with the tools, especially the touch screen focusing and exposure adjustments that are available. Focus specifically in an area you want the camera to focus on by touching the screen. A square will appear to tell you that is where the camera is focused. At that time you can also adjust the exposure by moving the small sun icon up for a lighter image and down to darken it.

The leaves of the Japanese Maple Bloodgood provide an elegant but vibrant groundcover in this Japanese-inspired garden.
iphone 12 pro max camera specifications
I would prefer not get into the fine details of the iphone’s specifications, since there are a number of technical sites that focus on such details. However, some basic information might help readers better understand the camera’s capabilities.
The iphone pro max has three lenses on the back of phone. While looking at the phone, the user sees three settings – 0.5 (representative of a 13mm f/2.4 lens in 35mm lingo), 1X (26mm f/1.6 in 35mm equivalency) and 2.5X (65mm f/2.2 equivalent in 35mm). The iPhone Pro Max features a 5x optical zoom range and a much larger digital zoom up to 12x. Using the digital zoom at its extreme will likely leave you with images that will be unsatisfactory in most instances.
For more on the apple iphone line including comparisons between the various models’ camera features, go to the apple iphone site.

What’s left of the fern garden with a Cornus Kousa still in leaf. The texture of the spent ferns in the woodland garden actually creates a lovely scene in itself.
Although at the time of writing this post, the iphone 12 pro max is by no means the latest iteration of Apple’s iphone line – that would be the iphone 14 Pro. That iphone comes with the latest Pro camera system sporting a 48MP camera sensor with ultra wide and telephoto lenses, something they call a Photonic Engine for incredible detail and True Depth colour. The iphone14 is a step up from the dual-camera 12MP camera system in the iphone 13, but not that much of a leap from the iphone 12 pro max that I am now using.
The back of the iphoto 12 pro max includes from the left the 2.5X telephoto lens, the flash (white lens on right), 0.5X lens (directly below flash), 1X lens (lower left) and LIDAR bottom right. The LIDAR is used for Face ID and depth mapping.
Both the iphone 14 and the 12 pro max offer the three camera lens system but the 14 boasts a massive 48MP sensor while the 12 pro max comes in with a 12MP sensor. The 14 has a 6X optical zoom range, while the older iphone 12 model has a 5X optical zoom range. Both have 6.7-inch Super Retina XDR display screens.
So, unless you are planning to create poster-size images of your photographs, or need to seriously crop your images to get in closer to your subjects, there really is not a huge difference between the latest iphone and my trusty iphone 12 pro max. The larger sensor would also improve noise in the image, especially in the evening when the light is low.
In garden photography, there would be little need to want to upgrade to the newer iphone and camera unless you are using it to photograph birds or small mammals. Images taken from afar with the iphone 14 could take a much more severe crop to get in close to the subject (a bird for instance) than the smaller sensor on the iphone 12 would allow. In that case, however, it’s probably wise to use a dedicated camera and telephoto lens.
A slight mist or fog is the ideal time for garden photography
There is no question that the soft fog and misty conditions created the ideal atmosphere to show off the capabilities of the iphone 12 pro max. In bright sunny conditions, the images would not have anywhere near the impact that the right atmospheric conditions can bring to a scene.
Using these opportunities to get out in the garden can make a huge difference to your photographic success. The annoying backgrounds are either softened or disappear completely in the fog. The colours are muted and the tree trunks take on the look of dark skeletons against the white background of the sky. The lighting is even and even the darkest areas of the garden benefit from the soft light in the scenes.
When the fog rolls in, it can be a magical time.
Even if you are busy or need to get out the door to get to work, try to take a moment to grab a camera, or your cell phone, and capture your garden in its best light. You won’t get many of these special opportunities – especially in fall when the colours are at their peak – so don’t miss the opportunity.
For more on the apple iphone line including comparisons between the various models’ camera features, go to the apple iphone site.
Get the most out of your compact camera: Ten tips to better photos
Getting the most out of your compact camera involves getting acquainted with the camera’s features, many of which can be hidden in menus.
Beginners should focus on scene modes for best results
Getting the most out of your compact camera is the first step to creating your best photographic images.
Hidden in the depths of many compact cameras are a host of creative filters, scene modes and special effects that most photographers either never explore in any meaningful way, or don’t even know their little camera offers these capabilities. Beginning photographers will benefit from learning how to take advantage of these filters and scene modes to get the most out of the camera.
Reconsider leaving your camera on automatic and explore the scene modes to maximize your results.
For more on Photographing your garden, be sure to check out my comprehensive post on Flower Photography in your Garden.

In this image, I used a in-camera filter available in most digital cameras that takes a B&W photo of the image but lets the user choose a colour or two colours that are displayed. In this case, the dark purple salvia flower was highlighted.
The best advice I can give is to:
Place your camera manual on the table beside your favourite couch and read it – several times. If it’s a digital manual, download it to your computer and keep your computer nearby. Keep it handy for the first two or three months until you believe you know every part of the camera and its features. (I like to flip through the manual while watching television.)
Leave the camera in the same spot beside the couch. Pick it up regularly and go through the menus learning the features and how to quickly access them.
Now go out regularly with the intent of using these features, filters and scene modes. Get comfortable with them to the point that you can access them quickly and efficiently even if they are buried deep in the menus.
Don’t believe what you read that you have to use manual modes like aperture and shutter priority. There is a time to use these modes, but often the scene modes will serve you better, especially if you understand what is happening to your camera when you use these specialized modes. Many camera manuals will actually provide a brief explanation of what settings are used on the camera in the various modes.

The macro mode in the Fujifilm X10 was used to capture this image of the forest floor. Photographing images like this is a great way to experiment with using the various features and modes in the camera.
Eleven tips to improved photography with compact cameras
Know your compact camera and how to quickly access menus and features.
Keep the ISO as low as possible. You are dealing with a small sensor that will get noisy (grainy) quickly in high-ISO settings
Use in-camera stabilization to help keep ISO levels low and images sharp.
Treat the camera like a DSLR and put it on a tripod if you are shooting landscapes to get the sharpest images possible with low ISO and a high aperture. Use the self-timer feature to set the shutter without touching the camera.
If you are using a tripod, turn off in-camera stabilization.
If you are using in-camera stabilization, use proven traditional methods to hold the camera steady, including bracing yourself against a wall or tree, pushing the viewfinder up to your eye to help brace the camera or using a monopod, say at a sporting event. No need to turn off the in-camera stabilization if you are using a monopod.
Gently press the shutter button rather than jamming at it to take the picture. Pressing the shutter quickly and with force may cause camera shake and make the photo look out of focus.
Use the burst feature to shoot multiple images of a scene to ensure one of the images is sharp. Use side-by-side comparisons in post processing to pick the sharpest image.
Consider setting the in-camera bracketing feature to ensure you obtain the best exposure. Obtaining perfect exposure is more important on a compact camera than it is on a larger sensored camera, because the smaller files cannot handle as much post processing.
Shoot in RAW whenever possible and if you are comfortable doing post processing in programs like Lightroom or Photoshop. If you don’t like processing RAW images, consider using the Raw plus jpeg setting to ensure you have the opportunity to post process an important image if necessary but still retain the more convenient jpeg image.
Take advantage of the scene modes provided by most compact cameras, but also take the time to learn what the camera is doing in these scene modes so you can make adjustments if necessary.

Here, a combination of macro mode and B&W mode is used to capture this image of the forest floor. Fujifilm’s X10 enables the photographer to experiment with B&W digital film including the use of B&W filters that darken skies or lighten foliage. Experimenting with these features helps to prepare you for the time when you need them.
What compact camera features should I focus on?
Focus on the camera features you use the most and get totally comfortable using them.
Garden photographers, for example, might want to get acquainted with, macro mode, sports /action mode, portrait mode, and pet mode. These are obvious features that come to mind but night-shooting mode including night portraits are shooting modes that you might want to get familiar with before you are forced to use them.
Macro mode is obviously a feature for garden photographers to get comfortable using. Just set the camera on the macro mode and go out into the garden to experiment getting up close to flowers and insects. Don’t wait until you come across a beautiful butterfly to learn how macro mode works. By experimenting with the macro feature, you will get comfortable, for example, with how close you can get to the subject.
You’ll also learn how far away you can be while using the zoom feature to get in as close as possible. This is particularly useful to get images of butterflies from a distance.
Don’t be afraid to experiment. There is no cost to this exercise accept your time.
Try shooting with and without flash to see how the results change and how your camera handles flash up close.
The macro feature is just one of many camera features to focus on.
If, for example, you are going to watch your childs’ ball game, take the camera and use the opportunity to experiment with the action or sports mode. Set the camera on “action mode” and fire away.
Feel free to use the manual modes to capture game action, but unless you are very comfortable setting the aperture and shutter speeds setting the ISO and turning on burst modes, let the camera’s technology do most of the work for you.
Afterall, camera manufacturers have put a lot of thought into coming up with the best camera settings for the various modes.
One of my favourite cameras for creative modes is the Pentax Q. For my comprehensive post on this tiny camera, check out my post on The Pentax Q, and why you need one in 2022.
What are the best compact and micro 4/3rd cameras for 2022?
If you are wondering what the best compact cameras for 2022 are, here is a short list of some of the top compact cameras Fuji, Sony, Lumix, Canon and Leica.
The Fujifilm X100V, boasts an APS-C sensor and 24.3 megapixels along with its 23mm, fast f2 lens. It’s got a hybrid optical electronic viewfinder and a 3-inch fixed LCD screen. This is for more serious photographers who are looking for fine craftmanship and are happy with using a prime lens rather than a more versatile zoom lens. I’ve included a few links from various locations if you are interested in purchasing the camera.
Fuji X100V (Adorama)
Fuji X100V (B&H)
Fuji X100V (Amazon)
Sony ZV1 boasts 20.1 megapixels in in 1-inch sensor. It sports a fast 24-70mm zoom lens and a 3-inch screen. This enthusiast camera has very fast auto focus and a screen that can be moved to multiple views. This camera lacks a viewfinder but is a very capable camera for video.
Sony ZV-1 (Adorama)
Sony ZV-1 (B&H)
Sony ZV-1 (Amazon)
Not quite a “compact” camera but the Panasonic Lumix G9 is a mirrorless, 20.3 megapixel camera with a 3-inch LCD and interchangeable lenses in the micro 4/3rds category. It is a professional photo and video camera that has class leading dual image stabilization and outstanding video.
The Panasonic DMC-ZS 100K is a compact point and shoot 20megapixel camera with a 10X optical zoom ranging from 25-250mm (35mm equivalent). Like your phone, it has a touch screen on the back and is fully equipped to handle any challenge you may face.
Panasonic DMC-ZS100K (Henry’s Cda)
Panasonic DMC-ZS100K (Adorama)
Panasonic Lumix G9 (B&H)
Panasonic Lumix G9 (Amazon)

Adding punch of colour to images can be done with in-camera filters. Here, “vivid film” was chosen to add a punch of colour to the photograph of the container pond along side containers of flowers.
How does “sports/action mode” work on a compact camera?
Let’s examine what happens to the camera when you set it on “sports/action mode.”
Most cameras, when set on “action mode” will make a series of alterations to your camera settings to best capture fast-moving subjects.
First, the ISO setting on the camera will set the ISO to a high number to give the camera it’s best chance of stopping any action.
Second, it will set the shutter speed to a higher level to reduce the blur caused by the action on the field.
Third, it will set the aperture to provide as much light as possible so that the shutter can fire at a rate fast enough to stop the action. As a result, the depth of field will be limited.
The camera will likely choose continuous-focus mode as well as burst mode or continuous shooting mode.
The camera may choose other features to enable your best action photos, such as turning off the flash and turning on anti-shake mode if it is not already in use.

This Panasonic Lumix camera’s mode dial shows the various modes available to the photographer including a custom mode (CUST), scene mode (SCN), two my scene modes (MS1-2), a movie mode, intelligent mode, program mode as well as aperture, shutter and full manual mode.
All of these actions are turned on in a fraction of a second and the camera is ready for capturing the big game.
Knowing what the camera is doing in sports mode, should also give you ideas of how to use this mode for other subjects.
If I see a fox trotting through the garden, “sports/action mode” is the first mode I go to to capture the scene. With only seconds to capture the fox as it trots through the garden, there is no time to make the changes necessary to capture the scene.
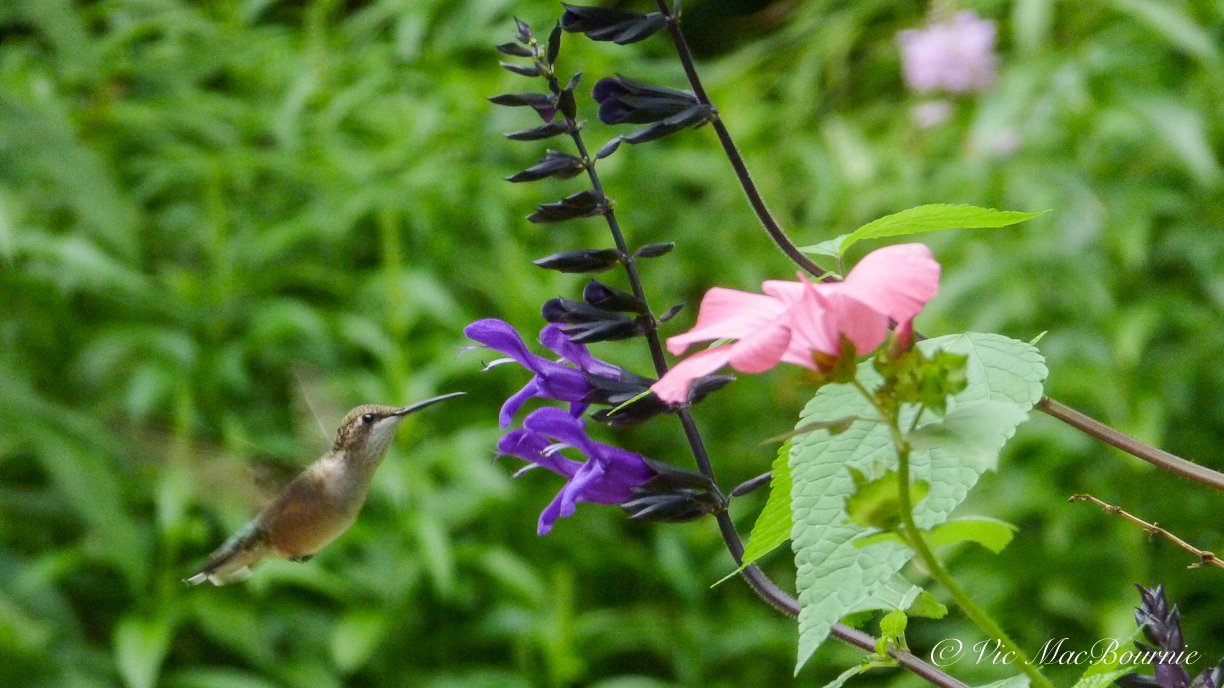
A fast shutter speed was used to help stop the motion of this hummingbird. Using action or sports mode will help you capture images of birds and animals in the garden. Using TV or time value will also help you capture the action if you choose a shutter speed of 500/sec or faster. Finding a compromise between a high shutter speed and setting a high ISO is key to capturing good, usable images.
The action mode is likely the one I would choose to capture kids playing at the park, or the dog having a great time in her pool or the hummingbird working the flowers while I sip my morning coffee.
Why use the custom features over scene modes?
Many high-end compact cameras also have custom modes that enable you to set the camera for your most-used situations such as portrait, B&W images or action photography.
Custom modes are excellent alternatives to using scene modes because they allow you to dial in all the settings you need to create the desired effects. For example, action mode may allow your camera to automatically pick an ISO setting higher than 1600, but you know that the resulting image is not very good. The custom setting would allow you to limit the ISO to say 800 or 1000 ISO.
How does portrait mode make better people photos?
We’ve discussed some of the camera settings in action mode, let’s look at what goes on in portrait mode. There is more to the portrait mode than you might think. Although each camera manufacturer will set their portrait mode differently, the number of changes might surprise you.
Consider the following possibilities:
Change the f-stop to wide open to create a pleasing background
Take several images at once in and out of focus to help create a lovely soft background
Change the colour calibrations to create a warmer, more pleasant skin tone for portraiture. Some camera manufacturers – including Fujifilm cameras – have included the colour parameters of their former portraiture films so that users can experience classic portrait film in digital form.
Add a softening filter or effect to create the illusion of softer, blemish-free skin.
Lower the ISO for a less grainy or noisy effect.
Turn the flash on or off. If the flash is on, add red-eye reduction. (My Fujifilm X10 even has a handy feature where the camera takes the portrait with and without flash. The photographer can then choose the image they like best.
I’m sure there are other changes depending on the camera manufacturer, but these changes to the camera settings should give you a good idea how much thought goes into creating the best settings for successful images using the scene modes and why you should consider using them.

These two images show how effective using the HDR mode can be. The above image shows the non-HDR image where the lighting between the hi-lights and shadows is extreme. By using the HDR mode, the PentaxQ took two fast images exposing for the hi-lights and shadows and then combining them into one image (see below).

The final HDR image finds a middle ground between the highlights and shadows. HDR can be used effectively in a number of situations where the lighting extremes call for it.
Other modes, such as HDR (see above), combine several photos taken in quick succession to remove the extreme highlights and shadows and give you a properly exposed image. (Useful when shooting a cityscape from inside your condo when you want to balance the indoor light with the outdoor light.
Other modes and what they do:
Scenic modes often enhance blue skies and add punch to green foliage.
Kid modes enhance skin tones while capturing fast-moving subjects.
Pet modes allow you to capture fast-moving subjects.
Food modes (popular for instagram) enhance colour to create more appetizing food.
Sunset modes enhance warm colours creating more dramatic sunrise and sunset effects.
Fireworks mode uses long exposures to capture the fireworks.
There are many more modes that are set up to help photographers get good images in unusual or difficult situations. Once again, experiment with the modes that you expect to use regularly.
When is the best time to use manual modes
So far, we have discussed the benefit of using scene modes rather than the manual modes such as aperture priority mode (AV), or shutter priority mode (TV) or full manual mode (M).
Once you become more comfortable with the camera, using manual modes gives you more control of the camera. The scene modes are very good most of the time, especially in difficult or unusual situations, but there are times when you want full control of the camera settings.
In these situations you can set your aperture and shutter speed and let the ISO change automatically to create the proper exposure. It’s a good idea to restrict the ISO to a specific range (depending on the camera) so that the ISO levels do not go so high that they degrade the image.
By controlling the aperture, you gain control over the depth of field in the image including the perceived sharpness of the subject and/or the softness of the background.
By controlling the shutter, you gain control over the ability to stop movement or create movement in the image. You would want to stop the motion of a flower getting blown in a gentle breeze, but show the movement of a stream cascading over rocks creating the effect of soft, moving water.
Although there are scene modes in many cameras that help you create the effect of flowing water, having complete control allows you to change the look of the water in greater detail.
Final thoughts on maximizing your compact camera
For most beginning photographers, the compact camera is often the first and the best camera to purchase. Becoming familiar with the features and getting comfortable with the camera menus helps to quickly access the features when you need to and takes much of the thinking out of using the camera whether in the garden or on vacation.
By making use of the scene modes and the various filters built-in to these cameras, you can take professional looking images that just might surprise you and your friends.
As you get more comfortable with the camera, learning when to use the scene modes and filters will probably be the most difficult part of getting great photos.
Finally, when you are comfortable with the camera and understand its inner workings, you can move to more manual control and take your pictures to another level.
Over time, getting great images and developing a good eye will become second nature and you will know you have discovered the joy of photography.

Review: Panasonic’s Lumix DMC-ZS8 in the garden and on the road
The Lumix DMC-FZ8 travel camera gets the job done whether you are photographing your garden or taking the handsome little camera on vacation.
Kolari adapter opens a world of creative opportunity
Is a $10 camera all you need to capture great garden photography while at home or travelling the world? The short answer is yes, absolutely.
For just about the price of a Big Mac extra value meal, I was able to score a Lumix DMC-ZS8 compact travel camera complete with a Leica 24 to 384mm lens in excellent condition. Admittedly, it was a very good purchase, but these “great buys” are out there if you are willing to take the time to search them out.
The Lumix ZS8 is categorized as a travel camera, meaning it is the perfect single camera to take on vacations because it can technically handle almost anything you can throw at it while still being small enough to fit into your pocket or purse. The ZS8 fits all those requirements and more.
Getting the most out of your compact, point-and-shoot camera is key to successful photography. Take some time to check out my comprehensive post on Getting the Most Out Of Your Point-and-Shoot Camera.
Check out my earlier post on using the travel camera in the garden and my comprehensive post on Garden flower photography. If you want to see more images from the Lumix ZS8, please check out my Lumix ZS8 Gallery of images.
This little Lumix packs a solid macro feature along with its long reach at the telephoto end.
Kolari adapter is perfect addition
One of the major problems with the ZS8 and many other point and shoot travel cameras is the difficulty of adding filters such as polarizers and neutral density filters to the front of the lenses.

The Kolari adapter on the Lumix opens a world of creative possibilities.
Kolari has changed all that. By adding a simple, inexpensive adapter to the front of the camera, Kolari takes the Lumix ZS8 and other point-and-shoot cameras to a whole new level by allowing users to add filters like a polarizing filter and neutral density filters to the front of the camera.
And, by using Kolari’s magnetic rings and filters, slipping the filters on and off at a moment’s notice could not be easier.
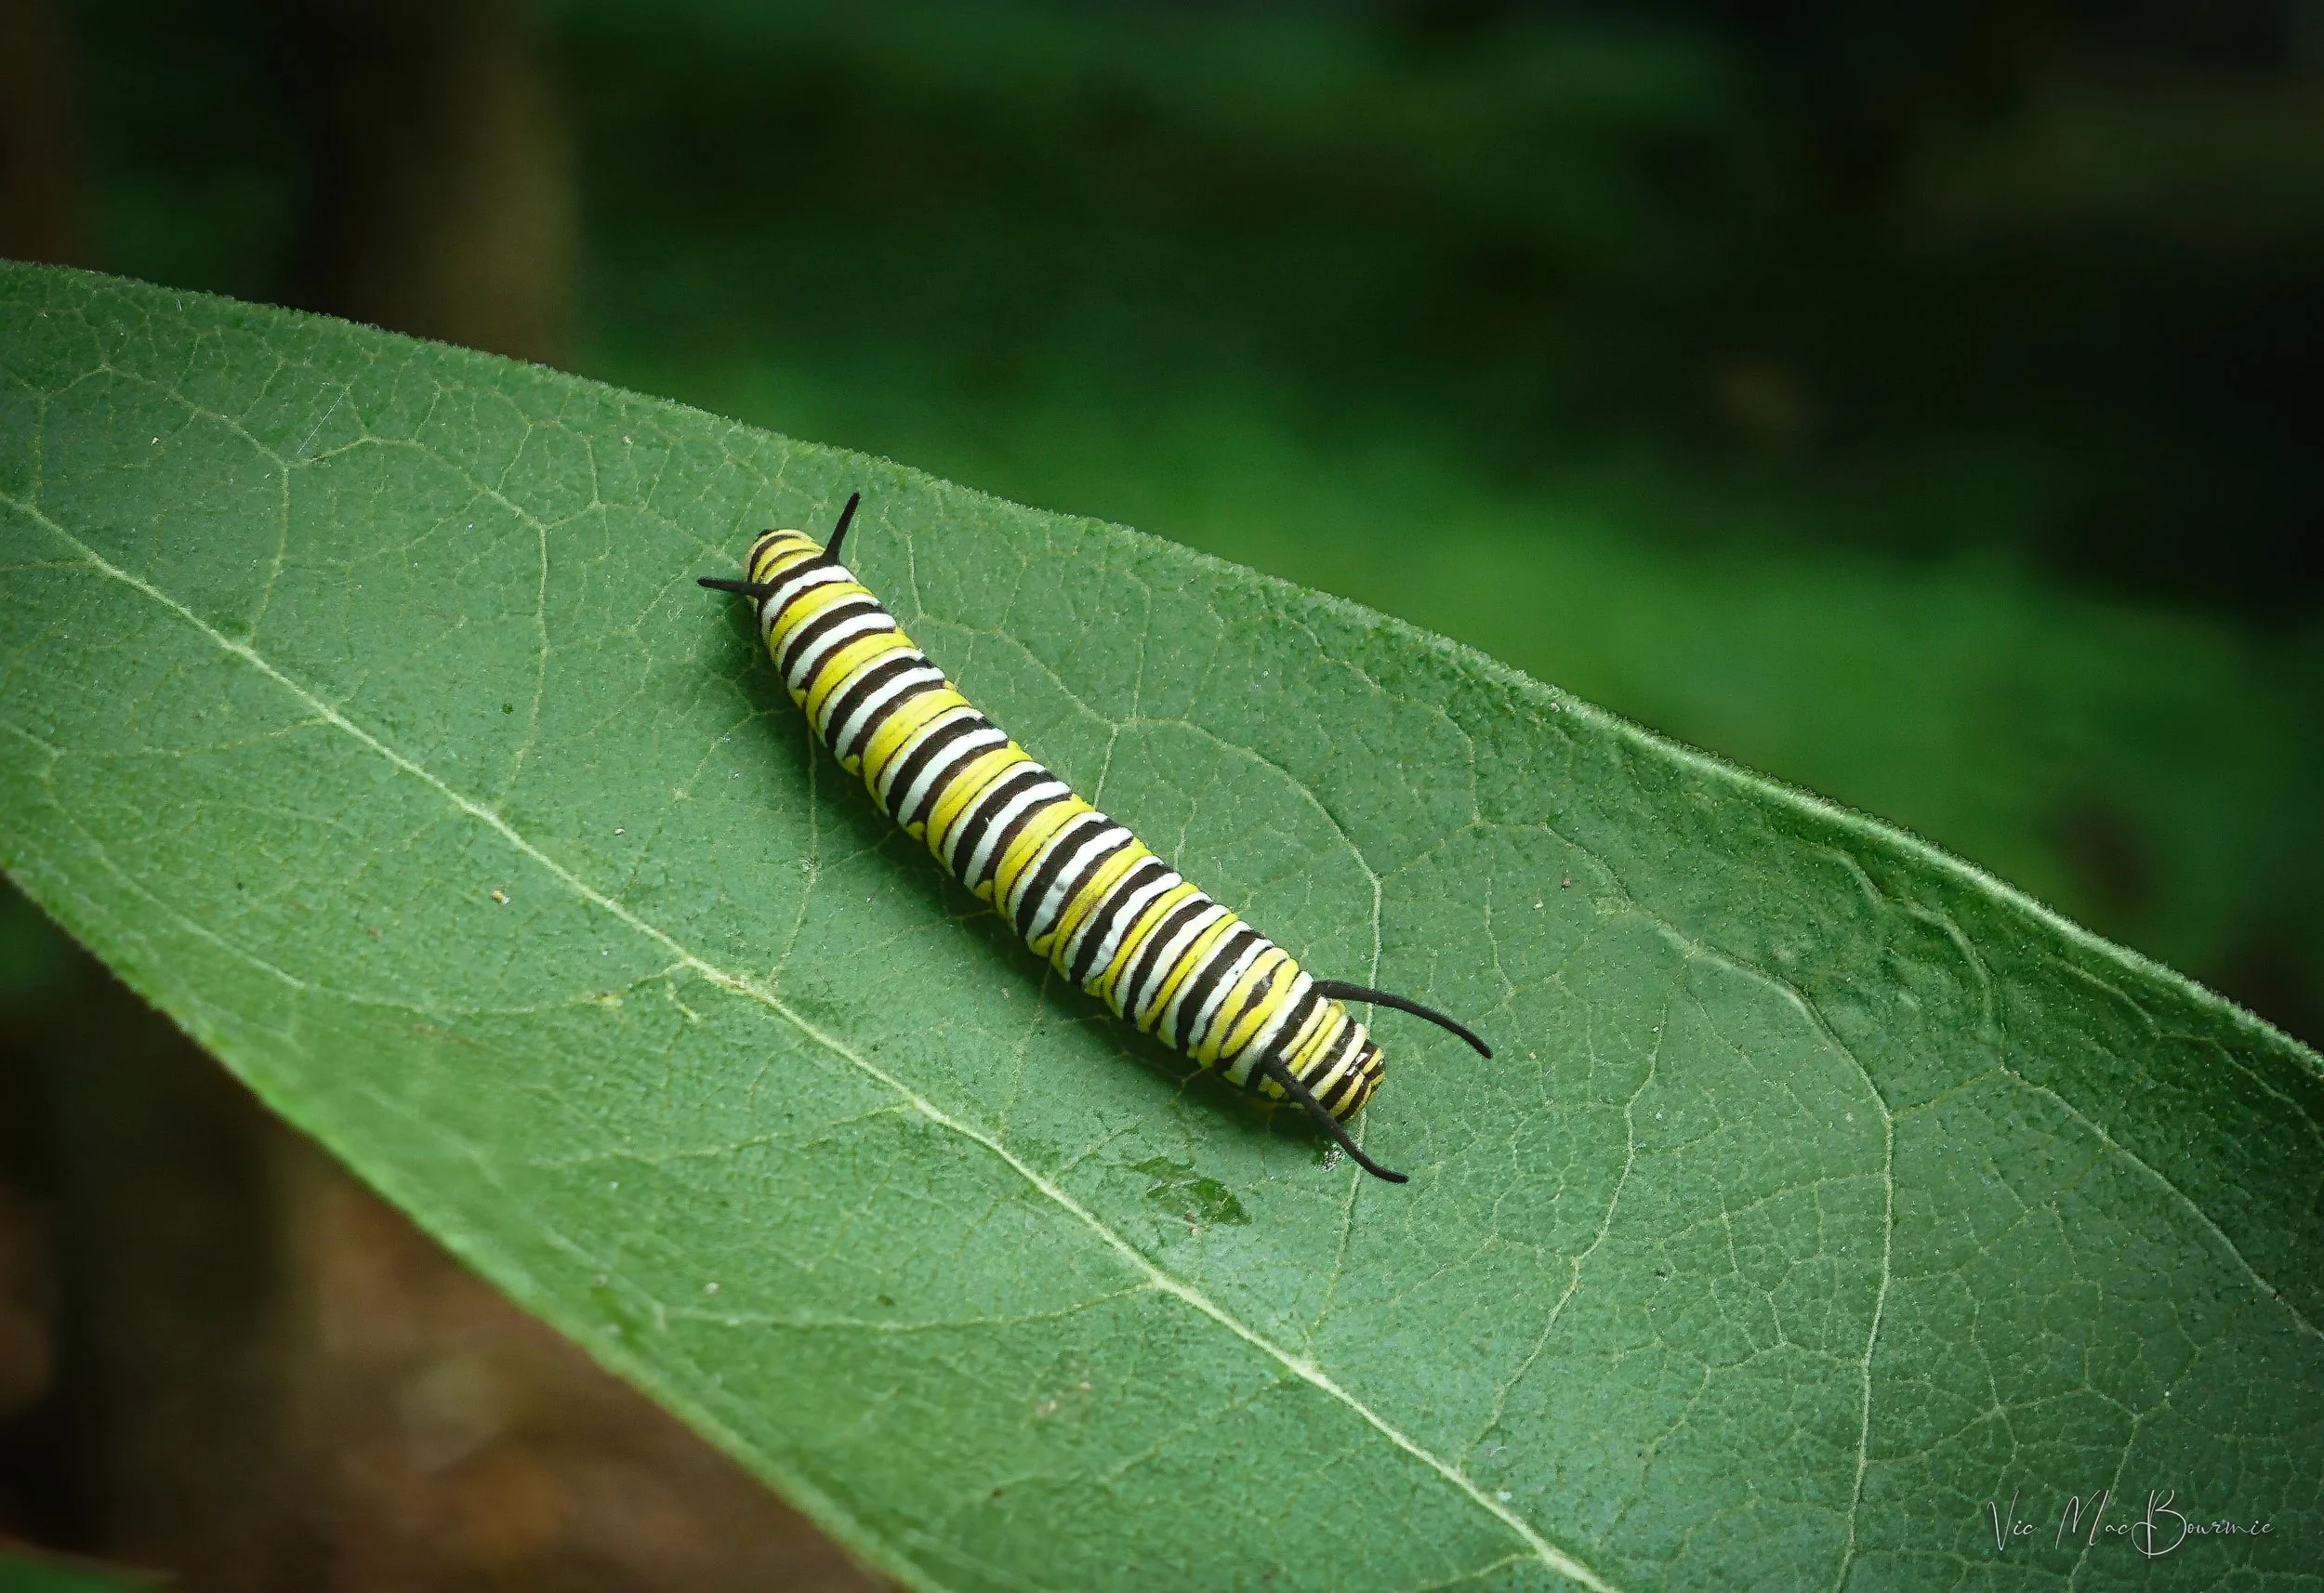
Monarch caterpillar captured with Kolari adapter and polarizing filters on Lumix DMC ZS8
Reducing glare off foliage, darkening blue skies and removing reflections in glass and water are just three great reasons to use a polarizing filter. Here, for example, I used a polarizing filter to capture this monarch butterfly caterpillar on one of our milkweed plants. Without the filter, the leaf would have given off a distracting reflection.
Although the polarizing filter is probably the most useful filter you will use – especially in the garden – neutral density filters can also be used to create stunning results. The Kolari three-filter magnetic neutral density filter set proved to be indispensable to capture the look of soft, gentle water cascading over rocks in a nearby stream. The neutral density set I use comes in a 3-stop, 6-stop and 10-stop kit that delivers a wide range of possibilities.

The Kolari 6-stop neutral density filter was used to create this dreamy look in the water of the small waterfalls.
Intentional camera movement in the garden
The Kolari neutral density filters are also the perfect companion for anyone looking to turn their garden photography into works of art by experimenting with Intentional Camera Movement (ICM).
The abilty to slow the shutter speeds down to a second or even several seconds using the neutral density filters makes ICM photography possible even in bright sunny conditions. The image below of bee balm in our garden is just one illustration of the potential the filters offer photographers looking to take their point-and shoot cameras to a whole new level.

This image of bee balm takes advantage of a slow shutter provided by the Kolari neutral density filters to use intentional camera movement as a creative effect.
The Kolari adapter for the ZS8 uses sticky two sided adhesive to attach the adapter to the front of the camera. Be especially careful mounting the adapter to ensure the sticky adhesive does not attach itself to the camera. (follow instructions provided.) In my case, the adhesive stuck to the lens as well as the exterior of the camera, but I was able to cut the adhesive away from the camera using a simple exacto knife.

Kolari adapters are also available for other camera including the Canon G-line.
The adapter comes with a 52mm thread and I got a 58mm magnetic adapter with the Kolari neutral density filters to use with my other cameras and lenses. Go to the Kolari site to see the wide range of filters and adapter sizes available for other cameras and lenses.
Check out Kolari’s offerings for other point and shoot cameras.
So many excellent compact cameras that were put away in drawers following the release of the iphone and other smart phones are sitting collecting dust and deserve to get a second chance at life. If you have one or two in a drawer or sitting on a shelf, why not give them a good workout in the garden where these cameras can really show off their stuff? You might be surprised how capable they are and how fun they can be to use.
Click on the link to see a complete list of Panasonic’s Point and Shoot cameras.
If you are looking to upgrade your camera equipment or simply add a few of your favourite lenses, consider checking out the used equipment deals and KEH Camera Exchange. If you are looking to trade in your older equipment, KEH is also an excellent place to consider your trade-ins.
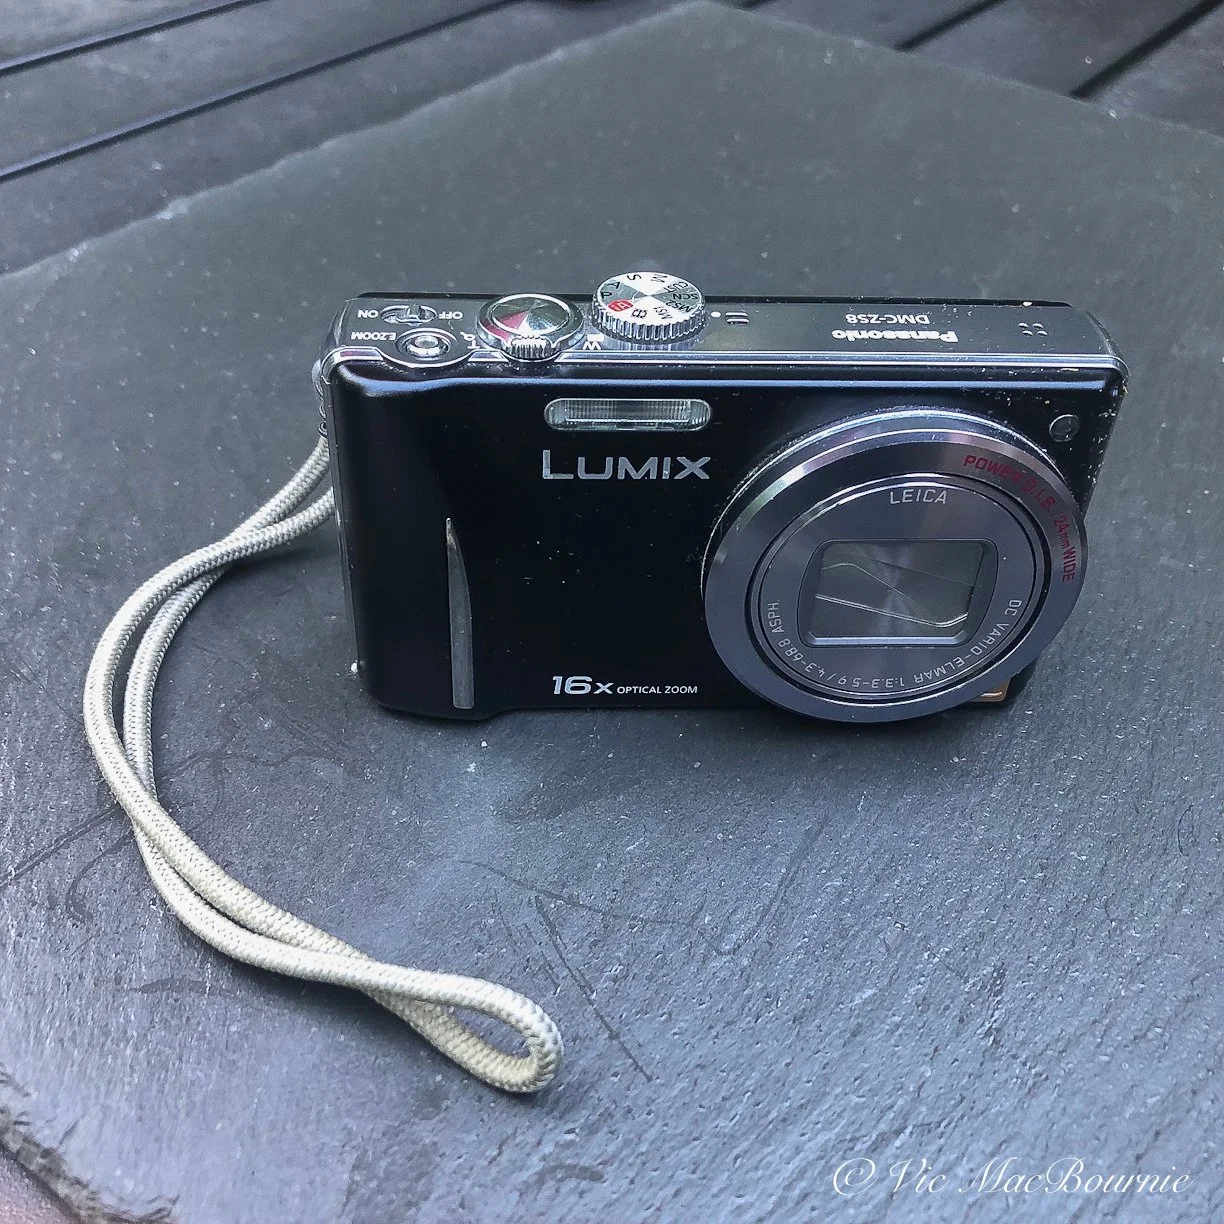
The very handsome black and chrome Lumix FZ8 is a design found in several earlier Lumix travel cameras.
In my reviews of classic, older digital cameras, I like to use real world images from my garden and on the road to provide readers with the type of images they can expect from the camera if they own one or choose to track one down on the used market. For those of us who enjoy playing with older, digital cameras, I hope these reviews will pique your interest in high-end compact, DSLRs and other mirrorless cameras.
If you want more information on using your compact camera to photograph flowers in your garden, be sure to check out my comprehensive article on Garden Flower Photography.
If you are interested in older digital cameras, check out my reviews of the extremely popular Fujifilm X10, Canon’s PowerShot Elph 500 and the Casio EXILIM Pro EX-P505.

While not easy, capturing fast-moving wildlife is possible with the Lumix ZS8.
When was the Lumix ZS8 released?
Back in 2011, when the Lumix ZS8 travel camera was released with a suggested retail price of just under $300 U.S., it was considered one of the leaders in its class competing with the likes of the Canon Powershot SX230 HS, the Nikon Coolpix S9100, Pentax RZ10, Samsung WB210, Sony Cyber-shot HX9V, including the Lumix flagship Panasonic Lumix DMC-ZS10 which came with GPS and a different sensor and better video, but is essentially the same camera.

A pollen-laden Bumble Bee on a native Obedient plant is a little easier to capture than a frenetic hummingbird.
The Panasonic Lumix DMC-ZS8 has a high resolution 14.1megapixel CCD sensor, with a 16X super zoom (ultra wide-angle 24-384mm (35mm equivalent) Leica lens and 1280 x 720 high definition (HD) video. All this wrapped in a high-build-quality, all-metal camera with a 3-inch TFT, LCD Display with 230K-Dot Resolution.
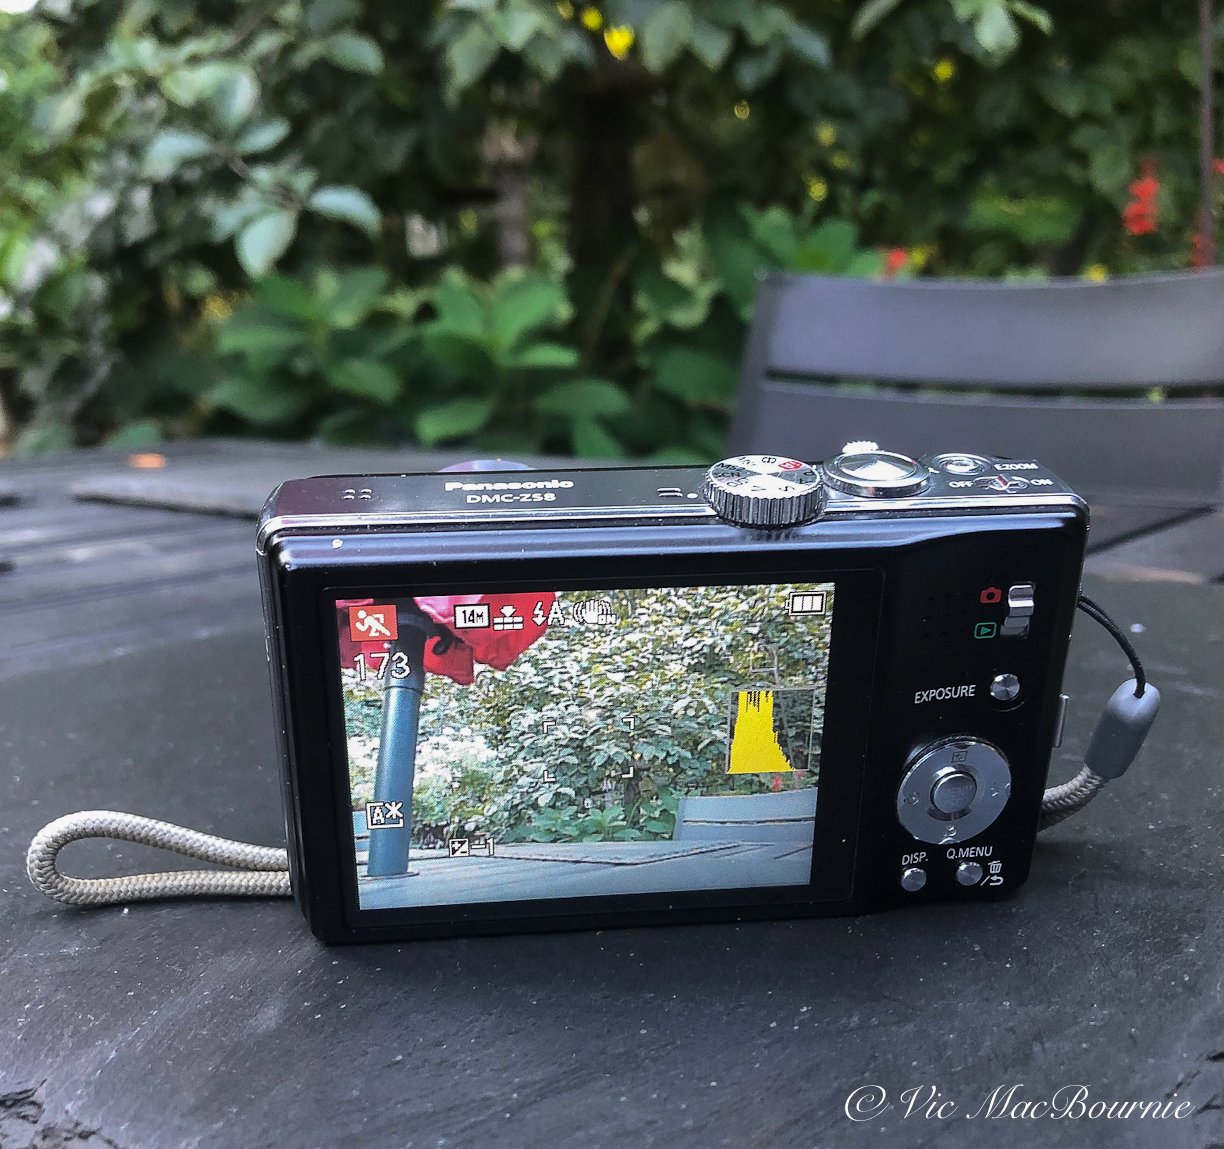
The rear LCD panel in the Lumix FZ8 and back buttons.
What’s all this jibberish mean?
It means the Lumix DMC-ZS8 was very good when it was released in the hey day of high-end compact digital cameras, and, if these results are any indication, this sweet little Lumix is still a very good camera today.

The camera particularly shines when you can slow down and handle subjects carefully whether you are in the garden or out for a road trip. This scene was captured while out for a drive in the nearby farm country.
Is the Lumix DSC-ZS8 still good in 2024
How does the Lumix ZS8 measure up to today’s modern cameras?
Let’s not fool ourselves. Technology is constantly evolving, especially in the world of digital photography. Today’s cameras can be incredibly good. In fact, for many of us, the evolution of digital cameras including compact, high-end point and shoots have evolved well beyond many of our needs and wants.
That’s where these classic digital cameras fit in.
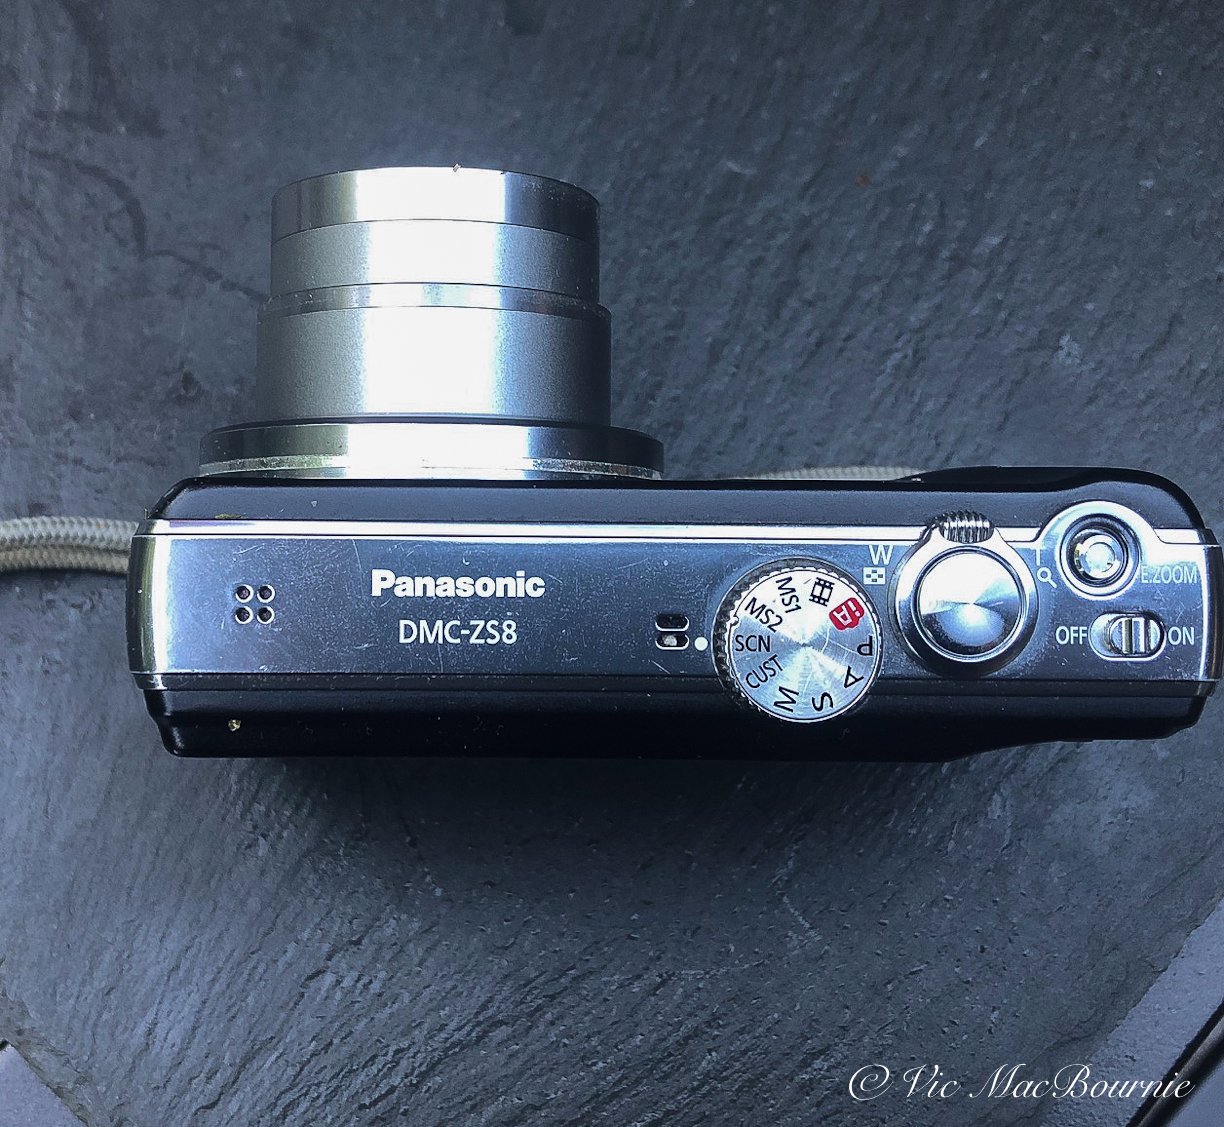
The top view of the Panasonic Lumix DMC-ZS8 showing the impressive Leica lens 24-384 (35mm equivalent).
Older cameras suffer from smaller sensors, and slower focusing capabilities which might make getting a prized shot more difficult or the quality of the image substandard to today’s cameras if you like to compare images pixel by pixel. Shooting in less than desirable conditions will push the capabilities of these older cameras.
Bump the ISO up to 1600 to get a handheld photograph in the poor light of early morning or late evening and you might be disappointed.
By disappointed, I mean the image may not seem sharp as a result of digital noise – a grainy look that is not necessarily obvious until you move in close to the image on your computer. Today’s larger sensors can better handle low light and produce less grain. The result are images that look sharper.
If that really matters to you, than older cameras like the ZS8 may not be worth using.
For most of us who primarily use our images for social media or make prints no larger than 8X10” or 11X14”, the FZ8 and other compact cameras are more than sufficient to get the job done. Even if you are planning to create your own garden photo book (highly recommended by the way) these cameras, with proper techniques, will give you beautiful results.
Consider using a tripod and setting the ISO to 100 or 200 when lighting is not at its best and chances are you’ll be more than pleased with the results.
In fact, some fans of classic cameras will tell you that the CCD sensor on the Lumix ZS8 will give you better results than you are likely to get on more modern CMOS sensors. I have to admit the files coming out of this camera are very impressive when lower ISO settings are used and/or there is enough light to properly handhold the camera.
The camera does boast an impressive anti-shake feature that can give you up to two stops of light-saving stability.
What does getting two stops of light mean?
It basically means that you can hand hold the camera and still get sharp photos even if the light is low. It’s in reference to the shutter speed. A low shutter speed means getting sharp images in low light is difficult because of camera shake when taking the picture. You gain the ability to take sharp images in low light by anti-shake features built into the camera as well as “fast lenses” that allow more light to hit the sensor.
Okay, so we know that the Lumix ZS8 is capable of taking good photos, but there are so many other factors that play a role in whether you fall in love with a camera or put it back in the drawer.
This camera is not going back in the drawer any time soon.

A grab shot on the road shows the camera’s ability to capture great images with lots of colour in good light.
What are the pros of the Lumix ZS8
Quite frankly this camera is easy to love. From its impressive build quality, including the camera’s feel in your hand and the solid, tactile feel of the control buttons, to the simple yet effective menus that allow users to easily set up the camera to their liking. It all comes together in this sophisticated-looking little camera that has full manual controls.
Add to that:
• Two macro settings will get you in close to flowers, butterflies and other garden creepy crawlers.
• The quick menu button alone will set most of us free from having to search through menus looking for basic commands to get the shots we want. The Quick menu button in the bottom right on the back of the camera allows you to easily set burst mode, autofocus mode, white balance, ISO settings, file size and the camera’s back LCD mode.
• As already mentioned, the camera’s 24 to 384mm F3.4-6.4 Leica lens is reason enough to search out one of these cameras at a great price. It’s not a super fast lens, especially at the long end at F6.4, but, again, using a tripod or a monopod will go a long way toward achieving memorable images.
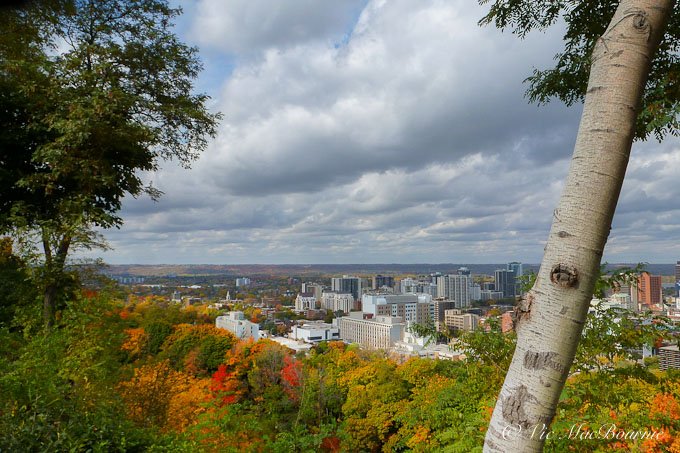
A city scene in fall shot with the Lumix ZS8.
• The 13-year-old camera uses easy-to-obtain SD cards for memory and has a series of mode scenes (29 to be exact) that makes getting photographs in specific situations, whether portraits, shots of your children, pets, snow scenes and night scenes, or landscapes extremely easy.
• The flash on the camera is also a good performer and puts out plenty of light to use as a fill-in flash or a regular flash if you are working in a close distance.
• In addition to the 29 scene modes, the camera’s top function wheel boast two “my scene modes” that allows you to quickly go to your favourite scene modes whether that’s portrait mode, landscape mode… pet mode…
• The camera has Panasonic’s IA mode (intelligent auto) that looks at the scene and sets the proper scene mode to ensure proper exposure etc. This is excellent for quick shots on the move and beginner photographers who don’t want to get involved in learning the technical details of the camera.
• In addition, the camera has three custom modes that allow you to set camera settings that you can access easily. I have set up a high-quality custom feature where the settings are optimized for the highest quality image for landscape photography, a black and white custom feature, and a high-speed custom feature.
• A solid tripod mount right square in the middle of the camera’s bottom plate ensures a balanced mount.

Lumix DMC-FZ8 is a smart looking camera that is small enough to fit in your pocket or purse but with enough features to be the only camera you will need on vacation.
… and some cons
• The small sensor (like all compact cameras) makes getting good images difficult in low light situations. Trying to photograph fast-moving hummingbirds was an exercise in frustration between the slow focus and movement caused by using lower ISO settings. You will never match the speed of high-end DSLRs or mirrorless 4/3rds sensors, but it is possible if you are patient.
• The camera does not have a RAW setting so everything is in jpeg format. RAW would have been nice to pull the most out of the camera’s impressive CCD sensor but the jpegs right out of the camera are very nice.
• No hot shoe for external flash.
• The camera feels comfortable enough in my hand, but it’s tiny size may not feel ergonomically correct for everyone. Always use the wrist strap in case you drop the camera.
Is a Lumix camera a brand to search out on the used market?
Although this review is for the 14.1 megapixel, DMC-ZS8, there are a number of Lumix cameras that were released using the same or a similar design. As the camera design evolved, Panasonic added larger sensors with more pixels and features, but generally kept the same impressive design.
I think it’s safe to say that all these Lumix cameras with this design are worth purchasing today. They are high quality cameras that feel substantial in your hand and are fitted with high quality Leica lenses.
Panasonic built compact cameras for Leica, while Leica provided lenses for Panasonic. The result is that the companies put out almost identical cameras and simply rebranded them for their buyers. In some cases, Leica released almost identical cameras to the Lumix brand for considerably more money.
The original buyers of these Lumix cameras saved a considerable amount of money by purchasing the almost identical Panasonic camera over the equivalent Leica model. Over the years, the Leica cameras have maintained their high prices based on the prestigious brand. The Panasonics have not fared as well even though they have held up extremely well. Now, the difference in prices between the Leica version and the Lumix has widened ever farther making now the perfect time to purchase one.
You know the old saying – buy low. It’s hard to imagine these cameras going much lower.


Ten tips for great garden and flower photography
Here are ten tips to help you improve your garden photography. A good camera and lens is a great start but more important is great vision and attention to technique to ensure good results.

This female Ruby-throated hummingbird was caught feeding on the Monarda. An off-camera flash helped to freeze motion and create a lovely highlight in the bird’s eye.
Grab a coffee a camera and get some great garden and flower photos
Capturing memorable garden and flower photographs involves a combination of great light, creative vision and attention to technique.
It might be hard to believe – given the push for better and more expensive cameras – but these three factors are more important than the type of camera or lens you use.
Having a good camera can certainly take your flower photography images up a level and, at times, help you capture photographs that might otherwise be almost impossible to obtain with lower quality equipment or cameras and lenses that are less capable. But don’t let the quality or the price tag of your camera stop you from jumping in with both feet into garden and flower photography. In fact, your smartphone might be all you need to begin exploring the joy of garden and flower photography.
Be sure to check out my comprehensive post on Garden Flower Photography for more information.
It’s better to have a camera you understand and know how to get the most out of, than carry around an expensive camera that you set on auto and hope for the best.
Is the Fujifilm X10 possibly the best camera for garden photography? Check out my review of the high-end compact camera after owning it for 10 years and find out if it may be the perfect choice for the Best Garden photography camera.

A hummingbird sips nectar from salvia. This image is the result of sitting out in the early morning and watching the hummingbird visit the flowers in a nearby container. A little flash added sparkle to the image.
Getting the best camera you can afford either new or used will help set you on the right path. If you are thinking about upgrading from your smart phone, be sure to check out my comprehensive look at the Best Cameras and Lenses for Garden Photography.
If photographing birds and wildlife is your goal but you lack the expensive lenses to get you in close, there are options that you can take advantage of to help you capture these images. I have found a backyard photo blind from Tragopan Photo blinds to be incredibly helpful to get in close to birds, foxes and other wildlife. If you are interested in pursuing backyard wildlife photography, be sure to check out my article on Photography blinds.
It’s easy to put your garden in the best light
One of the greatest benefits to photographing your own garden is that you can return regularly to ensure you capture the subject in the best light, whether that’s in the early morning, in spring when the greens look their best, or in the dying days of summer when late-season grasses steal the show. When I say best light, I don’t mean strong mid-day sun.
Look for soft overcast light or situations when there is a lot of cloud cover to soften the shadows in your pictures.
Having your subject outside your back door certainly has its benefits. The fact the garden is right outside your door allows you to wait for days with good lighting to take your images. During or right after a rain is usually an excellent time to photograph your garden. Light foggy days in early morning also lends itself to potentially great images.

Moving in close with a true macro lens will allow you to create interesting images that are not easily seen by most gardeners.
Understanding great light for photography will also prepare you to capture beautiful images on vacation or on special occassions.
Be sure to check out my article on some of the best public Woodland gardens in the United States, and the best Woodland/public gardens in Canada to plan your vacation around.
Here are ten tips to help you capture memorable images of your garden or a public garden.
Get up early with your coffee and a camera
Take a walk with your favourite camera
Move in to get up close and personal with your subjects
Get down and dirty in the garden
Put something cool or colourful in the foreground
Telephotos aren’t just for wildlife
Who said everything has to be sharp?
Filters are great fun in the garden
Be a rebel: just go ahead and break the rules
Don’t be afraid. Show some courage and creativity

Morning light filters through the trees onto our fern glen. Underexposing the scene helped to bring out the rays of sun in the image.
Tip #1: Capture the early-morning light
Get up early. That’s the first and most important tip I have. If you do anything, make sure your first cup of coffee in the morning is outdoors and your camera is at your side. The earlier the better. At times, you’ll be blessed with morning dew, other times maybe a little fog or sunbeams streaming through the trees.
There is nothing like sitting on the patio or deck with your coffee watching how the early-morning light kisses the tops of trees before it bathes the garden in a beautiful, soft, warm light. You never know what subjects might present themselves. Many times I’ve been out and a young fox comes into the garden, or a doe and her fawn. Maybe a bird lands in a nearby tree within range of your camera and provides the perfect opportunity to capture a memorable moment.
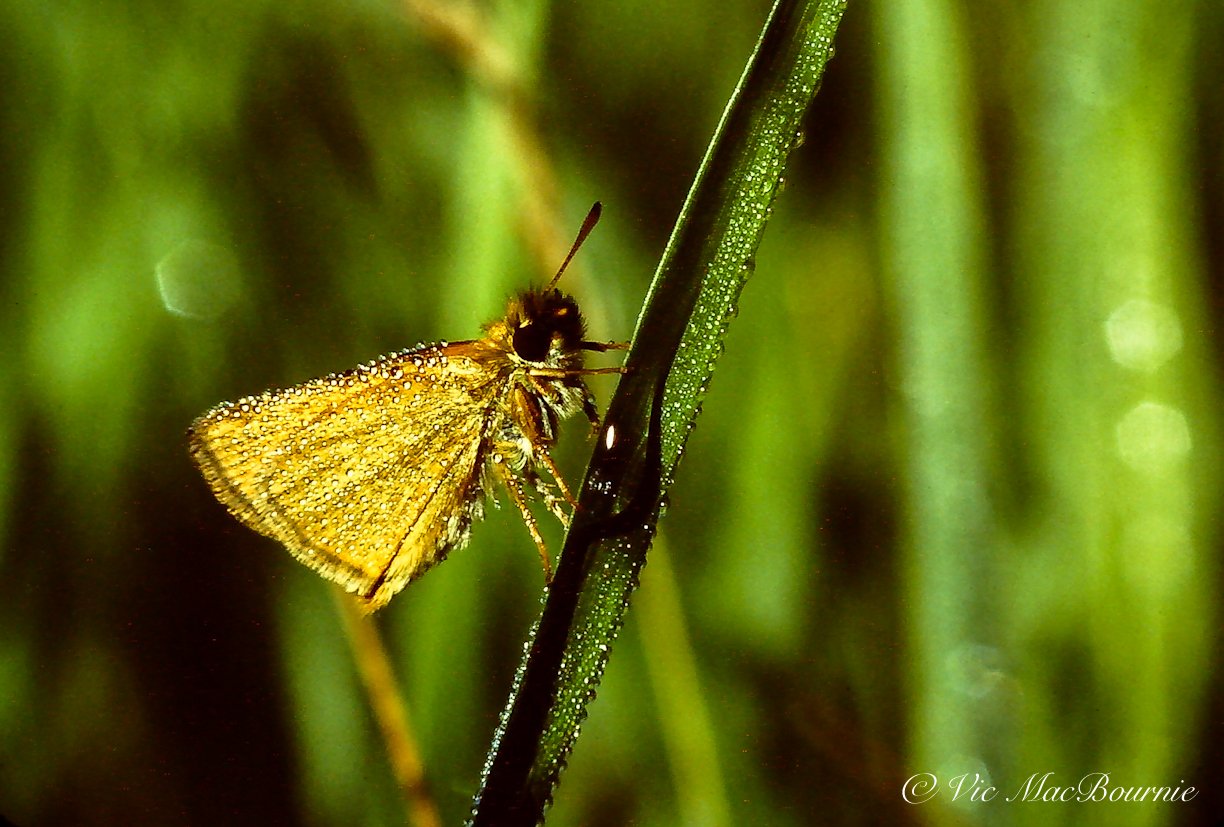
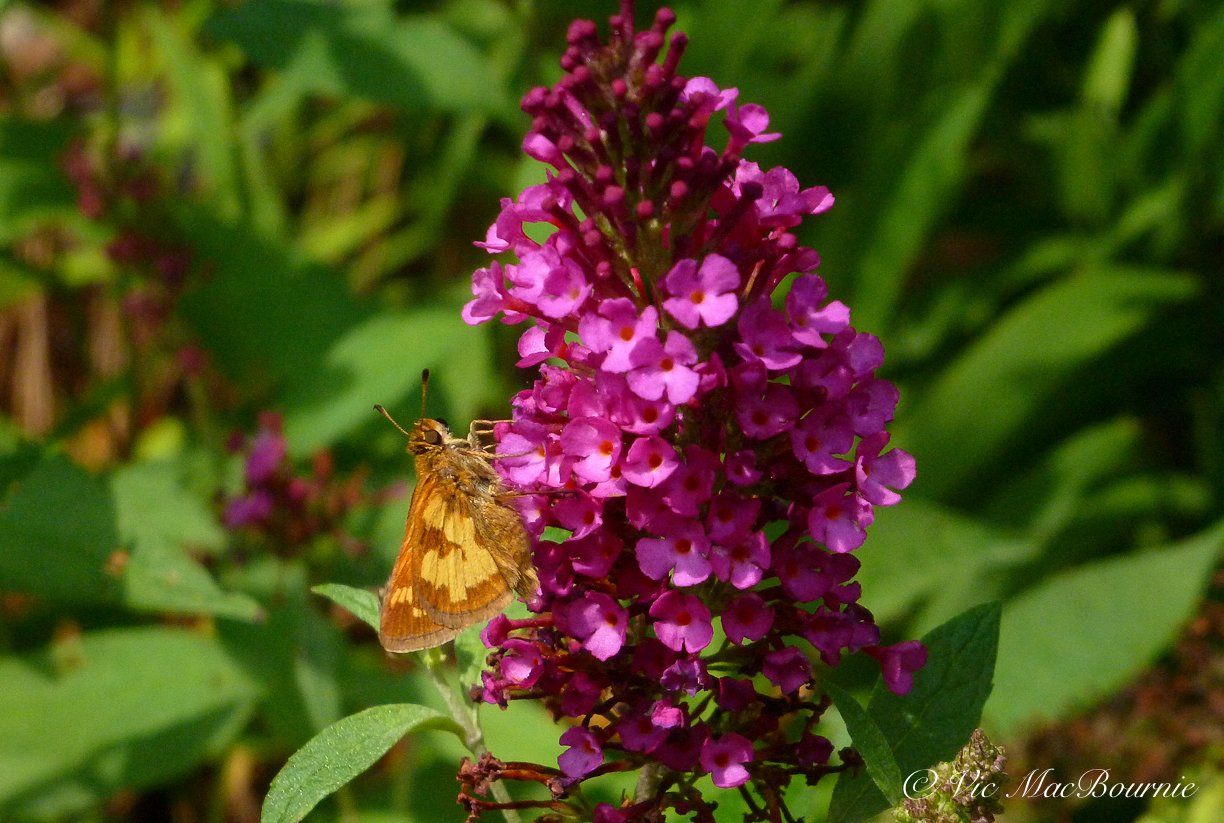
Early morning dew on this skipper is the result of getting up early and capturing this tiny butterfly before the sun has burned off the dew and warmed the butterfly enough to allow it to fly off.
You need to be out there, sitting quietly with your camera at ready and watching for these special moments. And if the weekends are the only time you can swing it, make a date with yourself, your camera and a good coffee this weekend and every weekend possible in the spring through to the fall.
There is no question that having a small, high quality compact camera to carry around the garden is a real benefit. A compact Travel camera or a Bridge camera might be the perfect option for the morning walk about.
If you are considering upgrading your cameras and lenses, be sure to check out the daily offerings at KEH Camera Exchange.
Not many people want to carry a large, heavy DSLR around the garden in the morning.
Capturing a memorable moment in the garden is great, but simply being out in the garden in beautiful light studying how it moves across your landscape is a valuable learning opportunity. Knowing that at a certain time in the morning, light skips across the Monarda lighting it up against a dark background is an opportunity to set up a tripod and capture the moment a hummingbird or butterfly visits.
Tip #2: Take a walk in the garden
While you are up early enjoying your first cup of coffee, go for a walk in the garden. Notice what flowers are about to bloom. Notice how, when you are at the far end of the garden, the rising sun lights up the drift of rudbeckia in a way that is unnoticeable from the deck.
Take that picture now remembering to expose for the brightly lit flowers and not the entire scene. You are probably going to need to underexpose the scene to capture that ray of sunshine on the flowers, rather than setting the camera on automatic and accepting the resulting image. (Or you can walk up to the flowers and take an exposure reading directly), lock that in and step back to capture the scene.
Most mornings, I take my camera and walk around the garden looking for unusual lighting situations and noticing what flowers are preparing to bloom. Maybe there’s a butterfly sitting quietly warming its wings in the morning light, a toad taking shelter under a leaf or a flower about to bloom. Maybe it’s just the way the light hits the fountain grass.
If you are not a morning person, or it’s impossible to get out in the morning with your camera, take the time, instead, to walk the garden most evenings. The warm evening light has many of the same qualities as morning light and can show the garden in different but equally beautiful ways.
Walking around the garden with camera in hand, whether it’s morning or evening, is both an opportunity to capture images as well as get in touch with the finer details of your gardens.

A longer lens helps to create a soft background in this image, which helps to make the chipmunk stand out more.
Tip #3: Make sure your camera has a macro or close-up lens
Being able to capture close-up images of flowers, butterflies and insects is an important part of making interesting images of your garden. Mastering macro photography involves specialized, expensive equipment, but getting good close-up images is not that difficult with today’s modern digital cameras and lenses.
Most compact and Bridge cameras have macro or close-focus capabilities built into them. These may not allow you to get a 1:1 magnification ratio, but we are not doing scientific work here. If they allow you to move in close, it’s probably all we need.
For true macro capabilities you will need specialized macro lenses likely in the 50mm to 100mm range. There are 200mm macro lenses that allow you to get much closer to subjects while being able to keep a good working distance between you and the subject. These lenses demand the photographer use a tripod and or flash systems to get the best results.
If flower photography is your goal, close focus capabilities in most compact cameras are more than enough to get the job done.
If you are hand holding your camera to do close-up images, it’s a good idea to boost your ISO up to increase your shutter speed and help you get sharper images.
Following a butterfly around your garden trying to get it to rest on a flower can be challenging, but if you find one in the morning before the sun warms it, you will be blessed with the opportunity to capture the image without it quickly flying off. If you are lucky, you may be able to capture it covered in morning dew.
In the film days when ISO topped out at between 64-100, taking macro shots involved almost always using a tripod. Today’s digital cameras’ ISO can be boosted to astronomical numbers allowing you to hand-hold many of the images. Try setting your ISO at 6400 and check out the results. If the images are not to your liking, bring it back to lower numbers until the noise (grain) is acceptable.
Experiment with your close-focus capabilities to get comfortable with it so when the Giant Eastern Swallowtail visits your garden and spends some time on your butterfly weed you’ll be ready for it.

Getting down close to ground level helps create a more pleasing image of these anemones. Shooting them from a higher angle would have resulted in a background that included either soil or mulch.
Tip #4: Get down low
It’s rarely a good idea to stand over a plant and shoot down at it. That also holds true for animals, birds and most insects. It’s usually best to shoot your subjects at eye level. For flowers, that usually means getting down on your knees to capture images and eliminate the garden soil or mulch from the image.
By getting down low on a drift of flowers, you can use the other flowers to give you a pleasing background, or shoot through the foreground flowers to create a dreamy look using the out-of-focus foreground and background flowers to isolate a single in-focus flower.
If getting down low is getting difficult, having a screen that tilts up and allows you to look down at the screen can be a valuable feature when you are considering purchasing a camera. Many of today’s cameras offer screens that can be tilted.

The foreground flowers create a centre of interest and help to create a more three dimensional feeling.
Tip #5: Include a strong foreground element
Photographing large expanses of your garden may seem like a good idea, but unless you include a strong foreground object chances are you’ll be unhappy with the results. A wide angle setting on your campact camera, or a wide angle lens on your camera really benefits from having a strong foreground object such as a drift of flowers, garden art or another element that helps to draw your eye into the garden. Having a dominant foreground element helps to give depth to the image and provides a strong centre of interest for the viewer.
Focus on the foreground element and use a large depth of field (higher aperture like F8- F11 or even F16) to ensure the entire image is in focus.
Tip #6: Use your telephoto to simplify the image
A telephoto lens is not just for capturing wildlife and they are not designed for photographers who can’t be bothered to get up to walk over to their subjects. (Although they can be helpful in this regard for us lazy photographers.)
The telephoto lens has many redeeming factors, not the least being a great tool to simplify an otherwise busy garden scene. By moving in close, it’s easier to isolate one flower or a group of flowers to simplify the image. Of course, they are useful for capturing wildlife in the garden as well. A 200mm lens, for example, would enable you to photograph a butterfly while still giving it enough space to not feel threatened.

A telephoto lens allows you to move in close on small subjects and create a very soft background.
Tip #7: Use the telephoto to soften the background
It’s much easier to soften a background to isolate a subject if you are using a longer telephoto lens. Fast lenses (ones that open to F2.8 for example) can create beautifully soft backgrounds.
Lenses that do not usually open up enough to soften the image to your liking, can still be used to create a soft background. Try finding an angle to your subject where the background is farther away. That longer distance will help create the softer, out-of-focus background even for lenses that normally do not create that effect.
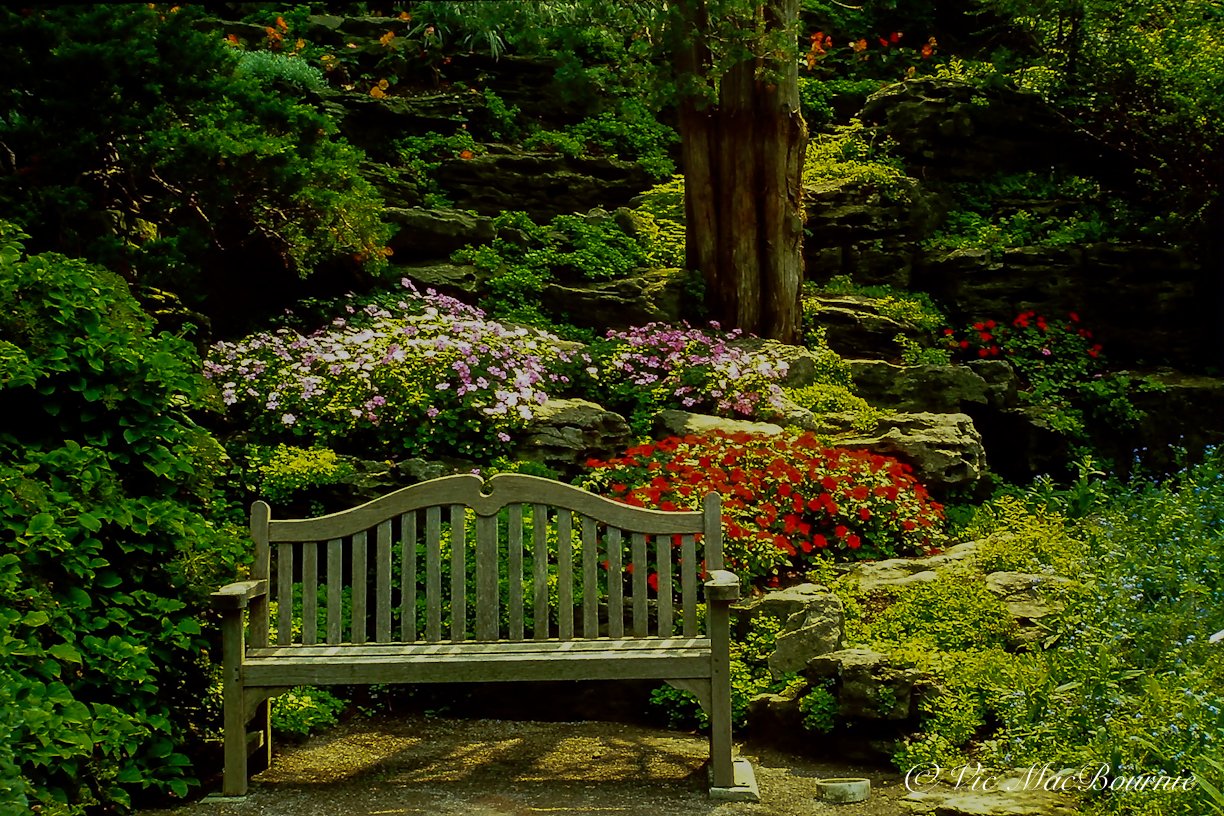
Public gardens can be a great place to practise your garden photography.
Tip #8: Experiment with your tools and camera settings
Photographing in your garden is the perfect opportunity to experiment. All those built-in filters in your camera are there for a reason and many of them can be used to great effect in garden photography. For example, consider shooting your garden entirely in B&W. (Check out my full story on B&W garden photography). Most cameras these days have a black and white setting. Look for strong graphic elements in the garden like backlighting or strong side light.
Experiment with the vibrant colour filter setting to punch up the colour on your flowers. My Fujifilm camera, for example, has a setting for shooting Velvia-style images. If you are not familiar with Velvia, it was a highly praised slide film that eventually edged out Kodachrome as the favourite film used by nature photographers looking for more saturated colours. Kodachrome was ISO 64, while Fuji’s Velvia came in at ISO 50. Fuji cameras are now able to offer a Velvia-like image at much higher ISO ratings. A feature that film photographers couldn’t even dream about back in the day.
Other cameras offer similar highly saturated colour filters, some better than others.
While many of the built-in filters look unnatural in garden photography, the soft focus filter can create beautiful results. Most often used for portraits, a soft focus filter can add a dreamy almost romantic look to your garden photography.
Another filter worth experimenting with is a high-key filter that enhances images with light-coloured flowers in white, pink or soft blues and violets.

Don’t be afraid to have fun in the garden, wither by using filters or using selective focus to create dreamy images like the one above.
Tip #9: Follow the rules and then break them
There are a lot of long-standing design rules in photography to help you create pleasing pictures. The first, and probably the most important is the rule of thirds. In fact, most cameras have a built in grid to help photographers with their compositions and take advantage of the rule of thirds. A setting in the camera’s menu gives photographers the choice of setting up a grid system that is digitally overlaid on your camera’s screen. Where the lines intersect on the screen represents strong points to place a centre of interest in your image.
I almost always set up my cameras to include a grid system which also helps me keep the horizons straight.
Take some time to learn basic rules of composition and then, when you understand them, feel free to break them. By breaking the rules, you create tension or intrique in your photographs that, when done successfully, can result in a dynamic image.
One helpful rule is ensuring that any movement in your image has more space in front of it than behind it.
The rule: A bird flying left to right needs more space in front of it to fly into than is behind it. Ideally, you would want the bird at one of the intersecting lines in your rule of thirds grid pattern on the left side of the frame. That would give you a pleasing, natural image which would score well at your local camera club.
Try putting that bird in the intersection of lines on the right side of the frame and your image becomes potentially more dynamic. A bird flying out of the frame rather than into the frame of view is often seen as an error by the photographer. If, however, it is balanced by say a beam of light filling the left side of the frame or maybe a colourful drift of plants, than the image could be a show stopper despite breaking the rule.
The key to success is knowing the rules of composition and knowing when to break them.

Know the rules of composition and then feel free to break them. In this image the bird appears to be looking out of the image, but the tree branches leaning in from the left help to balance the image and makes breaking the rules of composition work.
Tip #10: Don’t be afraid to fail
It’s garden photography folks, there is no pressure here.
Shoot often, shoot regularly, experiment and have fun. Many of us have cameras that sit in a desk drawer only to get pulled out during holidays or special events. Your garden gives you the opportunity to get out daily or weekly to use your camera and experiment with it. It should be fun creating images.
Bring your kids or pets out to the garden and photograph them in it. Set up a bird feeder or bird bath near where you normally sit and experiment with your camera(s).
Finally, when you have built up a large collection of garden images, consider putting them together in your own personal Garden photography book. (Link to my story on creating a personalized garden book). Putting the book together is a wonderfully creative exercise that results in a keepsake, a memory of your garden and the wildlife that visit it.
Tips for Sharing your images on social media
Sharing your garden images on social media is one of the benefits of modern digital cameras. Here are some suggested sizes for posting your images on some of the popular social media sites.
If none of this makes any sense to you, just upload the pictures and don’t worry about it.
Facebook: For your Facebook feed, try 1080 X1350 pixels. For Facebook stories, try 1080 X 1920
Instagram: photos were once optimized as square 1080 x 1080, but have evolved to become more vertical to better fit smartphone screens. The ideal Instagram portrait aspect ratio is now 4:5, and the best photo size is 1080px by 1350px. For Instagram stories try 1080 X 1920 for best results.
Tumblr: 500 x 250
Twitter: For best profile image try 400 X400 pixels. For header photos, try 1500 X500 pixels and for in-stream photos go with 1600 X 1900 pixels.
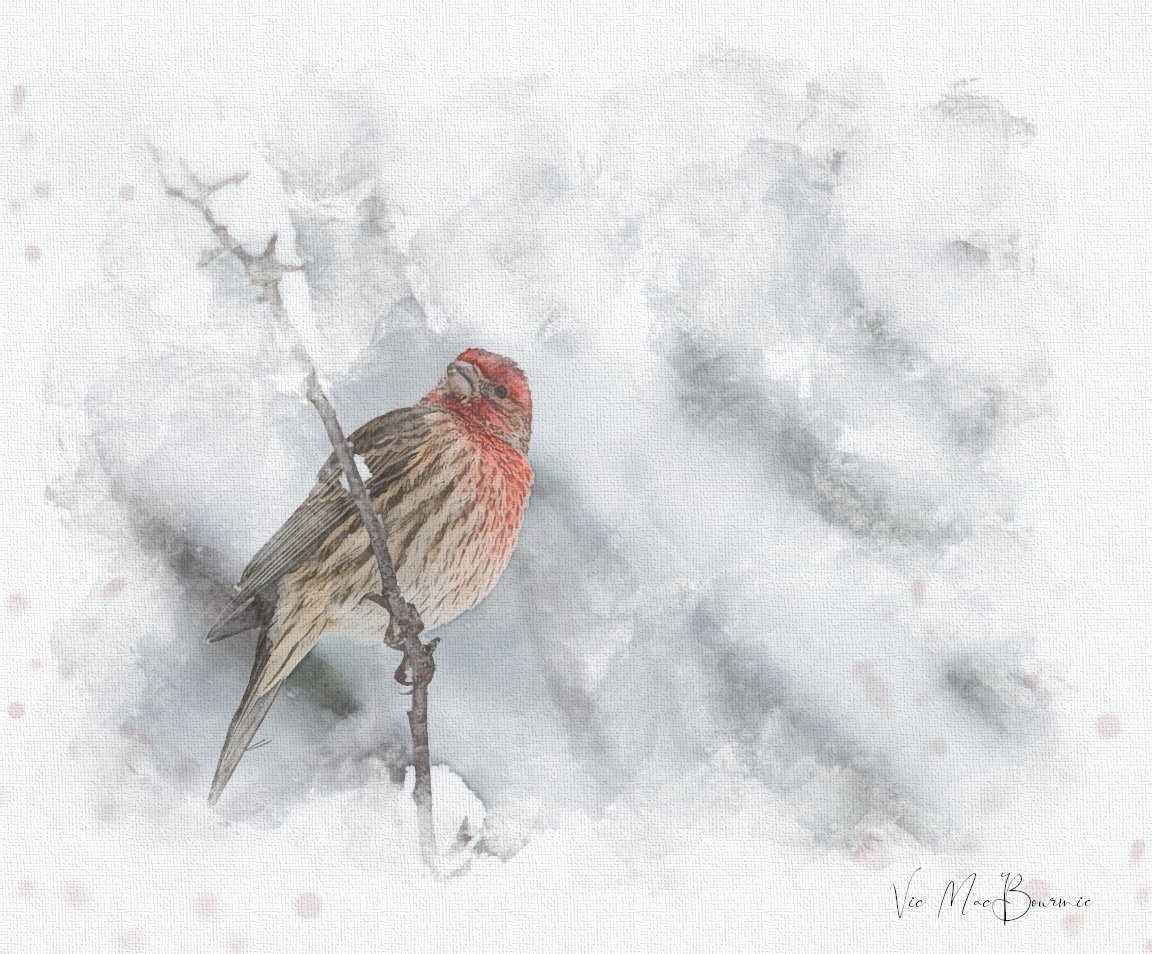
How to create bird artwork from digital watercolour paintings
Creating artistic interpretations from photographic images can be an extremely rewarding endeavour that is not only a way to get your creative juices going during the cold days of winter, but an excellent way to see your photographs in a different light.
Turn backyard birds and garden photos into works of art
Since digital images became mainstream in the world of photography, learning to manipulate pixels has become increasingly important for serious photographers.
For garden photographers, artistic interpretations can turn your favourite flower and bird images into beautiful works of art. And who doesn’t appreciate artwork of birds.
There was a time photographers really didn’t need to know about software programs. Jpegs, tiffs and RAW images had not been born and perfect exposure was crucial to keeping an image or throwing it in the wastebasket.
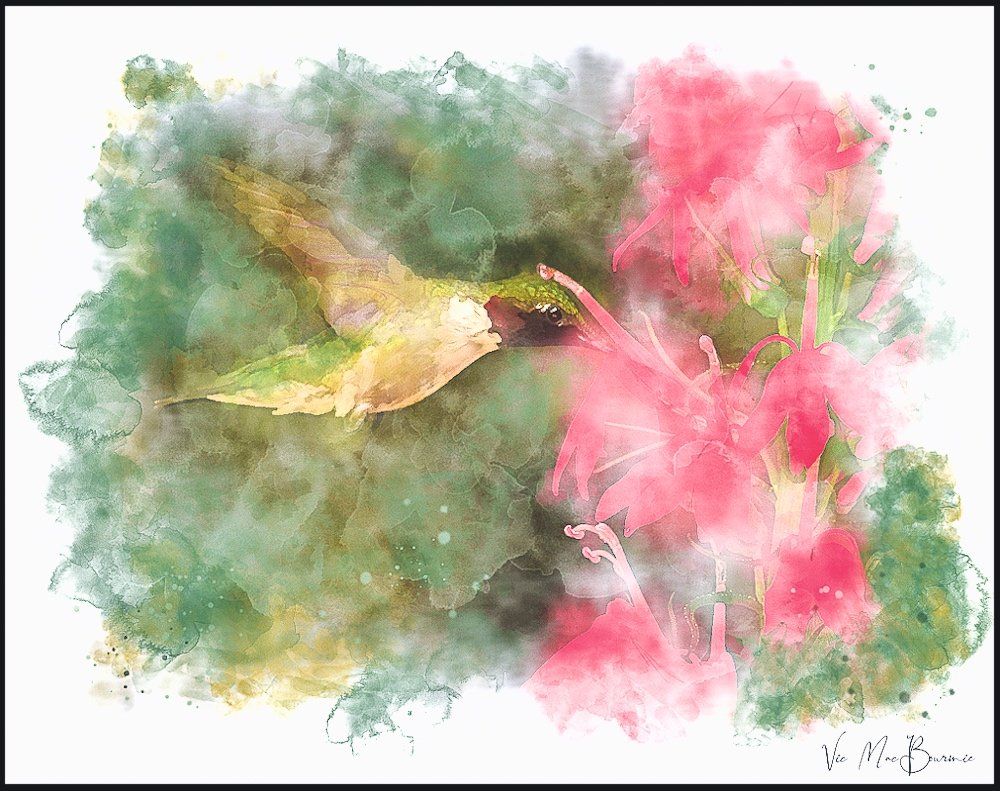
This digital image of a hummingbird at a Cardinal flower is a good example of how it’s possible to create works of art with your photographs.
Go here for more Hummingbird images including digital art.
Much of their “artistic creations” centered around in-camera techniques such as selective focus as shown by the colourful tulips (above).
For more on selective focus in garden photography check out my article on photographing snow in summer.
(If you are interested in exploring garden photography at a higher level, be sure to check out my comprehensive post on the Best camera and lens for Garden Photography.)
Today, if you take photography at all serious, you not only need to know the basics of photo manipulation, you almost need to be an expert in some way.
These days my main photo data base and manipulation program is without a doubt Lightroom Classic, but it’s not the program I use to transform my photographic images into watercolour paintings.
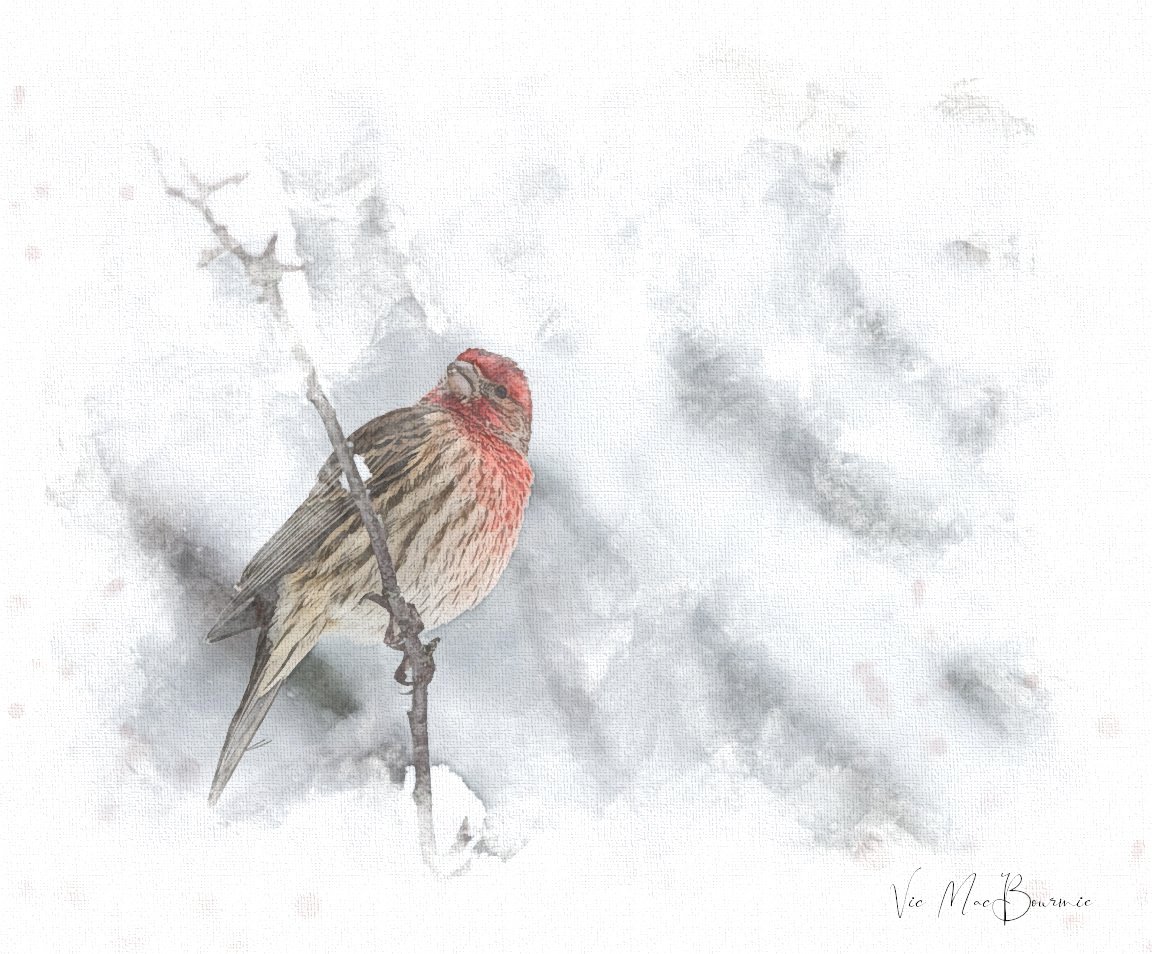
This artwork of a bird was created from a photograph taken in the garden and then manipulated in post processing with programs like Photoshop and Lightroom.
While most photographers focused on improving their images, I have always been interested in transforming my images into a more artistic interpretation of that same photograph. Over the years, I’ve spent a lot of time playing with the likes of the many variations of Photoshop before discovering Painter (Mac Link) (Windows Painter link) – a program that can best be described as a fine artists’ version of Photoshop. In other words Painter is to artists, what Photoshop is to photographers.
This seemed a perfect marriage to achieve my goals of turning photographic images into works of art, accept without any formal training in fine art, and facing more tools, paintbrushes and artistic choices than I could imagine, to say I was a little overwhelmed was an understatement.
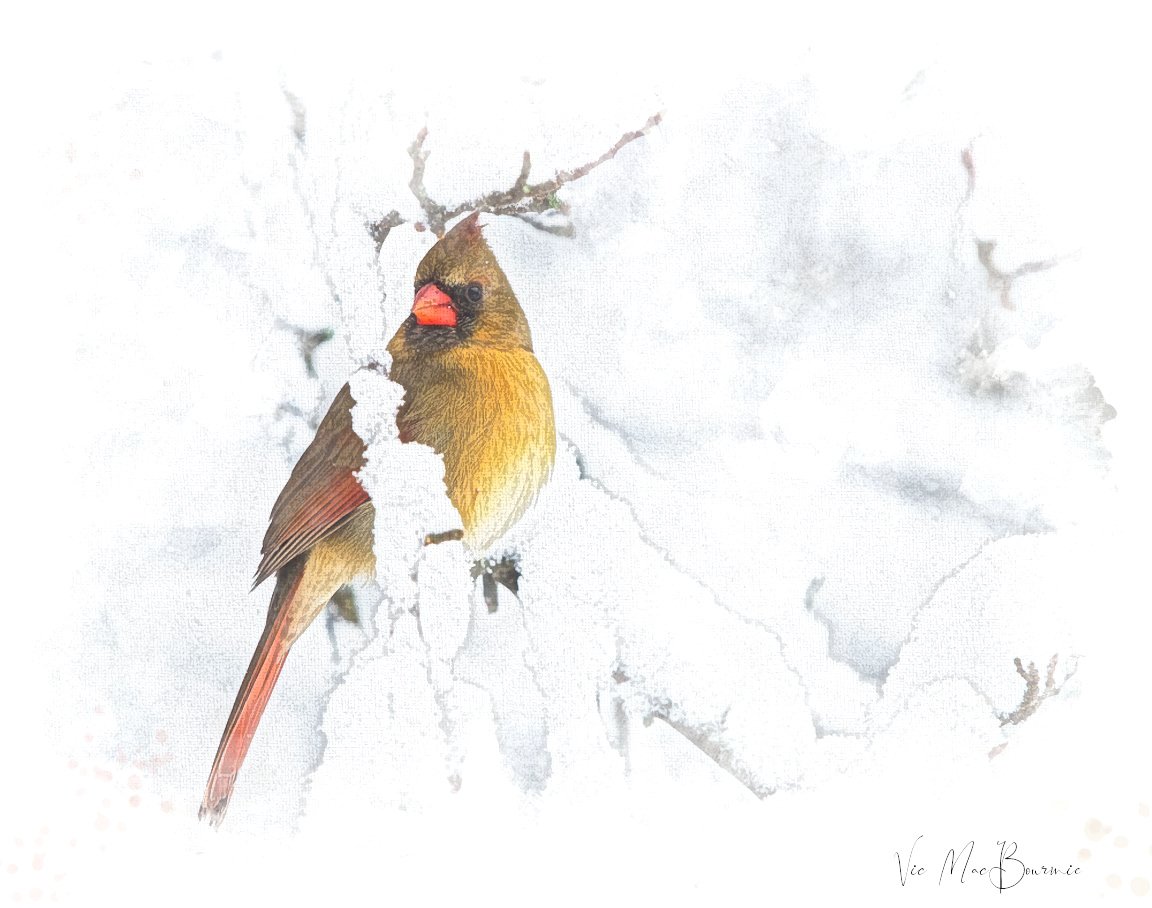
This artwork of a female cardinal was created from a photograph that got the creative treatmen in programs like Photoshop, Painter and Lightroom.
After “a lot” of computer time trying to understand the intricacies of Painter, I eventually taught myself the basics and proceded to work on animal portraits for hours and sometimes days to get them where I wanted.
For my animal portraits, I used a process that involved meticulously going into the original photograph and softly smudging tiny areas of the image to create a sort of painterly effect. For the most part, all this tedious work went unnoticed in the final versions, but it all served as a learning process and, to this day, I still like the results.
Since the animal portraits, I have continued experimenting with painterly images.
Fast forward to today. I no longer use Painter for my artistic endeavours and still can honestly say that I have no clue what I’m doing, but I am getting happier with some of the results.
And, there is no better way to pass time in the cold winter months than taking an afternoon going over some of your favourite images, isolating ones that you think might make nice watercolour images, and experimenting with one of the many programs you may already have to create your own works of art.
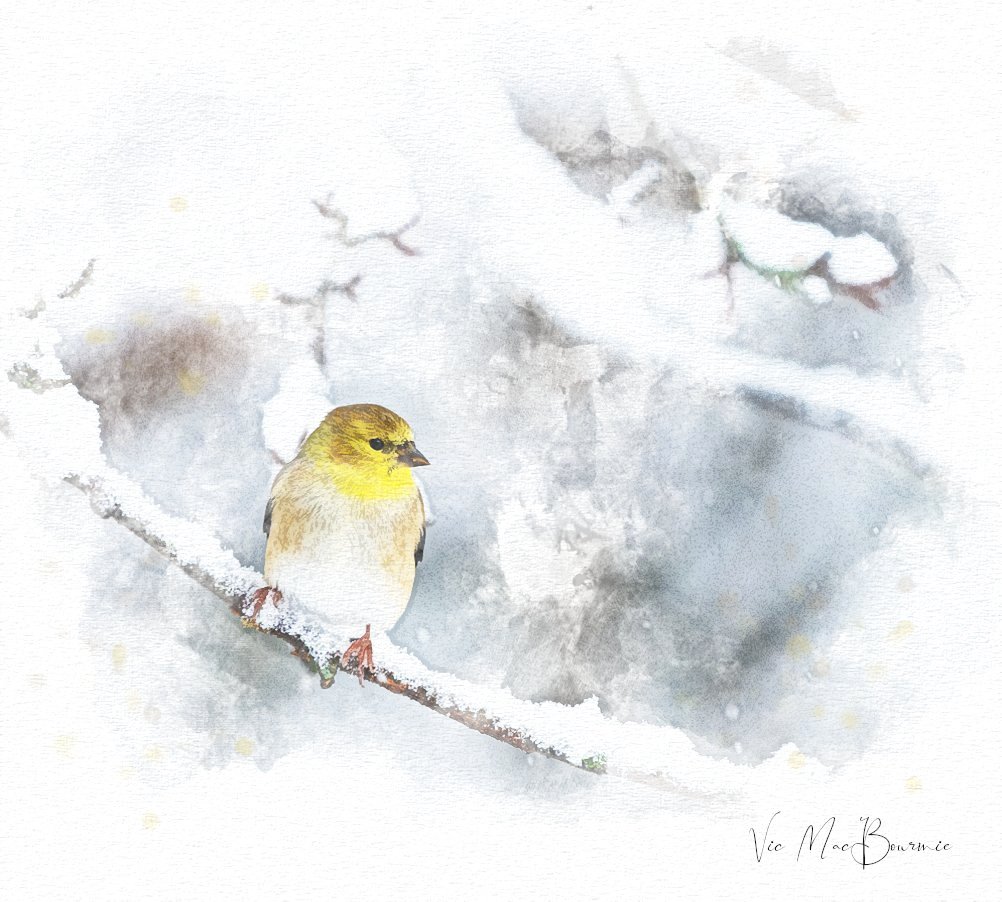
This creative interpretation of a Goldfinch in a snowstorm was created from a photograph and turned into artwork of a bird.
Right now I’m using a free program that you download from the web called GIMP, which is an excellent substitute for Photoshop.
The equivalent “free” program for Painter fans is Krita, another excellent program that has endless possibilities for artists looking to experiment in the digital world.
The GIMP community – particularly the available YouTube videos – make learning the program relatively easy and extremely enjoyable. Following the step-by-step procedures on the various YouTube channels will have even the most inexperienced user creating nice images in a relatively short time.

Prior to Photoshop and other digital manipulation programs, photographers used selective focus techniques like the tulip image above to create more artistic images. Selective focus can still be a very effective way to bring an artistic feel to your garden images.
Try searching “Turning photos into art” and you will be rewarded with a host of videos that will start you down the path to your particular artistic vision. Not all the videos focus on turning your images into watercolour images. Many focus on pencil drawings (which I have also experimented with), digital drawings, pastels…
After learning the basics from YouTube, I proceeded to develop my own method of creating the watercolour images from my photographs. Although the procedure for each image is similar, I like to let the original image dictate the various steps needed to attain the finished result.
It’s difficult to give you a step-by-step guide on how to create these images because I like to think each image is it’s own work of art and I rarely approach each image in the same manner.
I will, however, provide some guidelines that will help you get started as well as a general guideline of the steps I take in creating an image.
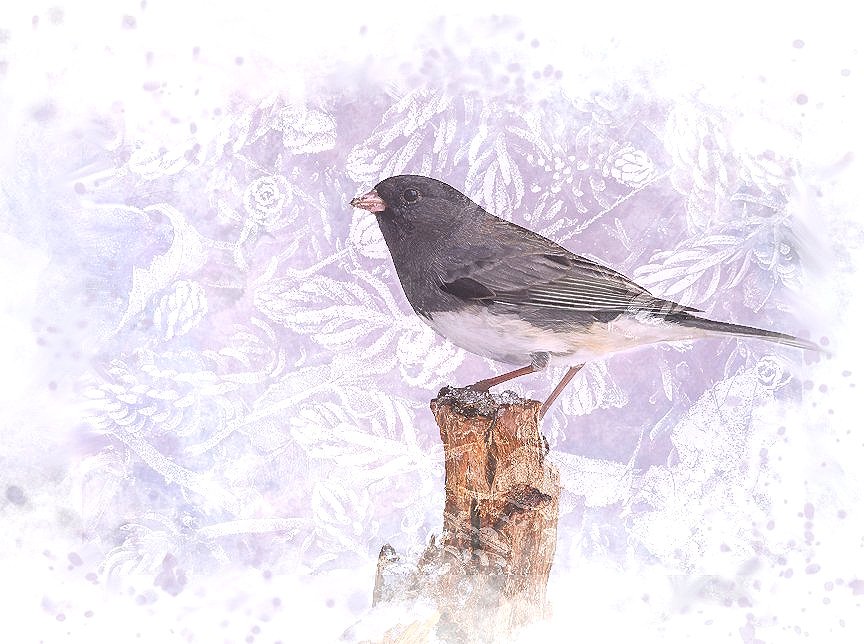
This image combines a Junco and a background of a frost-covered forest floor for an interesting example of using photography to create bird artwork.
Five tips to turn your photographs into artistic interpretations
1) Start with a slightly overexposed image to provide the basic structure of a delicate watercolour image.
2) Recognize that the subject does not have to be tack sharp for an effective image. The process of transforming the image into a digital painting does not call for tack-sharp images.
3) Always use layers (photoshop, Painter, GIMP and KRITA and most photo manipulation programs offer them) so that each manipulation can be done separately and the layer can be discarded and redone if you have problems.
4) Consider purchasing a Wacom drawing tablet or adding a pen to your existing ipad if it is compatible that allows you to paint directly on the screen.
5) Your finished result looks its best if the main image has a gradual softening leading to the edge of the image and includes a white border surrounding the edge of the painting.
6) When you are satisfied with the image, you must flatten the layers into a single image to save it as a jpeg. Be sure to first save it with all the layers first, so that you can go back to it and make changes.

This Tufted Titmouse, with its hint of rust under its wing, created a lovely painterly image.
Creating the image in GIMP: A step-by-step guide
To put it mildly, the process can be complicated.
Without getting too specific, let’s just say the process starts by creating 6 or 7 layers of the original image.
Each layer is given an appropriate name to help identify it while you are working.
The first layer I create is a rough watercolour layer using the filter “waterpixels.” I follow that layer up with another “waterpixel” layer that has finer details.
The next layer is created using the cartoon filter and manipulated in such a way as to obtain what you think is just the right amount of underlying black lines in the image. This helps to create the illusion that the image was first sketched out with a light pencil
The next layer is usually created with a white tracing paper over it. By reducing the opacity slightly, the image faintly emerges through the tracing paper.
Now take the erasure, pick one of the texture brushes from the assortment of brushes or you can create your own. Set the opacity to somewhere between 60-80 per cent. Begin dabbing the image, starting in the centre or on the main subject. Continue dabbing it (removing the tracing paper) but leaving the edges white.
At this stage you can turn the opacity on this layer to its maximum to see how the image is developing.
Next, continue erasing the white tracing paper until the image emerges the way you like it.
It’s a good idea to change brushes and opacity as you are working the image with the erasure tool.
Once you get it looking the way you want, it is time to add some paint splatters. This time choose the paint brush rather than the erasure and pick one of the splatter brushes.
Use the eyedropper to obtain a colour you think will work well as paint splotches. I usually try to keep the splotches very subtle.
Splatter the corners of the image but keep it subtle by leaving the opacity of the spatters very low.
Finally, add another layer with a white background and pick the filter “canvas” or “clothify” or, if you have them, various art papers. This one will need major adjustment to get it to blend in with the image without obstructing the visual presence. I find using the “multiply” mode can work well.
At this point you have the basic elements of the painting, but you now have to go into each layer, find the best opacity for your particular image and the best blend mode. That can take a lot of time and experimentation to get it looking the way you want.
Obviously, this process is not created with a one-click “painterly image filter” in photoshop.
There are programs and apps that will allow you to turn an image into a photograph, but the results vary too much to depend on them to create the image you desire.
Besides, it takes all the creative inspiration out of the finished result.
This process is not meant to provide immediate satisfaction for the artist. Each image needs its own approach, but once you have mastered the process, recognizing the necessary steps given a particular type of image, becomes a simpler process.
The amount of time it takes to create an image might come down to an hour or two rather than an entire afternoon. And, if you save it properly, you can go back later and continue to work with it.
Who knows, maybe if you like the results you’ll be inspired to turn your works of art into a lovely book or your garden art. This year I created my first Garden Photographic Book, maybe next year it’ll be a book of Garden Watercolour images.
In conclusion
There are days, especially in the cold of winter, that I barely come out of my office because I am too wrapped up in working on digital images of some of my favourite garden images. Some are a complete failure and I am still trying to figure out which images work best. I think, snow images work well simply because of the already delicate feel to the them.
No matter, there is no better way to pass the time than to sit down at your computer, push some pixels around and work some artistic magic with a fine cup of coffee (or wine) and your favourite music playing.
It doesn’t matter if you are the only one who feels the magic.

Create your own custom garden photography book: Ten simple steps
Creating a custom photo book of your garden is not only simple, it’s an enjoyable and extremely creative process. By creating a garden book each year, you can document its yearly growth in a series of beautiful books of your own photography. The customized books from Mixbook are also great ways to document memorable vacations, or a year in the life of your children or grandchildren.
Mixbook: Focus on my favourite photo book creator
I am hoping this article will plant the seed for readers to dig into their digital images and treat themselves to the best gift ever – a beautifully bound custom photographic memory of their gardens.
Creating a custom photo book featuring images from our gardens could not be easier, more rewarding or satisfying. And don’t be surprised if it also awakens your creative juices inspiring more photo books documenting other areas in your life – vacations, children, grandchildren… the possibilities are endless.
Online book publishers are everywhere and the good ones, including my personal favourite Mixbook, have gone to great lengths to make the creation of a high-quality photo book using your digital images extremely simple for even the most novice of computer users. If you can click a few buttons to upload your images to a website, you can create a beautiful memory of your garden. You can even let the online software place all your images onto the pages, making the process as simple as possible.
Looking for a great camera to photograph your garden? Check out my extensive review after using the Fujifilm X10 after ten years.
(If you are interested in exploring garden photography at a higher level, be sure to check out my comprehensive post on the Best camera and lens for Garden Photography.)

Turning your garden and wildlife images into a memorable garden book is not only a rewarding experience but a creative one as well.
Ten steps to create a custom garden photo book
Gather existing digital photos of your garden, or, if you have not been documenting your garden, begin taking photos on a regular basis throughout the seasons for a future book
Organize the images in a single folder or divide them into 12 separate folders – one for each month.
Optimize the images you want to use in the book in a photo editing program
Save the images as large files –preferably in the neighbourhood of 5-10 megabytes or larger. These large files allow you to use the images as full 8X12 pictures without losing quality when they are printed.
Log on to the website and upload your images.
Drag and Drop the images on the template you have chosen. It’s helpful to have both vertical and horizontal images to choose from. Once they are on the page, make any needed adjustments to the photographs
Fill all the remaining photographic boxes on the pages and write headlines and/or captions of the photos if you want.
Add more pages if necessary.
Finalize mailing address and payment requirements
Now sit back and wait approximately two weeks for delivery of your garden book.

A screenshot of the Contemporary White template I chose to create my Woodland/Wildlife custom photo book.
I know these photo books have been around for quite some time, but I suspect many people have put off creating one for a myriad of reasons. Wedding photographers have used these photo books for years as a replacement for the traditional wedding album as well as a convenient way to show potential clients their portfolios.
I want to plant the idea in gardeners’ heads that these photo books are excellent resources that we really need to use to our advantage. So, it’s time for gardeners to dig their hands deep into the digital dirt, get their photos organized and begin putting their books together. And what better time than over the winter months to create a memory of the previous year’s garden.

The first page of my custom Woodland/Wildlife custom photo book from Photobook Worldwide.
The making of my Woodland/Wildlife Garden book
Recently, I created my own garden coffee table book made up primarily of garden and wildlife images taken this year in the Woodland/Wildlife garden.
I only wish I had done this years ago, so I could look back and trace the annual growth of our garden. My plan now is to create a garden book on a yearly basis not only to monitor the changing face of the garden and its visitors, but to document annual highlights so I can use it as a visual resource to easily recreate successful plant combinations.
For years, I put off exploring the many companies offering to print your photographs in book form. In fact, the garden book is the second photo book I recently completed. The first was created as a Christmas gift for my daughter using her digital images of the Tokyo Olympics, where she attended to work with the Canadian Olympic team. The book, full of her Olympic moments, is the best souvenir she could hope for of her trip. We plan to do another for the upcoming Beijing Winter Games in China.
But, back to my gardening book.

One of many spreads in the custom photo book.
The result: I could not be happier with the finished book and the price. This will become a book I will treasure and one that will take its rightful place as the main act on our coffee table.
Technology has made these professional looking books not only incredibly easy to create even for beginners, but exceptionally inexpensive for a one-off printing.
By inexpensive, I mean cheaper than getting similar sized photographic images printed at your local photo shop.
Using a discount code, I recently created a hardcover, 36-page, 8.5-inch by 12-inch book with 110 of my favourite garden images for just over $50 Canadian. Many of the images were full-page bleeds that covered the entire 8” by 12” page.
For the price of an inexpensive dinner out with your partner, a small selection of annual or perennial plants, even a single high-priced shrub, you can produce an outstanding memory of your garden and the wildlife that call it home.
If you don’t use your camera often in the garden, the book will inspire you to get out more often to capture images.
The book could be a one-time event or even a yearly endeavour used like a tool to document the changing nature of your garden and the fauna that live in it.
What better way to document the plant combinations that worked so well together, or, where exactly the 150 bulbs that you planted last year are located.
You don’t need a fancy camera, your smartphone is more than capable of getting high-quality photos for the book. My book is a combination of images taken with a host of cameras and lenses from expensive DSLRs with telephoto lenses for the bird images and wildlife, to simple point-and-shoot cameras and images captured on my smartphone.

One of several templated pages showing multiple images.
How easy was it to create the garden photo book?
After much research into various companies that create these photo books, I chose Mixedbook.
The company’s list of recognitions and awards is impressive – New York Times, techrader, Good Housekeeping and Digital Camera World all give it awards for Best Photo Book Service, and c|net recognizes it for Easiest software to use.
I don’t know how the folks at Mixedbook could make it any easier.
That’s not to say that creating a beautiful photo book does not involve putting in some work to prepare for the project.
Just gathering my best photographs into a digital folder took more than a little effort. But, I’m sure many readers are much more organized than I am and would be able to organize their images much easier than me.

Although the entire book is templated, changing the templates to suit your images is easily done.
Once I got the images into a single folder, I imported them into Adobe Lightroom where they were all edited for proper exposure. Some were cropped and others took a little more work to enhance the colours etc. I happen to use Lightroom, but any photo editing software will get the job done.
In fact, if you are careful when you shoot the images, and you are not too worried about the quality, you could skip the editing process entirely.
At this stage, all you do is log onto the Photobook website, pick a book template you like from the many available and upload your images.
Once the images are uploaded to the site, you can either begin to drag-and-drop them on the various pages or allow the computer to populate the pages for you.
You can add descriptions under all or just a few of the images if you like. Add stickers if you are doing a fun book or one for your children or grandchildren.
If you need more pages, you can add them two at a time for a small additional cost.
Before you complete the purchase, ensure that any discounts are applied before pressing complete, but if you do complete the purchase, you have a half hour to change your order.
When I created my book, I recognized that I did not get the 50 per cent discount and quickly texted the support line. They were extremely helpful and guided me to the location where I made the proper changes to ensure the discounted price.
I was very impressed with the service.
Once completed, it’s as simple as adding your mailing information and paying with a credit card.
Press complete and your finished book will likely be delivered in less than two weeks.
In conclusion
If you are like me and have put off creating a photo book, don’t procrastinate any longer. They really are exceptional keepsakes of your garden, favourite vacation or a year in the life of your children or grandchildren.
The print quality is exceptional. The Photo book’s binding for my hardcover book proved to be very professional, and the quality of paper is very impressive (upgraded paper is available). Without the discount, my cost would have been more than $100.00 Canadian, which I would consider good value. The discount made it an outstanding value and there are discounts available throughout the year.
If you currently do not have images to create a book right now, make a promise to yourself to begin regularly photographing your garden so that you will have plenty of images for a future book.