
Ten tips for great garden and flower photography

This female Ruby-throated hummingbird was caught feeding on the Monarda. An off-camera flash helped to freeze motion and create a lovely highlight in the bird’s eye.
Grab a coffee a camera and get some great garden and flower photos
Capturing memorable garden and flower photographs involves a combination of great light, creative vision and attention to technique.
It might be hard to believe – given the push for better and more expensive cameras – but these three factors are more important than the type of camera or lens you use.
Having a good camera can certainly take your flower photography images up a level and, at times, help you capture photographs that might otherwise be almost impossible to obtain with lower quality equipment or cameras and lenses that are less capable. But don’t let the quality or the price tag of your camera stop you from jumping in with both feet into garden and flower photography. In fact, your smartphone might be all you need to begin exploring the joy of garden and flower photography.
Be sure to check out my comprehensive post on Garden Flower Photography for more information.
It’s better to have a camera you understand and know how to get the most out of, than carry around an expensive camera that you set on auto and hope for the best.
Is the Fujifilm X10 possibly the best camera for garden photography? Check out my review of the high-end compact camera after owning it for 10 years and find out if it may be the perfect choice for the Best Garden photography camera.

A hummingbird sips nectar from salvia. This image is the result of sitting out in the early morning and watching the hummingbird visit the flowers in a nearby container. A little flash added sparkle to the image.
Getting the best camera you can afford either new or used will help set you on the right path. If you are thinking about upgrading from your smart phone, be sure to check out my comprehensive look at the Best Cameras and Lenses for Garden Photography.
If photographing birds and wildlife is your goal but you lack the expensive lenses to get you in close, there are options that you can take advantage of to help you capture these images. I have found a backyard photo blind from Tragopan Photo blinds to be incredibly helpful to get in close to birds, foxes and other wildlife. If you are interested in pursuing backyard wildlife photography, be sure to check out my article on Photography blinds.
It’s easy to put your garden in the best light
One of the greatest benefits to photographing your own garden is that you can return regularly to ensure you capture the subject in the best light, whether that’s in the early morning, in spring when the greens look their best, or in the dying days of summer when late-season grasses steal the show. When I say best light, I don’t mean strong mid-day sun.
Look for soft overcast light or situations when there is a lot of cloud cover to soften the shadows in your pictures.
Having your subject outside your back door certainly has its benefits. The fact the garden is right outside your door allows you to wait for days with good lighting to take your images. During or right after a rain is usually an excellent time to photograph your garden. Light foggy days in early morning also lends itself to potentially great images.

Moving in close with a true macro lens will allow you to create interesting images that are not easily seen by most gardeners.
Understanding great light for photography will also prepare you to capture beautiful images on vacation or on special occassions.
Be sure to check out my article on some of the best public Woodland gardens in the United States, and the best Woodland/public gardens in Canada to plan your vacation around.
Here are ten tips to help you capture memorable images of your garden or a public garden.
Get up early with your coffee and a camera
Take a walk with your favourite camera
Move in to get up close and personal with your subjects
Get down and dirty in the garden
Put something cool or colourful in the foreground
Telephotos aren’t just for wildlife
Who said everything has to be sharp?
Filters are great fun in the garden
Be a rebel: just go ahead and break the rules
Don’t be afraid. Show some courage and creativity

Morning light filters through the trees onto our fern glen. Underexposing the scene helped to bring out the rays of sun in the image.
Tip #1: Capture the early-morning light
Get up early. That’s the first and most important tip I have. If you do anything, make sure your first cup of coffee in the morning is outdoors and your camera is at your side. The earlier the better. At times, you’ll be blessed with morning dew, other times maybe a little fog or sunbeams streaming through the trees.
There is nothing like sitting on the patio or deck with your coffee watching how the early-morning light kisses the tops of trees before it bathes the garden in a beautiful, soft, warm light. You never know what subjects might present themselves. Many times I’ve been out and a young fox comes into the garden, or a doe and her fawn. Maybe a bird lands in a nearby tree within range of your camera and provides the perfect opportunity to capture a memorable moment.
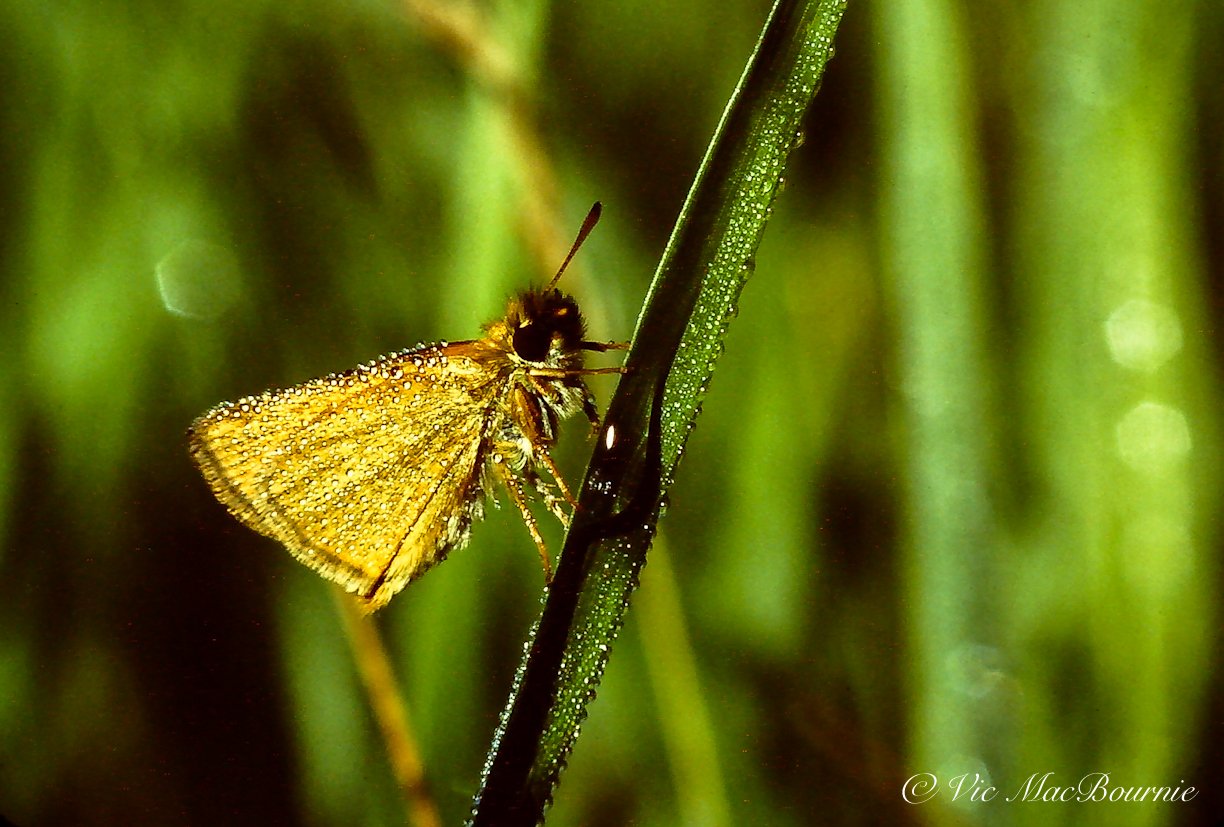
Early morning dew on this skipper is the result of getting up early and capturing this tiny butterfly before the sun has burned off the dew and warmed the butterfly enough to allow it to fly off.
You need to be out there, sitting quietly with your camera at ready and watching for these special moments. And if the weekends are the only time you can swing it, make a date with yourself, your camera and a good coffee this weekend and every weekend possible in the spring through to the fall.
There is no question that having a small, high quality compact camera to carry around the garden is a real benefit. A compact Travel camera or a Bridge camera might be the perfect option for the morning walk about.
If you are considering upgrading your cameras and lenses, be sure to check out the daily offerings at KEH Camera Exchange.
Not many people want to carry a large, heavy DSLR around the garden in the morning.
Capturing a memorable moment in the garden is great, but simply being out in the garden in beautiful light studying how it moves across your landscape is a valuable learning opportunity. Knowing that at a certain time in the morning, light skips across the Monarda lighting it up against a dark background is an opportunity to set up a tripod and capture the moment a hummingbird or butterfly visits.
Tip #2: Take a walk in the garden
While you are up early enjoying your first cup of coffee, go for a walk in the garden. Notice what flowers are about to bloom. Notice how, when you are at the far end of the garden, the rising sun lights up the drift of rudbeckia in a way that is unnoticeable from the deck.
Take that picture now remembering to expose for the brightly lit flowers and not the entire scene. You are probably going to need to underexpose the scene to capture that ray of sunshine on the flowers, rather than setting the camera on automatic and accepting the resulting image. (Or you can walk up to the flowers and take an exposure reading directly), lock that in and step back to capture the scene.
Most mornings, I take my camera and walk around the garden looking for unusual lighting situations and noticing what flowers are preparing to bloom. Maybe there’s a butterfly sitting quietly warming its wings in the morning light, a toad taking shelter under a leaf or a flower about to bloom. Maybe it’s just the way the light hits the fountain grass.
If you are not a morning person, or it’s impossible to get out in the morning with your camera, take the time, instead, to walk the garden most evenings. The warm evening light has many of the same qualities as morning light and can show the garden in different but equally beautiful ways.
Walking around the garden with camera in hand, whether it’s morning or evening, is both an opportunity to capture images as well as get in touch with the finer details of your gardens.

A longer lens helps to create a soft background in this image, which helps to make the chipmunk stand out more.
Tip #3: Make sure your camera has a macro or close-up lens
Being able to capture close-up images of flowers, butterflies and insects is an important part of making interesting images of your garden. Mastering macro photography involves specialized, expensive equipment, but getting good close-up images is not that difficult with today’s modern digital cameras and lenses.
Most compact and Bridge cameras have macro or close-focus capabilities built into them. These may not allow you to get a 1:1 magnification ratio, but we are not doing scientific work here. If they allow you to move in close, it’s probably all we need.
For true macro capabilities you will need specialized macro lenses likely in the 50mm to 100mm range. There are 200mm macro lenses that allow you to get much closer to subjects while being able to keep a good working distance between you and the subject. These lenses demand the photographer use a tripod and or flash systems to get the best results.
If flower photography is your goal, close focus capabilities in most compact cameras are more than enough to get the job done.
If you are hand holding your camera to do close-up images, it’s a good idea to boost your ISO up to increase your shutter speed and help you get sharper images.
Following a butterfly around your garden trying to get it to rest on a flower can be challenging, but if you find one in the morning before the sun warms it, you will be blessed with the opportunity to capture the image without it quickly flying off. If you are lucky, you may be able to capture it covered in morning dew.
In the film days when ISO topped out at between 64-100, taking macro shots involved almost always using a tripod. Today’s digital cameras’ ISO can be boosted to astronomical numbers allowing you to hand-hold many of the images. Try setting your ISO at 6400 and check out the results. If the images are not to your liking, bring it back to lower numbers until the noise (grain) is acceptable.
Experiment with your close-focus capabilities to get comfortable with it so when the Giant Eastern Swallowtail visits your garden and spends some time on your butterfly weed you’ll be ready for it.

Getting down close to ground level helps create a more pleasing image of these anemones. Shooting them from a higher angle would have resulted in a background that included either soil or mulch.
Tip #4: Get down low
It’s rarely a good idea to stand over a plant and shoot down at it. That also holds true for animals, birds and most insects. It’s usually best to shoot your subjects at eye level. For flowers, that usually means getting down on your knees to capture images and eliminate the garden soil or mulch from the image.
By getting down low on a drift of flowers, you can use the other flowers to give you a pleasing background, or shoot through the foreground flowers to create a dreamy look using the out-of-focus foreground and background flowers to isolate a single in-focus flower.
If getting down low is getting difficult, having a screen that tilts up and allows you to look down at the screen can be a valuable feature when you are considering purchasing a camera. Many of today’s cameras offer screens that can be tilted.

The foreground flowers create a centre of interest and help to create a more three dimensional feeling.
Tip #5: Include a strong foreground element
Photographing large expanses of your garden may seem like a good idea, but unless you include a strong foreground object chances are you’ll be unhappy with the results. A wide angle setting on your campact camera, or a wide angle lens on your camera really benefits from having a strong foreground object such as a drift of flowers, garden art or another element that helps to draw your eye into the garden. Having a dominant foreground element helps to give depth to the image and provides a strong centre of interest for the viewer.
Focus on the foreground element and use a large depth of field (higher aperture like F8- F11 or even F16) to ensure the entire image is in focus.
Tip #6: Use your telephoto to simplify the image
A telephoto lens is not just for capturing wildlife and they are not designed for photographers who can’t be bothered to get up to walk over to their subjects. (Although they can be helpful in this regard for us lazy photographers.)
The telephoto lens has many redeeming factors, not the least being a great tool to simplify an otherwise busy garden scene. By moving in close, it’s easier to isolate one flower or a group of flowers to simplify the image. Of course, they are useful for capturing wildlife in the garden as well. A 200mm lens, for example, would enable you to photograph a butterfly while still giving it enough space to not feel threatened.

A telephoto lens allows you to move in close on small subjects and create a very soft background.
Tip #7: Use the telephoto to soften the background
It’s much easier to soften a background to isolate a subject if you are using a longer telephoto lens. Fast lenses (ones that open to F2.8 for example) can create beautifully soft backgrounds.
Lenses that do not usually open up enough to soften the image to your liking, can still be used to create a soft background. Try finding an angle to your subject where the background is farther away. That longer distance will help create the softer, out-of-focus background even for lenses that normally do not create that effect.
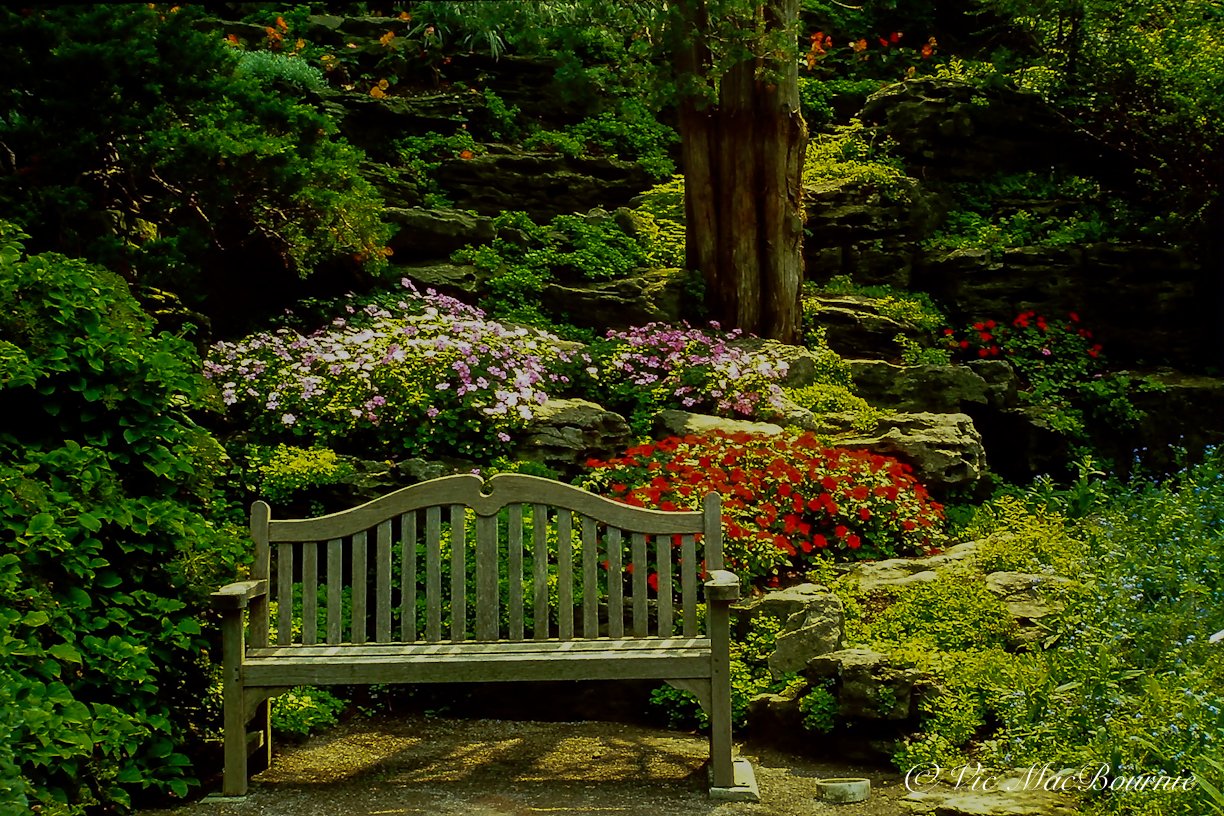
Public gardens can be a great place to practise your garden photography.
Tip #8: Experiment with your tools and camera settings
Photographing in your garden is the perfect opportunity to experiment. All those built-in filters in your camera are there for a reason and many of them can be used to great effect in garden photography. For example, consider shooting your garden entirely in B&W. (Check out my full story on B&W garden photography). Most cameras these days have a black and white setting. Look for strong graphic elements in the garden like backlighting or strong side light.
Experiment with the vibrant colour filter setting to punch up the colour on your flowers. My Fujifilm camera, for example, has a setting for shooting Velvia-style images. If you are not familiar with Velvia, it was a highly praised slide film that eventually edged out Kodachrome as the favourite film used by nature photographers looking for more saturated colours. Kodachrome was ISO 64, while Fuji’s Velvia came in at ISO 50. Fuji cameras are now able to offer a Velvia-like image at much higher ISO ratings. A feature that film photographers couldn’t even dream about back in the day.
Other cameras offer similar highly saturated colour filters, some better than others.
While many of the built-in filters look unnatural in garden photography, the soft focus filter can create beautiful results. Most often used for portraits, a soft focus filter can add a dreamy almost romantic look to your garden photography.
Another filter worth experimenting with is a high-key filter that enhances images with light-coloured flowers in white, pink or soft blues and violets.
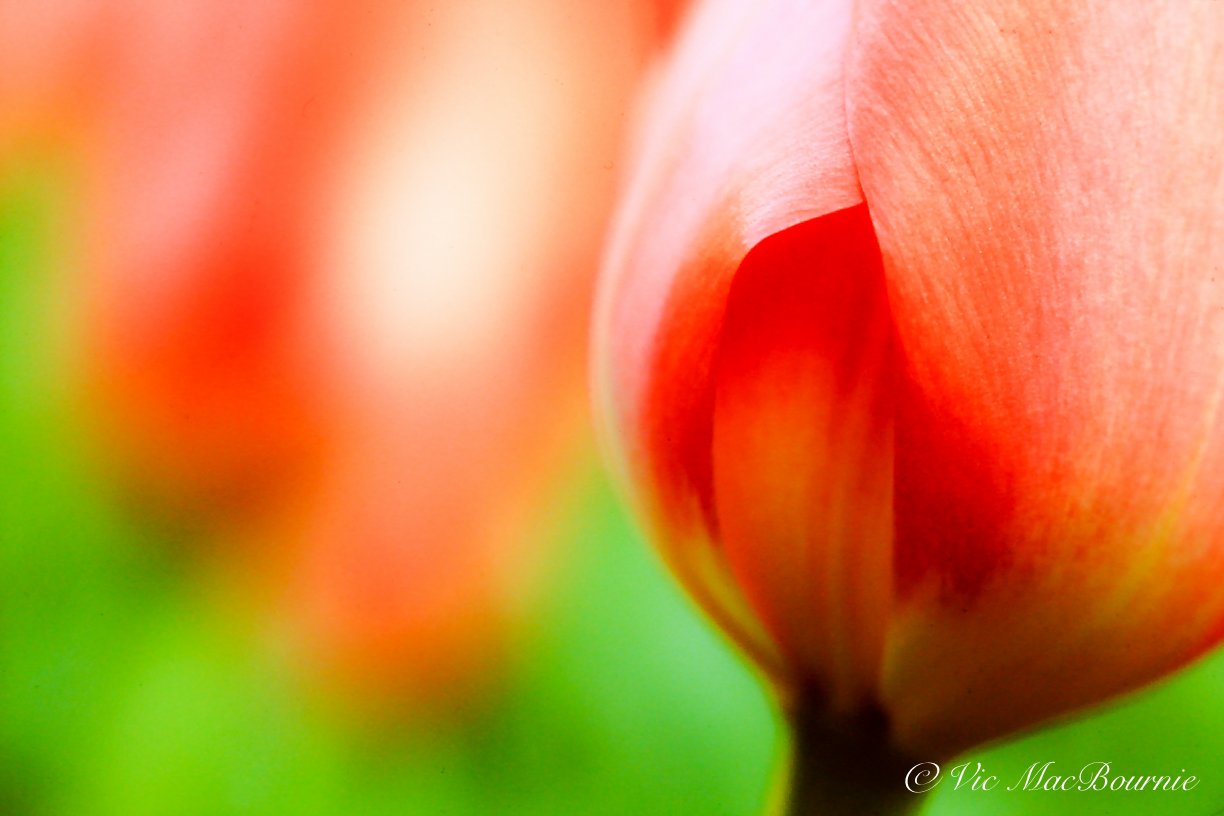
Don’t be afraid to have fun in the garden, wither by using filters or using selective focus to create dreamy images like the one above.
Tip #9: Follow the rules and then break them
There are a lot of long-standing design rules in photography to help you create pleasing pictures. The first, and probably the most important is the rule of thirds. In fact, most cameras have a built in grid to help photographers with their compositions and take advantage of the rule of thirds. A setting in the camera’s menu gives photographers the choice of setting up a grid system that is digitally overlaid on your camera’s screen. Where the lines intersect on the screen represents strong points to place a centre of interest in your image.
I almost always set up my cameras to include a grid system which also helps me keep the horizons straight.
Take some time to learn basic rules of composition and then, when you understand them, feel free to break them. By breaking the rules, you create tension or intrique in your photographs that, when done successfully, can result in a dynamic image.
One helpful rule is ensuring that any movement in your image has more space in front of it than behind it.
The rule: A bird flying left to right needs more space in front of it to fly into than is behind it. Ideally, you would want the bird at one of the intersecting lines in your rule of thirds grid pattern on the left side of the frame. That would give you a pleasing, natural image which would score well at your local camera club.
Try putting that bird in the intersection of lines on the right side of the frame and your image becomes potentially more dynamic. A bird flying out of the frame rather than into the frame of view is often seen as an error by the photographer. If, however, it is balanced by say a beam of light filling the left side of the frame or maybe a colourful drift of plants, than the image could be a show stopper despite breaking the rule.
The key to success is knowing the rules of composition and knowing when to break them.

Know the rules of composition and then feel free to break them. In this image the bird appears to be looking out of the image, but the tree branches leaning in from the left help to balance the image and makes breaking the rules of composition work.
Tip #10: Don’t be afraid to fail
It’s garden photography folks, there is no pressure here.
Shoot often, shoot regularly, experiment and have fun. Many of us have cameras that sit in a desk drawer only to get pulled out during holidays or special events. Your garden gives you the opportunity to get out daily or weekly to use your camera and experiment with it. It should be fun creating images.
Bring your kids or pets out to the garden and photograph them in it. Set up a bird feeder or bird bath near where you normally sit and experiment with your camera(s).
Finally, when you have built up a large collection of garden images, consider putting them together in your own personal Garden photography book. (Link to my story on creating a personalized garden book). Putting the book together is a wonderfully creative exercise that results in a keepsake, a memory of your garden and the wildlife that visit it.
Tips for Sharing your images on social media
Sharing your garden images on social media is one of the benefits of modern digital cameras. Here are some suggested sizes for posting your images on some of the popular social media sites.
If none of this makes any sense to you, just upload the pictures and don’t worry about it.
Facebook: For your Facebook feed, try 1080 X1350 pixels. For Facebook stories, try 1080 X 1920
Instagram: photos were once optimized as square 1080 x 1080, but have evolved to become more vertical to better fit smartphone screens. The ideal Instagram portrait aspect ratio is now 4:5, and the best photo size is 1080px by 1350px. For Instagram stories try 1080 X 1920 for best results.
Tumblr: 500 x 250
Twitter: For best profile image try 400 X400 pixels. For header photos, try 1500 X500 pixels and for in-stream photos go with 1600 X 1900 pixels.
