
How to create bird artwork from digital watercolour paintings
Turn backyard birds and garden photos into works of art
Since digital images became mainstream in the world of photography, learning to manipulate pixels has become increasingly important for serious photographers.
For garden photographers, artistic interpretations can turn your favourite flower and bird images into beautiful works of art. And who doesn’t appreciate artwork of birds.
There was a time photographers really didn’t need to know about software programs. Jpegs, tiffs and RAW images had not been born and perfect exposure was crucial to keeping an image or throwing it in the wastebasket.
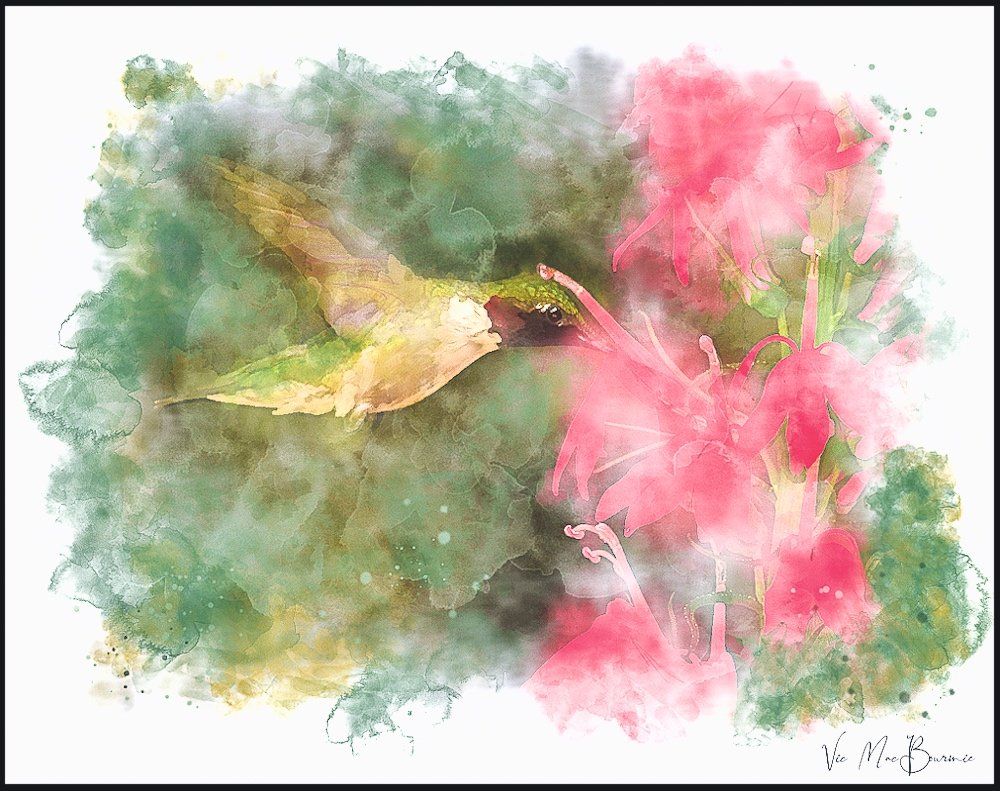
This digital image of a hummingbird at a Cardinal flower is a good example of how it’s possible to create works of art with your photographs.
Go here for more Hummingbird images including digital art.
Much of their “artistic creations” centered around in-camera techniques such as selective focus as shown by the colourful tulips (above).
For more on selective focus in garden photography check out my article on photographing snow in summer.
(If you are interested in exploring garden photography at a higher level, be sure to check out my comprehensive post on the Best camera and lens for Garden Photography.)
Today, if you take photography at all serious, you not only need to know the basics of photo manipulation, you almost need to be an expert in some way.
These days my main photo data base and manipulation program is without a doubt Lightroom Classic, but it’s not the program I use to transform my photographic images into watercolour paintings.
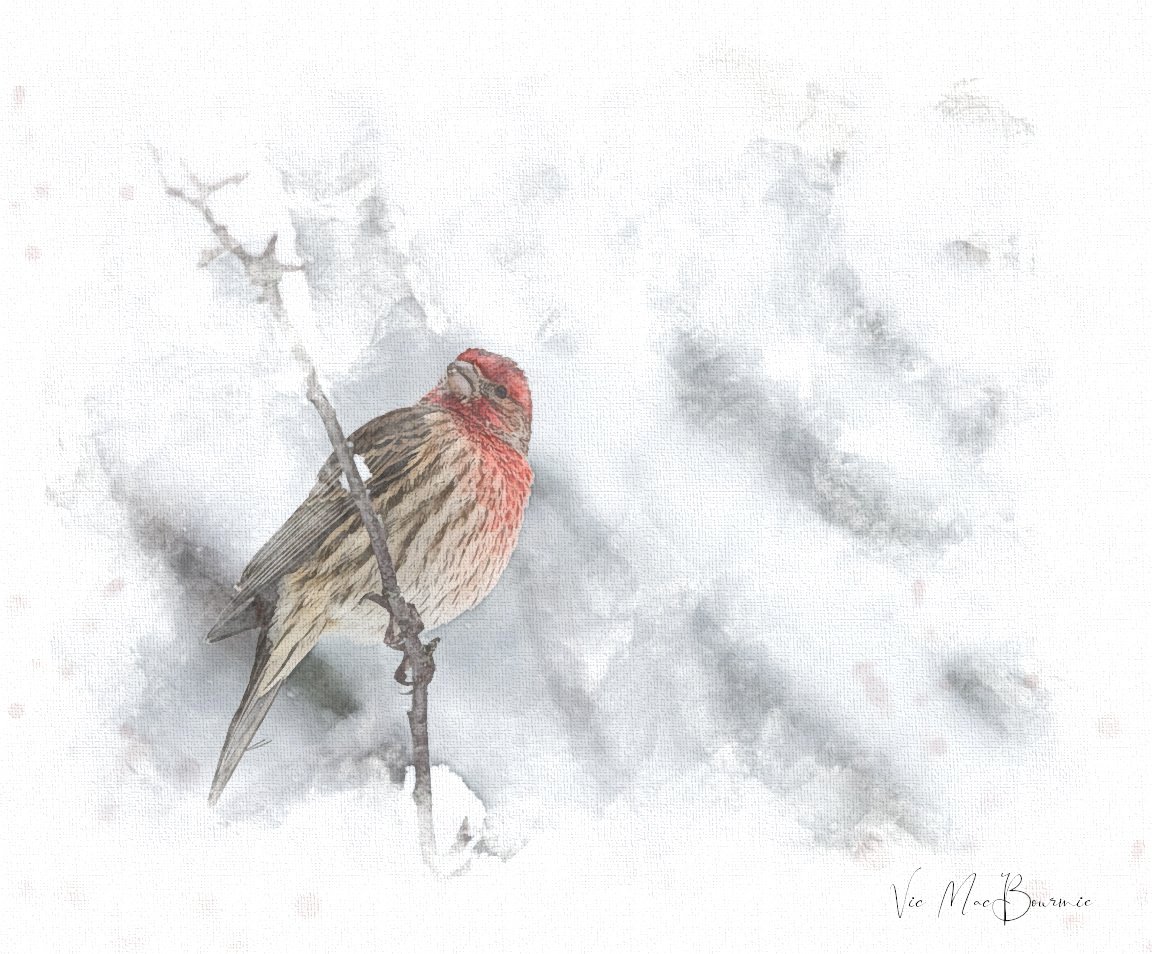
This artwork of a bird was created from a photograph taken in the garden and then manipulated in post processing with programs like Photoshop and Lightroom.
While most photographers focused on improving their images, I have always been interested in transforming my images into a more artistic interpretation of that same photograph. Over the years, I’ve spent a lot of time playing with the likes of the many variations of Photoshop before discovering Painter (Mac Link) (Windows Painter link) – a program that can best be described as a fine artists’ version of Photoshop. In other words Painter is to artists, what Photoshop is to photographers.
This seemed a perfect marriage to achieve my goals of turning photographic images into works of art, accept without any formal training in fine art, and facing more tools, paintbrushes and artistic choices than I could imagine, to say I was a little overwhelmed was an understatement.
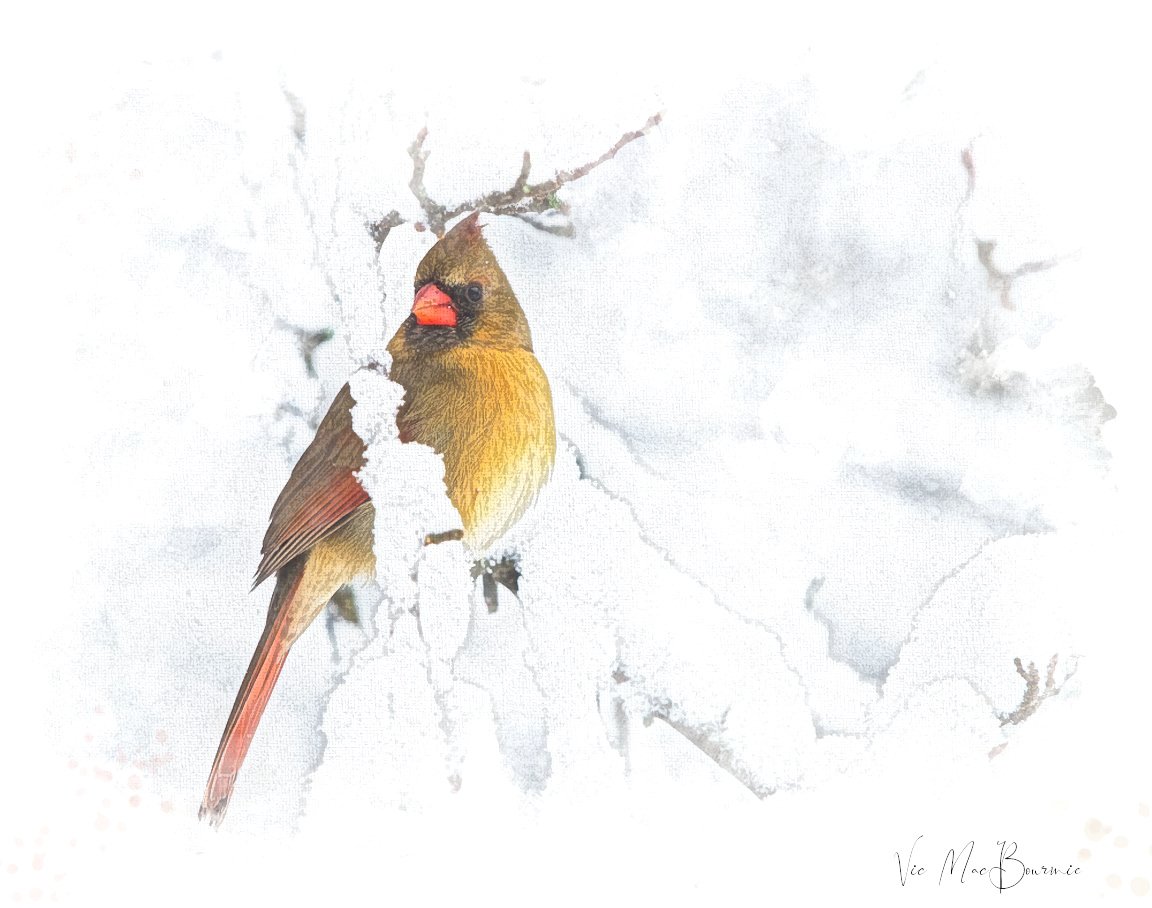
This artwork of a female cardinal was created from a photograph that got the creative treatmen in programs like Photoshop, Painter and Lightroom.
After “a lot” of computer time trying to understand the intricacies of Painter, I eventually taught myself the basics and proceded to work on animal portraits for hours and sometimes days to get them where I wanted.
For my animal portraits, I used a process that involved meticulously going into the original photograph and softly smudging tiny areas of the image to create a sort of painterly effect. For the most part, all this tedious work went unnoticed in the final versions, but it all served as a learning process and, to this day, I still like the results.
Since the animal portraits, I have continued experimenting with painterly images.
Fast forward to today. I no longer use Painter for my artistic endeavours and still can honestly say that I have no clue what I’m doing, but I am getting happier with some of the results.
And, there is no better way to pass time in the cold winter months than taking an afternoon going over some of your favourite images, isolating ones that you think might make nice watercolour images, and experimenting with one of the many programs you may already have to create your own works of art.
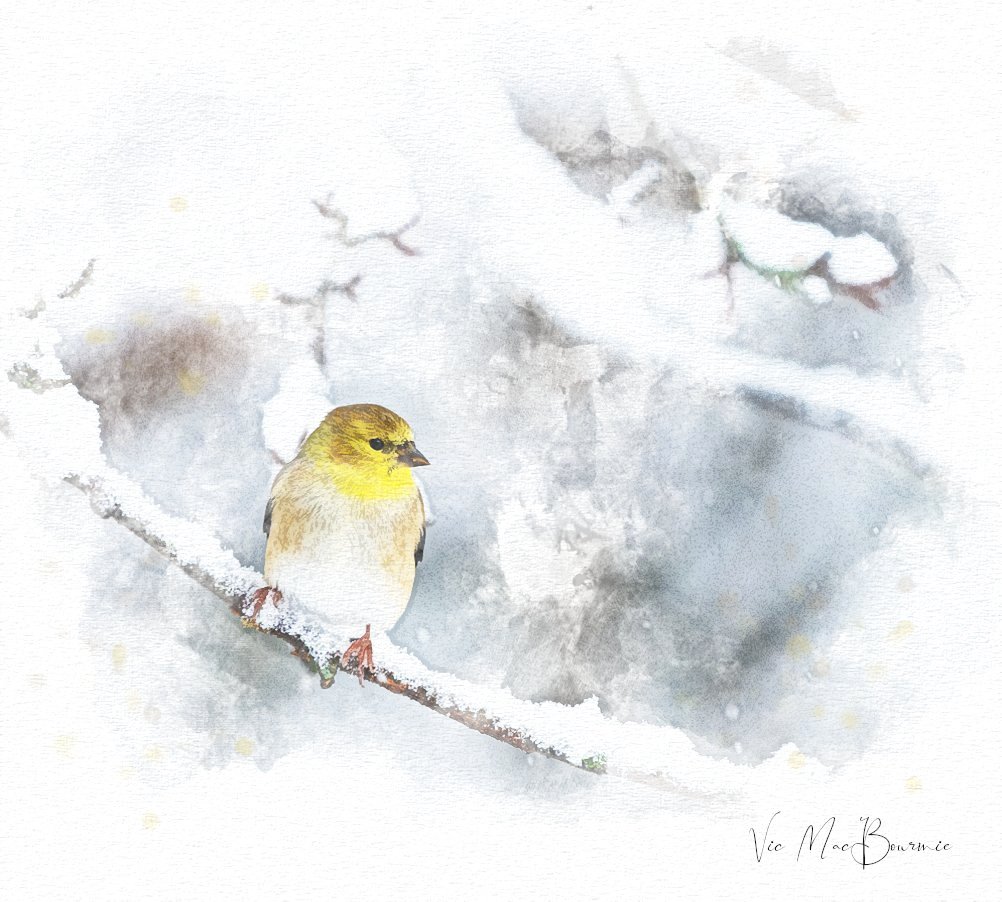
This creative interpretation of a Goldfinch in a snowstorm was created from a photograph and turned into artwork of a bird.
Right now I’m using a free program that you download from the web called GIMP, which is an excellent substitute for Photoshop.
The equivalent “free” program for Painter fans is Krita, another excellent program that has endless possibilities for artists looking to experiment in the digital world.
The GIMP community – particularly the available YouTube videos – make learning the program relatively easy and extremely enjoyable. Following the step-by-step procedures on the various YouTube channels will have even the most inexperienced user creating nice images in a relatively short time.

Prior to Photoshop and other digital manipulation programs, photographers used selective focus techniques like the tulip image above to create more artistic images. Selective focus can still be a very effective way to bring an artistic feel to your garden images.
Try searching “Turning photos into art” and you will be rewarded with a host of videos that will start you down the path to your particular artistic vision. Not all the videos focus on turning your images into watercolour images. Many focus on pencil drawings (which I have also experimented with), digital drawings, pastels…
After learning the basics from YouTube, I proceeded to develop my own method of creating the watercolour images from my photographs. Although the procedure for each image is similar, I like to let the original image dictate the various steps needed to attain the finished result.
It’s difficult to give you a step-by-step guide on how to create these images because I like to think each image is it’s own work of art and I rarely approach each image in the same manner.
I will, however, provide some guidelines that will help you get started as well as a general guideline of the steps I take in creating an image.
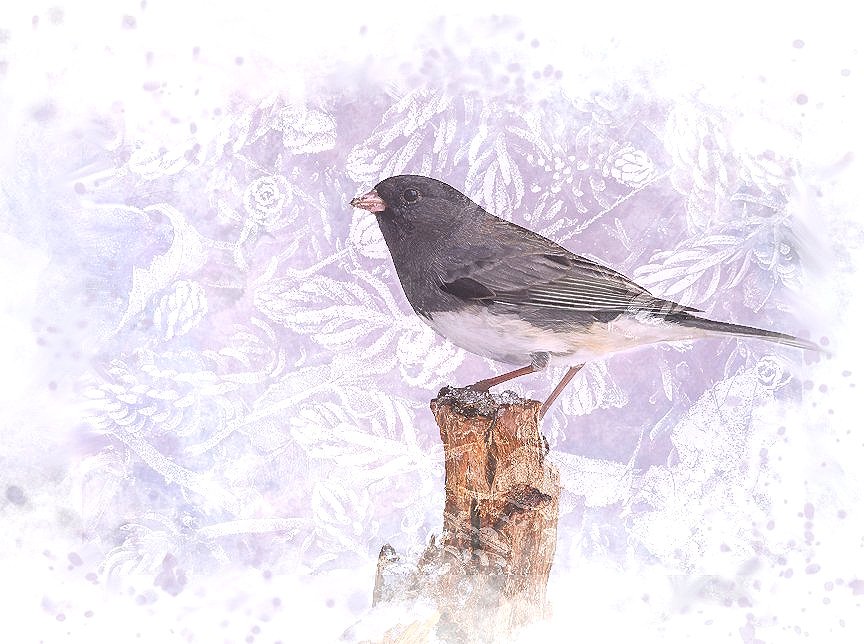
This image combines a Junco and a background of a frost-covered forest floor for an interesting example of using photography to create bird artwork.
Five tips to turn your photographs into artistic interpretations
1) Start with a slightly overexposed image to provide the basic structure of a delicate watercolour image.
2) Recognize that the subject does not have to be tack sharp for an effective image. The process of transforming the image into a digital painting does not call for tack-sharp images.
3) Always use layers (photoshop, Painter, GIMP and KRITA and most photo manipulation programs offer them) so that each manipulation can be done separately and the layer can be discarded and redone if you have problems.
4) Consider purchasing a Wacom drawing tablet or adding a pen to your existing ipad if it is compatible that allows you to paint directly on the screen.
5) Your finished result looks its best if the main image has a gradual softening leading to the edge of the image and includes a white border surrounding the edge of the painting.
6) When you are satisfied with the image, you must flatten the layers into a single image to save it as a jpeg. Be sure to first save it with all the layers first, so that you can go back to it and make changes.

This Tufted Titmouse, with its hint of rust under its wing, created a lovely painterly image.
Creating the image in GIMP: A step-by-step guide
To put it mildly, the process can be complicated.
Without getting too specific, let’s just say the process starts by creating 6 or 7 layers of the original image.
Each layer is given an appropriate name to help identify it while you are working.
The first layer I create is a rough watercolour layer using the filter “waterpixels.” I follow that layer up with another “waterpixel” layer that has finer details.
The next layer is created using the cartoon filter and manipulated in such a way as to obtain what you think is just the right amount of underlying black lines in the image. This helps to create the illusion that the image was first sketched out with a light pencil
The next layer is usually created with a white tracing paper over it. By reducing the opacity slightly, the image faintly emerges through the tracing paper.
Now take the erasure, pick one of the texture brushes from the assortment of brushes or you can create your own. Set the opacity to somewhere between 60-80 per cent. Begin dabbing the image, starting in the centre or on the main subject. Continue dabbing it (removing the tracing paper) but leaving the edges white.
At this stage you can turn the opacity on this layer to its maximum to see how the image is developing.
Next, continue erasing the white tracing paper until the image emerges the way you like it.
It’s a good idea to change brushes and opacity as you are working the image with the erasure tool.
Once you get it looking the way you want, it is time to add some paint splatters. This time choose the paint brush rather than the erasure and pick one of the splatter brushes.
Use the eyedropper to obtain a colour you think will work well as paint splotches. I usually try to keep the splotches very subtle.
Splatter the corners of the image but keep it subtle by leaving the opacity of the spatters very low.
Finally, add another layer with a white background and pick the filter “canvas” or “clothify” or, if you have them, various art papers. This one will need major adjustment to get it to blend in with the image without obstructing the visual presence. I find using the “multiply” mode can work well.
At this point you have the basic elements of the painting, but you now have to go into each layer, find the best opacity for your particular image and the best blend mode. That can take a lot of time and experimentation to get it looking the way you want.
Obviously, this process is not created with a one-click “painterly image filter” in photoshop.
There are programs and apps that will allow you to turn an image into a photograph, but the results vary too much to depend on them to create the image you desire.
Besides, it takes all the creative inspiration out of the finished result.
This process is not meant to provide immediate satisfaction for the artist. Each image needs its own approach, but once you have mastered the process, recognizing the necessary steps given a particular type of image, becomes a simpler process.
The amount of time it takes to create an image might come down to an hour or two rather than an entire afternoon. And, if you save it properly, you can go back later and continue to work with it.
Who knows, maybe if you like the results you’ll be inspired to turn your works of art into a lovely book or your garden art. This year I created my first Garden Photographic Book, maybe next year it’ll be a book of Garden Watercolour images.
In conclusion
There are days, especially in the cold of winter, that I barely come out of my office because I am too wrapped up in working on digital images of some of my favourite garden images. Some are a complete failure and I am still trying to figure out which images work best. I think, snow images work well simply because of the already delicate feel to the them.
No matter, there is no better way to pass the time than to sit down at your computer, push some pixels around and work some artistic magic with a fine cup of coffee (or wine) and your favourite music playing.
It doesn’t matter if you are the only one who feels the magic.