
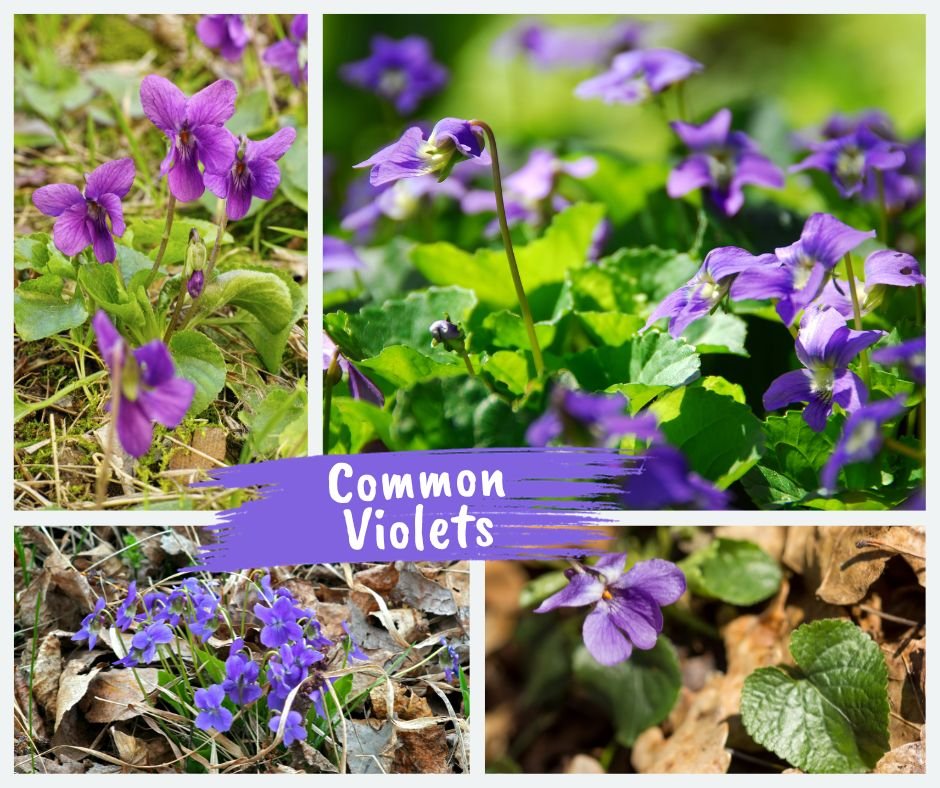
What are the benefits to growing native violets?
Our common native violets are important wildflowers that need to have a place in our gardens and even in our grass.
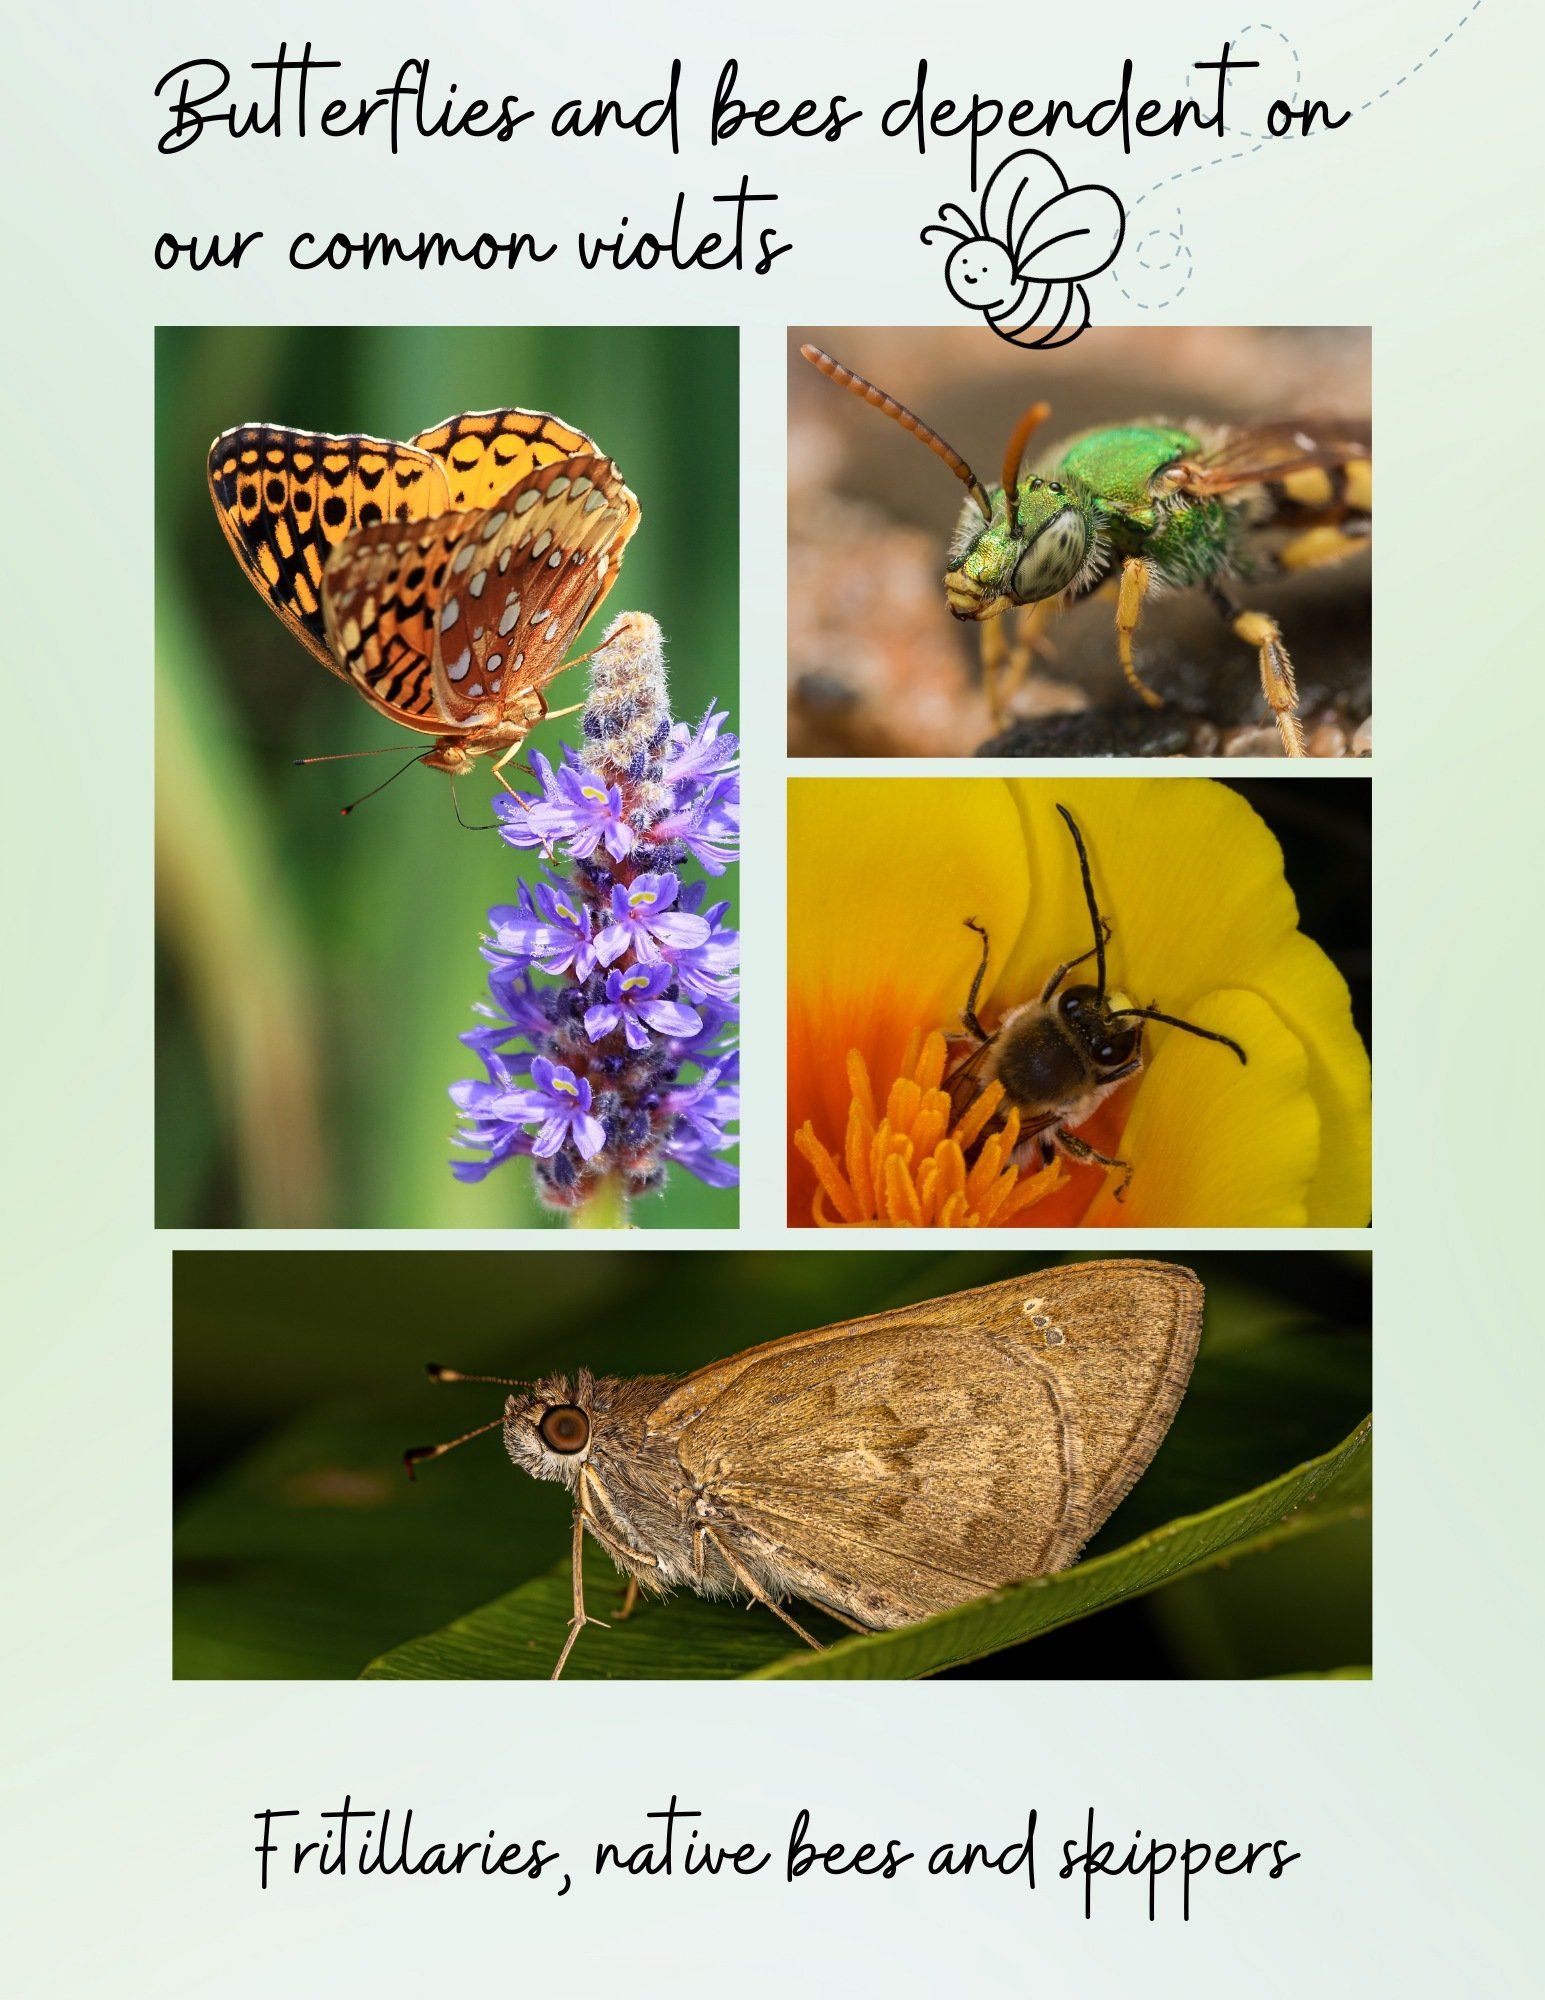
Native butterflies depend on our common violets
In our garden, common native violets are welcome wildflowers.
Whether they are growing happily in the grass or adorning wild areas of the garden, common violets will always have a home here.
I extol the virtues of commonplace violets due to their critical and pertinent role within our local ecosystems. Their vivid purple, yellow and white blooms are a delightful signal that spring has arrived, leading the way for other native wildflowers, which will continue to flourish right through to the summer.

But it is not just their charming appearance that makes them essential; it is their ecological significance that truly stands out.
These little plants serve as host for many butterfly species, particularly the fritillaries, as well as a range of essential insects. This interaction guarantees the perpetuity of these species. Recognizing the significance of this relationship is vital and therefore we should resist the impulse to remove these wildflowers from our yards.
Their presence is not just an aesthetic addition to our landscapes; it is a fundamental factor in ensuring the survival of our native wildlife.
Moreover, I must highlight that violets are not just a symbol of spring. They bloom from the early days of spring continuing into the colder months, bringing colour and life to our gardens even in early winter. This makes them not only a visual treat but also a constant source of sustenance for a variety of local insects and pollinators.
Rather than eliminate them, we need to applaud and appreciate the remarkable roles of such ordinary plants like the violet, in contributing to the biodiversity of our ecosystems.
Our common native violets are host plants to many charming fritillary butterflies such as the Great Spangled, the Aphrodite, Atlantis, Silver Bordered, and Meadow fritillary butterflies.
What does it mean to be a host plant mean, and why does it matter?
Host plants play an integral role in the sustenance of our indigenous wildlife. They are crucial in providing nourishment for the larvae of butterflies and other insects.
The colourful and captivating butterflies we so cherish are in fact bi-products of these caterpillars who, in their initial stages, rely heavily on these host plants for their sustenance and habitat.
However, the fascinating metamorphosis from a caterpillar to a butterfly is a process that requires a bit more elaboration. During this transformation, the host plants serve as the primary source of food and nutrients for the caterpillar. They also provide the much needed sanctuary for these creatures to grow and develop safely.
A prime example of a host plant would be common violets, these nurturing plants are known to host a variety of butterfly species.
In order to conserve these vital host plants, one simple practice we can adopt is to discourage the unnecessary weeding of our gardens and lawns. By preserving these plants, we provide more than just a home for caterpillars, we are supporting the lifecycle of butterflies, and in turn, the vibrancy and balance of our native fauna and flora.
The critical role host plants play is undeniable. Not only do they foster growth and development for caterpillars, they are instrumental support systems to our indigenous fauna and flora.
Where are common violets found?
The common blue violet (Viola sororia), also known as common meadow violet, purple violet, woolly blue violet, or wood violet grow in a wide range across eastern North America in the United States and Canada in areas ranging from zones 2 through 11.
A similar violet (Viola odorata) is a species in the viola family, native to Europe and Asia. Commonly known as wood violet, sweet violet, English violet, common violet, florist’s violet, or garden violet, this small herbaceous perennial has been introduced into North America and Australia.
Although our common blue violet are best known for their spring blooms, common violets can grow from spring into winter, making them extremely important wildlife plants.
There exists a wide variety of 35 Viola species throughout Canada, from the Atlantic to the Pacific Ocean, extending up to the northern treeline. These include varied habitats such as forests, prairies and marshlands. A notable species is the green violet (H. concolor) frequently seen in southern Ontario.
As we said earlier, these Viola species play a crucial role as host plants to a myriad of fritillary butterfly species. Preserving these plants will significantly aid in the survival of our native wildlife, particularly our cherished butterfly species.
Within the realms of the United States, the humble common violet has embedded itself in the core of its native ecosystems. The plant serves as a host to an array of Fritillary butterflies. The importance of its preservation is paramount. The robust flower thrives in zones 2 to 11, surviving from spring to winter, acting as a reliable food source for larvae. As such, it is imperative to reorient our gardening approach from removing these perceived ‘weeds’ to fostering these foundational aspects of our biodiversity.
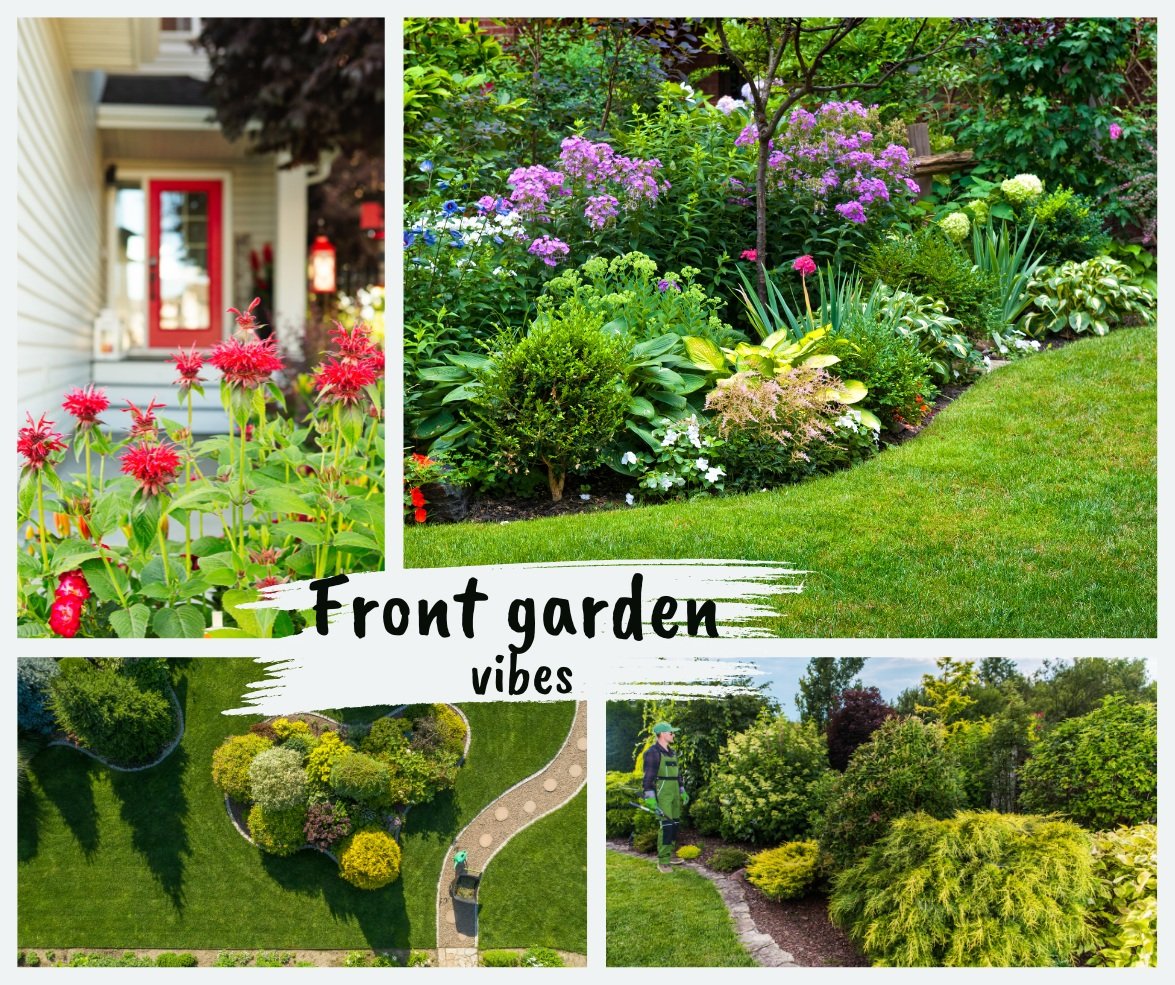
Front yard ideas: Embrace your garden style
Create a front garden that pleases you rather than your neighbours.

The Japanese-inspired garden in late fall blends seemlessly with the front woodland garden where the two adirondack chairs add a punch of colour and centre of focus in all four seasons.
Be bold not boring in your front garden
Front yards don’t have to be boring, but fear of being different often results in front yards conforming to every other yard on the street.
And that almost always leads to a street full of boring front yards. Typically, a sea of grass, small foundation garden beds and maybe a small single tree in the middle of the yard.
It’s much better to be bold, make a statement and create a front landscape that reflects a style that makes YOU happy rather than the neighbours.
In our rather small front yard, we have worked to create a very casual woodland garden in the main area leading with a Japanese-inspired woodland garden in another part of the front yard.

Adding interesting garden elements such as the Adirondack chairs, bird bath and ceramic “Fish in the Garden” creates points of interest that do not over power the garden plants.
In this “small front garden” all grass has been removed. Instead, there is a total of nine trees, a variety of ground covers including ferns, pachysandra, epimediums, moss, creeping phlox, foamflower and bloodroot, just to name a few. It also has several drifts of black-eyed-susans and ornamental grasses big and small, as well as many more native plants, several massive boulders, a dry river bed, two bird baths and two very prominent yellow Adirondack chairs on a small flagstone patio.
Yes, that’s a lot to pack into a smallish front yard, but it’s an example of what is possible once you remove the grass and open up your vision to a front yard that does not conform to what most homeowners consider acceptable. My immediate neighbour also removed all of their front grass and created an oasis of native, non-native plants, trees and shrubs that, together, create an exceptional habitat for a host of wildlife from mammals to reptiles, from a variety of birds to pollinators too numerous to name here.
Unfortunately, we are the minority on a street of orphaned trees growing in a sea of never ending lawns and boring foundation plantings. And, this is in an area surrounded by conservation lands and massive natural forests.
Time to rethink our front landscapes
I recognize, however, that our front woodland garden landscape design might not be for everyone. Maybe a less aggressive approach that includes some grass and sweeping gardens with a variety of tidy perennials, might suit you better. Maybe a more contemporary garden made up primarily of evergreens is something that would appeal to you more.
To enhance the overall appeal of your front yard, here are five landscaping ideas that will help transform your outdoor space into a more welcoming one.
Create a Welcoming Pathway: A well-designed pathway leading to your front door not only adds visual interest but also guides visitors to your home. Consider using natural stone pavers or colourful tiles to create a unique and inviting pathway.
Incorporate Colourful Flower Beds: Add vibrancy and charm to your front yard by planting colourful flower beds. Choose a variety of flowers that bloom at different times of the year to ensure year-round beauty. Be sure to incorporate native plants to attract local wildlife and promote biodiversity.
Install Outdoor Lighting: Softly illuminate your front yard with strategically placed outdoor lighting. Not only does it enhance the safety and security of your home, but it also adds a warm and inviting ambiance. Use path lights to highlight the pathway and accent lights to showcase architectural features or focal points. Don’t use bright lights that disrupt the lives of animals and insects that depend on darkness to survive.
Add a Water Feature: Incorporating a water feature, such as a small fountain or a pond, can create a soothing and tranquil atmosphere in your front yard. The sound of running water adds a sense of serenity and can mask unwanted noise from the street.
Utilize Vertical Space: Make the most of limited space by utilizing vertical elements. Install trellises or arbors and grow climbing plants. This not only adds visual interest but also creates privacy and shade.
This professional garden design (below) created for a Pacific Northwest garden, (see full story here) is a perfect example of what can be done when a bold approach is taken.

A landscape design or a middle-size front garden shows intensive planting including several trees, shrubs and plantings. Notice the lack of grass in the plan.
Try designing around a focal point in the garden
Once you embrace your style with courage and commitment, try to settle on a focal point in your garden.
The focus of our front yard are actually the two very yellow Adirondack chairs that, more than anything, make a statement that this is meant to be a casual place – almost our cottage in the city.
I like to think that a woodland garden, by its very nature, is a casual unpretentious landscape that conveys a message that the people who live here care about the environment, wildlife and native plants more than impressing others, including the neighbours.
More on the Environmental Benefits of a Woodland Garden.

A dry river bed and creeping phlox combine for a colourful spring display.

A Natural Approach
Allowing the creeping phlox to flow over the large boulders creates a natural feel in the front garden rather than a traditional over-manicured front garden.
It is also a front yard that is not wild and out-of-control and possibly seen as an eyesore on a street of very, very traditional front landscapes.
Our front garden is also in constant change – from the native plants in the main garden, to the annuals that fill our two window boxes.
Birds make nests in the trees, visit the bird baths on a regular basis and devour the fruit of our native serviceberry tree in early summer. Deer visit the garden to sample the plants and even the local foxes often use the area to hunt.

Our front garden in late fall showing the Japanese-inspired garden with large boulders on the left, together with the middle canopy Japanese maples, grasses black-eyed-susans and cottage-style adirondack chairs.
It may not, however, be a front yard that appeals to everyone.
So, let’s take a look at a variety of front landscapes that lie between our grassless woodland garden and a traditional front yard.

A few different examples of tiny garden design styles.
More front yard ideas: The tiny front yard
Whether it’s a cottage garden, a contemporary garden or something in between, the important thing is to embrace your style and move forward.
If you are short of space, embrace that vibe.
• Remove the grass
• Use paving or mulch to cover the entire space
• Consider using containers to grow your favourite plants
• Create one centre of interest – a bistro table and two small chairs or a small water fountain for the birds.
• Don’t be afraid to use at least a few large-leaved plants like hosta, elephant ears or a large fern to create visual interest.
• Try to keep the space simple and use natural elements as much as possible.
• The goal is not to make the garden pretty by using too much colour or unnatural materials. Bright white quartz stone rarely looks right in a garden, but pea gravel or river rock can work well. Better yet, large moss-covered boulders can be a perfect statement piece for even a tiny garden.
One of the most common situations I am asked about is what to do with a very small inner-city front garden with an existing mature tree where grass struggles to grow. The key to success here and in most difficult situations is to work with, rather than against, what nature is offering you.
In a tiny garden
My suggestion: Remove all the grass. Bring in some large boulders (not mid-size rocks) and bury them in the landscape. Please don’t let them lay on top of the soil. Boulders need to be dug in so that at least one-third is under the ground. This gives the impression that the boulders are rising out of the ground rather than placed on top of it.
Add some native ground covers, or mulch the area heavily with a pea gravel or bark mulch. Include a simple flagstone pathway, a bird bath – maybe one carved out of one of the boulders – and a small tree or large multi-stemmed shrub (maybe a serviceberry) that is trimmed up like a small multi-stemmed tree. The bird bath could be replaced over time with a bubbling rock or natural looking fountain. The moving water will help attract more birds and other wildlife.
A selection of larger garden designs using islands to create interest and variety.
Larger front yard covered in turf grass
A more typical surburban front yard offers more choice and more challenges.
Removing all the grass might not be an option or even a desired result.
The question to ask yourself is whether it is worth your time and effort to care for the grass, including lugging the lawn mower and other instruments of destruction from the back yard to the front yard on a weekly basis. If you plan to remove the grass, it might be best to do it over the course of several years rather than all at once.
By creating ever expanding garden islands in your existing turf, you can slowly migrate away from turf entirely, or just leave strips of grass that are easily mown with a single pass.
My suggestion: Consider a five year plan where most of the grass is slowly replaced by large garden islands. Individual islands can serve different purposes and allow you to experiment with different plants and even styles.
One island could be set up to attract birds with fruiting shrubs and an under-story tree like a Flowering Dogwood. Add some native purple coneflowers and black-eyed-susans to provide late-summer food sources for birds. Supplement these sources with annual sunflowers to add some whimsy and provide more food and habitat for birds. A bird bath and small bird feeder is a nice addition.
Another island might focus on plants that thrive in acidic soil. Once you have amended the soil to acidify it, you can begin to plant hydrangeas, blueberries, and other acid-loving native woodland plants that can be more easily grown together rather than trying to combine them with non-acid loving plants. Mulch the acidified soil with pine needles to enhance the soil and keep the plants healthy.
In another island you may want to turn your attention to edibles. Plant your favourite herbs, one or two tomato plants, your favourite garden vegetables and maybe a favourite fruiting tree like a peach or even an orange or lemon tree if you are in the warmer growing zones.
If you like the cottage/meadow look, a garden island allows you to create that look in a smaller scale rather than trying to manage a massive meadow garden that can easily get out of control. Grow all your favourite plants, but grow them in a manageable-sized garden where you can focus your energy into creating a wild but still-in-control cottage garden. More on meadow gardening here: Create a mini meadow; The making of a large meadow
The above collage (bottom right) shows a large garden island made entirely of evergreens. This is perfect to create winter interest as well as provide year round habitat for wildlife.
In conclusion: A front garden for your enjoyment
In the end, it’s important to first create a front garden that pleases you. If you can, keep in mind that your garden should not look so out of place in the neighbourhood that you are going to draw too much negative attention. That can be difficult if you are in a very traditionally minded neighbourhood. In that case it might be wise to go all out in the backyard, while you take a slightly tamer approach in the front yard.
I have read about so many homeowners trying to do the right thing only to be forced to cut down their gardens because neighbours or home owner’s associations choose to continue living in the 1950s.
If you find yourself in this situation, create a garden that pleases you most but maintains a enough of a traditional garden appearance that it does not attract too much attention.
If you are in a more progressive area, or in one that is far from your neighbours, have some fun. Go bold and create a garden for you, your local wildlife and the natural environment.
You won’t regret it.

How to get the Moody Green look in your images
The moody green theme has become extremely popular in today’s social media apps. Creating that vision in your own garden images begins by building a Lightroom preset that helps you create the images.
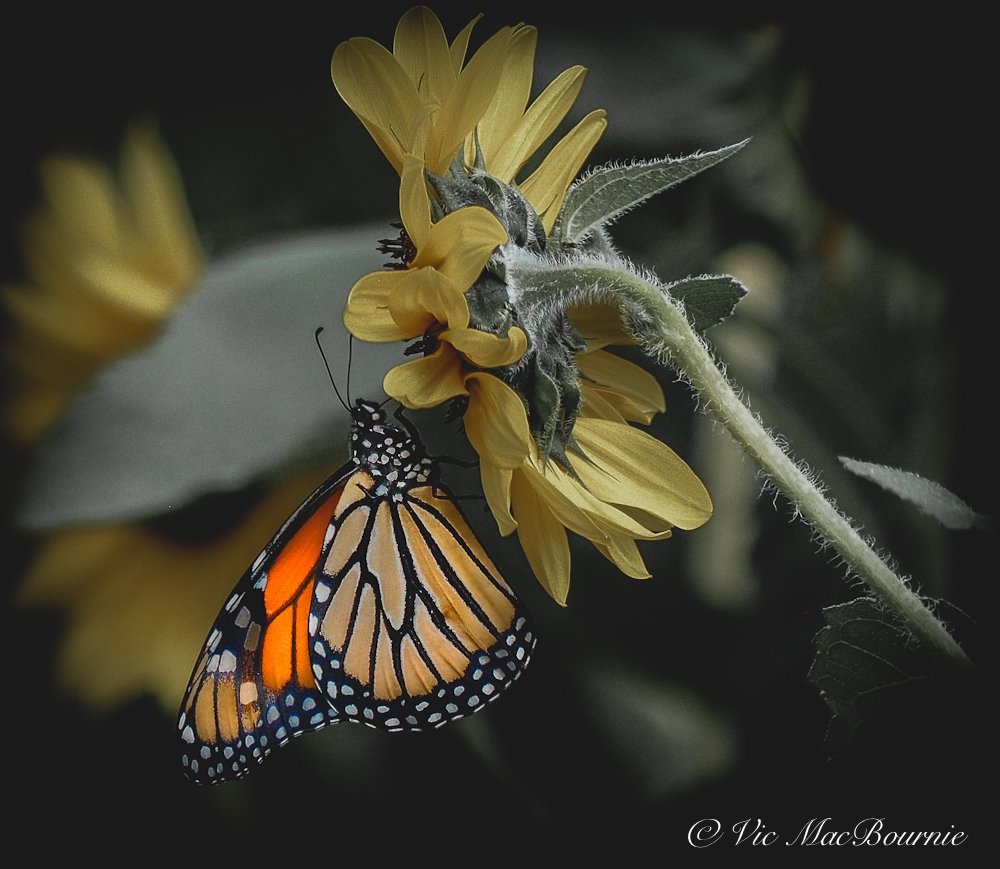
This dark, moody image of a monarch on sunflower is a good example of how, with proper post processing, an average image can be transformed into something more memorable that you would be happy to call your own.

Original image
The original image shows the typical greens and colours in the monarch.
Dark-Green look is perfect for garden photography
Garden photography offers an opportunity to capture beautiful images as well as give your cameras, lenses and accessories a real workout. The problem many photographers have is coming up with new ideas to take their garden photography to another level.
Creating high-key painterly images with your garden photographs (see images below) is certainly one way to add an artistic impression to your photography, but so too is doing the opposite and going dark and moody. (see above image)
In this post, we are going to explore tips on how to create this moody effect with our existing garden images, including revealing the Lightroom settings I use to create these dark green, moody images.
The camera you use to achieve these images can be as simple as your phone’s camera or a favourite point-and-shoot. For tips and reviews on my favourite cameras for garden photography, check out the following posts: Pentax K5, FujiX10, Pentax Q, Canon Powershot Elph, Panasonic Lumix, Olympus E-10 or Olympus PEN series of cameras.
Photography programs, however, such as Lightroom and Photoshop, even free programs like Gimp and Krita become integral to creating these memorable garden images.
Late fall and winter is also the ideal time to cozy up to your computer and experiment with some of your existing images.
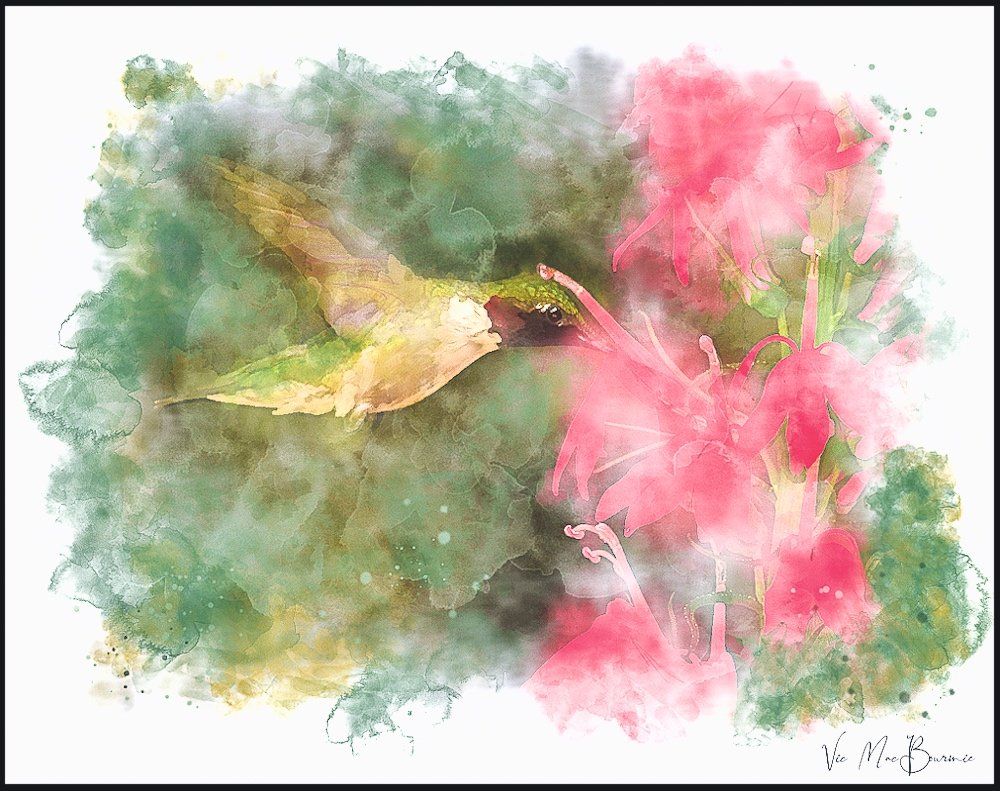
I often use these digital post processing programs to create painterly images of my favourite flower and bird images. For more on how I create these images, check out my posts here: Creating Painterly Images from photographs, Digital images of hummingbirds.
This high-key painterly image is an example of how you can turn your favourite photographs into beautiful painterly images using programs such as Lightroom and Photoshop.

This painterly image is an example of what you can achieve using post processing on one of your favourite photographs.
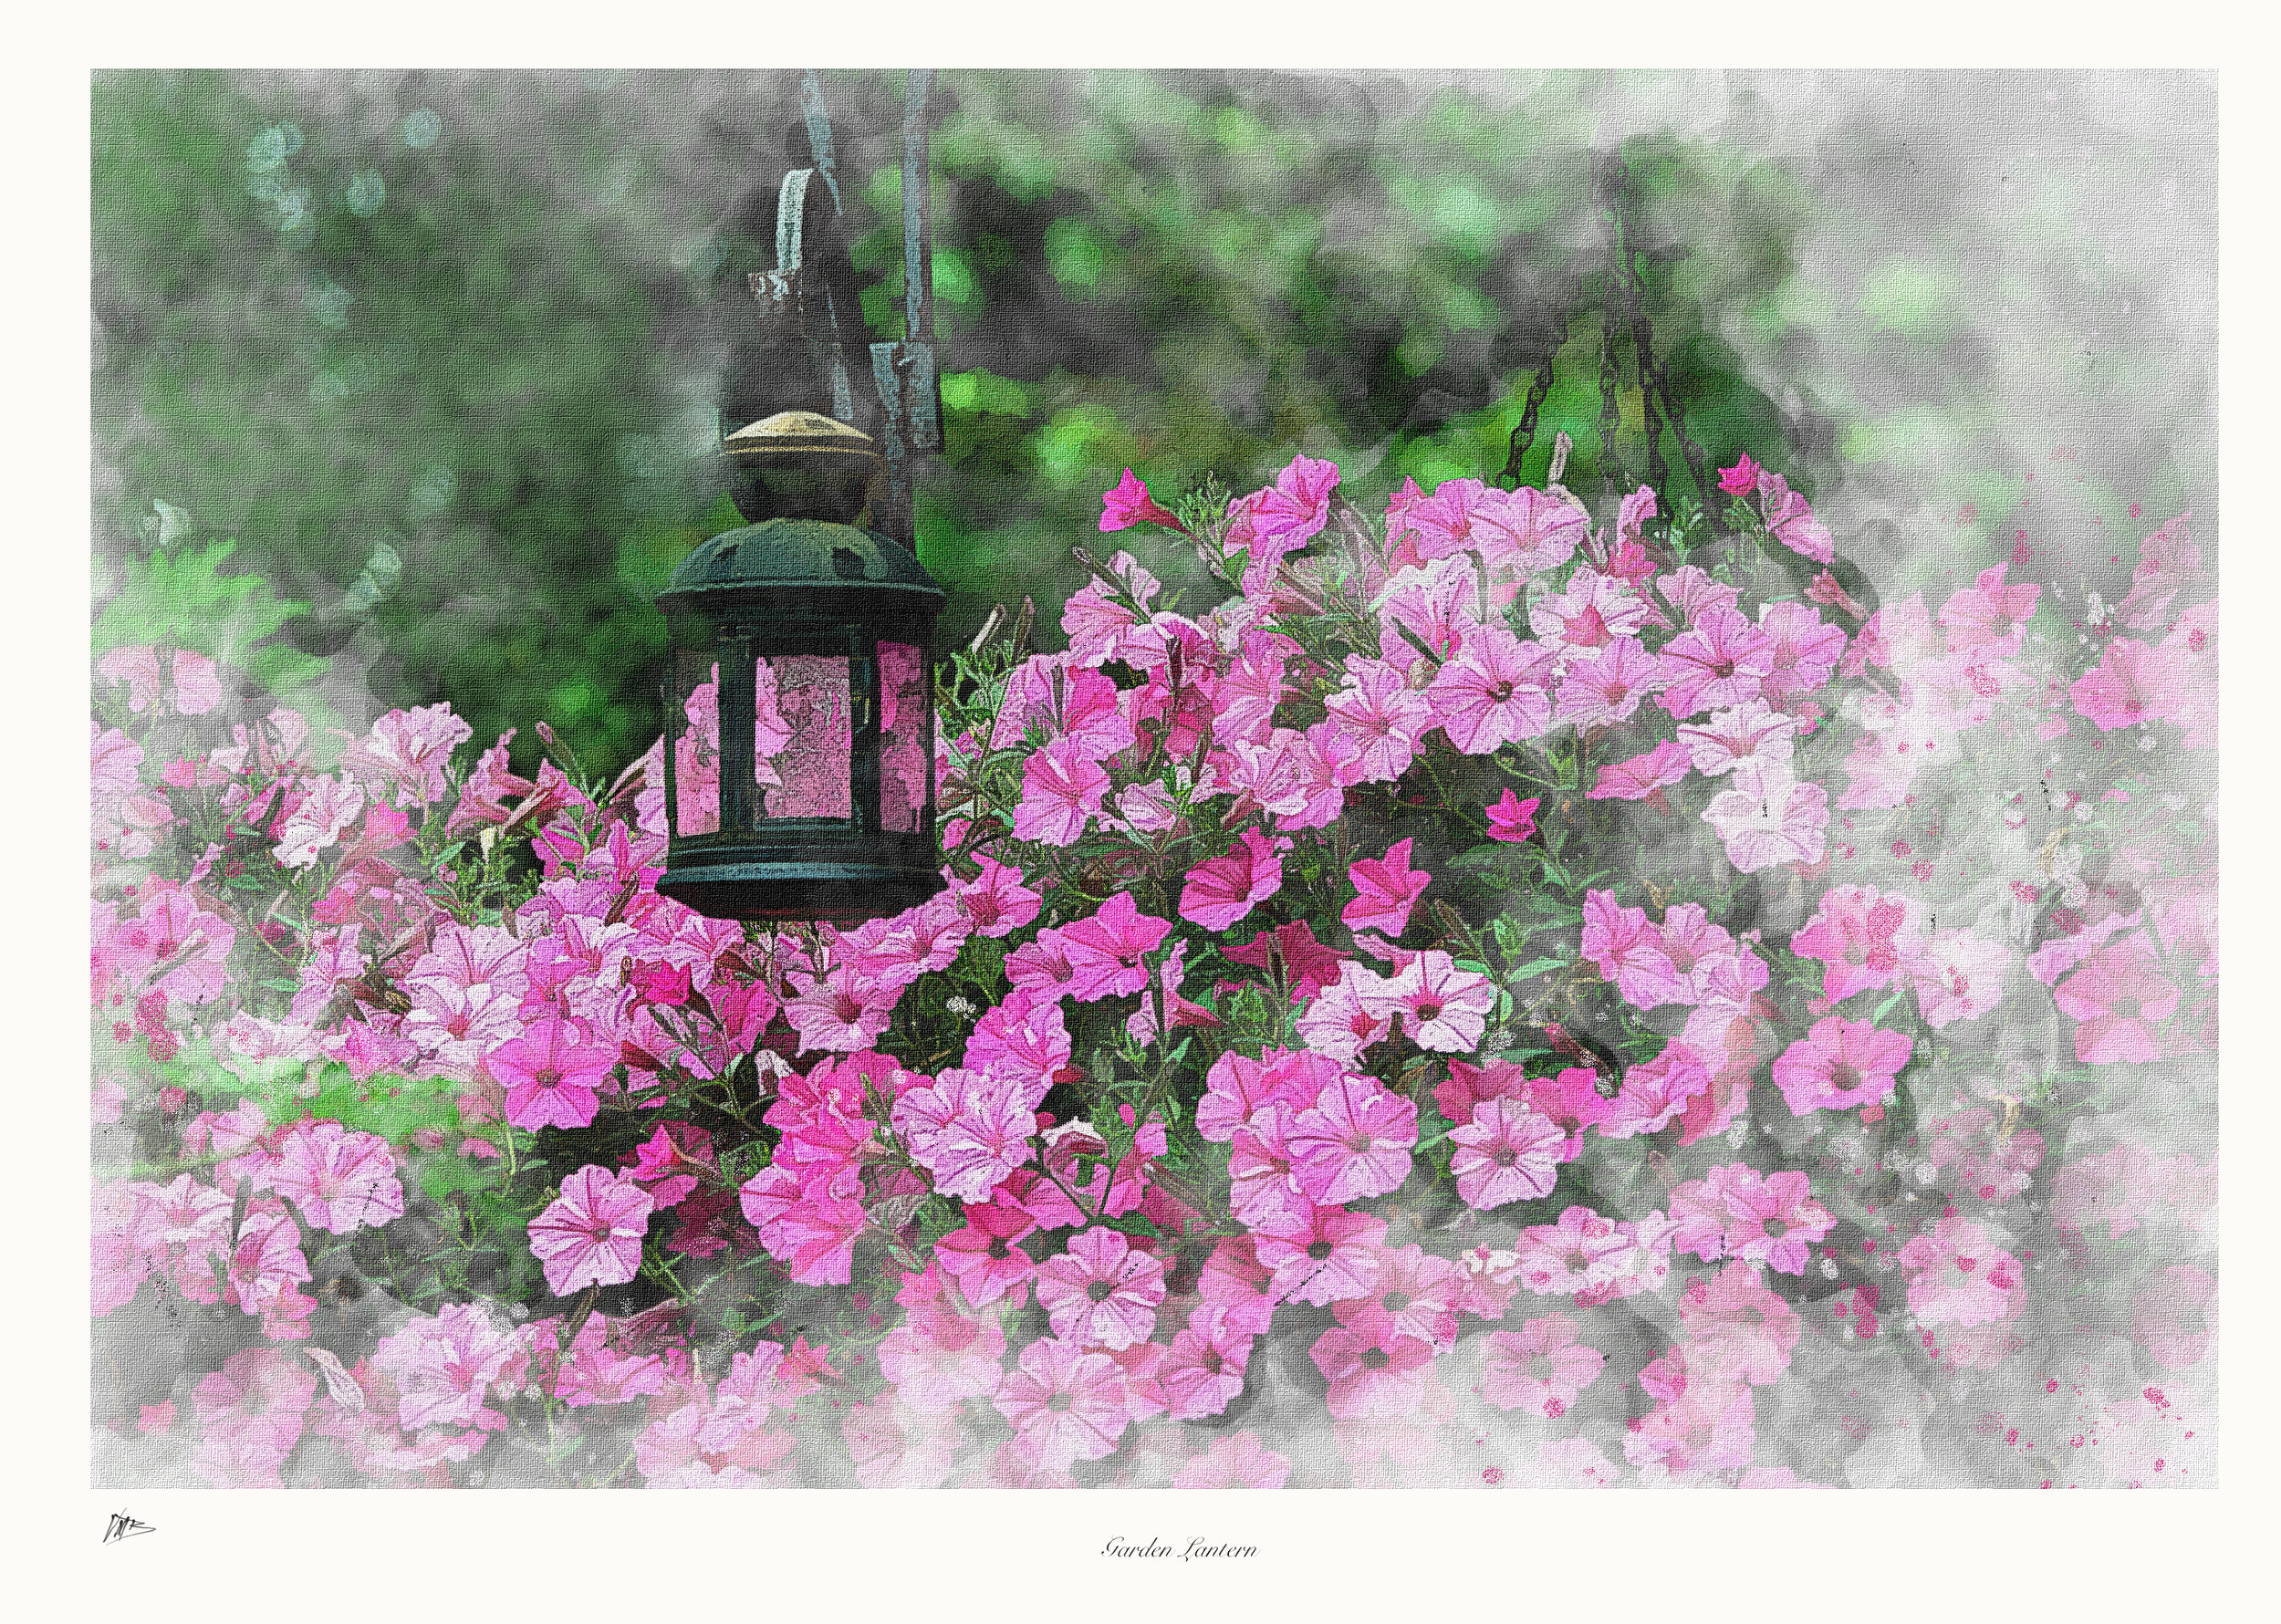
This painterly image of a typical backyard scene is an example of how you can transform you backyard photography into works of art.
Most of these processes involve creating high-key images of birds in winter or flower images. These results can be beautiful in their own right, but a growing trend in photography is creating a dark and moody feel in the images that often revolves around the greens contained in the image. This involves converting your vibrant spring and summer greens into dark, moody greyed-down greens while maintaining the other colours in the image.
I don’t consider myself an expert in post processing images, but I recognize that being able to create memorable images – whether they are fall scenes, portraits or garden images – requires some familiarization with these photography post processing computer programs.
Mastering basic techniques can transform your images from standard photographs into impressive works of art or simply bring out the best in your photography.
Below are just a small sampling of my Moody Green images I created using my Lightroom preset.
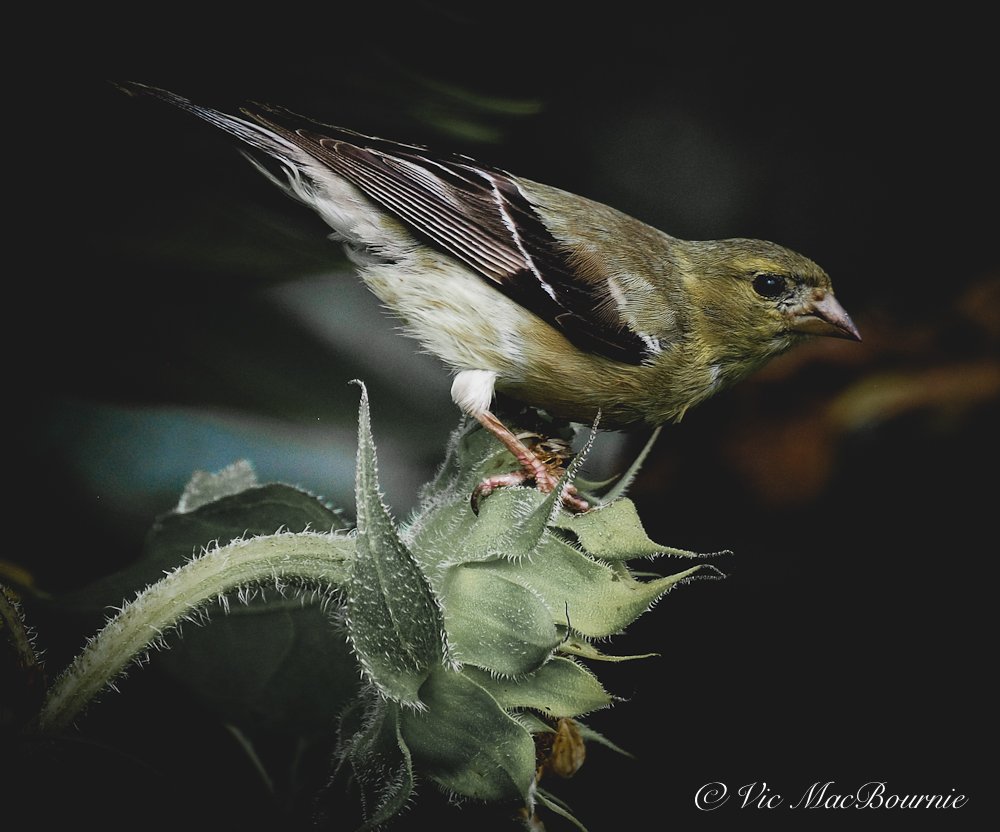
This image shows a goldfinch on sunflower that is post processed using my moody green preset in Lightroom.

This image of Black-eyed Susans and Blue Lobelia was taken with a vintage Auto 110 lens on the Pentax Q and then transformed with my Lightroom preset that darkens the bright greens but allows the other colours to appear more saturated.

Notice how the moody-green preset transforms the greens in the image while leaving the magenta colours in the obedient plants.
Create your own Moody-Green preset in Lightroom
So, how do we transform these images from average to memorable moody green garden photographs?
While similar effects can be created in Photoshop and other photo post processing programs, I simply use an older version of Lightroom to create the effect.
Lightroom presets are usually just a good starting point
Anyone who uses Lightroom presets knows that they are usually nothing more than a very good starting point.
Instead, you’ll likely need to tweak each individual image to get the desired results. Sometimes that involves decreasing the exposure, raising the blacks, playing with the shadow sliders or working with the HSL (hue, saturation and luminence) sliders to perfect the colours in the image.
The main focus of the dark-green moody look is to grey-down or add more black to the greens in the image. This is done by desaturating the greens while leaving most of the other colours intact to some degree.
Many photographers sell their favourite presets
You can purchase a moody-green preset from many photographers who offer them for sale on-line usually on their personal websites. All of these presets would likely give you slightly different, but similar results. By tweaking your finished presets, you can create more presets with slightly different looks that might work better with another type of image.
Once the original preset is tweaked, ensure that you save it under a different name. I have created a number of presets to give me different results from cinematic effects to high-key pastel images.
Rather than try to sell my moody green preset, I offer it here for readers to experiment and create on their own.
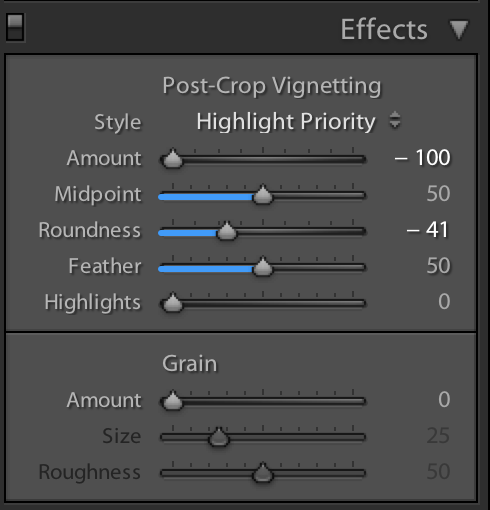
Here are my preset settings for Moody Green images
The following are my settings to create moody-green images with Lightroom 4. More up-to-date versions of Lightroom will give you finer control of the sliders, but the end result should be similar.
Feel free to copy these levels to create your own moody-green preset. Remember, most images will still need tweaking to achieve your desired results. Also, be warned that some images will not work at all with this and other presets.

Getting started with creating your own Moody-Green preset starts here. Notice the right side panel that the highlights are turned down, shadows are way up…


Creating presets in Lightroom
By following the above settings, you should be able to create the moody look that is so popular on social media these days.
Once you have created an image you are satisfied with, simply save the Lightroom preset under Develop/new preset.
By going through your existing images and picking out photographs that you think might work with the Moody- Green theme, you can test it out with the click of your mouse.

Mature Japanese Maple is star of the woodland garden
There is nothing like a mature Japanese Maple in a landscape with its elegant horizontal branches stretching out and shading the ground below.
How to properly grow, prune and plant Japanese Maples
A mature Japanese Maple is truly a spectacular site no matter the season. Their slow growth habit also makes even a mature Japanese Maple the ideal tree for today’s more compact front and back gardens.
Even in maturity, most Japanese Maples will reach only 15-20 feet (4.5 meters) in height. But getting to these lofty heights will take a while considering they will grow on average only about 1-2 feet (about .5 of a meter) per year. These non-native trees are generally hardy in zones 5-8. If planted in a sheltered micro-climate area close to your home, you might be able to stretch it to even lower zones.
That’s why a Japanese Maple (see image below) was the first tree I purchased when we moved into our home more than 25 years ago.

This images shows a trio of Japanese maples in our Japanese-inspired garden. The large, mature tree was the first tree we planted on our property 25 years ago. In the foreground is a weeping cutleaf Japanese Maple. A third Japanese Maple grows in the black container. A fourth Japanese Maple is actually growing in the garden behind the main maple.
I remember purchasing it on sale for about $25. Today, it’s a large, mature Bloodgood Japanese Maple that takes a prominent spot in our front garden and anchors our Japanese-inspired garden.
Twenty-five dollars and 25 years later, our little Japanese Maple – home to a red-eyed vireo family one year – is now a priceless addition to the front yard and contributes immensely to the curb appeal of our modest home.
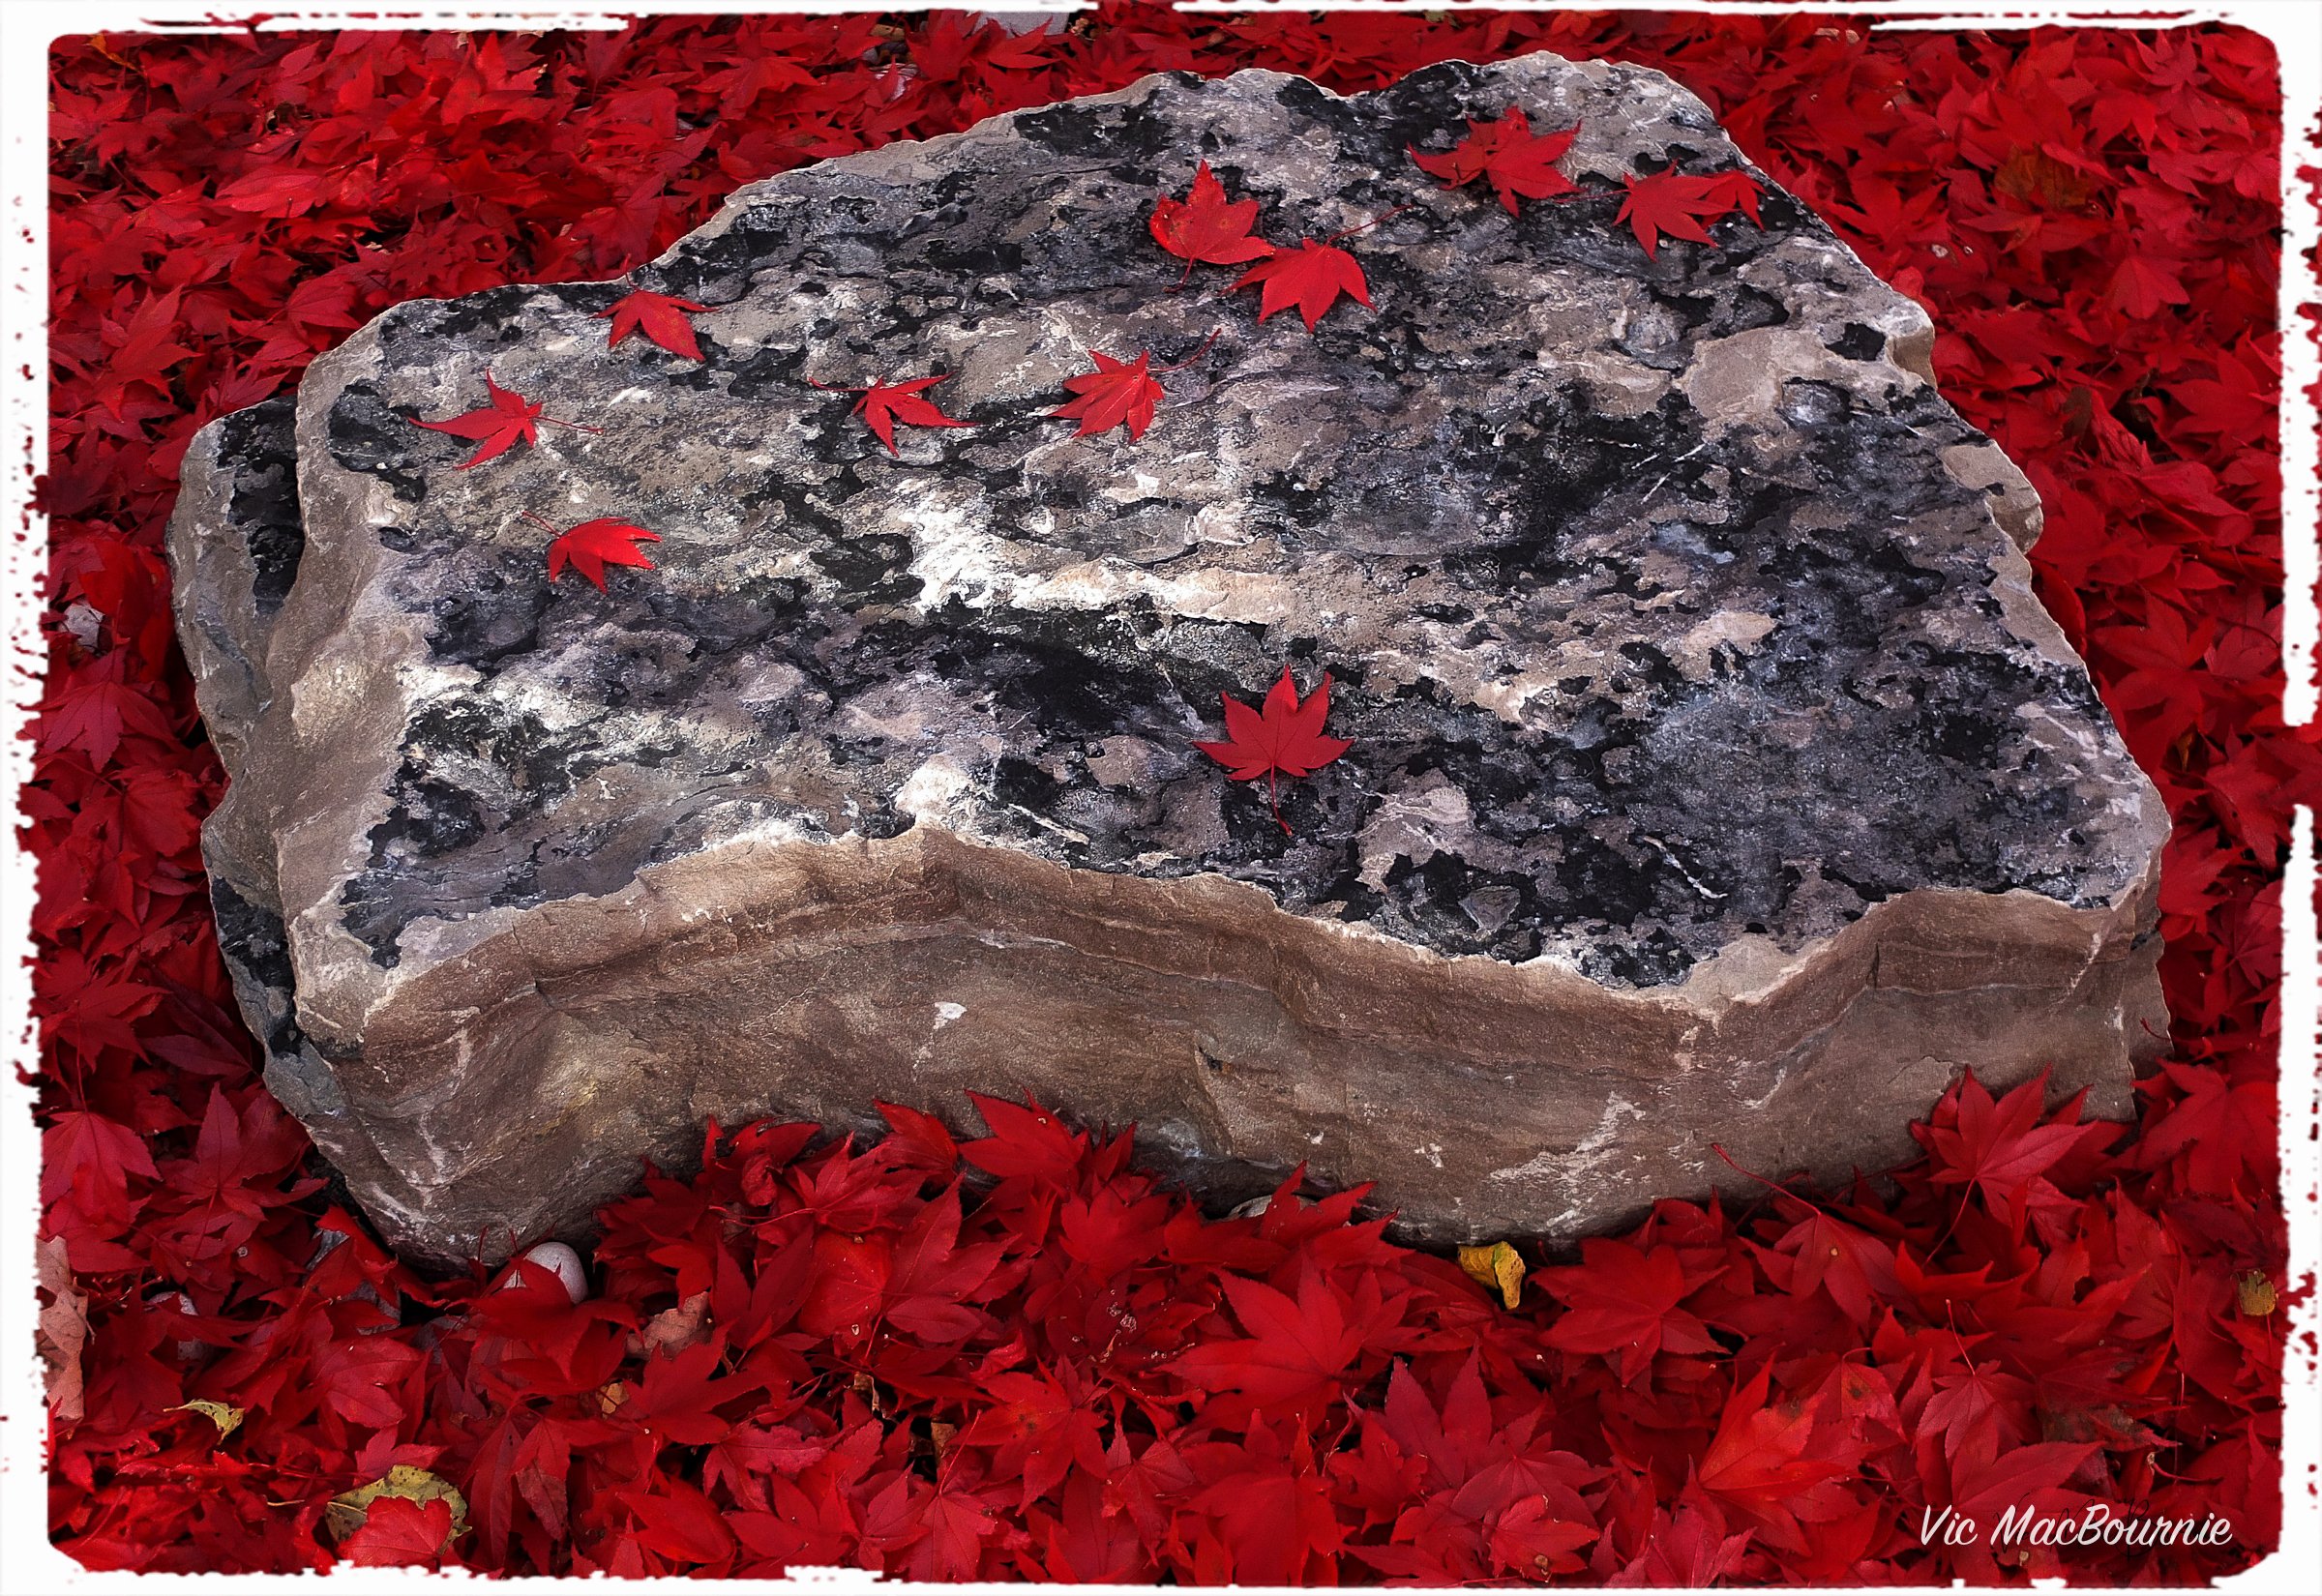
Japanese maple leaves form a beautiful, vibrant ground cover after falling off the tree.
Its beauty is evident in its early spring foliage which gives way to a darker red leaf colour through summer changing to an incredible crimson red in fall before the leaves all drop over the course of a day or two and create the most magnificent ground cover for several glorious days. The image above shows the leaves shortly after falling from the tree in fall and creating the most glorious of ground covers.
• For more on using Japanese Maples in the landscape check out my other posts:
•How to Use Japanese Maples in the Landscape

These images of mature Japanese Maples are illustrative of how these magnificent trees should be grown with respect and reverence for their inherent beauty. Any pruning should be done discretely to enhance their natural beauty.
Consider mature size when planting a new Japanese Maple
It’s important to consider the final, mature height and width of these trees when you decide to plant one.
Since there are many different Japanese Maples – all with varying growth habits – it’s important to do your research on the particular variety of tree you have purchased to ensure that you give it room to spread out.
It’s easy to think this tiny tree will stay small all its life and plant it too close to your home or other structures.
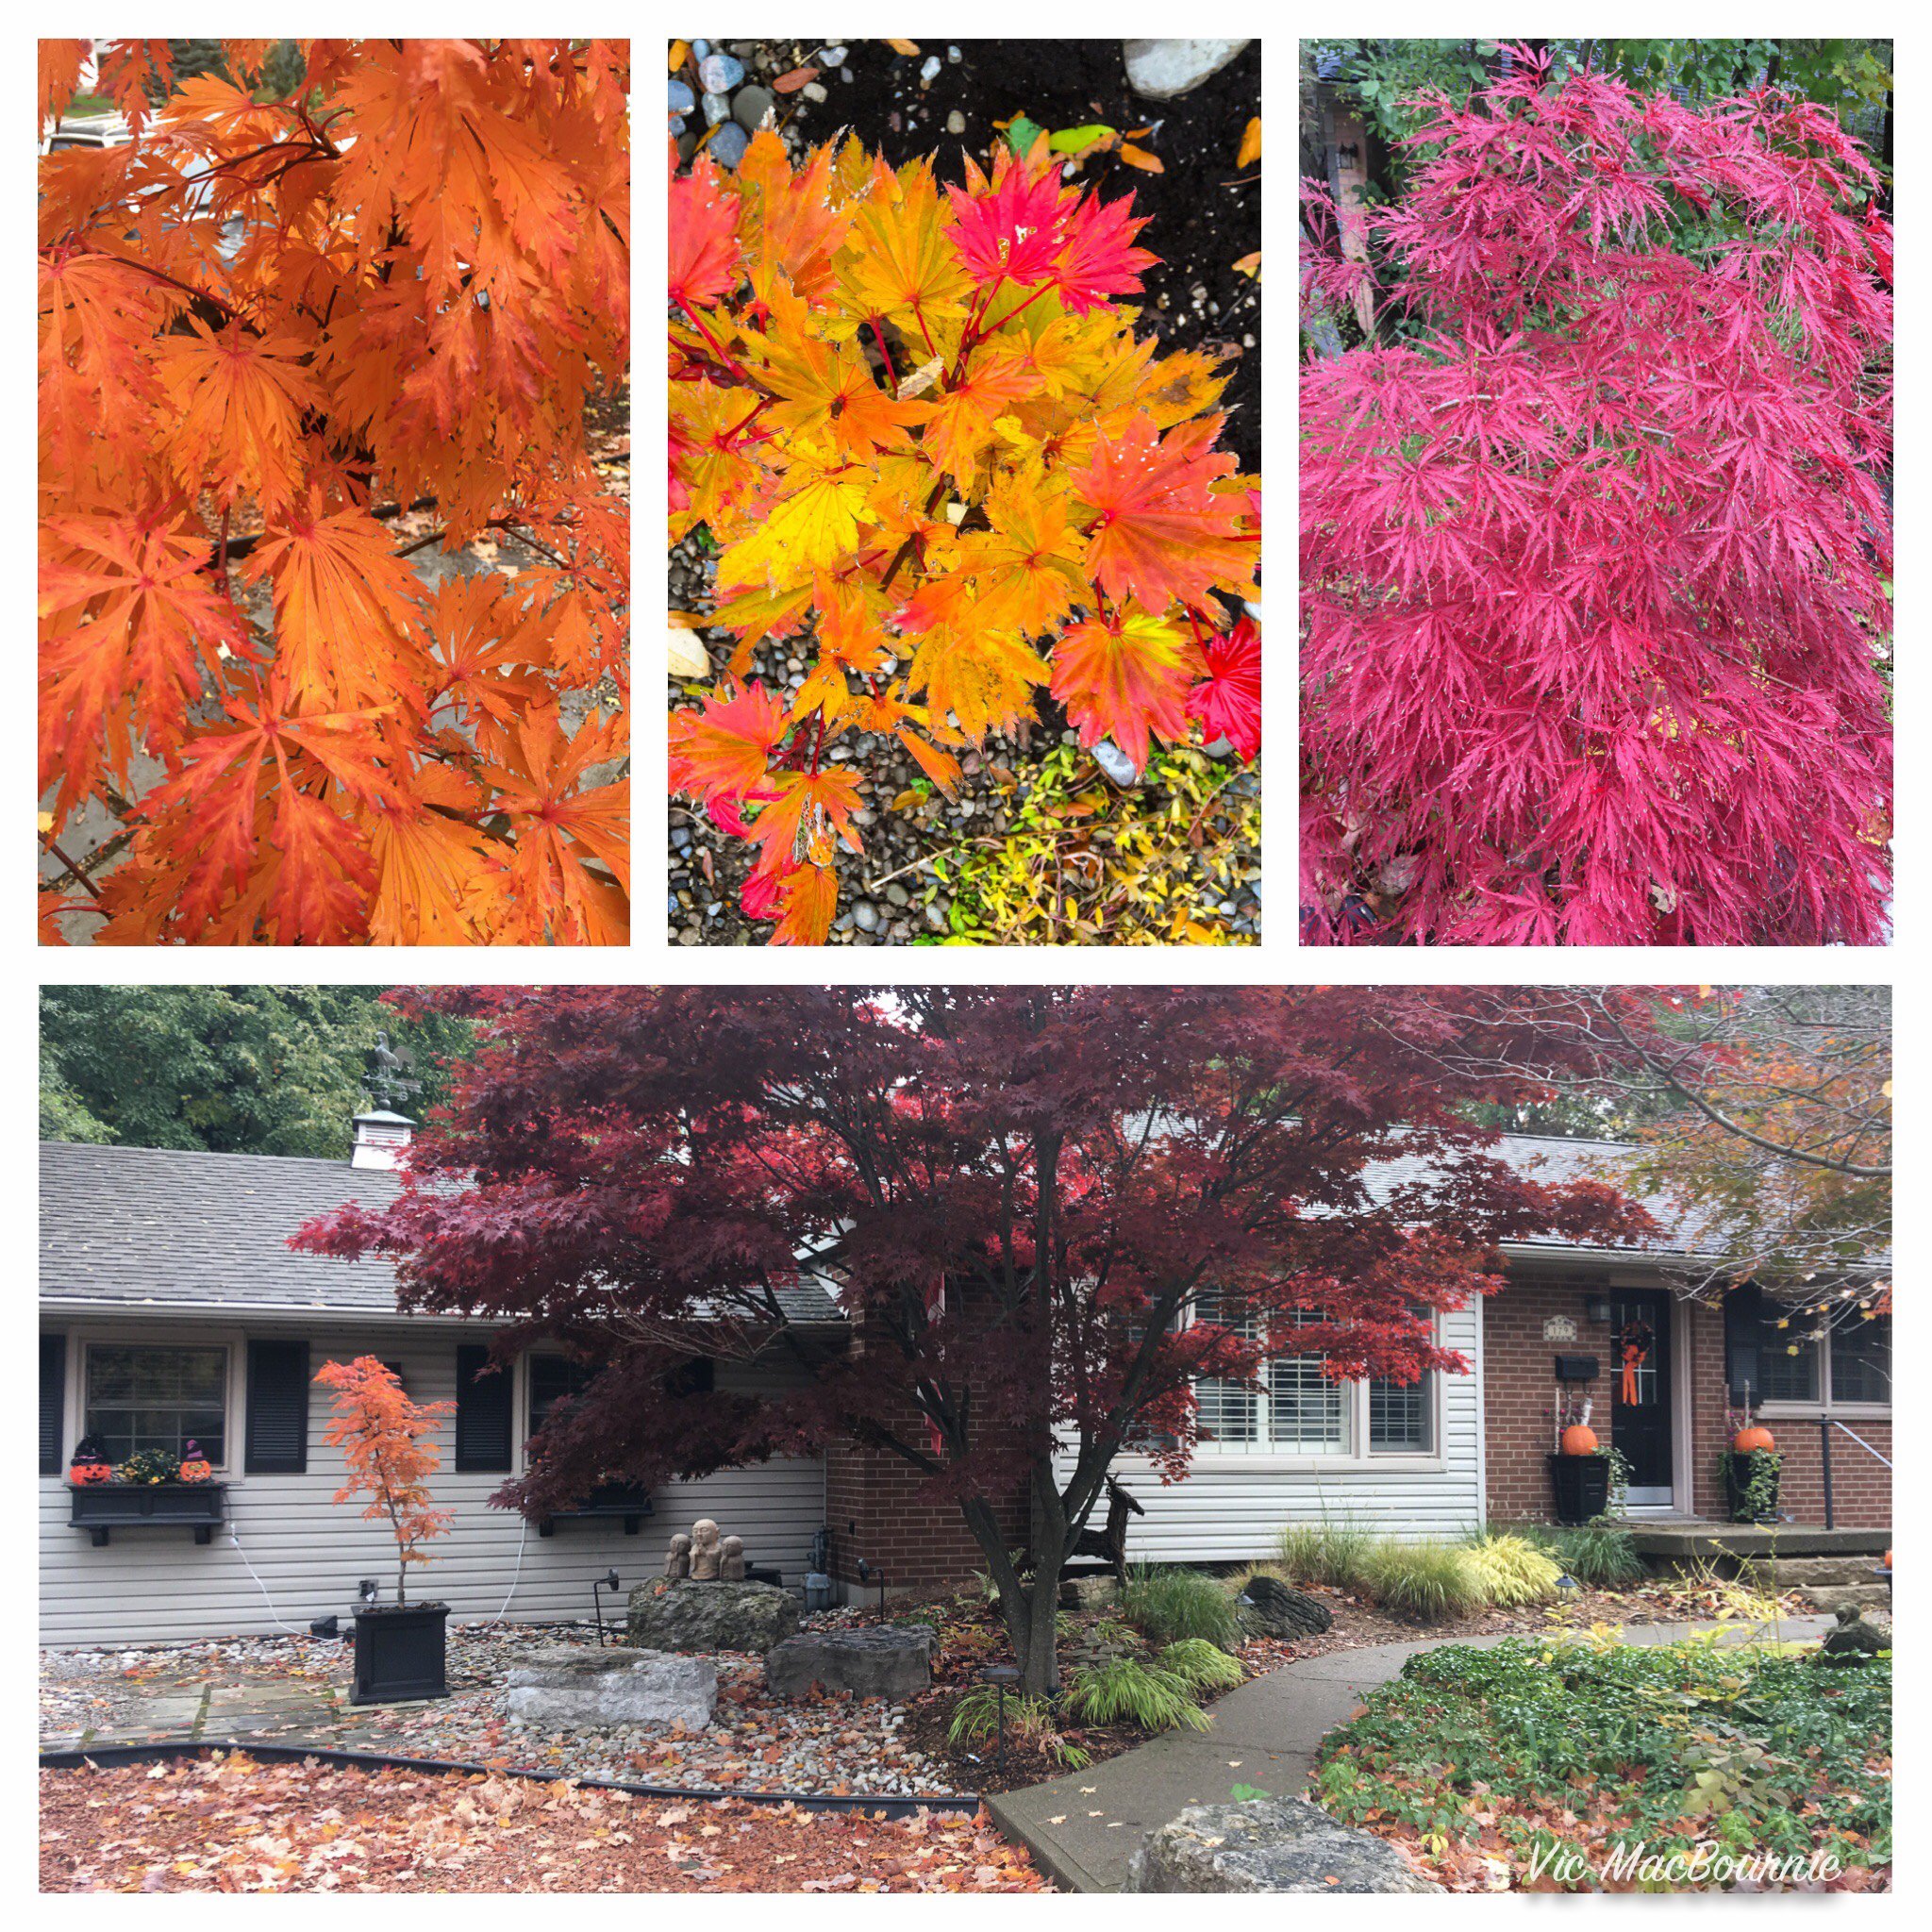
Image shows a mature Bloodgood Japanese Maple and the various leaf patterns of the different Japanese Maples including the Laceleaf, full moon and cutleaf varieties.
Let your Japanese Maples spread their horizontal branches
Although they don’t grow very tall, most Japanese Maple’s, except for the weeping varieties, are meant to be grown in a way that allows their branches to spread out horizontally.
In fact, a properly grown, mature Japanese Maple can have a horizontal spread equal to or even greater than its height.
As Japanese Maple trees mature, they should be treated more like a flowering dogwood trees and allowed to take on their natural shape. These are not trees you want to heavily prune into tight balls or columnar shapes. (There is a columnar variety available if you really have a constrained space.)

A mature Japanese Maple in fall colours.
Please don’t heavily prune these trees into ridiculous shapes. As they mature, these majestic trees deserve to be allowed to grow the way nature intended.
If you are not sure how to prune these trees, either leave them to grow on their own, or hire a professional tree pruner who specializes in Japanese Maples. Be careful, a lot of tree companies will tell you they can prune the tree only to destroy your tree’s lovely horizontal shape.
I was actually shocked to see one of the top garden websites’ using an image of a Japanese Maple pruned to the point that I’m sure would be a crime in Japan or at least a mortal sin. In all seriousness, just plan to give these trees ample room to spread out and you will be amazed at how beautiful they will become in time.
Acer shirasawanum 'Aureum' (Golden Full Moon Maple) in its fall colours.
Japanese Maples for very small or tight areas
Ont of the great things about Japanese Maples is that there is a huge variety available, including ones that never get very large at all.
So, rather than trying to grow a Bloodgood variety in a tiny space, consider one of the slower growing varieties that never get much larger than three or four feet. These include the cutleaf weeping Japanese Maples that can be spectacular in their own right.
However, there are acer palmatum varieties with such a slow growth rate that they will never get too large for a small space.

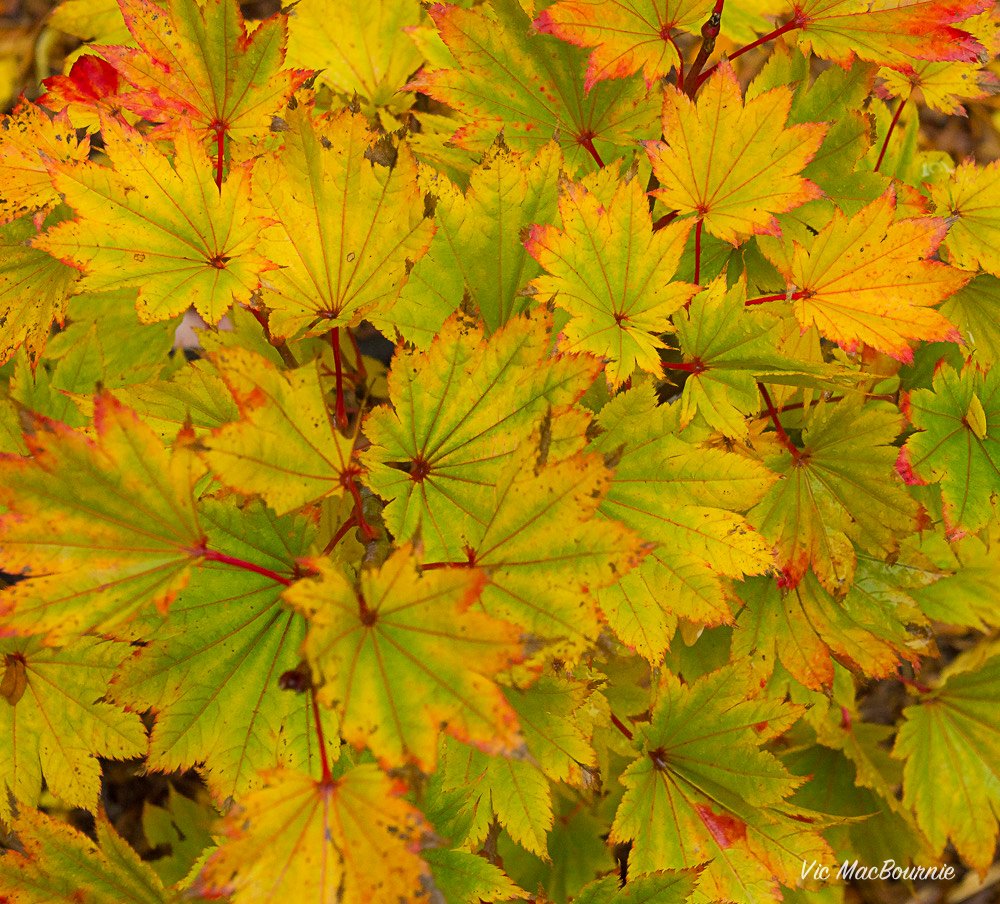
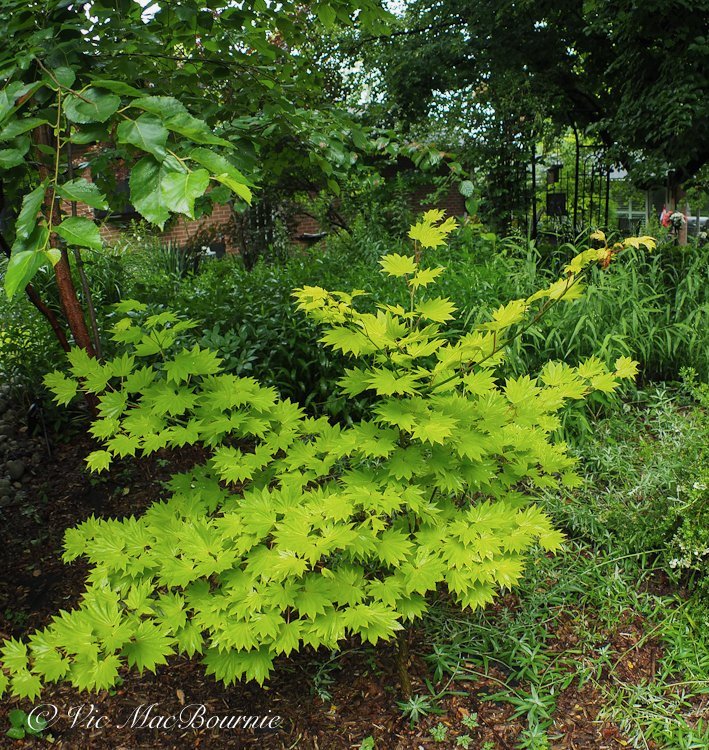
A very young Acer shirasawanum ‘Aurem’ Golden Full Moon Maple growing in our back garden. Below is the same tree after about seven years of growth.
Acer shirasawanum ‘Aurem’ Golden Full Moon after about 7 years of growth.
In our woodland garden, we have a Acer shirasawanum ‘Aureum’ (Golden Full Moon Maple), with a mature height of about 15 feet. It’s extremely slow growth habit means reaching this height would probably take your lifetime. A lovely mature specimen can be seen here on Kiefer Nursery’s website.
One of the more expensive and surely one of the most beautiful specimens, these are best grown as a true understory tree in the shade of larger trees where they can get ample shade to protect their magnificent golden foliage.
Diseases to watch for in your Japanese Maples
Japanese Maples are relatively healthy trees without any significant diseases. However, like any plant, they can still be susceptible to certain diseases.
One common disease that affects Japanese Maples is powdery mildew. This fungal infection appears as a white, powdery coating on the leaves, causing them to become distorted and eventually drop off. Powdery mildew thrives in humid conditions, so it’s important to ensure good air circulation around the tree and avoid overhead watering.
Verticillium wilt can be deadly for Japanese Maples
Another disease that can affect Japanese Maples is verticillium wilt. This fungal infection attacks the tree’s vascular system, causing wilting, yellowing leaves, and eventual death. Verticillium wilt is difficult to control once a tree is infected, so prevention is key. Avoid planting Japanese Maples in soil that has previously been infected with verticillium wilt and ensure the tree is well-watered and properly fertilized to maintain its overall health.
I have personally experienced Verticillium wilt that quickly killed two of my favourite Japanese Maples and then took out another red maple in a corner of the yard after I threw the dead Japanese Maple with soil attached in the back near the regular maple. I believe the contaminated soil got into the soil around the young red maple and killed it over the course of a year.
Lastly, Japanese Maples can also be susceptible to root rot, especially if they are planted in poorly drained soil. Root rot is caused by various fungi and can lead to the tree’s decline and death. To prevent root rot, it’s important to plant Japanese Maples in well-draining soil and avoid overwatering.
By being aware of these common diseases and taking preventive measures, you can keep your Japanese Maples healthy and thriving.
Regularly inspecting the tree for any signs of disease and promptly addressing any issues that arise will help ensure the long-term health and beauty of your Japanese Maples.
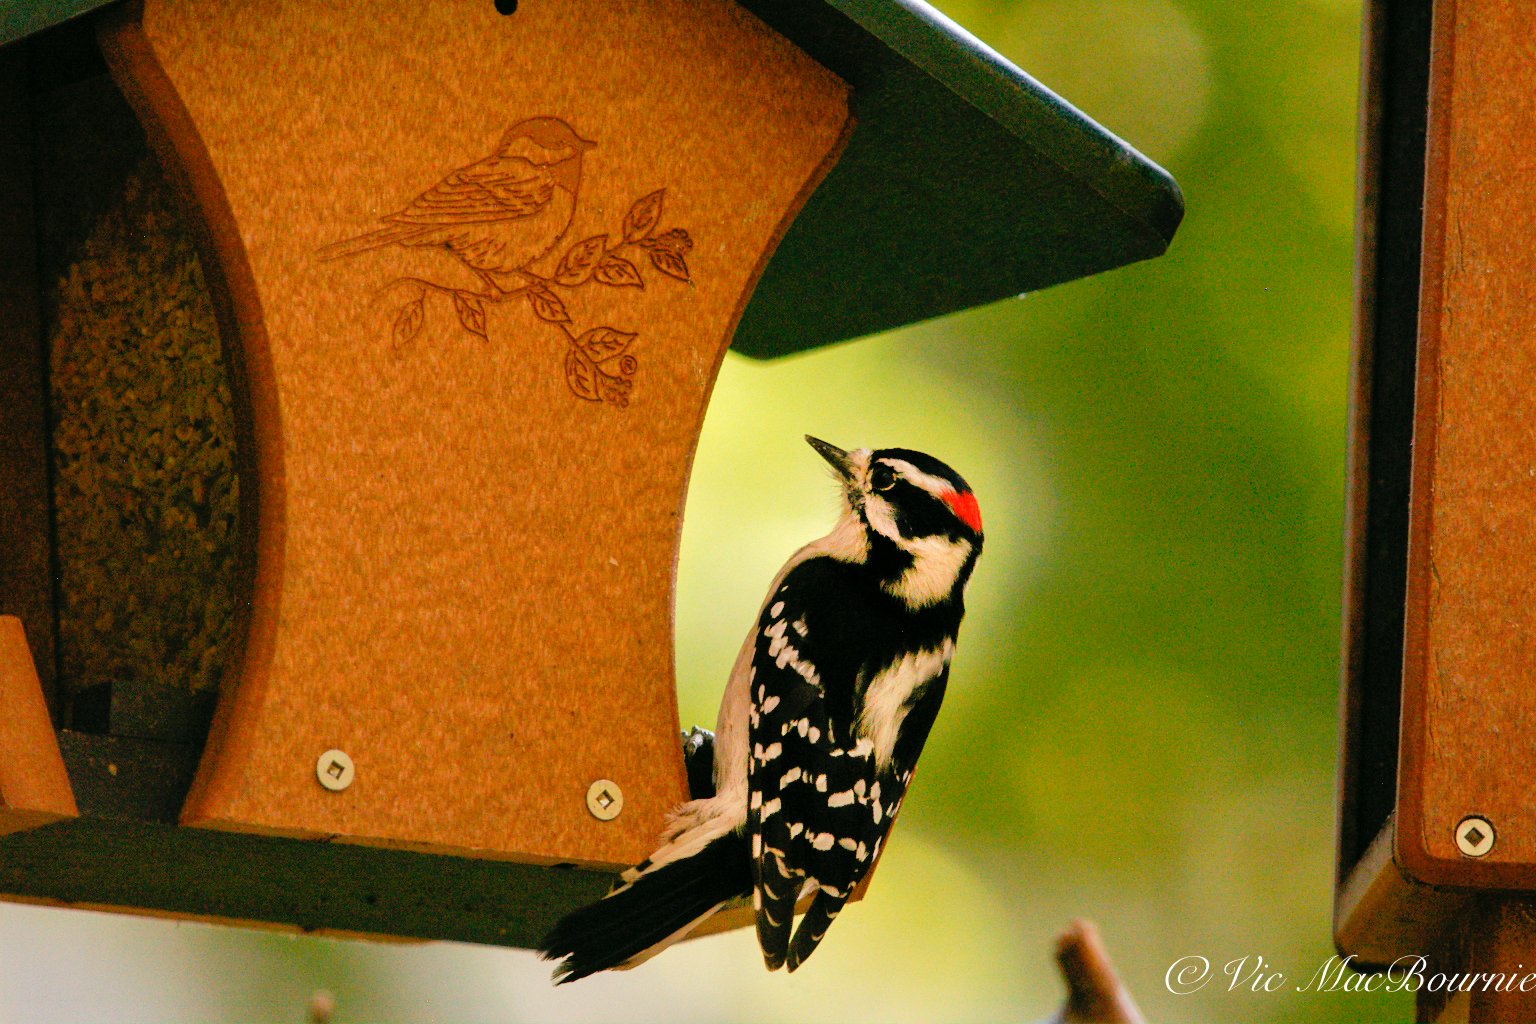
Large bird feeder plays big role at feeding station
Large bird feeders are an excellent choice to not only provide a reliable food source for backyard birds, but also makes keeping them filled less taxing, especially in winter.
Fill-and-forget-it makes larger bird feeder best choice

A large resin, hopper-style feeder is a good all round choice as a bird feeder.
A large bird feeder is a great investment to attract a huge variety of backyard birds.
In fact, incorporating a large bird feeder into your backyard-feeding strategy will play an important role in both attracting more birds as well as making the feeding experience much more enjoyable.
Let’s face it, going out every day to fill your feeders can quickly become a chore you can do without.
More importantly, if you fail to keep your smaller bird feeders full, backyard birds may look at your feeding station as an unreliable source of food and go elsewhere.
If you are just starting out on your bird feeding journey, purchasing the largest, high quality bird feeder you can afford is probably your best chance at success. It’s a lot easier to keep a large feeder filled and ensure the birds return to a reliable food source than to spend your time trying to keep a small feeder filled.

Our bird feeding pole showing a number of feeders including the large black industrial strength fly-thru feeder on the right.
One visit from a squirrel, and the small feeder can be emptied in minutes. If the empty feeder goes unnoticed for any period of time, birds will begin to look elsewhere for a reliable food source.
Consider using smaller feeders for more specialized seeds, including niger, safflower and millet. These sources of food are preferred by more specialized birds and, for the most part, are not as appealing to squirrels. There is a good chance they will not be raided by squirrels or birds looking for sunflowers. As a result, they will need less filling and monitoring than if they were filled with more desirable sunflower seed.
Three large feeders add variety and reliability
I use three large feeders at various times during the year. One is ideally built for black oil sunflower (see image above of large black screened feeder), another is a large feeder that works like three smaller feeders that allow me to offer a variety of food to specific birds. The final feeder is a larger, covered hopper style feeder that is good for a variety of birds and seed concoctions.
If you are either looking to purchase your first feeder, or your first large feeder, consider purchasing a large resin hopper feeder, They tend to be the best all-round choice. The larger feeders not only hold plenty of seed, but they offer sufficient space for larger birds like blue jays to perch while they eat.
Industrial strength black oil bird feeder
The black oil sunflower feeder is a massive, fly-through, industrial type feeder that leaves the seed completely open to the elements. Made from industrial strength steel mesh, this is an ideal fill-and-forget-it feeder that can act as a real magnet for many backyard birds that thrive on black oil sunflower seed. That, as most of us know, includes almost all backyard birds.

The above Green Meleave Bird Feeder, that holds up to 6.5 lbs of seed, is similar to our larger industrial fly-through feeder. This high quality feeder is made entirely of metal and the bird-shaped safety lock lid makes the feeder extra secure against squirrels, deer and raccoons.
Our large black industrial-grade feeder makes it the ideal feeder to take on squirrels and even racoons that might make it up our feeder pole system. Even deer have trouble shaking out much seed with their noses.
Because its metal screen leaves the seed open to the elements, black oil sunflower – with its protective outer shell – is best used in this feeder.
Our feeder is large enough to allow several birds to feed on it at once, including several smaller birds that can actually fly into the interior of the feeder and feel protected surrounded by their favourite food. I can’t help but think birds imagine themselves in heaven when they actually fly into the feeder and realize they are literally surrounded by their favourite food.
This feeder can stay full for more than a week, depending on the time of year and the number of birds using the feeding station.

Three cylinder feeder offers variety of seed to specialized birds
The second feeder we use on a regular basis is a large, three-cylinder feeder like this one from Heath that allows you to feed three different types of food and includes 6 feeding perches. These feeders are particularly attractive to smaller perching birds.
These feeders are completely covered and do a good job of keeping the seed dry even in harsh weather conditions.
I use this style of feeder to provide a variety of bird feed to attract more specialized birds at different times of the year. In spring and summer, for example, I use one of the feeding cylinders for white proso millet, which is a favourite for Indigo Buntings. In another cylinder, safflower can be used to give Cardinals their own special treat. The third cylinder can be filled with a combination of no-mess sunflower seeds and meal worms for nuthaches, chickadees and woodpeckers or specialized finch food for goldfinches, housefinches etc.

Hopper-style feeders are excellent choices for general bird feeding. The larger hopper in the front not only holds more food, but gives larger birds more area to perch while they eat. The size of the feeder you choose is in part dependent on the type of birds you are looking to attract.
Large hopper-style feeder is always a solid choice
The final choice is a large hopper-style feeder that is an excellent all-round feeder for a variety of birds.
I particularly like the resin-feeders (see post on why resin feeders are superior to wood ones) for their more hygenic properties.
Filling these feeders is easy and cleaning them, especially the Wild Bird Unlimited feeders that have removable bottom plates, involves a simple blast of water and a little soap.
I use the large hopper feeder and a smaller one to hold the expensive, no-mess feed that is my mainstay for most of the summer when I don’t want a build-up of seed and husks under the feeders.
I also recommend trying to purchase resin feeders over the wood ones. Although the more modern resin feeders are more expensive, they tend to last longer and, most importantly, are easier to clean. For more on choosing resin feeders over wood ones.

This Audubon squirrel feeder, available on-line from walmart offers strong construction and weight sensitive feeding….
Another option is to invest in a steel hopper-style feeder much like this one available from Walmart and other sellers. This hopper style feeder even has weight sensitive adjustments that help you target the type of birds that can use the feeder.
This style of feeder was one of the first feeders I purchased when I started to feed birds. The feeder was exceptionally well made and lasted for years before I replaced it. The all-metal construction makes them ideal for situations where squirrels and racoons are a problem, and the touch sensitive feeding bar makes it ideal for discouraging larger heavier birds like Blue Jays, Grackles and blackbirds that tend to throw feed on the ground in search of their favourite seed.

Large covered table feeders can be a useful addition
Now that we have explored the importance of including a large feeder as part of your bird feeding arsenal, let’s look at another large feeder that also offers lots of potential.
Feeders such as the Large Amish Homemade Gazebo Vinyl Bird feeder (also pictured above as a clickable Amazon link), is an ideal choice for those looking for both an attractive and an effective bird feeder. The fact it is vinyl rather than wood makes the feeder even more desirable.
Large covered table feeders can be ideal to attract certain types of birds to your yard. Many of these feeders are also very attractive and can be used as functional pieces of art in your landscape.
To show them in their best light, these feeders really need to stand alone in a picturesque area of the garden where they can shine. Look for feeders like the Large Amish Homemade Gazebo feeder that has a large, built-in seed storage container.
Without built-in seed storage, the covered table feeders either have to be filled on a daily basis, or simply become attractive works of art in the landscape.
If they are used as stand alone feeders, they will also need to have their own pole and guards to keep squirrels and raccoons off the feeder.

A nuthatch feeds from a small resin hopper-style feeder.
Can a large bird feeder save you money?
Whether you are just starting out on your bird feeding journey, or have been feeding backyard birds for a number of years, investing in a large high-quality feeder is a good choice.
A large feeder will help ensure that your yard becomes a reliable source of food for the neighbourhood birds. They are particularly important in winter, when keeping feeders full becomes both more important as well as more difficult.
Large backyard feeders can indeed save you money in several ways. One of the main advantages is that they allow you to purchase bird seed in bulk instead of smaller bags. By having one or two larger bird feeders, you can use an entire large bag of bird seed, which is usually more cost-effective than buying multiple small bags. This way, you can take advantage of bulk discounts and save money in the long run.
Another benefit of using larger feeders is that they can help minimize food waste. When squirrels, raccoons, and deer are unable to access the feeders, there will be less spilled food or seeds eaten by these critters. This means that more of the bird seed will be available for the birds you are trying to attract, reducing the need to constantly refill the feeders and ultimately saving you money on bird seed.
By investing in larger backyard feeders, you not only save money on bird seed but also ensure that the food you provide is primarily consumed by the birds you want to attract. This can lead to a more enjoyable bird-watching experience and a greater variety of bird species visiting your backyard. So, if you're looking to attract backyard birds while also saving some money, consider using larger bird feeders.

Fields of gold: How to create ideal wildlife habitat
Creating a habitat for wildlife can be as simple as a flower border extending down the side of a driveway or across the back of your yard.
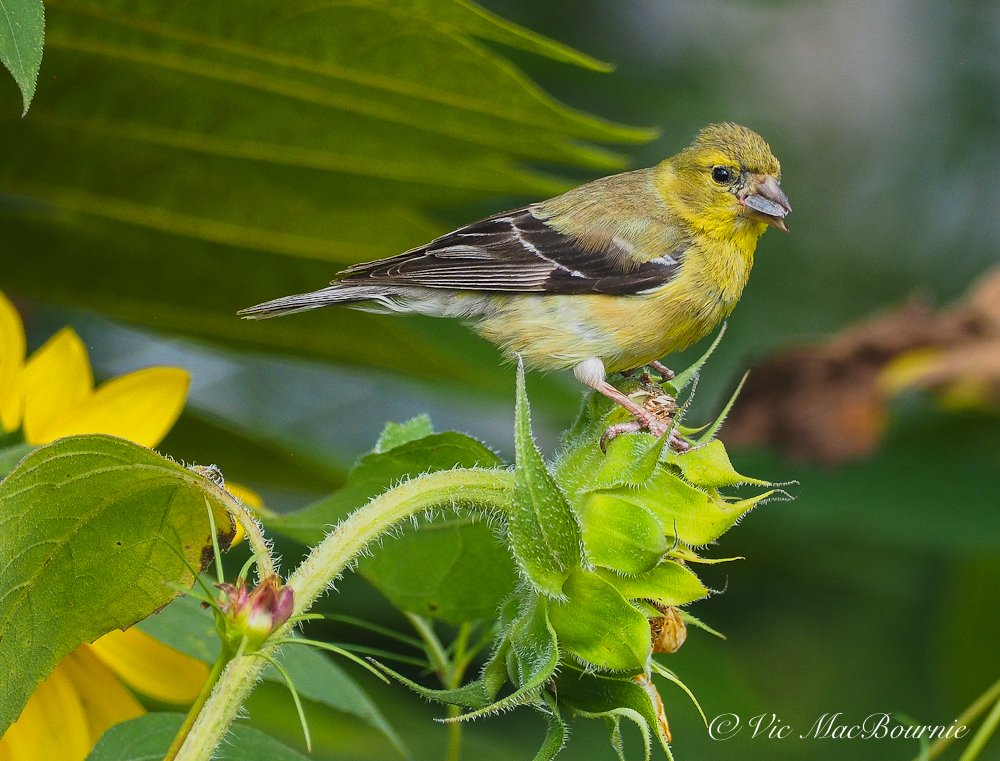
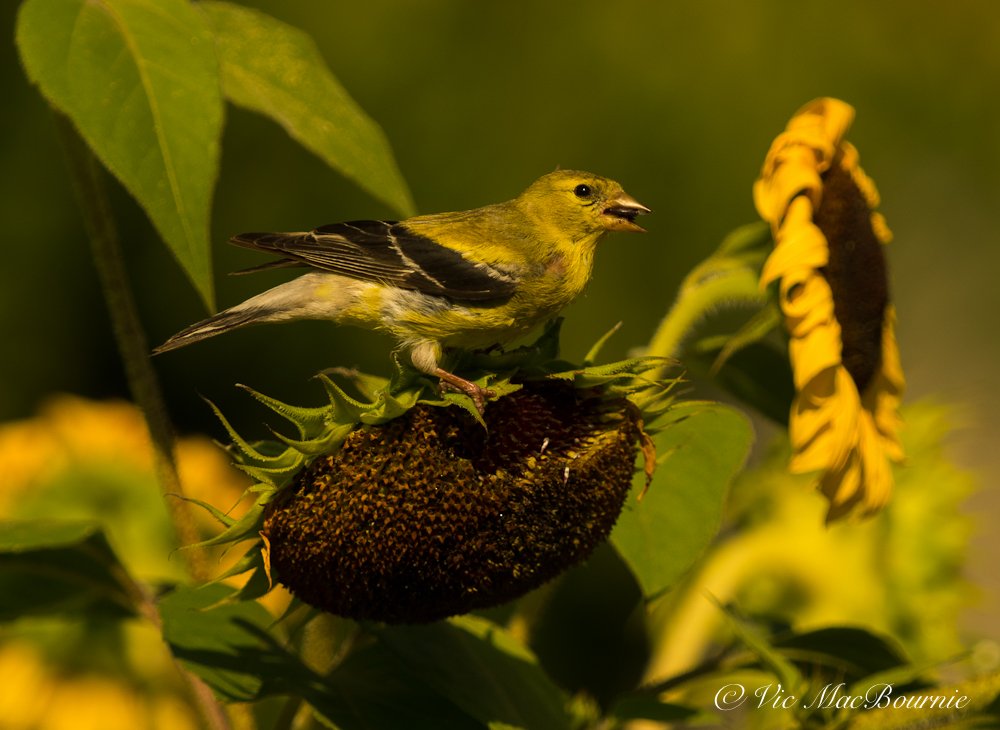
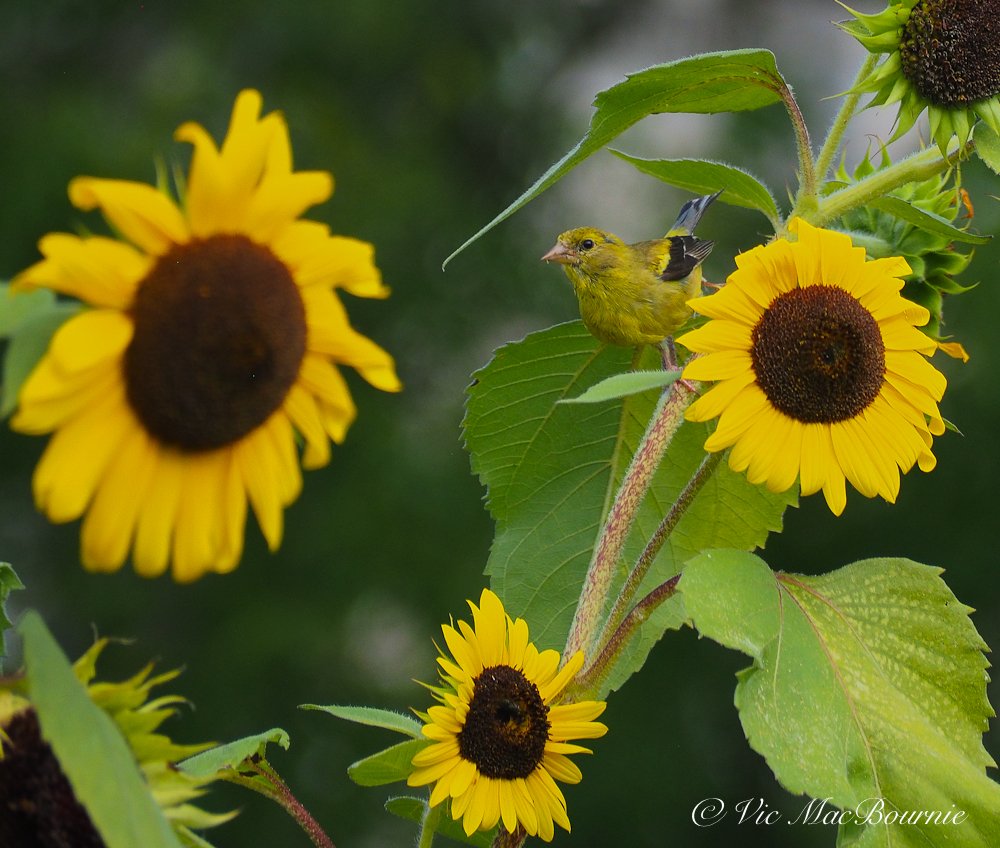
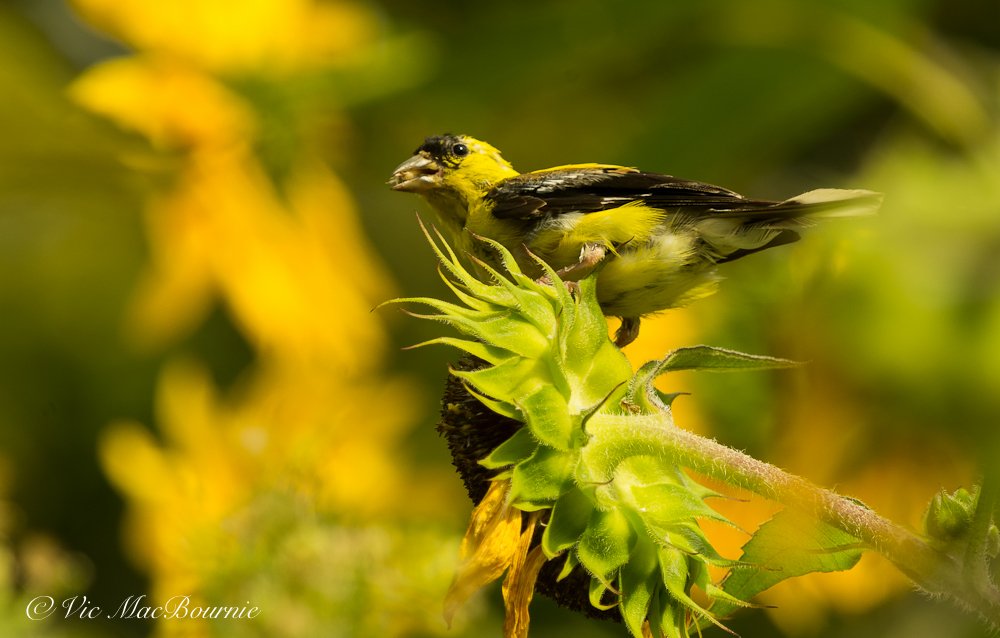
This image shows a goldfinch feasting on a sunflower in a long naturalized border of sunflowers, asters, coneflowers, goldenrod and other native and non-native flowers.
How to create a naturalized flower border for wildlife habitat
The combination of dozens and dozens of colourful Goldfinches and monarch butterflies feeding on hundreds of sunflowers and a mix of other native and non-native plantings was simply too much to pass by.
As a gardener and photographer, these are situations begging us to explore further. The massive border stretching along a roadway leading into an old cemetery is obviously not natural. Although parts of it were planted, it had been left to naturalize on its own resulting in the creation of a wonderful wildlife habitat that would not be difficult – except for its sheer size – to duplicate in our own gardens
This is not a typical precious garden border we see in so many urban landscapes.
Creating a naturalized flower border with a combination of native and non-native flowers, with an eye on providing seeds for birds and other wildlife, is the key to creating ideal wildlife habitat.
(All the images on this post are from the flower border wildlife habitat.)
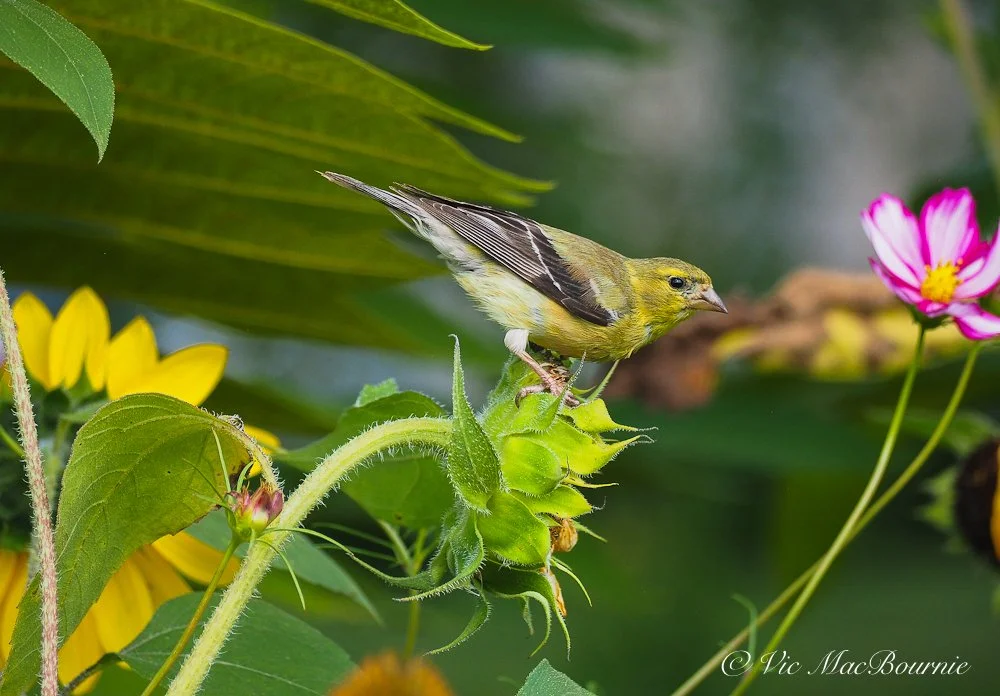
A goldfinch perched on a sunflower among other wildflowers and a colourful cosmos.
How to create wildlife habitat
These plantings grow together creating a wall of foliage where birds, red squirrels, mice, insects and who knows what else can seek refuge in a natural wildlife habitat.
What it’s not is a single coneflower planted in a sea of mulch, or a grouping of three sunflowers held erect with poles and supports.
There are no individual plants in this naturalized border.
This is habitat – real habitat. Habitat that birds, butterflies and a host of other wildlife flock to for food and cover.

A small portion of the naturalized border that could be duplicated in our gardens on a small scale.
If you ever wanted to create outstanding wildlife habitat, this is the way to do it. Take notes, take pictures and work to create something similar in your own backyard.
The border measures at least the length of a football field, yet it is only maybe 10-12 feet deep running along the side of a chain link fence.
In late summer and fall, it is truly a magnificent entrance to what many would consider a solemn place.
But here, it works as a celebration of life if there ever was one!
Goldfinch on sunflower at naturalized wildflower border.
Lessons learned from the ultimate wildlife habitat
Besides its obvious wildlife benefits, the naturalized border’s greatest gift is an opportunity to learn from its magnificence.
We can explore it, study it and learn from it with the idea of creating a smaller version that offers the same benefits to our backyard wildlife.
This is actually a form of mini meadow created from what would have been a wasted strip of grass running alongside a roadway leading into a cemetery. (See posts: Making a mini meadow, and the Making of a Meadow.
It’s really a shame that more cemeteries, golf courses and other public areas don’t adopt a similar approach to wasted spaces where grass seems to be the only option in their minds.

A goldfinch tucked in among the sunflowers growing in a naturalized garden.
The naturalized border provides us with an opportunity to record – even if it’s only in our minds – the vision of a more or less naturalized border incorporating sunflowers, coneflowers, goldenrod, cosmos and a host of other native and non-native flowers.
I love using natural areas as inspiration for our garden. Check out my link for more inspiration on learning from what Mother Nature offers.
Back to our naturalized border and wildlife habitat.
I stumbled upon the magnificent naturalized flower border while out photographing Great Blue Herons and White Egrets at a nearby pond.
It’s not always necessary to move in extremely close to your subject. Don’t be afraid to step back and create a more environmental image showing the bird’s surroundings, especially when they are this beautiful.
After an afternoon with the herons and egrets, (see images below) the flower border literally stopped me in my tracks and forced me to drive over for a closer look.

Goldfinches were not the only ones feasting on the abundance of sunflowers.
As I drove up to it, the long, naturalistic border of sunflowers, coneflowers, New England asters, goldenrod and cosmos, – just to name a few – slowly revealed its true magnificence. Birds and more birds feeding voraciously on the sunflowers, coneflowers and other seed heads that filled the border.
If you ever wanted to see nature at work, it was here in great abundance.
Goldfinches to be more exact. Sure, there were a few chickadees, sparrows and even a couple of hummingbirds that joined in on the feast, but for the most part it was primarily goldfinches. I am sure other birds join in on the action over the course of a day but the overwhelming number of goldfinches was hard to ignore.
Monarch butterflies also visited the plants regularly as they prepared for their long journey south for the winter.

It was a spectacular scene and one I knew I had to return to the very next day.
And that I did, accompanied by an arsenal of cameras and long lenses. Truth be told, I actually returned for a second day because the action along the border was too good to ignore.
It was also the perfect opportunity to try out various cameras and lenses for my camera reviews on this site.
Cameras and lenses used to document the wildlife habitat border
While my Pentax K5 and 300mm F4.5 * lens documented most of the action, I have to admit that the Olympus EM-10 equipped with the 40-150mm kits lens resulted in many of my favourite images. Pentax’s X5 Bridge camera with its built-in 26x optical zoom, offering 22-580mm equivalent (35mm) held it’s own with the goldfinches but was by far the most difficult to use. Once I set the the camera to multiple burst mode, my success rate improved.
The overall results during the two-day shoot were well worth the effort.
More images of the naturalized border here.

A monarch lands on a chocolate coloured sunflower with its complementary colours.
Photographers: Don’t pass up a perfect opportunity
The first quick visit to the border following the afternoon at the pond photographing egrets and herons, was enough to tell me that I stumbled across something very special with a lot of opportunity.
If you are thinking about creating your own wildlife habitat in your backyard, Prairie Up, An Introduction to Natural Garden Design, is a good starting point. In this book, Benjamin Vogt shares his expertise with prairie plants in a richly photographed guide aimed at gardeners and homeowners. His step-by-step blueprints point readers to plant communities that not only support wildlife and please the eye but forces us to rethink traditional planting and maintenance.
The fact that no other photographers were there capturing the incredible scene told me that maybe no-one else noticed the potential opportunity.
Turns out I wasn’t alone, however. On my visit the next day, it was obvious that this scene did not go unnoticed. A number of other photographers also recognized the potential of the naturalized flower bed and were already at work when I pulled up.

Although most of the images show a soft green background, I was able to position the camera in such a way to create a blue sky background in this image.
It’s important that we photographers don’t pass up good opportunities to capture great images, especially when they are presented to us so readily.
Whether it is in our own gardens, or at a nearby cemetery, or public flower garden, these opportunities are simply too good to miss.
That may mean visiting the location over and over again looking for a variety of photographs from close-ups to more environmental images.
Also, situations like this is the perfect opportunity to experiment with different lenses and cameras. Try different vantage points. Get down low to use the sky as a background, or move around to get a more pleasing background. Change your depth of field to create soft backgrounds.

A wide angle view of a naturalized border designed to create wildlife habitat at its finest. Notice that the plants grow together rather than as individual plants.
Don’t be afraid to even pull out your wide angle lenses (see image above) to document the entire scene.
The wide angle images are perfect for obtaining an overview of the of the border and then use it to plan your wild habitat border in your own yard.
In this image, the soft out of focus flowers creates a pleasing background that highlights the Goldfinch.
Wild border is perfect place to experiment with your cameras
Try not to simply set the camera lens and shoot away all day with a single setting. By adjusting your f-stop, you can create dramatically different images using a combination of depth of field, different focal lengths and even a variety of cameras.
The flower border that originally caught my eye was hard to miss from the road leading to the pond where I was heading to photograph wading birds. But, it was easy to admire and pass by if you were too focused on getting to your original destination.
It’s always a good idea to take the time to investigate these types of opportunities.
For more images from my two-day shoot, be sure to check out my photo gallery here.
Below are a couple of images from the nearby pond. While they are good enough images of a heron and egret, the location failed to provide the variety that the sunflower border offered.
In my mind, time was better spent at the naturalized border.

Great blue Heron at the nearby pond. Photographed with Pentax 300 f4.5 and 1.4 converter.
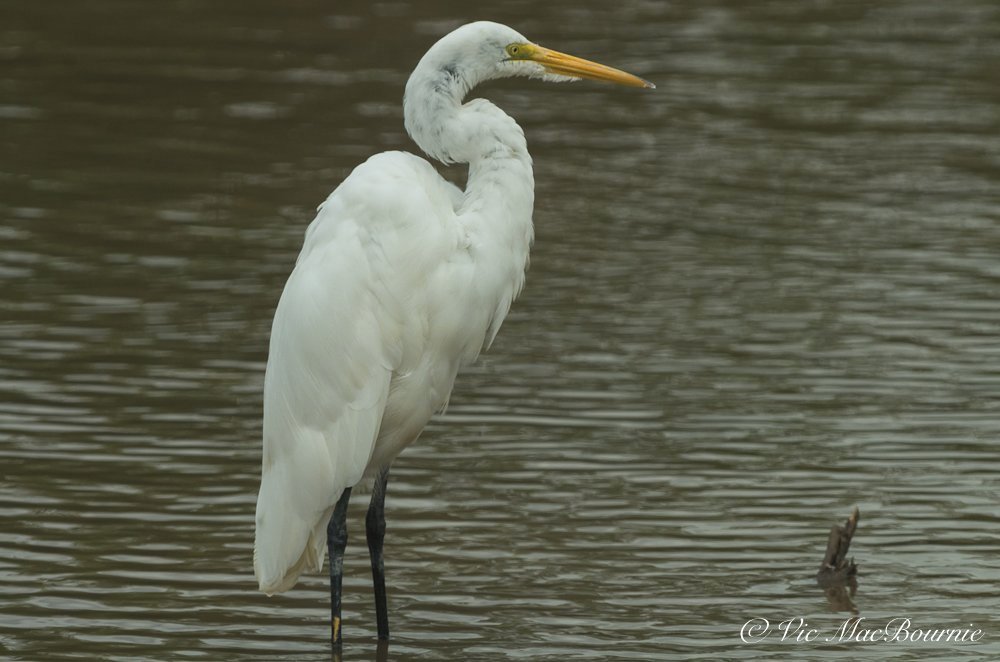
White egret at the pond. Photographed with Pentax 300 f4.5 and 1.4 converter.
While the majority of the photographers in the area were focused on the big birds, I preferred to turn my cameras on the smaller birds among the sunflowers.
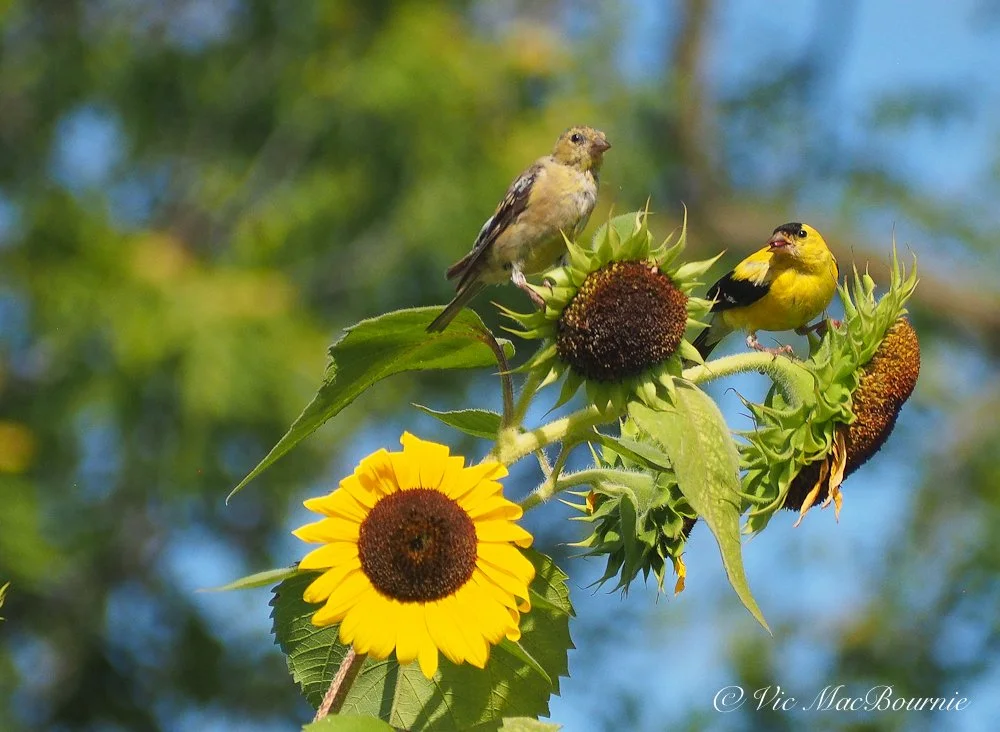
Two goldfinches work the sunflowers in the naturalized border.
Although the birds were skittish to some degree, their frenzied feeding allowed a closer approach than normal allowing me to get good frame-filling images at the long end of the zoom.
Use your car as a blind whenever possible
As the day passed on, all the other photographers left leaving me alone with the birds. This presented me with the opportunity to use my car as a moving photographic blind. By driving slowly along the road, I was able to get even closer to the birds and butterflies that showed little fear of the car.

Sunflowers and goldenrod grows together in the natural border helping to create the ideal wildlife habitat.
Best of both worlds: A flower border for wildlife photography
Stumbling upon this beautiful, naturalized flower border and wildlife habitat was, to me, the perfect ending to the summer. While many of the flowers had lost their lustre and it was obvious the border would soon be little more than a graveyard of dying flower stalks, it was also full of life.

This image show a small part of the naturalized flower border. It’s not hard to see how much of a great wildlife habitat it makes for all types of wildlife.
In death, the dying flowers gave life to the birds, the bees the butterflies and the many insects, reptiles and mammals that no doubt called the flower border home.
It is only fitting that it all takes place at the front entrance to a magnificent cemetery.
For me, it provided an opportunity to combine my two greatest loves in life – gardening for wildlife and photography.
It also provided an opportunity to learn, experiment and be creative without travelling hundreds or thousands of miles in search of photographic opportunities.
The location of this wildlife habitat was a short drive from my home, and I was able to get a sneak peak at how I can recreate that same wildlife habitat right at home in my own garden.
Next year I hope to get similar images without even leaving my backyard.
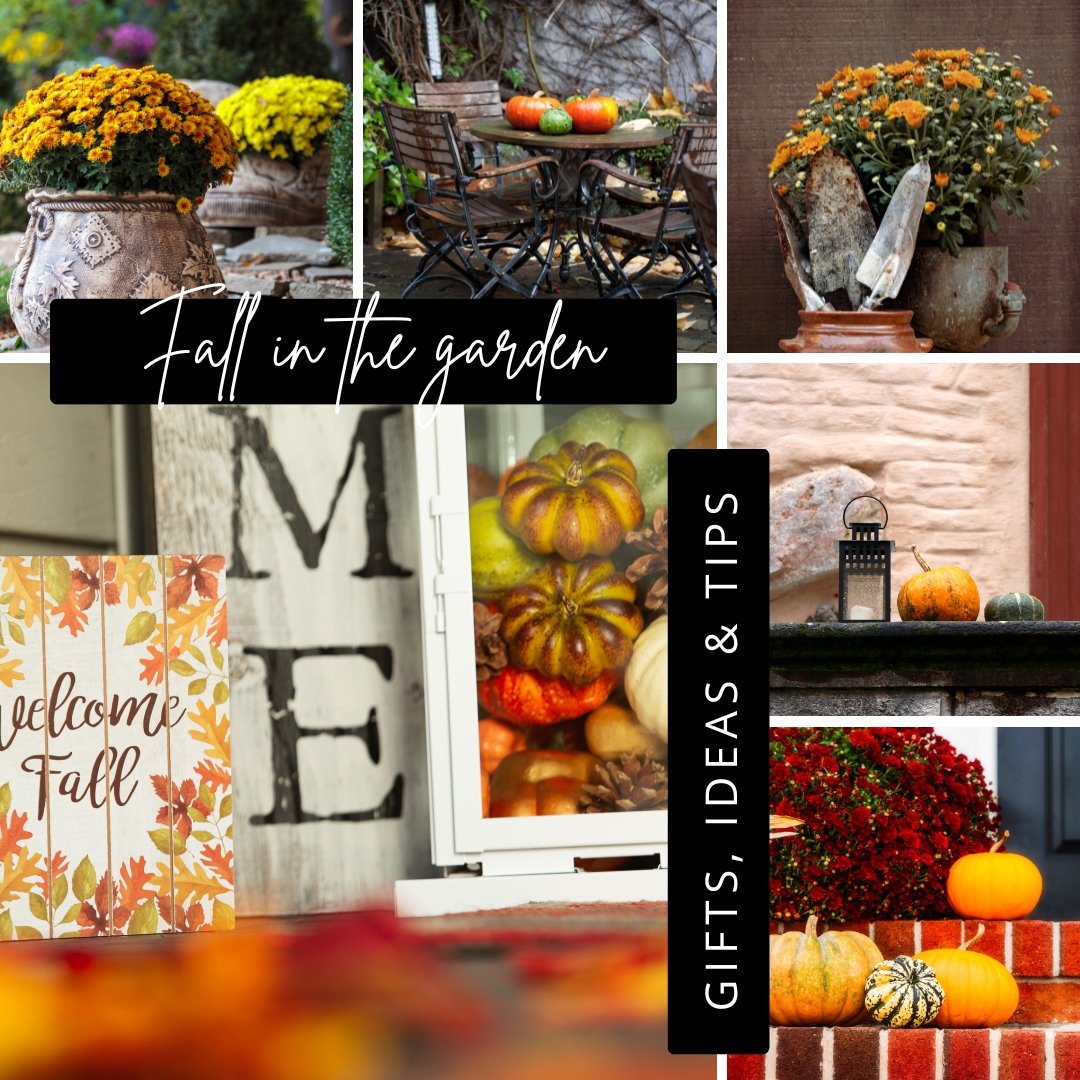
Embracing fall: Ideas for gardeners both indoors and out
Fall is the time we transition from the heat of summer to the warming colours of autumn both in the garden and in the home. Check out the ideas for both the home and the garden.

Embracing the warmth of fall colours begins in the garden but there’s no reason we can’t celebrate the season indoors too.
Fall by far is my favourite time of year. The garden takes on its tapestries of colour, and cool misty mornings make the coffee in hand so much more appreciated.
It’s also a time of transition – from shorts and T-shirts to sweaters; from flowers to grasses and bright berries.
In the home and on the patio there are changes happening too. It’s a good time to put away the bright colours and adopt the earthy, warm colours of fall. It’s also the time to begin thinking about gift giving and get a head start on the holidays.
We’ve put together some helpful suggestions to assist you in the transition and offer some great gift-giving ideas.

This fun door mat from Anthropologie is a fun and very seasonal way to welcome visitors to your home.
Let’s start at the front door. Nothing says welcome to our homes like a fun door mat, especially one that celebrates fall. This Oh My Gourd coconut fiber doormat can welcome visitors at the front or back door. It’s exclusive to Anthropologie, and is a great starting point in the transition from summer to fall.

These lovely brass numbers will add a touch of class to your front entry. Also from Anthropologie.
Anthropologie also features these elegant brass and black house numbers that are a welcome addition to any front entryway. These are only available online but can be picked up at a nearby store to reduce shipping costs. They are sold individually and come with their own mounting hardware.

There is nothing more synonymous with fall than the captivating smell of pumpkin spice and these candles bring it indoors or out. Check out a wide selection from Anthropologie.
Staying on the Gourd theme, Anthropologie also offers a number of pumkin themed candles in exquisite containers that will warm up any room – indoor or outdoor – that you place them in.
Fall, with its cooler temperatures, is the time we enjoy being outside enjoying the migrating birds, the butterflies and the evolving warmth and texture that begins taking over the woodland.
A barbecue with family and friends is the perfect weekend activity.

Fall is the time to get out and do some entertaining in the backyard. These colourful acrylic glasses are the perfect companion.
These Lucia Acrylic Goblet Wine Glasses are perfect for the deck, patio or under a pergola as the rain falls all around us. They come in a variety of colours from mint to cobalt, turquoise and a lovely hot pink.
If you are lucky enough to have a sheltered outdoor space, extending the entertaining season well into fall offers numerous possibilities.
A small woodburning firepit or gas fire table can bring us outside through fall and even well into winter.

The Sedona fire bowl from Woodland Direct adds warmth and a touch of class to your outdoor space.
WoodlandDirect specializes in fire pits, fire bowls, outdoor fireplaces and the like and offer an incredible variety of choices and styles to suit even the most picky of buyers.
The Sedona Copper Fire Bowl, above is a good example of the exquisite detail available from WoodlandDirect.

Less expensive options are also available from less specialized stores. Walmart even carry the popular, contemporary styled Solo Stoves (above) that are small enough to take with you to the cottage or even camping, but still have a place in your backyard.
For a full look at the firepits Walmart offers, including many that are on sale click here.
Of course fall is the time to get into the garden and muck about digging out, transplanting and clearing areas in preparation for next year. Muck boots make a variety of garden boots and shoes to tackle even the dirtiest of jobs with a little style. Check out their full line of women-, men- and kid-approved boots for the garden or everyday use.

For those lucky enough to have a covered garden area, fall is the perfect time to transition from summer colours into the warm tones associated with autumn. This scene from Anthropologie focuses on just that with an assortment of warm colours and textures. One of the highlights is the Abstract Pillar Compote planters featured on the table and below.

Decorating this space is always fun and adding a modern touch seems to work well in these spaces. These Abstract Pillar Compote planters are the perfect size to act as a focal point a gathering place. Use them for plants, but don’t be afraid to use your imagination. A bird bath, even a contemporary bird feeder to welcome the chickadees into your more personal space.
Imagine them full of large pine cones or simply covered in a rich layer of exquisite moss or planted with the simple elegance of a maindenhair fern.

The Boston fern is from Macy’s outstanding collection of natural looking plants.
Finally, if you need plants around you all winter, but can’t seem to keep them alive indoors, Macy’s offers an outstanding collection of extremely natural looking plants. These are not your craft store collections that neither look natural, nor stand the test of time.
Macy’s Department Store collection is both extensive and exquisite in their realism. The above Boston fern is just one example of the detail of these plants. Place them on your enclosed patio or porch (recommending for indoor use only) and bring them indoors to enjoy them throughout the winter. No muss, no fuss.
The Boston fern, for example features deep green fern leaves extending outwards and created from the finest materials. The natural looking stone planter is included.

Best shade trees: Poplar tulip tree, birch, maple and oak
Shade in our landscape has never been more important. Here are four great shade trees to consider in your landscape.
Tulip trees are perfect if you need quick shade in a sunny area
The Poplar Tulip Tree is a magnificent tree that stands tall and straight in our landscape – taller and strighter, in fact, than any other tree in the woodland.
If you have space, plant a tulip tree (Liriodendron tulipfera) in your yard for almost immediate impact.

From its stunning appearance to its positive impact on the environment, the Poplar Tulip Tree is a deciduous tree you will want to explore fully.
Standing tall and proud, tulip trees have captured the imagination of nature enthusiasts for centuries.
These magnificent trees have a rich history that dates back thousands of years. Native to North America, tulip trees have been an integral part of the continent’s ecosystem for centuries.
They have flourished in the diverse landscapes, from the eastern United States to parts of Canada.
In fact, in one of my favourite garden design books Outdoor Living Spaces, How to Create a Landscape You Can Use & Enjoy, the landscape designer suggests using a “grove” of Poplar Tulip Trees in a tiny courtyard to create an almost instant canopy, privacy and lovely shade in just a few short years. This bold use of our native Tulip tree is just one example of how important shade has become in our landscapes.
The illustration below shows the grove of Tulip Trees in the upper corner of the tiny yard. Although the trees will eventually grow quite large and some may have to be removed, the designer is not afraid to use them to create shade quickly.

Even in a small yard, the landscape designer boldly used a grouping of Tulip trees to provide both shade and privacy.
By grouping the trees closely in a confined space, the designer explains that the trees are forced to grow tall and narrow as they compete for the light. With proper pruning techniques they can be kept relatively narrow as they reach up to the sky, rather than stretch out.
Tulip trees provide the primary shade as well as the foliage canopy for privacy.
For more information on the best trees for wildlife, be sure to check out the works of Douglas Tallamy. His book Nature’s Best Hope and The Nature of Oaks are excellent places to start.
I actually tapped into this concept in our garden by using three clump birch trees in a small area of our back garden. (See below for more details.)
Even the indigenous people held great reverence for the tulip tree, recognizing its importance and utilizing its resources for various purposes.
More on the Tulip Tree here.
Let’s take a moment to explore the origins of these majestic giants and their ancient heritage.

The unusual shape of the tulip tree leaf is seen here as it lays on the forest floor in fall.
These majestic giants are known for their towering height, reaching up to 150 feet or more. With their distinct tulip-shaped leaves, they add a touch of elegance to any landscape.
But it’s not just their appearance that makes them unique.
Tulip trees also boast vibrant flowers that resemble tulips, hence their name. These beautiful blooms attract a variety of pollinators, including bees and hummingbirds, making them an essential part of the ecosystem.
Additionally, tulip trees have a straight trunk and smooth bark, which sets them apart from other tree species. Their wood is highly valued for its strength and durability, making it ideal for construction and furniture.
Of course tulip trees are not the only native trees that are capable of providing shade in our garden.
Below are other great native trees ideal for throwing shade in our garden. They include the maple tree in fall colour, the large mature oak tree, the tulip tree and birch trees.

Excellent shade trees include from top left: Maple tree, Oak tree, Tulip Tree and birch trees.
Here are three more of the best shade trees for your garden
Fast-growing shade trees can transform your outdoor space into a much cooler environment in a reasonable time period. Depending, of course, on how large they are when you plant them, these trees can transform your yard both aesthetically and by cooling it over the course of the summer.
Before exploring the specific trees, it’s important to understand why shade trees are so important.
Shade trees not only provide relief from the scorching heat of the sun, they also offer numerous benefits for both humans and the environment.
They can help reduce energy costs by providing natural cooling, improve air quality by absorbing pollutants, and create a peaceful and inviting atmosphere.
The criteria for selecting fast-growing shade trees can vary depending on your needs and the size of your garden.
When choosing shade trees, it’s essential to consider their growth rate, adaptability to your climate, and overall size.
Fast-growing shade trees are preferred because they provide quick relief from the sun’s heat and can transform your outdoor space in a shorter period. Additionally, you’ll want to select trees that are well-suited to your specific climate conditions, ensuring they can thrive and grow successfully.
Lastly, consider the overall size of the tree at maturity, as you’ll want to ensure it fits within your available space. By keeping these criteria in mind, you’ll be able to select the perfect fast-growing shade trees for your oasis!
My choices for the three outstanding, fast growing shade trees are as follows: The birch tree either single or multi-trunk, the maple tree either single or multi-trunk, and the oak tree.
All three are relatively fast growers, extremely important for the environment and wildlife, and capable of creating a beautiful canopy in a hurry.
Let’s explore each of these individually.

This mini birch grove creates a lovely dappled shade beneath and around the dry river bed.
The Birch Tree: Adds dappled shade to the landscape
Birch trees have so much going for them in our landscape, especially in today’s more compact yards. The white paper birch is an exquisite tree, but the river birch is usually a better choice.
In fact, there are about 60 different species of birch (Betulaceae). Grow them in well-drained soil, with plenty of moisture and sunlight. Birch trees are found in zones 2-6 and are known as a pioneer species that are often found growing near lakes and rivers in their natural habitat. These medium-sized trees generally reach between 30 and 50 feet with bark that can be white, grey, yellow, silver or black. Because they are fast growers, birch trees can be short-lived trees.

A birch tree clump shines in winter showing off its peeling, textured bark.
Known as extremely fast growers, these trees – either as single or multi-stem specimens – are attractive in all seasons, but especially in winter when their peeling white bark and textural qualities stand out against a stark landscape.
In our landscape, I borrowed the idea (see above) of planting several trees in a small space, close together to create upward growth by forcing them to compete for sunlight. Three birch clumps amounting to 11 trees create a small birch grove around a dry river bed and bubbling rock.
More on the birch grove here.

This birch tree clump is one of three that form a mini birch grove in our woodland garden.
The leaves of the trees forming the small birch grove throw a lovely open shade on the dry river below, while creating a magnet for local wildlife including birds, butterflies and other insects. In just a few short years, the trees have grown sufficiently to be able to hang bird houses, feeders and birdbaths from the stronger branches.
The Maples: Huge selection to choose from
Maple trees offer homeowners a variety of alternatives to create shade in their yards. From the smaller and more delicate Japanese maples, to larger native maples that are medium-fast growers but boast outstanding fall colour. Some, like the Norway maples are extremely fast growers but can be invasive.
Most maple trees prefer cool temperatures in plant hardiness zones from 5-9. A few of them are cold-hardy that can even tolerate sub-zero winters down to zone 3.

The incredible fall colour of our native maples make them an almost irrisistable addition to the garden.
Although not as showy as birch trees – with the possible exception of the paperbark maple – the native maples are renowned for their incredible fall colours. In addition, unlike birch trees, maples tend to throw a much deeper shade below and around them.
If you are looking for a cool place to sit under the shade of a tree, a native maple tree is an excellent choice. Maples are also important trees for wildlife attracting a variety of birds, caterpillars and insects. In addition, the deep shade provides excellent nesting potential for birds and habitat for other wildlife.
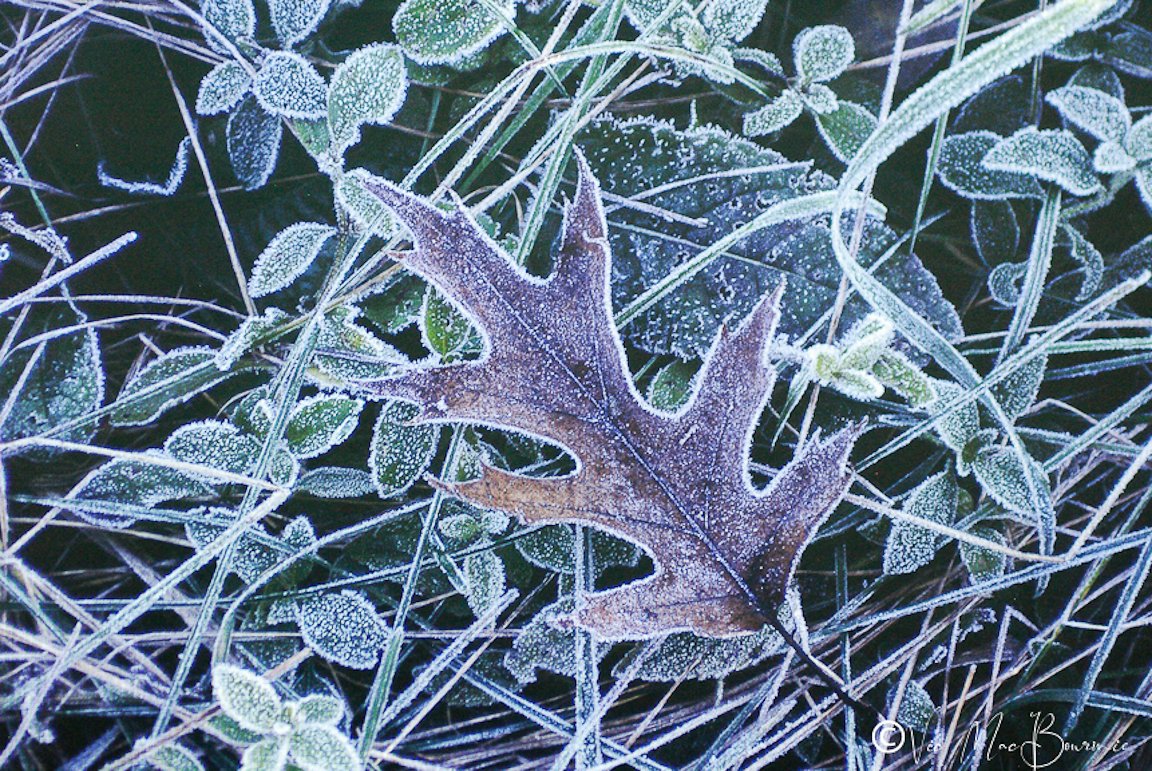
An oak leaf is rimmed in frost on the forest floor.
The Oaks: A haven for wildlife
Studies show that Oak trees are the most valuable wildlife trees in any landscape. That alone is reason enough to plant oaks in your yard. Considering their value for wildlife, the shade these trees throw can be considered a pure bonus.
Oaks are not considered fast-growing trees, but their sheer size means that they can get to a size to throw shade quite quickly and, in the right situation, can reach for the sky at a good pace. At maturity, Oaks can reach heights of several hundred feet but average about 100 feet or (30 meters).
Different varieties can be grown in zones 3 up to 11, so there is virtually no place where an oak can’t be used to throw shade.

If you have ever wondered how important an oak tree can be for a backyard, this infographic should convince you to be sure to add one to your yard.
It’s important to consider the mature height of the oak you want to plant, but don’t let their mature height sway you too much from planting these important trees. There is a good chance that they will not get close to their mature height in your lifetime.
For more on oak trees, be sure to check out these posts: The mighty oak, What tree should I plant in my backyard, A columnar oak perfect for small backyard or narrow space.
Let’s get back to the Tulip tree
As we continue our journey into the world of tulip trees, it is crucial to highlight the conservation efforts aimed at protecting and preserving these trees.
Due to their historical significance and ecological importance, organizations and individuals have come together to ensure the survival of North America’s native tulip trees.
Conservation initiatives focus on various aspects, including habitat restoration, seed collection, and public awareness campaigns. By restoring and protecting the natural habitats of tulip trees, we can create safe havens for these majestic giants to thrive.
Seed collection programs play a vital role in preserving the genetic diversity of tulip trees, ensuring their resilience against threats such as disease and climate change.
Furthermore, raising public awareness about the value of tulip trees fosters a sense of appreciation and encourages responsible stewardship. Together, these conservation efforts contribute to the long-term survival and flourishing of North America’s native tulip trees.
One of the top reasons to plant and preserve the Poplar Tulip Tree is its fast growth rate and ability to provide ample shade.
This magnificent tree has the remarkable ability to reach impressive heights in a relatively short period of time. With its rapid growth, it can quickly transform any landscape into a shaded oasis, providing relief from the scorching sun during hot summer days. And we all know that our summers are getting hotter each year and the need for shade in the garden is increasing exponentially.
Whether you’re looking to create a cozy spot for outdoor activities or seeking natural shade for your garden, the Poplar Tulip Tree is an excellent choice.
Another compelling reason to plant and preserve the Poplar Tulip Tree is its significant environmental impact and carbon sequestration abilities.
Like all large trees, the Tulip Tree is an integral part of nature’s intricate web by doing its part in a crucial role in mitigating climate change. The Tulip Tree has a remarkable capacity to absorb and store carbon dioxide from the atmosphere, helping to reduce greenhouse gas emissions.
By planting and preserving these trees, we can contribute to the fight against global warming and create a more sustainable future. Additionally, the Poplar Tulip Tree acts as a natural air purifier, filtering pollutants and improving air quality.
Its presence in urban areas can help combat the harmful effects of pollution, creating healthier and more livable environments for both humans and wildlife.
So, by choosing to plant and preserve the Poplar Tulip Tree, we not only enhance the beauty of our surroundings but also make a positive impact on the planet.
In addition to its environmental impact, the Poplar Tulip Tree also serves as a vital wildlife habitat and supports biodiversity.
The tree’s large size and dense foliage provide shelter and nesting sites for a variety of bird species, including woodpeckers, owls, and songbirds.
These birds not only bring joy with their songs but also play an essential role in controlling insect populations and pollinating plants.
Moreover, the Poplar Tulip Tree attracts a diverse range of insects, which serve as a food source for birds, bats, and other small mammals.

Where do hummingbirds go in winter?
Ever wonder where the heck our hummingbirds go during the winter. You’ll find out all about their incredible journeys and where they spend their winters here.
How long do hummingbirds live in the wild?
Hummingbirds are well known for their incredible migration patterns.
In fact, one hummingbird was documented travelling up to 1,200 miles (1,931 kms) over a 12-day period – amounting to 100 miles (almost 161 kms) per day. That’s an astoundingly fast migration that might have been assisted by a strong tailwind.
It’s hard to imagine our tiny, delicate birds travelling such great distances, but twice every year they embark on these incredible journeys.

This male Ruby-Throated works a salvia flower in mid-summer. Providing food sources throughout the summer into late fall is critical for both our resident hummingbirds and those that stop in on our gardens for food and rest during migration.
While travelling 100 miles a day is possible, most hummingbirds average about 25 miles (40 kms) per day on their migration routes.
Many of our hummingbirds travel more than 1,500 miles (2,414kms) to more southerly regions.
In case you are wondering how far that is, imagine travelling from Toronto, Canada to Miami, Florida (1,485.7 miles). Most of us would not even think of driving that distance, let alone walk or get there any other way than by jet propulsion.
Hummingbirds do it, on their own, twice a year and many times over their lifetimes.
How far south they fly, probably depends on where they are starting their journey. Many of the hummingbirds that spend the breeding season farther north in Canada, will likely overwinter along the Florida or Atlantic coasts.
A quick calculation means that a typical migration could take up to 60 days, or a full two months, before the birds reach their final destinations. Most migrations, however, will not take that long.
More birds braving colder climates
Every year there are more and more reports on the internet of birds – including hummingbirds – overwintering in more northern states. Just a few years ago, a Toronto, Canada couple spent the winter caring for a female Baltimore oriole in their backyard during a bitterly cold winter season. (You can check out their fascinating story here.)
Along the route, the hummingbirds must feed regularly on both insects and nectar and face many dangers, including storms, droughts and predators. Storms can easily blow these tiny birds off their regular migration routes and force them to burn up additional energy to get to their locations.
Be sure to check out my earlier post on How we can help hummingbirds during migration.
Many hummingbirds face serious threats during migration. Some, obviously fall victim to these threats and don’t survive.
How long do hummingbirds live?
Hummingbirds are fascinating creatures, but have you ever wondered how long they live in the wild? The lifespan of a hummingbird can vary depending on several factors.
One of the key factors that influence the lifespan of hummingbirds is their species. Different species of hummingbirds have different lifespans. On average, most hummingbirds live for about 3 to 5 years in the wild. However, some species, such as the Ruby-throated Hummingbird, can live up to 10 years or more.
Another factor that affects the lifespan of hummingbirds is their habitat and environment. Hummingbirds that live in areas with abundant food sources and suitable nesting sites tend to have longer lifespans. Additionally, the availability of water sources for drinking and bathing is crucial for their survival.
Predators also play a significant role in determining the lifespan of hummingbirds. Birds of prey, snakes, and even domestic cats pose a threat to these tiny birds. Avoiding predators and staying vigilant is essential for their survival.
In general, the lifespan of hummingbirds in the wild can range from 3 to 5 years, with some species living longer. Factors such as species, habitat, and predators all contribute to their lifespan. Understanding these factors can help us appreciate and protect these remarkable creatures.

A female Ruby-Throated hummingbird scratches her chin while resting on a commercial perch in our garden.
According to the informative website Operation Ruby Throat, The hummingbird project: the Ruby-Throated Hummingbird (Archilochus colubris) breeds from Florida to Maine; westward across the Great Plains to the foothills of the Rockies; from south Texas north to southern Canada; and northwest into Alberta. They are defined as neotropical migrant insect- and nectar-eaters.
Where do Ruby-Throated hummingbirds go in winter?
According to researchers, Ruby-Throated hummingbirds mostly pass through south Florida during migration but a small number of the tiny birds are known to overwinter in Florida and on the Gulf Coast. Most, however, continue their migration to central Mexico and and even farther south to northern Panama.
There are reports of a few hummers spending winters in Cuba, Hispaniola, Bahamas, Bermuda, and southeastern U.S. coastal areas.
Although little is known about the fall migrational routes, research does show that many of the birds gather in Louisiana and/or Texas in mid September before flying across the Gulf. Others, choose not to cross the Gulf, instead taking an overland route through Mexico.
Research shows their winter distribution to be as follows:
Very common throughout areas of Mexico
Common in Nicaragua
Panama – Rare but reported in the northwestern section
Rare sightings in the United States usually along the Gulf and Atlantic coastlines.
Rare in Belize. Mostly only seen during migration
Guatemala – Uncommon
El Salvador – Uncommon
Honduras – Uncommon
Costa Rica – Uncommon
Costa Rica is at the far end of the hummingbirds wintering range, but many hummers travelling from their breeding grounds in the United States and Canada spend winters in Mexico and Nicaragua. They are less common in Guatemala and Hondouras .
Many hummingbirds from North America, make their way to Mexico and Central America.
These regions provide the perfect winter habitat for hummingbirds.
The availability of food is crucial for their survival during these months when resources are scarce in their breeding grounds.
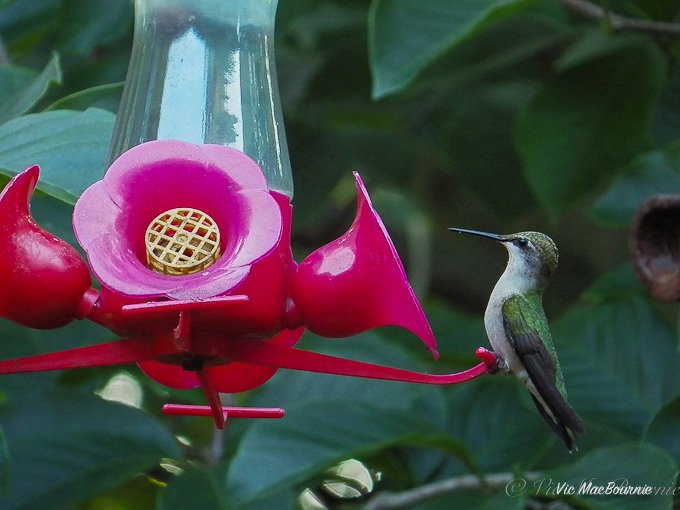
Providing a reliable source of homemade nectar can be critical for hummingbirds’ survival as they prepare to embark on their migration. Be sure to read my tips on preparing nectar (link below).
With their tropical climates and diverse plant life, Mexico and Central America offer a constant supply of nectar-rich flowers that hummingbirds rely on for sustenance. The abundance of insect life in these warmer climates provide the much needed protein the hummingbirds count on for survival.
Many of us who feed hummingbirds with commercial feeders (link to high-quality Walmart feeder) and homemade nectar may not realize that a hummingbirds’ diet is dependent on a rich supply of insects and spiders. Fruit flies and other small insects are an important source for these tiny birds. Leaving rotting fruit out near feeders is a good way to supplement their food supply.
Be sure to check out my post on tips to Making your own homemade hummingbird nectar.
In addition to the abundance of food, these regions also offer suitable nesting sites and protection from harsh weather conditions. Hummingbirds find shelter in the lush forests and tropical landscapes, where they can rest and conserve energy for their return journey in the spring.
The migration of hummingbirds is a remarkable feat of endurance and adaptation. It showcases their ability to navigate long distances and adapt to different environments.
By understanding their migration patterns and the importance of wintering grounds, we can better appreciate and protect these fascinating creatures while they are with us over the summer months.
Providing them with natural food sources as well as homemade nectar will ensure that they have the needed energy to make the incredible journey.
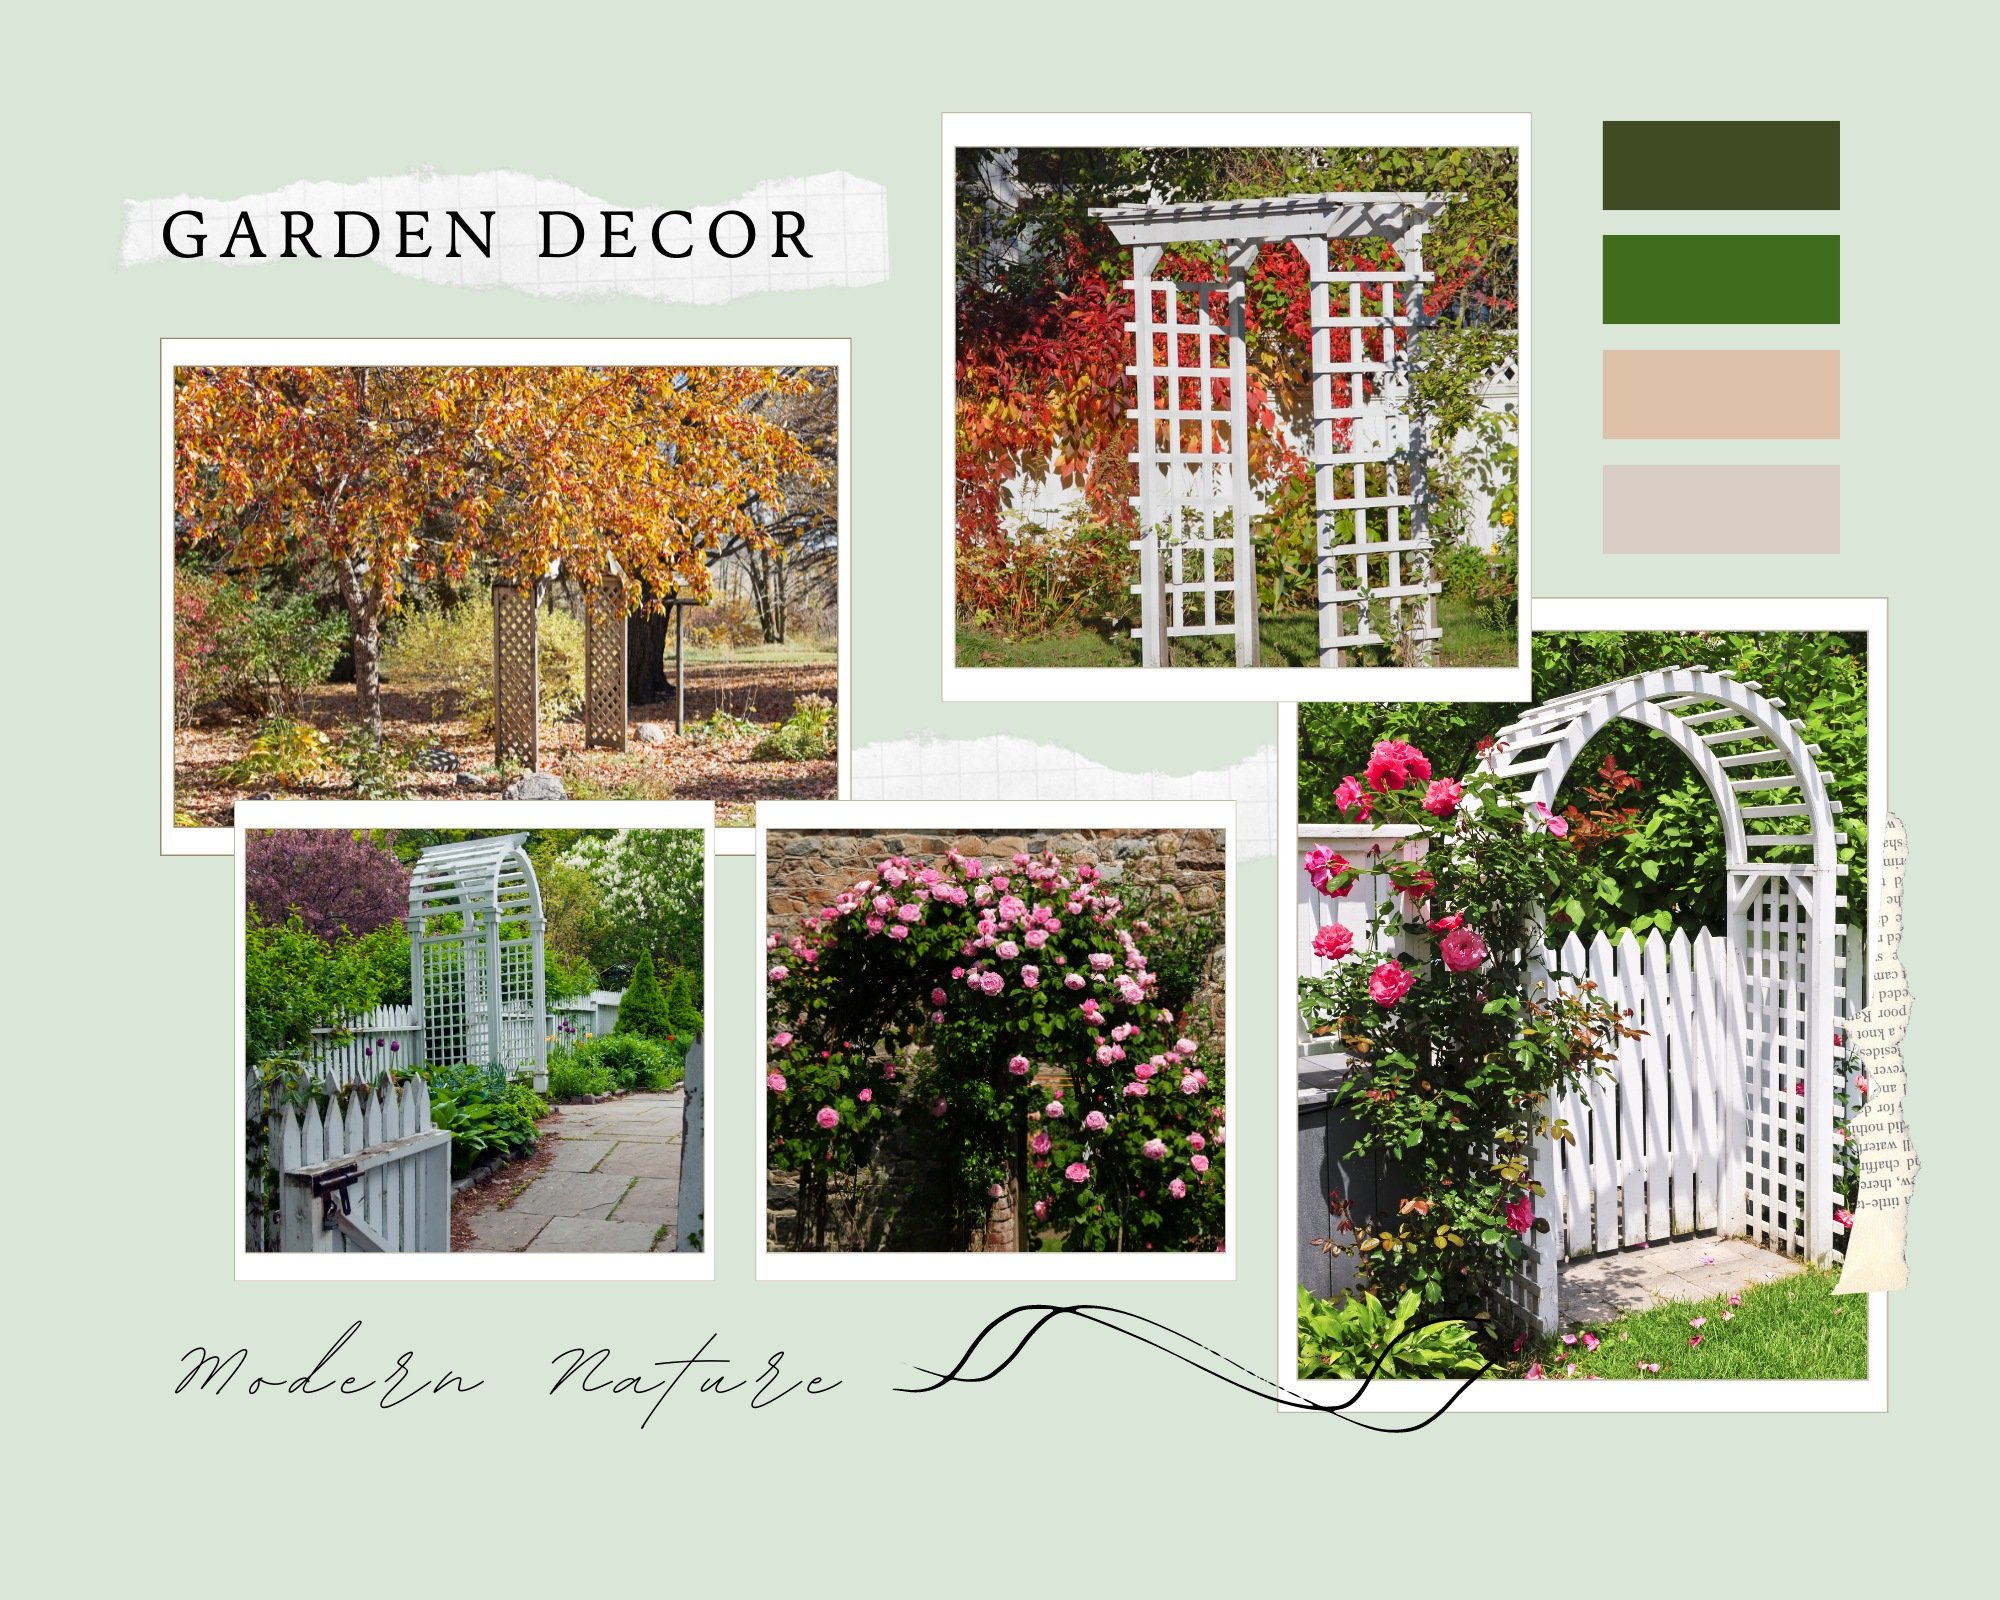
Arbour creates vertical planting space, privacy and shade
Arbours can provide vertical garden space in gardens both big and small. You don’t have to grow roses, consider planting native vines or annual vines such as Morning Glories.
Consider planting native vines to provide nesting habitat and food for wildlife
A rose arbour has been at least ten years overdue in our backyard.
I’ve never really been a fan of roses, but after a neighbourhood cat started hanging around a birdhouse in our yard, I decided a rose would help provide a safe place for the birds to raise their young. Eventually, however, the birdhouse fell apart and I removed the cedar pole leaving the rose on its own.
Fast forward to this spring when my wife and I decided it was time to add an arbour to give our old white iceberg rose the support it’s been craving for years.

These arbours are examples of the different ones available with some ideas on how you can use them in your garden decor.
It came in a tidy box. I pulled out the sections of black iron and built it in the comfort of our family room before moving it out into the garden. Four spikes – included in the box – were easily hammered into the ground to provide support and, before I knew it. our black iron arbour was taking up a prominent spot in the woodland garden.
I tied the rose canes to the arbour, being careful to gently bend the rose over the arbour, and voila.
If I knew it was going to be that easy, I would have added an arbour years ago.

Our backyard arbour provides support for our mature climbing white rose and creates a gateway into an area of the woodland garden. A garden bench nearby affords the perfect spot to relax and can be seen as a destination through the arbour and along the walkway.
I was surprised how the allure and practicality of a rose arbour helped elevate our outdoor space, adding a little romance to our surroundings, as well as provide numerous benefits beyond its aesthetic appeal.
Birds now have a safe place to land, and the thorny rose on the arbour provides an ideal spot for birds to safely build their nests tucked between the canes.
A nearby garden bench provides a quiet spot just to sit, admire the roses and the birds that feel totally safe among the branches and thorns. More on the Garden Bench as art.
Arbour creates focal point and perfect gateway to the garden
A rose arbour also serves as a stunning focal point, adding elegance and charm to any garden or patio.
In our case, it works as a gateway to an area of our garden that was often ignored because it lacked a more formal entrance. In fact, I had even built a small pathway through the area that now leads directly to our rose arbour making it look like it’s been there forever.
Its simple design and graceful arches create a sense of grandeur, instantly transforming an ordinary outdoor area into a more picturesque retreat enticing visitors to stroll along the pathway leading to the arbour.
A quick look on the internet and it’s clear that there are a host of styles to choose from. Of particular note are the arbours that create a small room like the one below.
This Bird Cage arbour from Costway is the perfect way to create a small private retreat. Grow some roses or vines up and over the arches and it becomes the perfect place to relax with your morning coffee or an evening glass of wine with friends.
This birdcage arbour from Costway provides the perfect secluded spot especially if it is covered in vines and/or roses.

Amish-made bird feeder is built to last and perform in your woodland garden
The Amish crafted large gazebo vinyl birdfeeder is the perfect addition to any backyard. Include it as a finishing touch topping feeder for your bird feeding pole, or use it as a stand alone feeder on a separate pole. If you use it as a stand alone feeder, be sure to include a squirrel baffle to keep squirrels and racoons of the feeder. This handmade and handcrafted feeder includes a clear plastic, built-in seed storage container that can hold up to four pounds of bird seed.
This makes it an ideal feeder to fill-and-forget for a week or two while, at the same time, protecting the seed from the elements and providing our feathered friends with a comfortable and sheltered place to feed. The fact that the feeder is made from high quality vinyl, plastic and cedar ensures it is a long-lasting, easy-to-clean and maintain feeder.
An arbour is a perfect addition for a small yard
Whether you have a small yard or a sprawling woodland garden, an arbour can effortlessly elevate the aesthetics of your outdoor space.
There are so many different styles that can be used to fit any garden – from a romantic more formal design, to a rustic arbour design featuring metal branch-like supports that fit in beautifully in any woodland or natural garden.
Now that we’ve explored how a rose arbour can enhance an outdoor space, let’s explore the enchanting world of creating a romantic ambiance with blooming roses. Imagine strolling through your garden, surrounded by vibrant and fragrant roses in full bloom.
The sight and scent of these beautiful flowers can instantly transform any outdoor area into a captivating sanctuary.
Whether you’re planning a romantic dinner under the stars or simply seeking a serene spot to unwind, a rose arbour adorned with blooming roses sets the perfect stage for unforgettable moments with friends and loved ones.
Forget the roses, consider native vines for wildlife
Let’s not limit ourselves to roses, however.
An arbour can simply be a convenient way to add more vertical gardening space to what otherwise might be lacking in many of our garden spaces, especially in a smaller garden or a new one that lacks tall trees.

This Tree of Life Arbour is the perfect addition to a backyard woodland garden with it’s intricate details adding an artistic touch to the backyard landscape decor.
A perfect addition to a woodland or naturalized garden is this “Tree of Life” arbour that is, in itself, a beautiful work of garden art. Add a native vine growing up and over the arbour and you have the ideal entry into a back woodland garden.
Consider growing native vines on the arbour and even up through the rose to provide both a food source as well as more nesting space for birds.
Virginia creeper or wild grape are great choices, but so too are annual vines like Morning Glory to attract hummingbirds. Clematis and honeysuckle are also favourites because they tend to be less aggressive and their flowers can attract pollinators and hummingbirds. The possibilities are endless.
Sweet Autumn Clematis (C. terniflora) is a great fall performer in our area where it can be a little aggressive, but puts out a mass of beautiful tiny white flowers for the bees and other pollinators at a time when many flowering vines and shrubs have finished blooming.
There is a huge variety of garden arbours available to suit everyone’s needs. Here are just a few examples of garden arbours from Amazon to consider.

This twig-style garden arbour is ideal as garden decor in a woodland garden. For more check out this link.
The simplicity of the garden arbour with its metal branch-like look, (above) works perfectly in a woodland-style garden.
Arbour is ideal way to create privacy and shade
Now that we’ve explored how an arbour can enhance your outdoor space and create a certain romanticism in the garden, let’s delve into the practical benefits it offers beyond aesthetics.
One of the key advantages of a rose arbour is the shade it can provide especially in a yard that lacks large trees.
As the sun shines down on your garden, the arbour’s structure casts a cool and refreshing shadow, allowing you to enjoy the outdoors even on hot summer days.
Additionally, the dense foliage on the arbour can be used to create a natural privacy screen, shielding you from prying eyes and creating a secluded area in your own backyard.
Moreover, the sturdy framework of an arbour serves as excellent support for climbing plants, such as vines and ivy, giving them the opportunity to flourish and provide not only a dense shade but plenty of privacy.
So, not only does an arbour add charm and allure to a garden, it also offers practical benefits that make it a valuable addition to any outdoor setting.

Can sedum be used as a ground cover?
Sedum is an ideal ground cover especially in hot sunny areas where other ground covers may struggle.
A young Oriole takes a bath among the sedum stonecrop ground cover in the backyard.
Stonecrop sedums are perfect for hot dry areas of the garden
Did you know that sedum, a remarkable plant known for its versatility, can also be used as a ground cover?
With its ability to thrive in various climates and soil conditions, sedum has become a go-to choice for many gardeners and landscape designers.
Many homeowners are familiar with sedum Autumn Joy combined with Black Eyed Susans and various ornamental grasses in the New American Garden landscape. Most, however, are unaware that sedum also excels as a ground cover.
The low-growing sedums are quick to spread but their shallow root systems mean they are not invasive and easily kept in check in the garden.
The sedum or stonecrop genus, part of the Crassulaceae family, comprises between 400–500 species, some of which are hardy down to zone 3. All sedums are fleshy succulents that store moisture in their leaves making them ideal for dry soils and arid regions.
Let’s explore the power of sedum as a ground cover and discover how it can enhance the beauty and functionality of your outdoor space.
Looking for more information on ground covers? Be sure to check out these posts for more ideas. Three Great Ground covers for the woodland garden, What is the easiest ground cover to grow, best native ground covers for shade
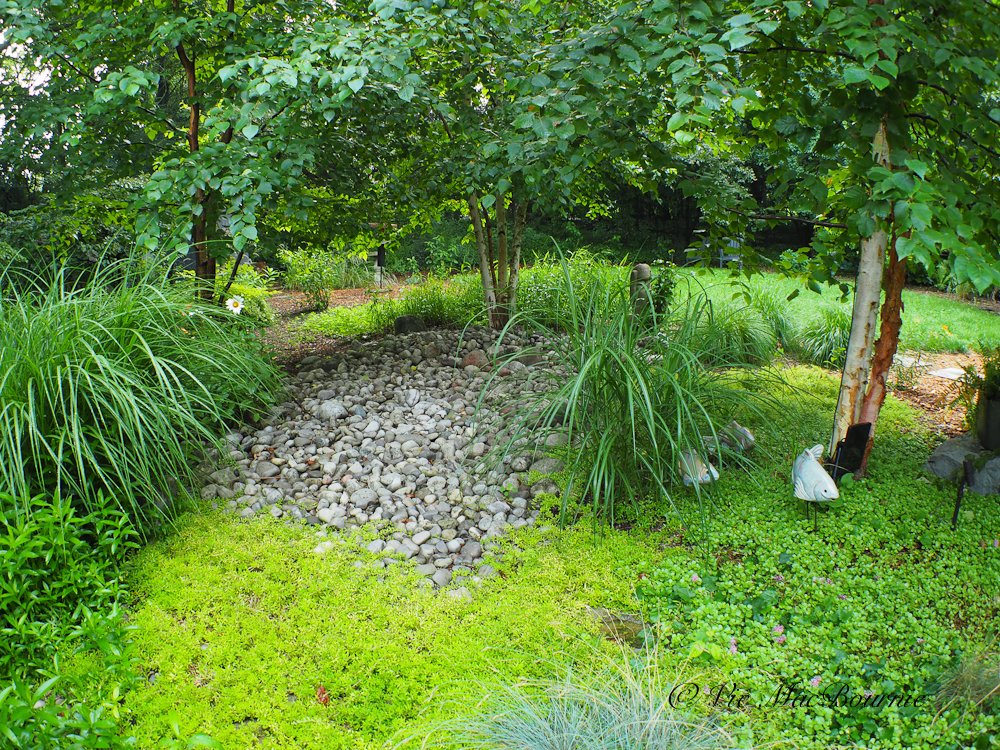
Sedum forms the ideal ground cover among the rocks and pea gravel in the back garden. Here Angelina stonecrop on the left grows together with Murale on the right.
In our garden, two types of sedum stonecrop form dense mats along and into our pea gravel pathways. Both are low-growing sedum that perform well in hot, arid areas where other plants may struggle to survive.
An abundance of small yellow and pink flowers in late spring or early summer provides pollinators with an early food source, while creating a lovely changing tapestry of colour from spring into summer.
There are several different Sedum stonecrop that will work as a groundcover They include:
• Angelina stonecrop – (Sedum rupestre ‘Angelina’) a lovely gold-leaved sedum with tiny yellow flowers throughout the summer that grows to between 4-6 inches and is hardy from zones 3-9.
• Russian stonecrop – (Sedum kamtschaticum) unlike Angelina, this sedum has dark green leaves and golden yellow flowers that bloom later in the summer. It grows 3-6 inches in zones 3-8 with foliage that turns bronze in fall.
• White Sedum – (Sedum album) a standout ground cover that turns reddish in fall and is at home in rocky or poor soils. It grows to between 3-5 inches in zones 3-9 and sports white flowers.
• Murale – (Sedum album ‘Murale’) has pink flowers in spring that are particularly attractive to bees and butterflies. The bronze foliage of this low growing ground cover stays to a tidy 2-3 inches high and is hardy in zones 3-9.
• Purple Emperor – (Hylotelephium telephium) stands out because of its plum foliage and pink flowers that is ideal for rock gardens and sunny borders. It is a more upright growing sedum with a mature size of between 12 and 15 inches and is hardy through zones 4-9.
Other sedums to consider include Blue Spruce sedum (sedum reflexum ‘Blue Spruce’) hardy in zones 4-9 with needle-like foliage and yellow flowers in mid to late summer. Japanese stonecrop (Hylotelephium sieboldii) is hardy from zones 3-9 with its bright pink flowers and a mature height of between 3-4 inches.

Sedum stonecrop can make the perfect ground cover especially in hot dry or rocky areas where other ground covers might struggle.
Using sedum as a ground cover offers numerous benefits that can enhance the beauty and functionality of your outdoor space. One of the key advantages is its ability to suppress weed growth, saving you time and effort in maintaining your landscape.
Sedum also acts as a natural mulch, helping to retain moisture in the soil and reduce water evaporation. This makes it an excellent choice for areas with limited rainfall or where water conservation is important.
Additionally, sedum ground covers provide insulation, keeping the soil cooler in hot weather and warmer in cold weather. They also help prevent erosion by stabilizing the soil and reducing runoff.
With their low-growing and spreading nature, sedum ground covers create a lush carpet-like effect, adding texture and visual interest to your landscape.
And let’s not forget about the pollinators, Sedum flowers attract bees, butterflies, and other beneficial insects, making your garden a haven for biodiversity.
So, whether you want to create a low-maintenance garden, conserve water, prevent erosion, or simply add beauty to your landscape, using sedum as a ground cover is a smart choice.
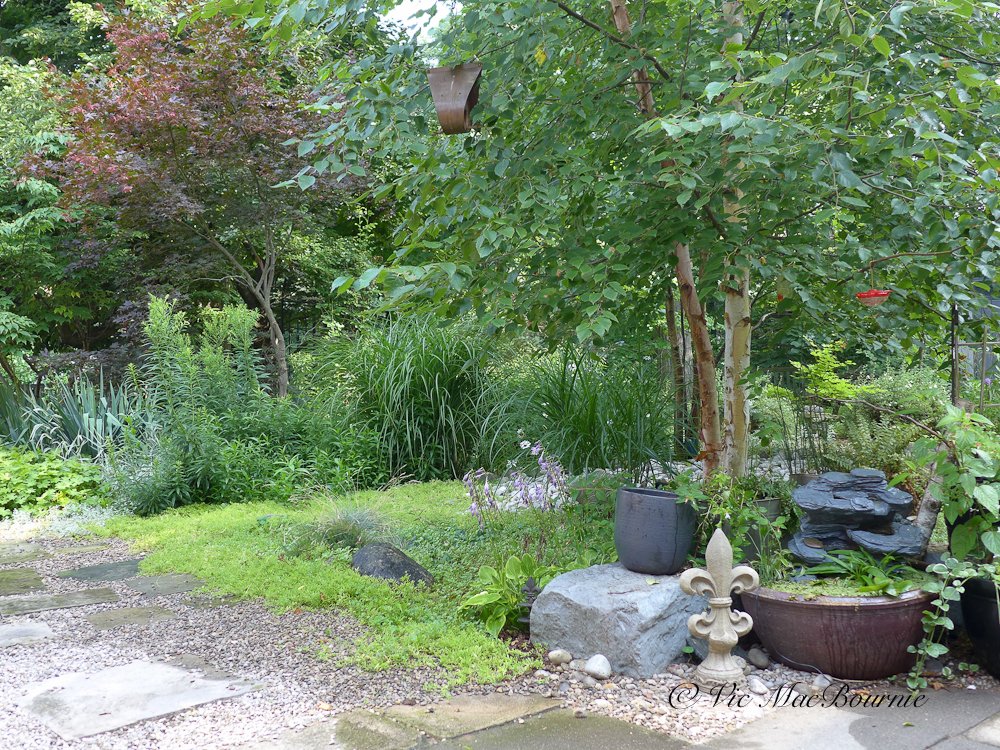
Sedum stonecrop grows through the stones and around the birch tree clump forming a soft green cover that our dog Holly loves to lay on when she is outside.
How to grow sedum in your garden
Now that you know the benefits of using sedum as a ground cover, let's explore how to successfully incorporate it into your landscape.
First and foremost, it’s important to choose the right sedum variety for your specific needs. There are many different types of sedum, each with its own growth habit, color, and texture. (see above for descriptions of sedum varieties.)
Some varieties are more suitable for sunny areas, while others thrive in shade or partial shade.
Sedum are extremely easy to grow from cuttings.
Once you have chosen the right sedum, prepare the soil and plant the sedum plugs or cuttings at the recommended spacing, usually around 6 to 12 inches apart. Water the newly planted sedum thoroughly and keep the soil moist until the plants are established. After that, sedum is relatively low-maintenance and requires little watering.
However, it's important to monitor the soil moisture levels during dry periods and provide supplemental water if needed. To maintain the appearance and health of your sedum ground cover, trim back any overgrown or damaged foliage in early spring.
Whether you're using it to fill in gaps between pavers, cover slopes, or create a vibrant border, sedum will transform your landscape with its versatility and charm.
How to use sedum in your landscape
Let’s take a look at some inspiring examples of how it can transform your landscape.
One popular way to use sedum is as a vibrant border along pathways or garden beds.
The low-growing, colourful foliage creates a beautiful contrast and adds visual interest to any outdoor space.
Another creative use of sedum is to cover slopes or hillsides. The dense growth habit of certain sedum varieties helps prevent erosion and adds stability to the soil. Plus, the cascading effect of sedum spilling over the edges creates a stunning natural look.
Sedum also works wonders in rock gardens. Its ability to thrive in dry, rocky conditions makes it a perfect choice for adding texture and colour to these unique landscapes.
I like to mix different sedum varieties to create a tapestry of hues and shapes in the landscape.
Lastly, sedum can be used to fill in gaps between pavers or stepping stones. This not only adds a touch of greenery but also helps prevent weed growth and keeps the area looking neat and tidy.
Whether you’re looking to enhance your pathways, cover slopes, create a rock garden, or fill in gaps, sedum offers endless possibilities.

Focus on vintage Pentax 110 lenses on the Pentax Q
The Pentax Auto 110 lenses are capable of some impressive results, especially if you use one of the hacks that help sharpen the lenses and create a greater depth of field.
The 110 lenses also fit micro four thirds and fujifilm cameras
No one could blame you if you thought the vintage Pentax Auto 110 lenses were made for the more modern Pentax Q line of cameras.
It’s just that 46 years ago, no-one would have dreamed that a miniature digital camera would even exist let alone continue to be so popular today.

This garden image, taken with the vintage 18mm lens from the former Pentax Auto 110 system, shows the capabilities of these vintage lenses especially if complementary post processing is used to bring out the best in these old lenses. In this image, I created a moody feeling that I think works well with the image.
These exquisite, tiny, almost miniature 110 lenses could not be more perfect for the Pentax Q line of cameras unless, of course, they offered full auto focus capabilities. However, even the Pentax “Toy” lenses, – the wide angle, telephoto and fisheye lenses – made especially for the Q series – do not offer auto focus capabilities.
So, the 18mm, 24mm, 50mm and the outstanding 70mm Pentax 110 lenses are almost too good to be true for Pentax Q users. All that is needed is a simple, inexpensive adapter to convert the lens. These adapters to convert the 110 lenses are also available for Fuji FX X-Mount camera X-PRO2 X-E1 X-E2 X-A2 X-M1 X-T3 X-S10 etc.

Grasses and dogwood with 18mm lens.
The build quality of these vintage lenses is also outstanding. Although the first three are made of plastic, it’s not your everyday plastic found in many of today’s inexpensive lenses.
These are extremely solid lenses that feature weighted almost perfectly silky focus.
• Be sure to check out my full post on using the 07 Pentax Mount Shield Lens on the Pentax Q.

The Pentax Auto 110 from 46 years ago beside the more modern Pentax Q. Notice how the 110 film size is similar to the Pentax Q sensor.
Can Pentax 110 lenses be used on other camera systems?
Just by adding another simple and inexpensive adapter, these vintage lenses can even be used with Micro 4/3rd cameras like those available from Olympus and Panasonic brands.
In fact, the sensors in the Micro 4\3rd cameras fit the rear element of these lenses almost perfectly, meaning there is no lens vignetting.
When used with these camera systems, the crop factor is only 2X meaning the 18mm becomes the equivalent of a 36mm f2.8 lens, the 24mm becomes a 48mm, the 50mm becomes a 100mm and the 70mm becomes a 140mm.

The image shows the four Auto 110 lenses and the #01 standard Q lens for comparison. The 50mm 110 lens is on the camera along with the adapter.
What are the crop factors of 110 lenses on the Pentax Q cameras?
If you are wondering how these lenses translate in the world of traditional 35mm on the Pentax Q series, consider the 5.35 times crop factor of the original Pentax Q and you are left with the following: 18mm = 96mm, 24mm = 128mm, 50mm = 267mm and finally the 70mm = 374mm. The same lenses on the Q7 or Q-S1 – with a larger sensor and a crop factor of 4.65 – results in the following: 18mm = 83mm, 24mm = 111mm, 50mm = 232mm, and finally 70mm = 325mm. These numbers are rounded off, but you get the idea.
All of these lenses are manual focus, fixed f2.8 lenses that do not transmit any information to or from the camera. Just set your Pentax Q on Program, Aperture or shutter priority and let it choose the proper exposure. The over and under compensation button will correct for any unusual lighting conditions.
In addition, with the proper firmware, the camera’s in-body stabilization will work on these lenses after you program the lens’s focal length into camera.

This image shows the resolving power of these lenses.
Pentax 110 70mm is a real gem
The one lens in the group that really stands out to me is the 70mm.
I am drawn to telephoto lenses anyway, so the all-metal 70mm F2.8 Pentax 110 lens that is a made-in-Japan masterpiece is by far my favourite if I need the reach. The 70mm actually translates into almost a 400mm lens (374 mm in 35mm equivalent) on the original Pentax Q.

Pentax’s exquisite, all-metal 70mm f2.8 lens from the former 110 Auto system mounted on the original Pentax Q.
The slightly swirly bokeh on the lens can be beautiful and the silky smooth focus reminds me of the old Takumars.
All this in a package that could easily slip into your coat pocket and weighs in at a mere 240 grams (Pentax Q is 80 grams, plus the 70mm 160 grams = 240 grams). This lens has 6 elements in 5 groups and even uses the traditional Pentax 49 mm filters – perfect for standard circular polarizers and even high-quality close-up lenses.

This Blue Jay was taken with the 70mm lens at f2.8. The bird is sharp enough but the background bokeh with the lens wide open is very pleasing.
Speaking of filters. I was lucky enough to get filters mounted on the entire set I purchased on-line, but if you are looking for your own, here is a list of the filters you will require for these lenses: 18mm takes a 30.5mm filter, 24mm takes a 25.5mm filter, 50mm takes a 37.5mm and the 70mm takes a 49mm filter. Of course with step up rings you can use larger filters such as standard polarizers.
How about image quality?
The build quality, aesthetics and fun factor means little if the image quality falls short.
Some users would argue that the image quality of these lenses does fall far too short to take them serious, but others would say that, with a brilliant little hack, the image quality on these lenses can be very good to excellent.

This image of Joe Pye Weed in a natural woodland was photographed with the 24mm with the rubber washer used to create the effect of an approximately F8 lens.
Simple hack helps sharpen focus
What’s the hack that turns these soft, fixed f2.8 lenses into sharp, high-quality glass?
It involves a $1.00 rubber washer and about one minute of your time. That’s it.
If that’s too much trouble, you can always pick up a box of ring binder reinforcements, use a black sharpie to darken them, and simply stick them on the back of the lens’s plastic surround. That will turn the lenses into about an F8 lens with the accompanying greater depth of field and a significant increase in sharpness.


These images show the rubber washer inside the Q’s adapter: first image is from the back of the adapter closest to the sensor. Second image shows the rubber washer just behind where the lens connects to the adapter.
Although the ring binder reinforcements get a lot of praise on-line, the rubber washer works very well and you could create two or three with different hole sizes to give you more access to different f-stops.

Ring binder reinforcement on the back of one of the 110 lenses.
The rubber washer is simply pushed inside the adapter and sits in a concave position from the camera mount and sensor. From the back of the lens, the rubber washer sits comfortably in a convex position. (see images above).
If you want to shoot the lenses wide open, the rubber washer is extremely easy to remove from the adapter and then replaced in just a few seconds.
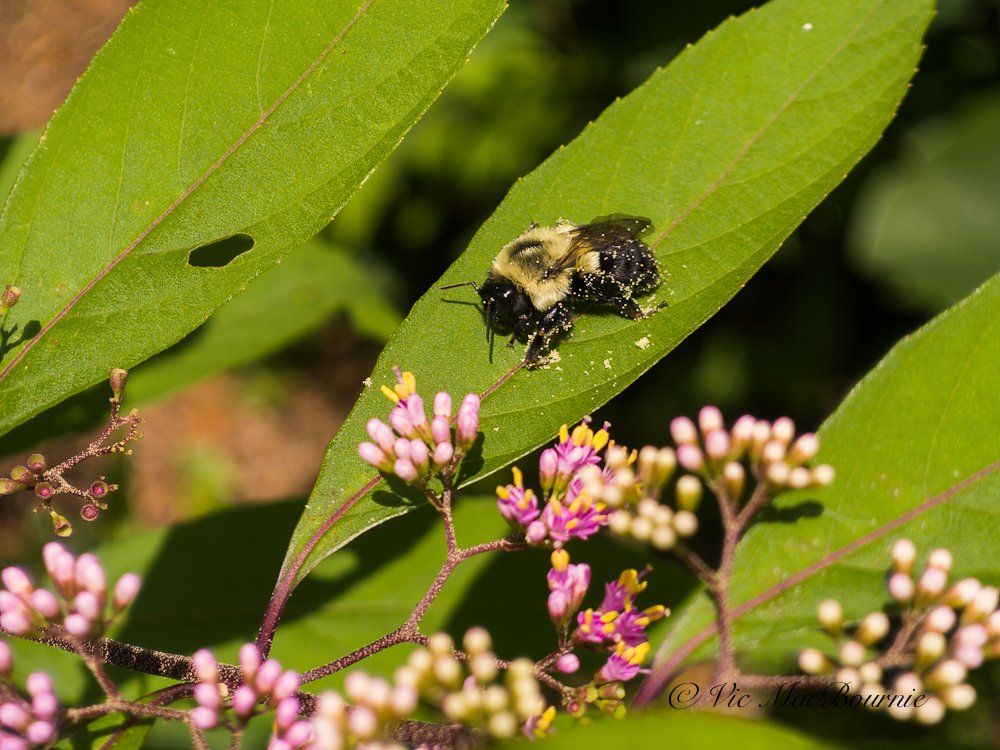
Anyone who thinks these lenses are not capable of achieving sharp focus might be surprised with this shot from the 18mm Auto 110 lens that clearly shows the pollen on and around the Bumble bee.
Using these lenses successfully requires the photographer to slow down.
On the above image and the one below of the bees, I hand held the camera and shot several images to get a sharp one.
However, if you are shooting landscapes, woodlands or your garden flowers, put the camera on a tripod, turn off the anti shake option, use the 2 or 4 times built-in magnifier and focus peaking on the Q to focus precisely on the LCD and use the 2 second delay timer to get the most sharpness out of these lenses.
You will be rewarded for your efforts.

Bumble bee on Blue Lobelia hand held and taken with 18mm lens with rubber washer hack.
Is lens sharpness over rated?
When it comes to lenses, there are those who consider only pin-sharp lenses as acceptable. Others, however, look for qualities in the lenses that give them a look and feel that works with their style of photography whether the lenses are tack sharp or not.
Let’s face it, most images are only ever seen these days on social media where sharpness is already compromised through the social media platform.
I consider these 110 lenses as somewhere in the middle. They are capable of creating very sharp images but the combination of having to manually focus them on the back of the LCD panel and being more than 40 years of age, makes getting tack sharp images difficult sometimes. This difficulty is only increased if you are shooting the lenses wide open at f2.8.

Image of dogwood shot with 18mm lens.
Even with a tripod, sharp images are not the easiest to obtain, especially since so many of us have been spoiled with autofocus lenses.
But, if you use the rubber washer or ring binder reinforcements these lenses really can shine.
The 110 lenses are fun, they fit the Q cameras aesthetic and are usually inexpensive if you can purchase them as a package.
With a little work you can create more than acceptable results, and with a little creativity, you can create masterpieces.
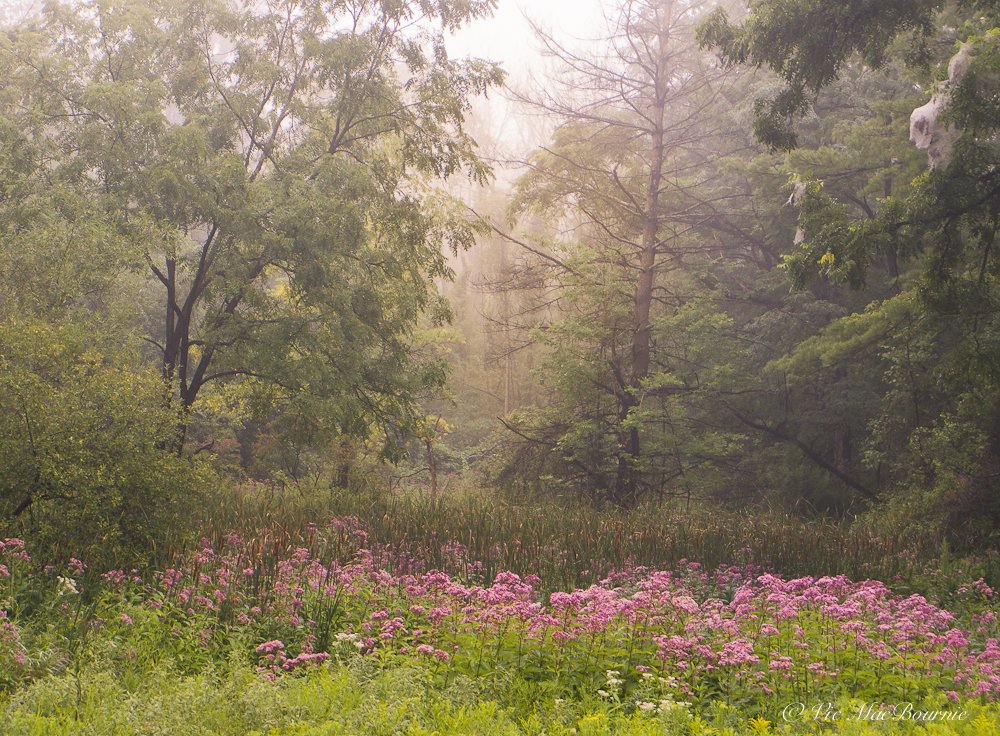
Joe Pye Weed: Pollinator magnet that’s perfect for wet areas
Sweet Joe Pye Weed is an impressive native wildflower that attracts a range of pollinators from bees to butterflies.
How to grow and care for Sweet Joe Pye Weed
Sweet Joe Pye Weed (Eutrochium Purpureum) is a stunning perennial plant that not only adds beauty to your garden but also draws in a host of pollinators and butterflies including swallowtails and monarchs.
In our backyard, I have it growing toward the back of the property at the foot of a small hill and mini meadow where its impressive size and pink blooms combine nicely with the other late-blooming native plants like asters, goldenrod and wild sunflowers. It is native to eastern United States and Canada and is hardy in zones 4-8.
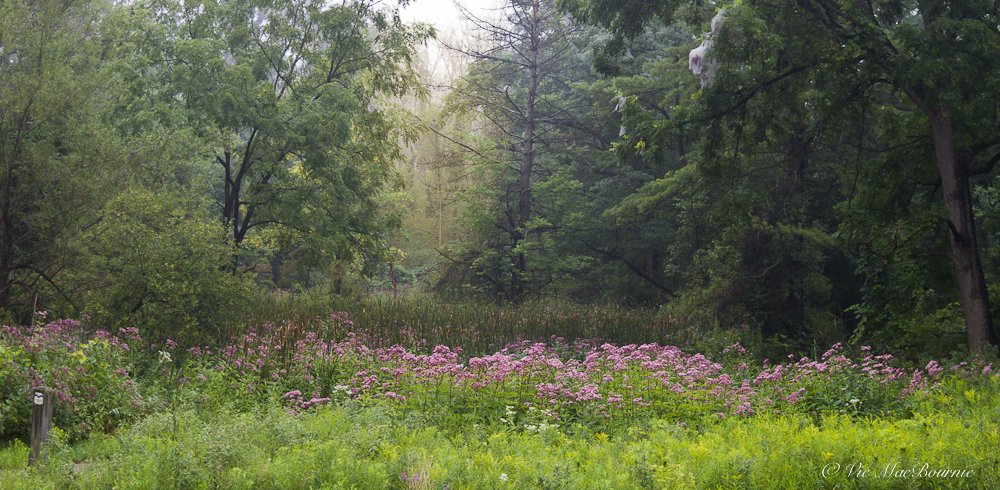
Joe Pye Weed (Eutrochium Purpureum) is shown here growing in a drift in a natural woodland area.
Joe Pye Weed is both deer and rabbit resistant. The plants also tolerates both clay soil and road salt spray, making them ideal plants to use as a screen if you need privacy near a roadway.
Consider growing Joe Pye Weed as a native alternative to the non-native and invasive butterfly bush. Joe Pye Weed is host to a number of butterflies and moths including the Ruby Tiger moth.
Can I grow different Joe Pye Weed plants?
There are actually several different Joe Pye Weeds you could grow in your garden including the tallest plant Hollow Joe Pye Weed (Eutrochium Fistulosum) known for growing large flower heads on 5-7 foot tall plants. Under optimum conditions, it is said that this plant can grow up to 12 feet in height with blooms from July through September. It does best in full sun and spreads by rhizomes. The stem, which is hollow as its name suggests, has a whitish surface.
•Spotted Joe Pye Weed (Eutrochium maculatum) blooms a little later than other Joe Pye Weeds lasting from August through October. It grows best in damp soil and spreads by underground rhizomes.
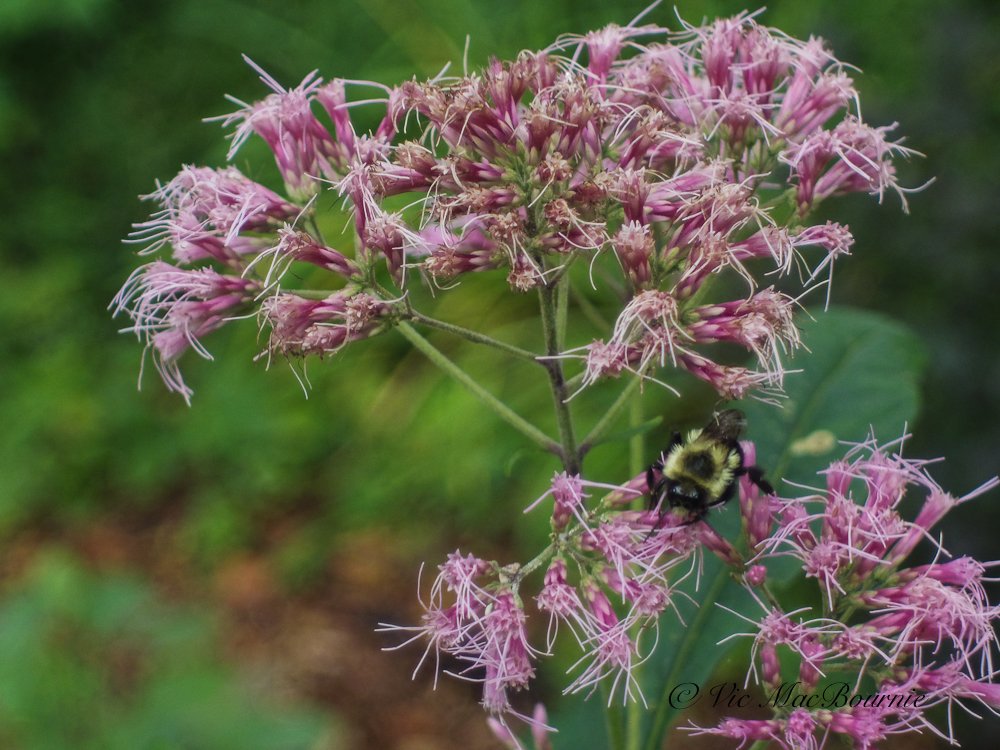
A large bumble bee works the nectar of our Joe Pye Weed in the woodland garden.
• Coastal Joe Pye Weed (Eutrochium dubium) is the smallest of the Joe Pye Weeds and is known for producing its beautiful display of purple to pink flowers on three- to five-foot stems. The bloom period lasts from July through to October and grows best in wet sandy soils. It is found growing along the atlantic coastal states. The leaves are rough and the stems are purple spotted.
There are also many cultivars available, with the cultivar “Little Joe” being the most common at nurseries. It grows to a maximum height of 3-4 feet, has stiffer stems and is more drought resistant than the native species. Other cultivars include Gateway, and more short varieties including Baby Joe and Little dwarf.
It’s always better to grow the native plants whenever possible to ensure the best ecological results.
Joe Pye Weed prefers moist ground, including wooded slopes, wet meadows, and along the banks of streams.
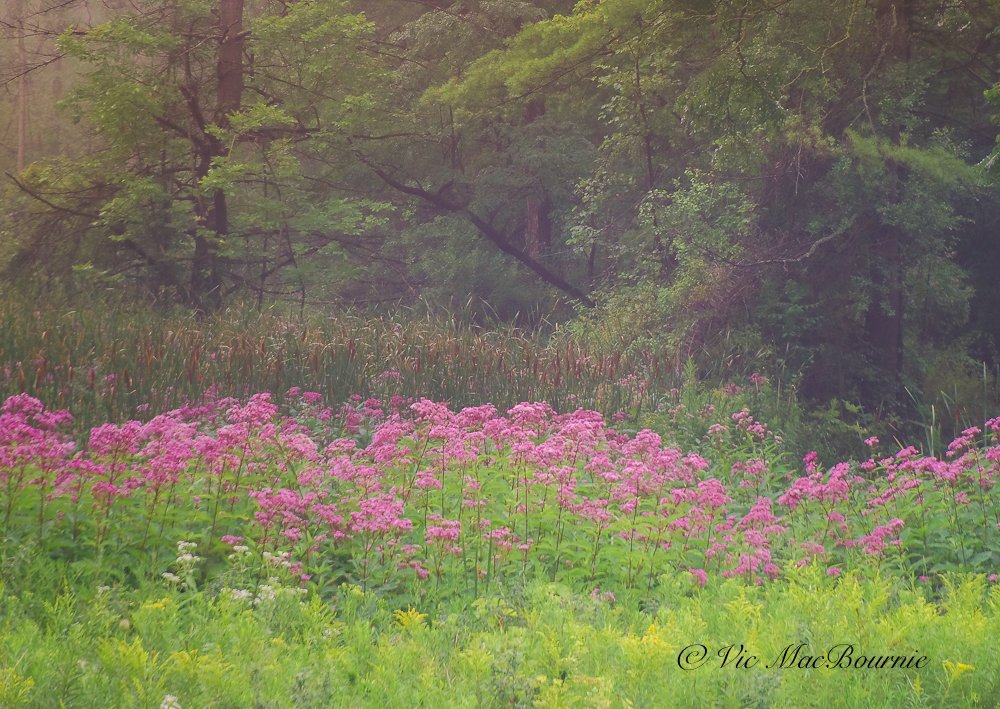
A beautiful drift of Sweet Joe Pye Weed lights up the forest on this misty morning.
Why plant native varieties rather than cultivars?
Like most native plants, Sweet Joe Pye Weed plays a crucial role in supporting and sustaining pollinators, such as bees, butterflies, and hummingbirds. Native plants have co-evolved with local pollinators over thousands of years, developing a mutually beneficial relationship. Unlike non-native plants, native plants provide the essential food sources and habitats that pollinators need to survive and thrive.

Sweet Joe Pye Weed’s vibrant pink flowers are a magnet for bees, butterflies, and other important pollinating insects, providing a rich source of nectar, fuelling the energy needs of these creatures as they go about their essential work in our gardens.
One of the key advantages of Sweet Joe Pye Weed is its long blooming period, which extends from mid-summer to early fall. This extended flowering time ensures a consistent supply of nectar for pollinators throughout the season when other food sources may begin to become scarce.
By planting Sweet Joe Pye Weed in your garden, you’re providing a reliable food source for pollinators during critical times as well as providing an important nectar source for hummingbirds as they begin their migration south.
Another benefit of Sweet Joe Pye Weed is its impressive height, reaching up to six feet or more. This tall stature makes it highly visible and easily accessible to pollinators, attracting them from a distance.
The towering flower clusters of Sweet Joe Pye Weed also create a stunning visual display in the garden. If you have the room, plant drifts of Joe Pye Weed to take advantage of the late summer bloom period. The first image on this post, for example, shows how effective a large drift can be in a garden, especially in a wet area where other traditional plants often struggle.
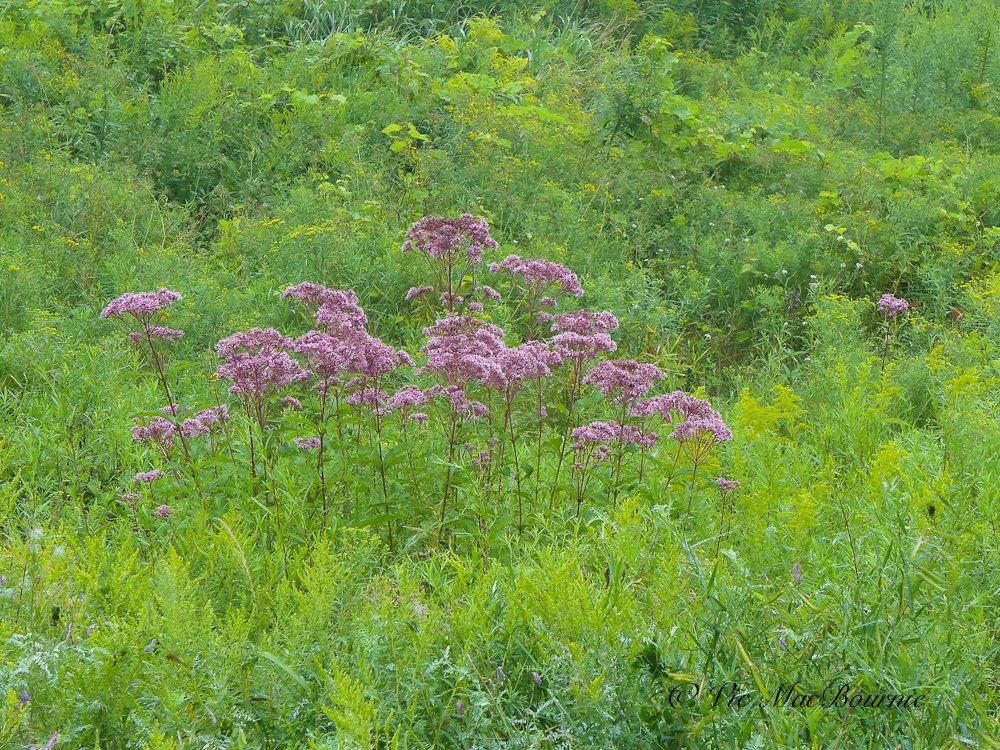
Joe Pye Weed growing in natural meadow surrounded by golden rod.
Furthermore, Sweet Joe Pye Weed is a versatile plant that can thrive in various soil types, including moist or wet areas.
This adaptability makes it an excellent choice for rain gardens, stream banks, or any location with consistently damp conditions. By incorporating Sweet Joe Pye Weed into these environments, you’re not only enhancing the beauty of the landscape but also providing valuable resources for pollinators that rely on such habitats.
In our garden, two plants tell a very different tale. The plant at the bottom of the hill is growing with great vigour, while a second Joe Pye Weed planted nearby is struggling because it is growing in a much dryer environment. While it will survive in a dry area, Joe Pye Weed really does well in damp or even wet conditions. Regular watering and the fact it is growing at the bottom of a hill, where water is more likely to trickle down to the roots and keep the surrounding area damp, has played a role in the plant’s success.
One of the main reasons why native plants are important for pollinators is their ability to provide a diverse and reliable source of nectar and pollen. Native plants have evolved to produce flowers that are perfectly suited for the specific needs of local pollinators, including their tongue length, body size, and feeding behaviours.
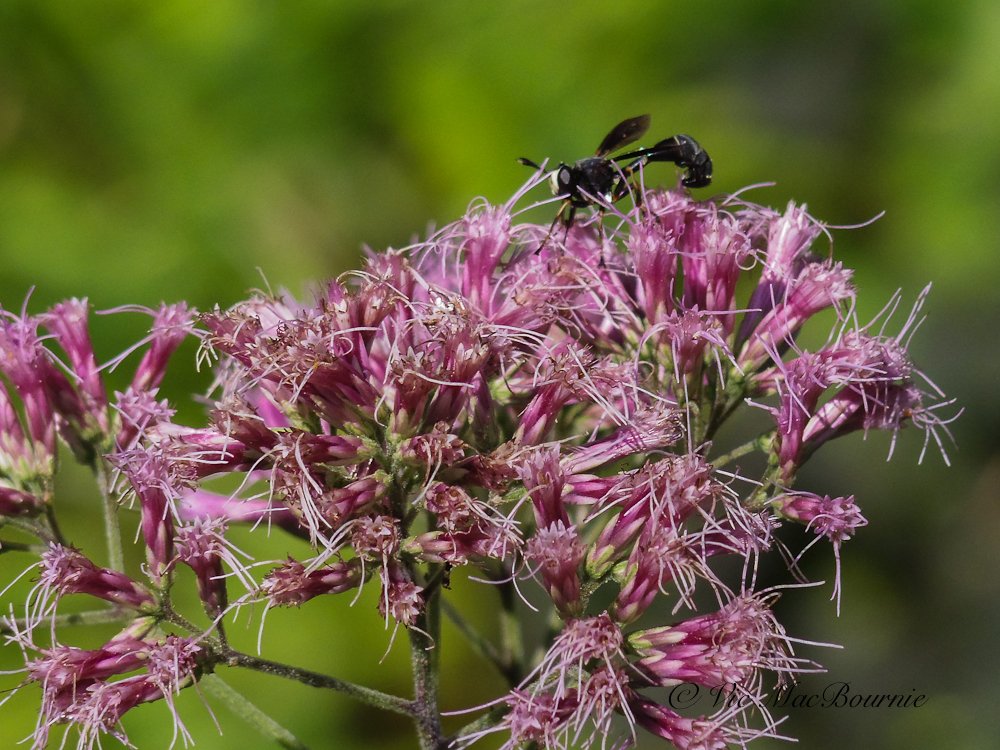
Joe Pye Weed attracts a host of pollinators, from bees and butterflies to wasps.
By planting native plants like Sweet Joe Pye Weed in your garden, you can create a haven for pollinators and help maintain the delicate balance of our ecosystems. They also contribute to the overall biodiversity of the area around your garden, creating a healthier and more resilient environment.
In addition to providing food, native plants often provide shelter and nesting sites for pollinators.
A native plant you need in your garden
In summary, Sweet Joe Pye Weed offers a multitude of benefits for pollinators. Its abundant nectar, long blooming period, towering height, and adaptability to different soil conditions make it an ideal choice for attracting and supporting a diverse range of pollinating insects.
By including Sweet Joe Pye Weed in your garden, you’re creating a paradise for pollinators and contributing to the overall health and vitality of our ecosystems.

This image shows a lovely drift of Joe Pie Weed growing naturally in a nearby woodlands.
How to grow Joe Pye Weed
Now that you’re familiar with the benefits of Sweet Joe Pye Weed for pollinators, let's explore how to successfully grow this native plant in your garden.
First and foremost, it's important to choose the right location for planting Sweet Joe Pye Weed. This perennial thrives in full sun to partial shade, so select a spot that receives at least six hours of direct sunlight each day. Additionally, ensure the soil is well-draining to prevent waterlogged conditions that can harm the plant.
Before planting, ensure your Sweet Joe Pye Weed is planted in a fertile soil by adding organic matter like compost or well-rotted manure to improve its nutrient content.
When it comes to planting, space the Sweet Joe Pye Weed plants about two to three feet apart to allow for proper air circulation and growth.
Once planted, it’s crucial to provide adequate moisture to help establish the Sweet Joe Pye Weed. Water the plants deeply after planting and continue to water regularly, especially during dry spells.
To promote healthy growth and abundant blooms, you may want to apply a balanced fertilizer in early spring, but heavy fertilizing is not necessary with native plants.
While Sweet Joe Pye Weed is generally resistant to most pests, occasional issues with aphids or powdery mildew may arise. I wouldn’t worry much about these problems and, instead, let nature take care of any pests that may occur.
Finally, to maintain the vigour and longevity of your Sweet Joe Pye Weed plants, it’s beneficial to divide them every three to four years. Dividing helps prevent overcrowding and promotes better airflow, resulting in healthier plants.
By following these simple guidelines, you can successfully grow Sweet Joe Pye Weed in your garden and create a thriving habitat for pollinators.
So get ready to enjoy the beauty of this native plant while supporting the essential work of bees, butterflies, and other pollinating insects.
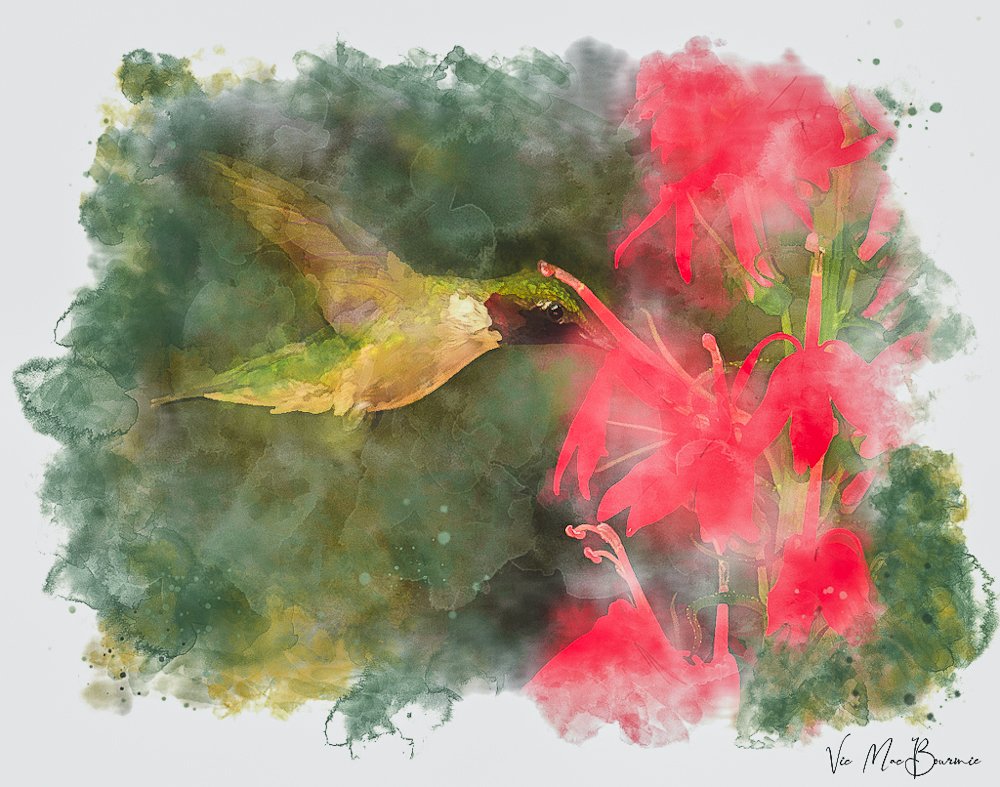
Hummingbird images and digital creations
Capturing and creating memorable images of hummingbirds can be an extremely rewarding experience.
How to create memorable images of hummingbirds
Hummingbirds are the perfect models for backyard photographers.
Not only are they regular visitors to our gardens, their destinations are often very predictable, including the flowers they are most likely to go to and even where they enjoy perching for periods of time.
Despite all of this, their quick movements can make getting good images difficult.
For more on hummingbirds in the garden, check out the following posts:
• How to help Hummingbirds during migration
• Five tips to attract hummingbirds
• Create a hummingbird hangout in your yard
• Where do hummingbirds go in winter
The following are a combination of photographs and digital paintings created from photographs that I have taken or created over the past few years in our garden.
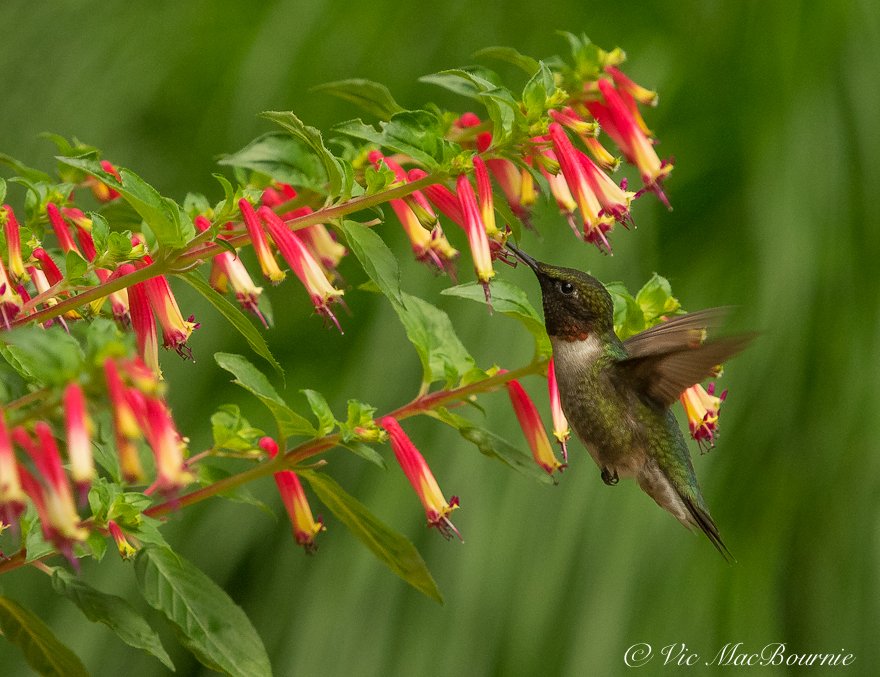
This image of beautiful hummingbird working cuphea flowers shows how capturing the birds in soft light can result in a lovely image. The colourful flowers and soft background help to make the hummingbird standout in the image.
Trying to capture images of hummingbirds requires patience.
Setting the shutter speed fast enough to stop any movement is an important first step.
A good starting point is a shutter speed of at least 500th of a second, but that will not stop the movement of the wings. You will need a much faster shutter speed to stop the wing movement – something in the range of 1200 or higher. Unfortunately, increasing the shutter speed usually means your ISO needs to be up extremely high. This, of course, can lead to grainy or noisy images.
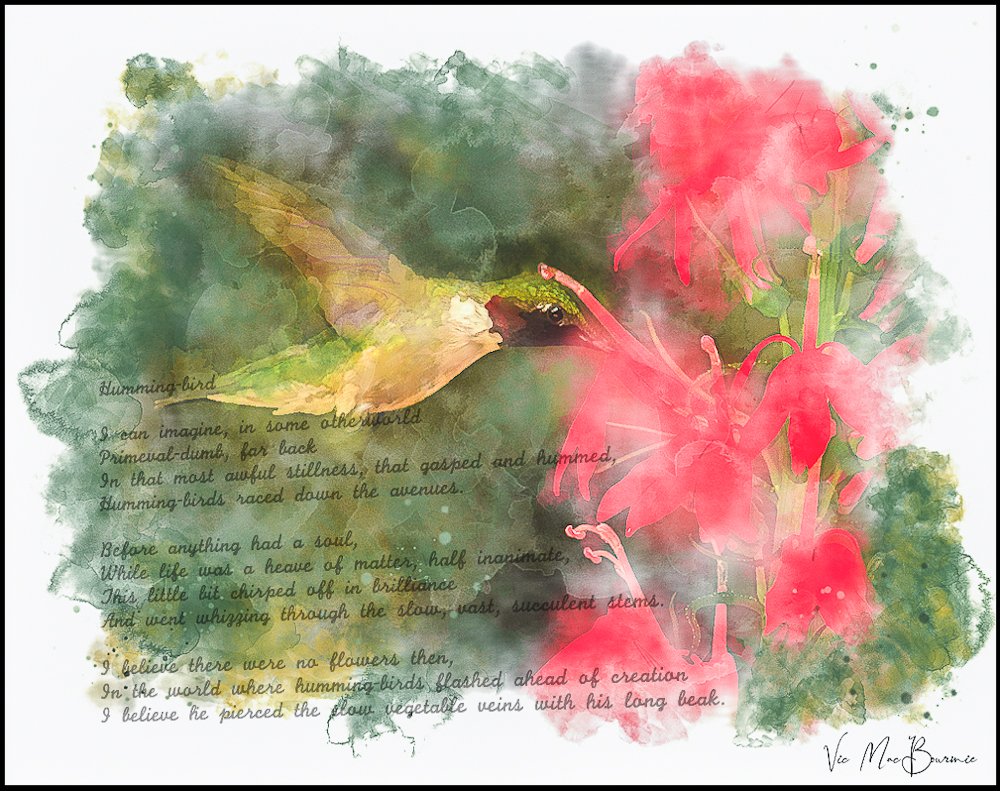
Digital image of hummingbird with D.H. Lawrence poem.
Using flash is an excellent way not only to help add some pop to the image, but also stop any motion. The flash also adds a highlight in the bird’s eye, which helps to give the bird some life.
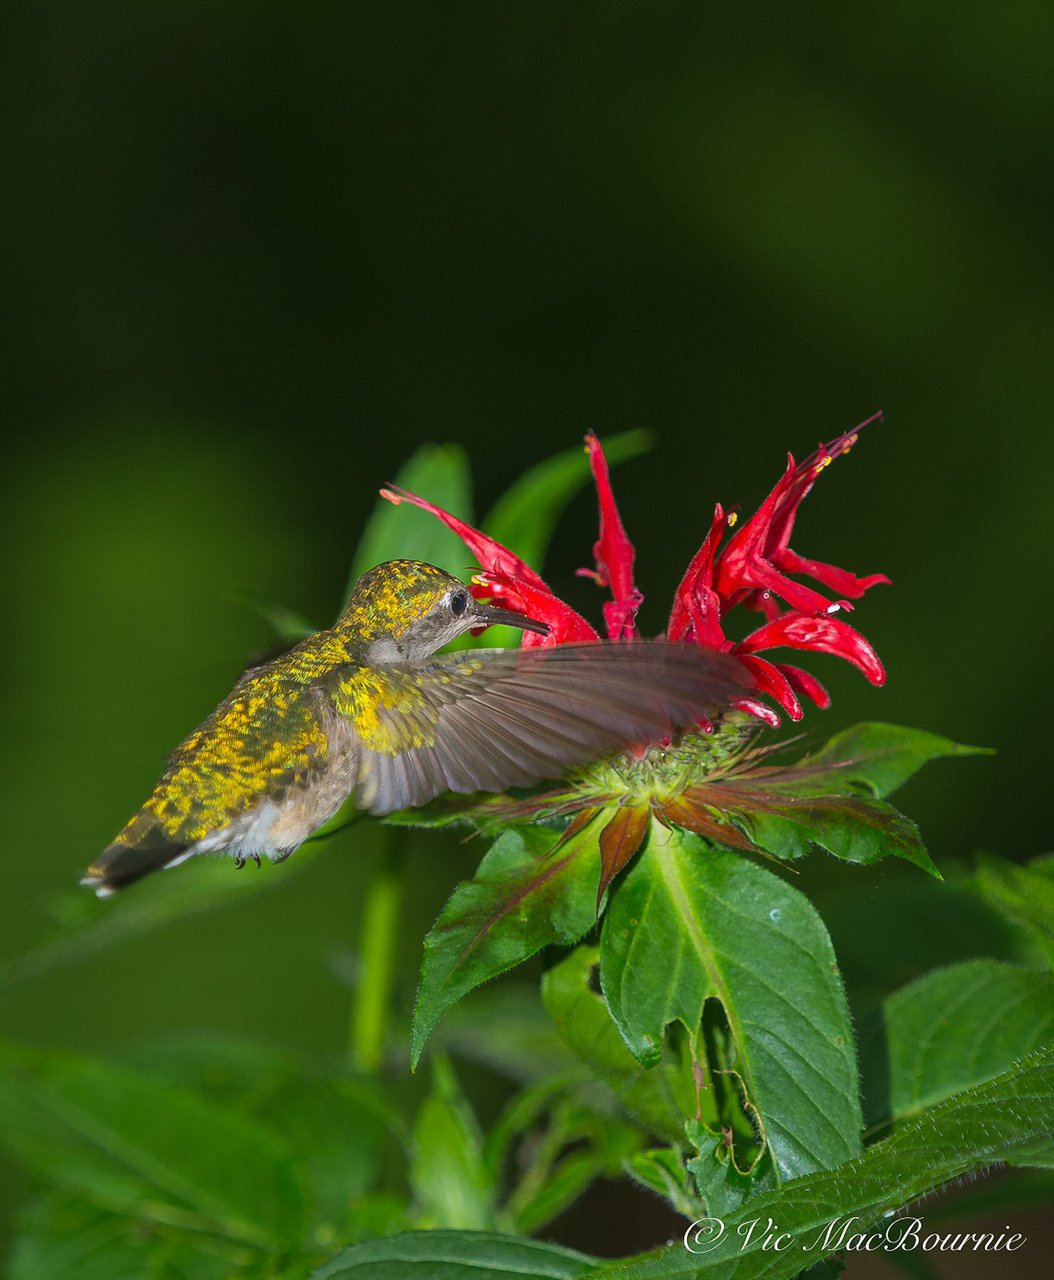
A hummingbird is photographed from up close at a Cardinal Flower. Notice the iredescent feathers on the bird’s upper body.
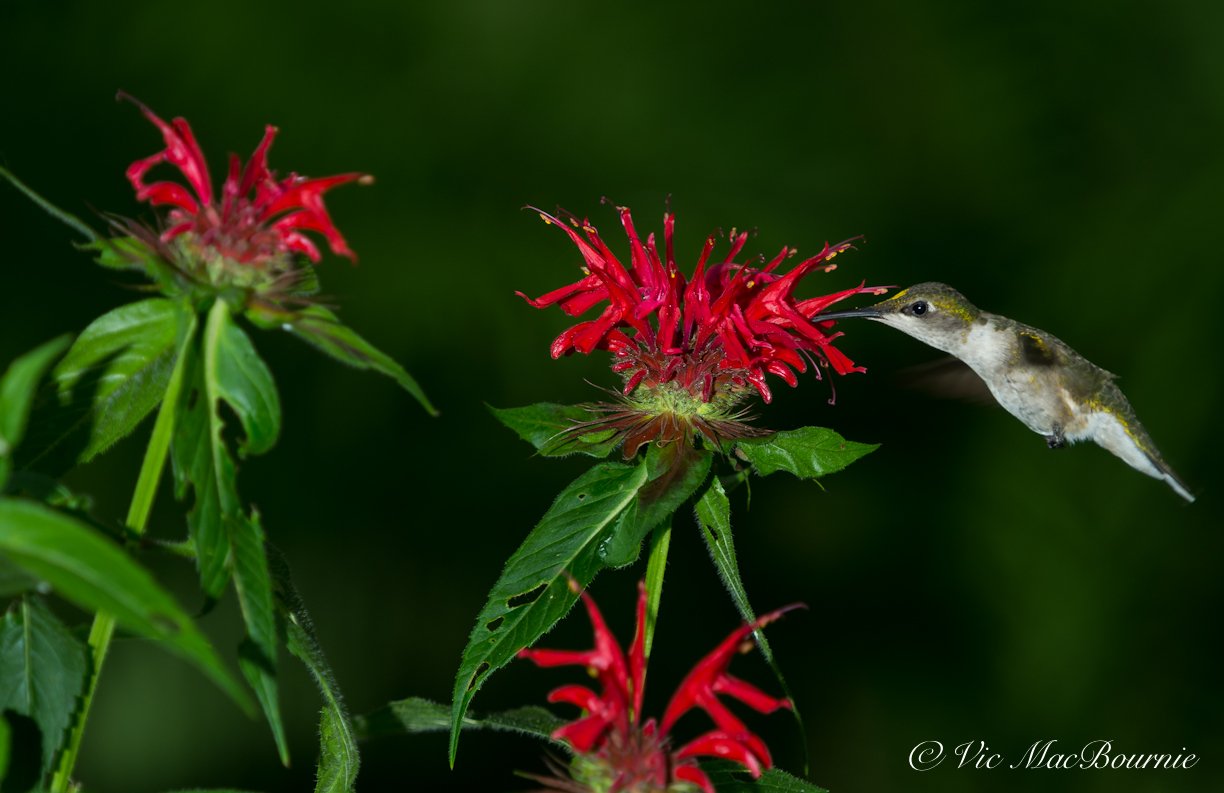
This is one of the few images where I used a flash to capture the hummingbird. Using a flash helps add pop to the image by lighting the bird and flowers up nicely while creating a darker background. By balancing the flash with the background light, I was able to still keep colour in the background rather than having a completely black background.
Planting flowers – both annual and perennial – that hummingbirds are particularly attracted to provides excellent opportunities to capture these tiny birds.

Cuphea is an excellent annual plant to add to your garden. Use it in the landscape, in a container or even a hanging basket to attract hummingbirds.
Although the above image looks like it may have been photographed using a flash, it was actually taken later in the morning in direct sunlight when the plant was in full sunshine but the background was still in shade.

This was one of my first images of a hummingbird in flight.
A long telephoto lens was in most of these images including the above image where I used a 300mm F4.5 lens (420mm equivalent). This is an ideal lens to photograph these tiny birds from a respectable distance.
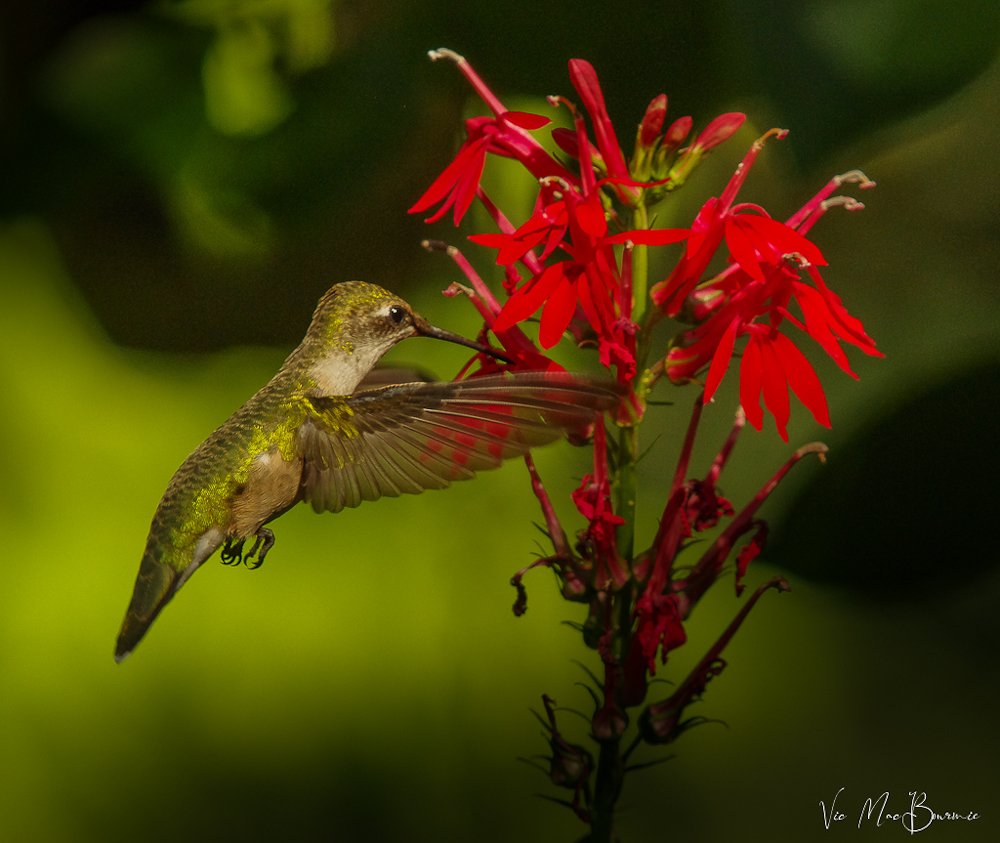
This image is interesting because it shows the translucent wings of the hummingbird in flight.
Although photographers strive to capture hummingbirds in their natural environments, including a feeder can result in some interesting images. In the hummingbird image below, I tried to capture both the feeder and the hummingbird swing in the same image.
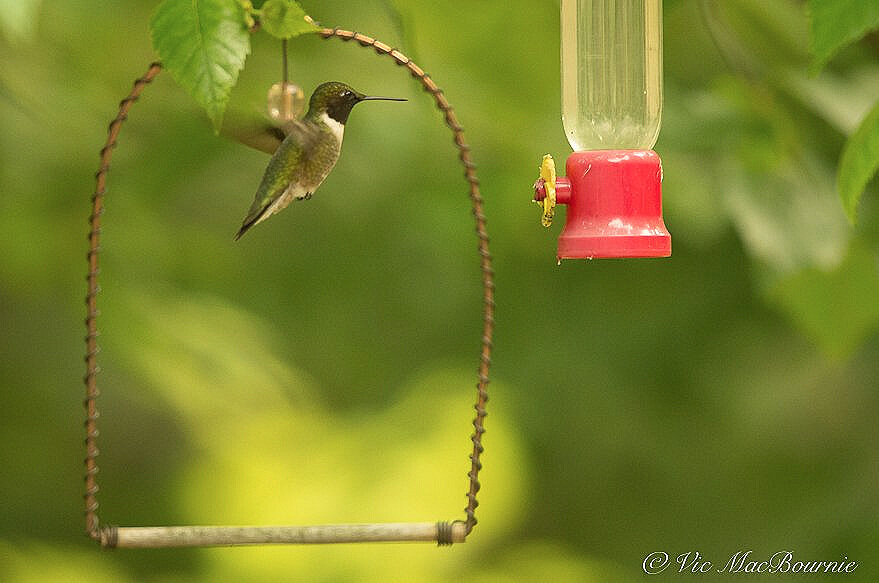
Capturing both the feeder and the hummingbird perch in the same image tells a story about our backyard hummingbird haven where I have tried to create a corner in the yard specifically to attract and photograph these spunky little birds.

Capturing a hummingbird at a feeder may not be the best image, but it’s good way to begin capturing images of these tiny birds. Hummingbirds also don’t mind a close approach if they get to know and trust you, so these type of images are possible using a simple point and shoot camera with a longer lens.
Capturing hummingbirds with smaller point-and-shoot cameras, such as those made by Canon, Panasonic’s Lumix LX line of cameras, or their ZS line of high-end point and shoot cameras and Fuji can be challenging, but with a little extra effort and patience, it’s possible to get some nice environmental images such as the ones below. With a little patience and practise you can learn to get the most out of your compact camera.
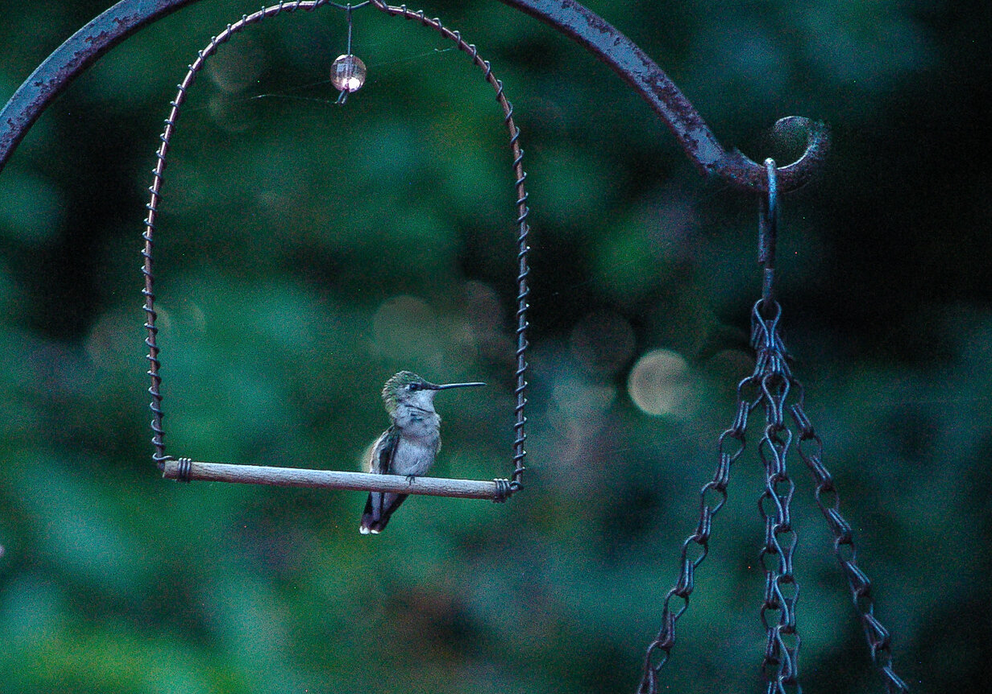
This hummingbird posed on this perch for a period of time allowing me to capture it with a simple point-and-shoot camera.

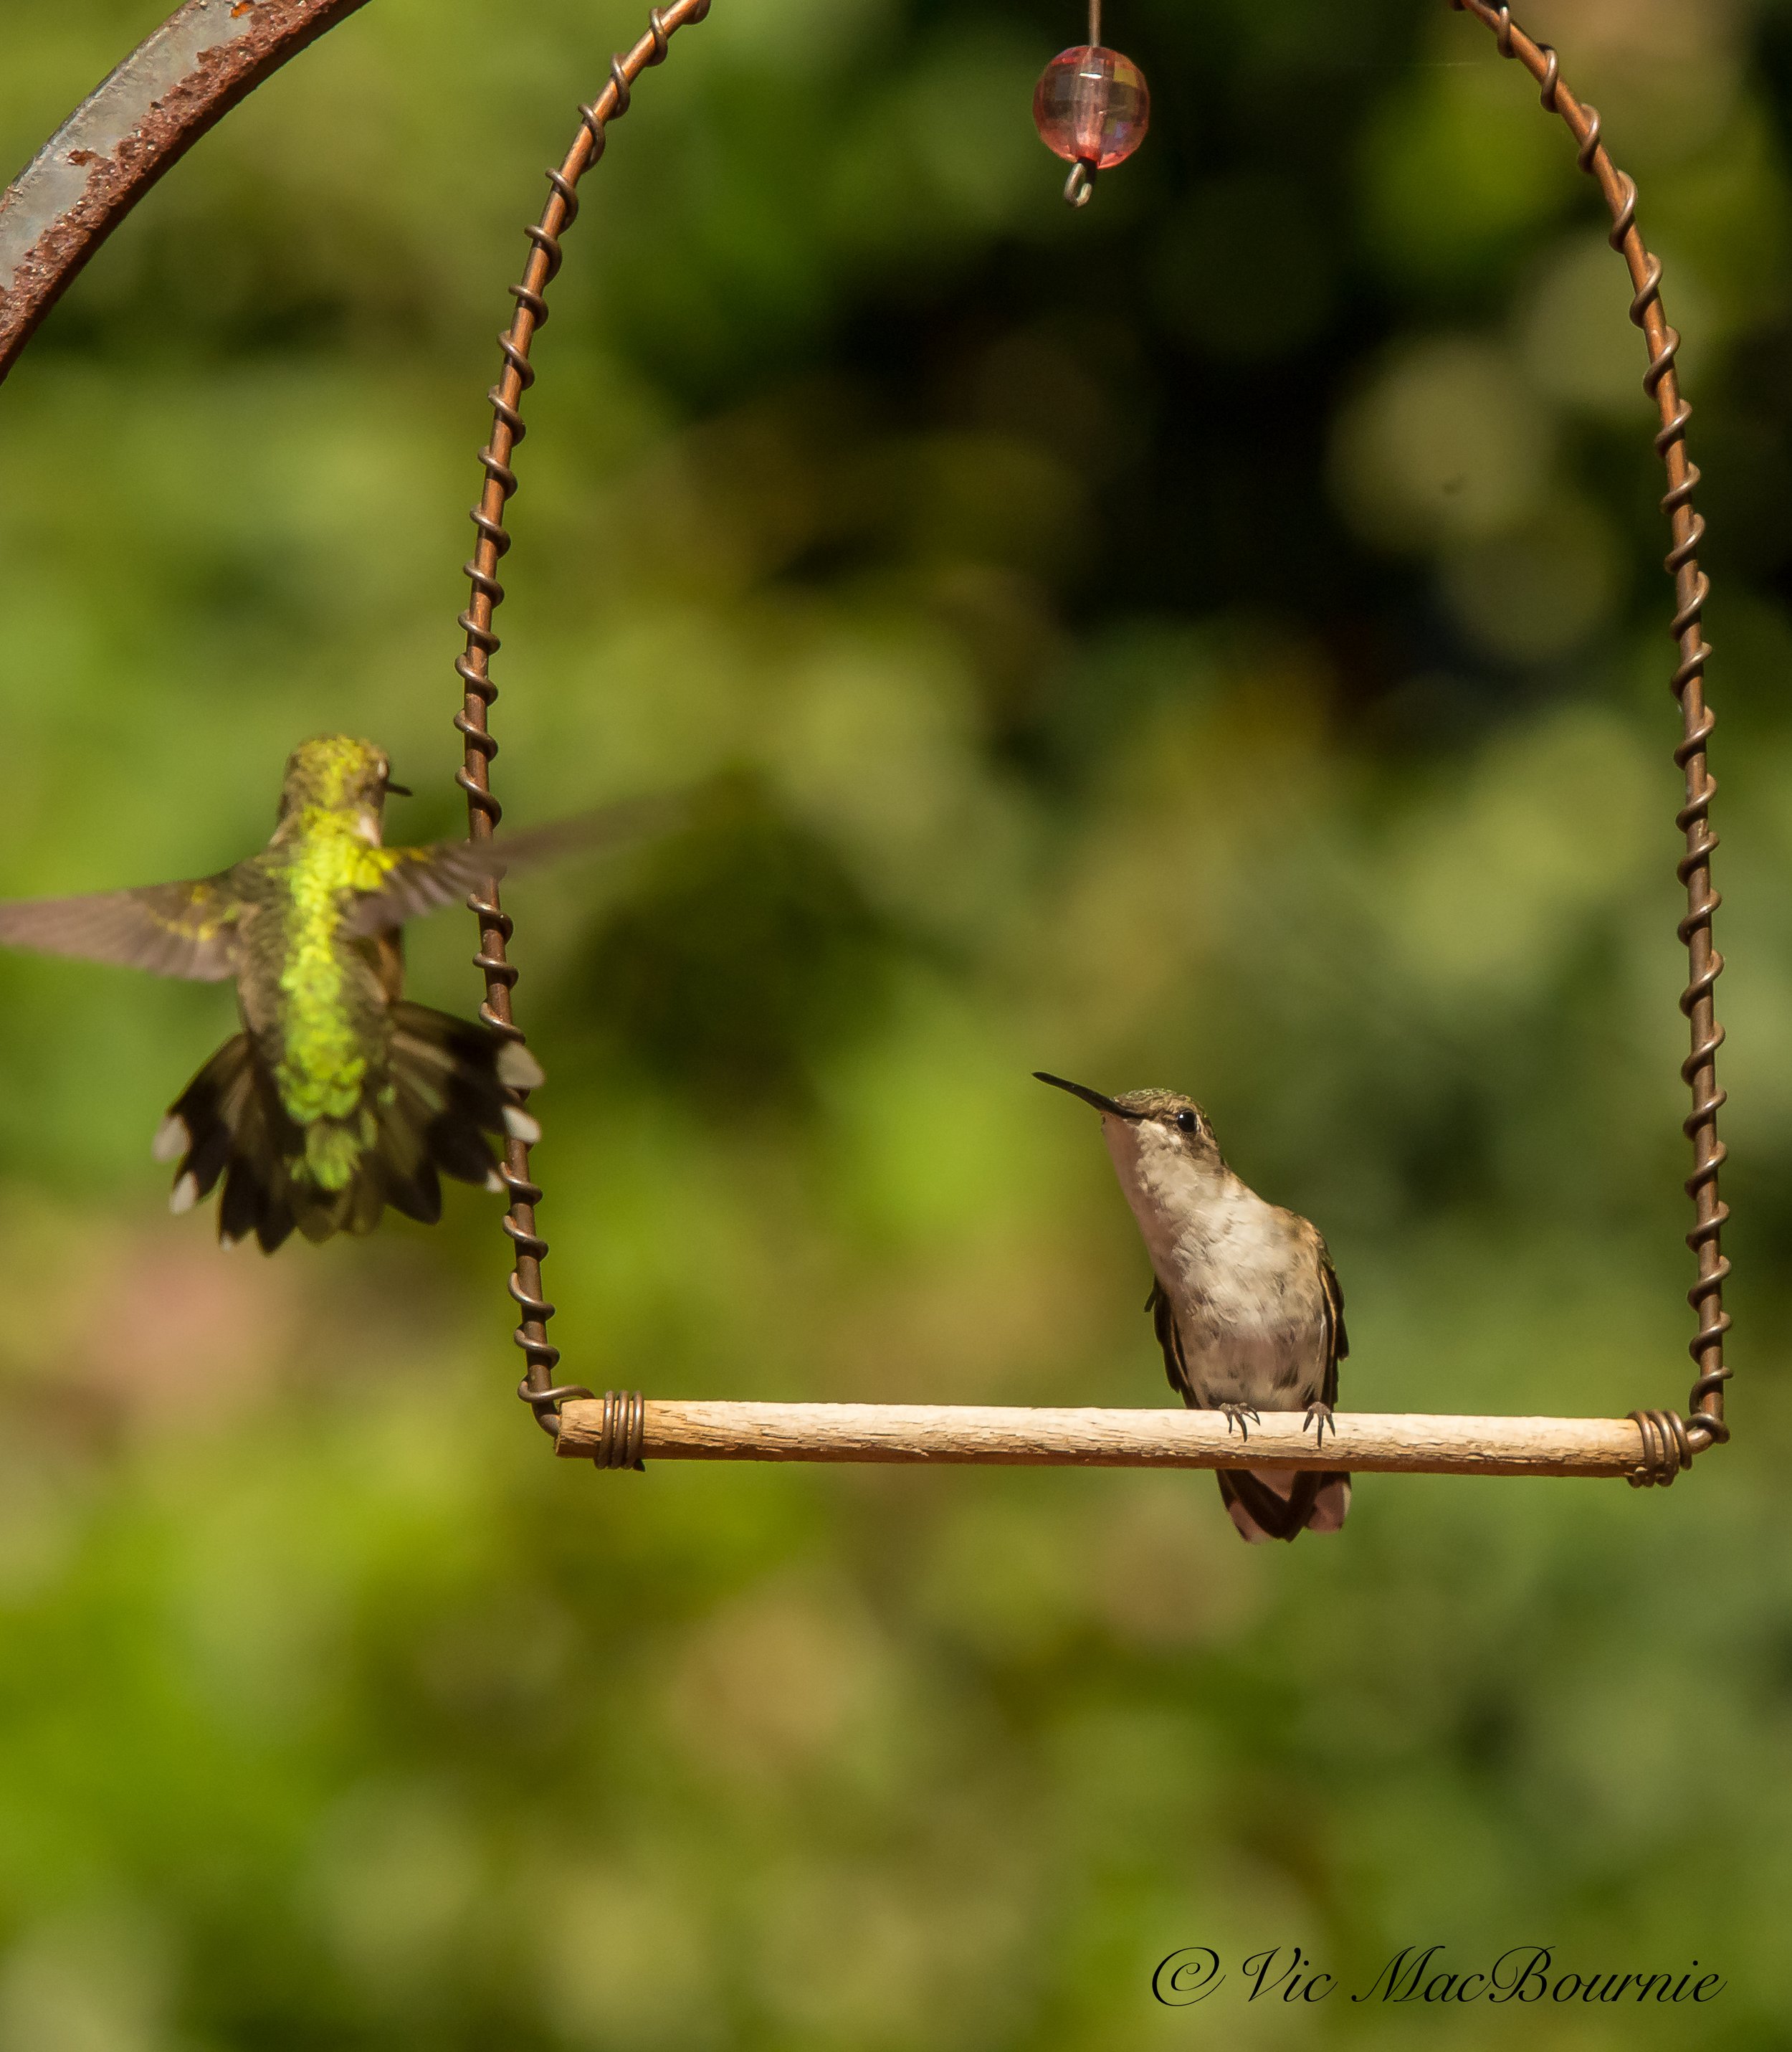
Hummingbirds will often show aggressive territorial displays especially later in the season.
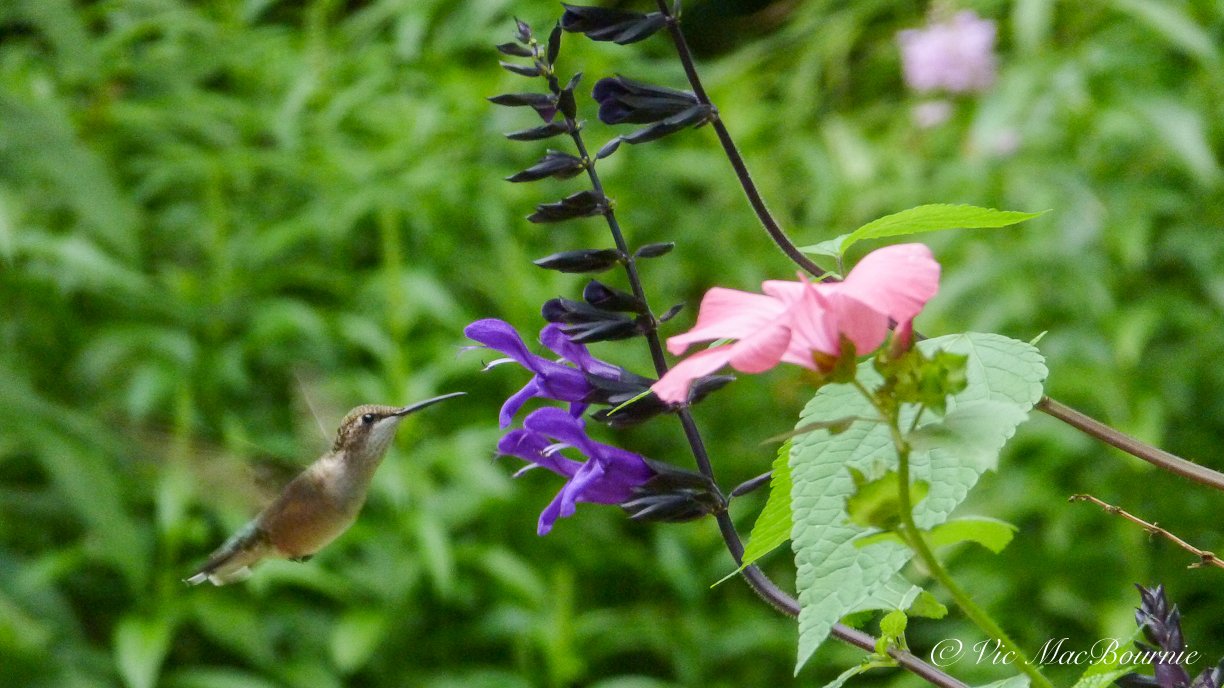
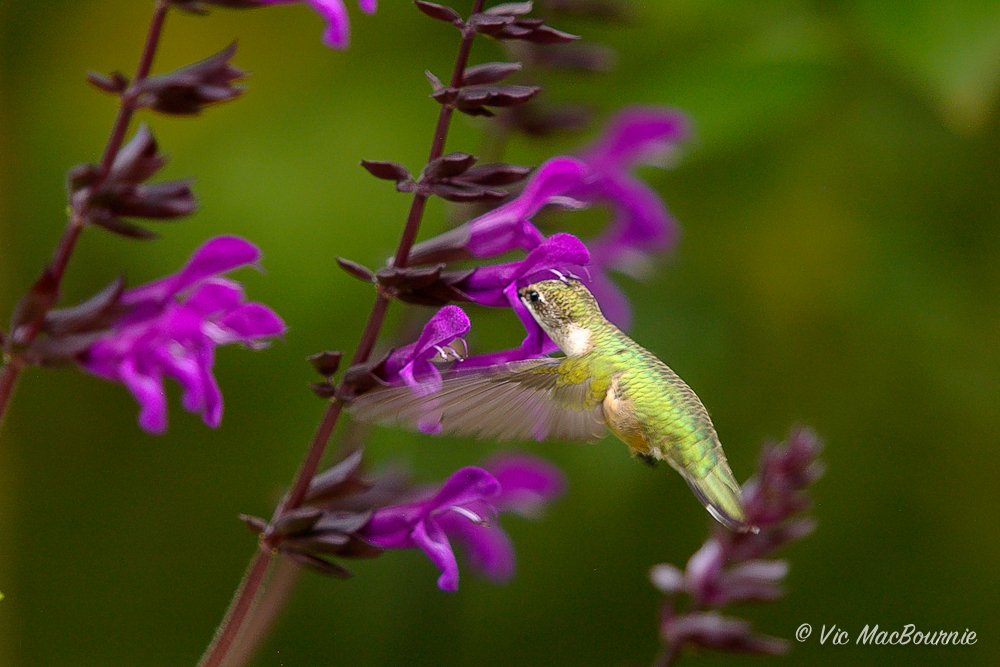
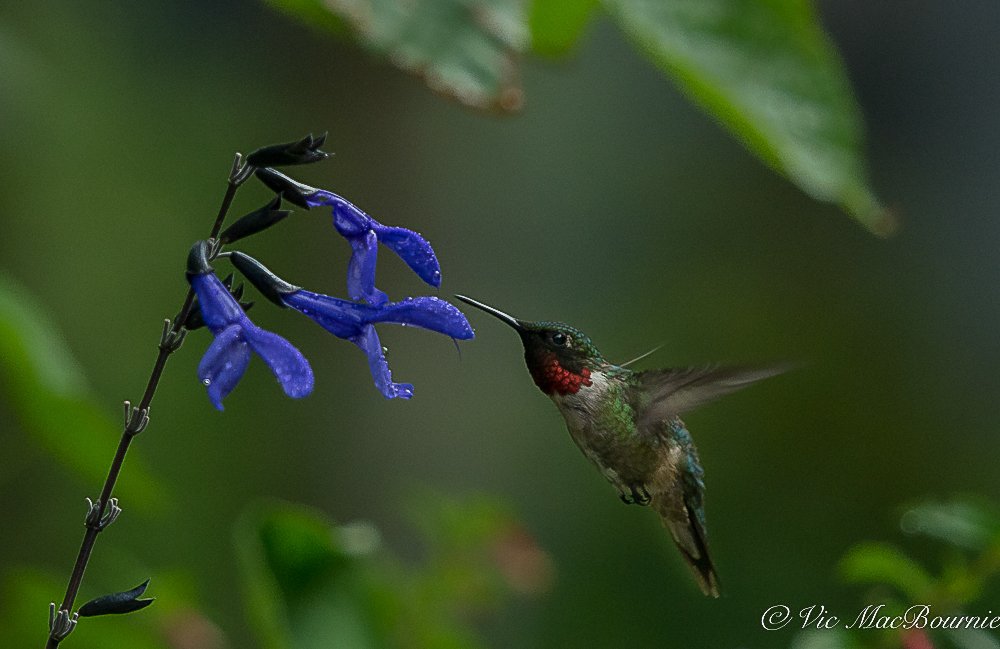
This image shows a male hummingbird at an annual salvia plant.
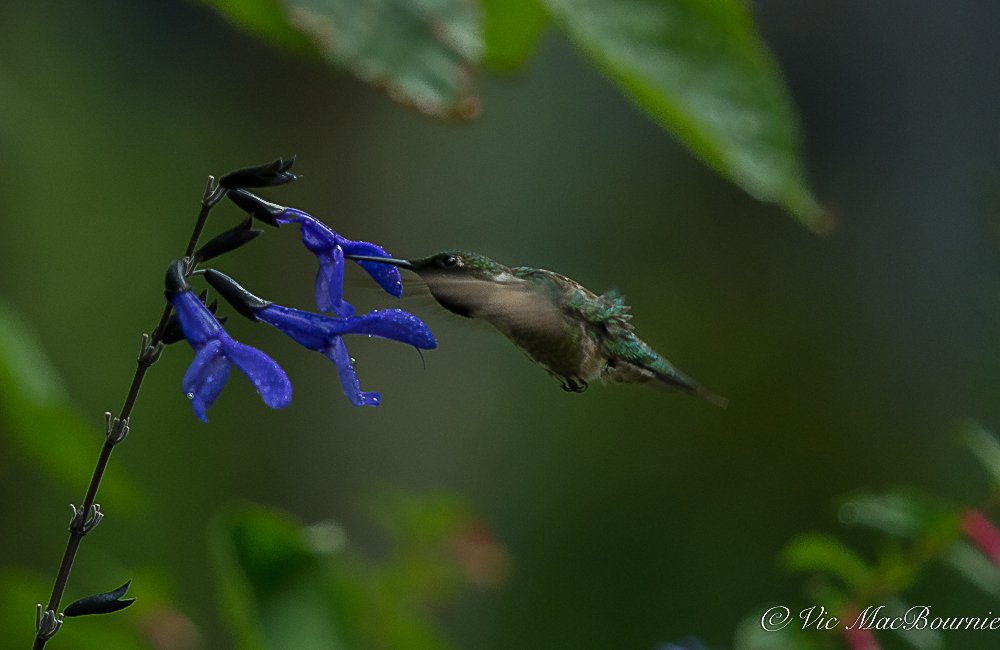
Hummingbird working the salvia. The 300mm f4.5 lens provides a beautifully soft background to the image.

Hummingbird shows off its tail feathers while on its perch.
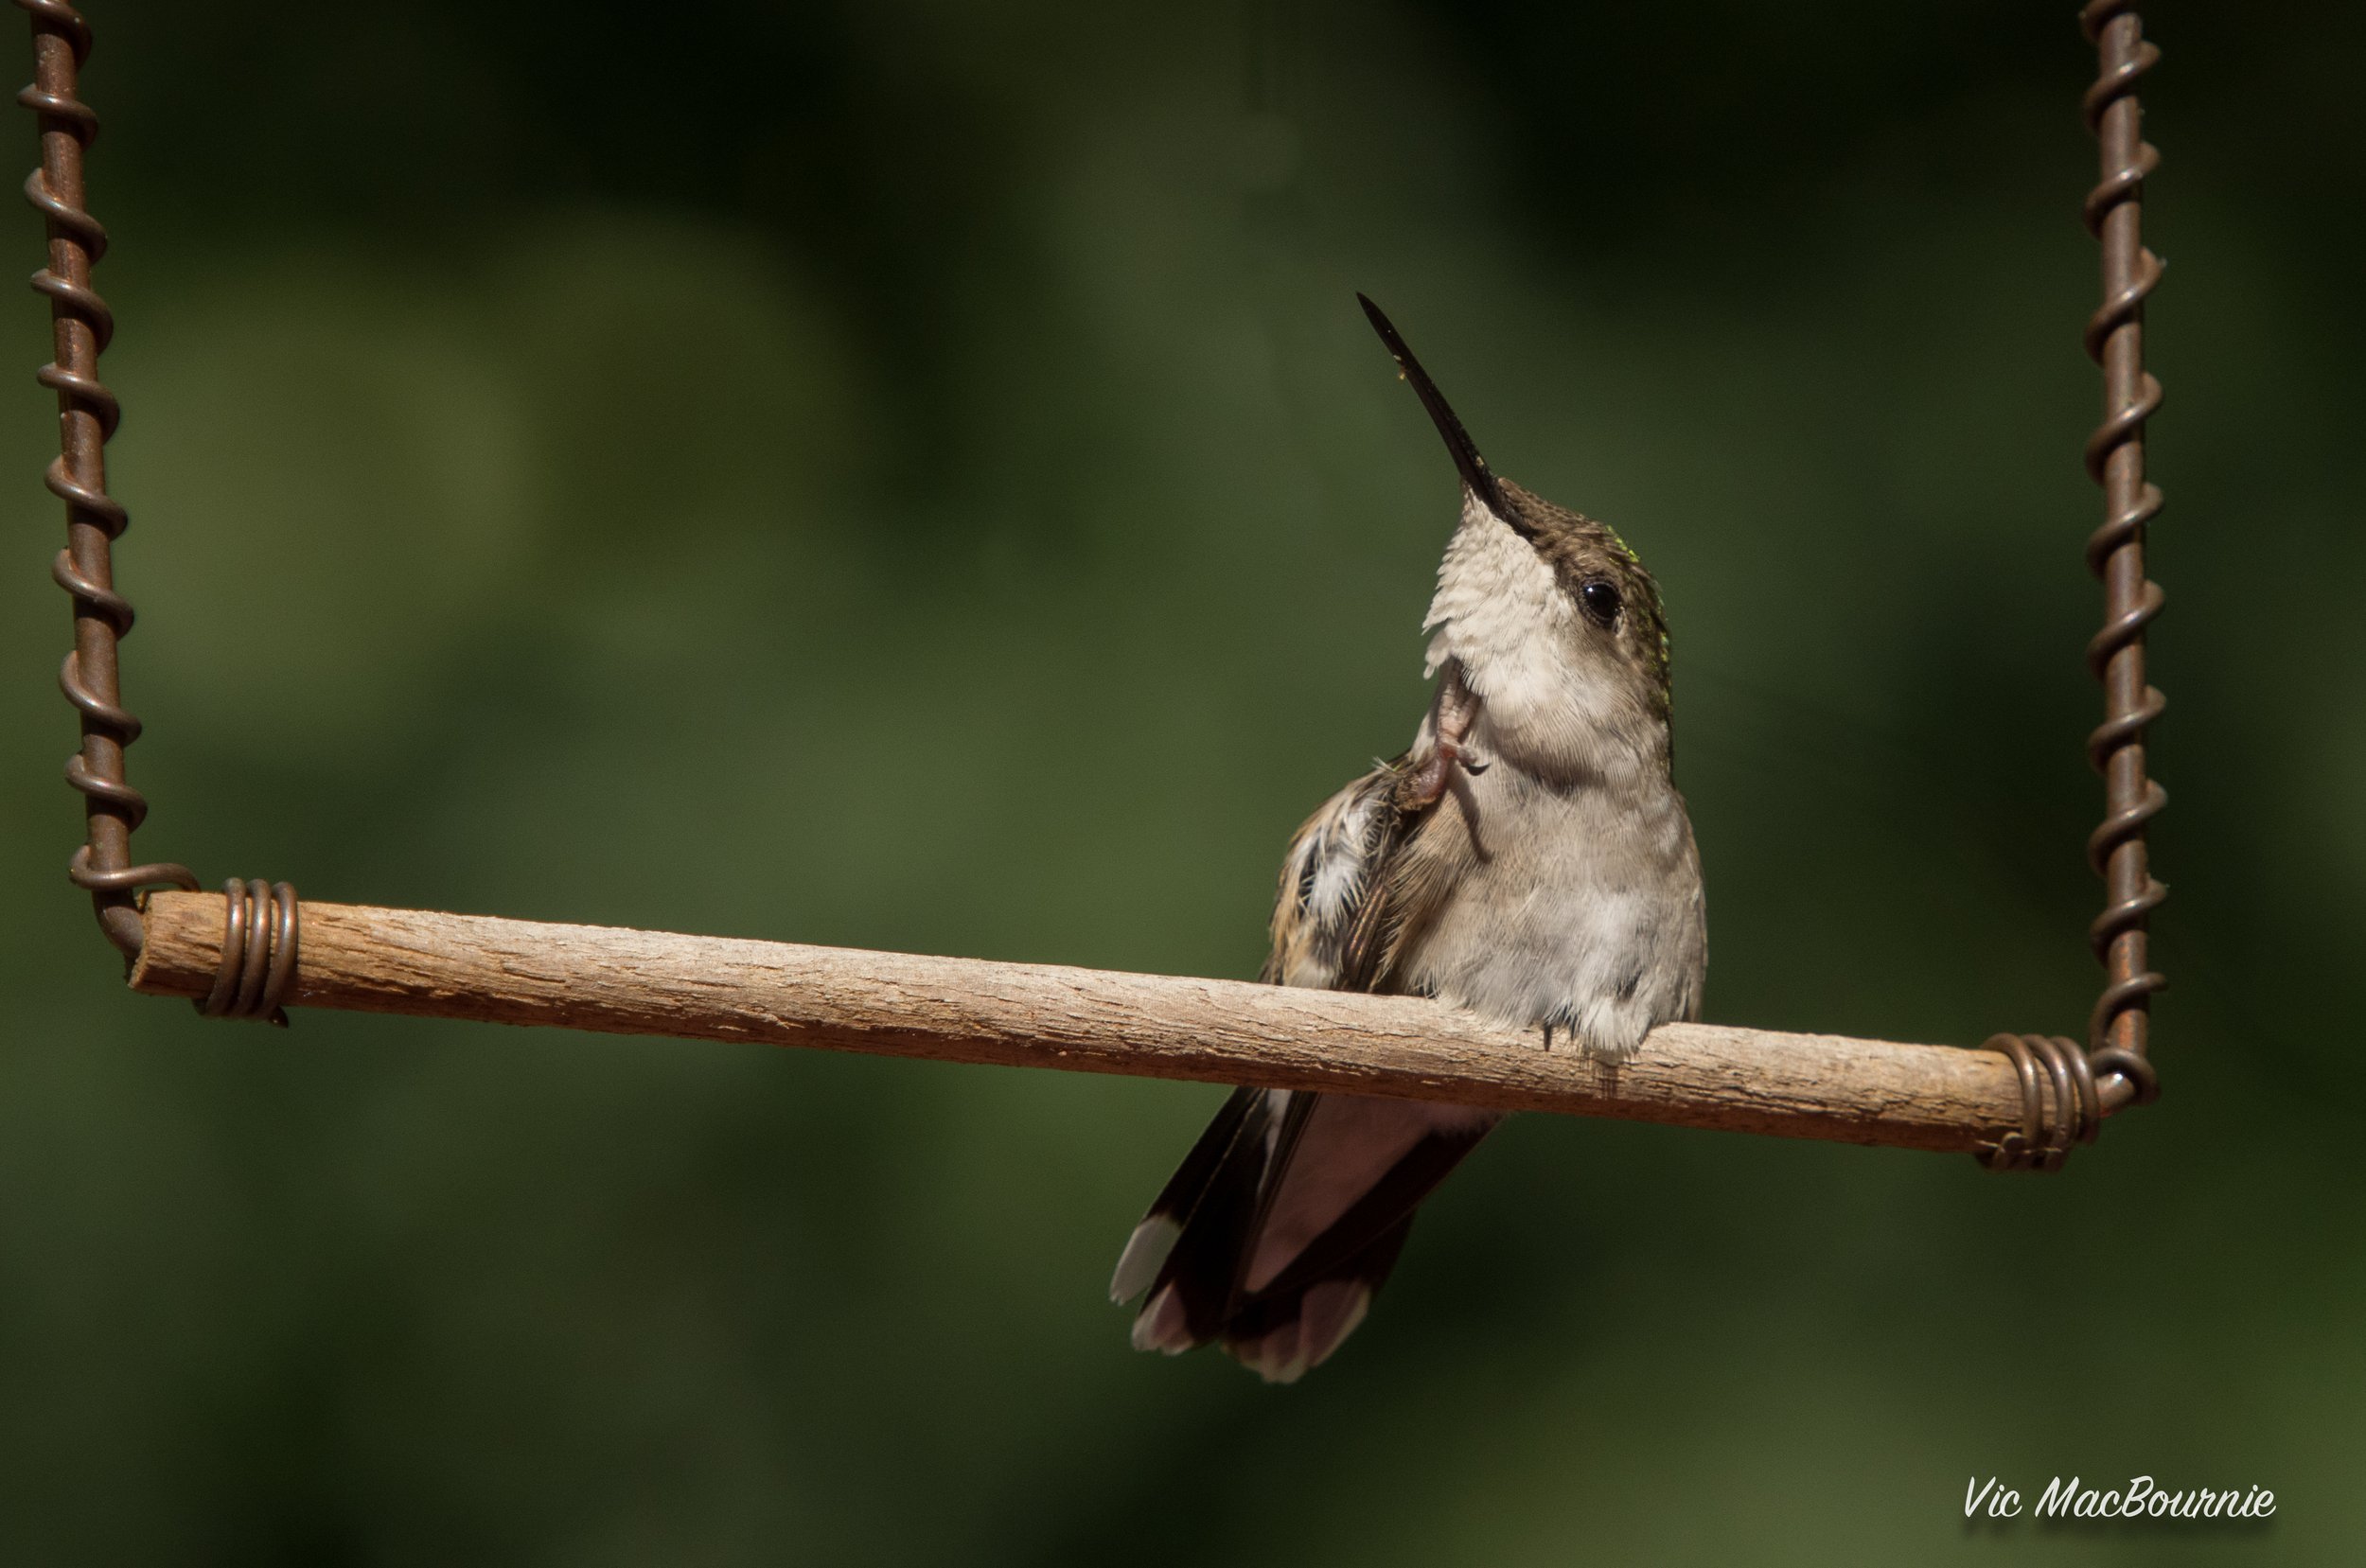
Catching a hummingbird in an unusual pose adds a little more interest to the image.

This image shows how hummingbirds and orioles both often share nectar at feeders.

A hummingbird eyes a cardinal flower on approach.
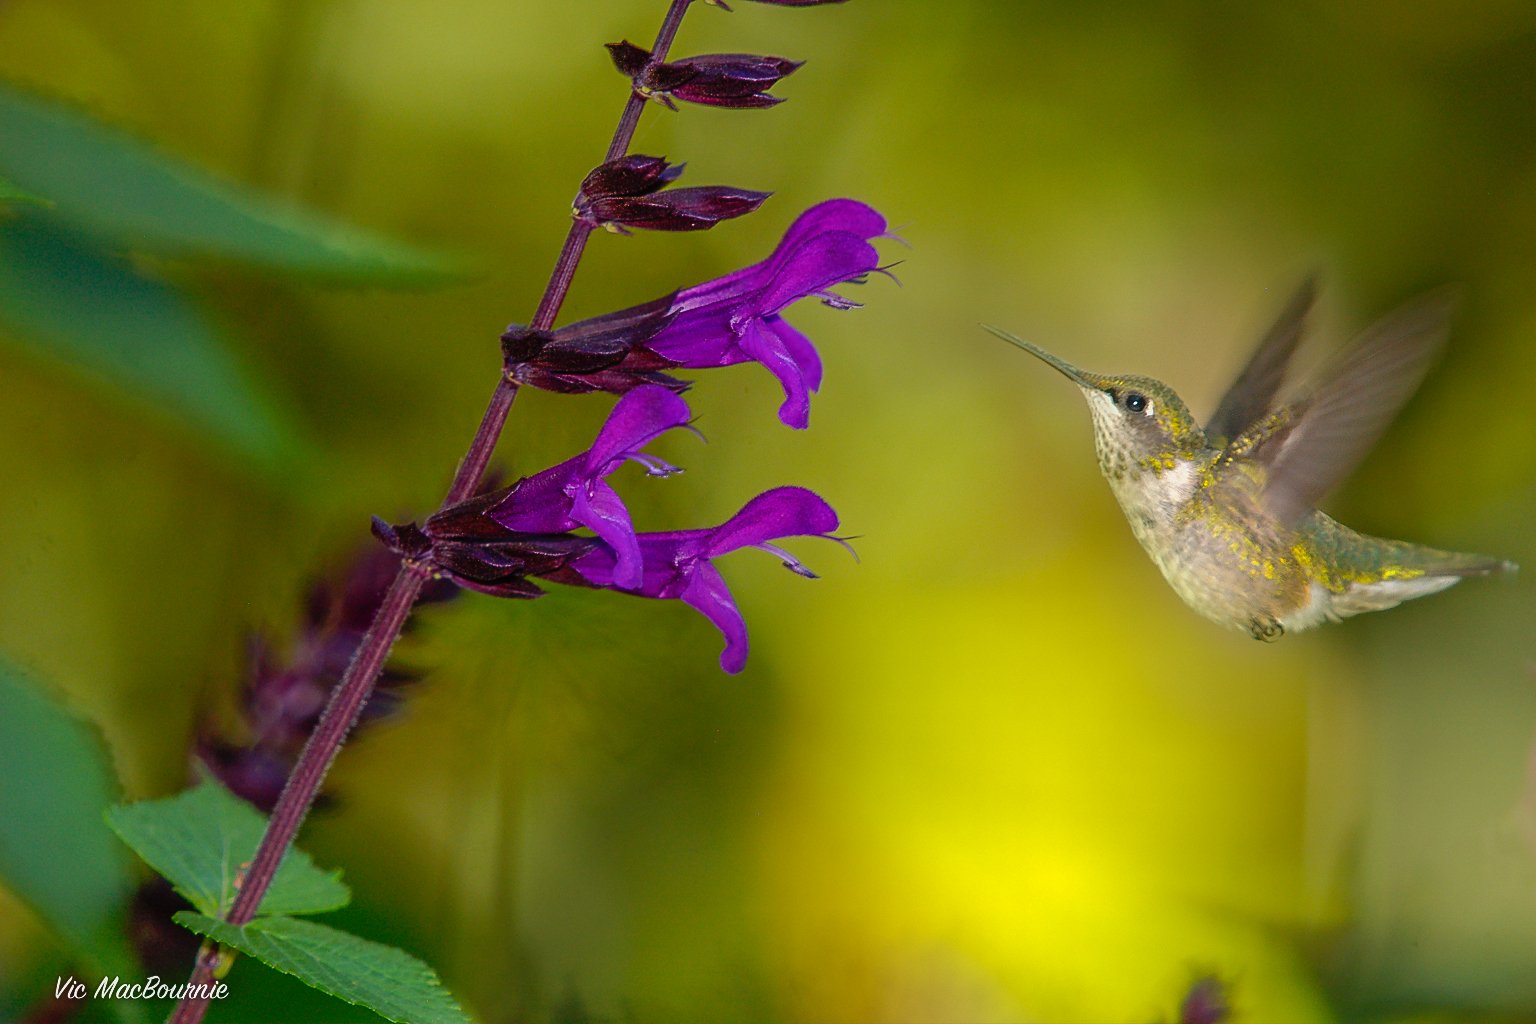
Hummingbirds can’t resist salvia and will almost always spend time working the flowers when they visit the garden.
One of my favourite pastimes, especially in winter, is to take some of my favourite photographs and use them to create artistic impressions of the images. Below are just a few of my digital paintings which are created using a number of different computer programs as well as a tablet that allows you to paint with a pencil tool similar to a hand held paintbrush. Click on the link to learn more about turning photographs into digital works of art.

A digital painting of a Hummingbird created using a number of software programs as well as a drawing tablet. This is the same image as the one at the top of the post that included the Hummingbird poem by D.H. Lawrence.

In this digital painting, I combined a poem “The Hummingbird” by D.H. Lawrence with the digital image from an earlier photograph to create a memorable piece of art.
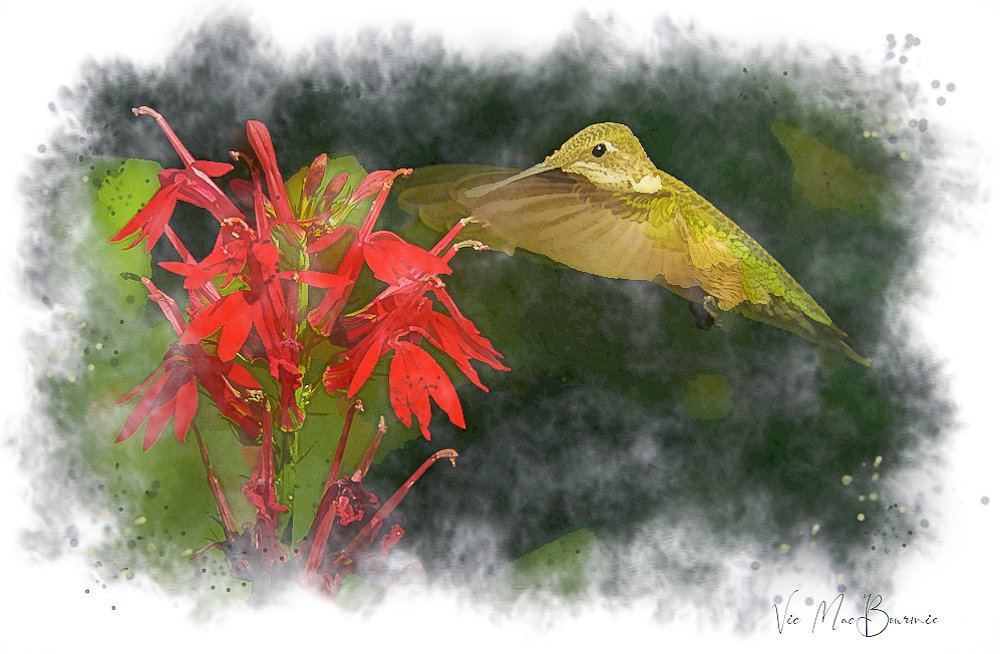
Another digital painting of a hummingbird from one of my original photographs.
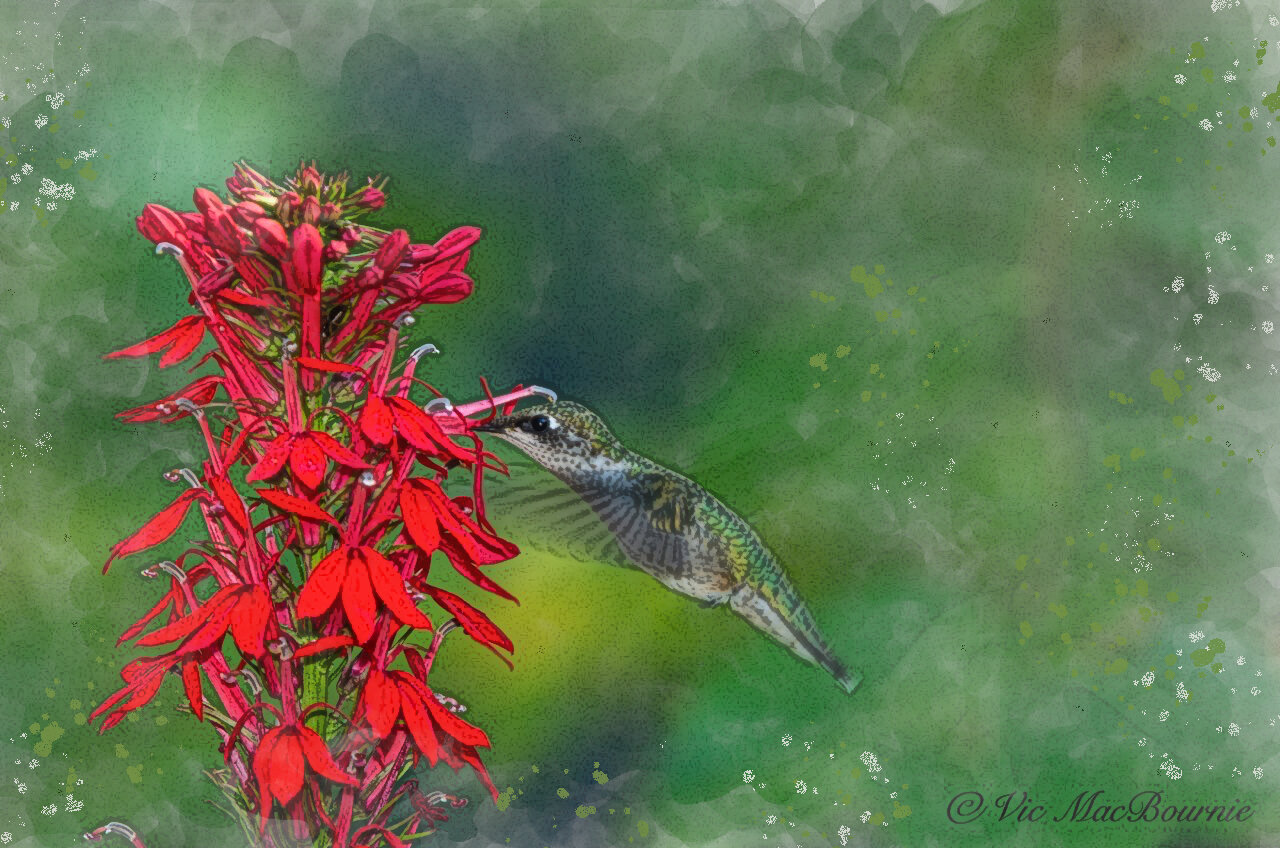
Creating digital paintings from original photographs can be an extremely rewarding experience, especially over the winter months, when snow makes photographing birds more difficult.

How to make nectar (sugar water) for hummingbirds
Creating your own hummingbird nectar is easy, but there are steps you can take to make it a healthy alternative to natural nectar sources.

A natural food source such as this bee balm is always the most ideal nectar for hummingbirds but a combination of natural and commercial feeders is the ideal way to attract the tiny birds to our gardens.
Aim for a combination of natural and commercial hummingbird feeders
Hummingbirds are truly remarkable creatures and providing them with homemade nectar (sugar water) in our feeders is a great way to watch them up close. By making homemade nectar, we can attract hummingbirds to our yards in early spring on their migration routes and then use native flowers to keep them in our backyards all summer, where they will raise their young.
Once we have encouraged them to stay and raise their families, there is a good chance they will return year after year.
Their vibrant colours, tiny size, and incredible flying abilities, have captured the fascination of gardeners and nature enthusiasts all over the world.
Attracting them to our backyards by providing feeding stations is very different from feeding other birds in our backyard.
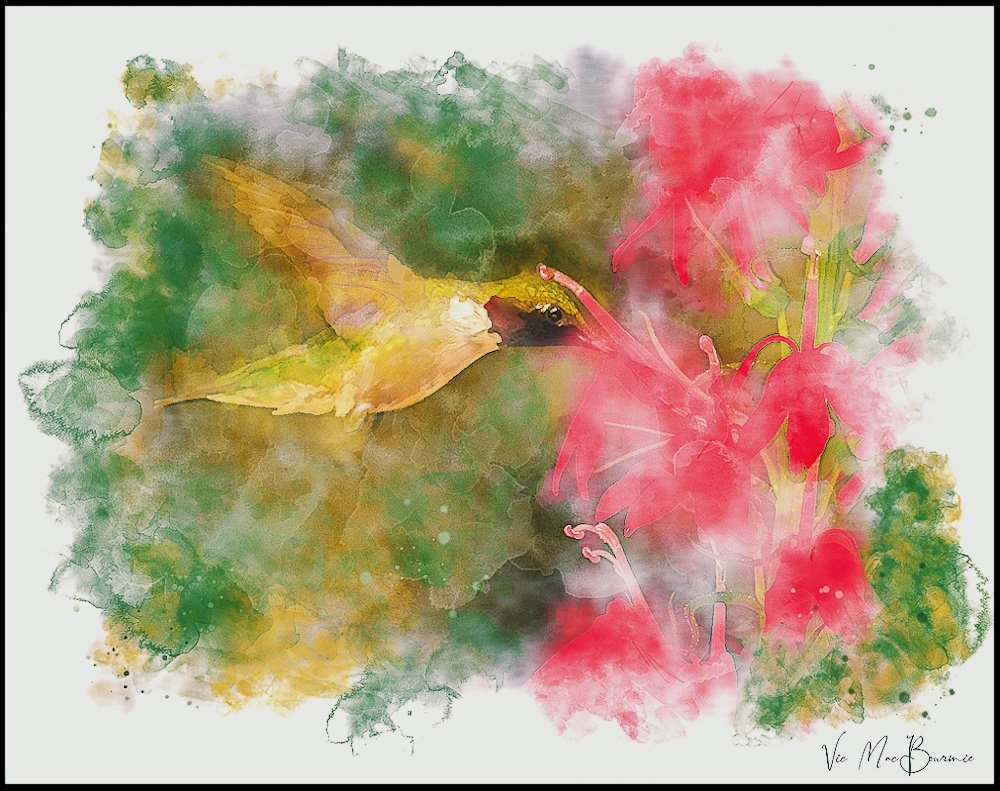
One of my many digital paintings of a hummingbird eating at a Cardinal flower. Go here for more images including digital paintings.
• Check out this post for more hummingbird images and digital creations.
It’s always best to provide natural nectar by growing many of the native and non-native plants that hummingbirds feed on. Cardinal flowers, columbine, cuphea, fuschia, trumpet vine, bee balm and salvia are just a few of the flowers hummingbirds are attracted to in our gardens. These vibrant blooms will not only provide a natural food source for hummingbirds but also add beauty to your garden.
For more on attracting hummingbirds to your garden, check out my earlier posts: Cardinal flower, Best plants to attract hummingbirds, How to photograph hummingbirds.
For more on hummingbirds in the garden, check out the following posts:
• How to help Hummingbirds during migration
• Five tips to attract hummingbirds
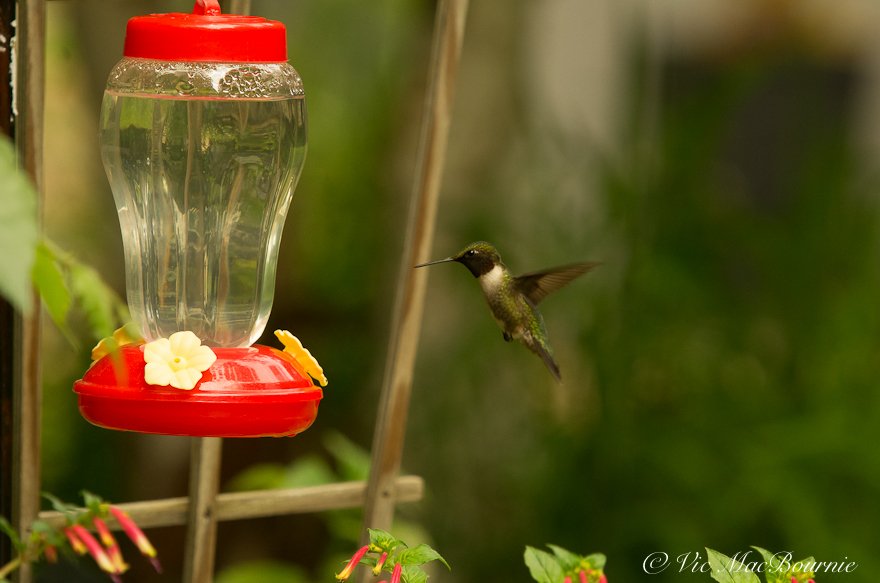
A commercial feeder provides a never ending source of nectar for the hummingbirds. Be sure to use a 4:1 ration of water to sugar. Cuphea is seen below the feeder to provide natural nectar choices for the birds.
In our backyard, I have even created a “hummingbird haven” that is aimed at focusing our hummers on a corner of the yard where there are several feeders – both natural and commercial feeders – as well as a water feature and perches where the birds can rest. For more, go to my recent post on the hummingbird haven.
How to make nectar for hummingbirds
Making nectar to feed hummingbirds is not difficult, but there are steps you can take to ensure it is a healthy choice for these little birds.
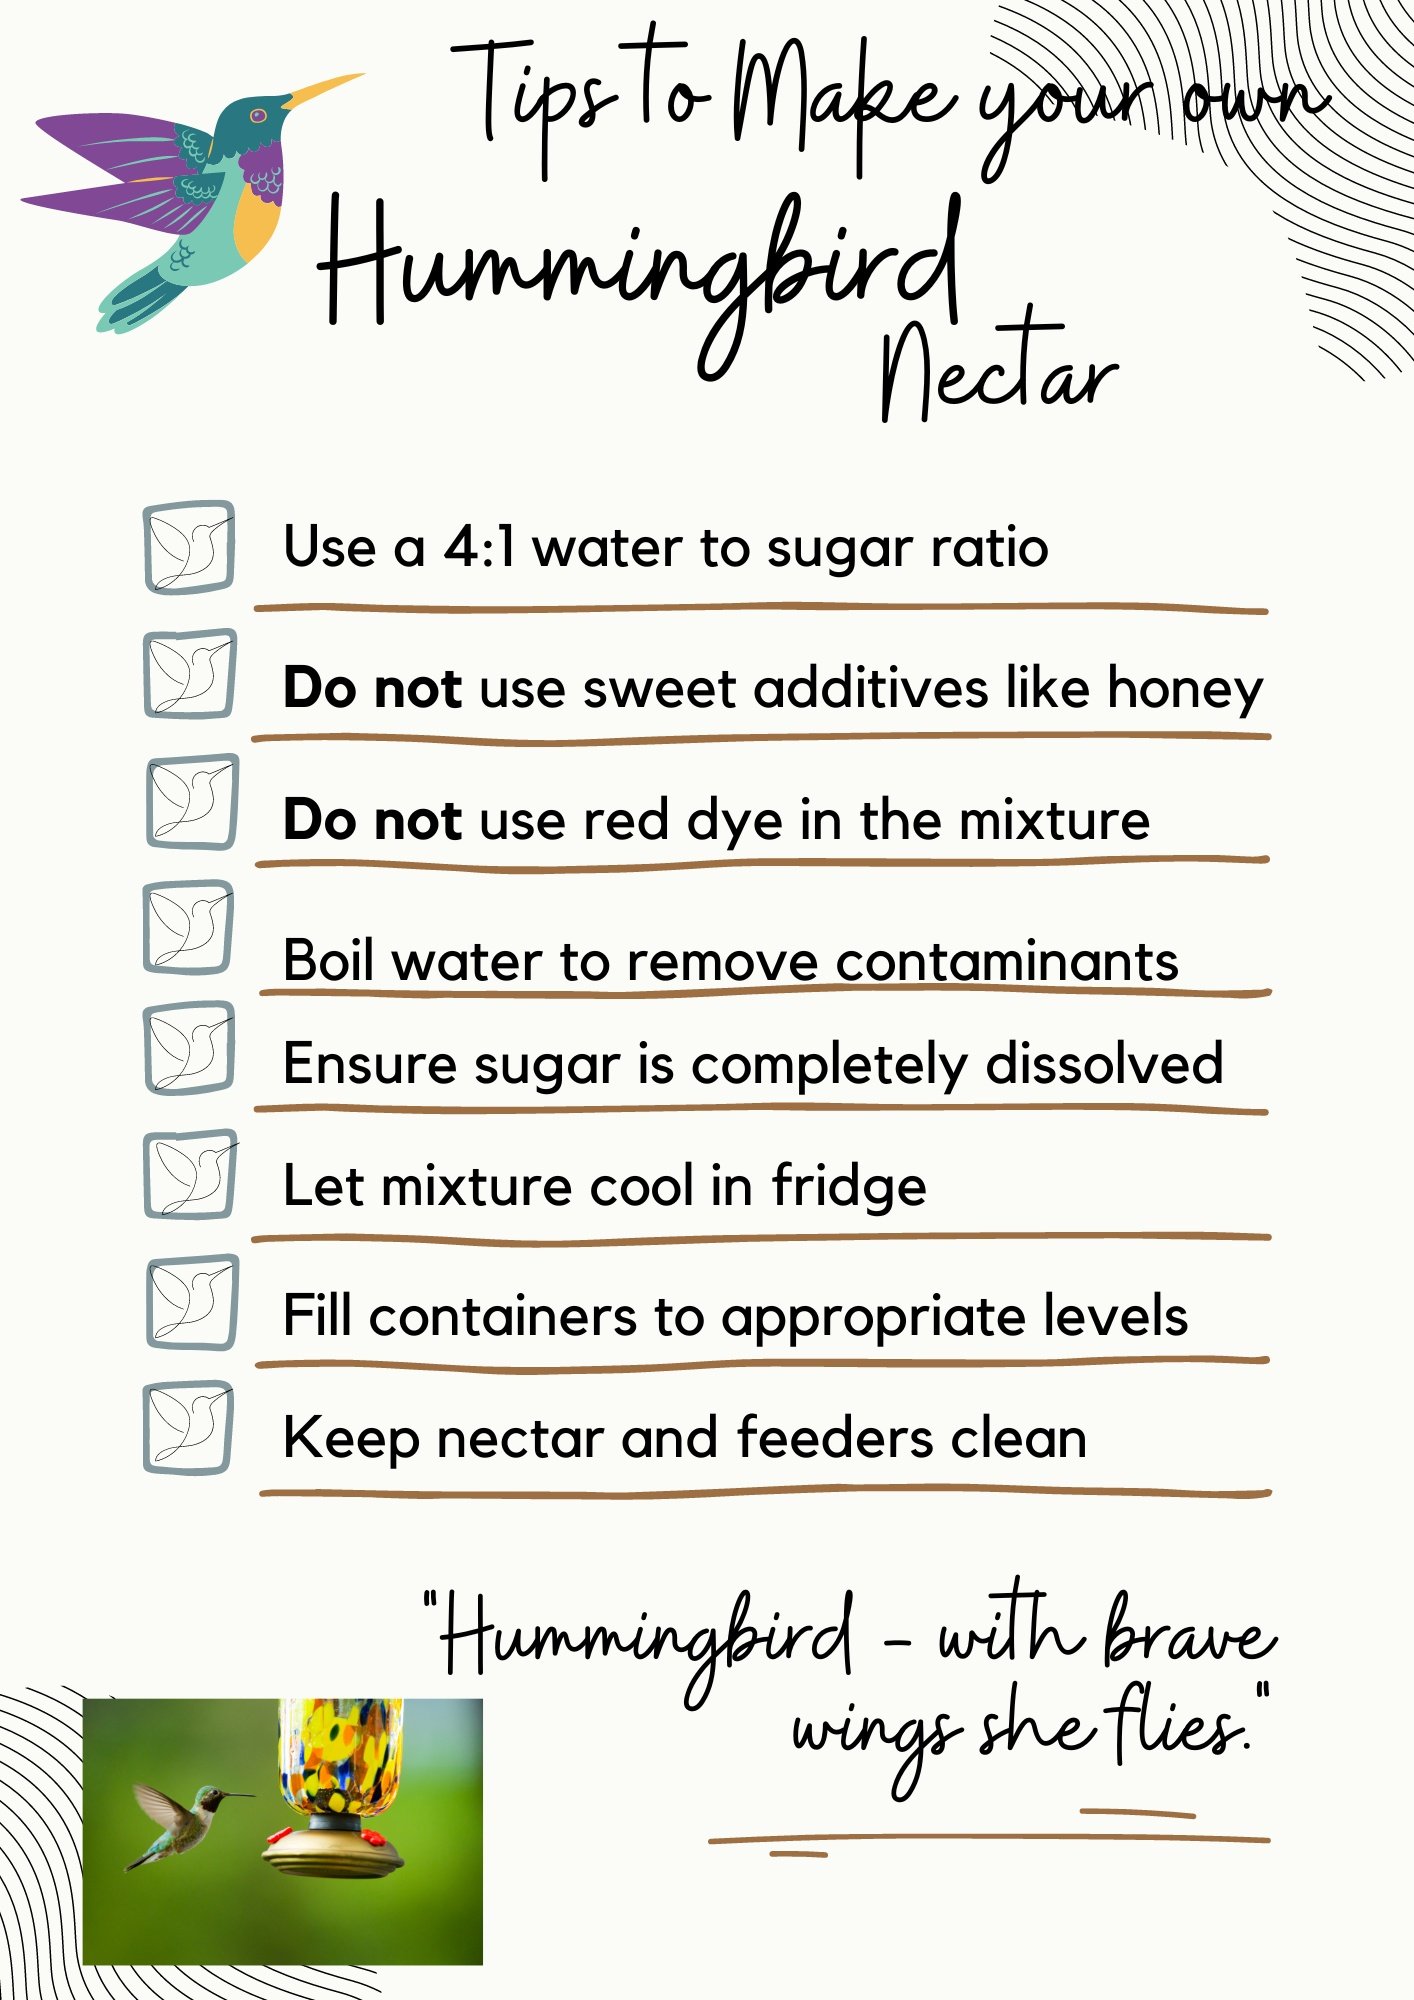
Checklist on how to prepare your own Hummingbird nectar.
First, let’s dive deeper into understanding their favourite food – nectar, and how we can make it at home.
Hummingbird nectar is a simple mixture of sugar and water that closely mimics the natural nectar found in flowers. The key ingredient is white granulated sugar, as it provides the necessary energy for hummingbirds.
Avoid using honey, brown sugar, or artificial sweeteners, because they can be harmful to these tiny birds.

This image shows a hummingbird working a small feeder placed beside a convenient perch to give the birds an opportunity to rest.
What is the ratio of sugar to water
The ratio for making hummingbird nectar is important to ensure the right balance of sweetness.
The recommended ratio is four parts water to one part sugar.
For example, you can use one cup of sugar with four cups of water. This ratio closely matches the sugar concentration found in many flower nectars and provides the optimal nutrition for hummingbirds.
It’s crucial to dissolve the sugar completely in hot water before cooling the mixture. This helps prevent fermentation and ensures the nectar stays fresh for longer. Remember to always use plain, unchlorinated water, as chlorine can be harmful to hummingbirds. Boiling the water helps to remove any chlorine that might be present in the tap water.
By understanding the ingredients and ratios for hummingbird nectar, you'll be able to create a delicious and nutritious treat that will attract these beautiful birds to your garden.
Now that we know the ingredients and ratios for hummingbird nectar, let’s dive into a step-by-step guide on how to make it at home.
First, gather your supplies: a clean container, white granulated sugar, and plain, unchlorinated water.
Start by boiling four cups of water. Once the water reaches a rolling boil, carefully measure out one cup of sugar. Slowly add the sugar to the boiling water, stirring continuously until it completely dissolves.
This hot mixture helps prevent fermentation and ensures the nectar stays fresh for longer.
Next, allow the nectar to cool completely before pouring it into your hummingbird feeder.
It’s important to never use hot nectar in your feeder, as it can harm the delicate beaks of hummingbirds. Once the nectar has cooled, carefully fill your feeder with the homemade nectar.
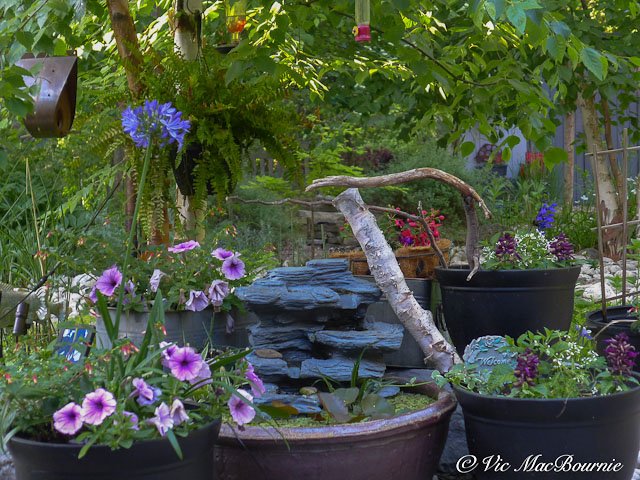
Our hummingbird corner has been set up to encourage hummingbirds into a corner of the yard where we can better watch and photograph them.
Make extra nectar to always have a supply ready
I like to double up on the recipe and store it in the fridge to either top up my feeders or refill them BEFORE the nectar begins to ferment. In addition, it is not uncommon for insects to squeeze into the feeders and quickly contaminate the nectar. By having a ready supply in the refrigerator, keeping the nectar fresh is much easier.
Remember to clean your feeder thoroughly before refilling to prevent the growth of harmful bacteria. Place the feeder in a shaded area, away from direct sunlight, and enjoy watching the hummingbirds flock to your garden.
By following this simple step-by-step guide, you’ll be able to create a delicious and nutritious treat for these enchanting creatures.
Now that you know how to make homemade hummingbird nectar, let’s explore some tips for attracting and caring for these delightful creatures.
Looking to add a hummingbird feeder to your garden? Here are some of the best feeders available at Amazon.
Hummingbirds have a high metabolism and need to consume large amounts of nectar daily.
Regularly cleaning your feeders prevents the growth of harmful bacteria and ensures the health of the hummingbirds.
It’s also important to place your feeders in a shaded area, away from direct sunlight. This helps to keep the nectar cool and prevents it from spoiling too quickly.
Lastly, consider providing perches or small branches near your feeders. Hummingbirds often rest between feeding flights and having perches nearby allows them to conserve energy.
By implementing these tips, you'll create an inviting environment that will attract and care for hummingbirds, bringing joy and wonder to your backyard.
A digital painting of a hummingbird at a cardinal flower.
A little background on hummingbirds
If you are just embarking on feeding hummingbirds, or want more information about these tiny birds, here is some background that might help you on your journey.
Did you know that hummingbirds are the smallest birds in the world? They weigh less than a nickel and can beat their wings up to 80 times per second.
These tiny powerhouses can fly in any direction, even upside down, and reach speeds of up to 60 miles per hour. Their unique ability to hover in mid-air and move with such agility is simply awe-inspiring.
Hummingbirds are also known for their iridescent feathers, which can shimmer and change colour depending on the angle of light. This makes them appear like living jewels, adding to their allure.
Additionally, hummingbirds have an incredibly high metabolism and need to consume large amounts of nectar to fuel their energy. They play a crucial role in pollination, as they transfer pollen from flower to flower while feeding.
So, not only are they beautiful to observe, but they also contribute to the health and diversity of our ecosystems. Now that we have a glimpse into the fascinating world of hummingbirds, let's dive deeper into understanding their favorite food - nectar, and how we can make it at home to attract these delightful creatures.
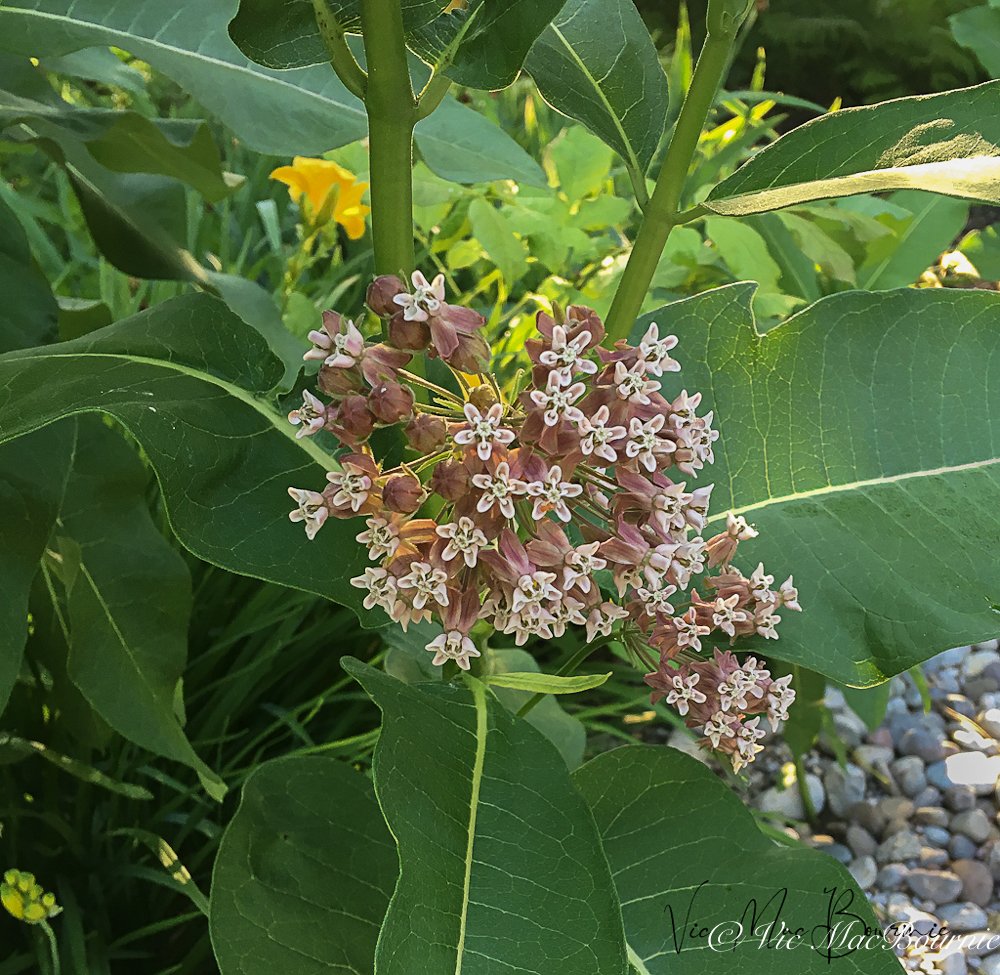
How to grow common milkweed and why it should be in every garden
Common milkweed is not just for butterflies. Every garden needs a patch of these beautiful flowers in their front or back gardens.

The common milkweed is an exceptionally beautiful garden plant that is critical to the future of monarch butterflies.
It’s not just for Monarch butterflies
Common milkweed is an outstanding native plant that needs to find a place in every garden. Even if it’s nothing more than a small patch in a corner of the yard, we need common milkweed in our gardens.
Yes, it is a great pollinator plant. And yes, it’s the host plant for our beautiful Monarch butterflies that are completely dependent on the plant for their future.
That should be enough to convince any wildlife gardener to have a patch of common milkweed in a prominent spot in the garden.
But too few people talk about the incredible beauty of this plant in full bloom. Massive balls of pinkish-mauve blooms that can take centre stage in any garden for their outstanding beauty.
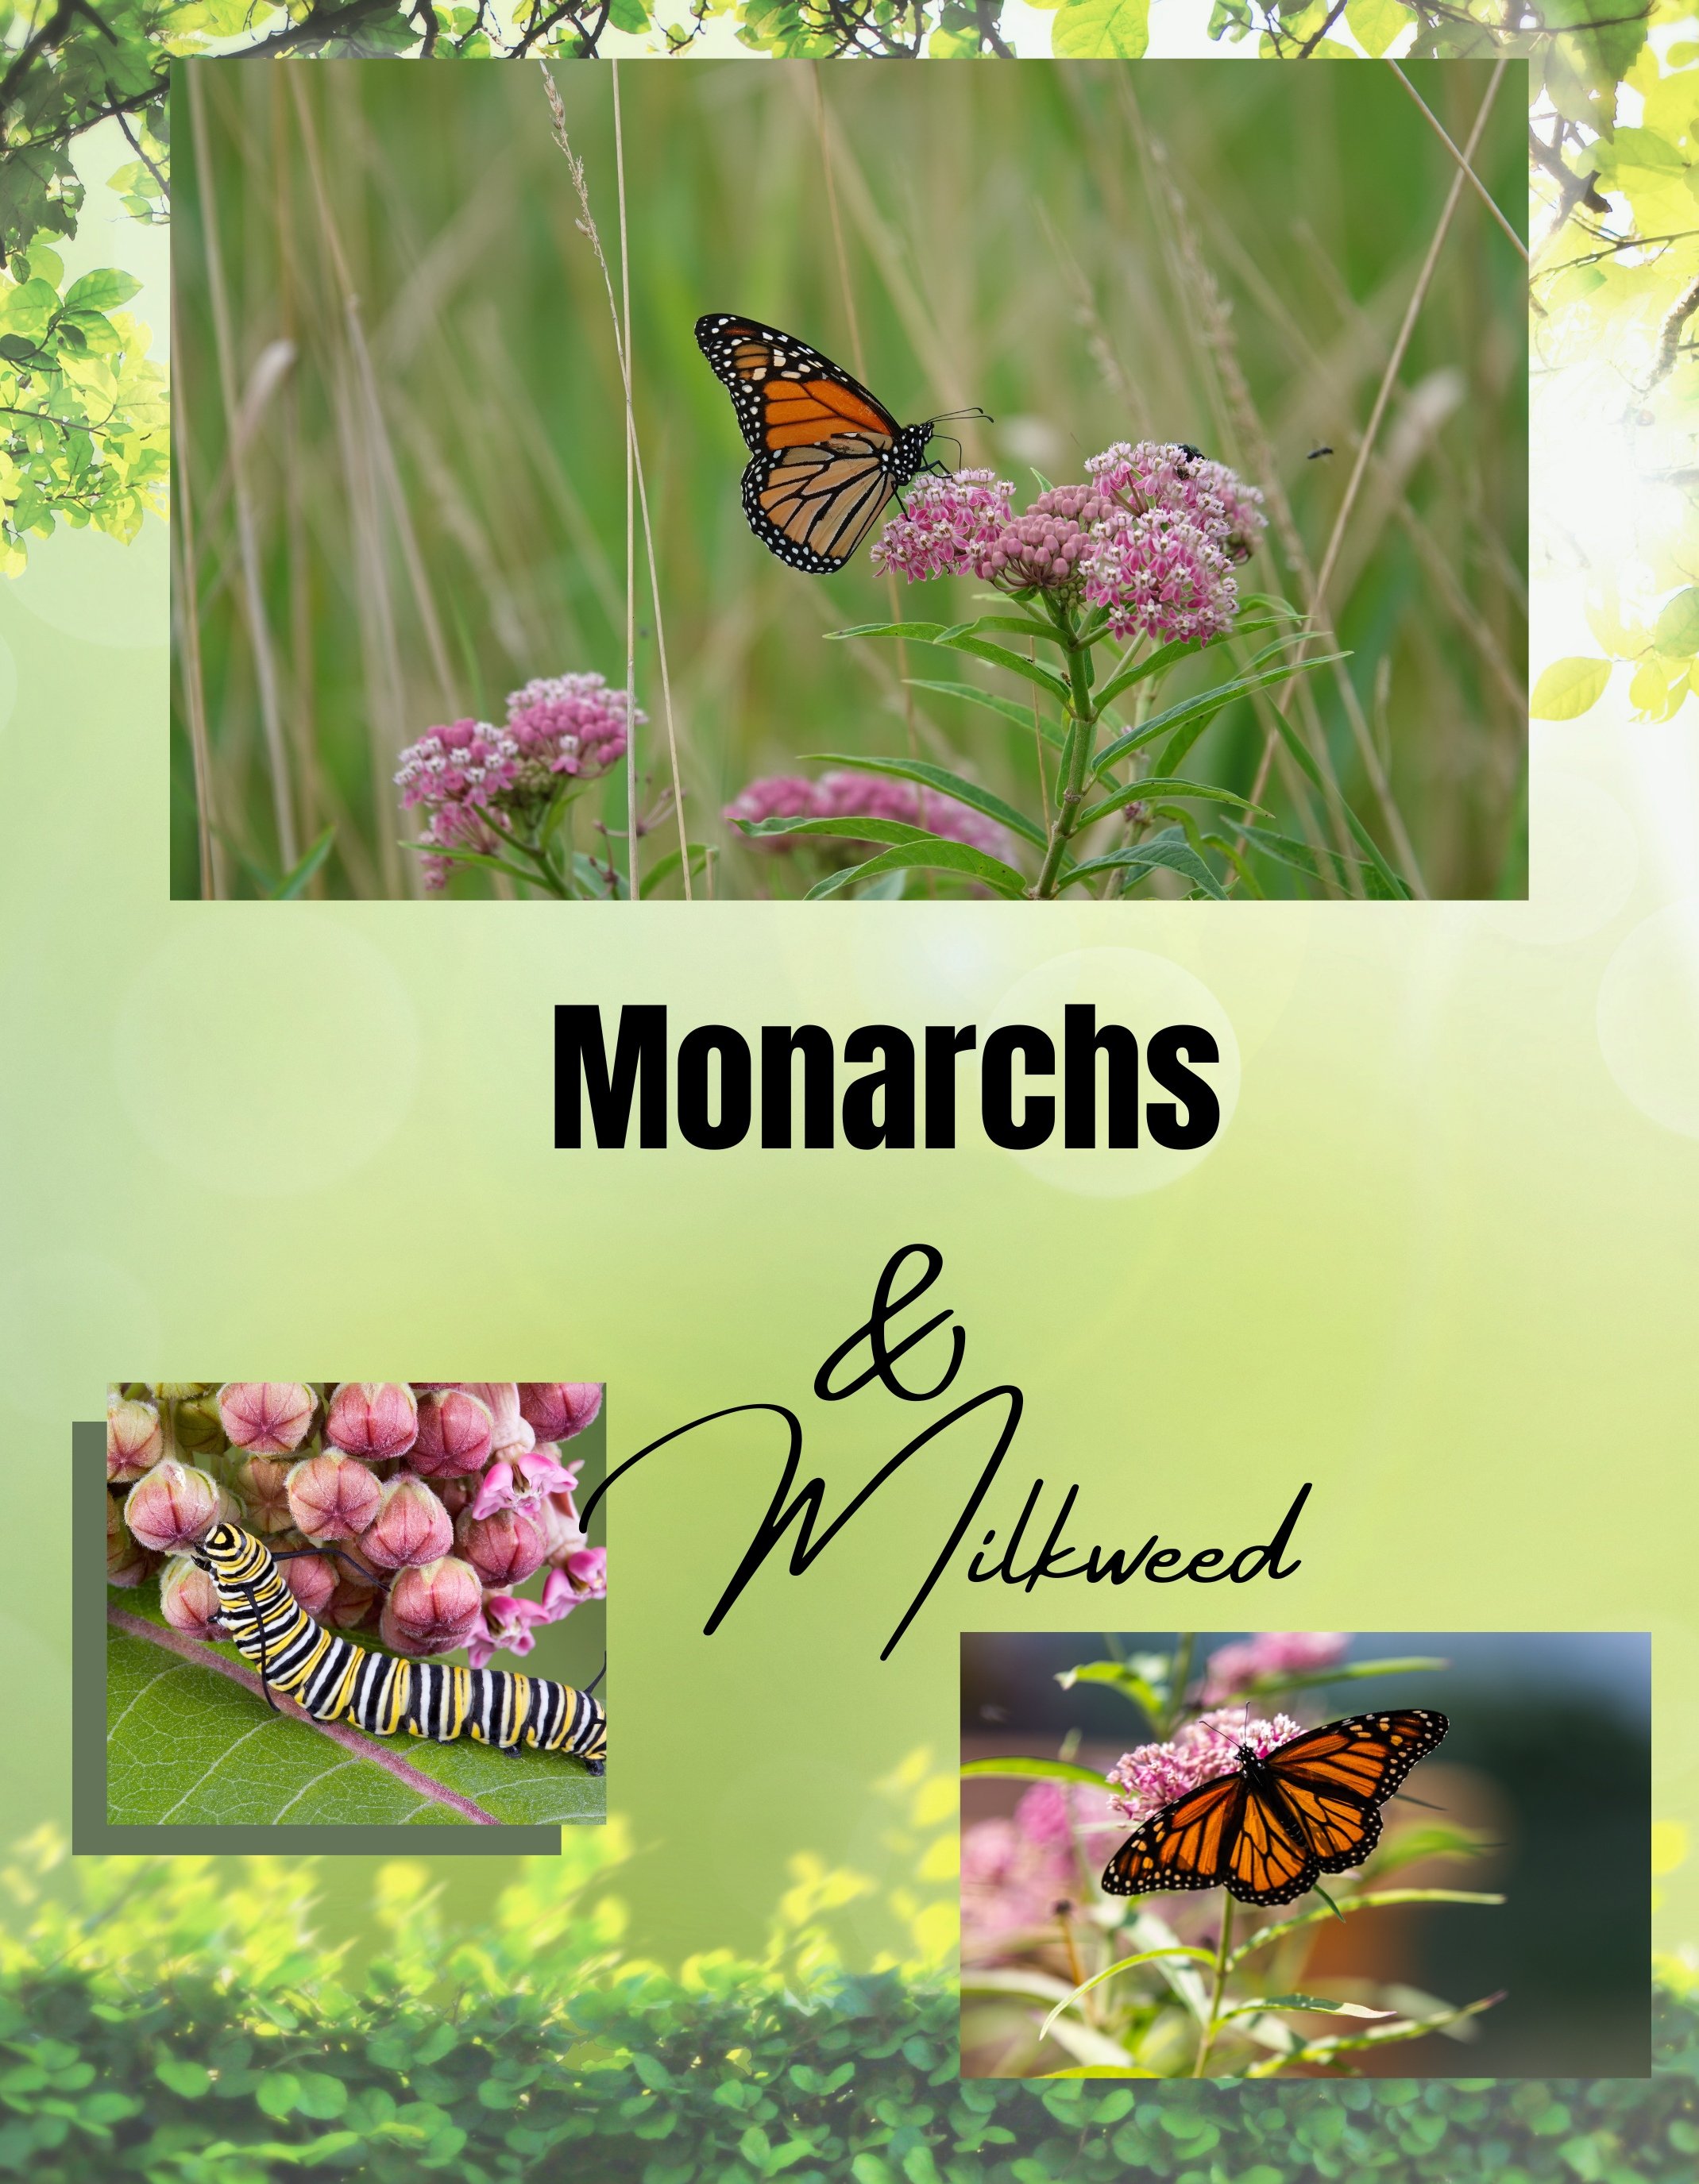
Our monarch butterflies are dependent on milkweed for their future survival. Every garden should have one of these beautiful native plants.
Add butterflies flitting about it and how can you go wrong?
Common milkweed, scientifically known as Asclepias syriaca, is a native perennial that can be found throughout North America.
As we said, its stunning flowers and unique characteristics make it a favourite among natural gardeners and nature enthusiasts alike.
How to grow common milkweed
To successfully grow common milkweed, you need to start with the right seeds or plants. You can find common milkweed seeds at local nurseries or online stores specializing in native plants.
Alternatively, you can also collect seeds from existing milkweed plants in your area in the fall when the large seed pods open up to reveal the unique seeds heads. The unique dispersal method of common milkweed seeds has long been a favourite of children (and adults alike) who who watch as the seeds attached to a silvery, feathered sail are lifted into the sky with the slightest of breezes.
Once you have the seeds, it’s time to prepare the soil. Common milkweed prefers well-drained soil, so make sure to choose a location with good drainage.
But don’t over improve the soil. Anyone who has seen Milkweed growing along roadsides knows that the plants can thrive in very average rocky soil. In fact, We had a large clump growing in one of our dry river beds in the front of the garden where they faced winter salt and hot sun most of the day.
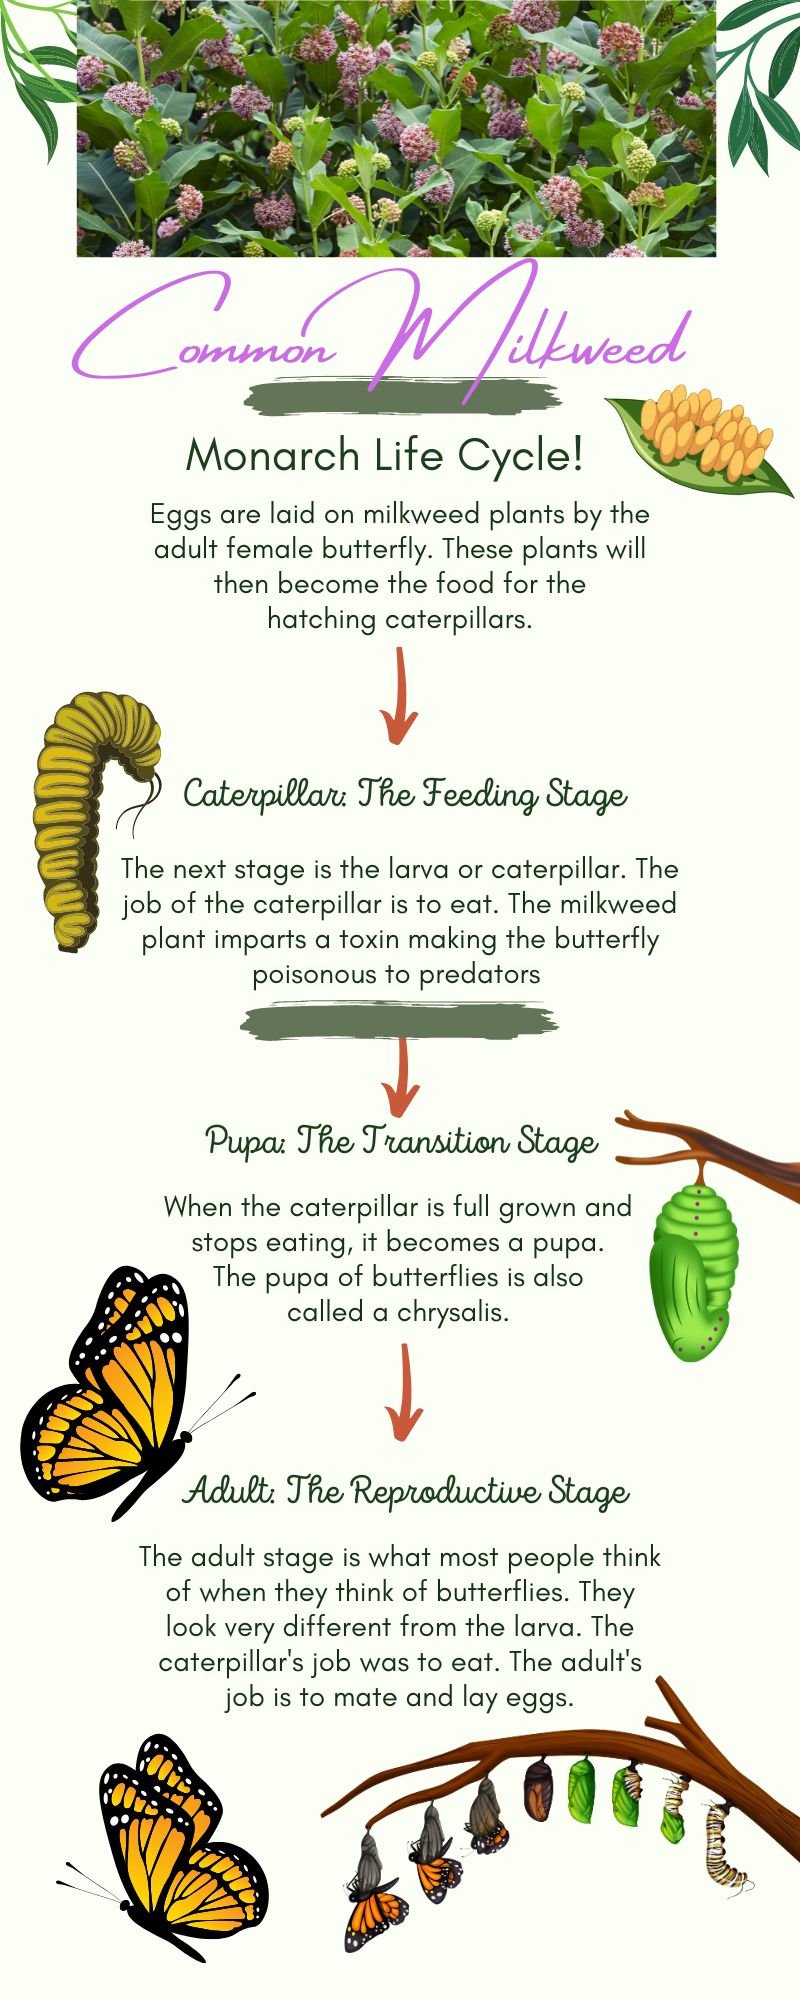
I was able to move some of those plants to the backyard where they are forming a good sized clump that is welcome to grow as large as it wants.
Milkweed plants have long tap roots that can be very difficult to dig out if the plants are mature. Instead, look for young plants that can be moved much easier, but remember that tap root when you dig them out. It’s always a good idea to transplant any plant after a heavy rainfall.
Do not dig them from wild areas unless you know the plants are going to be bulldozed or threatened in another way. Check out my earlier post on Why we should not dig up plants from the wild.
If you are starting from seed, loosen the soil before planting and remove any weeds or grass. This will create an ideal environment for the milkweed seeds to germinate and establish themselves.
For more on attracting Monarch butterflies, check out my earlier post on Butterfly Weed.
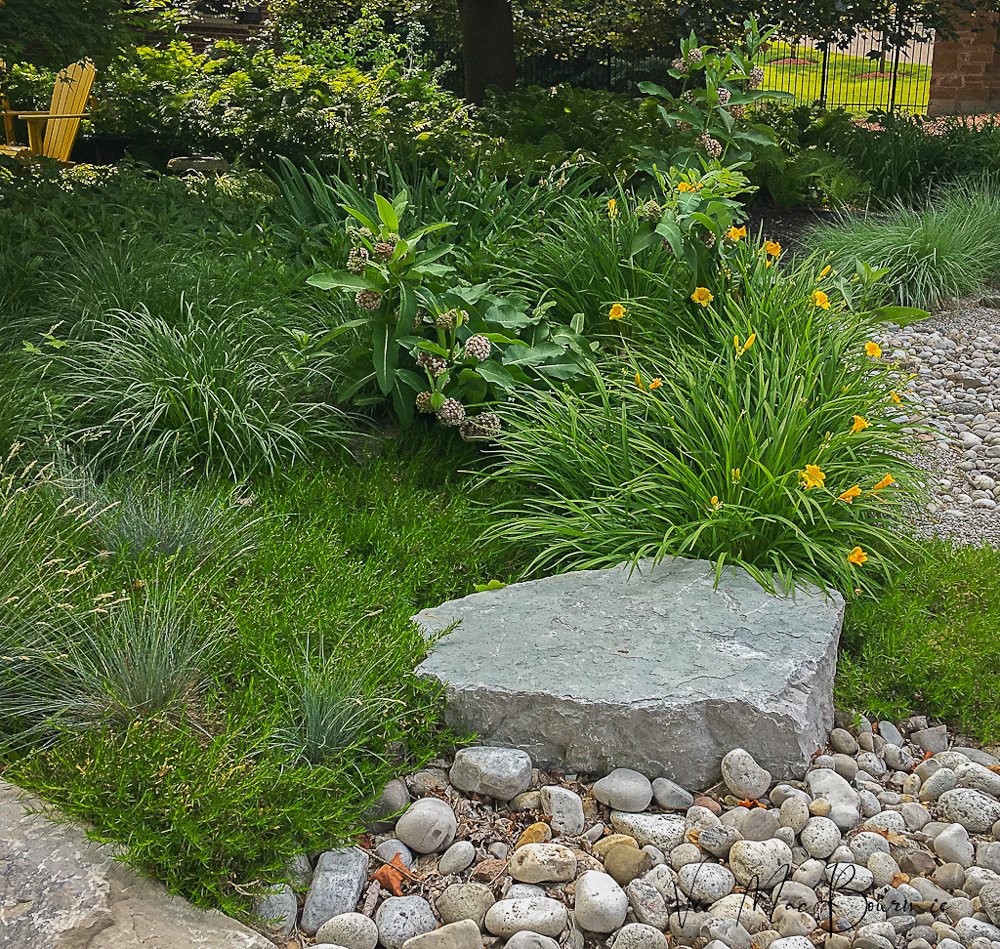
The Milkweed plants growing in the centre of the front garden provide food for monarchs while offering beautiful summer blooms followed by interesting seed pods in fall.
When it comes to planting, sow the seeds directly into the soil in early spring or fall. Lightly cover the seeds with soil, ensuring they are not buried too deep. Water the area gently to keep the soil moist but not waterlogged.
As the seeds germinate and sprout, thin out the seedlings to provide enough space for each plant to grow.
Common milkweed can reach heights of up to six feet, so make sure to give them enough room to flourish.
Remember, patience is key when growing common milkweed. It may take a year or two for the plants to fully establish and bloom, but the wait will be worth it.
Importance of Common Milkweed
Now that you know how to plant and grow common milkweed, let’s explore its crucial role in supporting pollinators.
Common milkweed is a magnet for various pollinators, including bees, butterflies, and hummingbirds.
Its vibrant flowers produce nectar, which serves as a vital food source for these important creatures.
As pollinators visit the milkweed flowers to feed on nectar, they inadvertently transfer pollen from one flower to another, enabling the plants to reproduce. This process of pollination is essential for the survival and diversity of many plant species.
As we know, common milkweed is a host plant for the monarch butterfly.
Monarchs lay their tiny eggs exclusively on milkweed plants, and the caterpillars that hatch from these eggs rely solely on milkweed leaves as their food source. The leaves of the milkweed are important because they impart toxins that make the Monarch butterflies poisonous to birds and other predators.
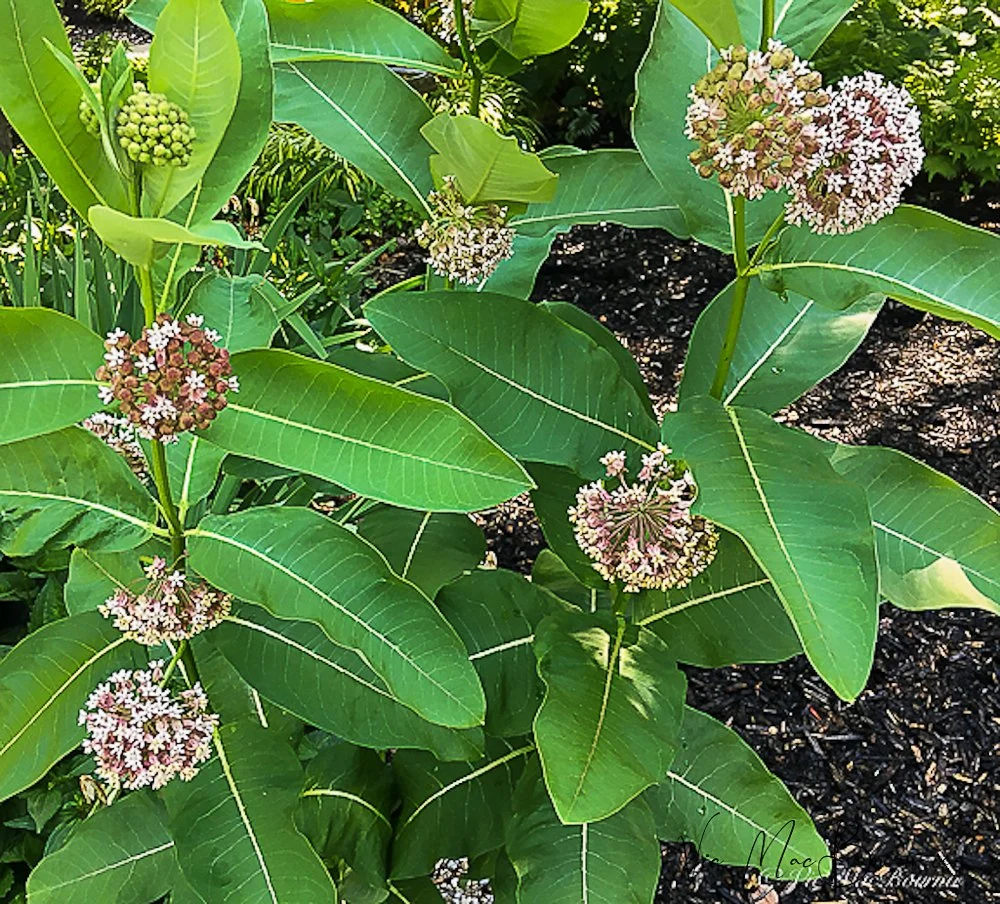
Milkweed flowers in full bloom in the front garden. Some of the smaller plants were transplanted to the backyard to begin a patch there as well.
By planting common milkweed in your garden, you are providing a critical habitat for monarch butterflies and contributing to their conservation.
Additionally, common milkweed also attracts a wide range of other beneficial insects, such as ladybugs and lacewings, which help control pests in your garden naturally. One of the more fascinating insects you will likely find on your milkweed plant is the milkweed beetle. The red and black beetle should not be considered a pest but, in fact, is part of the complicated ecosystem that exists on the milkweed plants.
Studies show that Milkweed plants that include a host of insects including aphids and milkweed beetles, prove to be more successful in bringing monarch larvae through to complete metamorphosis. So, leave your plants in a natural state, and when you notices the leaves are being eaten, it is most likely the monarch butterfly caterpillar munching on the leaves, and that, after all, is the reason we planted the milkweed.
Milkweed plants for every garden
So, by growing common milkweed, you not only enhance the beauty of your garden but also play a vital role in supporting pollinators and maintaining a healthy ecosystem.
Here are some tips to help you keep your common milkweed garden thriving.
First, make sure to water your milkweed plants regularly, especially during dry spells.
While common milkweed is relatively drought-tolerant, providing adequate moisture will promote healthy growth and blooming. However, be cautious not to overwater, as excessive moisture can lead to root rot.
Keep the area around the plants free from very competitive weeds or shrubs. Milkweed’s long tap root enables it to grow alongside other less competitive plants including grasses.

Lumix LX7: Perfection in a tiny, full-featured package
Panasonic’s Lumix LX7 is the ideal camera for the advanced photographer looking for a premium camera in a tiny package.

The Panasonic Lumix LX7 captured the fine details of this scene at a local restaurant. The incredible small size of the LX7 made it easy to slip into my pocket enabling me to take it along without it getting in the way.
First impressions of this tiny Leica-equivalent workhorse
It’s difficult to imagine Panasonic jamming more features into its tiny LX line of enthusiast cameras without it looking more like a full-sized digital SLR. But they have, or should I say, they did way back in 2012 when they released the DMC-LX7 to succeed the highly acclaimed LX5.
The combination of having manual control f-stops at my fingertips (just like the old days) on the extremely fast and superb Leica lens, as well as image dimension control, put this camera at the top of my must-have list. The traditional style aperture ring covers F1.4 to F8, with detents at every third stop. These features built into the lens makes it much easier to set both the aperture and picture dimension without having to dig deep into the camera’s menus. There is a separate switch on the side of the lens that sets the focus from autofocus, manual and autofocus macro.
In addition, the LX7’s mostly metal construction gives the camera the proper heft reminding you that this is a serious camera. A redesigned grip makes the camera comfortable in my hand, leaving the most important controls within easy reach.
Click on the link to see a complete list of Panasonic’s Point and Shoot cameras.
For more information on the LX10, click on the link to go to the Panasonic Lumix site where you can purchase the camera directly from Panasonic on a monthly payment plan.
Add to that the camera’s close-up capabilities and it becomes an ideal camera to take out into the garden to capture flowers and insects. In fact, the DMC-LX7’s macro setting allows the photographer to focus on a subject that is only 1cm away from the camera when the lens is set to 24mm wide-angle.
That’s impressive.

The Panasonic Lumix LX7, shown here with a high quality TT Artisan optical viewfinder, is a nice combination for street photography, capturing quick snapshots of kids in action as well as garden images (see below.)

The Leica lens showing both the aperture control and the image dimension control rings.
What about that impressive Leica lens?
It’s a 4.7-17.7mm, F1.4 - F2.3 lens, or the equivalent of a 24-90mm in the world of 35mm. Now, imagine what it would cost you to purchase an extremely fast Leica 24-90mm lens, and you’ll realize just how good of a deal this camera is if you are looking to create outstanding images with a pocket-sized camera.
The lens alone is worth the price of admission.

The rear view of the Panasonic Lumix LX7.
Why should we care that the lens is fast?
A fast lens allows us to do two things: first it helps to get images in low light situations, and second, it allows us to capture images with more pleasing out-of-focus background. A soft background is generally more pleasant, especially when you are taking portraits or focusing on a butterfly or flower in your garden.
Most point-and-shoot style cameras force you to either dig into the menus on the back of the camera to change the f-stop, or use a wheel on the back of the camera. The LX7’s placement of the aperture ring on the lens – where most of us old timers are used to it – makes it both convenient and nostalgic for anyone who used a 35mm film camera in the past.
I can honestly say I have not been disappointed in the least.
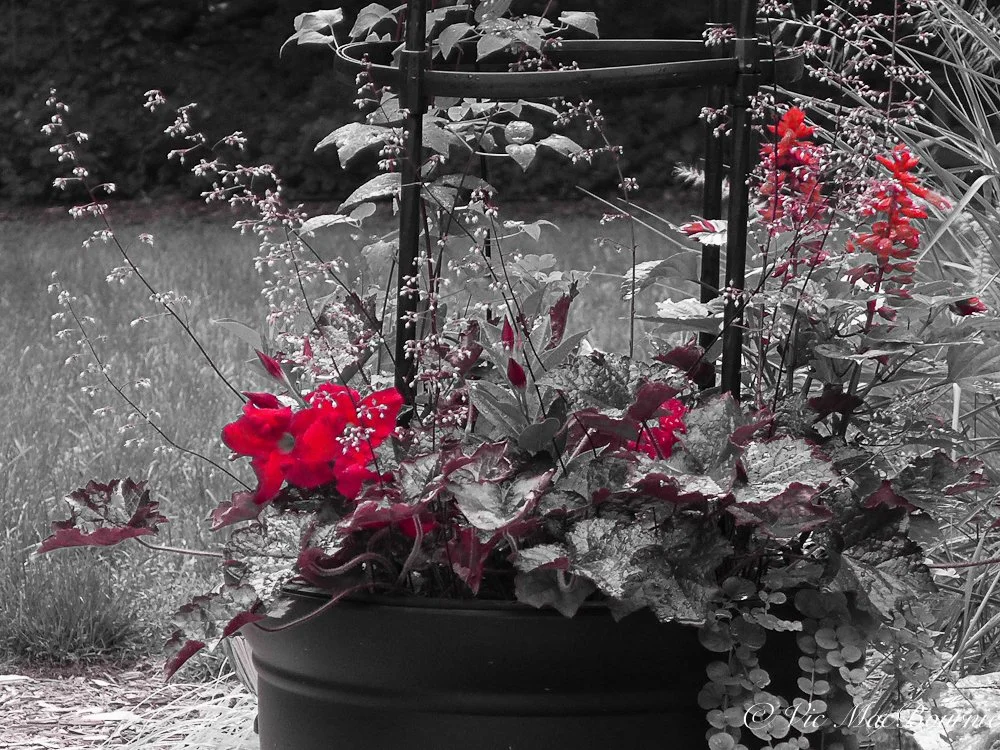
One of the many filter modes available on the Panasonic LX7 that creates a B&W image extracting only the objects in red. Other colours can be chosen to extract in the image. A nice feature that is good to get familiar with to create some interesting images.
Why buy the Panasonic Lumix LX7 over the LX5?
The LX7’s sensor and image processor have both been improved over the LX5, resulting in less noise at high sensitivities.
Other new features on the Lumix LX7 include the aforementioned manual aperture ring, higher resolution LCD display, a built-in neutral density filter, 11 fps continuous shooting, HDR capabilities, and the ability to record movies at 1080/60p (with stereo sound).
Panasonic has also built 70MB of memory into the DMC-LX7. The LX5 offered only 40MB of built-in memory. The 70MB will hold five RAW or sixteen JPEGs at the highest quality setting – perfect for those times you either run out of room on your card or forget to insert it before going out for a day of photography. It will at least allow you to capture those special moments until you can get your card back into the camera.

The image shows a garden vignette taken with the Panasonic Lumix LX7 featuring the impressive Leica 24-90mm (35mm equivalent) lens.
The extremely fast lens together with the camera’s impressive optical image stabilization (OIS) helps you get images in even the lowest light conditions.
These additional features are added to an already impressive array of features that have made their way into the LX-series over the years, resulting in a very capable camera that can serve the photo enthusiast as well as the professional looking for a second camera to carry in their pockets.
So far, in my small sample-size usage of the DMC-LX6 camera, I have found little to dislike.
Lumix LX7 weaknesses worth considering
It would have been great if Panasonic had made it possible to be able to screw filters on to the front of the lens – especially a polarizing filter. However, there is an ingenious accessory available for the camera that makes it possible to add filters to the front of the camera.
I am also a big fan of having built-in viewfinders on my cameras. LX7 users have to rely on the large LCD screen on the back of the camera, unless they are willing to put out a few hundred dollars to purchase Panasonic’s impressive EVF accessory. The electronic viewfinder snaps into the camera’s hot shoe and offers full integration with the LX7’s electronics. It’s an excellent addition, if not a little pricey and only available on the used market.

The high-quality TTArtisan viewfinders work well on the LX7 but offer no communication with the camera’s electronics.
Alternatives are available including third-party accessory optical viewfinders such as the TTArtisan viewfinders. (see image above) The TT Artisan optical viewfinder works well on the LX7 as an alternative to the more expensive Electronic Viewfinder offered by Panasonic as an accessory. Click on the link for my earlier post on these inexpensive TT Artisan viewfinders.
Finally, the camera’s feature packed menus can be a little difficult to navigate at first. It would be wise to spend some time in the menu system navigating to your favourite features to be truly comfortable using the camera.
Why should you buy the LX7 now?
The fact that the Panasonic LX7 is now available on the used market for a fraction of its original cost ($499 U.S.), makes these cameras a steal for anyone looking for the highest quality enthusiast camera in a very small, but full-featured package.
Although the LX-series are holding their price better than some 10-year-old-plus digital cameras, it’s important to realize that these were never meant for the inexpensive digi-cam market.
Who should buy the Lumix LX7?
This is an ideal tool for any photo enthusiast looking to have a camera with them at all times – either in the garden, on vacation, or snapping shots of the kids (grandkids) going about their business.
Small enough to slip into a coat or even pants pocket, a small purse or camera bag, the LX7 is totally capable on its own out of the box. Add the external electronic viewfinder, filters etc and these little Leica equivalent cameras leave little to desire.
Maybe you’re thinking that the 90mm equivalent lens just won’t cut it at the long end when you’re trying to get shots of birds or pull in distant scenic shots.
Well, Panasonic solved this problem in the LX7 by including Ai intelligent zoom that doubles the 90mm equivalent to 180mm. Yes, there is some loss of quality at the longer end – which would be expected – but consider the tiny size of the camera and the fact you can get a fast 180mm equivalent Leica lens without having to lug around an oversized camera and lens.
By lowering the image size, you can also use the Extended Optical Zoom feature to get similar results.

The LX7’s wide angle capabilities are ideal for capturing general garden scenes that require a fast lens.
Just slip this baby in your pants pocket and you are good to go.
This is not a camera for someone interested in bird or wildlife photography. Yes, you might get lucky with a friendly bird or chipmunk, but generally even a 180mm lens is not long enough for most serious bird photography.
If you are working around the garden, however, deadheading or watering your containers, its a great camera to have at your side. Pull out the LX7 for a quick shot of the butterfly or the perfect spray of cardinal flowers. Who knows maybe a hummingbird working the flowers. Just zoom in with the telephoto to get the shot or go to the 24mm equivalent for a wider shot of the garden in its prime.

The outstanding Leica lens can pick up beautiful details and colour even with the camera's relatively small sensor.
Features of the LX7
High sensitivity 1/1.7-inch MOS sensor (10.1 megapixels)
24 – 90 mm (35 mm equivalent) ultra wide-angle f/1.4 - 2.3 Leica DC Vario-Summicron lens (3.8x optical zoom)
POWER O.I.S (optical image stabilizer)
3.0-inch (920,000-dot) TFT LCD
Optional full manual operation
HD 1080p/60 quality movie clips in AVCHD and Motion JPEG format
HDMI output

The Panasonic LX7 close-up capabilities make this camera perfect for taking out in the garden.
History of the LX-series of cameras
Panasonic’s LX-series cameras have long been a favourite for premium compact cameras for the past decade.
The LX7 is the final version of a long list of LX enthusiast cameras beginning with the LX1, that combined the expertise of Panasonic with the exquisite craftmanship of Leica lenses. The pairing works beautifully.
Known over the years for their larger-than-average sensors, more recently the LX series (beginning with the LX3 and moving through the LX5 to the LX7), have earned their reputations for their fast and superior Leica lenses.
In fact, the LX7 is almost identical to the Leica D-LUX 6 which was made in the same factory by Panasonic for Leica. Check the link for the full scoop on the Leica D-LUX 6.

A close up image of a hosta with ferns is captured beautifully by the Leica lens.
The LX7 was replaced two years after it was first introduced by the LX100 in 2014.
The LX100 is, in many ways, a significantly different camera to the LX7. Not only does it sport a built-in electronic viewfinder (EVF), it features a larger sensor.

The impressive LX100 takes the LX line of cameras to an even higher level.
The Lumix DMC-LX100 (above) has managed to squeeze in a Four Thirds sensor, whose area is twice as large as a 1" sensor and five times bigger than the 1/1.7" sensor in the LX7.
While the LX100 has the larger sensor in comparison to the LX7, it doesn’t actually use the entire sensor, instead cropping it to allow for multi-aspect shooting (similar to how the LX7 uses its sensor).
The result is that the effective sensor area on the LX100 is really 1.5X larger than 1" and 4.3X the size of 1/1.7".
For more information on the LX100, click on the link to go to the Panasonic Lumix site where you can purchase the camera directly from Panasonic on a monthly payment plan.
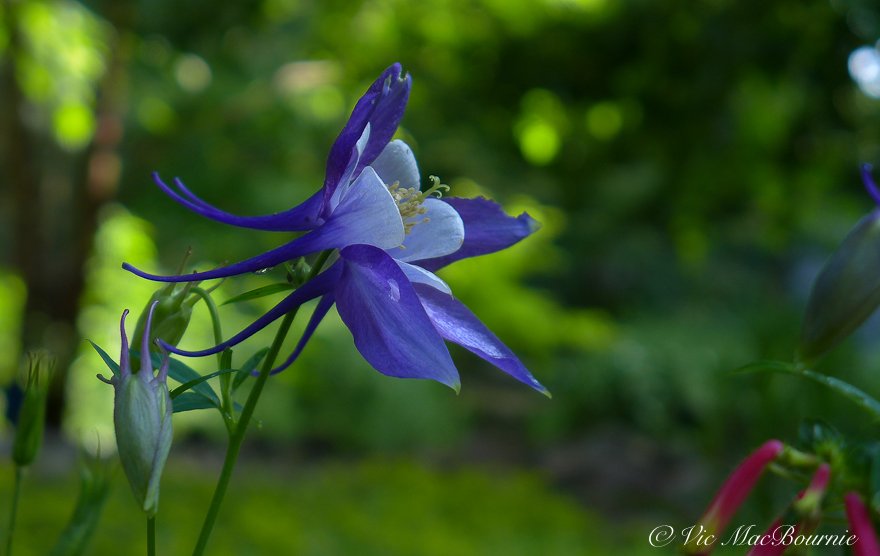
A columbine is captured beautifully by the Panasonic Lumix LX7.
What’s so special about the LX-Series of cameras and the LX7?
If you are a lover of small, full-featured cameras than the LX7 will appeal to you.
Add in the beautiful Leica lens and it’s really hard to go wrong. You can shoot this camera in full manual mode (including focus) or flip it to Ai for full automatic exposure. The camera even shoots RAW as well as aperture, shutter and program priority modes. There is also a complete offering of modes that leave little to be desired.
For old-school photographers there is even a step-zoom feature that allows you to jump to five preset positions (24, 28, 35, 70, and 90 mm).
In addition you can take double exposures, time lapse photography and HDR (high dynamic range) images.
You can also choose from sixteen special effects filters, that can be used in both stills and video, and can be fine-tuned to your creative preferences.
The LX7 vs a Smartphone
You may be thinking, “I don’t need a camera my smartphone is all I need.”
Well, think again.
The LX7 is smaller than most smartphones, boasts a fast Leica lens, offers features too long to list as well as excellent video capabilities, and can be purchased for a lot less than your average smart phone.
It’s small enough to take everywhere and there is no doubt you are holding a finely crafted piece of machinery.
You could go out and buy the Leica equivalent for two or three times the price, or just be smart and nab yourself the Lumix LX7 and all the accessories for an even better price.
There is something about that Leica lens.
For a in-depth look at the Panasonic Lumix LX7, go to DPreview’s review here.

How to attract Blue Jays and are they mean birds?
They’re boisterous, bullies that add a hit of colour to our backyards. Blue Jays are one of the most beloved birds in our gardens, but it was not long ago when they were threatened by a deadly virus that wiped out hundreds of thousands of birds.

A blue Jay taking advantage of a bird bath. Their territorial habits have resulted in them being unfairly labelled as mean birds.
Blue Jays rebound after severe hit from West Nile
They’re loud, arrogant, boisterous bullies, and some may even consider them mean. But most bird lovers are happy when they see them at the feeders or, better yet, nesting in their backyard.
Not everyone, however.
Like some family members, blue jays arrive, make a lot of noise, steal all your food, hang out for longer than you want them sometimes and then leave without as much as a thank you.
Blue Jays have returned to our backyards after a couple of lean years caused by a multitude of deaths resulting from West Nile disease that hit Blue Jays hard.
And nothing could make me happier.
If you are looking to attract Blue Jays to your yard, take a minute to check out my post on my two favourite Blue Jay feeders.
Back when West Nile emerged in the late 1990s into the 2000s, dead crows and blue jays provided early warning of the outbreak. In the year 2007, research by the journal Nature warned that populations of seven species of birds, including robins, blue jays and crows showed “dramatic decline” across the continent since West Nile emerged in the U.S. in 1999. The research compared 26 years of bird breeding surveys to arrive at the results. The report stated that the disease, primarily an avian virus spread by mosquito bites, killed hundreds of thousands of crows and jays.
The virus targeted seven species – American crow, blue jay, tufted titmouse, American robin, house wren, chickadee and Eastern bluebird. Only the blue jay and house wren were able to bounce back in 2005.

Six Blue Jays raid the bird feeder especially the seed cylinder which is, without a doubt, their favourite. For more on the seed cylinder, see an earlier blog post on my 5 best bird buys.
Earlier this summer I had nine – count’em nine – blue jays on my birdfeeder at once. A few more in the trees scattered throughout our woodland and another making itself at home in one of the birdbaths.
Then they spotted an owl way up in a tree and all hell broke loose for about five minutes until the owl flew off into some denser foliage.
One thing I can honestly say is that there is never a dull moment with these guys around.
And people love to see their colourful plumage in their backyards. These intelligent and adaptable birds that grow to about a foot long will feed on pretty much anything in our backyard landscapes, but are certainly very happy helping themselves at our bird feeders.

Blue Jay in crab apple. Blue Jays are very territorial birds that has resulted in a reputation for being a “mean” bird.
Are Blue Jays mean birds?
Blue Jays have gained a reputation in many circles for being mean birds, not only around the bird feeders but in their natural surroundings.
This reputation is probably the result of their loud rambunctious vocals as well as the the fact that they can be very territorial during nesting season and even around a bird feeder or bird bath.
At the bird feeder you will often find them visiting as a family group in large numbers. Their sheer size, rambunctious attitude and loud calls often force smaller, more timid birds to move on, leaving the feed for the Blue Jays to feast on all on their own.
Blue Jays’ long, sharp beaks also make them a formidable foe against even larger woodpeckers at our cylinder feeders.
It’s not hard to see how they have earned the reputation for being mean birds.
But most of their aggressive nature is the result of four factors:
Protecting their nest
Protecting a food source which includes a bird feeder
Protecting their fledglings either on the nest or near the nest
Protecting their flock when resting (bathing/feeding)
Yes, blue jays are territorial but they have to be to protect themselves.
Their aggressive approach to any raptor that decides to come into their territory is another example of how “mean” these birds can appear. Blue jays fear raptors but will – together with crows – aggressively harass a hawk or owl that wanders into their area, not backing off until the raptor moves on.
But Blue Jays have earned the reputation of being “mean” birds for more than just their bravado around the feeders and when raptors appear near their nests.
Blue Jays can seem downright mean in our eyes when they aggressively protect their nests and even bird feeders. They’ve even been know to attack humans who get too close to their babies on their nests. You may not realize you have invaded their territory and just think the birds are being extremely aggressive.
Blue Jays can also be very aggressive toward garden snakes, which is another reason they have earned a bad reputation.
Blue Jays are also known to eat other birds’ babies as well as frogs, which probably has not helped their reputations.
Blue jays have full repertoire of calls and sounds
These guys are not limited to their ear piercing raucous calls of jay, Jay, jay. Their repertoire includes a variety of musical sounds and they can apparently do a remarkably realistic imitation of the scream of a Red-shouldered Hawk. They’ve also been known to try to imitate humans on ocassion.
Often times I hear odd sounds and expect to see a rare bird emerge from the tree, only to find that the unusual sounds are from a blue jay. They can certainly communicate in a number of voices.
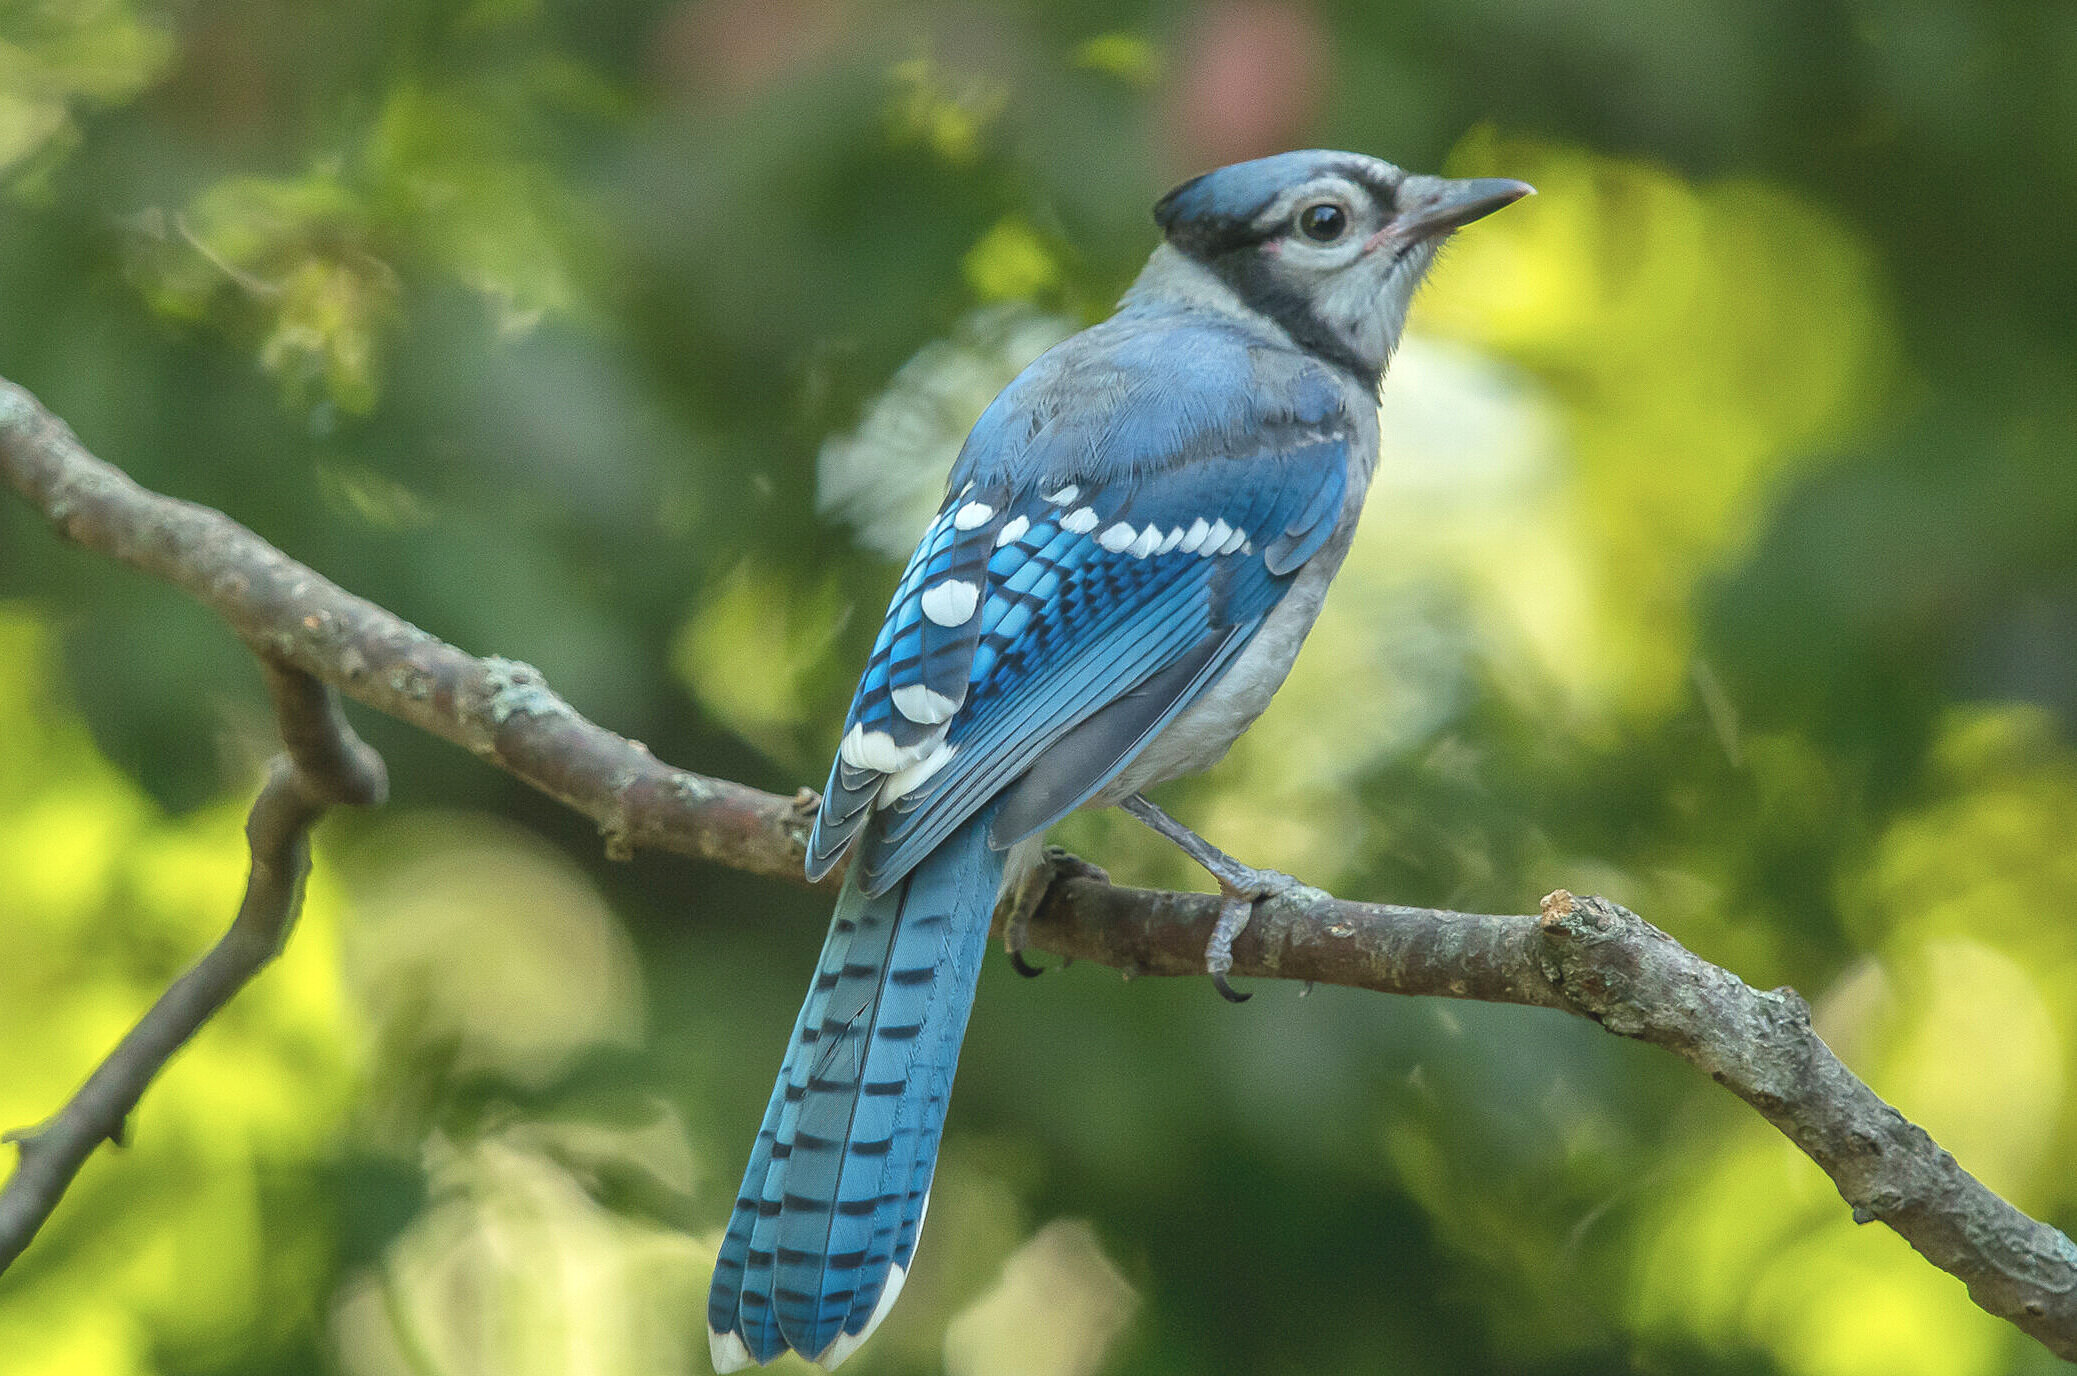
Blue Jays are among our more colourful and boisterous backyard birds.
What Blue Jays eat
The birds are omnivorous, with vegetables, fruits and berries making up more than 70 per cent of their diet, including beechnuts, acorns, seeds, grain and, of course, a variety of berries and small fruits like service berries and dogwood berries.
They can be seen foraging in trees and shrubs as well as on the ground. Their large, strong beaks allow them to pound open hard nuts and seeds like acorns, which they harvest and store in holes in the ground for later use.
Needless to say they help plant many an oak tree in our forests and our own backyard landscapes.
Being opportunists, as summer progresses, they also like to feast on caterpillars, beetles and grasshoppers, but they’ll also eat snails, spiders other birds’ eggs, small rodents like mice, frogs, baby birds and carrion.
Just a reminder that using native plants and trees in our backyard landscape designs, including oak, dogwood, serviceberries and chokecherries are always a good idea.

Where Blue Jays nest
Both Blue Jay parents take part in feeding the nestlings who spend about 17-21 days in the nest before going out on their own. Blue Jay eggs, between 3-7, are greenish or buff, sometimes pale blue, spotted with hints of brown and gray. Incubation is about 16-18 days.
Look for nests anywhere from about eight feet to as high as 50 feet above the ground, made up of twigs, grass, weeds, bark strips and moss. They can be quite messy often lined with rootlets combined with paper, old rags, string and other debris found in urban areas.
Their range is large, stretching north well into eastern Canada and as far west as Alberta and down south to Florida. Although they are common at our bird feeders year round, many do migrate during the day further south.
They are in the same family as Crows and Magpies and are found throughout eastern oak and pine forests where they breed in deciduous or mixed woods and is often quite common in heavily wooded suburbs or parks.
Climate change is increasing the blue Jays’ range farther north in Canada, but, at the same time, spring heat waves are diminishing their range slightly because of the heat threatening young nestlings in hotter parts of both the U.S. and Canada.

Discover the Beauty and Versatility of Virginia creeper
Virginia Creeper is an excellent native vine that can be grown up trees and trellises or used as an effective ground cover in the woodland garden.
A high value ground cover for birds and other wildlife
There are many reasons why our native plant Virginia Creeper (Parthenocissus quinquefoliais) is a fantastic addition to most gardens, from its stunning visual appeal to its practical benefits and value for wildlife.
So, let’s dig a little deeper and unleash the magic of Virginia Creeper.
When it comes to enhancing the aesthetics of your woodland garden, few plants can rival the beauty and charm of Virginia Creeper. With its vibrant green leaves that turn into a stunning display of red, orange, and purple in the fall, this versatile vine adds a touch of elegance and drama to any garden landscape.
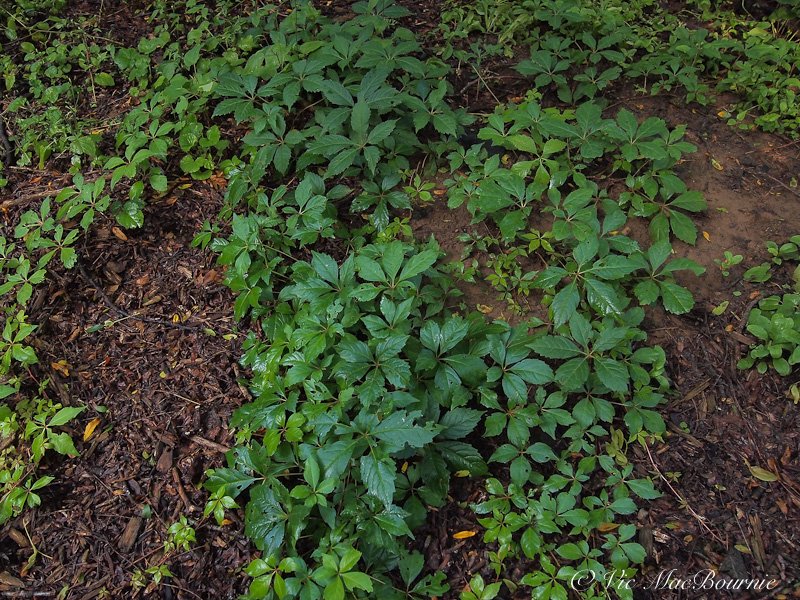
Here is an example of Virginia Creeper in our garden acting as a ground cover.
Virginia Creeper is hardy in zones 3-9, drought tolerant, and grows in pretty much any soil from poor to humus-rich woodland soil. It can handle both wet and dry conditions as well as sunny or shady areas.
It is a woody deciduous vine that can climb or trail up to 30 - 40 feet (up to 12 meters). The only real limiting factor is the structure it is climbing on, whether it be a tree, fence or trellis.
Virginia Creeper climbs by means of tendrils with discs that fasten on to bark, rocks or any structure. Although it is often said that the vine will damage brick, it is not true. The discs will, however, leave unsightly marks on siding or bricks and can push into spaces between brick and siding or, if left unchecked, into spaces above the home’s faschia.
Its coarsely toothed leaves have five leaflets (occasionally as many as seven) that radiate from the tip of the petiole. It is one of the earliest vines to begin changing colour in fall.
The delicate tendrils of Virginia Creeper gracefully climb up trees, fences, and walls, creating a picturesque scene that is sure to captivate anyone who sets foot in your garden. Whether you’re looking to create a romantic, cottage-style garden or a more contemporary design, Virginia Creeper is the perfect choice to add depth, texture, and visual interest to your outdoor space.
First memories of Virginia Creeper
I remember the first time I came across Virginia Creeper. It was early fall and I was working on a photographic slide show about a creek and meadow that ran behind our first home. In a wooded area I noticed a beautiful vine growing over an old tree stump. The combination of vibrant colours – greens, yellows, oranges and reds – together with its delicate tendrils caught my attention and resulted in a prolonged photographic study of the plant.
It wasn’t until later that I learned the name of the plant and the fact that it was native to our area.
I’ve loved the plant ever since. There was no need, however, to plant it in our current garden, the birds took over that job for me.
All I needed to do was recognize the plant both for its beauty, its benefit to wildlife and its role in the woodland garden, and let it do its thing.

Images of Virginia Creeper shown here in it’s many colours and uses from climbing walls and trellises to being used as a ground cover.
How Virginia Creeper transforms your woodland garden
In addition to its stunning visual appeal, Virginia Creeper offers a range of practical benefits that make it an ideal choice for your woodland garden.
One of the key advantages of this vine is its ability to provide natural shade and cooling effects. As the tendrils climb and spread into nearby trees or trellises, they can create a dense canopy that helps to reduce the temperature in your garden, providing a cool and comfortable environment for you to relax in during hot summer days. This natural shading also helps to protect delicate woodland plants from excessive sunlight, preventing them from wilting or drying out.
Another practical benefit of Virginia Creeper is its ability to act as a natural privacy screen. As it grows and covers fences, walls, or trellises, it forms a thick barrier that shields your garden from prying eyes, creating a secluded and intimate space for you to enjoy. This can be particularly valuable if you have neighbours nearby or if you simply prefer to have some privacy in your outdoor sanctuary.

This image shows Virginia Creeper in different stages of growth. Insects are obviously munching on the plants. Virginia Creeper is a host plant to the Sphinx moth caterpillar.
Furthermore, Virginia Creeper is known for its low maintenance requirements. Once established, it is a hardy and resilient plant that can withstand various weather conditions, including drought and frost. It is also resistant to most pests and diseases, making it a hassle-free addition to your garden.
For more information on ground covers to consider for your garden check out the following posts: Bunchberry: perfect ground cover, Three Great Ground Covers for a woodland garden, Easiest ground cover to grow, How to grow and care for creeping thyme, Moss and moss-like ground covers
How I use Virginia Creeper in our garden
In our garden, Virginia Creeper is used primarily as a ground cover in a natural area as well as a climber that is scrambling up one of our mature locust trees, where I can easily keep my eye on it.
Used as a ground cover, Virginia Creeper spreads readily to fill bare spots locking its tendrils onto the cedar mulch and going to work covering the ground with a thick cover of green leaves followed by berries in fall. Right about the time the berries appear, the plant’s leaves begin turning the ground into a beautiful tapestry of fall colours of red, orange, yellows and purples.
I like to grow it along with numerous other groundcovers such as stonecrop, epimedium, wild geranium and Mayapple. The result is a tapestry of woodland groundcovers that compete for their place on the forest floor.
Yes, Virginia Creeper can spread rapidly and cover small plants, stumps and even climb trees and shrubs. As explained later in this post, that is its task in the natural world. As gardeners, we need to accept these traits and just learn how to control them as much as exploit them.
Valuable habitat for backyard wildlife
Lastly, this versatile vine serves as a valuable habitat for wildlife. Its dense foliage provides shelter and nesting sites for birds, while its berries attract a variety of insects and small mammals. By incorporating Virginia Creeper into your woodland garden, you are not only enhancing its natural beauty, but also creating a welcoming haven for local wildlife.
Birds such as chickadees, nuthatches, mockingbirds, finches, flycatchers, tanagers, swallows, vireos, warblers, woodpeckers, and thrushes will all feast on the berries and the insects this vine attracts. Deer too, will gladly sample the grape-like fruit.
The green to blue-black berries mature in late summer or early fall and persist on the vines until eaten by wildlife.
So, whether you're looking to create a cool and shaded retreat, add privacy to your garden, minimize maintenance tasks, or support local wildlife, Virginia Creeper is the perfect plant to fulfill your practical needs.
“As a culture we have allowed ourselves to hate a plant that we enabled, while it yet serves us a massive purpose we fail to recognize widely.”
The pros and cons of planting Virginia Creeper
Not everyone agrees that Virginia Creeper is a valuable addition to a garden. One only needs to scan Facebook’s garden forums to witness the hatred many gardeners have for this native plant.
The problem is that most of these gardeners are unaware of how to properly use this sometimes aggressive native vine and the role it is meant to play in the natural environment.
Gardeners who are looking for small, neat and tidy yards made up of well-behaved plants growing in individual clumps, will likely not appreciate the aggressive growth of Virginia Creeper.
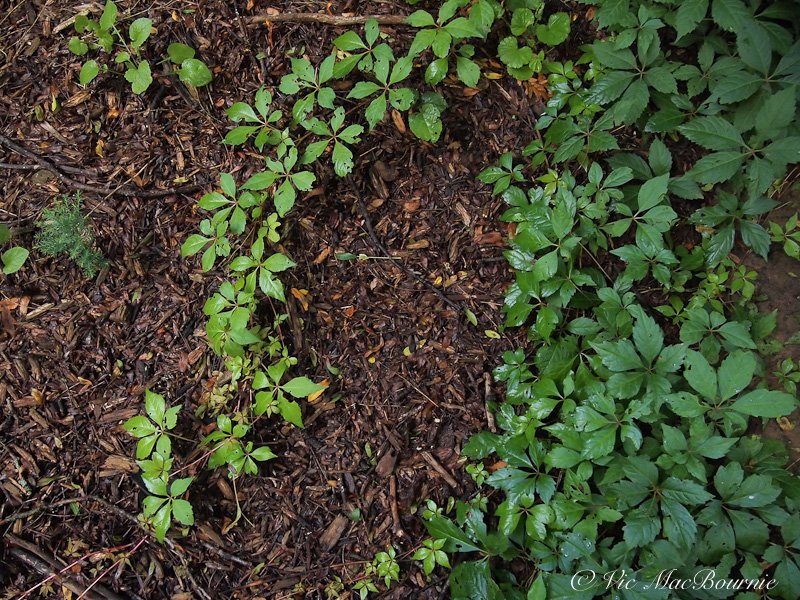
Virginia Creeper tendrils makes their way through the mulch adding texture in summer and a tapestry of colour in fall.
These same gardeners will probably not appreciate the qualities of other aggressive ground covers as well, whether they are native or non-native.
It’s important to understand the role Virginia Creeper plays in the natural environment.
In an informative essay by Wisconson-based Johnny Nativeseed on Facebook, Virginia Creeper is given its due as an early and important colonizer in the natural woodland.
In their words: “The lies told about this plant are a projection of those who despise it rather than truly know it, or it’s purpose in nature.
“While it’s abilities to climb are vaunted, and hated by humans who decimate the environment it calls home, it is humans who have caused this plant to appear as nemesis, when really its true purpose is in a forest environment that never intended humans to strip it bare… .
The author goes on to explain that “Virginia Creeper and Wild Grape both hold great value to nature in many ways.
“They both host various native fauna, and they both grow in like environments, sharing the duties of an important job in what was once vast, unending forest.
“In the endless canopies of former ancient forests that blanketed this land prior to the arrival of colonizers, if a tree died of disease or age, it’s weakness while dying, or it’s eventual death would punch a hole in the dense canopy under which both Virginia Creeper and Wild Grape Vine typically grow small, muted, ineffectual, and unnoticed.
“That new source of light however is all the batteries needed to juice these two valuable vines into becoming super performing plants bent on their fulfilling their multifaceted purpose.
“The vines sudden rapid growth in the newfound sunlight causes them to race for it, greedily feeding on the light, reaching massive, accumulative size in an extremely short time.
“They know their time in the sun will be short, by their perspective….
“In a world we have deforested, defoliated, colonized and bent to our will, these two vines have been wrongly vilified by the true villans themselves.
As a culture we have allowed ourselves to hate a plant that we enabled, while it yet serves us a massive purpose we fail to recognize widely.
These plants both are major food sources for insects and animals alike. This includes an invasive species we have all come to despise.
The Japanese Beetle: Virginia Creeper and Wild Grape
The author goes on to explain how Virginia Creeper and Wild Grape are magnets to the Japanese Beetles.
“Japanese Beetles will favour Virginia Creeper and Wild Grapevine before almost any other native, vegetable, or ornamental plant.
And it is with this magnetism that we must shift our perspective on to see that these vines are our allies….
The author uses the vines to attract the beetles so he can very easily pick and flick them into soapy water, daily….
“The vines, in their new purpose, act as a foil and in doing so, save the entirety of the other garden/prairie/yard space.
So while some may scream to get rid of the vines for false fear that they destroy healthy trees, or attract a hated invasive beetle...knowing fact and purpose while shifting perspective is all that is needed to utilize, co-habitate, and have success with these two venerable and useful native vines.”
Conclusion: Embrace the Charm and Benefits of Virginia Creeper in Your Woodland Garden
In conclusion, Virginia Creeper is a truly remarkable vine that brings both beauty and practical benefits to your woodland garden. With its stunning visual appeal, it enhances the aesthetics of your outdoor space, adding a touch of natural elegance and charm. But it doesn’t stop there. This versatile plant also offers a range of practical advantages that make it an ideal choice for any gardener.
From providing natural shade and cooling effects to acting as a privacy screen, Virginia Creeper creates a comfortable and secluded environment where you can relax and enjoy the serenity of nature. Its low maintenance requirements make it a hassle-free addition to your garden, allowing you to enjoy its beauty year after year without constant upkeep.
But perhaps one of the most rewarding aspects of incorporating Virginia Creeper into your woodland garden is the positive impact it has on local wildlife. By providing shelter and nesting sites for birds and attracting insects and small mammals with its berries, this vine becomes a valuable habitat for various creatures, contributing to the biodiversity of your garden.
So, whether you're looking to enhance the aesthetics of your woodland garden, create a cool and shaded retreat, add privacy, minimize maintenance tasks, or support local wildlife, Virginia Creeper is the perfect plant to fulfill your practical needs. Embrace the charm and benefits of this remarkable vine and let it weave its magic in your outdoor sanctuary.
• Looking for more garden news, check out Feedspot for a list of some of the best garden websites including Ferns & Feathers Woodland/wildlife gardening site.

Olympus PEN camera delivers sophistication in a stylish package
The Olympus PEN and PEN-EPL camera systems are examples of digital cameras that combine style with a little retro to create the ideal combination for amateur and advanced amateurs looking for a compact everyday camera.
First impressions of the Olympus PEN E-PL2
Very few camera manufacturers can successfully make retro cool again, while still delivering modern features.
Many of the major brands have tried and failed. Olympus, on the other hand, has never lost the “cool” factor with its PEN series of digital cameras beginning with the PEN E-P1 and running through a series of successful launches to the current E-PL10 model. (See image below)

A combination of sophisticated style and retro looks is packed into the highly capable E-PL10 package shown in this Olympus promotional image.
Not only has Olympus maintained the “cool” factor, it has also introduced a sophistication to their PEN series. There is also something to be said for big performance in a small compact body.
Cool, sophisticated and incredibly capable all wrapped up in an exquisite package that makes you just want to make memorable images.
Looking for more information on Olympus cameras, check out my review on the Olympus E-M10.

This image of a chipmunk was shot with the Olympus Pen E-PL2 with the 40-150mm kit lens.
But the PEN series actually got its start before many of us were likely even born. Its roots trace back to October, 1959, where it began life as an inexpensive, analog half-frame SLR compact camera that enabled photographers to double the output of a typical role of 35mm film.
It remained in the Olympus 35mm film camera arsenal until the early 1980s.
In 2009, Olympus released the PEN E-P1, a digital mirrorless interchangeable-lens camera, and the digital story of the Olympus PEN series began.
Today, the E-PL10 sports handsome styling in a compact package that uses a 16 megapixel sensor and impressive 3-axis in-body stabilization, along with a host of features including a flip-down touchscreen display, UHD 4K video capture, 6.1 frame per second burst shooting with continuous autofocus, Wi-Fi plus Bluetooth connectivity and 121-point autofocus system. It’s available in three colours – black, mocha and white – and will set you back abour $600 U.S. for the body only.
More recently the Olympus Corporation’s camera division – including the Digital PEN series – was purchased by Japan Industrial Partners, and is currently run under the name OM Digital Solutions.
The PEN’s compact size, sleek design and impressive feature-packed offering makes it a favourite for advanced amateurs looking for an everyday carry camera that performs like a full-sized near-professional camera.
Our Japanese-style garden taken with 14mm lens and TT Artisan optical viewfinder.
I was lucky enough to score an older, used PEN-E-PL2 model complete with both kit lenses (14-42mm and 40-150mm) and the impressive fisheye converter (Olympus FCON-P01 Fisheye Converter) for a very reasonable price.
The fisheye converter is a high quality lens attachment made in Japan specifically for the 14-42mm f3.5-5.6 ll MSC lens. It snaps on via a bayonet mount to the front of the 14-42mm lens and is used best at the 14mm end. There is also a scene mode that should be set to get the most out of the attachment.
Olympus states on its website that the fisheye converter “lens attachment allows you to easily take fisheye-style shots. In addition to capturing unique and intriguing shots of pets with a fisheye effect, you can also shoot photos with emphasised perspective when shooting up close since you can get as close to the subject as 7cm from the lens front.
It weighs in at a hefty 112 grams, includes a built-in metal tulip hood and is constructed with 3 elements in 3 groups. Olympus states it is the equivalent of an 11mm lens (22mm in 35mm equivalent). This falls a little short of the angle of view most stand alone fisheye lenses provide, but the fisheye effect works well with the additional width.
Check out this Olympus post for more on getting the most out of your fisheye photography with Olympus cameras.
Although these PEN series cameras are holding their value better than some older digital cameras, they are still available for a fraction of their original price if you take your time tracking down a solid example on Ebay or other online used-camera retailers.
The Olympus E-PL2 is a 12-megapixel Micro Four Thirds system camera with in-body stabilization released in 2011 to sit above the E-PL1 (released in February 2009) in the product line, but beneath the E-P2. If that’s a little confusing it’s because Olympus actually has two PEN lines – a higher end line and a “light” line that is aimed at more novice photographers rather than the solely enthusiast camera consumers. Both used the same sensor, with the E-PL line dispensing of a back control dial opting instead for a wheel and adding a built-in flash.

This unfiltered Bee Balm image is shown in the first of a series of images below taken at the 14mm length.

The Bee Balm taken at 14mm with camera filters set to Pop art.

The Bee Balm taken at 14mm with camera filters set to soft focus.
The E-PL2 was actually the fourth Olympus PEN camera released over a two-year period back in its day.
More importantly, the E-PL2 sported an improved LCD screen over the E-PL1 that increased to 3 inches and a doubling in resolution to 460K dots. A higher ISO rating, face detection AF mode and some variations in the Art Filter modes, as well as a new at the time collapsible M.Zuiko Digital ED 14-42mm f3.5-5.6 ll MSC lens that takes the fisheye attachment as well as two other converters – a wide angle and macro converter. (MSC is a connotation signalling that lens can be zoomed silently for use in video work.)
It also features the Olympus super control panel on the back LCD screen that puts most of your settings in one convenient place. It’s just part of the customization available with the camera that allows users to set the camera up to their liking.
The E-PL2 went through some minor cosmetic changes to give it a more curvaceous look over its predecessors improving ergonomics and giving it a touch more style.
On the back, a blue tooth accessory below the hot shoe –aptly named the Pen pal – allows you to add a small device to transfer your images from the camera to the smartphone.
In addition, an electronic EVF – the VF-3 – can be purchased separately. It sports a high resolution of 920,000 dots, a 100% field of view, long eye relief of 17.4mm, and 90° tilt mechanism. The EVF enables stable framing for outdoor, low-angle, and telephoto shooting and can be found used on EBay and other used-camera outlets.
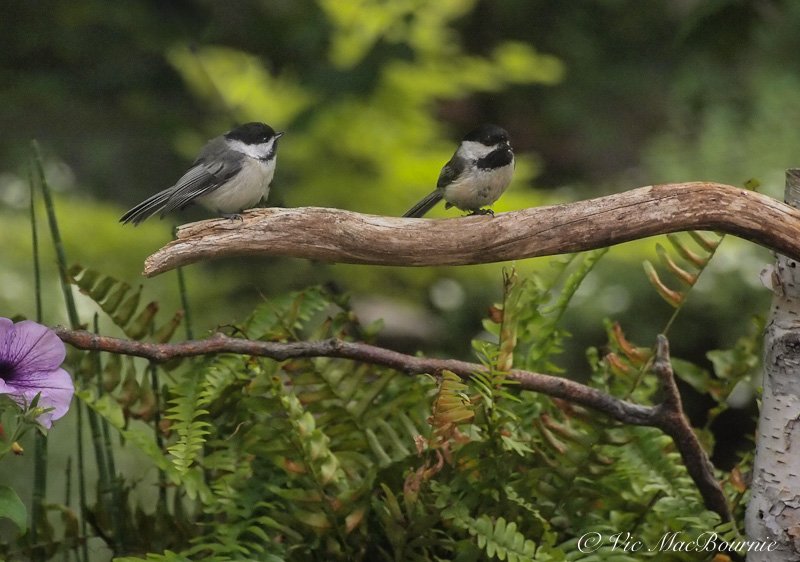
A couple of chickadees photographed with the Olympus 40-150mm kit lens.
For a detailed review of the camera specs, check out the extensive review at DPreview.
I’m not interested in getting into the fine details of the camera. That’s the expertise of the people at DPreview (see link above.)
I’m more interested in how the camera performs in the garden, in everyday use and on vacation. First let’s get it out there that although the PEN “light” series is a simplified version of the PEN series, it doesn’t feel like a “light” version. These cameras have a premium feel and touch to them and are no way considered lightweight and flimsy like many cheap point-and-shoot models.
I’ve been using the camera off and on for the past month or two and am thoroughly impressed. Truth be told, I miss the digital viewfinder of my Olympus E-M10, but that aside, the camera and kit lens packages have performed admirably.
The compact size and light weight makes it an easy choice if you just want to grab a few shots in the garden.

A close up of our clematis flower taken with the Olympus Pen E-PL2.
Put the camera on Program mode and shoot it like a typical point-and-shoot camera without much thought. Switch it to IA and the camera picks the most suitable program mode to get the shot. Non-photographers will love the convenience of these modes, but if you are looking for a little more control, the camera offers full shutter, f-stop and manual modes.
The selection of “Art filters” can add a nice creative touch to your images, if used judiciously. To add an even more creative approach, there is the ability to shoot double exposures, HDR photography and time lapse exposures.
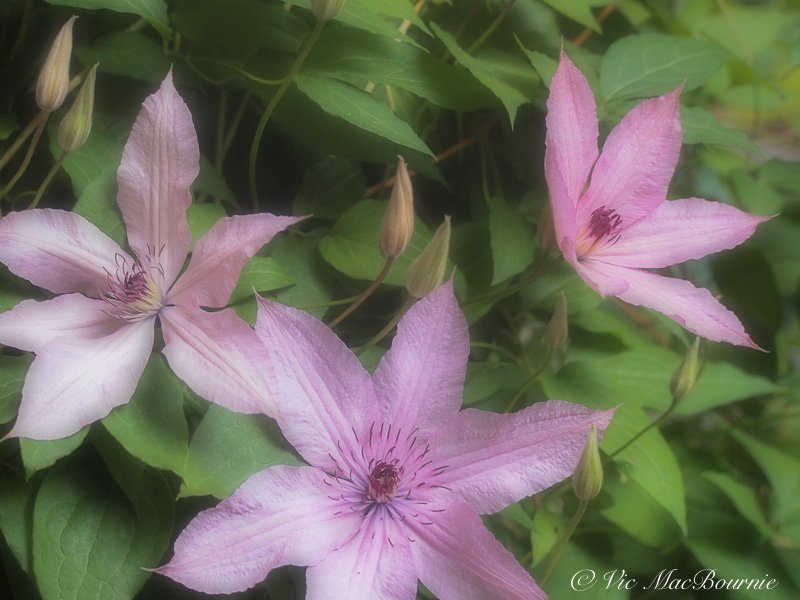
Using the built-in soft focus filter on flowers can be effective in the right situation.
Not bad for a stylish little camera that can be tucked into a pocket as easily as a purse.
The E-PL2 is a 12-year-old camera and it shows at times. The LCD panel is fixed on the back of the camera. I would prefer it to at least articulate to allow a low image without having to lay on the ground. Newer PEN cameras offer and articulating screen.
Focus is good, but obviously falls short of today’s more modern cameras. There is certainly some hunting when trying to focus on a smaller subject with a busy background.
It has face detection that is excellent for getting in-focus shots of toddlers on the move. It also has follow focus and continuous autofocus, but I prefer to leave it on single autofocus most of the time.
Focusing with more vintage, manual focus lenses can be difficult, but live mode makes full use of the LCD screen and by using the magnifying glass you can move in closer to nail the focus.
Olympus did not make focus peaking available for manual focus lenses until around the time of the E-P5.
Video is only 720P at 30 frames per second, which is good enough for most users but falls a little short for serious videographers. The camera sports only a single microphone but an accessory can be added to get stereo sound if you need it.

The TT Artisan optical viewfinder works well on the Olympus E-PL2. The viewfinder is considered “dead” and does not communicate in any way with the camera’s electronic system.
The PEN series of cameras does not come with a viewfinder.
To combat that, I added the The TT Artisan 28mm optical viewfinder which is a nice addition to the Pen E-PL series of cameras. This optical viewfinder has no electronics built into it and therefore transmits no information from the camera.
For more on the TT Artisan viewfinder, check out my earlier post here.
The camera’s selection of art filters is impressive and fun to use. Everything from soft focus, (see clematis image above), to pop colour, B&W and dramatic colour as well as pinhole is available for experimentation both in photo and video mode. The camera also allows for filter stacking –combining filters for even more varied effects –combining pop art and pinhole for example to create a real retro look.

The TT Artisan optical viewfinder looks like it was made for the exquisite styling of the Olympus E-PL2.
Several scene modes simplify the process still further and the various colour modes – natural, vivid, monochrome, muted – further enhances the creative choices. I prefer natural for most of the garden shots, but vivid offers an almost “velvia” look to the images.
There are buttons that let you customize the menu and set up shooting styles and preferences in advance.

A less expensive but still usable alternative is this tiny, plastic optical viewfinder that lacks the clarity of the more expensive glass and steel TT Artisan finder.
If you are looking to capture images of flowers or insects up close, there is an accessory that clips on the hotshoe and allows the photographer to aim small LED lights at the subject.
The close-up spotlight is an excellent accessory for garden and macro photographers that slides on to the hotshoe of the camera and provides the photographer with two movable LED lights that can be positioned to add a constant light source for flower or inset photography, for example.
Battery life is good considering the sole reliance on the back LCD panel.