
How to get the Moody Green look in your images
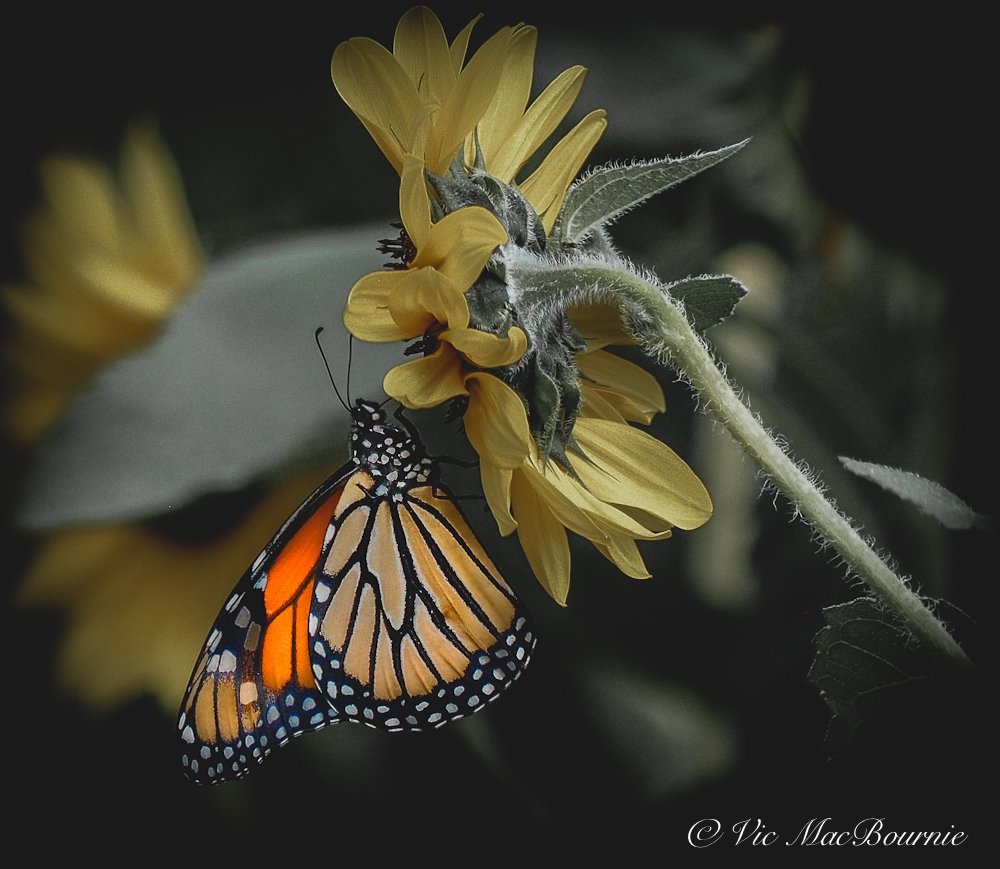
This dark, moody image of a monarch on sunflower is a good example of how, with proper post processing, an average image can be transformed into something more memorable that you would be happy to call your own.
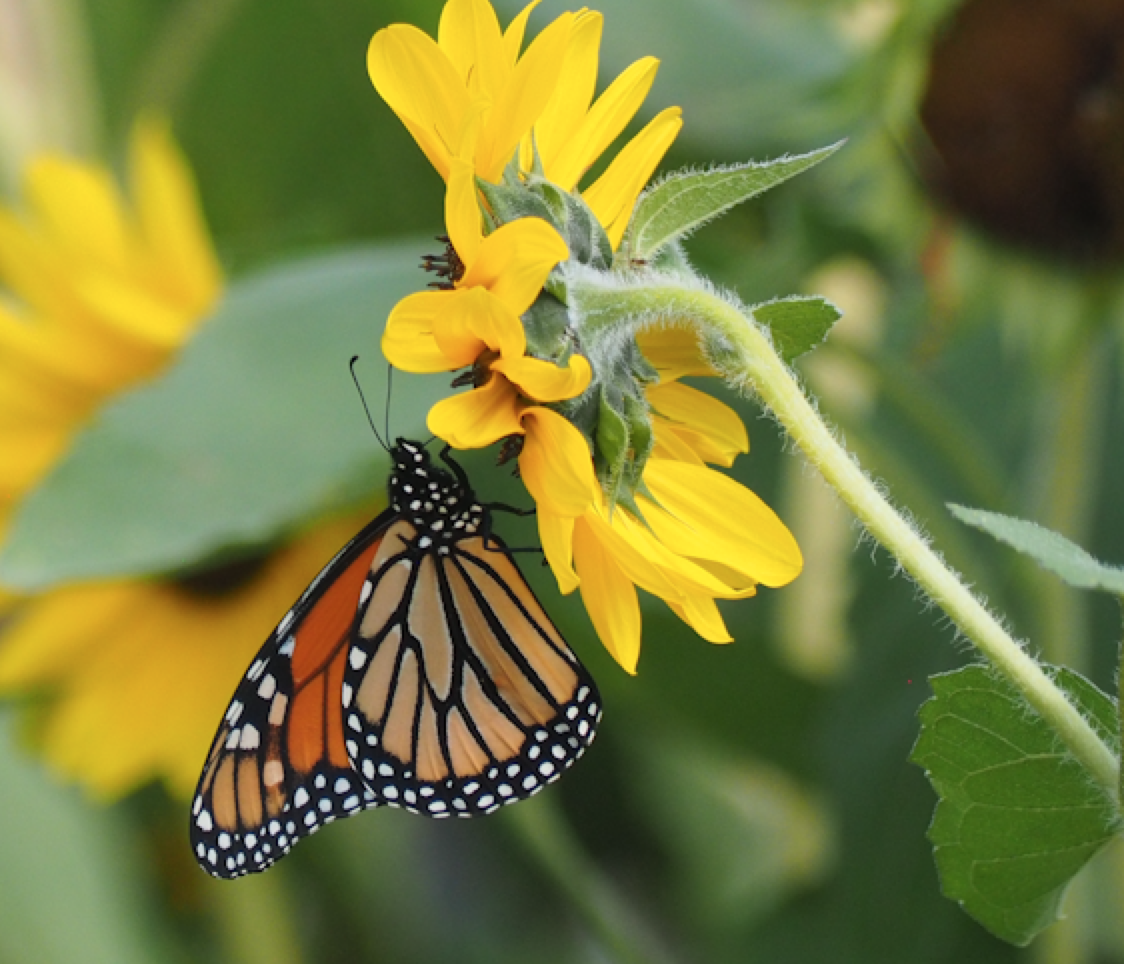
Original image
The original image shows the typical greens and colours in the monarch.
Dark-Green look is perfect for garden photography
Garden photography offers an opportunity to capture beautiful images as well as give your cameras, lenses and accessories a real workout. The problem many photographers have is coming up with new ideas to take their garden photography to another level.
Creating high-key painterly images with your garden photographs (see images below) is certainly one way to add an artistic impression to your photography, but so too is doing the opposite and going dark and moody. (see above image)
In this post, we are going to explore tips on how to create this moody effect with our existing garden images, including revealing the Lightroom settings I use to create these dark green, moody images.
The camera you use to achieve these images can be as simple as your phone’s camera or a favourite point-and-shoot. For tips and reviews on my favourite cameras for garden photography, check out the following posts: Pentax K5, FujiX10, Pentax Q, Canon Powershot Elph, Panasonic Lumix, Olympus E-10 or Olympus PEN series of cameras.
Photography programs, however, such as Lightroom and Photoshop, even free programs like Gimp and Krita become integral to creating these memorable garden images.
Late fall and winter is also the ideal time to cozy up to your computer and experiment with some of your existing images.
I often use these digital post processing programs to create painterly images of my favourite flower and bird images. For more on how I create these images, check out my posts here: Creating Painterly Images from photographs, Digital images of hummingbirds.
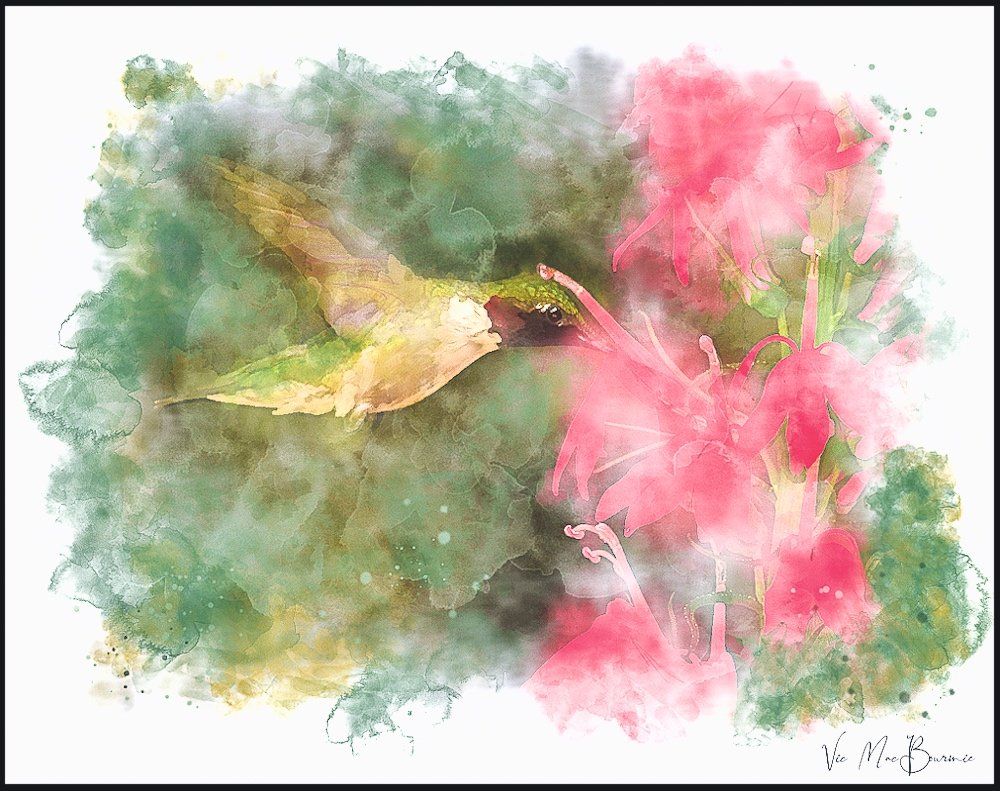
This high-key painterly image is an example of how you can turn your favourite photographs into beautiful painterly images using programs such as Lightroom and Photoshop.

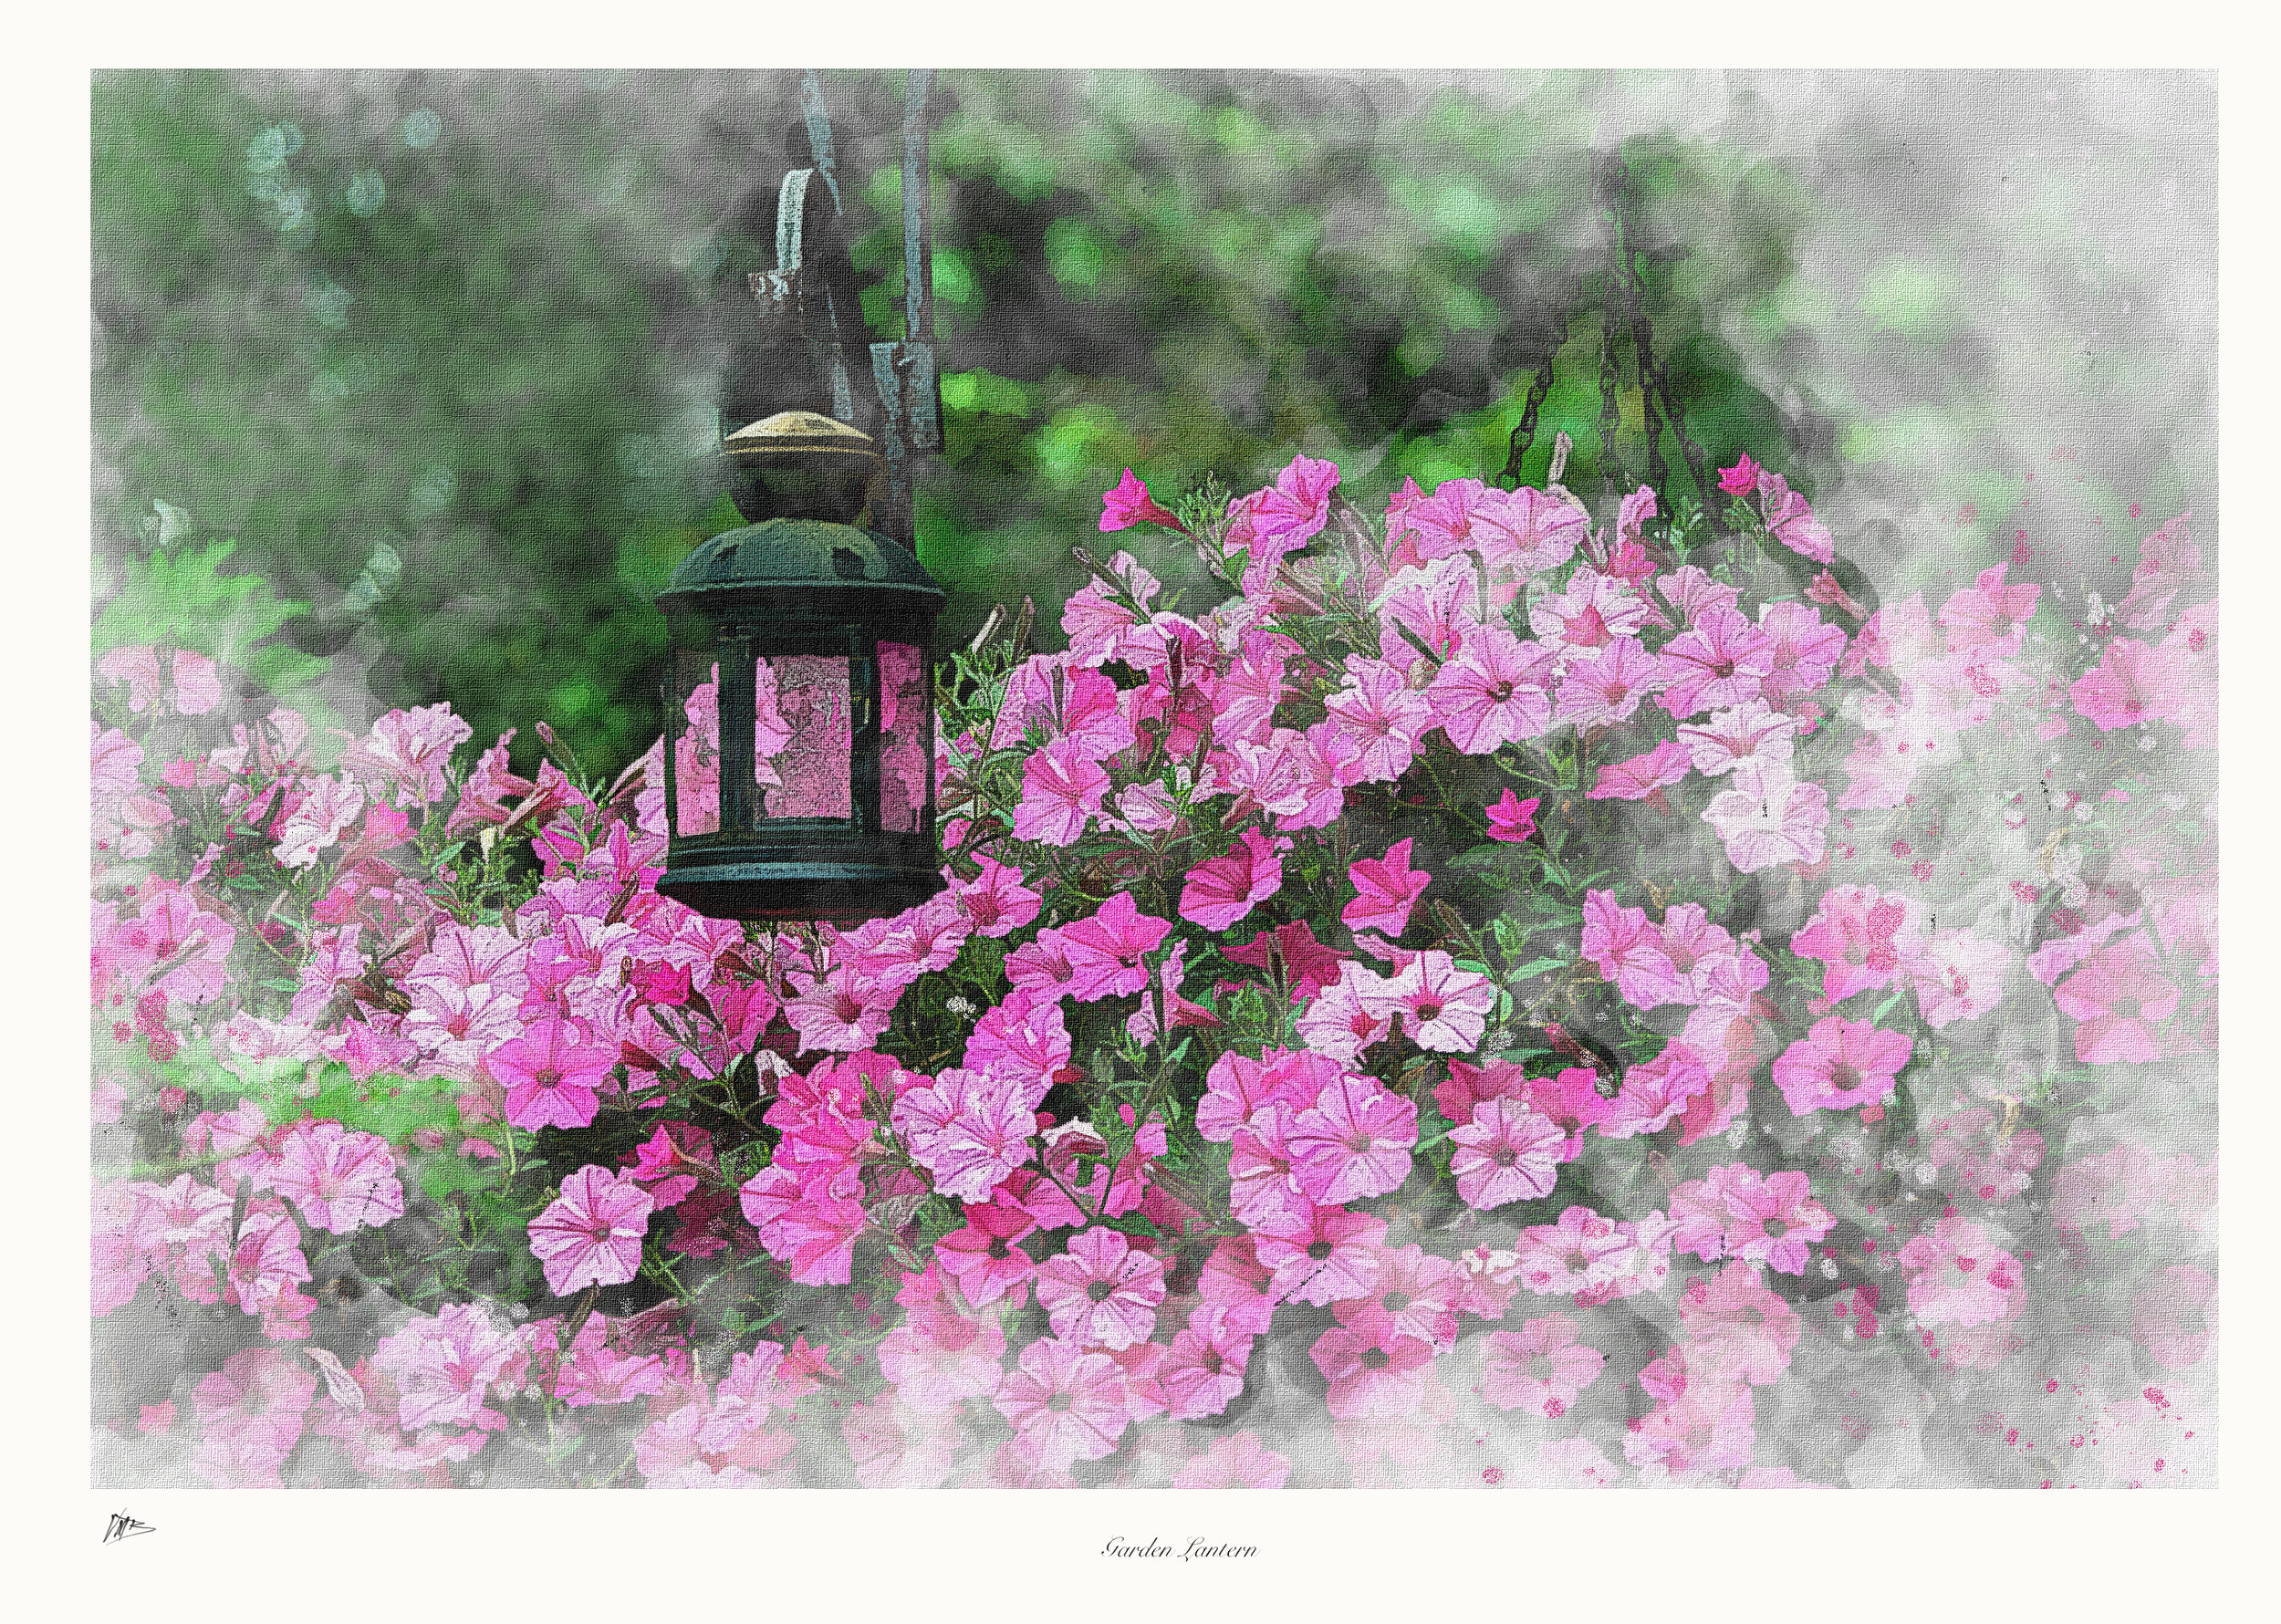
This painterly image is an example of what you can achieve using post processing on one of your favourite photographs.
This painterly image of a typical backyard scene is an example of how you can transform you backyard photography into works of art.
Most of these processes involve creating high-key images of birds in winter or flower images. These results can be beautiful in their own right, but a growing trend in photography is creating a dark and moody feel in the images that often revolves around the greens contained in the image. This involves converting your vibrant spring and summer greens into dark, moody greyed-down greens while maintaining the other colours in the image.
I don’t consider myself an expert in post processing images, but I recognize that being able to create memorable images – whether they are fall scenes, portraits or garden images – requires some familiarization with these photography post processing computer programs.
Mastering basic techniques can transform your images from standard photographs into impressive works of art or simply bring out the best in your photography.
Below are just a small sampling of my Moody Green images I created using my Lightroom preset.
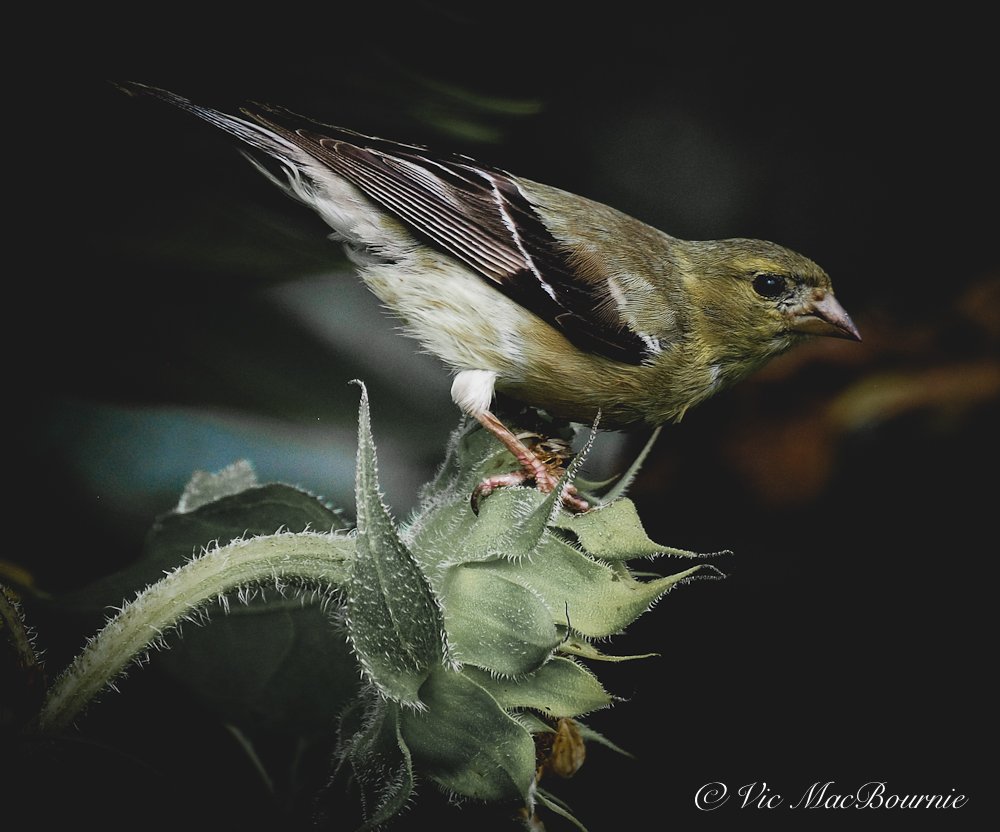
This image shows a goldfinch on sunflower that is post processed using my moody green preset in Lightroom.

This image of Black-eyed Susans and Blue Lobelia was taken with a vintage Auto 110 lens on the Pentax Q and then transformed with my Lightroom preset that darkens the bright greens but allows the other colours to appear more saturated.

Notice how the moody-green preset transforms the greens in the image while leaving the magenta colours in the obedient plants.
Create your own Moody-Green preset in Lightroom
So, how do we transform these images from average to memorable moody green garden photographs?
While similar effects can be created in Photoshop and other photo post processing programs, I simply use an older version of Lightroom to create the effect.
Lightroom presets are usually just a good starting point
Anyone who uses Lightroom presets knows that they are usually nothing more than a very good starting point.
Instead, you’ll likely need to tweak each individual image to get the desired results. Sometimes that involves decreasing the exposure, raising the blacks, playing with the shadow sliders or working with the HSL (hue, saturation and luminence) sliders to perfect the colours in the image.
The main focus of the dark-green moody look is to grey-down or add more black to the greens in the image. This is done by desaturating the greens while leaving most of the other colours intact to some degree.
Many photographers sell their favourite presets
You can purchase a moody-green preset from many photographers who offer them for sale on-line usually on their personal websites. All of these presets would likely give you slightly different, but similar results. By tweaking your finished presets, you can create more presets with slightly different looks that might work better with another type of image.
Once the original preset is tweaked, ensure that you save it under a different name. I have created a number of presets to give me different results from cinematic effects to high-key pastel images.
Rather than try to sell my moody green preset, I offer it here for readers to experiment and create on their own.
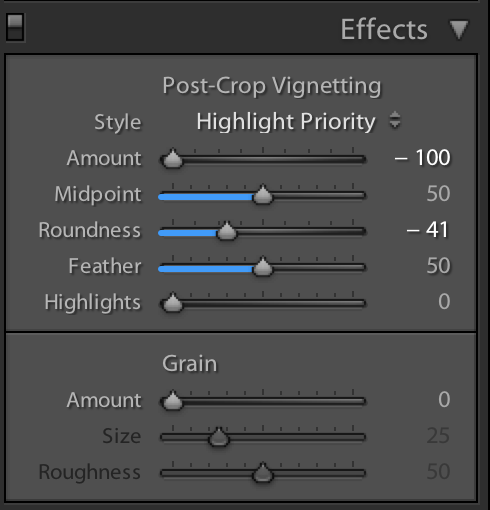
Here are my preset settings for Moody Green images
The following are my settings to create moody-green images with Lightroom 4. More up-to-date versions of Lightroom will give you finer control of the sliders, but the end result should be similar.
Feel free to copy these levels to create your own moody-green preset. Remember, most images will still need tweaking to achieve your desired results. Also, be warned that some images will not work at all with this and other presets.

Getting started with creating your own Moody-Green preset starts here. Notice the right side panel that the highlights are turned down, shadows are way up…


Creating presets in Lightroom
By following the above settings, you should be able to create the moody look that is so popular on social media these days.
Once you have created an image you are satisfied with, simply save the Lightroom preset under Develop/new preset.
By going through your existing images and picking out photographs that you think might work with the Moody- Green theme, you can test it out with the click of your mouse.