

Wildlife rescue: Living with foxes and other garden wildlife
If you are fortunate enough to have foxes living in or near your garden consider yourself lucky. These entertaining little critters are great to have in your yard to control mice and rats.
Are foxes good or bad to have around the garden
All Photographs by Jennifer Howard
Count yourself lucky if you are fortunate enough to have a fox living in or visiting your garden on a daily basis.
Besides keeping rodents like mice and rats at bay, having a fox family living or visiting your woodland garden is likely a signal that your garden is healthy and offers good habitat for an upper level predator. That includes access to an abundant supply of food, water and shelter.
“If you are lucky enough to have a family of foxes move into your yard. Please try to let them stay. It’s a wonderful experience watching them raise their kits from a distance,” explains Jennifer Howard, a wildlife rescue and rehabilitator at Procyon Wildlife Centre in Beeton Ontario.
“They are incredible parents and to be honest, until the wee ones start to come out of the den at around 3 to 4 weeks you may not even know they are there,” she adds.

A beautiful photograph of a fox rambling through the garden.
Can foxes be removed from your yard humanely?
If having a family of foxes in your yard is unworkable, you may be able to gently convince the family to move on to another denning site.
“Foxes do have more than one den. If they are disturbed too much by their human neighbours the foxes will move their kits to another den,” explains Howard.
Playing music near the den and staying close by making some noise whenever possible might be enough to convince the parents to move the kits to a second den. You should never use loud noises to stress out the animals.
“But personally, if it were me,” says Howard. “I would be thrilled (with the fox family) and would work around it. And allow them their space. They have a hard enough time as it is living in our world of craziness, what is a few months of sharing. After all, it was their space first and we are taking it away at an alarming rate. It’s very sad,” she adds.

There is no need to feed foxes in the backyard. Foxes are perfectly capable of finding thier own prey. When they do, they pounce on their prey to stun it before eating it.
Should I feed foxes in my backyard?
Feeding foxes, unlike birds, is not a good idea. These upper level predators need to retain their wildness and eat a healthy, raw diet rather than become habituated to eating processed food provided by humans.
“They are wild,” says Howard. “both parents feed the kits and teach them how to hunt. They need to stay wild and eat the proper diet. The kits learn from their parents and you are not helping if you feed them. In fact, you may do them more harm.”
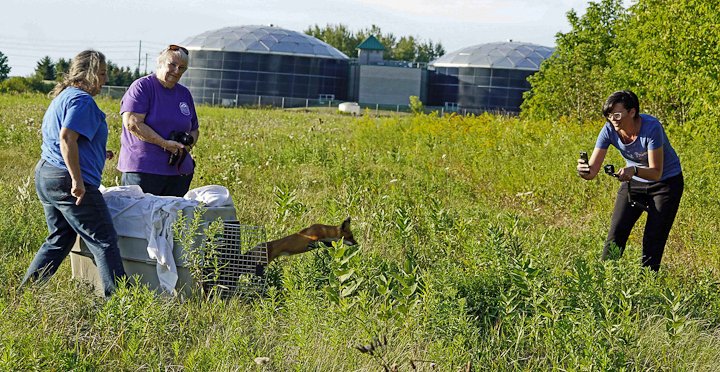
The only time Howard recommends feeding foxes is if the animals are being live trapped for medical reasons.
“They don’t need your help. They are born into this world to hunt live prey or eat road kill,” she explains.
But the biggest reason not to feed the foxes in your yard is the risk of the fox “losing their healthy fear of humans.”
“Not all humans are kind,” she says. “Because the foxes are not afraid to approach people for handouts, they may be shot or injured in some other way.”
Foxes that have been fed by a human can begin to approach other humans who think there is something wrong with the animals usually attributing the friendliness to rabies.

A fox makes itself at home in the garden, sitting in a wooden barrel.
Will feeding foxes attract other animals
“By feeding our furry critters you have no control over who you will attract – Opossums, raccoons, skunks, weasels, rabbits, and even bears,” says Howard.
Feeding foxes also creates the potential of increasing rodents in the backyard.
“Since rodents are the main food source for foxes, if you feed the foxes they may have no need to eat the rodents you have attracted. An abundance of rodents in the garden is never a good thing especially if they find a way into your home or shed.
Howard adds that feeding foxes could also attract a sick animal with distemper or mange to your yard, which, in turn, could infect otherwise healthy animals or even pets.
“Distemper is a horrible disease to which there is no cure,” she adds. “It affects the animal’s brain and it is the worst thing for wildlife rehabilitators because euthanasia is the only thing we can do,” adds Howard.
“Raccoons and skunks have been awful,” at the Procyon Wildlife Centre, explains Howard. “Raccoons carry raccoon roundworm which can be contagious to your pets and you. But raccoons show no sign of having the disease and it doesn’t harm them. Distemper can be passed to foxes as well. Do you still want to feed them? Keep them wild, let them hunt and forage for food the way Mother Nature intended them to do, and what they know to do. These are incredibly beautiful animals that have been forced to coexist among us. And they do that very well.
Will foxes attack our cat or dog?
Foxes have virtually no interest in attacking your cat and even less in attacking a dog. A fox’s life depends on staying healthy and any injury, even a small one that could result from say a cat’s claws, could end in death for the fox. These animals are too intelligent to pick a prey that is a potential threat to them. A mouse, grasshoppers and maybe a squirrel or rat are better choices.
It needs to be noted, however, that a kitten, puppy or very small dog might be prey for an adult fox, especially if it is feeding kits. These animals should never be left out alone in the backyard anyway.
“Let them continue to coexist on their own, they won’t eat your cats or dogs or attack you. You now must learn to coexist with them. It’s a beautiful relationship when it’s done right,” Howard adds.
More information from Ferns & Feathers on Foxes
Wildlife Rescue: The Year of the Fox

Wildlife Rescue: The year of the Fox
Mange in foxes can be deadly if left untreated but it is relative easy to cure if the application of proper medication is given in a timely fashion. Follow Procyon Wildlife volunteer staff as they tackle an onslaught of wild foxes inflicted with mange. Their rescue and recovery and eventual release.
All photos courtesy of Jennifer Howard
Is mange in foxes fatal or easily cured?
The year 2021 will be memorable for the wildlife workers at Procyon Wildlife Rehabilitation and Education Centre for one reason: Foxes and plenty of them.
The wildlife centre in Beeton Ontario north of Toronto was inundated with red foxes in need of help.
Most of the foxes that were rescued by centre staff suffered from mange, but a few were admitted for head trauma resulting from collisions with vehicles. All of the foxes were saved and most have been released. Depending on the severity of the mange, and how early it was caught, curing the animal can be relatively easy with proper administration of medication. However, if left untreated foxes will die from mange.
“In years past we would maybe get two, up to maybe five foxes in the wildlife centre,” explains Jennifer Howard, a volunteer rescuer and rehabilitator at the centre.
“At the moment we have four foxes in our care and, I believe, this is the most we have had in at one time,” Howard explained at the time this article was put together in late fall. “Usually it works out that one is ready to go when a new one comes in. It was almost like an assembly line of foxes coming and going. it was pretty crazy!”

“However in 2021 it was an extremely bad year for mange, Howard explains. In Innisfil (a small village in rural Ontario) alone I got 19 foxes all with mange in various stages. Plus we got a couple car collisions from other areas and other cases of mange from other areas. All total I believe about 28 red foxes were admitted last year.”
Some of those foxes celebrated New Years at the facility and were still getting treatment into january 2022.
And the situation does not appear to be letting up. Already, the wildlife centre has admitted its first fox of the year on January 6 with mange.
For more on the work wildlife rescue and rehabilitators perform, be sure to take a look at my entertaining and informative article about Angels For Wildlife.

This fox shows advanced mange illustrated by bare patches and crusty, scabs on the skin.
For those who may not know about Sarcoptic Mange, sometimes called canine scabies, it is a type of skin disease, caused by parasitic mites. The mites that cause mange in mammals embed themselves by burrowing into the animals’ skin or hair follicles.
If left untreated, mange will cause the animal intense itching from an allergic reaction to the mites’ feces. Severe crusting develops on the animal’s skin that often becomes infected. The combination of infection, crusting (often around the eyes) and hair loss can progress until the fox is unable to care for itself or hunt, and it loses the insulation from its fur resulting in a slow and painful death.
If you see or have foxes in your garden, check out this article on the Fox Den in your garden and helping fox with mange.
The good news is that, if the animal is rescued in time, treatment is simple enough that they can be returned to the wild in most cases in a few short weeks. Secondary problems that may or may not be related to the illness can be more difficult to treat and result in a longer stay at the wildlife center.
Ever heard a fox scream. It’s terrifying but fascinating. For more on why foxes scream, check out my post here.

(More on the identification and treatment of mange in foxes is spelled out in this earlier article in Ferns & Feathers about recognizing mange in foxes living in, or using your woodland/wildlife garden.)
The good news is that all the foxes at Procyon Wildlife Centre are doing well and are either already set free or are on the road back to freedom.
“Some of those foxes had other issues, sores on their rump, minor injuries on a leg or foot, or were severely emaciated. But mange was the dominating issue,” Howard explains.
Many of the foxes admitted last year were kits, but thankfully, they were old enough so no special treatment was needed in their care.
But, a few years back, there was a special, very young little fox that was found alone in the snow with its eyes still closed.

“She was found in the snow with some fur from the den around her. No one knew how she got there,” explains Howard.
The tiny fox “was hypothermic, hungry, dehydrated and in critical condition” when they rescued her.
One of Procyon’s board of directors and animal caregivers took her home for round-the-clock care. Residents in the area even “donated fur coats to us so we could swaddle the tiny fox in fur (just like she would have received from her mother).” A soft stuffed toy was added for her to cuddle.
“She was adorable. She came back and forth on the days her caregiver came in only after she was stable. She became more curious day by day and was handled by only her caregiver at that time,” explains Howard.
Her story, as told by her caregiver Sarah Marrs Bruce, is one staff won’t soon forget.

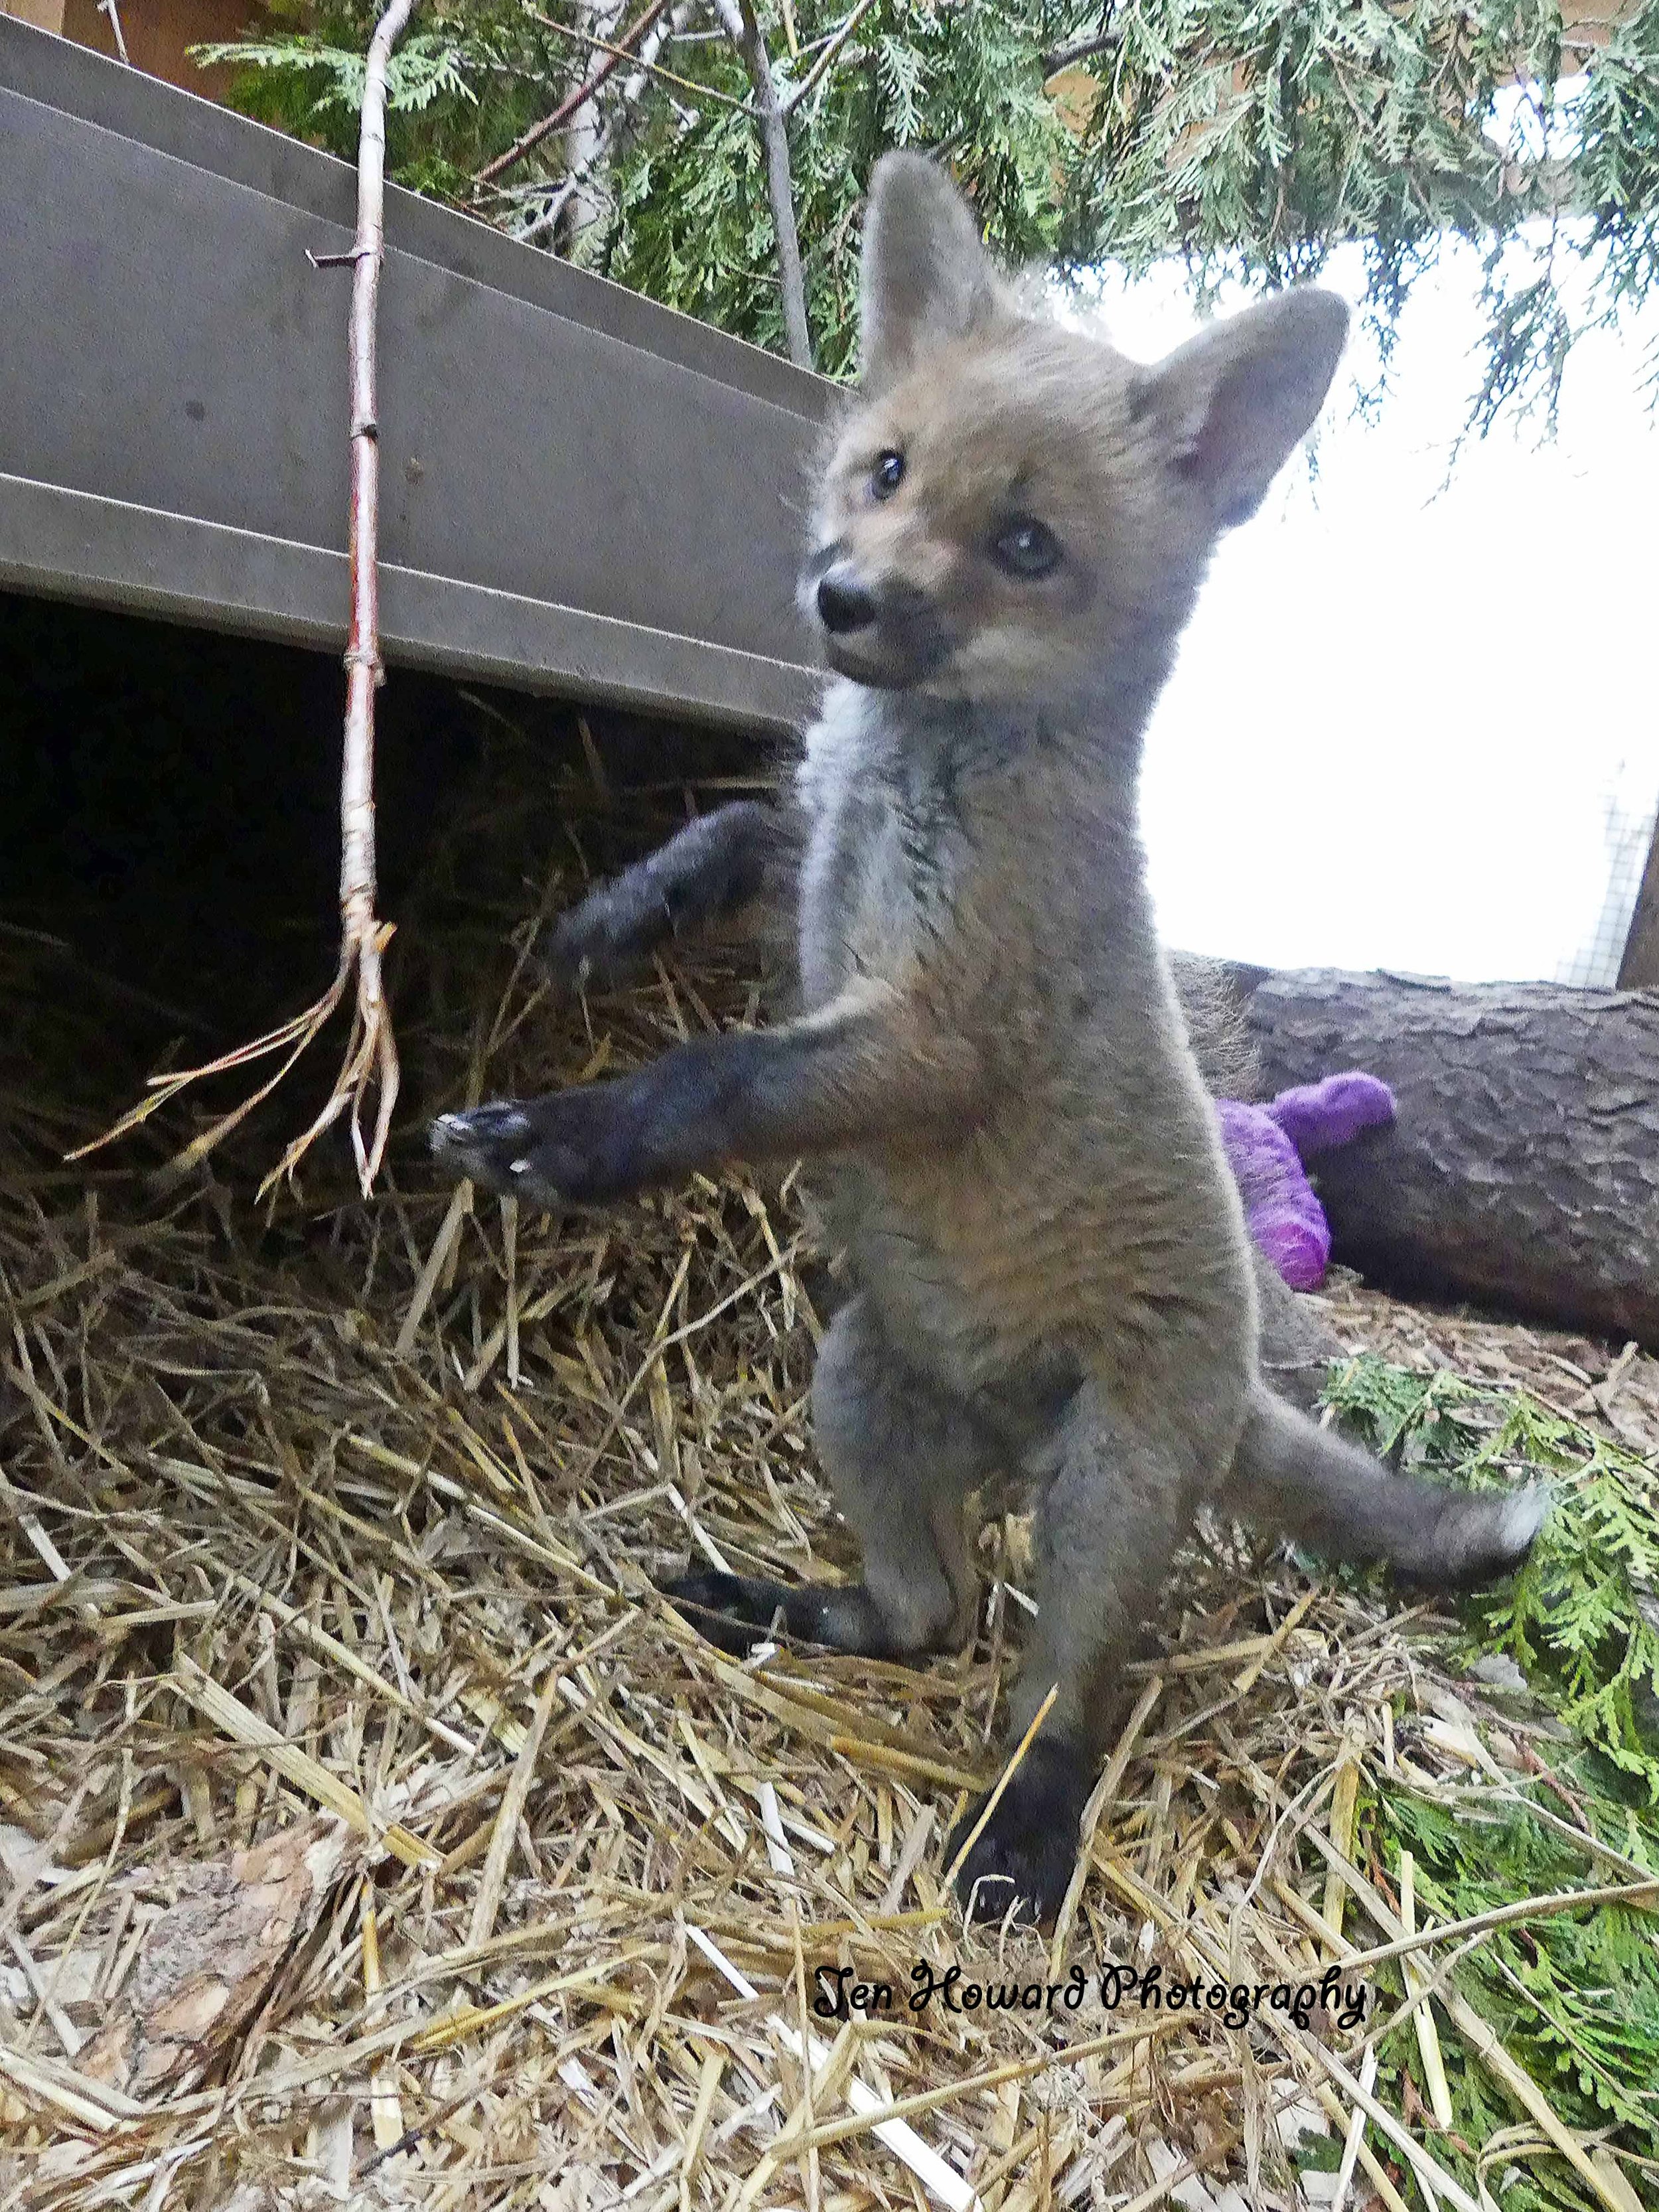
Talitha, a tiny rescued kit, needed round-the-clock care until it got old enough to begin eating on its own.
Meet Talitha: Procyon’s youngest and tiniest fox kit ever
When Talitha arrived, she had been called in as a baby raccoon.
This, most likely, was because her fur was still in the grey phase and not showing any of the typical red fox colouring yet. The colouring can take a few weeks to grow in, in the meantime serving as a part of the kit’s protection against predators – helping them blend into their dens.
She was still eyes-closed and estimated to be approximately 7-10 days old.

Staff used stuffed animals to keep Talitha comforted when she was alone.
She had been found in a snowbank surrounded by torn up fur that could have been from litter mates or her mother. It took a couple days to get her stabilized – warmed up and hydrated and able to handle diluted specialized formula.
She needed comfort but we needed to be very careful about not habituating her to humans. Once her eyes were open we provided her cuddle buddies that were stuffies (including one that had its own heartbeat). At the same time we blocked visual access to her caregiver (in an attempt to keep her as wild as possible.)
She progressed quite quickly from nursing on a “magic nipple” to eating a soft-porridge-like food made from a combination of species specific infant formula mixed with liquified kibble.
The images below show Talitha growing up with her buddy and her eventual release.
As soon as she could feed herself without assistance and was gaining weight reliably on her own, she was quickly moved into a larger outside enclosure to even further reduce her exposure to people. At that time we began searching throughout the province for another fox near her age that she could socialize with. Foxes are very social animals and it was essential to her development to be around other foxes to learn vocalizations and normal social behaviour with conspecifics.
“Caring for her was one of the highlights of my experiences as a volunteer and one that I won't ever forget. Her release together with another fox from the area was a joyful day for myself and several others.”
Work at the Centre never really ends
“After the baby stages, we are very careful to limit the handling of the animals to very few people, explains Howard, “Especially fawns, raccoons, foxes and coyotes, who are easily habituated to humans.”
Staff where gowns and masks and try not to speak in the presence of the animals. They only go out to feed and change the animal’s water at this point.
Rehabilitation Centres from other parts of the province work together to create the best environment for the animals to grow up knowing how to act and survive out in the wild.
“These species also need others of their kind, to bond with, play with, and learn from each other. That is of utmost importance so they do not get attached to their caregiver. We will search for others their age until we find one from other rehabilitation centres, then they either come to us or we go to them.”
In conclusion
The dedication and commitment shown by the volunteer staff at Procyon Wildlife Rehabilitation and Educational Centre is a testament to the type of people who have a special place in their hearts for our wild critters. This same dedication is to helping wildlife occurs everyday in rescue and wildlife refuges in the United States, Canada, the Europe, and throughout the world in countries big and small. Animals of all kinds, from the largest elephants to the tiniest creatures. As habitats are destroyed, either from natural calamities such as wildfires to the slow encroachment of urbanization, it is important for gardeners to do our part to recreate habitat in our yards for many of these creatures.
It is also falling to us to keep an eye on our backyard friends to ensure they are safe and free from illness. That includes everything from keeping our bird feeders and bird baths clean to stop the spread of disease, to taking immediate action if we see a sick or injured animal such as foxes suffering from mange in our woodland/wildlife gardens.
Take the time to look up your local wildlife refuge and make a donation. If you can donate your time or skills, I’m sure they would welcome it with open arms, if you cannot, a financial contribution to any one of these non-profit groups will go a long way to help them help our wild friends.
Ever wonder why foxes scream out in the night. Check out my story here.
The following are helpful Resources for homeowners looking for wildlife rescue and rehabilitation assistance
Worldwide
In Canada
https://www.nwrfcanada.org/what-we-do
http://www.ontariowildliferescue.ca/contact.php
https://www.ontario.ca/page/find-wildlife-rehabilitator
In the United States
• Here is an extensive state-by-state listing from the Humane Society of the United States on how to find a wildlife rehabilitator
https://www.humanesociety.org/resources/how-find-wildlife-rehabilitator
In the United Kingdom
https://www.rspca.org.uk/adviceandwelfare/wildlife/findarehabilitator
• The British Wildlife Rehabilitation Council includes a clickable download of UK rehabilitators
http://www.bwrc.org.uk/FindaRehabilitator
• Here is an extensive list of UK Animal Rescuers from Animal Rescuers.co.uk

How to bring the magic of fireflies to your woodland garden
Fireflies have always added a magical experience to our natural areas as well as our gardens. Creating habitat for these insects is critical to their survival and our ability to continue to watch these fascinating insects light up our gardens. This article provides tips on how to attract fireflies to your garden as well as resources on how you can help fireflies survive.

Capturing magic in your hands. A firefly lights up while it is being held.
Create the right habitat for attracting the firefly
Have you ever experienced the magic of a firefly, or better still, dozens of them lighting up the night sky?
If the answer is no, it’s time to get busy laying out the welcome mat for these intriguing little insects that can turn a summer night into pure theatre.
Like something out of a fantasy film, these warm glowing lights that emerge from the plants, grasses and trees in the garden for just a brief moment, capture our imaginations and, if you are like many of today’s gardeners, bring back memories of our childhoods when the woodlands, grasslands and even our own backyards were alive with the sparkling insects in desperate search of a mate.
It’s a shame that for so many of us, the experience is just a childhood memory.
That magical experience is still very much alive every summer in our backyard at the end of June.
And here’s why.
First, we live in an area where Fireflies are native to the area, but more importantly our garden is an invitation to them by actions we have not taken and steps we have taken to welcome them. There are about 2,000 different firefly species worldwide and, iin North America alone, there are close to 200 different fireflies. It’s time to bring some into our yards.

An impressive display of fireflies beautifully synchronized in displays of yellow-green flashes in the Appalachian mountains.
Let’s start with the actions we have taken to attract fireflies:
Create a wood pile in the backyard
plant native trees especially pine trees, grasses, sedges and plants to encourage them into your yard
Provide them with water in the garden, preferably a small fishless pond.
Turn bright lights off. You don’t need them. If you must, use lights on motion detectors.
We have allowed a large open compost of the finest woodland soil to develop untouched over many years. The larvae of fireflies prefer moist, woodland soil with plenty of organic material.
Steps we have not taken:
We have not picked up leaves in the fall, instead allowing them to fall naturally into our woodland where many of them gather around plants during the cold winter months providing safe, warm areas for insects
Refrain from cutting the grass on a weekly schedule in spring into early summer allowing it to grow longer than usual.
Choose not to use any broad spectrum pesticides in the garden and especially on the grass

A firefly grasps on to a blade of grass waiting for dark to put on its incredible light show.
What so many woodland gardeners may not realize is that our gardens are ideal habitat for fireflies, and like so many other insects, birds and butterflies, these unique insects are in real need of good habitat to keep their numbers up. Our gardens can be an important provider of that habitat if we are careful to provide the right conditions.

The firefly website is packed with information as well as guides and resources to help you develop habitat for these unique insects.
The Firefly Conservation & Research group besides being a fount of information for gardeners looking to create habitat for these insects, is a nonprofit organization founded in 2009 by a firefly researcher in Texas by the name of Ben Pfeiffer.
When Ben, a Texas State University biology major, beekeeper and certified naturalist with Texas Parks and Wildlife, noticed a decline in fireflies, he stepped in to help. He created the website with two missions in mind: One, to educate the public on threats to fireflies; and two, provide a public resource to help gardeners and landowners take the necessary steps to help fireflies.
“It was maybe 2008 when I noticed the fireflies in South Texas were disappearing,” Ben says. “There weren’t as many as I remembered when I was a kid. And then I heard a report on firefly decline on NPR Radio that confirmed it,” he states on his website.
So why should we help fireflies?
Well, for selfish reasons of course. How else can we turn our gardens into magical places where the show goes on for days (make that evenings) even weeks. Oh, and when the show is closed for the season, the larvae of the parent insects spend their time helping us gardeners by eating the snails, slugs and various other insects that call our garden home.
Can we ask for a better guest in our gardens?
More importantly, the habitats of fireflies, like so many of our native insects and pollinators are quickly disappearing. Researchers blame this disappearance on two main factors: over development and light pollution.
Firefly larvae prefer to live in the rotting, damp wood and forest litter around ponds, streams and generally wet areas.
Ben explains in the firefly Conservation & Research website that: “Their environment of choice is warm, humid and near standing water of some kind – ponds, streams and rivers, or even shallow depressions that retain water….”
It doesn’t take much to realize that these type of areas are quickly disappearing in nature and certainly in many backyards where gardeners are too concerned about creating the “tidy” garden and any sign of standing water removed or saturated with insecticide.
Scientists also point to increasing light pollution as a source for the decline in fireflies. The light caused by humans is believed to interrupt firefly flash patterns, critical to their communication and mating patterns.
“Where fireflies once had uninterrupted forests and fields to live and mate, homes with landscaped lawns and lots of exterior lights are taking over. The reduction of habitat and the increase in lighting at night may all be contributing to make fireflies more rare,” the firefly Conservation & Research site states.
Larval habitat for fireflies is critical
Creating habitat for the larval stage is critical to attracting them to your woodland garden.
More specifically, “Fireflies spend up to 95 per cent of their lives in larval stages. They live in soil/mud/leaf litter and spend from 1-2 years growing until finally pupating to become adults. This entire time they are eating anything they can find,” the Firefly Conservation and Research website states.
If that’s not enough to convince you to do all you can to lay out the welcome mat, the adults that only live 2-4 weeks, put on a fireworks show for your enjoyment before laying eggs in the moist, organic soil of your woodland garden.
Fireflies fall under the winged beetles category (Coleoptera) and although they are best know for their bioluminescence used to attract mates, not all fireflies produce this light.
Depending on where you live, you may be blessed with an abundant of firefly species. If you are lucky enough to live in and around New England, you might be able to count up to 30 species.
According to the Firefly Conservation & Research website, fireflies can be classified “under five main subfamilies, with with the Photinus in the Lampyridinae subfamily being the the most common in North America. It measures about a half-inch long and produce a yellowish-green light.
The one you are likely to see in your backyard at night is the eastern firefly (Photinus pyralis). It sports a reddish head area with black and yellow striped wings.
In the United States in parts of the Appalachian mountains lives a firefly (Photinus carolinus) that performs an incredible display of beautifully synchronized displays of yellow-green flashes in May and June.
In conclusion
I urge every gardener to consider taking the necessary steps to provide habitat for the elusive firefly so that future generations can enjoy these magical insects not only in wild areas but in gardens around the world.
Take a few minutes to check out Ben’s informative website to get further information on how you can help the fireflies. You may also consider making a donation to his site and the work he is doing to help protect our magical summers for years to come. You can make a donation to firefly: Conservation and Research here.
How to create bird artwork from digital watercolour paintings
Creating artistic interpretations from photographic images can be an extremely rewarding endeavour that is not only a way to get your creative juices going during the cold days of winter, but an excellent way to see your photographs in a different light.
Turn backyard birds and garden photos into works of art
Since digital images became mainstream in the world of photography, learning to manipulate pixels has become increasingly important for serious photographers.
For garden photographers, artistic interpretations can turn your favourite flower and bird images into beautiful works of art. And who doesn’t appreciate artwork of birds.
There was a time photographers really didn’t need to know about software programs. Jpegs, tiffs and RAW images had not been born and perfect exposure was crucial to keeping an image or throwing it in the wastebasket.
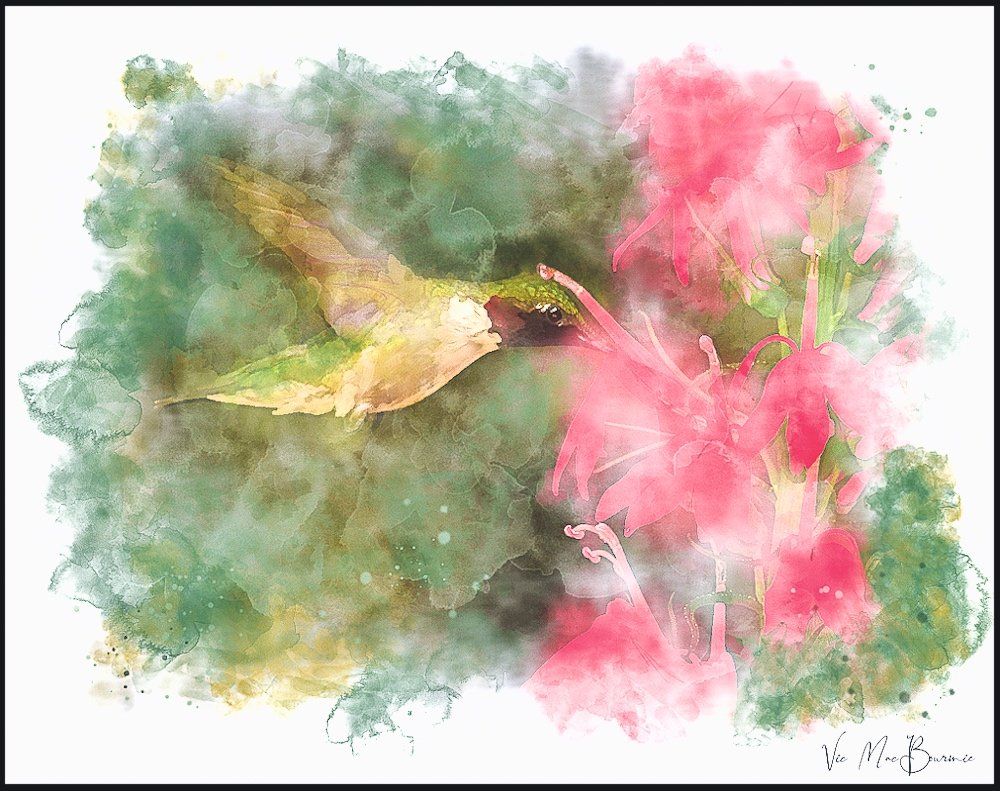
This digital image of a hummingbird at a Cardinal flower is a good example of how it’s possible to create works of art with your photographs.
Go here for more Hummingbird images including digital art.
Much of their “artistic creations” centered around in-camera techniques such as selective focus as shown by the colourful tulips (above).
For more on selective focus in garden photography check out my article on photographing snow in summer.
(If you are interested in exploring garden photography at a higher level, be sure to check out my comprehensive post on the Best camera and lens for Garden Photography.)
Today, if you take photography at all serious, you not only need to know the basics of photo manipulation, you almost need to be an expert in some way.
These days my main photo data base and manipulation program is without a doubt Lightroom Classic, but it’s not the program I use to transform my photographic images into watercolour paintings.
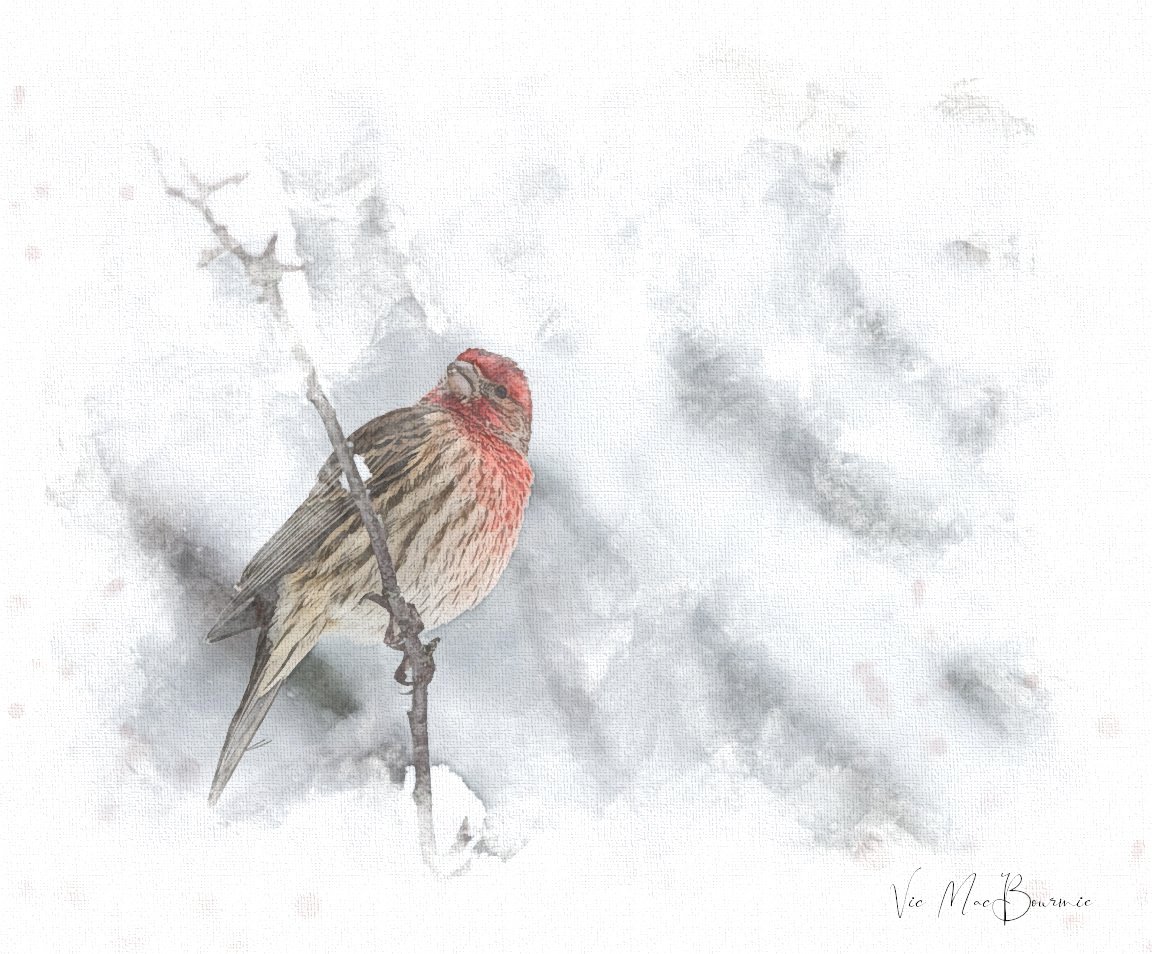
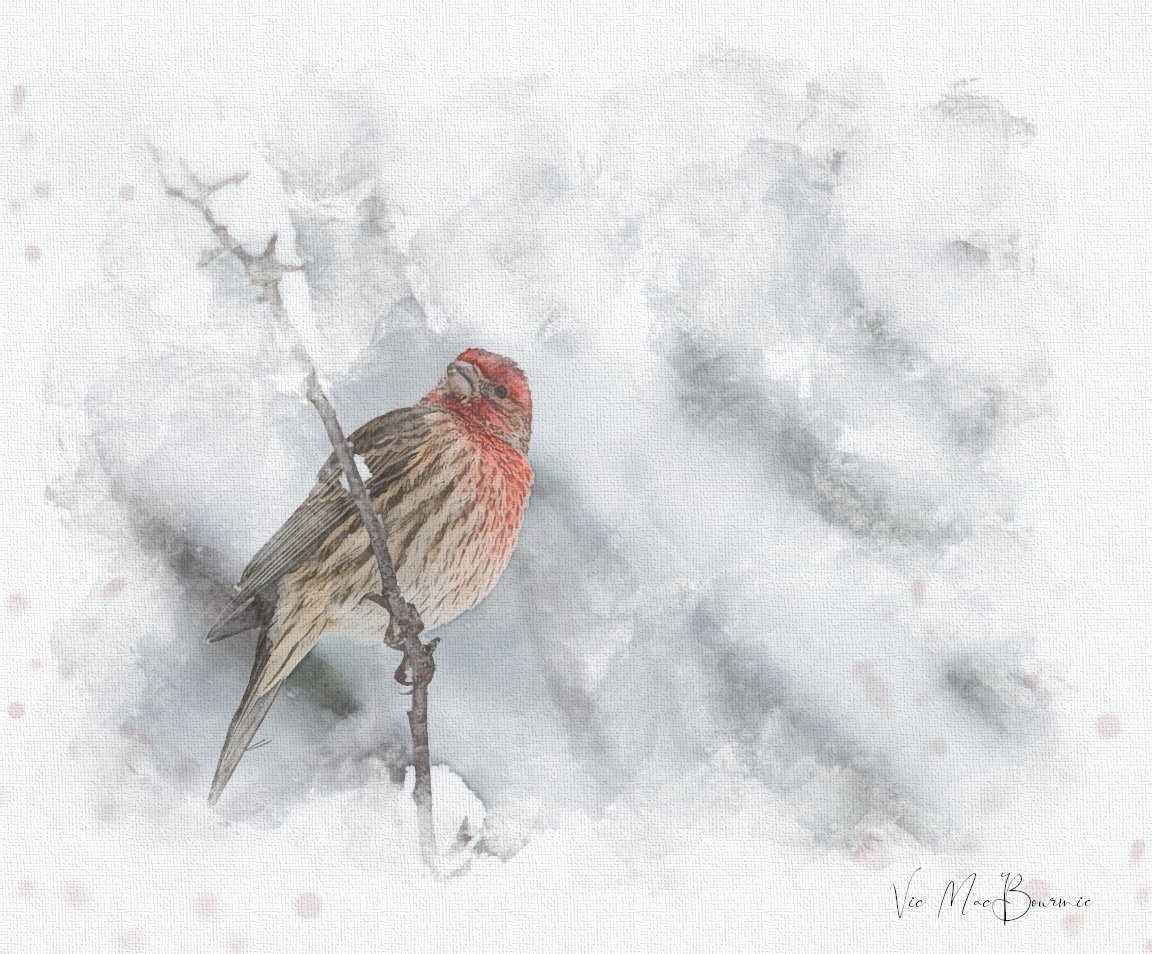
This artwork of a bird was created from a photograph taken in the garden and then manipulated in post processing with programs like Photoshop and Lightroom.
While most photographers focused on improving their images, I have always been interested in transforming my images into a more artistic interpretation of that same photograph. Over the years, I’ve spent a lot of time playing with the likes of the many variations of Photoshop before discovering Painter (Mac Link) (Windows Painter link) – a program that can best be described as a fine artists’ version of Photoshop. In other words Painter is to artists, what Photoshop is to photographers.
This seemed a perfect marriage to achieve my goals of turning photographic images into works of art, accept without any formal training in fine art, and facing more tools, paintbrushes and artistic choices than I could imagine, to say I was a little overwhelmed was an understatement.
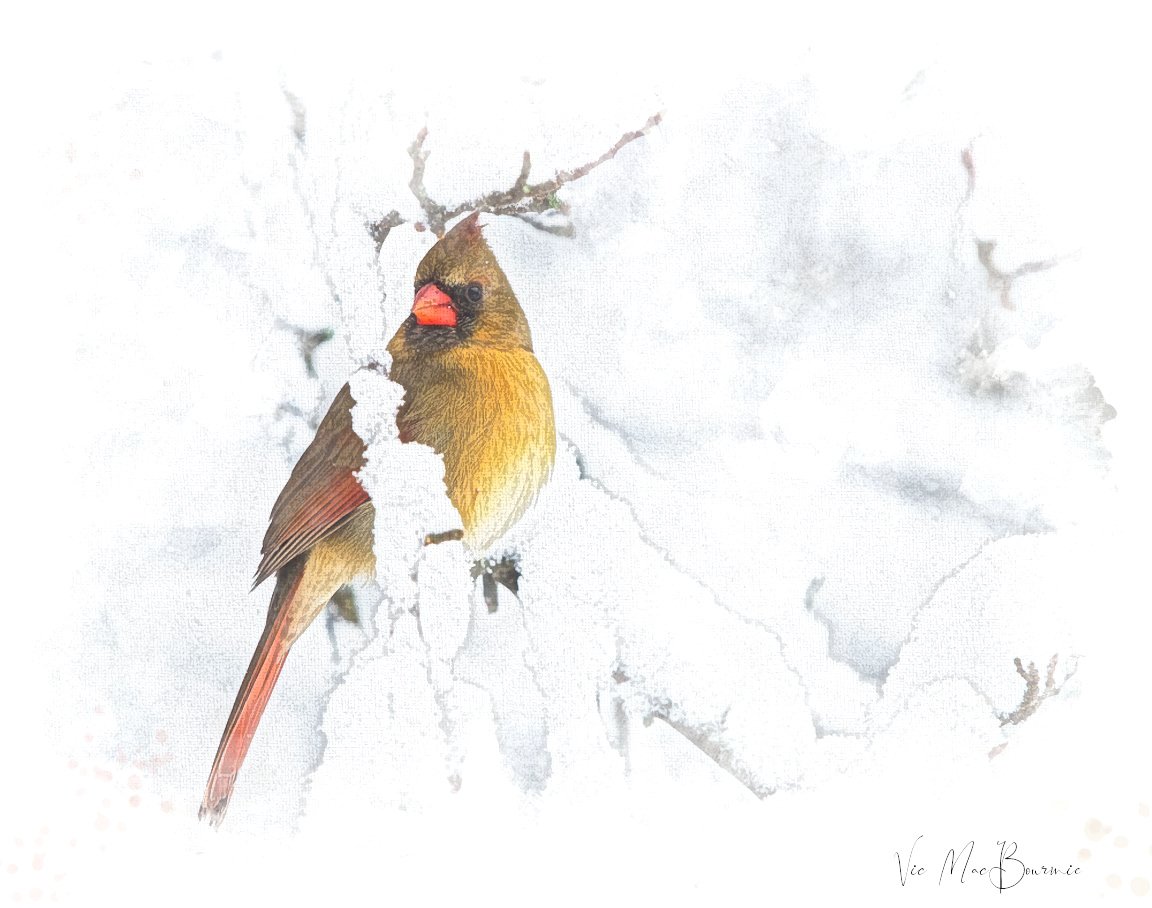
This artwork of a female cardinal was created from a photograph that got the creative treatmen in programs like Photoshop, Painter and Lightroom.
After “a lot” of computer time trying to understand the intricacies of Painter, I eventually taught myself the basics and proceded to work on animal portraits for hours and sometimes days to get them where I wanted.
For my animal portraits, I used a process that involved meticulously going into the original photograph and softly smudging tiny areas of the image to create a sort of painterly effect. For the most part, all this tedious work went unnoticed in the final versions, but it all served as a learning process and, to this day, I still like the results.
Since the animal portraits, I have continued experimenting with painterly images.
Fast forward to today. I no longer use Painter for my artistic endeavours and still can honestly say that I have no clue what I’m doing, but I am getting happier with some of the results.
And, there is no better way to pass time in the cold winter months than taking an afternoon going over some of your favourite images, isolating ones that you think might make nice watercolour images, and experimenting with one of the many programs you may already have to create your own works of art.
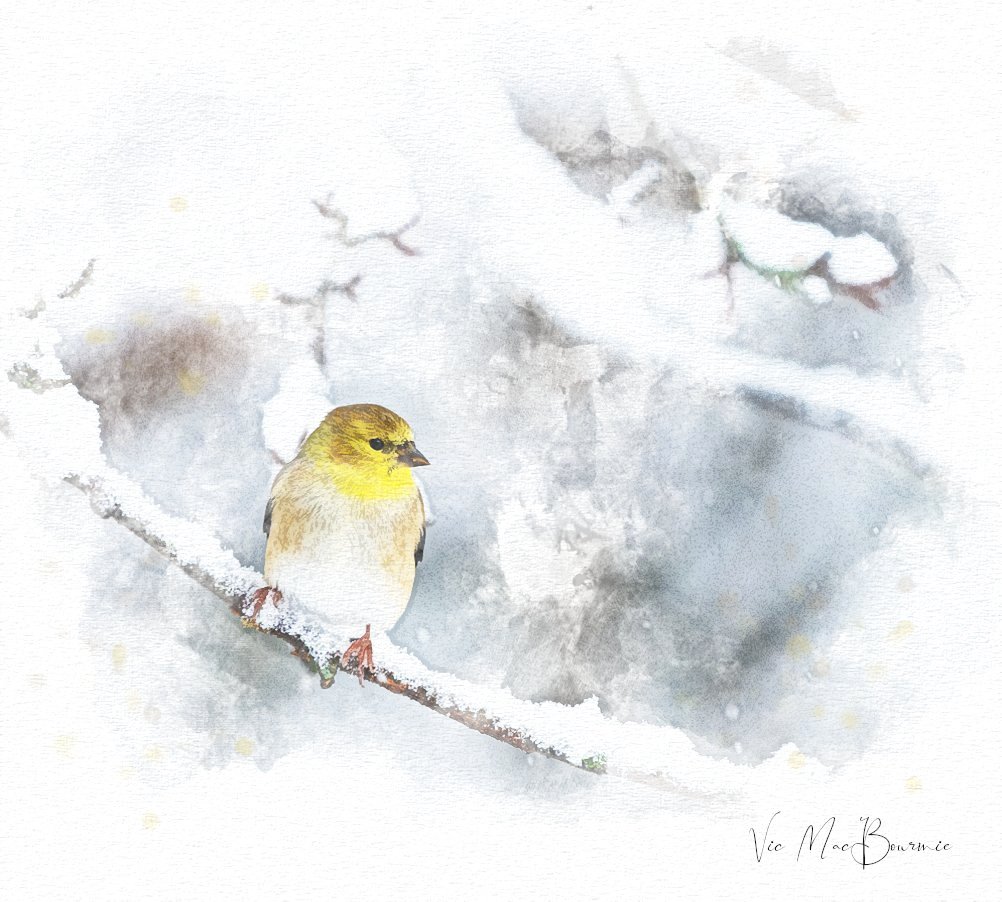
This creative interpretation of a Goldfinch in a snowstorm was created from a photograph and turned into artwork of a bird.
Right now I’m using a free program that you download from the web called GIMP, which is an excellent substitute for Photoshop.
The equivalent “free” program for Painter fans is Krita, another excellent program that has endless possibilities for artists looking to experiment in the digital world.
The GIMP community – particularly the available YouTube videos – make learning the program relatively easy and extremely enjoyable. Following the step-by-step procedures on the various YouTube channels will have even the most inexperienced user creating nice images in a relatively short time.

Prior to Photoshop and other digital manipulation programs, photographers used selective focus techniques like the tulip image above to create more artistic images. Selective focus can still be a very effective way to bring an artistic feel to your garden images.
Try searching “Turning photos into art” and you will be rewarded with a host of videos that will start you down the path to your particular artistic vision. Not all the videos focus on turning your images into watercolour images. Many focus on pencil drawings (which I have also experimented with), digital drawings, pastels…
After learning the basics from YouTube, I proceeded to develop my own method of creating the watercolour images from my photographs. Although the procedure for each image is similar, I like to let the original image dictate the various steps needed to attain the finished result.
It’s difficult to give you a step-by-step guide on how to create these images because I like to think each image is it’s own work of art and I rarely approach each image in the same manner.
I will, however, provide some guidelines that will help you get started as well as a general guideline of the steps I take in creating an image.
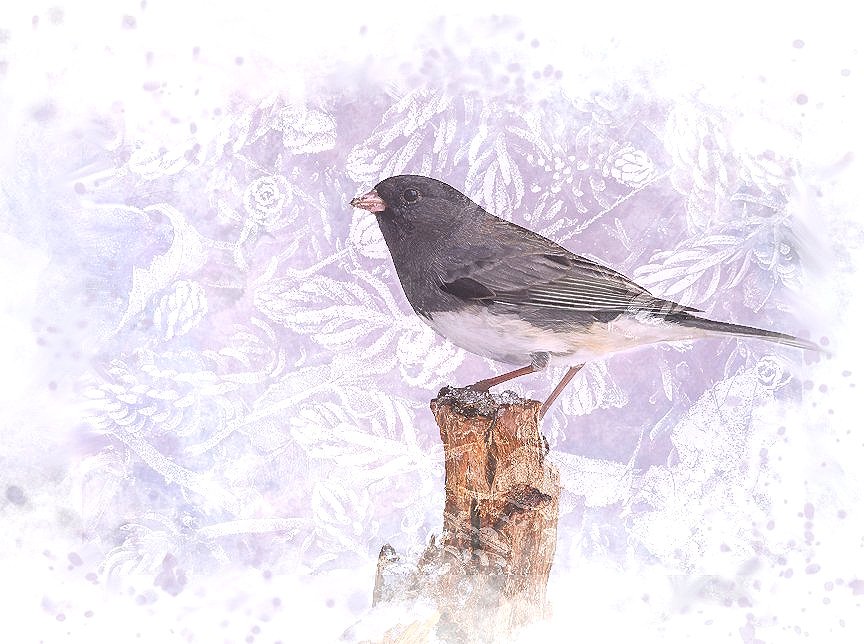
This image combines a Junco and a background of a frost-covered forest floor for an interesting example of using photography to create bird artwork.
Five tips to turn your photographs into artistic interpretations
1) Start with a slightly overexposed image to provide the basic structure of a delicate watercolour image.
2) Recognize that the subject does not have to be tack sharp for an effective image. The process of transforming the image into a digital painting does not call for tack-sharp images.
3) Always use layers (photoshop, Painter, GIMP and KRITA and most photo manipulation programs offer them) so that each manipulation can be done separately and the layer can be discarded and redone if you have problems.
4) Consider purchasing a Wacom drawing tablet or adding a pen to your existing ipad if it is compatible that allows you to paint directly on the screen.
5) Your finished result looks its best if the main image has a gradual softening leading to the edge of the image and includes a white border surrounding the edge of the painting.
6) When you are satisfied with the image, you must flatten the layers into a single image to save it as a jpeg. Be sure to first save it with all the layers first, so that you can go back to it and make changes.

This Tufted Titmouse, with its hint of rust under its wing, created a lovely painterly image.
Creating the image in GIMP: A step-by-step guide
To put it mildly, the process can be complicated.
Without getting too specific, let’s just say the process starts by creating 6 or 7 layers of the original image.
Each layer is given an appropriate name to help identify it while you are working.
The first layer I create is a rough watercolour layer using the filter “waterpixels.” I follow that layer up with another “waterpixel” layer that has finer details.
The next layer is created using the cartoon filter and manipulated in such a way as to obtain what you think is just the right amount of underlying black lines in the image. This helps to create the illusion that the image was first sketched out with a light pencil
The next layer is usually created with a white tracing paper over it. By reducing the opacity slightly, the image faintly emerges through the tracing paper.
Now take the erasure, pick one of the texture brushes from the assortment of brushes or you can create your own. Set the opacity to somewhere between 60-80 per cent. Begin dabbing the image, starting in the centre or on the main subject. Continue dabbing it (removing the tracing paper) but leaving the edges white.
At this stage you can turn the opacity on this layer to its maximum to see how the image is developing.
Next, continue erasing the white tracing paper until the image emerges the way you like it.
It’s a good idea to change brushes and opacity as you are working the image with the erasure tool.
Once you get it looking the way you want, it is time to add some paint splatters. This time choose the paint brush rather than the erasure and pick one of the splatter brushes.
Use the eyedropper to obtain a colour you think will work well as paint splotches. I usually try to keep the splotches very subtle.
Splatter the corners of the image but keep it subtle by leaving the opacity of the spatters very low.
Finally, add another layer with a white background and pick the filter “canvas” or “clothify” or, if you have them, various art papers. This one will need major adjustment to get it to blend in with the image without obstructing the visual presence. I find using the “multiply” mode can work well.
At this point you have the basic elements of the painting, but you now have to go into each layer, find the best opacity for your particular image and the best blend mode. That can take a lot of time and experimentation to get it looking the way you want.
Obviously, this process is not created with a one-click “painterly image filter” in photoshop.
There are programs and apps that will allow you to turn an image into a photograph, but the results vary too much to depend on them to create the image you desire.
Besides, it takes all the creative inspiration out of the finished result.
This process is not meant to provide immediate satisfaction for the artist. Each image needs its own approach, but once you have mastered the process, recognizing the necessary steps given a particular type of image, becomes a simpler process.
The amount of time it takes to create an image might come down to an hour or two rather than an entire afternoon. And, if you save it properly, you can go back later and continue to work with it.
Who knows, maybe if you like the results you’ll be inspired to turn your works of art into a lovely book or your garden art. This year I created my first Garden Photographic Book, maybe next year it’ll be a book of Garden Watercolour images.
In conclusion
There are days, especially in the cold of winter, that I barely come out of my office because I am too wrapped up in working on digital images of some of my favourite garden images. Some are a complete failure and I am still trying to figure out which images work best. I think, snow images work well simply because of the already delicate feel to the them.
No matter, there is no better way to pass the time than to sit down at your computer, push some pixels around and work some artistic magic with a fine cup of coffee (or wine) and your favourite music playing.
It doesn’t matter if you are the only one who feels the magic.

How do our bright yellow Goldfinches get their colour
The stunning colour changes of the American Goldfinch is unmatched by most backyard birds. These changes can be traced, in part, to its almost entirely vegetarian diet of seeds, most notably the seeds of thistle, sunflower and milkweed.

A digital watercolour image of an American Goldfinch sitting out a winter storm.
Bright yellow bird’s colour change and the common thistle
The story of the American Goldfinch’s bright yellow colour and why it changes from a drab greyish brown in winter to a stunning bright yellow in early spring really begins with, and is tied to, its diet of almost entirely seeds – primarily seeds from its favourite food, the thistle plant.
If you want these colourful “wild canaries” in your woodland garden, let the thistles grow in a corner of your yard or, if you want to watch these beautiful little finches attack your thistles, plant them near your favourite sitting area or a window. Be sure to include sunflowers and milkweed as well for some spectacular late summer entertainment.
What you will notice is that later in summer these thistles and other native plants will begin to flower and put out seed just in time for the Goldfinches to take advantage of this abundance of seed to feed their, most likely, one and only brood of nestlings.
Okay, so what does this have to do with the male Goldfinch taking on its bright yellow spring colour and the female’s subtle soft yellow coat?
It is thought that the timing of the moult and the transformation into its beautiful yellow plumage in spring is related, at least in part, to natural seed production. The Goldfinch’s late winter/spring moult is unusual because most birds can’t use up that much energy in spring when they are trying to raise their nestlings, but because Goldfinches depend almost entirely on the consumption of seed, they are able to nest later in the season following a spring moult.
American Goldfinches are unusual among goldfinches in moulting their body feathers twice a year, once in late winter and again in late summer. The late summer moult takes place after the nestlings are born and are more independent of their parents.
Of course, the male’s bright colour relates to the mating season, but unlike most birds that begin nesting in early spring timed in part to the explosion of insect and larvae life that feeds their nestlings, Goldfinches breed later and feed its nestlings almost entirely seeds.
Check this link for more on the American Goldfinch and attracting colourful birds to your yard

An American Goldfinch quietly waiting for its turn at the Nyjer bird feeder during an early winter snowstorm that helps explain the bird’s still-vibrant plumage colours.
When do Goldfinches begin nest building?
Goldfinches don’t begin their mating ritual and nest building until later in the summer – June and July in the eastern part of their range and as early as May and June in their western ranges. By this later date, the transformation from drab, easily overlooked birds to the stunning yellow plumage of the males and more subtle yellow of the females is usually completed. In fact, by late April the moult is usually complete and the birds can begin building back any energy lost as a result of the moult.
The birds’ almost entire dependency on small seeds also mean they don’t need to rely on insects. This is particularly helpful during winter months when insects are in short supply and helps explain the fact that few of the birds migrate far distances if at all.

Moving water proves too much of an attraction for these male and female American Goldfinches. The male can be seen with its black cap waiting for its turn in the bird bath.
Cool facts about the Goldfinch
The Cornell Lab of Ornithology, in their informative website, provided some of the following facts:
Goldfinches incorporate the fibrous seeds of thistle and milkweed, which they also use to feed their young, into their nests.
Goldfinches begin moulting in September, and continue for six to eight weeks During this time they molt all of their feathers, ending up with a completely new set of drab-coloured feathers heading into winter.
In the spring, as new body feathers are grown, the males especially transform into bright yellow breeding plumage, but the wing and tail feathers remain from the previous fall.
American Goldfinches are among the strictest vegetarians in the bird world, only inadvertently swallowing an occasional insect.
American Goldfinch nestlings usually leave the nest two weeks after hatching but continue to be fed by the parents for a period of time.
Although American Goldfinches traditionally only have one brood, an experienced couple may have a second brood. In this case the female builds the new nest while the male continues to feed the first brood.
Brown-headed Cowbirds that lay eggs in an American Goldfinch nest can’t survive on the all-seed diet and perish quickly.
The oldest known American Goldfinch was 10 years 9 months old when it was recaptured and rereleased during a banding operation in Maryland.
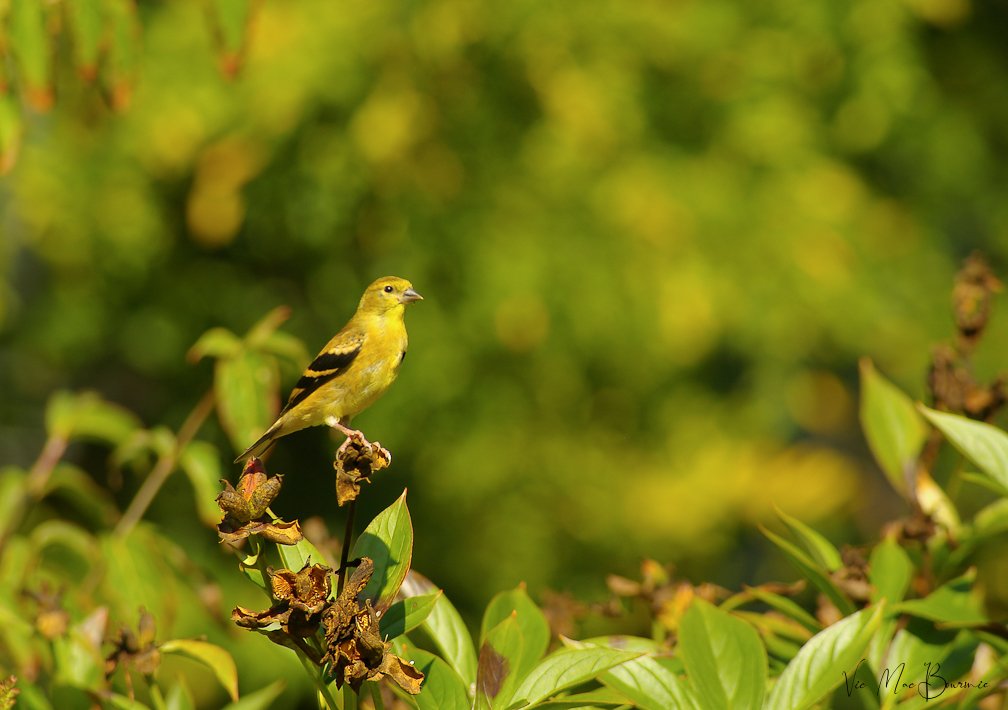
A Golfinch looks for seed in the Woodland Wildlife garden where it feeds almost entirely on the seed of native plants and trees.
Where do Goldfinches get this bright yellow colour
This cheerful bright yellow plumage of the male Goldfinch and to a lesser degree the females comes from carotenoids in the plants and plant seeds that they ingest.
The Cornell Lab of Ornithology explains in their article on How Birds Make Colourful Feathers that: “Carotenoids are responsible for the bright yellows seen in goldfinches and Yellow Warblers as well as the brilliant orangish yellow of the male Blackburnian Warbler. Carotenoids can interact with melanins to produce colours like the olive-green of the female Scarlet Tanager.”
Some bird species, whose feathers remain the same colour year round, such as the Cardinal, Blue Jay or Chickadee, the annual moult serves to simply refresh their plumage. Others, like the Goldfinch, use the moult as an opportunity to change their colours from vibrant breeding ones to those that help to camouflage them from predators. The bright yellow plumage of the Goldfinch would do little to hide them in the stark winter landscape. For American goldfinch, that means going through a second moult in the spring, to regain their bright breeding colours.
What other natural seeds do Goldfinches eat?
Thistles are not the only seeds eaten by these small birds. Their strong beaks allow them to open an assortment of seeds including another one of their favourites – sunflower seeds. They also eat seeds from asters, wild grasses and several trees including alder, birch, western red cedar and elm.
Most of us are familiar with the popular (but expensive to purchase) Nyjer seed which is used almost exclusively in special feeders to attract these birds. Although most people think Nyjer seed is the seed of the thistle plant, it is actually the similarly small, thin, black seed from the African yellow daisy (Guizotia abyssinica). Though unrelated to the thistle plant, it is high in oil and a popular source of food for the Goldfinch.
What to do if Goldfinches are not eating your Nyjer seed
Nyjer seed should always be purchased from a reputable seller preferably one that has a high seed turnover because older seed quickly dries out and loses its nutritional benefits. If you notice that finches stop eating from your feeder despite the fact it is full of Nyjer seed you may have just recently put out for them, it is likely that the oil in the seed has dried out and it is no longer useful. At that point it is best to dispose of it and purchase new, fresh seed.
In addition, Nyjer seed is easily spoiled when it gets wet. Even condensation building up at the bottom of the tube feeder can cause the seed to go rancid. Replace and clean the feeders on a regular basis to keep the Goldfinches coming back regularly.
If American Goldfinches are coming regularly to your feeder, September and October is a good time to pay particular attention to them. It is at this time of year that they transition from their stunning golden colour to gray.
Once the transformation is complete the Goldfinches can still be identified by their wings which are mostly black with a thick, buffy bar and white edging during flight.
In conclusion
As Woodland Wildlife gardeners we are often told about the importance of using native plants in our gardens to not only help protect these often threatened species, but to provide birds, pollinators and other predators with a critical food source – either pollen and nectar or the protein provided by insects and caterpillars who live off of them.
The American Goldfinch provides the perfect example of how these native plants provide an important source of food in the form of seeds. In fact, the entire life cycle, mating, giving birth, even moulting is dependent in some way on the production of seeds from a specific group of plants and trees.
For the ill informed, these critical plants, namely thistle and milkweed, are not often desirable plants to have in our gardens and are shunned by many traditional “tidy up” gardeners.
Maybe these gardeners would prefer to pay for an endless supply of Nyjer seed to feed the few Goldfinches that are passing through rather than let the birds natural food source grow in a corner of their yard.
Never has it been more important to embrace native plants and because of the dwindling supply of natural seeds you may be doubly rewarded for your efforts to grow these critically important native plants.

The Fox den: How to find and identify it in the garden
Finding a fox den in the forest or in your backyard is always an exciting experience. Consider yourself lucky to be able to watch the kits grow up and the dedication the parents have as they teach them how to make their own way in the world. The den is often a series of tunnels with separate compartments for sleeping and stashing a cache of food.
How to help foxes with Mange
Finding and identifying a fox den can be either extremely difficult if it is a new, recently dug den site, or quite easy if it is a well-used den with multiple entrances and exits.
If you have a fox den in your garden and notice they are developing Mange, go to the bottom of this story for guidelines on how to help the fox fight off mange.
A well-disguised den can be as simple as a small entrance tucked under the roots of a mature tree hidden by tall grasses. The more complex dens that have been used for several years can have multiple exits and entrances (sometimes even into the teens) and a maze of deep underground tunnels that allow the foxes easy escape if a predator enters one of the den tunnels.
In our woodland gardens, however, dens are often more easily discovered in the spring after the vixen digs a den under a small building such as a garden shed or deck. The kits – usually between 1-10 in each litter – are usually born between March and May. In fact, a number of studies in the U.K. found that urban foxes were attracted to the convenience of building dens under the roof of a garden shed. A study in Bristol found 37 per cent of dens were dug under backyard garden sheds. Similar studies reported foxes found a home under a shed 15 per cent in Oxford and 25 per cent in an area of London. An Australian study found that 44 per cent of urban foxes set up their dens under some form of building.
Five tips to find and identify a Fox den
A fresh mound of dirt and a hole about a foot in diameter.
Within a few feet of the den you may find animal remains at times. there should be evidence of predation because fox will often eat their prey near the den
location of the den is often near former, well-used dens where the fox have moved on to construct a new den.
Fox will often create a den on the side of a steep bank in typically well-drained gravelly soil. The fox parents will often use the top of the bank as a lookout where they search the area for predators.
There will often be well travelled trails leading to the main denning site as well as less pronounced trails leading to secondary entrances of the denning site.

If a fox family chooses your garden for its denning site, don’t be surprised if you hear them communicating at night either through soft sounds or through very loud bone chilling “screams.”
In addition, be thankful that your urban fox family will do an outstanding job of clearing your garden of rats and mice which they prey on to keep the kits well fed.
Also, don’t be surprised if things like leather work gloves or shoes begin to go missing in your gardens. Parent foxes will often steal from the garden and bring them to the kits who use them as “toys” that begin to teach them the basics of hunting.

This den, which is actually nothing more than a teel culvert on the side of a busy road near my home, has been used for at least two years.
How long does a fox family use the den?
It’s important to remember that foxes do not treat the den like a what we would call a traditional home. Foxes, not unlike birds, build the den as a short-term location used primarily to give birth and raise their kits in relative safety.
The den is also used to store caches of food as well a safe place to go during severe weather, especially during extreme cold winter days or in stormy weather.
It is not a lifelong residence or even a location where the fox family would remain for a full year. They may visit the site on occasion, but normally only for brief periods.
The family usually leaves the den in a matter of weeks, often moving to another location, as the kits begin to explore or go out in the world to find their own way.

Foxes will often carve out a den below the roots of a dead tree.
What if a fox family takes up residence in your garden?
If a fox decides to make your garden the location to raise its family, consider it an honour. The parent foxes have decided that your property offers what they need to safely raise their family – which includes an ample source of food and water nearby and a location where they feel safe from other predators.
The Toronto Wildlife Centre (TWC), a highly respected animal rights organization in Canada, state on its website that both “foxes and coyotes are an important part of our shared, local ecosystems. By understanding their normal habits and behaviours, we can learn to coexist peacefully and even develop a deeper appreciation for our wild neighbours.”
The organization does recognize that there are times when a fox family builds a “den to raise their young underneath porches or in earth banks on urban properties. Most people count themselves quite lucky to be onlookers to such a fascinating nursery, but on rare occasions where the den is in a truly unsuitable area, fox and coyote residents can sometimes be encouraged to move their pups to an alternate den site using simple harassment methods.”
The Wildlife Centre states on its website that “playing talk radio and sprinkling human urine next to the den opening for several days is often enough to convince the family to move on.” Putting sweat-soaked socks in the area is also unappealing for fox and coyote families and has been successful in encouraging the family to choose a new site.
Are foxes a threat to humans and pets?
TWC goes on to explain that “under normal circumstances foxes and coyotes are not a threat to people.” They do warn, however, that animals “who have been habituated because they were fed are still unlikely to initiate any contact with people, but they occasionally may come too close for comfort.”
TWC is quick to point out that “limiting human food sources is the best way to prevent conflicts with foxes and to help keep them wild.”
Smaller pets including cats and dogs are traditionally not in danger around a fox, but could be attcked by coyotes if left unattended in the backyard.
Foxes have actually been known to get along with both cats and dogs to the point where they often become garden friends, playing and even napping beside one another.
It’s best, however, too never leave small pets alone outside in either urban or rural backyards. There are just too many dangers in both environments, including larger, more aggressive pets that could get into the yard and attack smaller pets.
How to help a fox with mange: Call a professional
When we first moved into our home more than 20 years ago, fox were a common sight in the neighbourhood. Shortly after moving in, however, mange went through the local fox population killing most of the resident foxes. It took them years to recover, but today a fox sighting is almost a daily experience if you keep an eye out for them at both ends of the day.
Mange continues to be a serious threat for these animals and one of the main issues animal rehabilitaters deal with every year.
Mange is caused by a burrowing mite (Sarcoptes scabiei) which infests the skin of foxes and other canids from our own pet dogs to coyotes and wolves. The resultant scratching causes significant trauma to the skin which develops thick grey, foul smelling crusts with extensive hair loss. As a result, the animals become so sick that they are unable to hunt leading to a painful death.
If you notice a fox in your garden developing a case of mange, it’s best to contact an animal rehabilitater who can provide the best care possible for the fox.
Jennifer Howard, an Ontario animal rebilitator with Procyon Wildlife Rehabilitation & Education Centre in Beeton, Ontario, emphasises that the first step is to call your local wildlife rehabilitater right away. To find a list of licensed wildlife rehabilitators in Ontario visit Ontario Wildlife Rescue. Individual States have their own organizations you can contact in the U.S. and similar groups are available in the United Kingdom.
She explains that not all vets are wildlife trained and dealing with mange requires the expertise of trained rehabilitaters.
Some fox enthusiasts suggest homeowners give a fox with mange Ivermectin in food set out for them, but Howard warns that doing that could be dangerous to both the fox and other animals.
“I know we will not give or recommend Ivermectin to anyone,” she explains. “We give it by injection at Procyon every 2 weeks with usually 2 doses doing the job or sometimes 3 doses. Ivermectin can also be given by mouth once a week. But you need the weight of the fox before administering it,” she explains.
“When we bring the fox in or any animal in the first thing we do is weigh it. That’s important to get the proper dose of meds. Ivermectin can be dangerous because there are certain breeds of dogs that can die if they ingest it, other wildlife can die if they ingest it, and without proper weight you can cause an overdose in the fox.” Howard explains.
“We had a fox come in to the centre January 6th that we weighed twice because it said she was 6.5 kg. She is a mangy fox and normally they are underweight. She sure surprised us. Some come in very tiny but don’t look it. What I’m saying here is there is no way of really estimating their weight properly. And some need more than mange meds, they may need eyes flushed and or antibiotics, wounds dressed etc. even heat lamps.”
Howard explains that “Bravecto is what we give them just before they are released into the wild as it protects them for another 12 weeks. But that too is toxic to certain other animals. You must be absolutely certain and mindful that the right animal would get it and that isn’t always doable. It’s kind of like, if your not experienced or trained under a wildlife rehab do not give meds. Our vets even say ‘no. It’s too risky.’”
Howard explains that she knows that in the U.S. things are different and even here in Canada people do administer meds on their own, but “you may actually do more harm than good if it goes wrong. And other animals, including pets, can die.”
Bravecto, she explains, can kill cats and other wild animals.
You’re not going to toss a medicated piece of meat out into the yard and run out to try grab it if the wrong wild animal or random feral cat or someone’s pet comes in to snatch it up. I know my dog is bad at grabbing things and fast, even though it is on a leash. … And that’s what we are there for, to help,” she explains.
Howard says there are “exceptions to this rule with, say a nursing vixen with mange. But, again call a wildlife rehab expert and they will help you. Always make that call. It’s so important, never ever take it into your own hands. Otherwise you may take a life instead of save one,” she warns.
Can mange be passed on to our dogs or humans
The simple answer to whether mange can be passed on to our pets and even humans is yes. Certainly our canid family members are susceptible to it, but it can be passed on to humans as well, although the mites are not able to complete their life stages on humans and usually result only in severe itchiness in humans.
How is the inside of the den constructed
If a family of foxes to decide to dig a den in your yard, you’ll likely only be aware of it because of a small entrance hole. What’s behind the hole can vary greatly.
The inside of a typical fox den can be as simple as a hollowed out room at the end of an entrance tunnel that may stretch up to seven metres or 23 feet in length. There have been reports of tunnels as long as 17 metres (56 feet). The longer tunnels with multiple exits is often the result of a den that has been expanded over several seasons and quite possibly by multiple fox couples.
Do foxes sleep in dens?
Although a family of foxes may sleep together in the den, the parents mostly sleep outside close enough to the den where they can monitor any threat that may appear, while the kits remain in the den.
In conclusion
Woodland gardeners should feel honoured to have a family of foxes living on their property. Besides being excellent for rodent control, a fox family will provide hours of entertainment in your garden, especially in early morning when you are enjoying your first cup of coffee, and later in the day when we are enjoying our first glass of wine.
In an urban setting, the fox is often the top predator in the area. Creating an environment that attracts a top predator probably means you are doing a lot of things right in your woodland garden. Embrace their presence and enjoy them in your yard while you watch over them. Keep an eye on them to ensure their safety and, if they are injured or sick, take the necessary steps to either nurse them back to health or ensure they get to professional rehabilitators that can help them.
Before you know it, the family will likely move on leaving you with only fond memories of the fox family that chose your yard to raise their young.
Consider it an honour.

Three common woodpeckers and how to tell them apart
Woodpeckers are common visitors to our feeders in winter and summer. telling them apart can be a problem considering they share some of the same characteristics – especially the Downy and Hairy Woodpeckers. The Red-Bellied Woodpecker can be confusing to some because it’s not easy to see the subtle red on its belly.
Downy, Hairy and Red-Bellied Woodpeckers: What they eat
Woodpeckers are probably the most common bird at our feeders most winter days.
Between the Downy, Hairy and Red-Bellied there always seems to be at least a couple working the seed cylinder that sits atop our feeder pole, or one of the many suet feeders that provide them with a high-fat source of food when the weather turns colder. It’s also common to see them flitting about searching out the Bark Butter and DIY feeders I leave on home-made snags that have been set up around the feeders. They will also readily take the black-oil sunflower seed in the feeders.
Although they are among the most frequent visitors to our feeders, their primary food source is without a doubt insects and larvae of all kinds. In fact, even in winter when insects are sparse, these woodpeckers keep busy using their long beaks to probe under or between bark in search of insects.
For more on feeding backyard birds check out these articles on The Tufted Titmouse, Seed cyclinders, Attracting Orioles, attracting Indigo Buntings.
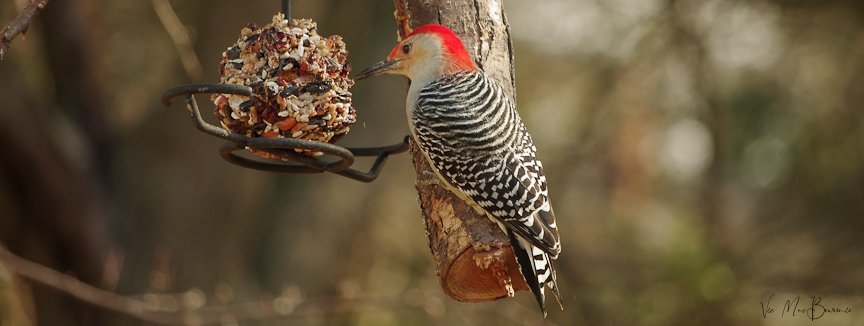
The vibrant red head of the Red-Bellied Woodpecker complete with its zebra-like plummage across its back helps to give it a very distinguished look.
How woodpeckers catch insects
All woodpeckers share a number of special anatomical features that allow them to dig or violently carve holes in wood. Their chisel-shaped bills are constructed of strong bone overlaid with a hard covering that broadens toward the birds’ heads helping to spread the force of the birds’ heavy pecking. Woodpeckers even have a covering of feathers over their nostrils to help filter out wood splinters and dust that is generated during their aggressive pounding on trees.
Woodpeckers also boast long, barbed tongues that includes a sticky substance that enables them to search crevices and cracks for insects and larvae.
How to identify woodpeckers at the feeder
It’s easy to mistake one woodpecker from another considering all three are primarily black and white birds with similarly longish beaks. Their size and a few specific identification markings will help you identify these three birds at your feeder. Distinguishing between the Downy (actually the smallest woodpecker in North America) and the Hairy is difficult at times but with a little practise the differences become more obvious.

The Red-Bellied Woodpecker with just a hint of the red belly showing here.
Identifying the Red-Bellied Woodpecker
It’s not too difficult to identify the Red-bellied Woodpecker from its Downy and Hairy counterparts, but don’t look for a bright red belly to easily identify this larger woodpecker.
These birds do sport a spot of red on their belly but the marking is so subtle that it is easily missed unless you have a clear view of the birds’ underside.
Probably the easiest way to identify the Red-Bellied Woodpecker is its sheer size, in comparison to many other woodpeckers. Look for a black and white clear zebra-like pattern that runs down their backs with the male displaying red on its forehead, crown, and nape while the female only has red on her nape with a grey forehead and crown.

Red-bellied vs Red Headed woodpecker
Although the Red-Bellied Woodpecker might be mistaken for the Hairy Woodpecker, at least when comparing the size of the birds, a better comparison is probably made with the more elusive Red-headed Woodpecker. Size wise they are similar, but unlike the Red-Bellied Woodpeckers’ zebra-like pattern on its back, the Red-Headed Woodpecker has a solid black back with large white wing patches (not unlike the larger Pileated Woodpecker). Of course, the entirely red heads of both male and female Red-Headed Woodpeckers are easy distinquishing marks compared to Red-bellied woodpeckers’ where the male sports a large partial red cap.
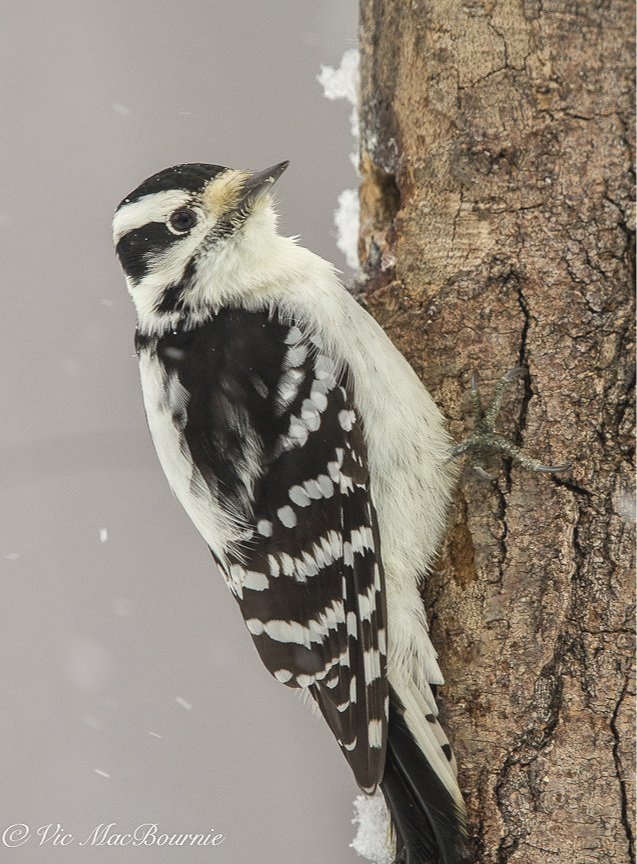
A Downy Woodpecker identified by its smaller beak and the spotted outward tail feathers.
Comparing the Downy and Hairy Woodpeckers
There is no doubt that in the world of woodpeckers, distinguishing between the Downy and Hairy woodpeckers is the most difficult. The two main differences between the two is size and their tail markings, with size being the easiest distinguishing factor of the two.
Both sport primarily black and white zebra-style feathers down their backs (not unlike the Red-bellied Woodpecker) with a white stripe down the back from the shoulders to their rump, white bellies and flanks, and black eye patches. So, at first glance, they look very much like the same birds.
Besides the size difference – the Downy is considerably smaller measuring in at about six inches compared to the much larger Robin-sized Hairy that stands about 50 per cent taller than the Downy – pay attention to the birds’ bills. The Downy’s bill is delicate and smaller – about a third the size of the Hairy’s much stronger, stout bill.
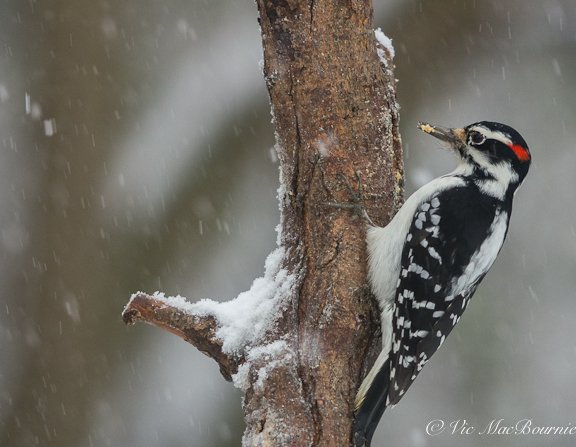
The larger Hairy Woodpecker sporting a larger beak and clear white outward tail feathers.
Finally, if all the above fails to convince you of what you are seeing, the Downy woodpecker’s outer tail feathers are barred with black, while the Hairy sports all-white outer tail feathers.
Most important, is how to remember the names of the two similar looking Woodpeckers. I use a word association that has never failed me – The Downy is the Diminutive one. In other words, the Downy is always the smaller and more Delicate of the two woodpeckers.
Where do these woodpeckers live?

Downy Woodpecker looking for a snack among the lichen growing on the branch.
Downy woodpecker at home in wooded areas
The diminutive Downy Woodpecker Picoides pubescens lives year-round across much of North America and is considered the most common woodpecker in eastern North America where it can be found nesting in holes in trees.
It is at home in a variety of wooded areas, including northern mixed forests and in the deciduous forests to the south. It’s equally at home in smaller urban woodlots and parklands, in orchards and in backyards with appropriate tree cover.
In its westerly range, the birds can be found in alder and willows.

Hairy Woodpecker’s beak catches the light. Notice the feathers just in front of its eyes that help to filter wood splinters as well as wood dust from getting into the bird’s lungs.
The Hairy Woodpecker likes more mature forests
The larger Hairy Woodpeckers are more often found in more mature forests across North America. Although the Hairy and Downy woodpeckers share many of the same habitat, the Hairy woodpeckers need larger trees to live and successfully breed. It’s for this reasons that their numbers are thought to be declining in many areas where they are forced to compete with Starlings and House Sparrows.
Hairy woodpeckers will accept a wide variety of habitats from woodlands to river groves, they need large trees in deciduous, coniferous and mixed forest locations.
Although they can be found almost all over North America even up into Alaska and down through the southern states, some birds from the northern edge of their range may move well south in winter, while some who spend summers in the higher elevations of the Rocky Mountains will readily move to lower elevations.
The Red-Bellied woodpecker is expanding its range
The Red-Bellied Woodpecker is a positive story in a long list of negative ones when it comes to its numbers and habitat range. This large woodpecker, whose numbers are stable or even appear to be increasing slightly, has actually been extending its range to the north – possibly along with climate change.
Originally a bird that inhabited the southeastern parts of North America, this omnivorous woodpecker has adjusted to habitat requirements and now can be found in suburbs and urban parks as well as smaller woodlots and woodland gardens.
These cavity nesters make their homes in dead wood located usually less than 50 feet above ground. The male does most of the excavating for new tree cavities, but a nesting pair is not above using existing tree cavities whether they are natural or abandoned by other woodpeckers.
In conclusion
Identifying woodpeckers in your woodland garden can be daunting at first, but, eventually, you will begin to recognize their various characteristics including their often loud and rambunctious calls. They are quite friendly birds especially the Downy that will, with a little practise, readily eat out of your hand if tempted with high-quality black-oil sunflower seed.
Some homeowners may worry when they see a woodpecker banging away at one of their favourite backyard trees. I wouldn’t worry too much unless the woodpeckers are tearing apart the tree. But don’t blame them for the possible death of the tree. These important predators in our garden do much more good for our trees routing out problematic borers and other insects attacking the tree. If woodpeckers are tearing apart the tree, it’s likely because the tree is already fatally infested with borers.

How to attract the Tufted Titmouse
Attracting the Tufted Titmouse during the winter involves putting out a good supply of black-oil sunflower seeds. Keeping them around all summer requires a much more detailed approach involving ensuring a supply of insects, spiders and caterpillars, and good habitat that includes everything from fresh water to a supply of moss and, if possible, fur for them to use as nesting material.
Keep feeders loaded with Black Oil Sunflower and a supply of suet
It’s not hard to fall in love with the Tufted Titmouse and if you provide them with plenty of black oil sunflower seeds there’s a good chance they’ll be regular visitors to your winter bird feeders.
These sparrow-sized birds – close relatives to chickadees – love the small black oil sunflower seeds, but they’ll also readily eat, nuts and berries when they are available.
Black oil sunflower is the perfect food source for these little hoarders. You’ll notice that they take the seed, fly away from the feeder and often store it in the bark of a nearby tree for later consumption.
If the Titmouse is hungry, it will take the seed away to a nearby branch, hold the seed in its feet before opening its shell by pounding it with its strong, rounded little beak.
These gray birds are easily identified by the crested head feathers and soft orange flank feathers are also regulars at our suet feeders and, of course, are included in the long lineup of birds that can’t resist Wild Birds Unlimited’s Bark Butter, either the spreadable butter or the nuggets. (Check out my full report on bark butter here.)

This beautiful little Tufted Titmouse waits out a winter storm near our bird feeder where it feasts primarily on black oil sunflower seeds.
Tufted Titmouse habitat: Encouraging them in your garden year round
All that said, Tufted Titmouse need more than black oil sunflower seeds to call your woodland garden home.
If you have, or live near, a heavily wooded area throughout the Eastern U.S., through Ontario and into Quebec, your chances are much better to have these birds in your garden year round. The birds were once thought of as a southern species, but have steadily expanded its range northward until today when it reaches southern Quebec and Ontario.
Tufted Titmice are primarily foragers of deciduous and mixed forests. They’ll fill your garden with their distinct peter-peter-peter song in spring during the spring breeding season.
(Be sure to check out my story on attracting Nuthatches to your feeder and my article on attracting colourful birds to your backyard.)
Although they rely on seeds during the winter months, their primary food source throughout the remaining seasons are insects, spiders and caterpillars.
They are also regular visitors to our many bird baths throughout the warmer months, particularly our regular cement bird bath located in a secluded area of the garden under one of our Flowering dogwood trees.

Ensure a good supply of insects in spring and summer
Providing this essential food source that the Tufted Titmouse depends on to feed its young requires a number of factors, including using more native plants in the garden to encourage insects that feed on those native plants, as well as removing pesticides from the environment. We can’t kill all the insects, spiders and caterpillars and expect to encourage birds to set up homes in our yards. Try to control insect infestations naturally, either by picking them off your plants or encouraging predators, such as birds, to control them for us.
For a detailed list of native flowers, shrubs and trees to attract birds, be sure to check out my article on Attracting Birds Naturally.
The Tufted Titmouse family is made up of a mating pair that stays together for a lifetime and raises three to five offspring at a time usually in a tree cavity, but often in a bird house, including blue bird houses.

Tufted Titmice are regulars to our bird baths and especially enjoy one that is secluded in the back of the garden beneath a Flowering Dogwood.
Tufted Titmouse use fur and moss in nests and bird houses
Their nests often include a combination of mosses, grasses and animal fur, but they will readily use a bird house in your garden as well. The tufted titmouse birdhouse share many of the same requirements as those of the nuthatches and chickadees.
The spunky little birds have been known to steal fur from sleeping foxes and dogs. They also have been known to pull hair from unsuspecting humans.
Most woodlands have at least some moss in the garden, but it’s never a bad idea to have a ready source available in the garden for the birds to use to line their nests.
Besides the Tufted Titmouse that we enjoy in our yards, more westerly residents enjoy the antics of the black-crested titmouse and bridled titmouse.
Along the Pacific Coast, woodland gardeners can enjoy the oak titmice, while Juniper titmice stay in the interior where they forage in the dry woodlands.

Why do foxes scream?
Have you ever heard a terrifying scream at night in the garden or in a nearby woodlands? Chances are the bone-chilling sound was simply a red fox calling out for a mate. The piercing sound of a fox scream can shatter the peace of the woodland garden, but it is just one of the many vocalizations foxes make.
Terrifying screams ring out in Woodland garden
Have you have ever heard a fox screaming at night in the garden?
If you are unfamiliar with the sound, mark my word, it’s what horror movies are made of. Some describe it as a bone-chilling sound similar to a woman in distress. Others describe it as a child screaming in pain.
Despite the terrifying, high-pitched sound, it’s important to note that the scream is nothing more than a form of communication used by red foxes. The vocalization is one of a number foxes use. Rest assured they are likely not in distress, being attacked or fighting, although they could be warning another fox that they are in the area and to leave them alone.
The screams are often heard during breeding season in the spring. The scream is believed to be used by vixens (female foxes) to lure male foxes to them for mating, but males have also been known to let out screams occasionally as well.
Parent foxes with cubs may also use loud screams to warn off other foxes entering into their territory.

A beautiful young fox hunts for mice in the grass. Foxes have several vocalizations including a loud, piercing scream that can sound terrifying in the middle of the night in the woodland garden.
Foxes are territorial
Foxes can be very territorial and will aggressively defend an area from other foxes.
Their territory is very much dependent on the habitat but studies show that they have been known to hold territories as small as 0.2 square kilometres in urban areas where food is plentiful, to as high as 40 square kilometres in more natural areas. Each fox family group consists of a vixen (female) a dog (male) and their kits.
In areas where foxes are not hunted regularly, and there is plenty of food, a family group could consist of several adult offspring.
Because foxes are most active at night, you are likely to hear the screams late into the night, but as a video below shows, fox will scream during the day as well.
In my case, it was around midnight and, although the screams were clearly coming from the hedgerow in the back of the garden along a fence line, I never saw the culprit and had no idea what was causing the sound.
Check out my earlier article on the urban fox.
Fox screams are surprisingly loud
The sheer loudness of the scream made me think it was coming from a much larger animal than a fox, either a racoon or coyote.
I’ve heard a terrified rabbit, angry racoons in a battle and barking deer, but nothing is more terrifying than a single fox or, even worse, a couple of foxes running through the garden screaming at one another.
I experienced it recently while taking our dog out for her late-night bathroom break.
I was sure an animal of some kind was the victim of a predator.
There had to be at least two fox, maybe more, contributing to the raucous sound.
It wasn’t until recently that I was able to determine the exact cause of the sound. YouTube videos provided the answer. If you have know idea what a screaming fox sounds like, check out these videos.
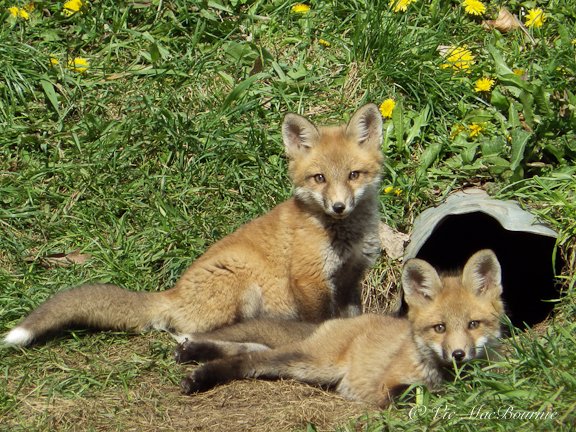
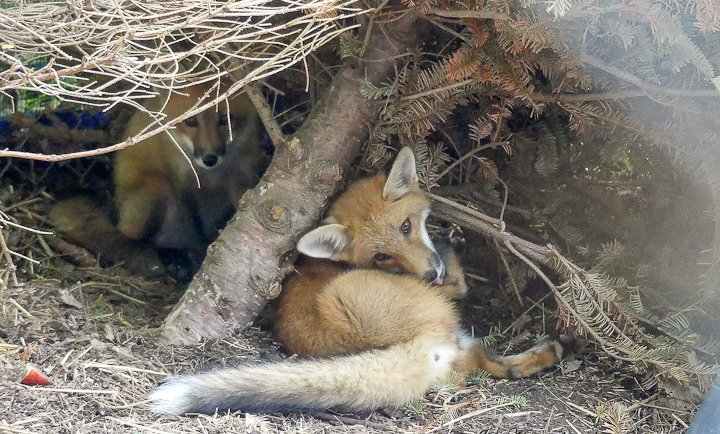
Two fox kits sit outside their den waiting for mom to return. Foxes can be are very territorial, especially when they have kits to protect.
Here is what a fox scream sounds like
I was not fortunate enough to record the fox scream in the garden but I’ve included some links here that provides both an audio and visual (see second video) example of fox screams.
Here is a YouTube video of a couple running through a forest around 1 am. The author suggests that it may have been parents distressed after a coyote or owl made off with one of their kits. It’s possible, but it may also be that the adults were communicating either between themselves or with their kits.
Here is a fun video of a fox seemingly wanting to play with a friendly dog in the middle of the day and letting the dog know it was not impressed when it ignored the fox. The video is particularly good because you can see the interaction and see the fox actually scream.
More Ferns & Feathers article’s on foxes
Wildlife Rescue: The Year of the Fox
Wildlife Rescue: Volunteers key to Wildlife Rehab success
The Fox Den and how to find it in your garden
Why foxes steal from our gardens: Fox got my croc
The urban fox: Easy Rodent control on four legs
What other vocalizations do foxes make?
Foxes, not unlike our dogs, coyotes and wolves, use numerous vocalizations to communicate with other foxes and kits. Their vocalizations are not as varied as our family pets.
The most common vocalization from a red fox are a quick series of high-pitched, almost yippy barks. Studies have shown that the bark sequence can be used as an identification system by other foxes.
The bark and scream are quite loud so are the most often heard sounds from a fox, but their are a host of quieter vocalizations used when foxes are in close proximity.
Gekkering is a guttural chattering with occasional yelps and howls that is often used by adult foxes during aggressive encounters as well as amongst kits playing around the den.
Parents will also use a sharp bark as an alarm call to alert youngsters of potential danger.
Submissive foxes will, not unlike wolves and coyotes, often emit piercing whines that often become loud shrieks as they approach more dominant animals.
Why foxes scream: A conclusion
If you are out at night in your woodland garden or hear a load scream through an open window, chances are good it’s a fox communicating with a partner or warning another fox that it’s intruding on their territory.
Having fox in your garden is a positive sign that your property is working as a natural resource for a host of animals including predators that help to keep rodents under control.
Rejoice, in their presence and embrace the many benefits they bring to our properties. They are fascinating animals that mean no harm to our family including our pets.
There are many examples of foxes hanging out with cats and dogs and growing so accustomed to people in the garden that they will tolerate a close approach as they explore the garden.
Remember, though, that these are wild animals and not pets.
Don’t be surprised if they decide your garden is as much their garden as it is yours. And don’t be surprised, if shoes, garden gloves and other potential “toys” go missing.
Check out my earlier story about why foxes steal from our gardens.

Create your own custom garden photography book: Ten simple steps
Creating a custom photo book of your garden is not only simple, it’s an enjoyable and extremely creative process. By creating a garden book each year, you can document its yearly growth in a series of beautiful books of your own photography. The customized books from Mixbook are also great ways to document memorable vacations, or a year in the life of your children or grandchildren.
Mixbook: Focus on my favourite photo book creator
I am hoping this article will plant the seed for readers to dig into their digital images and treat themselves to the best gift ever – a beautifully bound custom photographic memory of their gardens.
Creating a custom photo book featuring images from our gardens could not be easier, more rewarding or satisfying. And don’t be surprised if it also awakens your creative juices inspiring more photo books documenting other areas in your life – vacations, children, grandchildren… the possibilities are endless.
Online book publishers are everywhere and the good ones, including my personal favourite Mixbook, have gone to great lengths to make the creation of a high-quality photo book using your digital images extremely simple for even the most novice of computer users. If you can click a few buttons to upload your images to a website, you can create a beautiful memory of your garden. You can even let the online software place all your images onto the pages, making the process as simple as possible.
Looking for a great camera to photograph your garden? Check out my extensive review after using the Fujifilm X10 after ten years.
(If you are interested in exploring garden photography at a higher level, be sure to check out my comprehensive post on the Best camera and lens for Garden Photography.)

Turning your garden and wildlife images into a memorable garden book is not only a rewarding experience but a creative one as well.
Ten steps to create a custom garden photo book
Gather existing digital photos of your garden, or, if you have not been documenting your garden, begin taking photos on a regular basis throughout the seasons for a future book
Organize the images in a single folder or divide them into 12 separate folders – one for each month.
Optimize the images you want to use in the book in a photo editing program
Save the images as large files –preferably in the neighbourhood of 5-10 megabytes or larger. These large files allow you to use the images as full 8X12 pictures without losing quality when they are printed.
Log on to the website and upload your images.
Drag and Drop the images on the template you have chosen. It’s helpful to have both vertical and horizontal images to choose from. Once they are on the page, make any needed adjustments to the photographs
Fill all the remaining photographic boxes on the pages and write headlines and/or captions of the photos if you want.
Add more pages if necessary.
Finalize mailing address and payment requirements
Now sit back and wait approximately two weeks for delivery of your garden book.

A screenshot of the Contemporary White template I chose to create my Woodland/Wildlife custom photo book.
I know these photo books have been around for quite some time, but I suspect many people have put off creating one for a myriad of reasons. Wedding photographers have used these photo books for years as a replacement for the traditional wedding album as well as a convenient way to show potential clients their portfolios.
I want to plant the idea in gardeners’ heads that these photo books are excellent resources that we really need to use to our advantage. So, it’s time for gardeners to dig their hands deep into the digital dirt, get their photos organized and begin putting their books together. And what better time than over the winter months to create a memory of the previous year’s garden.

The first page of my custom Woodland/Wildlife custom photo book from Photobook Worldwide.
The making of my Woodland/Wildlife Garden book
Recently, I created my own garden coffee table book made up primarily of garden and wildlife images taken this year in the Woodland/Wildlife garden.
I only wish I had done this years ago, so I could look back and trace the annual growth of our garden. My plan now is to create a garden book on a yearly basis not only to monitor the changing face of the garden and its visitors, but to document annual highlights so I can use it as a visual resource to easily recreate successful plant combinations.
For years, I put off exploring the many companies offering to print your photographs in book form. In fact, the garden book is the second photo book I recently completed. The first was created as a Christmas gift for my daughter using her digital images of the Tokyo Olympics, where she attended to work with the Canadian Olympic team. The book, full of her Olympic moments, is the best souvenir she could hope for of her trip. We plan to do another for the upcoming Beijing Winter Games in China.
But, back to my gardening book.

One of many spreads in the custom photo book.
The result: I could not be happier with the finished book and the price. This will become a book I will treasure and one that will take its rightful place as the main act on our coffee table.
Technology has made these professional looking books not only incredibly easy to create even for beginners, but exceptionally inexpensive for a one-off printing.
By inexpensive, I mean cheaper than getting similar sized photographic images printed at your local photo shop.
Using a discount code, I recently created a hardcover, 36-page, 8.5-inch by 12-inch book with 110 of my favourite garden images for just over $50 Canadian. Many of the images were full-page bleeds that covered the entire 8” by 12” page.
For the price of an inexpensive dinner out with your partner, a small selection of annual or perennial plants, even a single high-priced shrub, you can produce an outstanding memory of your garden and the wildlife that call it home.
If you don’t use your camera often in the garden, the book will inspire you to get out more often to capture images.
The book could be a one-time event or even a yearly endeavour used like a tool to document the changing nature of your garden and the fauna that live in it.
What better way to document the plant combinations that worked so well together, or, where exactly the 150 bulbs that you planted last year are located.
You don’t need a fancy camera, your smartphone is more than capable of getting high-quality photos for the book. My book is a combination of images taken with a host of cameras and lenses from expensive DSLRs with telephoto lenses for the bird images and wildlife, to simple point-and-shoot cameras and images captured on my smartphone.

One of several templated pages showing multiple images.
How easy was it to create the garden photo book?
After much research into various companies that create these photo books, I chose Mixedbook.
The company’s list of recognitions and awards is impressive – New York Times, techrader, Good Housekeeping and Digital Camera World all give it awards for Best Photo Book Service, and c|net recognizes it for Easiest software to use.
I don’t know how the folks at Mixedbook could make it any easier.
That’s not to say that creating a beautiful photo book does not involve putting in some work to prepare for the project.
Just gathering my best photographs into a digital folder took more than a little effort. But, I’m sure many readers are much more organized than I am and would be able to organize their images much easier than me.

Although the entire book is templated, changing the templates to suit your images is easily done.
Once I got the images into a single folder, I imported them into Adobe Lightroom where they were all edited for proper exposure. Some were cropped and others took a little more work to enhance the colours etc. I happen to use Lightroom, but any photo editing software will get the job done.
In fact, if you are careful when you shoot the images, and you are not too worried about the quality, you could skip the editing process entirely.
At this stage, all you do is log onto the Photobook website, pick a book template you like from the many available and upload your images.
Once the images are uploaded to the site, you can either begin to drag-and-drop them on the various pages or allow the computer to populate the pages for you.
You can add descriptions under all or just a few of the images if you like. Add stickers if you are doing a fun book or one for your children or grandchildren.
If you need more pages, you can add them two at a time for a small additional cost.
Before you complete the purchase, ensure that any discounts are applied before pressing complete, but if you do complete the purchase, you have a half hour to change your order.
When I created my book, I recognized that I did not get the 50 per cent discount and quickly texted the support line. They were extremely helpful and guided me to the location where I made the proper changes to ensure the discounted price.
I was very impressed with the service.
Once completed, it’s as simple as adding your mailing information and paying with a credit card.
Press complete and your finished book will likely be delivered in less than two weeks.
In conclusion
If you are like me and have put off creating a photo book, don’t procrastinate any longer. They really are exceptional keepsakes of your garden, favourite vacation or a year in the life of your children or grandchildren.
The print quality is exceptional. The Photo book’s binding for my hardcover book proved to be very professional, and the quality of paper is very impressive (upgraded paper is available). Without the discount, my cost would have been more than $100.00 Canadian, which I would consider good value. The discount made it an outstanding value and there are discounts available throughout the year.
If you currently do not have images to create a book right now, make a promise to yourself to begin regularly photographing your garden so that you will have plenty of images for a future book.
Seed to Dust: A gardener’s journey
Author Marc Hamer’s garden memoir Seed to Dust, Life, Nature and a Country Garden is an entertaining journey along a path of self discovery and garden tips. Along the way he shares his knowledge touching on important subjects ranging from the use of pesticides to allowing nature to weave its way into corners of the garden to help wildlife, birds and pollinators that inhabit it.
Finding solace in the art of gardening
Is it the gardener who breathes life into the landscape, or the garden that provides meaning and purpose to the person tending it?
It’s a question many of us have contemplated while we work our own gardens, and it’s the underlying question that author Marc Hamer explores throughout Seed to Dust, Life, Nature and a Country Garden, his latest novel detailing a year in his life as the lone gardener of a 12-acre private garden in the Welsh countryside.
Seed to Dust is another outstanding book from Canadian publishers Greystone Books, publishers of Peter Wohlleben’s NYT bestseller The Hidden Life of Trees and follow-up book The Heartbeat of Trees.
Seed to Dust follows Hamer’s successful book How to Catch a Mole, described in the Wall Street Journal as a “quirky and well-received 2019 memoir” and “account of how Mr. Hamer, a pacifist, came to retire from catching moles, since getting them out of a garden usually meant killing them.”
Hamer’s 400-page Seed to Dust memoir begins in January exploring – one month at a time in easy-to-digest chapters – a full year in the life of the professional gardener as he maintains the estate of his mysterious and wealthy employer, affectionately nicknamed Miss Cashmere.
“Anyone who loves the earth knows that a tidy-mindedness is death for nature. I am a wildflower, and untidy weed.”
Seed to Dust is the perfect book to curl up with a good coffee on a winter’s afternoon remembering what soon awaits us in spring.
Over the course of the year, he reflects on his life and that of Miss Cashmere’s since he began working for her: her husband’s death, the departure of her children from the stately home where she now lives alone.
It’s the reflections, however, on the difficulties he has faced – homelessness, loneliness, hunger, extreme poverty – that gives the readers great insight into his approach to gardening and the natural world.
Much more than a monthly how-to garden calendar, Seed to Dust tells the story of a young man finding his way in a world that sees him as somewhat of an outcast, struggling through depression, thoughts of suicide, self-discovery and, finally, as an older man ready to retire from working the land, content with his lot in life and the world he has built for himself, his wife and grown children.
Let nature guide your way
This is a tale for all garden lovers. It’s particularly valuable for those gardeners who struggle to let nature guide them in their journey. It’s for the gardener who is looking to get closer to nature, and for the gardener struggling to find meaning in the trees, plants and wildlife.
It’s a book I found both inspiring and very personal. Hamer and I – being of a similar age – share many of the same garden and life views, and struggle with similar health ailments as we try to complete everyday garden chores.
The book, which has been shortlisted for the Wainwright Prize for Nature Writing, is for those searching as much for gardening advice as they are searching for answers to some of life’s most complex questions.
His is, what he himself admits, a simple life; one that is reflected in his approach to life, nature and the art of gardening. In his garden there are no “special” plants, just common flowers, shrubs and trees that, when put together in just the right way, create a beautiful vignette or natural landscape.
““I do not spray the aphids on my roses, although in the past I have lost whole crops of broad beans to them. I am nurturing sparrows and ladybirds, beetles, ants and underground fungus instead.””
He writes early in the memoir about the garden he maintains for his employer Miss Cashmere: “This is not my garden, but it’s not hers, either. Just paying for something doesn’t make it yours. Nothing is ever yours. People who work with the earth and the people who think they own bits of it see the world in totally different ways.”
We can all benefit from a garden’s healing powers
“Any garden belongs to people who see it – it is like a book, and everybody who visits it will find different things.”
This theme of self discovery in the garden guides his belief that we all benefit from the healing powers a garden brings.
Later, he writes about how his gardening style changed. Over time, the garden evolved from the formality that once dominated the 12-acre site. Flowers are allowed to wander to create their own natural drifts – some even creeping into the once manicured lawns – giving the garden a naturalistic feel and welcoming pollinators, wildlife and critters that inhabit the garden’s wild areas.
He speaks of the hidden corners where he feels more at home among the grasses and overgrown plants.
“The way I choose to shape this or that space; wild, or tight and neat, closed or open. … If it were left alone for a few months, nature’s fertile beast would take over and it would become something else entirely. There are places where I let that happen, hidden from the house, where things grow wild and nature thrives. Damp spots for ferns and rotting wood, fungus and beetles, and hideaways for hedgehogs.”
It’s not difficult to see his respect for living things in the garden, and there is little question that his life experiences have helped shape his garden style.
“We were all deliberately sown with seeds of fear and hatred, but I chose not to water mine. I leave those seeds in arid ground: the racist, xenophobic, sexist, homophobic beliefs that I grew up surrounded by. I will not give them my attention, will not allow them to take root in me.”
No room for chemicals in the garden
His life experiences also reflect his views about the use of chemicals in the garden.
“There are chemicals available to spray lawns with, so that it shouldn’t grow so quickly; others to kill the worms and beetles so there are no worm casts, no moles feeding on them. … These are for the people who are not gardeners, people who want to control nature.”
“To speak of controlling nature is like the waves wanting to control the sea, the song singing the thrush, the flower creating the earth. We are not the sea, we are not the thrush, we are not the earth. We are the wave, the song, the flower.”
Man’s maddening machines of destruction
Hamer has harsh words about the machinery of gardening.
“I work around the buildings with the brush-cutter. It screams and makes smoke, a senseless thing that slashes back the grasses and native wildflowers. A ‘weed’ is a word that tidy-minded use for plants they do not want.”
“Anyone who loves the earth knows that a tidy-mindedness is death for nature. I am a wildflower, and untidy weed,” he writes.
“The scent of petrol, engine fumes, hot oil and blended greenery fill the air, and behind me the meadow is flourishing. The machine is violent and stupid. The violent and stupid nearly always win; it’s why they are created: to fight and win for their owner’s gain.”
His message to all gardeners, but especially Woodland and Wildlife gardeners is straight forward and one we would do well to heed: “I do not spray the aphids on my roses, although in the past I have lost whole crops of broad beans to them. I am nurturing sparrows and ladybirds, beetles, ants and underground fungus instead.”
Seed to Dust: Life, Nature and a Country Garden is published by Greystone Books. I encourage readers to check out this Canadian publisher who has made publishing Naturally Great Books its focus. The impressive list of nature-inspired books including The Hidden Life of Trees and The Heartbeat of Trees puts them in a class all their own for nature lovers. You can check out their catalogue here.

Tips to keep rats away from bird feeders and out of your yard
Keeping rats and mice out of your garden involves taking a multi-faceted approach beginning with no-mess bird seed and a high-quality bird feeding pole. Ensure no birdseed stays on the ground overnight and encourage natural predators like snakes, foxes, owls and other raptors that will help control them. Try to reduce the birds’ dependency on bird feeders by using trees, shrubs and flowers that provide natural food for the birds.
Aim for a woodland garden where everything is in balance
Attracting rats and mice to your backyard is without a doubt the biggest reason most people give up feeding backyard birds, or worse, choose to not even begin feeding backyard birds for fears of attracting the rodents.
The problem is not feeding the birds, the real issue is feeding the rats on the ground under the bird feeders or, even worse, allowing mice and rats access to the feed on a feeding table or on your feeders.
I am happy to say that in the 20 plus years we have lived here, I have only seen two rats in the woodland garden. In fact, I can count on one hand the number of mice I have seen in the garden as well.
And, I have fed the birds since the day we moved here. I think setting up the bird feeders was actually one of my first jobs on moving day.
Creating a functioning natural woodland garden where nature is in balance will help to keep rodent infestations in check. Eliminating predators, for example, is a sure way to invite problems.
(Be sure to check out my article on The urban fox and how it controls rodents like mice and rats.) Be sure to check out my post on setting up a Bird Feeding Pole.
It’s important to understand that rats and mice are primarily night-time ground feeders. Our job is to ensure that there is no birdseed or even shells left on the ground in the evening to attract rats and mice. Also proper baffles will help keep rats and mice from getting to your feeders.

Seed cylinders are one of the ways to keep access seed from falling to the ground where mice and rats can get to it. I use a screen under the seed cylinder to catch any seed the woodpeckers might knock off and not eat.
Six ways to keep mice and rats away from bird feeders
Use a single pole system that includes several baffles including a large racoon/squirrel baffle to keep squirrels off of the bird feeders and force them to clean up whatever feed falls to the ground.
Place the pole in an area where squirrels or rats cannot jump to it from nearby trees, fences or other structures. Obviously we don’t want rats to have direct access to the feeders, but squirrels will often throw out a lot of food onto the ground if they get direct access to the feeders.
Use a no-mess, high quality bird food and seed cylinders to ensure there is no waste at the end of the day gathering on the ground.
Always use a screened seed-catch tray under the bird feeders but above the baffles to further reduce the amount of seed that falls to the ground.
Encourage night-time predators such as owls and foxes to your yard. There is probably no better way to eliminate rats than having a resident owl on your property. Keep the area around the feeders open to allow these predators easy access to your night feeders.
Reduce or eliminate areas in the garden where rats may choose to set up a home. Under sheds and decks are particularly favourite places where rats and other animals like to call home.

Here is a full length view of the bird feeding pole, baffles and seed catcher tray – all vital to keep rats and mice off your feeders and the ground underneath free of seed.
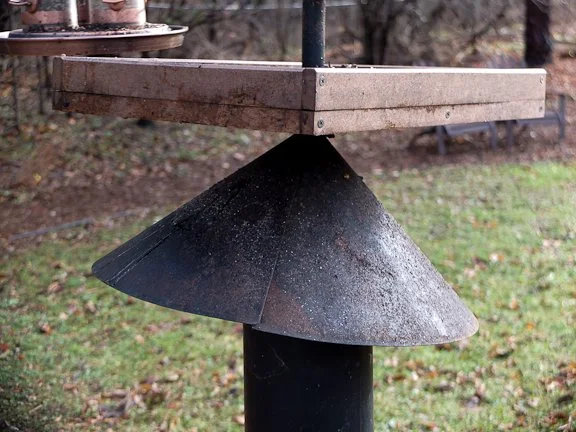
Three key ingredients to keep rats, mice and squirrels off of your bird feeders. It begins with a high-quality pole, followed by a large squirrel or raccoon baffle, a smaller cap baffle and a seed collecting tray to keep most of the seed from reaching the ground.
The importance of using a no-mess food
Ensuring that little or no bird seed reaches the ground and begins to build up under your feeders, involves a multi-faceted approach, but it starts with providing your birds with the highest quality feed.
A no-mess bird seed purchased from a bird store such as Wild Birds Unlimited is a very good start. If the birds, squirrels and chipmunks clean up all the birdseed that drops to the ground during the day, then there is nothing left for the mice and rats to eat in the evening.
Yes, the no mess blends can be very expensive.

Wayne Huggins created a patio under his bird feeders to allow for easy cleanup to keep rats and mice out of the yard.
It’s hard to justify spending three or four times the cost for a bag of no-mess feed vs a similar sized bag of mixed seed from a big box store. Remember though, the no-mess food is almost like a concentrated bird seed. You should use less seed than you would if you were using a less expensive, all-purpose mix.
I don’t necessarily fill up my feeders. This way, if a squirrel mananges to get up on the feeder, it is limited in the amount of food it can get to and possibly spill on the ground.
The problem with most mixed seed is that any millet, corn or other filler is likely not to be eaten by the birds. In fact, birds such as blue jays, mourning doves, grackles, woodpeckers and a host of other birds will throw out the “filler seed” to get to the prized sunflower seeds resulting in a large mess building up on the ground.
Some of the seed that spills to the ground will be eaten by squirrels or ground-feeding birds such as Juncos and mourning doves, but the majority of filler seeds will remain on the ground to be cleaned up by mice and rats throughout the evening and into the night.
You may think the mixed seed is not a problem because the space under your feeders is always clean. You might not know that rats and mice are cleaning up the mess under the feeders until their numbers increase to the point that you begin seeing them during daylight hours.
It’s best to ensure you don’t develop a problem, than to have to deal with one after the fact.
Many will argue that a shelled black-oil sunflower seed is all that you need. I agree that it is an excellent seed to use but its shells still leaves a mess under your feeder. Consider combining it in small amounts with the no-mess seed to reduce the expense of feeding only a no-mess blend but not adding so many shells that they begin to add up under your feeder.
Many birds such as nuthatches will take the shelled sunflowers and hide them in trees during the winter months for use later further eliminating the build-up of shells under the feeder.
Use a high-quality pole system
I find that a centralized, single pole system with the proper baffles and seed-catching trays helps to focus my efforts to feed the birds and at the same time monitor any rodent problems in a single area.
Not unlike the high cost of no-mess food, a bird-feeding pole system that works to feed the birds and keep rodents off the feeders can be expensive.
The good news is that you can start simple and expand the pole over time. But whatever you do, don’t skimp on the tools needed to keep rats and squirrels off the feeder.
Buy a pole with a hook, a high-quality squirrel (preferably the larger raccoon baffle), a hat baffle, a tray to catch seed and a spike for the top that accepts seed cylinders. That should be sufficient to feed birds and keep rodents off the feeders.
I included a seed cylinder spike for the top of the feeder because it is an excellent source of food for woodpeckers and other birds but, more importantly, is inherently a no-mess form of feeding birds.
I wrote an extensive article on the value of seed cylinders that you can read here.
Our pole system is located far from the house, but close enough that I can monitor it from a window. I check it every morning and most evenings to ensure there are no unwanted guests helping themselves. In addition, because I regularly sit in my photographic blind near the bird-feeding station for hours on end, I know what is hanging out under the feeder, at least during daylight hours leading into the evening.
I also get to see first-hand how efficiently the ground under the feeders is cleaned up by a myriad of chipmunks, red and black squirrels and, of course, ground feeding birds most notably the Juncos, doves and wrens that love to root around in the mulch looking for scraps of seed.
I can say that they do a heck of a job keeping the area spotless.
Directly under the feeder, I have devised a system to ensure that little to nothing grows up. The no-mess food is the first component. Under the feeder is a thick layer of mulch that gets topped up a couple of times over the summer. Under the mulch, however, are thick plastic bags that were originally used to hold the mulch. This stops bits of seed from getting to the ground and sprouting up under the feeder and discourages mice and other rodents from burrowing underground near a potential food source.
I use other feeders in the garden, but they tend to be feeders that take only a handful of seed at a time and do not create a magnet for rodents. I use a small amount of no-mess seed that is eaten in a single day either by the birds or by squirrels who come across it before the birds get there.
Encourage natural methods to control rats
One of the best ways to keep rats at bay is by attracting, or at least not deterring, natural predators to the yard.
I realize that not every yard is lucky enough to have a resident fox or owl living in or visiting their small urban backyard. But, you might be surprised what actually visits your yard in the evening when you are sleeping. Fox are common even in very urban areas and owls can live in a large tree in your backyard without you even knowing it unless you are lucky enough to see them flying about in the early evening or morning or hearing their calls.
Many of us would likely not recognize the call of an owl unless it is the common call of a Great Horned Owl, which is unlikely to be living in your yard anyway.
A single screech owl feeding their young is known to kill several rats and mice over the course of one night.
Putting up an owl box in your yard is a good first step to attract them. I have written an extensive article about attracting screech owls to your yard. Be sure to check it out here.
If you are lucky enough to have a fox family set up a den in your yard, celebrate it. Watch the kits emerge and play in your yard. At some point they will move on to their own territory but in the meantime, they will clear your yard of any rat and most mice that live there.
Most importantly, do not use pesticides, including rodenticides on your property. Mice and rats that eat this poison could be eaten by the very predators you are trying to attract to kill them naturally. Also, the poison can kill animals that were never meant to be targeted including chipmunks, possums and racoons as well as your cat or dog.
What backyard animals kill rats?
There are a host of animals that will prey on rats.
Raptors (including owls)
Fox
Coyotes
Snakes (especially harmless but scary looking rat snakes)
Possums
Dogs (especially terriers)
Weasels
Reduce your artificial feeding stations
One of the simplest ways to keep rats out of the garden is to get to the point where the birds depend less on artificial feeding stations and more on the natural supply of seed, berries and nuts that grow naturally in your yard.
By providing these natural food sources in your yard, you will be able to reduce the birds’ dependency on the seed provided by your feeders at the same time as reducing your cost of purchasing extensive amounts of expensive bird feed. It will also help to attract a wider variety of birds to your backyard.
I have written an extensive article here about planting a backyard feast to attract and feed your birds naturally.
Attracting and feeding backyard birds naturally is worth checking out.
In conclusion: Putting it all together naturally
Try to establish a garden that is in balance with nature – one that welcomes predators as well as other animals that compete with rats and mice for food sources.
Create natural food for birds such trees, shrubs and flowers where they are less dependent on artificial, centralized food sources such as bird feeders, and ensure that your feeders are set up to discourage rodents from accessing them and from any food staying on the ground.
If you follow these suggestions, you are less likely to attract unwanted visitors and, if you do, they are more likely to disappear one night and provide food for the offspring of hungry predators.
Let nature be your guide.

Making a difference: Shannon turns monoculture farm into a pollinators’ paradise
Shannon McNally is just one of the many women making a difference in the preservation of nature. Shannon and partner, Justin, were recognized for their work in restoring a once monoculture farm into a pollinator’s paradise. Shannon’s work with monarch butterflies also shows her commitment to the natural world.
NAPPC recognize her tireless work
It’s easy to excuse Shannon McNally for being nervous when she accepted her award from NAPPC as Canada’s best Farmer-Rancher.
Afterall, accepting an award from experts in the field of pollination – professors, scientists and other highly educated seasoned professionals – is one thing, but when it’s the first award you can remember receiving since a 4th Grade fairness award, it’s a big deal.
Especially when you’re only in your 20s, have no formal education in the field and very little experience in farming.
As you can imagine, receiving a national award from the North American Pollinator Protection Campaign (NAPPC) and the Pollinator Partnership, is a VERY BIG deal.
Shannon and her partner, Justin, received the award for converting more than 33 hectares at White Church Farm of a monoculture soy and corn farm in Hamilton, Ontario, Canada, into a pollinators’ paradise.
“It’s been five years ago now when I made the decision to join all of you who have been fighting for a greener future,” she said in her acceptance speech for the award.
“In 2017, Justin and I both quit our jobs to become first-generation farmers. At the time I was 23 years old with little experience or related formal education. My strengths relied entirely on my relentless passion for creating more space for nature and using the internet,” she explained.
“Caring was truly my biggest asset. I wanted to highlight that because I know that each and every one of you have that same strength too,” she said in a zoom call to an audience of co-award winners, organizers, professors and experts in the field.
Her passion for the environment and her dedication to making a difference in a natural world where climate change is threatening everything she cares so much for led her to take on the challenge.

Shannon McNally in one of the fields she works in Hamilton, Ontario Canada. Photo courtesy Shannon McNally.
“If I had waited until I felt confident enough, experienced enough or educated enough to start trying to make a difference, I would never have started. As a rookie in this community, I was constantly inspired by all of you and truly humbled to be in your company and to connect with you today,” Shannon said in her speech.
Since taking on the challenge, Shannon has been working hard to reshape the land with a plan for long-term biodiversity.
Bringing back nature
Each year, she works to restore large areas by planting permanent, native plant species including up to 30 trees and hundreds of perennial wildflowers. And that was just last year.
In addition, she has also planted more than 5 acres in permanent, mixed bee forage, created clover pathways around the farm, cultivated diverse, mature tree lines and hedgerows, and recently established a 2-acre permaculture orchard.
Each year, the farm grows a succession of sunflower fields for bee forage and bird seed and they plant a cover crop for pollinators.
“In this era of climate crisis, she explained in her acceptance speech, “we need everyone’s strength and contribution. Each of us has such an important role to play and we no longer have the luxury of time to get in our own way.
Her call to action did not go unnoticed by her peers at the NAPPC awards ceremony.
“NAPPC is thrilled to recognize Shannon McNally with the 2021 Canadian Farmer-Rancher Pollinator Conservation Award,” says Dr. Lora Morandin, Research and Conservation Director at Pollinator Partnership.
“Shannon’s work to provide habitat for pollinators and support biodiversity on her farm is an excellent example of how growers can incorporate conservation within their production systems. Creating pollinator habitat also supports beneficial insects that control pest insects, which can reduce the need for chemical pest control. We hope that the work Shannon and other farmers are doing to help pollinators provides inspiration to others to find ways to support pollinators and other wildlife or their farm or in their yard.”
The North American Pollinator Protection Campaign is a coalition group administered by Pollinator Partnership. NAPPC's mission is to encourage the health of resident and migratory pollinating animals in North America.
P2’s mission is to promote the health of pollinators, critical to food and ecosystems, through conservation, education, and research. The Canadian arm of Pollinator Partnership (P2C) is a registered not-for-profit organization.
The organization is quick to point out that pollinators perform a nearly invisible ecosystem service that is a precious resource requiring attention and support. It adds that disturbing evidence found around the globe, shows that pollinators and the service they provide is increasingly in jeopardy.
Shannon is more than aware of the ever emerging deadline she and others face to not only slow the trend but to work hard to reverse the trend as quickly as possible.
Not unlike woodland gardeners toiling away to rewild their small urban or rural plot of land using native plants, trees and shrubs, Shannon also realizes that the work she is doing on the small farm is just one step in the solution.

Her work with Monarch butterflies this past year is an example of her commitment to helping wildlife and was one reason she was recognized by NAPPC.
Helping monarch butterflies through social media
“I really enjoy participating in conservation efforts, but often feel overwhelmed by wanting to help ALL of the at-risk and endangered species,” Shannon wrote to her Facebook followers earlier this year.
“I do as much as I can here, but I feel the biggest impact I have is through sharing on social media. The possibility of someone being inspired into action and the potential ripple effect that could have is what gets me the most excited,” Shannon explains.
“With so many disheartening headlines these days, finding joy in nature and cherishing the positive outcomes from even the smallest of actions is worth celebrating. My hope with sharing this is that you can feel the same joy I do when I watch these monarchs fly away after 5 1/2 weeks of attentive care.”
In the coming year, Shannon plans to restore a riparian area with native trees and shrubs as well as install a monarch-focused garden featuring three milkweed species.
The work she is planning on a monarch-focused garden follows her success this past year of raising 100s of monarchs from eggs and sharing her work with others through social media.
Plans are still in the works for next year but Shannon says her focus will be on creating habitat for other native species rather than any rearing and releasing monarchs.
“It was a wonderful, educational and inspiring experience this year and I'm excited to see what next year has in store.”
More NAPPC award winners
Some of the other 2021 Pollinator Award Winners included:
2021 NAPPC POLLINATOR ADVOCATE - UNITED STATES
This Charleston, SC based non-profit organization works to engage students of all ages within their own environments through observation-based learning. Ted Dennard, a lifelong beekeeper and the founder of Savannah Bee Company, and Tami Enright, a fellow beekeeper and environmental educator, have dedicated their lives to protecting pollinators, founding The Bee Cause Project and securing a national partnership with the Whole Kids Foundation. The organization solicits honey bee grant and observation hive program receives hundreds of schools’ participation applications annually, and more than 550 schools and organizations have received bee grants to date, impacting thousands of children across North America. They have also introduced digital hives as an alternative for schools or community centers that cannot host a live beehive, and have just launched a Pollinator Garden Grant for Libraries.
DAN AND MICHAEL O’LOUGHLIN
2021 NAPPC-NACD FARMER-RANCHER - UNITED STATES
Dan and Michael O’Loughlin operate a 200-acre farm in Yamhill County, OR that primarily grows tall fescue seed. There are few pollinator initiatives in Oregon that the O’Loughlins have not supported or helped, including having surveyed bees at over 1,500 locations for the Oregon Bee Atlas, having worked with the county to establish trials assessing roadside pollinator seed mixes, having created pollinator habitat at schools through the State School Garden Network, and having served as leaders in the State Pollinator Protection Initiative, the Oregon Bee Project. O’Loughlin Farm has also made major strides to increase insect biodiversity. The farm rarely uses insecticides owing to the high endemic populations of beneficial insects and vertebrates, and insectary plantings are key to this strategy. Many of the plants they use are important nectar and pollen sources and butterfly host plants.
2021 NAPPC POLLINATOR ADVOCATE – CANADA
Pollination Guelph, founded in 2008, is an entirely volunteer-run charitable organization that focuses on protecting pollinator habitats by building and maintaining public and private gardens throughout Guelph, ON. Several notable projects include Eastview Pollinator Park, The Gosling Pollinator Gardens at Hospice Wellington, Trans Canada Trail Pollinator Gardens, and Clair Road Emergency Services Centre Pollinator Habitat Meadow. In addition to on-the-ground work, Pollination Guelph reaches out to its diverse audience with numerous education initiatives and advocacy campaigns through their website in the form of videos, web links, downloads, factsheets, and newsletters on a wide range of topics. The organization also hosts an annual symposium featuring workshops and networking opportunities that is attended by people from all over Canada. In addition, their Community Grant program enables other nonprofit groups in Guelph to establish and maintain pollinator habitat. In 2021, this program provided a total of $10,000 to 16 local organizations.
ESPECIES, SOCIEDAD Y HABITAT, A.C.
2021 NAPPC POLLINATOR ADVOCATE – MEXICO
Especies, Sociedad y Habitat, A.C. (ESHAC) is a nonprofit organization that uses a human community-centered approach to implement projects that promote the conservation of natural resources and endangered species while promoting sustainable use of biodiversity. ESHAC has implemented more than 30 projects in northeast Mexico, impacting more than 30,000 hectares of priority area for conservation in the region. Over the last five years, ESHAC has been collaborating closely with Don Martin-CONANP to promote the conservation of the Mexican long-nosed bat (Leptonycteris nivalis), with special emphasis on protecting cave roosts and enhancing foraging habitat along their migratory corridor. To date, they have planted over 9,500 agaves near critical roosts and restored over 250 hectares of habitat. They have also worked with local communities to develop holistic management approaches, train 79 individuals form 5 communities in sustainable and regenerative agriculture and grazing techniques, and pioneer a drone-based survey protocol to evaluate foraging resources for pollinating bats at the landscape level.
EMILIO VIEYRA
2021 NAPPC FARMER-RANCHER – MEXICO
Emilio Vieyra owns and operates Mezcal Don Mateo de la Sierra to produce one of the few environmentally friendly, sustainable mezcals. He ensures that the areas where they grow agaves remain forested and was one of the first to receive recognition of Bat Friendly© practices, keeping the recognition each year since 2016. In keeping with this recognition, Emilio allows at least 5% of his agaves to flower for bats and other pollinators. The majority of bats visiting their plants are the endangered Mexican long-nosed bat (Leptonycteris nivalis), showing the impact of their practices at the local level. Regionally, Emilio is educating his peers and extending his practices to other mezcal producers. He also hosts practical seminars covering all his production processes for bartenders and others during the flowering season, creating many other promoters of Bat Friendly© practices in the process.
TORONTO AND REGION CONSERVATION AUTHORITY
2021 NAPPC ELECTRIC POWER
Toronto and Region Conservation Authority’s (TRCA) The Meadoway is an active urban restoration project in Toronto, ON that encompasses 200 hectares and 16 linear kilometers of the Gatineau Hydro Corridor between the Don River Ravine and the Rouge National Urban Park. The goals of the revitalization are to create and maintain a diverse, native meadow habitat for local wildlife and to create and active East-West link between Toronto and the Rouge National Urban Park. Full project completion is expected by the end of 2024, but by the end of 2021, 64 hectares will have been restored, completing 70% of the project. The Meadoway will connect seven rivers and ravine systems, 15 parks, 16 km of trail, 13 neighborhoods, over 200 hectares of greenspace, and more than 1,000 diverse species of flora and fauna. Corporate and community groups have also been engaged as participants in stewardship activities including the planting of native potted stock, garbage collection, invasive species removal, and interpretive walks.
More on Pollinator Partnership
Pollinator Partnership’s mission is to promote the health of pollinators, critical to food and ecosystems, through conservation, education, and research.
The Pollinator Partnership is working to protect pollinators and their habitat with projects all over the North America and globally. See what local and regional initiatives are active near you.
Pollinator Partnership Canada (P2C) is a registered not-for-profit organization dedicated exclusively to the protection and promotion of pollinators and their ecosystems through conservation, education, and research.
Birds, bats, bees, butterflies, beetles, and other small mammals that pollinate plants are responsible for bringing us one out of every three bites of food. They also sustain our ecosystems and produce our natural resources by helping plants reproduce.
Pollinating animals travel from plant to plant carrying pollen on their bodies in a vital interaction that allows the transfer of genetic material critical to the reproductive system of most flowering plants – the very plants that
bring us countless fruits, vegetables, and nuts,
½ of the world’s oils, fibers and raw materials;
prevent soil erosion,
and increase carbon sequestration
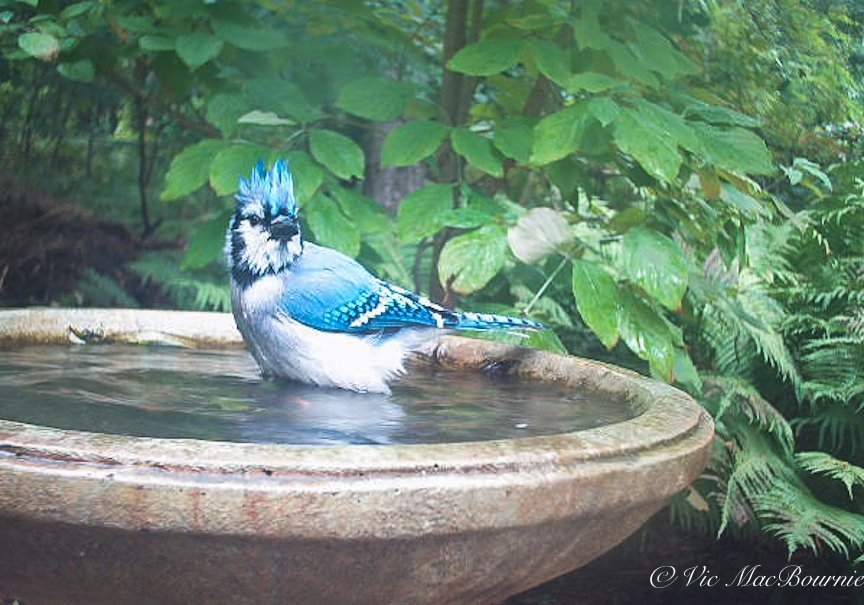
Trail camera turns garden photography into backyard safari
The Wingscapes BirdCam Pro is a unique Trail Camera that allows extremely close focus to capture birds and mammals at feeders, birdbaths, bird houses and in the garden. Trail cameras, originally designed for hunters, are now becoming popular for homeowners and gardeners wanting to document the wildlife in their backyards.
Wingscape models capture birds and mammals up close
It’s like a baby cam but instead of keeping an eye and ear out for a little one, it watches over your backyard for wildlife wandering through your garden.
For anyone who wants to know what is passing through or hanging out in their backyard night and day, one of the popular trail cameras is essential.
Trail cameras for home security and to document backyard wildlife
Woodland/wildlife gardeners may not know too much about these popular cameras, originally designed to allow hunters to document the wildlife using a particular trail out in the field.
While they continue to be a tool for hunters, more and more the cameras are finding their way into backyards not only to document the wildlife that are using the yard throughout the day and, especially, throughout the night, but also to act as a security camera to capture any potential security threats in the backyard.
Place one on your deck, for example, for security and to monitor wildlife. Realize, however, unless they are secured, they can be stolen or the digital cards removed by knowledgeable thieves. They will also put out light to capture images and video. Animals are not bothered by the lights but humans will notice it.
(If you are interested in exploring garden photography at a higher level, be sure to check out my comprehensive post on the Best camera and lens for Garden Photography.)

The benefit of the Wingscape Bird and Trail camera (pictured above) is that you can get up close and personal with backyard wildlife.
For more suggestions and some of my favourite garden things, be sure to check out my Favourite Things post.
Quality and features of the cameras and images vary widely, but most capture high-quality images and video both night and day. Some of the higher-end models even send the images to your smart phone to allow you real-time monitoring of the camera.
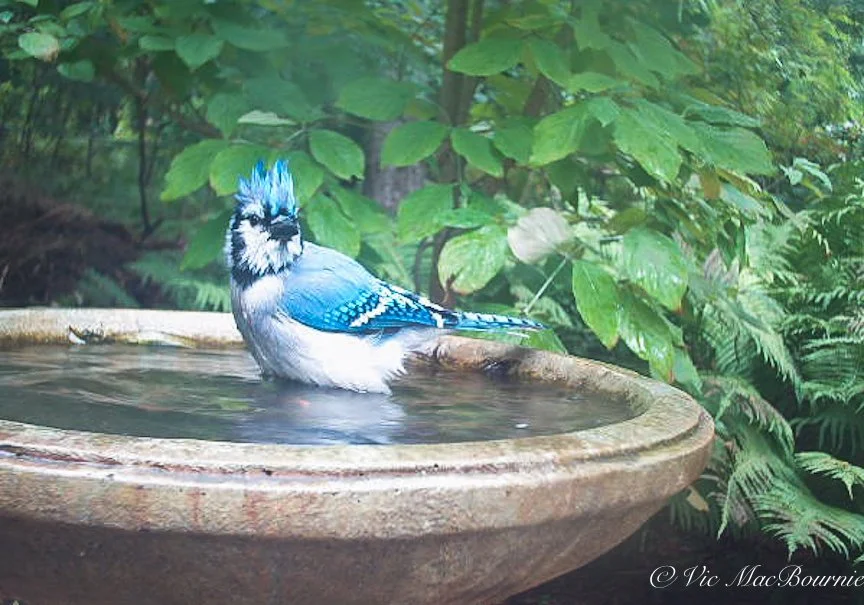
This photo of a Blue Jay at the bird bath was captured by the specialized bird camera. Imagine if it was a more rare bird or even a raptor that visited?
I’m not here to give readers a review of the best and worst trail cameras because I don’t own them all. I will, however, provide readers with some of the better cameras recommended by those who have tested the various models and tell you about my experience with my hybrid trail/bird camera.
Top five trail cameras from Bestreviews.guide
My hope is that this article simply introduces Woodland/wildlife gardeners to the possibilities these cameras offer them.
(I was fortunate enough to purchase a highly specialized trail camera (the Wingscapes BirdCam Pro) designed to capture birds and other wildlife images up close. More on that later in the article.)

Blue Jay at the BirdCam. The trail camera can be set up to show date and time, helpful if you are documenting times that wildlife appear.
Back to the Trail cameras. The cameras, that primarily run off of batteries, are meant to be left out in the field for months on a trail through any type of weather documenting the wildlife in the area. Some are available with supplementary solar power panels to give batteries a longer life, others use solar powered batteries to keep them going in the field for months. Most come with straps and other methods of attaching them to trees. They also have tripod attachments that enable the cameras to be used with a tripod or device that uses tripod-style attachments.
Woodland/wildlife gardeners can mount them to a tree, a pole or just place them on a tripod and move them around the yard to capture the fox, the skunk maybe the coyote or deer that you suspect are wandering through your yard while you sleep. Unlike hunters who have to worry about the expensive cameras possibly being stolen or damaged out in the field, gardeners can leave the camera out without any real fears of the camera being stolen or damaged.
If you are lucky enough to have a den in the yard, set the camera up near the den to document the life of your new little neighbours. Maybe you will be lucky enough to capture the babies as they emerge into the world and discover your garden.
The possibilities are endless.

The BirdCam is perfect to use at an outdoor photo studio that is specifically set up to photograph wildlife. Here a red squirrel is photographed up close and personal.
If you are still curious about what these trail cameras are capable of, check out a few of the thousands of Youtube videos that have been put up from all corners of the earth. My favourites are videos documenting wildlife in national parks ranging from the Florida Everglades to videos from Algonquin Park in Northern Ontario, Canada. Here is a good one from a small watering hole in Arizona.

This deer was caught on our trail camera in the middle of the night. These cameras are a great way to monitor what animals are roaming your property at night.
A few months ago I decided I needed a trailcam after watching our neighbourhood fox regularly wander through the yard. I have seen several deer, racoons and a few possums, but I suspected we probably had more wildlife visitors than I realized, including the odd coyote.

Another image of a wren caught on the BirdCam Pro at the birdbath.
The Wingscapes BirdCam Pro a hybrid trail camera
Regular visits to Kijiji where there are always several used trailcam models of varying quality and price points available, led me to the Wingscapes BirdCam Pro.
Although it can operate as a regular trail camera, the Wingscapes BirdCam Pro has the ability to focus very closely to capture birds and wildlife up close – very close – like 6-inches to infinity.

Trail cameras are a great way to see what animals are roaming your gardens at night. Here, a friendly skunk skitters across the frame in front of the camera. Night images are not always the best but they can be used to verify what animals are in the yard.
The BirdCam Pro is a weatherproof, motion-activated with an 8MP camera that includes an adjustable flash for nighttime photos and videos. It also includes a timelapse setting for recording non-animal subjectslike weather and plants emerging from bud over a period of time. It also features a 2-inch color preview screen and can also send images directly to your computer with an optional Wi-Fi SD card. Here is the bad new, the item is discontinued from Moultrie. The good news is that a later version is still available. (see below).
Traditional Trail cameras are not really designed to capture images or video that close to the camera. Most are simply trying to capture larger wildlife (deer, bears, moose) from a distance of 10-20 feet or more. They do an excellent job capturing these images.
Birdwatching Bliss, another blog site did an extensive comparison between the Wingscapes BirdCam and traditional trail cameras. You can read the full review here.
The Wingscape BirdCam Pro (which is no longer available from Moultrie) has the ability to manually focus the wideangle lens to capture small birds up close, for example, at a feeder or on a birdbath. Although this model is no longer available (I purchased mine from Kijiji used but in an unopened box), another later version, the Time Lapse Pro is still available, at least on Amazon. It may also be available at specialty stores. The Wingscapes TimelapseCam Pro produces 20MP pictures, has a focus range from 6 inches to infinity and a flash range to 25 feet. It also shoots HD video at 1080P with sound.
It’s important to note the the TimelapseCam Pro lacks the motion sensor that enables you to capture birds or animals that move into the scene. The Timelapse model, therefore, is of less value to those hoping to capture images of wildlife. It can be set up near a feeder or bird bath and programmed to take an image every 15 seconds for example. This would leave you with a lot of empty images.
I would recommend looking for a used BirdCam Pro model.
My BirdCam Pro has caught images and video of wildlife and birds in the backyard, including the video of a bluejay at one of my bird baths featured on this page.
I often set it up in the morning at one of my bird baths and let it to its thing for the entire day. Earlier this year I was able to catch a surprising image. I usually have several families of Baltimore Orioles living in and around our garden and visiting regularly, but this year none stayed around past a few days in the spring. I was convinced that none were around until I checked my SD card following a day of shooting at the bird bath.
Sure enough, a young oriole was photographed at the birdbath. It told me that at least they were still around.
In one evening it caught video of two skunks, a racoon and a possum at my woodpile. It’s night video capture is only B&W and not always publishable because of uneven lighting, but it does give you a good indication of the wildlife in your backyard.
Newer trail cameras are more than able to capture high quality video in B&W.
Wingscapes AutoFeeder for the birds
Related to the Wingscapes BirdCam is another interesting tool for bird lovers. The Wingscapes WSBF02-00132 AutoFeeder, is an automatic bird feeder that spills out a set amount of bird feeder at the same time of day. The battery operated digital timer can program up to 4 feed times a day, releasing food from its 1-gallon seed hopper from 1 to 10 seconds each feeding.
In conclusion
Trail cameras have been used for years by hunters and have only recently been discovered by homeowners, gardeners and wildlife lovers as a way to track what lives or passes through their gardens.
Besides the fun of downloading your SD card to see what visited over night, the cameras are a great resource to chart the different animals as well as learn about their movements. As a wildlife photographer, learning that the neighbourhood fox trots through the yard every morning between 6 a.m. and 7a.m and takes a very specific route every day, is incredibly valueable information if I want to photograph it with my high-end camera. The images from the TrailCam can be quite good, but it still won’t compare with a photograph made with a DSLR and a long lens from a photographic blind.
These cameras are great tools but take some getting used to before you are rewarded with good images. Realize that they work when the camera sees movement and therefore can be fooled by foliage blowing in the wind. Don’t expect miracles over night. Work with the camera and experiment with it in different locations, at different times of year and in different situations until you are getting successful images.
Once you master them, you will be rewarded time and time again.
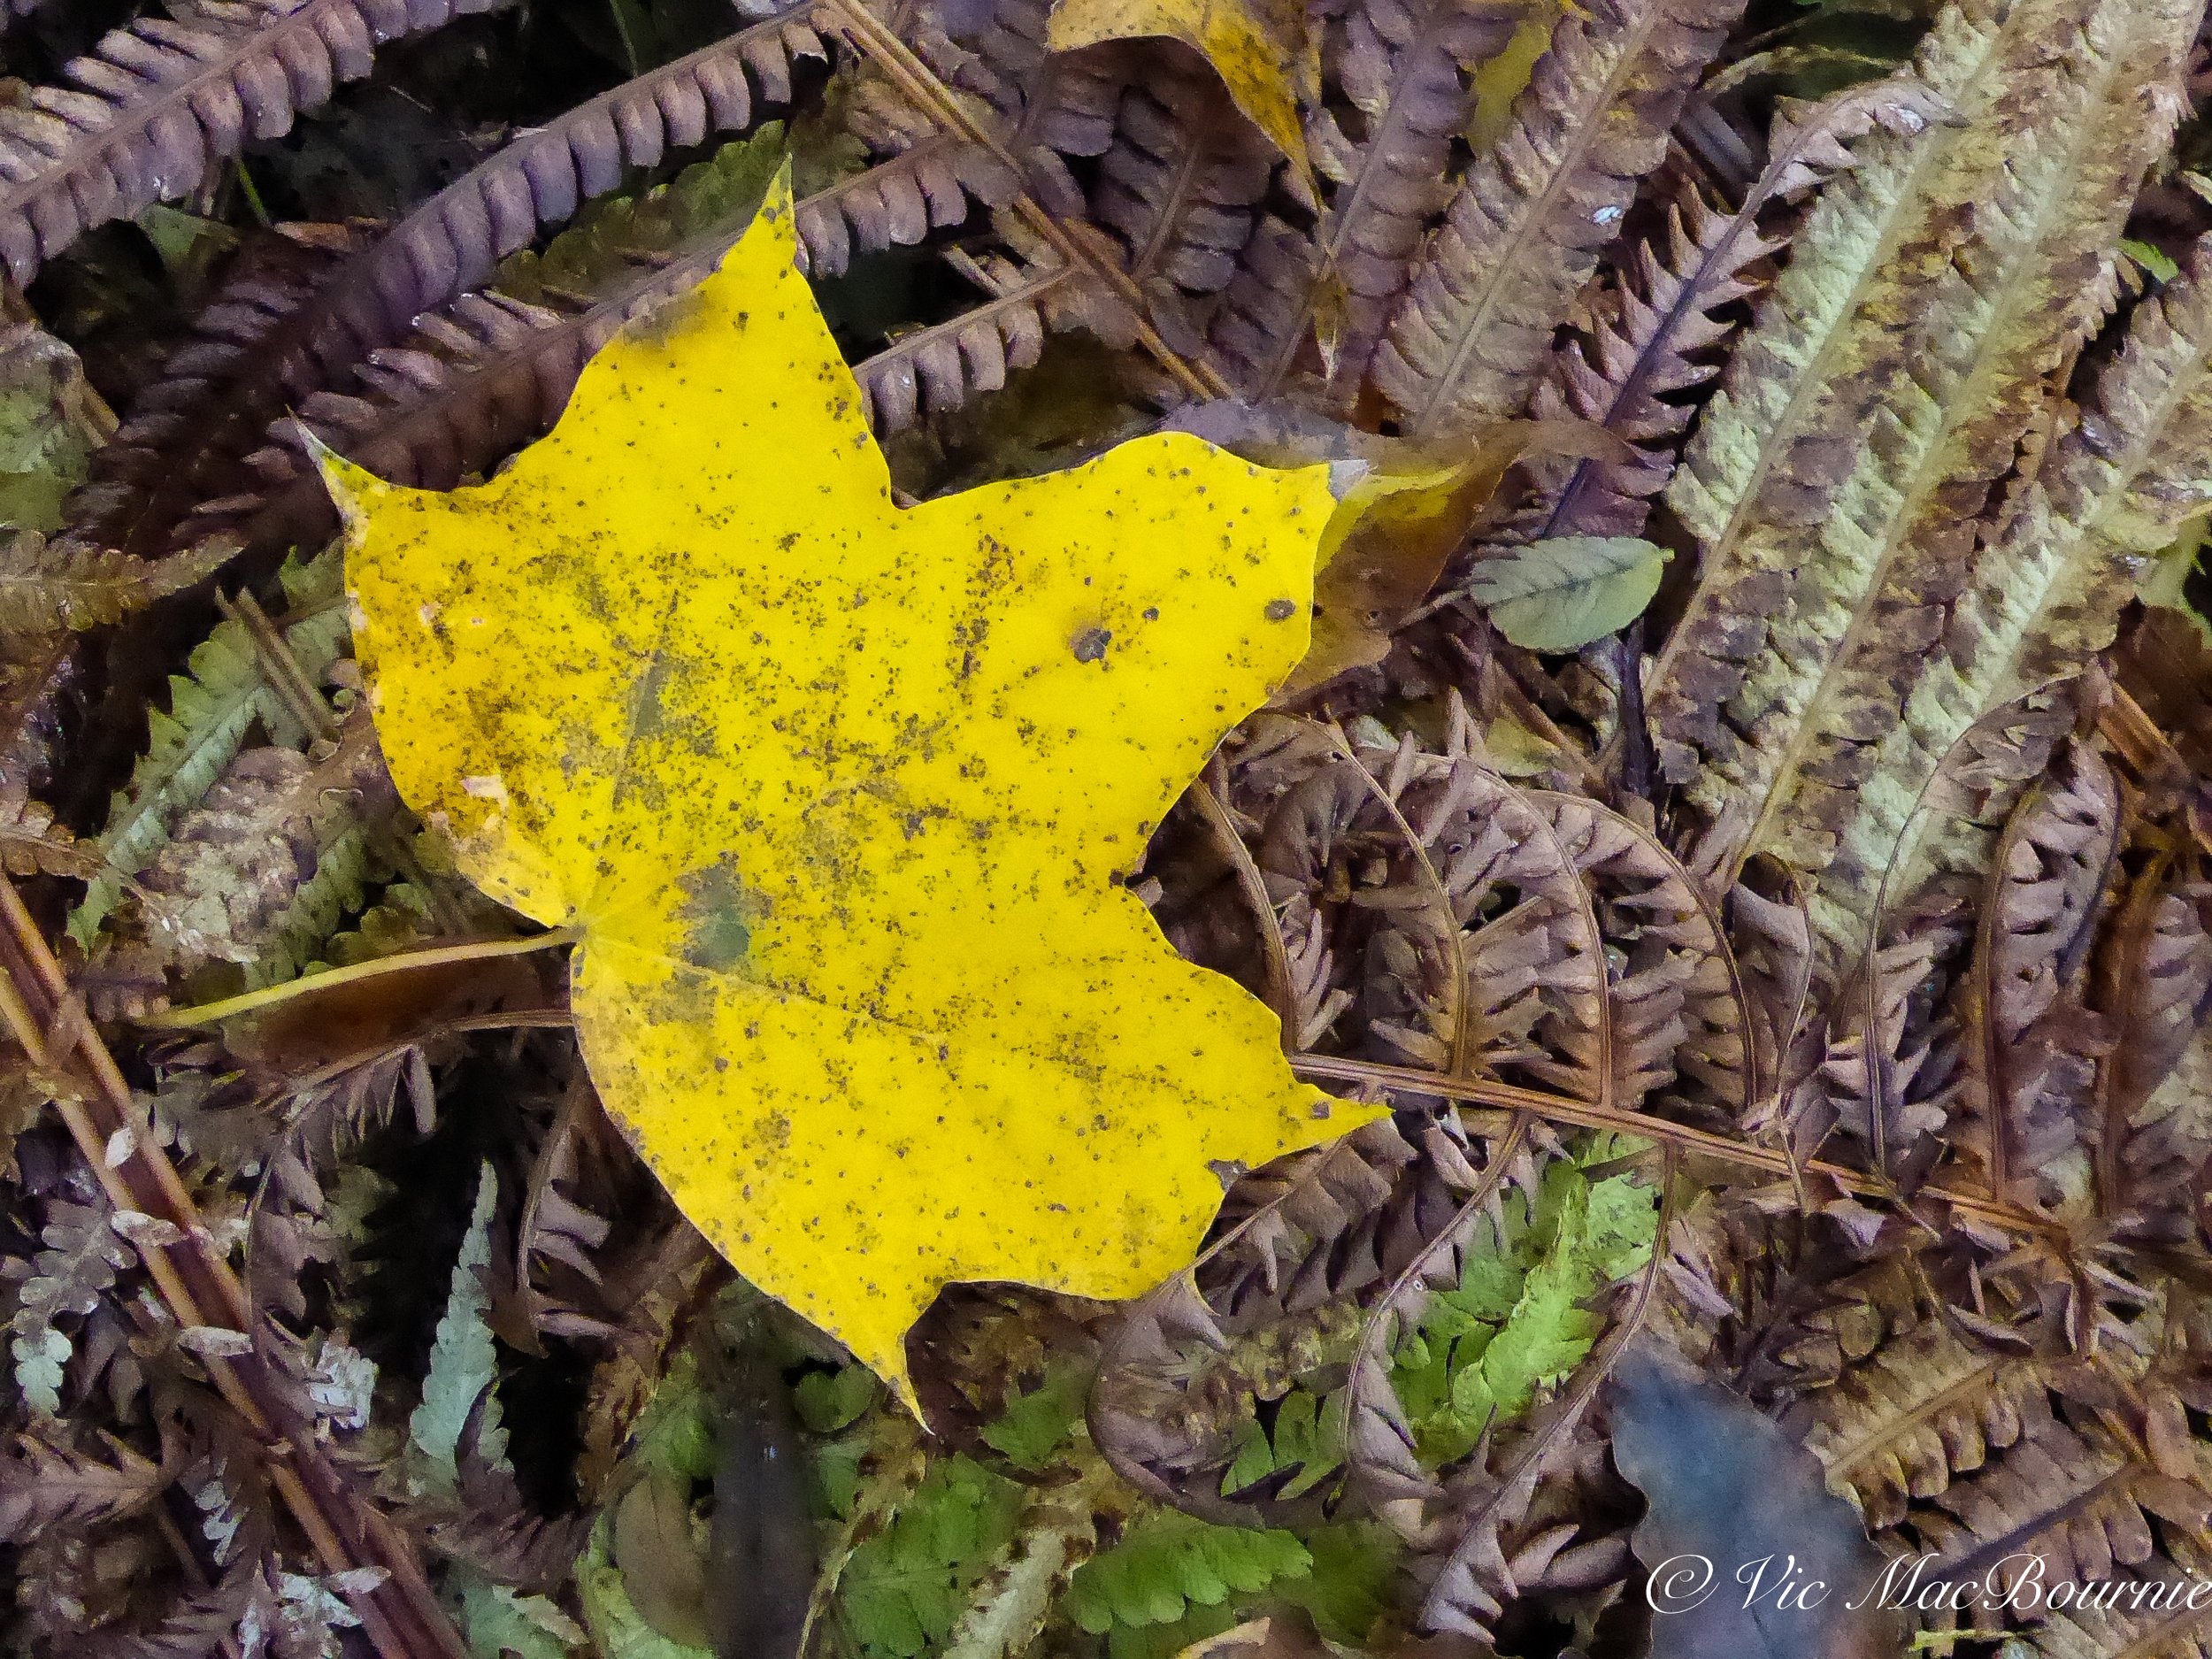
Take your Travel camera to the backyard to capture great garden photography
A Travel camera like the Panasonic Lumix camera is the ideal choice for capturing fall in your woodland garden. It’s portability makes it easy to carry around on your daily chores, yet its list of full features leaves nothing to chance. From long telephoto lenses to capture wildlife, to excellent macro capabilities and video, one camera really can do it all.

A maple leaf stands out in its bright fall colour among the spent ferns in the Woodland garden.
What’s the best camera for garden photography?
Can you use a travel camera to document your garden?
Absolutely you can. Not only can you use a small, point and shoot travel camera to photograph your woodland garden, but it just might be the ideal camera to get the job done.
A high-quality travel camera is small enough to easily fit into a pocket, but most pack a full set of features including a very long zoom lens that lets you get in close to most birds and wildlife. Their macro capabilities are also perfectly acceptable to photograph garden flowers, butterflies and insects, and their list of built-in filters turns the art of photographing and documenting your garden over the seasons into a creative adventure.

This Panasonic Lumix Travel camera is an ideal choice for garden photography.
Although the travel camera category was designed as the one-stop solution to capture a vacation with a single point-and-shoot camera that tucks nicely into a purse or pants pocket, what’s not to say it can’t be used as the ideal “staycation” camera in your backyard?
Click on the link to see a complete list of Panasonic’s Point and Shoot cameras.
Using it on a regular basis in the garden is also great practise for the time you need it to document that epic vacation. There is no better way to learn the ins and outs of a camera than to use it on a regular basis.

This close-up of a red squirrel shows the telephoto capabilities of the Lumix DMC-ZS50 camera.
(If you are interested in exploring garden photography at a higher level, be sure to check out my comprehensive post on the Best camera and lens for Garden Photography.)
Many travel cameras are about the same size as a smartphone but offer so much more flexibility and creativity.
Let’s make this clear, this is not a review of a specific camera. I’ll let camera experts do that on their blogs or YouTube channels.
This is a general article to help guide gardeners with their photography needs. Although it focuses on a particular camera, this is not the latest travel camera and lacks features many modern cameras now support. The article explores the “travel camera niche” and how gardeners can get the most out of using these types of cameras on an everyday basis in their backyards or travelling to some of the great gardens of the world.
In this article, we’ll use the Panasonic Lumix DMC-ZS50 travel camera (about 6 years old now) and feature a number of photographs taken with it one fall morning.

Image of raccoon high in the forest canopy. The image was taken with the DMC-ZS50 at the full 700mm telephoto.
Although I am using the Panasonic Lumix, the article pretty much pertains to any good point-and-shoot camera on the market today.
The modern Panasonic Lumix travel camera is the Lumix DV-LX100 Mark ll, which sells for upwards of $1,000. For those who like to compare specifications, this 21.7 MP Four Thirds MOS sensor camera sports a 24-75mm Leica DC Vario-Summilux F1.7-2.8 lens, comes with wi-fi and bluetooth and a 3-inch touch screen monitor. It has 4K video and 4K photo technology at 30 frames per second.
As you can see, these new cameras are packed with high-end features.

Using a soft focus filter gives a dreamy effect to this image of a Flowering Dogwood in fall colour.
I decided to use my Panasonic Lumix DMC-ZS50, a travel camera that made its debut back in 2015, to document my fall garden. The camera, which originally sold for as much as $500 back then but can now be purchased used for a fraction of that cost, comes with a 30X optical Leica zoom lens ranging from a lovely 24mm wide angle to an almost unbelievable 720mm telephoto lens. This kind of power will easily fill your viewfinder with everything from a humminbird to that colourful cardinal.
It handles low light conditions admirably and includes a Live View Finder to enable you to take photographs when lighting conditions make it difficult to use the 3-inch LED screen. The technology available in these point-and-shoot cameras, even a six-year-old model, is impressive. An eye sensor in the camera, for example, automatically detects your viewing preferences and switches image display to the Live View Finder when you are ready to use it.
If you are looking to purchase a new travel camera, deciding which of the many cameras to purchase involves some research on what features mean the most to you.
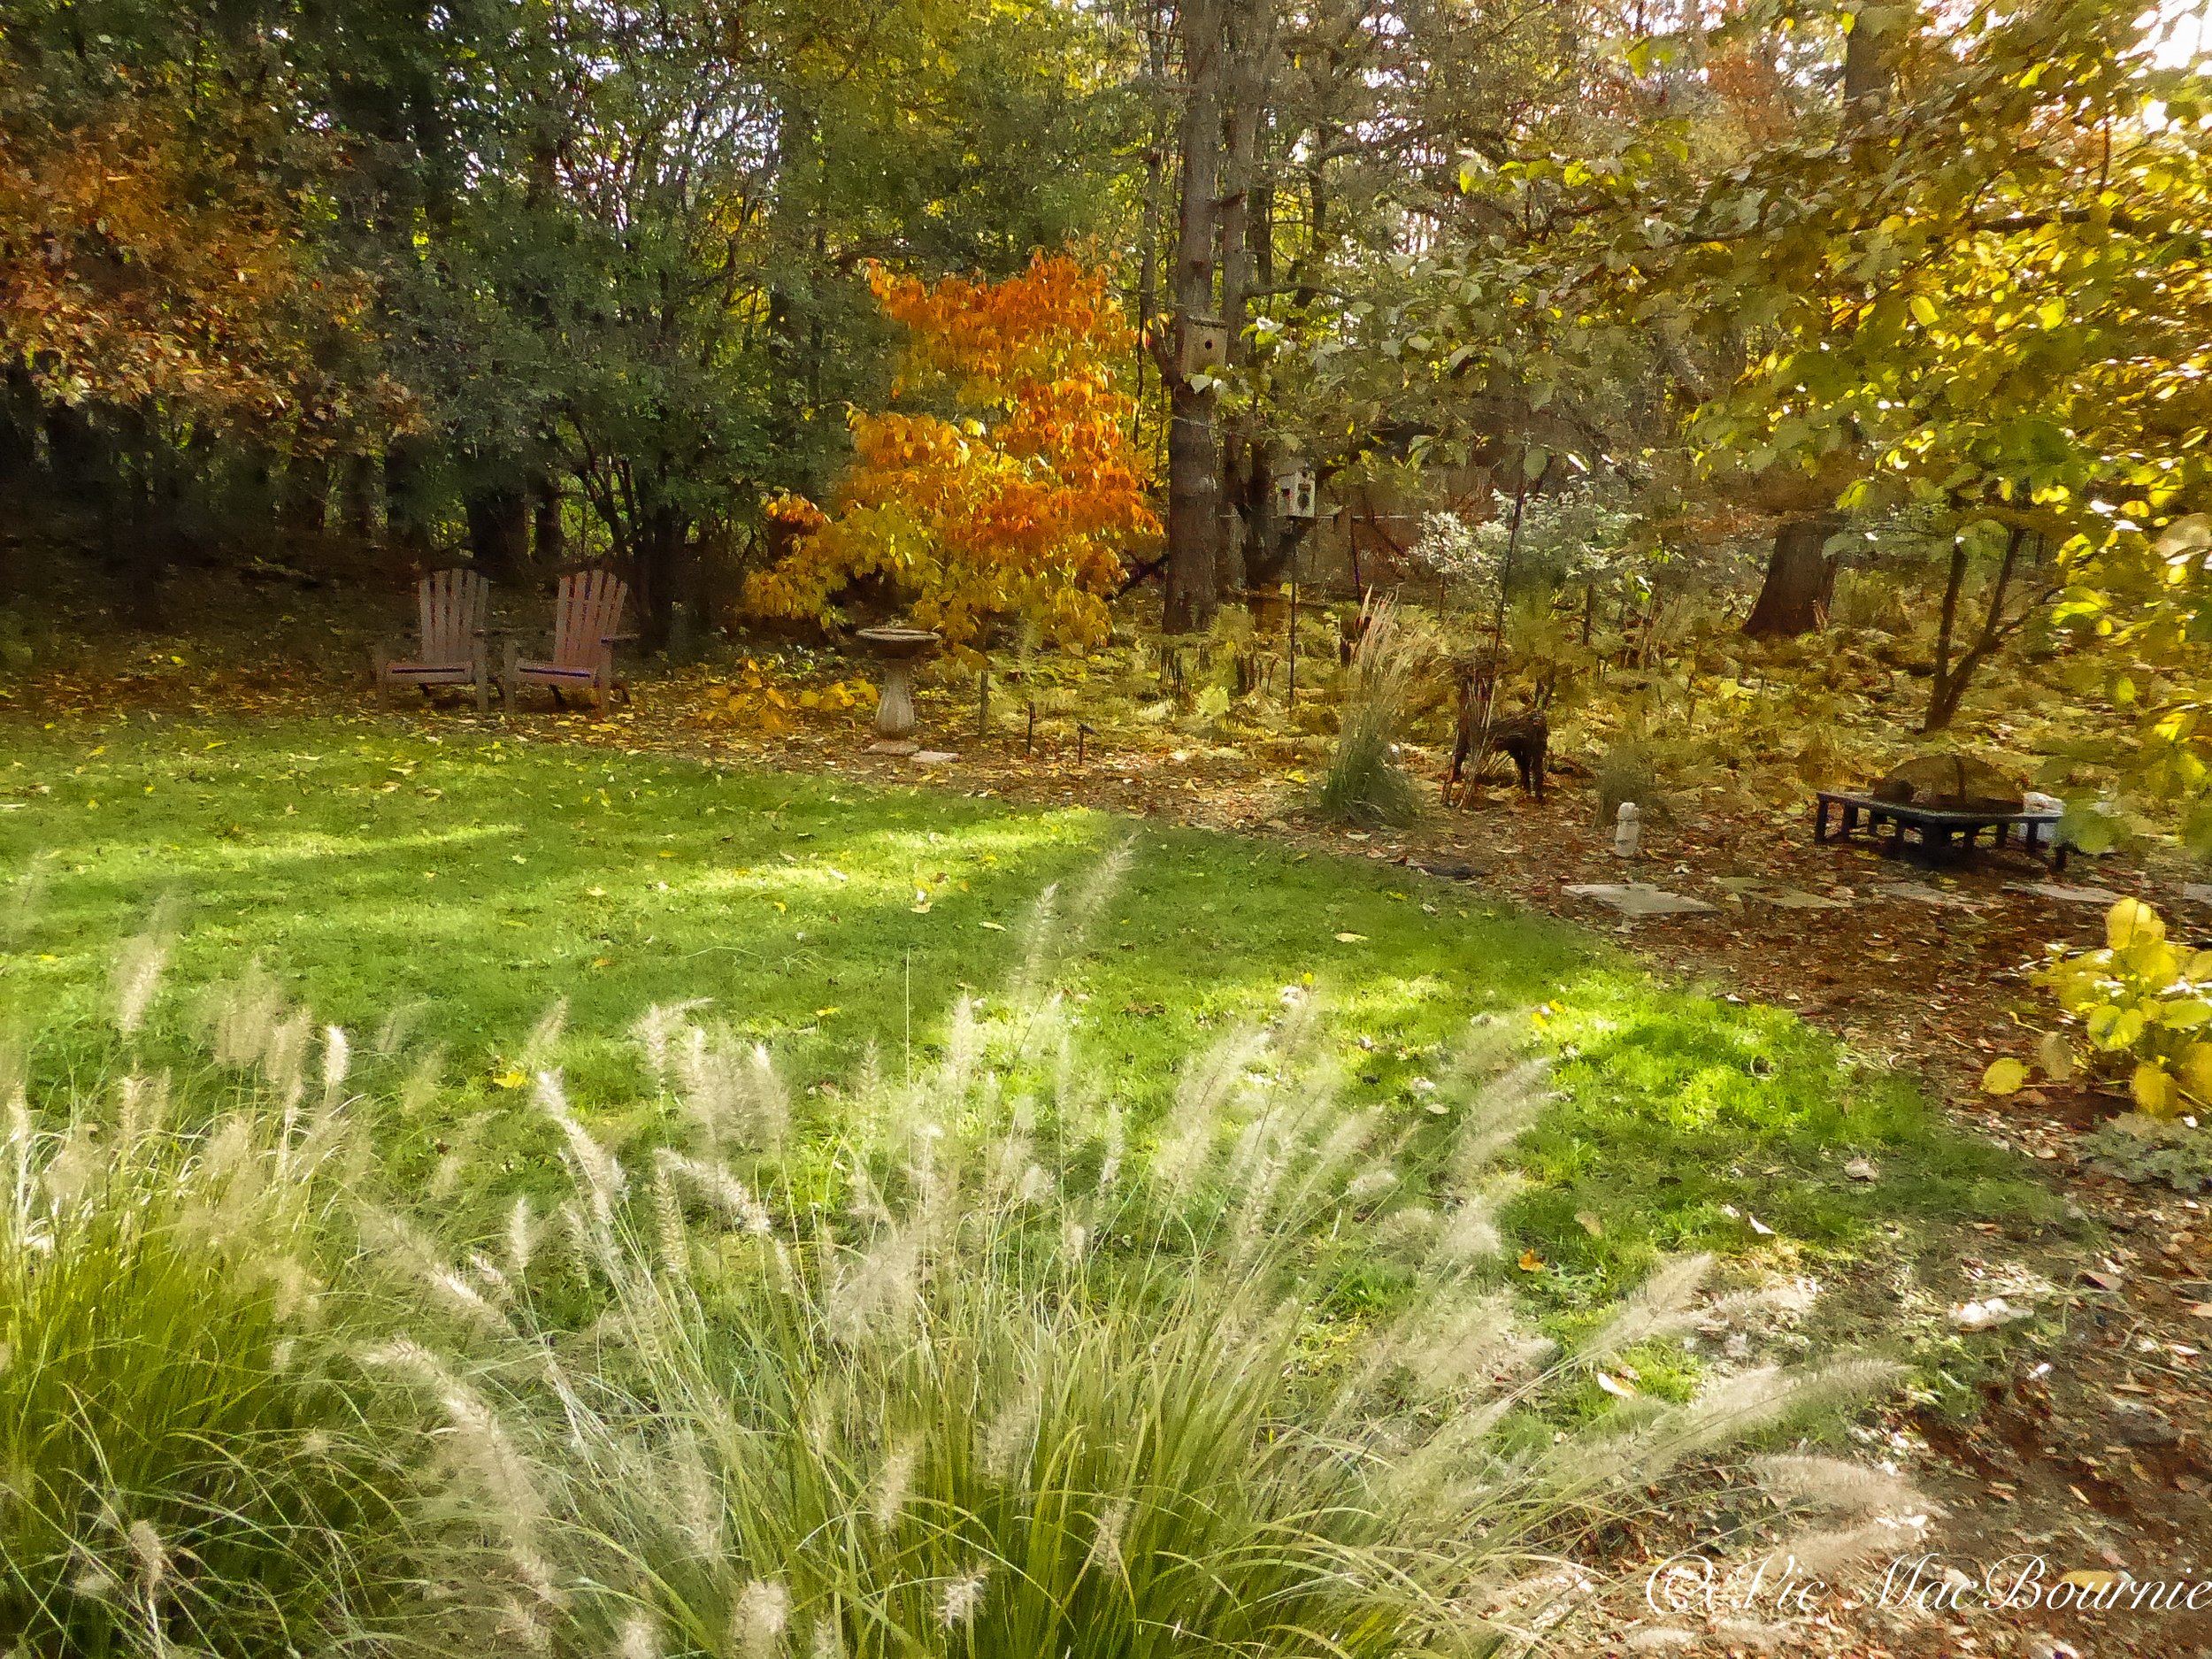
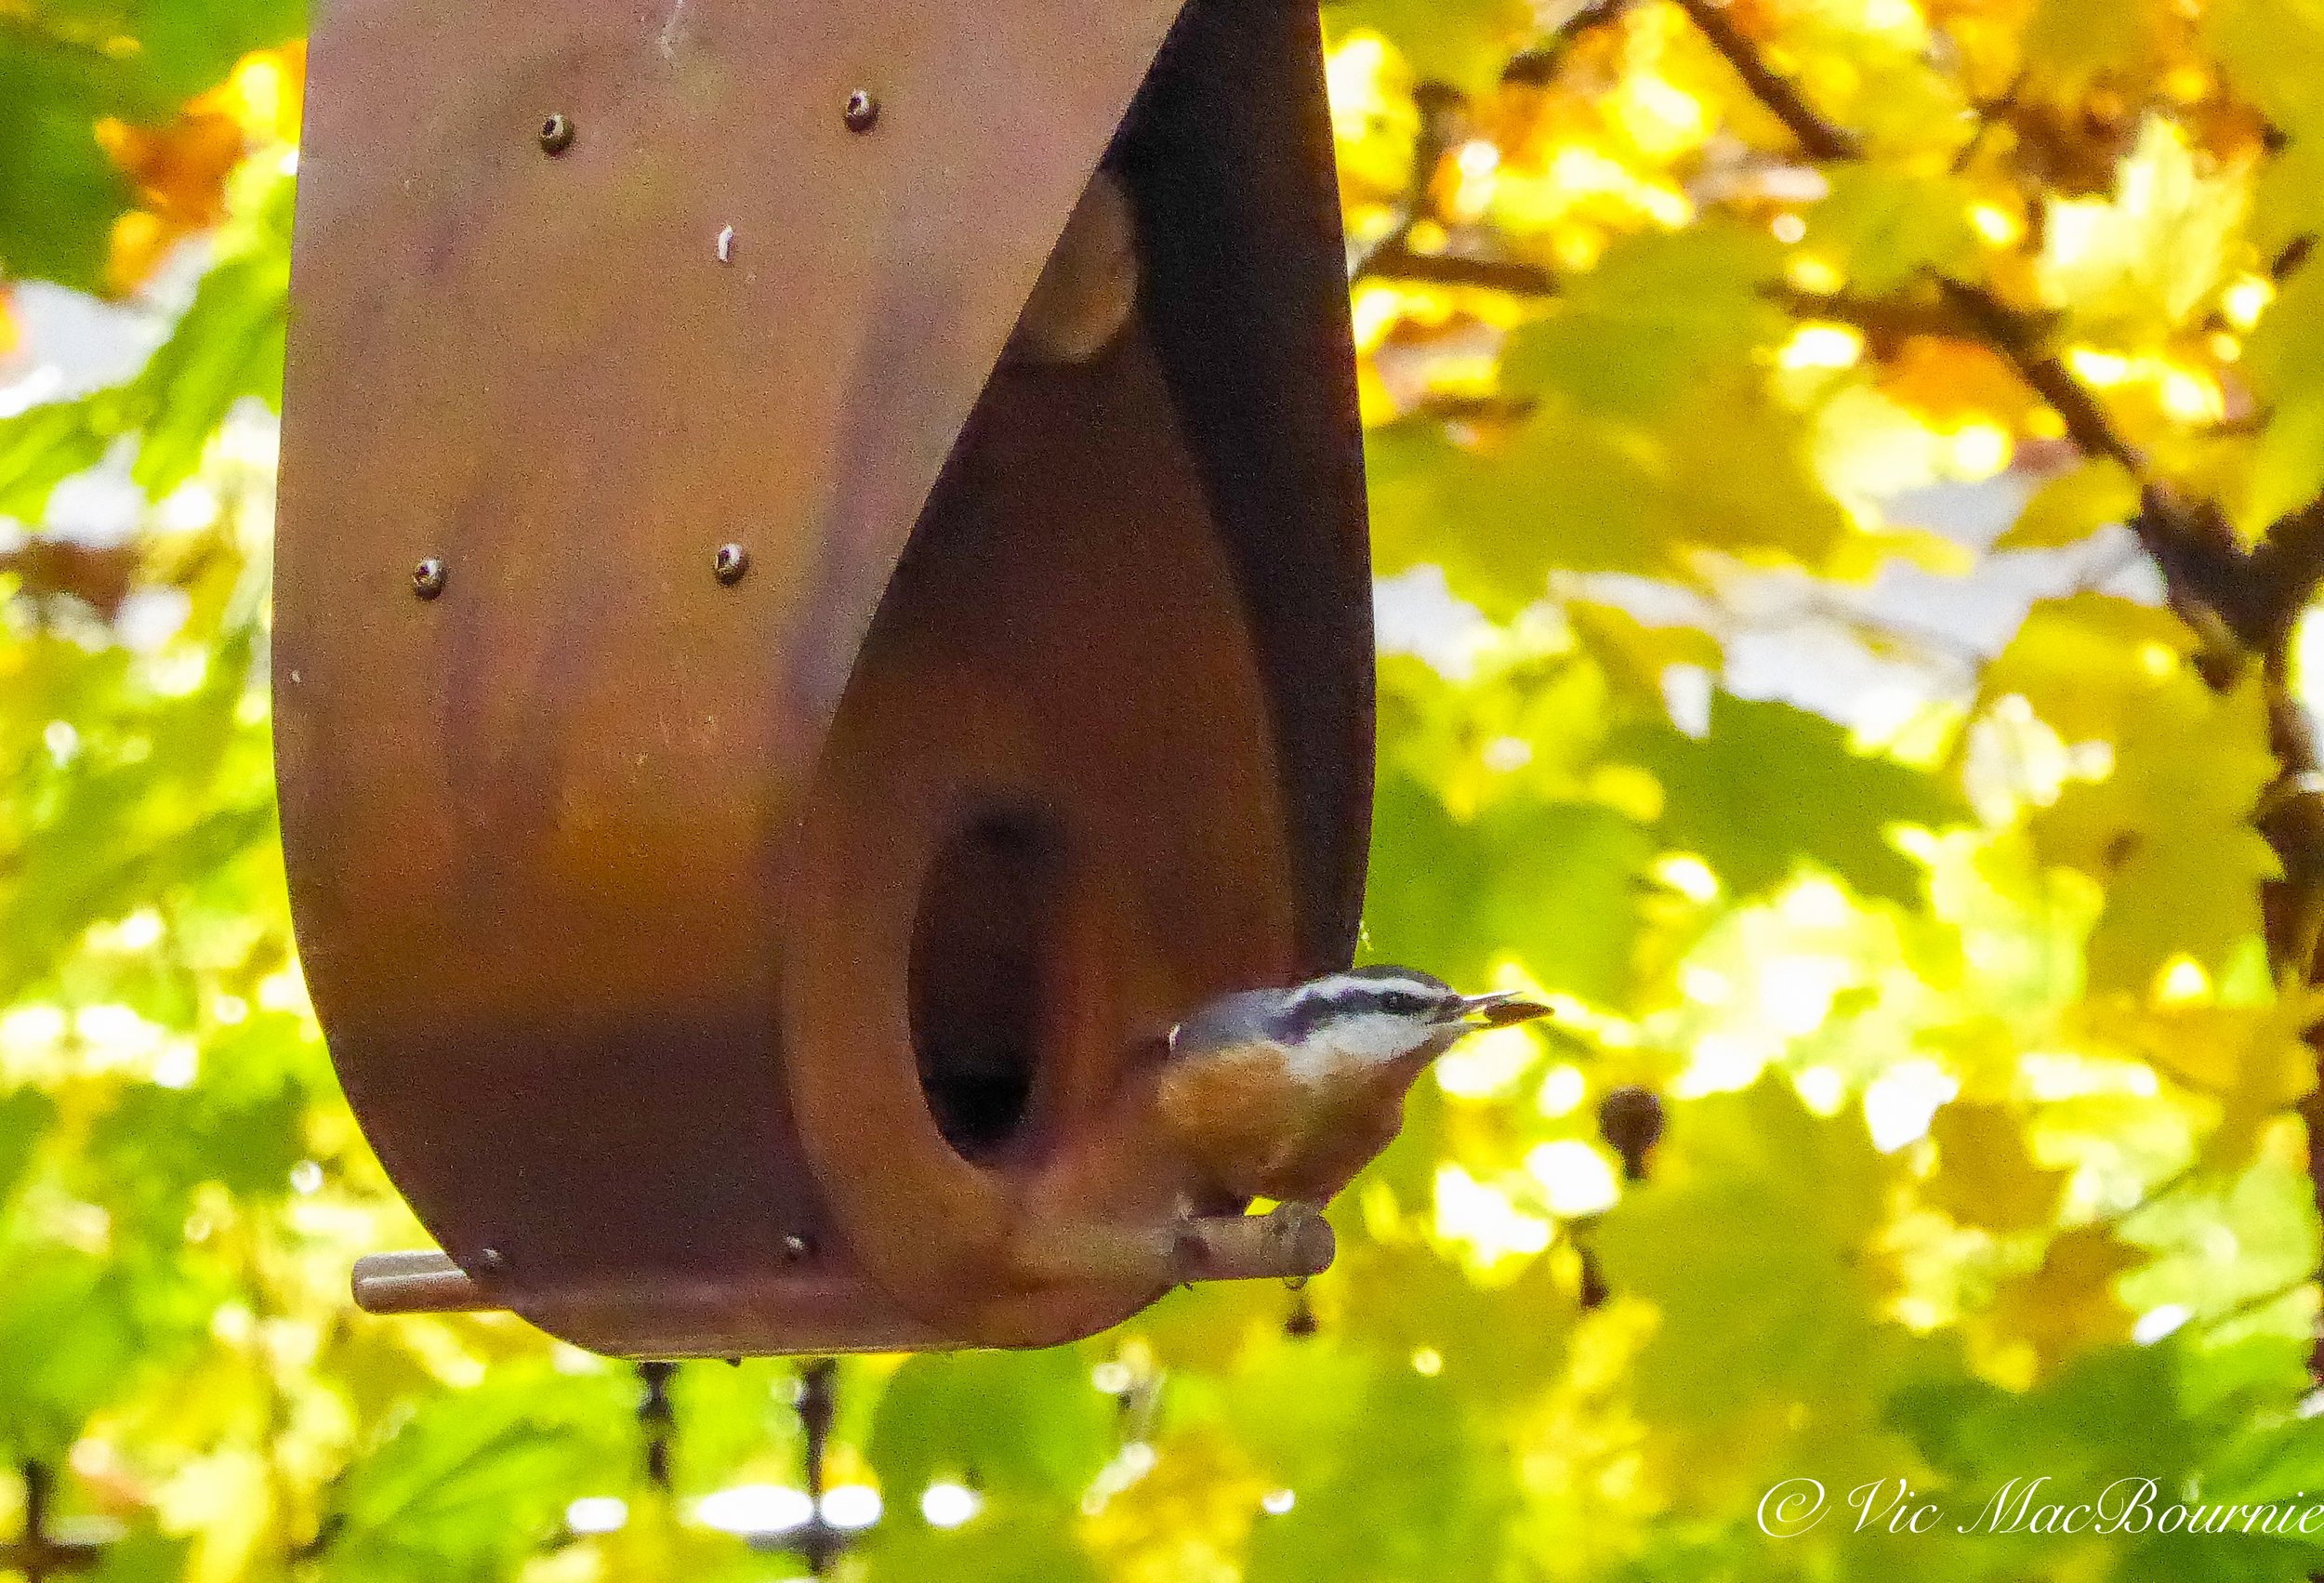


Besides the high quality Leica lens in the Panasonic cameras, I particularly like the ability to easily be in control of the camera settings. The Lumix DMC-ZS50, for example, includes a control ring around the lens that reminds me of my older manual focus cameras.
The Control Ring provides smoother manual control of the exposure, zoom and focus: leaving the photographer free to concentrate on shutter operation with their other hand.
The camera maker describes it this way: “Its intuitive design, precise focusing; plus smooth and silent operation, gives you total control over every picture and video taken.”
Speaking of video, these travel cameras’ abilities to shoot high-quality video just keeps getting better with the introduction of each new model.
Many models even allow you to easily shoot time-lapse sequences.
Why would I want that, you ask? Imagine setting up your camera on a tripod in front of your favourite flower and watching it open up over the course of the day, but seeing it all happen in 20 seconds on your computer screen or television. Or, set up the time lapse feature on a monarch butterfly about to emerge from its pupae and experience its transformation before your eyes.
Maybe you just want to set up the camera to document a day in the garden and how the sunlight changes over the course of the day. The time-lapse feature will get the job done.

Japanese Maple leaves in fall colours cover ornamental grasses and wildflowers.
Today’s Travel Cameras
Modern travel cameras come equipped with an even larger array of features, larger sensors that produce even higher quality images and videos. You can expect to pay anywhere from about $500.00 to more than $1,000.
The highly rated Sony ZV-E10 is priced at more than $1,000 Canadian, while Panasonic’s Lumix G100 sells for close to $700. Nikon’s Z fc will set you back almost $1300 U.S. or close to $1,400 Cdn.
Many have adopted features such as touch control focus on the back screens similar to a smartphone or tablet.
This article is not a review of the latest cameras. For a full comparison of modern travel cameras, check out this link from Digital Camera World for the latest in portable travel cameras for 2021.
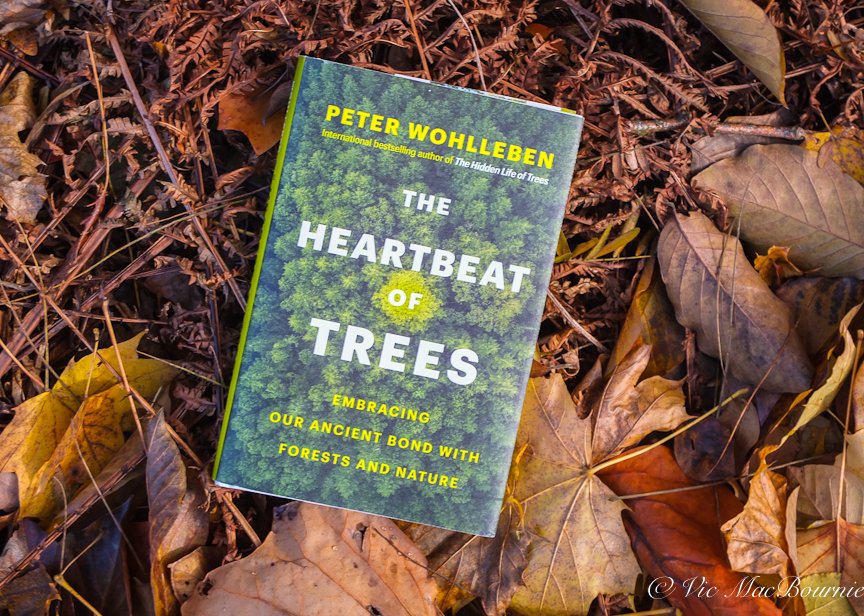
Feeling the Heartbeat of (woodland) Trees
The importance of a single tree outside your door, to the increasing threat to our ancient forests and woodlands is explored in Peter Wohlleben’s newest book The Heartbeat of Trees, Embracing our Ancient Bond with Forests and Nature. The followup to his award-winning book The Hidden Life of Trees is a must read for woodland gardeners and anyone who cares about the environment and the future.
Can a tree improve our health?
Can a single tree in your backyard or even a city-owned tree in the front yard make a difference in your life, in your health, in the health of your family?
Most of us tree lovers would say, ‘yes’. But do we really know, or are we simply using our belief systems to justify our desire for more trees?
Sleep easy my friends, there is evidence that a single tree in your front yard, even if it is a lonely “city tree” can make a difference – a big difference.
In his book, The Heartbeat of Trees, Embracing our Ancient Bond with Forests and Nature, author Peter Wohlleben cites a large-scale study conducted in Toronto, Canada by scientists at the University of Chicago that showed a single tree planted by a front door improves health and well-being.
Scientists apparently gathered data from about 30,000 Toronto residents – and from about 530,000 trees the city had already mapped.
The results are certainly eye opening.

The Heartbeat of Trees follows up on the success of The Hidden Life of Trees.
The study found that “ten more trees in a residential neighbourhood improved the health of the residents as much as an increase of $10,000 in income a year ( including the improved medical care that comes with such an increase.)”
Wohlleben adds that this is not just about mental health.
If you are interested in this book or other gardening books be sure to check out the impressive selection at Alibris (link).
“The liklihood of heart and circulatory diseases, the leading cause of death in North America these days, dropped measurably. Eleven more trees in the neighbourhood was an improvement in cardio-metabolic health equivalent to an additional $20,000 a year or, measured another way, it reduced a person’s biological age by 1.4 years.”
This is just one of the gems found in this New York Times best-selling author’s follow-up to The Hidden Life of Trees, a book that not only revealed to the world the incredible importance of trees in our climate-threatened world, but was also made into a critically acclaimed movie by the same name. Go here, to check out my earlier article on this ground-breaking book.
(Dr. Nadina Galle has taken her inpspiration from The Hidden Life of Trees and The Heartbeat of Trees and used it as a building block in her groundbreaking work to use smart technology to monitor the health of the urban forest. Read about her outstanding work here in my recent article The Internet of Nature.)
Pocket Forests are an intriguing approach to creating miniature forests. Check out my post on creating a mini-forest.
A forest prospers as a family group
The author is quick to point out, however, that although a single tree is a great thing, a forest is much better.
The Hidden Life of Trees was clear about the benefits of forests over singular trees planted on a front yard surrounded by non-native grass and facing the world – the beating sun, the cold winds, freezing temperatures – on their own. He compares the “street trees” that are found in most urban environments, to “street kids.” These lone trees face difficult and almost always shortened lives compared to trees that share resources as a family group in a proper forest or woodland.
The new book places more of the human element into the equation.
Wohlleben is convinced that ancient ties linking humans to the forest remain alive and intact. The test so many of us face is whether we are able, in an era of cell phone addiction and ever-expanding cities, to allow ourselves to rediscover nature, to reconnect with the forest and feel its heartbeat once again.
Whether we feel this connection or not, he points out with scientific evidence how our blood pressure stabilizes near trees and how the colour green calms us, while, the forest, especially at night sharpens our senses.
The 264-page book published this past June by Greystone Books is the perfect follow up to The Hidden Life of Trees, a book that introduced the world to a form of communication between a family of trees in the forest and their connection to the “Mother Tree.”
His new work takes another step into the forest and introduces readers to a host of revelations about our relationship with trees, forests and especially those who are left to care for the earth’s remaining trees.
“The Heartbeat of Trees reveals the profound interactions humans can have with nature, exploring the language of the forest, the consciousness of plants, and the eroding boundary between flora and fauna,” the book’s promotional material states. "The author “shares how to see, feel, smell, hear, and even taste your journey into the woods.”
“Above all, he reveals a wondrous cosmos where humans are a part of nature, and where conservation is not just about saving trees – it’s about saving ourselves, too.”
Forest bathing: Is it a new trend?
Nowhere is this more evident than his chapter on “Forest bathing.”
I doubt this is a new term to readers, but if it is, the act of forest bathing involves submersing yourself into the quiet, soothing sounds, smells and spirit of a natural forest.
Today, in Japan, a doctor can write a prescription for their patient that includes a “walk in the woods – a sick note, as it were, that gives you permission to spend time in the forest.”
This trend in natural medicine is making its way to Western medicine in the form of forest bathing.
For my comprehensive post on Forest Bathing, please go here.
Wohlleben points out that “with the longing for natural spaces forest bathing has spilled out of Asia, Called shinrin-yoku in Japanese, the whole thing sounds like ancient wisdom. However, it isn’t at all. Quite the opposite is true, in fact. Japanese forest agencies came up with the idea and the name in 1982 as a way to make people more aware of the health benefits of the country’s forests.
According to Dr. Qing Li of the Nippon Medical School in Tokyo, Japan, Forest Bathing is simple. In is 300-page book published on the subject, he explains how it works.
Turns out it is very simple. “Choose a forest you like (it could even be in a city park) and you go there to relax,” Wohlleben explains.
“Then you gather all your senses and dive into all the smells, sounds and sensations. According to Li, all you need to do is accept the forest’s invitation to slow down. Mother Nature takes care of the rest.”
Although he admits some skepticism over the whole “forest bathing” phenomena, he tells the story of a family walk in the forest. After some time resting and talking after a long walk in the wood he maanges, the author remembers how he and his family slowly began to relax as they enjoyed their company and the sights sounds and smells of the forest to the point where they were more relaxed than they ever could be at home.
It’s a relaxed state only the forest can help us achieve and one that takes us back to our ancient roots.
The Heartbeat of Trees is, by no means, all about natural remedies and how we can discover ourselves in the depths of ancient forests.
Ancient forests are under threat
In the final chapters Wohlleben warns readers about the threats our natural forest face and the efforts by small groups to save these critical remaining old-growth (or at least important) forests.
Unfortunately, these challenges are world wide.
He talks about his experience hiking up to a tiny ancient spruce tree names “Tjikko” that has lived for 9,550 years in a national park in Sweden. He talks about his fears for its future amid tourists trying to capture selfies with the highly threatened piece of natural history that for so many is nothing but an opportunity to stumble around it and its ancient roots for nothing more than a quick selfie for social media.
He tells the story of the Kwiakah First Nation in British Columbia, Canada that is fighting to save its forest in The Great Bear Rainforest from the timber industry. Clear cutting is threatening their traditional hunting and fishing grounds, not to mention the unique ecosystem that Mother Nature has created.
Of course, Canada is not alone. He tells of similar stories in Germany, throughout Europe where old-growth forests are non-existant and on the border of Poland and Belarus where an important forest (the Bialowieza) of oaks, lindens, hornbeams, maples and spruce is being threatened.
Wohlleben’s conclusion leaves plenty of room for optimism for our future and the future of our children.
He concludes: “… people have sown the seeds of hope across generations so that now a complete change in direction is being ushered in. A change that is taking place in not in our minds but in our hearts.”
Words well spoken, but I prefer to leave the last word with Richard Louv, author of “Our Wild Calling and The Last Child in the Woods. (See my earlier article on why children need more nature in their lives)
“As human beings, we’re desperate to feel that we’re not alone in the universe. And yet we are surrounded by an ongoing conversation that we can sense if, as Peter Wohlleben so movingly prescribes, we listen to the heartbeat of all life.”
Set the table for great garden photography with backyard wildlife studio
A backyard bird and wildlife studio combining food and water can be a magnet to attract a variety of birds and backyard wildlife and put them in a picturesque setting. Getting great photographs is easy, especially if you add a Tragopan Photographic blind to allow a close approach.
Create your own DIY backyard bird studio
How do you get great garden photography of backyard birds and other wildlife?
Capturing great images of birds and other wildlife begins with welcoming them into your yard by planting a natural landscape using native plants, shrubs and trees whenever possible.
Nothing, however, beats your own backyard wildlife photo studio designed to not only attract your favourite birds and wildlife species, but to put them into an environment conducive to great photography. Simple answer, provide a backyard dinner table where lunch is always being served. And, don’t forget to give your feathered friends and wildlife something to drink to go along with dinner. This need for birds and wildlife to obtain food and drink resulted in my latest backyard project – a combined food table and reflection pond.
My latest project combines a dinner table on one side with a small reflection pond on the other side to bring in the greatest variety of birds and wildlife. This combination makes action at the backyard photo studio hectic with activity at times, especially when you have fiesty red squirrels claiming the entire dinner table to themselves.
The combination allows me to photograph a woodpecker working a tree stump one minute, while a chipmunk gets a drink of water in a reflection pool less than a foot away.
What more can a backyard wildlife photographer ask for in life?

A blue jay visits the photo studio. Shot with a 300mm F4.5
Simple steps to building a compact, portable studio
Neither the wildlife table, nor the reflection pond take up much room. Both are designed to be portable and easily broken down.
The feeding table is nothing more than an old, black Ikea end table that was headed to the thrift store. The reflection pond (see my earlier story on how to build it a DIY reflection pond) is made from a simple rubber boot tray placed on an outdoor end table. Both, of course, are embellished with natural materials.

A red squirrel stops for a drink at the reflection pond.
Even with the two tables set up side-by-side, the whole studio takes up no more than 3-ft by 4-ft and is hidden away in the back of the yard near my bird feeding pole.
By placing the studio near the traditional bird feeding station (See my earlier story here), the wildlife is already familiar and comfortable feeding in the area.
(If you are interested in exploring garden photography at a higher level, be sure to check out my comprehensive post on the Best camera and lens for Garden Photography.)
If I could have only one lens for wildlife and birds in the garden, it would be my F* 300mm F4.5. Check out my full story on the lens by clicking the link.
I situated the wildlife studio so that it receives side lighting during the morning followed by front lighting into the afternoon and evening. I’m lucky to have a large, light grey shed (see my earlier story on the Keter Artisan shed) just a few feet from the studio that acts like a huge light reflector, especially in the morning light. The reflected light from the shed helps to soften the overall light that falls on the backyard studio.
Behind the studio, a small hill provides a natural backdrop of wildflowers and fall colours, but because the tables are only about 18 inches high, adding different background plants in pots is simple. In the past, I have used Northern Sea Oats from another area of the garden as a natural backdrop.
By experimenting with different natural elements either on the table tops or as a backdrop, the photographic combinations and possibilities are endless.

A combination of a feeding station on the left made out of an old Ikea end table is combined with a reflection pond made from a rubber boot tray on the right adds a lot of fun to backyard bird and wildlife photography. The natural materials were all found around the yard and can be replaced regularly to create different photographic possibilities.
Building a backyard studio
Building a backyard wildlife studio can be as simple as putting up a couple of bird feeders near a branch where the birds land on their way to the bird feeders, or as elaborate as designing the tabletop of natural props that allow you to photograph a variety of wildlife in different settings.
A moss-covered tree stump is perfect for hiding a handful of seeds. Add a mossy rock or two and provide a natural perch just above the tabletop to give birds a place to survey the dinner table before dropping down to feed. The natural elements can change regularly to keep the photography exciting and to ensure that not all the images have the same look.
if you are looking to upgrade your photography equipment, be it a new camera or lens, consider checking out KEH Camera Exchange. They offer a huge variety of used lenses and cameras to choose from and, you can trade in your old equipment to further reduce the already great prices.
Add seasonal elements as you find them. Acorns, pinecones, pine needles and colourful fall leaves are just a start. Cut some branches from your best berry-producing shrubs to add colour and a natural food source. I use a clamp that can be hidden to hold the branches in place. It helps to put the stems in a vase or water source to keep them from wilting too quickly.
The reflection pond uses many of the same natural elements and by using a black boot tray, the pond is literally made for you. An inch of water is all that is necessary to create the reflection, but the angle you photograph at plays an important part on how well the reflection works. The camera angle needs to be just above the level of the pond to get the best reflection.
I am experimenting with a small mirror under the water to give maximum reflective properties.
One of our resident red squirrels enjoys seeds set out in the crevices of the old logs that make up the feeding station half of the photo studio.
Tragopan photo blind brings it all together
Adding a Tragopan V6 photographic blind is really the final ingredient to successful bird and wildlife images. It allows a very close approach to both birds and wildlife in the garden, where wildlife is already familiar with human activity.
The photo blind is set up about 10 feet from the photo studio. This close approach lets me use a 300mm lens (420mm equivalent for cropped sensor) for a frame-filling image of birds and small wildlife. A simple 70-200mm lens works nicely as well.
The blind not only provides a certain comfort level for the birds and animals, it also keeps the photographer out of the elements – be it hot sun in summer, or the rain, snow and chilling winds of fall and winter.
By using a photographic blind, the need for expensive photographic lenses to get backyard images is reduced significantly. A consumer brand 70-200mm lens on a DSLR will get you high quality images. Even high quality travel camera (Lumix DSC50) or bridge camera (Pentax K5) which I am using will give you memorable images or video.
No photo blind, no problem
If you don’t have a photo blind you can still get great images, but you are going to have to work a little harder fot them.
Place a chair and a tripod where you want to sit to take your photographs and make it a habit to go out and sit there even if you are not taking pictures. The birds and wildlife will eventually get used to you being around and accept your presence. Even if they accept your presence, you need to move slowly at all times. That’s not always easy when a new bird lands just a few feet in front of you on your favourite perch.
What birds allow a close approach
There is no question that some birds allow a more close approach than others.
These are the birds you can often, with a little patience, encourage to eat right out of your hand.
These are also the birds that you are most likely photograph without the need of a photo blind.
I find chickadees, woodpeckers, nuthatches, blue jays and even Juncos to be quite approachable and accepting of photographers.
Cardinals are more elusive as are other backyard birds like Indigo buntings and, of course, raptors.
To capture images of these birds, a blind is more critical. Even with a blind, these birds can be skittish and fly off with even the slightest motion inside the blind.
In conclusion
A dedicated backyard bird and wildlife photo studio with a photographic blind may not be everyone’s cup of tea, but I guarantee that if you take a few moments to create this feeding station/reflection pond setup, you will be blessed with memorable images in no time.
It’s a great way to spend some time in the garden and put your camera to use on a weekend afternoon.
A word of caution. Don’t leave food on the table over night. Because it is low to the ground and there are no baffles or other deterrents to keep animals from feeding, it could be a magnet for unwanted visitors. I try to only put out enough food for the day. A handful or two of strategically placed food will go a long way and you can always replace it easily if the action at the studio is particularly busy.
My studio is set up right beside the shed and allows me to quickly refill the dinner table as necessary.
Happy shooting and please let me know if you build your own backyard studio. I would love to see some pictures.


Three of the best grasses for fall and winter interest
Three of the best ornamental grasses for fall and winter interest in the woodland garden include Miscanthus Sinensis, Northern Sea Oats, and Pennisetum alopecuroides or Fountain Grass. All three have excellent fall seed heads which remain on the plants throughout the winter. This article explores different ways the plants can be used either as a privacy screen in the landscape, or in containers and window boxes.
Ornamental grasses are often overlooked in the heat of the summer, but as fall approaches grasses emerge as the centrepiece of many gardens.
Ornamental grasses provide movement in the slightest wind, they’re drought tolerant and provide needed texture and height in the garden throughout summer and winter. They’re easy to grow, even easier to maintain, provide habitat for insects (bird food), and add an elegance to gardens that is difficult to obtain through traditional plantings.
In fall, their seed heads rise above the tallest of plants and often become the stars of our garden.
What’s not to love?
If you’re fussy, there’s an ornamental grass made just for you.
Be sure to check out my post on three of the best grasses for a shade or woodland garden. You might also like to read my post on Why we should leave ornamental grasses standing all winter.
Ranging in size from the massive Pampas grasses to the small and compact Caraxes; from colourful varieties like Japanese Blood grass to shades of variegated green best most evident in the popular forms of porcupine grass. There are also popular annual grasses, like the purple fountain grass, to add to the array of impressive perennial grasses.
Grasses are so adept, that they work in almost any garden style from shady woodland gardens, to sunny meadow gardens.

Miscanthus Sinensis Gracillimus or Chinese Silver Grass stands out beautifully in the fall garden with its silvery plumes. In the rear, a drift of Chasmanthium Latifolium or (Northern Sea Oats), complete with its interesting seed heads, spreads around the birch clump.
Best ornamental grasses for fall and winter
But let’s take a close look at three of the best ornamental grasses for fall.
My favourite ornamental grasses for fall and winter in my garden are Miscanthus Sinensis Gracillimus or Chinese Silver Grass, Pennisetum or fountain grass including Karley Rose, and Chasmanthium Latifolium (Northern Sea Oats).
All three are strong performers in the fall and even better in the winter when a dusting of snow creates a lovely vignette in the landscape.

This garden vignette on the edge of the Japanese garden benefits from three large Miscanthus plantings that help create a sense of privacy.
Chinese Silver Grass is perfect for privacy
Miscanthus Sinensis is an outstading ornamental grass that comes into its own in late summer when the purplish flower plumes rise up above the strapping green foliage and grows to heights of 5-6 ft, tall (150-180 cm) and in well-behaved clumps of 3-4 ft. wide (90-120 cm).
Give them plenty of sun in good to average well-drained soil and this stalwart of the late summer garden will perform admirably for years with nothing but an annual clipping.
Miscanthus is perfect as a natural privacy screen
Not only does this plant look great through summer and fall, it can be used to create an elegant natural privacy hedge. Plant it in groupings of three or five in strategic spots around your patio or fround-level deck to create a graceful, soft screen that does the same job as a static wood or metal panel, but has the added benefit of adding movement with a gentle breeze.
I use it in three places in our garden. Three large plants grow on the edge of our Japanese-inspired garden creating a lovely backdrop (see photograph above) for one of our large boulders and weeping Japanese Maple. But it’s real purpose is to act as a living privacy screen that looks as good from my neighbour’s side as our side where it creates a lovely garden vignette.
I have two other large clumps on the edges of our dry river bed to help create a natural look, and another close to the house to help hide a downspout.

Miscanthus covered in fresh snow cover.
Miscanthus as a plant for winter interest
As fall and winter approaches, the purplish flower plumes so prominent in the summer landscape take on a creamy wheat colour followed by a silvery luminance that creates a dramatic presence when backlit.
These plumes rise high above the narrow, green leaves with white midribs and last well into winter.
The leaves of the grasses slowly take on a wheat-coloured look of their own for the winter.
An added bonus is that the plant is both pest and disease free and for woodland/wildlife gardeners deer and rabbit resistant. Birds are attracted to the spent grasses in winter where plenty of insects use it to overwinter. Smaller birds will also use the strong plume stems as perches in winter, especially in more open areas devoid of natural perches. They also provide excellent photographic opportunities when they are perched on the stems.
The plant is native to Asia and can be invasive in parts of the United States and other warmer climates, so check before you plant this potentially invasive grass.
Alternatives to Miscanthus Sinensis Gracillimus in areas where it is considered invasive include natives: Andropogon gerardii (Big Bluestem), Chasmanthium Latifolium (Northern Sea Oats), Panicum virgatum (Switch Grass), or Elymus hystrix (Bottlebrush Grass).
The foliage can be cut back in early spring (4-6 inches up from the base) before the new shoots begin to show themselves. Don’t worry if you leave it a little late, just cut the spent stems a little higher so you don’t cut off the tips of the new growth. It won’t be long before new growth covers last year’s dried stems.
I use a hedge trimmer with great success to cut down my ornamental grasses. A cordless model like this from Gardener’s Supply Company is is an excellent choice and will make the task much easier.
The spent stems can get quite thick and difficult to cut in the spring.
(Be sure to read my story on best way to cut back ornamental grass.)

One of our fountain grasses in full fall bloom (November) in morning sun.
Fountain grass: A compact ornamental grass
Pennisetum alopecuroides or Fountain grass has long been a favourite in the garden. These elegant grasses form the perfect, compact, mound making them a standout in both our front and back gardens.
The easy-care and natural look of Fountain grass (their are several hybrids including a dwarf variety which I use in our garden) makes it a must for any garden looking to add summer, fall and winter interest.
Like the name suggests, the growth habit creates a fountain-like appearance in late summer and fall when the pinkish seed heads emerge surrounding the entire densely clumped mound of fine grasses. Over time, the pinkish plumes turn a creamy tan colour where they remain into late winter providing delicate foliage displays well into the winter months.
The densely clumped growth provide ideal habitat for overwintering insects. Besides the insects and larvae that overwinter in the thick grass, I have seen goldfinches feeding on the seeds of the plumes late into winter when the grasses were the only vegetation still poking their heads out of the deep snow.
This perennial is easy to grow and maintain. Mine have self seeded in the garden, and I have also divided it in the spring after the plants’ centre died out.
Centre-die-out is common with many grasses after several years of growth. You will notice a circle of dead foliage forming in the centre of the plant. At this stage, simply dig out the clump of grass, divide it into several plants (usually 3 or four) compost the centre of dead grass and plant the three or four divisions. Within a short time, the divisions will recover and fit right in.
• If you are considering creating a meadow in your front or backyard, be sure to check out The Making of a Meadow post for a landscape designer’s take on making a meadow in her own front yard.

Fountain grass in full bloom with a smaller fountain grass to the left that doesn’t get the full sun and always struggle to bloom. Northern Sea Oats, with its coppery blooms, can be seen blooming in the top left corner.
Ideal container plants
These divisions are perfect to use in containers for a year or two where their compact growth makes them the perfect filler during the spring and summer months before graduating into thrillers during the fall. I have used it in our window boxes for a year, eventually transplanting it into a larger container for a couple of years before moving it back into the garden as a full-sized specimen.
There are several types of fountain grass you might want to explore including the popular annual – purple fountain grass – that can grow to 4 feet and put on quite the late-summer and show. Remember that it is an annual in all but the warmest growing zones and will have to be replanted in spring.
Another fountain grass to consider is the hybrid Karley Rose. Proven Winners has developed a beautiful specimen (PW Link here) that grows in zones 5-9 with upright clumps of graceful arching green foliage and impressive rose-purple plumes from early summer until frost. It grows up to 40 inches in height with a spread of between 24-36 inches.
In our garden, we have grown an earlier version of Karley Rose for about 10 years. While it performs admirably in both our front and back gardens, I find its growth habit is less compact than the less hybridized versions. Our dog, Holly, loves to role in it all summer keeping it untidy and not looking its best.

Northern Sea Oats takes centre stage in this window box planting. The grass has an almost bamboo look to it. Beside the Northern Sea Oats is a small clump of Little Blue Stem which also performed well in the window box before being moved to the back meadow garden.
Northern Sea Oats at home in the woodland garden
Chasmanthium Latifolium or (Northern Sea Oats) always reminds me of the seashore. I must have first seen the plant growing in the sand while I was at the beach. Now I get to relive that same experience almost daily in my own garden.
Northern Sea Oats is one of the most interesting of the fall grasses, with it’s hop-like seed heads that flutter in the breeze and turn a purple-bronze-brown in the fall. Leave the seed heads on for winter interest or cut them off to use in dried flower arrangements.
It’s a relatively low maintenance plant that likes full to part sun and grows down to zone 4a.
It works as an accent plant, in a mass planting, naturalized in a woodland garden or used as a border edging.
Northern Sea Oats will grow to about 4 feet with a spread of 30 inches. Its foliage, that stretches right to the ground, is elegant and grows in a loose clump.
Northern Sea Oats also work nicely in containers as a late-season thriller. In fact, I used them this year in our window box as the thriller and it worked well. (see photo above) The grasses are now in our back flower meadow spreading their seed heads around for next year.
Be careful with Sea Oats, the seed heads will sprout the following year where they fall. Last year, I cut some of the seed heads off to use as a backdrop for bird photography, and noticed that this year a number of new plants are growing up where the seed heads were left.
In conclusion
If you have not experimented with any ornamental grass yet, consider picking up the annual Purple Fountain Grass and use it in a garden location where you might want to plant some larger grasses. I’m almost certain you will be converted to the joy of ornamental grasses.
If you are trying to use only native grasses in the garden, you would do well to consider purchasing Little Bluestem or Big Bluestem as starting points. These clump-forming grasses are maintenance free, easy to grow and add a little blue to the garden scheme.
Another standout in the fall garden is Japanese Blood grass. It’s a stellar performer adding a pop or red to the late summer and fall garden. The green grass tips take on a pinkish red colour in late summer into fall adding a lovely pop of colour to the landscape. I use a little of it under a birch clump where it grows up through sedum and acts as the perfect backdrop to a school of Fish in the Garden. (You can see it in the attached video)

How to define shade in a woodland or shady garden
Trying to understand the different levels of shade in the woodland garden can be complicated. Here is a guide to learning the definition of full shade, part-shade and high-canopy shade compared to full-sun and part-sun situations.
Not all shade in the garden is created equal
A question often heard in gardening circles, especially woodland gardening, is what’s the difference between part sun and part shade? How do you define full shade, full sun?
Let’s face it, the distinctions between full shade, light shade and partial shade can get very confusing.
Even more confusing is trying to understand what will grow best in these conditions. A garden bed in the deep shade on the side of your home might be quite different than the same garden bed adjacent to a white clapboard home that reflects soft, beautiful light onto the garden bed throughout the day.
The garden bed in deep shade would be ideal for ferns and hostas, but the same bed enjoying the soft reflected light would enable the gardener to experiment with a much larger array of flowering plants and shrubs, at least until a new neighbour moves in and decides a hip black-sided home is much more chic.
Either way, paying attention to how the sun plays on the garden floor will go a long way to help guide you on what plants will do best in particular areas of the garden.

A cardinal sits among the beautiful blooms of our crabapple tree in late spring before the locust and other woodland trees have cast their shade over the garden.
What to plant in a full-sun area of the shade garden
In a woodland or shade garden, full sun is not something experienced very often, although there can be spots that are open to full day sun.
In the front of our property close to the street, we experience pretty much full sun for most of the day. We have a dry-river bed across the front that allows good drainage through what was once a deep drainage ditch that seemed to suck in cars turning in the cul-de-sac on a weekly basis.
Native Ornament grasses (including little bluestem), Blue Fescue, Black-eyed Susans and creeping phlox combines nicely in the hot, dry, very sunny site.
Other areas in the garden get varying amounts of sun but, let’s face it, the majority of time the garden is in a form of shade.
It’s important not to get too wrapped up in what plants to grow in the various locations throughout your garden. Obviously a sun-loving plant is not going to do well in deep shade, but it might perform well in partial or high shade.
Push the boundaries in part-sun, part-shady sites
A little experimenting will go a long way in helping to build your knowledge about plant growing conditions. Don’t be afraid to push the boundaries, testing various plants to see how they perform in different locations.
Shade-loving plants are adapted to lower levels of light and their foliage will often burn if they are planted in an area if the sun is too direct and falls on the plant too long. These plants not only suffer from too much sun, but what that sun may be doing to the soil around it.
Shady soils can be moist or dry but sunny soil is most often dry and needs a good quality mulch to keep it moist. It may also need supplemental watering during times of drought.
The same can be said for shady soil surrounded by heavy roots. By choosing plants that do well in dry shade, success will come much easier. Try fringed bleeding heart, bears breeches and American bellflower.
Finding the right growing conditions is key to success and the amount of shade plays a key role in finding this success.
Basic light level definitions will often point to the following chart as a simple example:
Full sun - 6 or more hours of direct sun per day
Part sun - 4 to 6 hours of direct sun per day, including some afternoon sun
Part shade - 4 to 6 hours of direct sun per day, mostly before midday
Full shade - less than 4 hours of direct sun per day
When it comes to shade, however, a more detailed explanation will help woodland gardeners better understand their unique situations.
If you are looking for garden gift ideas, Amazon has put together a a great package of ideas to help you out this holiday season. Click on the Gardening 101 link below.
Guide to shade levels in a woodland garden
• Full shade is deep, all-day shade often found beneath the canopies of large maples and oak trees or if you are planting in a conifer forest. In an urban environment, this is the type of deep shade found beneath skyscraper canyons with buildings that absorb light rather than reflect it.
• Light shade is a form of dappled shade that is probably the most common in most woodland gardens. It is often the shadows that fall on the woodland floor beneath fine-leaved trees such as the ferny leaves of locust trees or birch trees. In our garden we are blessed with mature Locust trees that provide a perfect soft light throughout the day. In this light, rays of sunlight are able to filter through the fine leaves creating shifting patterns of soft light and shadow throughout the day. This light is ideal for growing most woodland plants from hostas, to dogwoods.
•Partial shade can be described similarly to light shade (above). But it can also be described as having sun for part of the day and shade for the remainder of the day. Whether this sun is at its strongest in the morning, or in the heat of the afternoon will dictate the best growing conditions for particular plants, shrubs and trees. Morning sun is ideal for most traditional woodland plants that benefit from the less intense heat and sunshine. Afternoon sun and extreme heat that it can bring is probably better for meadow plants and grasses that can survive the intensity. If would provide an ideal spot for Black-Eyed Susans, coneflowers, and native ornamental grasses.
• High shade is often the result of a woodland tree canopy that is either very mature, or one that has been heavily limbed up and raised over time to create an almost bare trunk stretching high up into the tree canopy. It can also result in a sparsely planted woodland where few trees remain to cast shade. Trees that grow in a woodland environment have fewer lower branches than those that grow in the open. The lack of low branches means that sunlight can find its way down to the understory plants at various times of the day accept at high noon. This provides favourable lighting conditions for most woodland plants, eliminating the hottest and most intense time of day.

The white trillium begins to take on a pinky shade as spring falls to summer and the tree canopy begins to shade out the spring ephemerals.
What can I grow in deep shade?
It’s important to remember that not all shade is created equal.
The shade cast by spruce and fir trees is quite different from the softer shade cast by our native white pine trees. Only the deepest shade loving wild flowers will do well under the deep and never-ending shade of a spruce grove.
The same deep shade may be found under the canopy of a mature Norway maple, but there are large times during the year where the ground layer under the maples are fully exposed to sun – namely spring and later fall through winter.
In springtime, when the warming suns rays filter through the branches of maples, oaks and other heavily leaved trees, many of our favourite spring ephemerals are free to bloom. Hepatica, Trilliums, Dog-Tooth violets, bloodroot, wild geranium, Columbines and spring beauties bloom for a few short weeks before becoming dormant until the following year. Check out my article on Three of my favourite spring wildflowers.
If you are planning a shade garden, the most important factor to consider is ensuring that the garden will be out of the intense sun during the heat of the summer and between 10 a.m. and 2 p.m.
In the past, a shady garden was not all that desirable. Gardeners, especially those new to the hobby, craved for a mass of vibrant colour associated with full sun. The dream of a cottage garden meandering through the white picket fence was just too much for many of us not to crave.
Are shade and woodland gardens becoming more popular?
Over time – either by choice or simply because our gardens matured in time and those small trees we planted 30 years ago grew into lovely mature specimens spreading their cooling shade onto our garden beds – we became woodland or shade gardeners to some degree.
Now, with climate change and everything we know about the benefits of staying out of the sun and heat, the woodland/wildlife garden has become the garden of choice for more and more environmental aware gardeners.
Embrace it. Find the joy in simple textures, the subtle shades of green and a little pop of colour provided sparingly throughout the woodland garden.
Add colourful annuals in containers in sunny spots
That’s not to say there is not room for colour. I like to find spots in the garden that get lots of sun and use containers with annuals to add a little colour to the woodland. The containers can even be easily moved around throughout the garden season to follow the changing sun patterns.
Partnering annuals with light conditions is a whole different article and one that has been covered by so many others over the years.
Proven Winners, however, have done an excellent article partnering its impressive list of plants with sunny growing conditions on its website. For a closer look on how to get the most out of your containers when it comes to sun and part-sun situations, check out the Proven Winners site here.

Native Moss and Moss-like ground covers for a Woodland, wildlife garden
Moss is quickly becoming a favourite ground cover for Woodland gardeners and those looking to create a Japanese-inspired garden. These top three ground covers are great alternatives to moss when native moss is not an option.
Three moss alternatives for a woodland garden
Maybe it’s just me, but is the gardening world finally embracing native moss as the ultimate ground cover?
The Japanese have worshipped moss for centuries.
Entire gardens centered around the perfect patch of moss, a single boulder and an ancient maple can be all one needs to create a stunning, tranquil and peaceful place.
More of us are looking for those qualities in our gardens, whether it’s a small Japanese-inspired garden or a more intimate area within a larger Woodland Wildlife garden.
The difficulty for most gardeners who love moss comes with growing and maintaining the perfect patch of moss.
The good news, however, is that we have alternatives to moss as a ground cover.
For my article on the importance of using native plants in the garden go here.
Here are three great alternatives if you are looking to create that tranquil, peaceful feeling in your woodland garden. Irish and Scottish moss are obvious choices but don’t overlook the beauty of creeping moss or the numerous Stonecrops available for hot sunny areas in your garden. These alternatives will never replace the true beauty of our native moss, but for many woodland gardeners they will provide the perfect alternative.

A Japanese painted fern creeps out over the flagstones in our front garden with ground covers Scottish moss, Japanese Spurge and Cornus Canadensis (top right).
Irish and Scottish moss as the perfect alternative ground cover
By far, the closest ground cover to real moss is either Irish or Scottish moss (Sagina subulata verna and aurea)(pictured above).
Both are perennials you can buy at most good garden centres, and both deserve prominent spots in our Woodland gardens.
The Irish moss is a more dark green whereas the Scottish moss is golden or chartreuse.
Both have delicate flowers that emerge in late spring, early summer in Zones 6-8.
They can take full sun to partial shade and some foot traffic.
I have used both types to fill the space between flagstone pavers in our front garden. But, because we are blessed with plenty of native moss growing on the property, the real moss is slowly taking over from these moss alternatives.
Once the natural mosses begin to grow in these areas, it’s probably a good time to move the Irish and Scottish moss to a more sunny area where they can spread their soft cushiony perfection elsewhere in the garden.
They are quite shallow rooted and easy to move by simply taking small clumps of it with a little soil and packing it in other areas of the garden.
It can also be used in containers to cover the soil. Put a little in a container and let it spread throughout the summer.
Looking for more information on ground covers? Please check out my other posts on ground covers I use in the woodland garden.
• Three great ground covers for the woodland garden.

Scottish moss growing between the flagstones in our front woodland garden.
Creeping Phlox is a glorious ground cover in all seasons
Creeping phlox is a real favourite in hot, sunny locations.
It really shines in early spring when the normally dark green prostrate plant bursts with lavender flowers.
It’s a real show-stopper in our front garden as it creeps among the grasses and onto the stones of the dry river bed and bumping up against large boulders on one side and blending in nicely with another mossy alternative Creeping thyme.
Creeping Phlox (Phlox subulate) spreads rapidly and, while it puts on quite the display in the spring, it takes a back seat for the remainder of the year forming a perfect dark green backdrop for our blue-green grasses that emerge through the ground cover in this hot sunny, dry area of our garden.

Creeping phlox among the rocks and grasses in our front garden.
This herbaceous perennial grows in zones 3 to 9 in a rich, well-drained soil and comes in pink, red, white, blue rose and lavender.
It’s a tidy plant that grows up to about 6 inches high with a spread of up to 2 feet for a single plant. It forms a thick mat and for Woodland gardeners it’s deer resistant. That alone should put it high on our list of plants.
Creeping phlox likes full sun but tolerates some shade. An added bonus is that it also attracts butterflies and provides an early food source for insects in the spring where it is one of the first to bloom.

This image shows the stonecrop beginning to bloom with its yellow flowers growing behind and around the container planting.
Best sedum/stonecrop plants as ground covers
Many of us are familiar with Sedum Autumn Joy. It’s a wonderful plant that provides year-round interest and is one of only a handful of plants recommended for the New American Garden. Just to make it clear, we are not talking about that popular type of Sedum here.
There are up to 500 individual species in the Sedum genus, often called stonecrops, some of which are native to zones 5-6 and beyond.
When it comes to ground covers in hot, dry areas, these ground cover Sedums are tough to beat. Of particular note is Mossy Stonecrop (Sedum acre), which is a non-native that has a lovely yellow flower in summer and grows well in hot, sunny locations.
I use them in an area of the garden that forms a pathway across the back of our home. It’s covered in pea gravel with a dry-river bed and blue square-cut flagstone.
The sedum ground covers spill over the edges of the garden into the pea gravel softening the edges with a moss-like texture that has the added benefit of lovely yellow flowers in the summer that the bees and butterflies flock to in large numbers.
The sedum mats are easy to control and thrive in the hot, dry soil. There is just too much to say about sedum as a ground cover in this blog. I encourage you to talk to your local garden nursery experts for advice.
For more information, check out Ontario Wildflowers.
This page may contain affiliate links. If you purchase a product through one of them, I will receive a commission (at no additional cost to you) I try to only endorse products I have either used, have complete confidence in, or have experience with the manufacturer. Thank you for your support.