

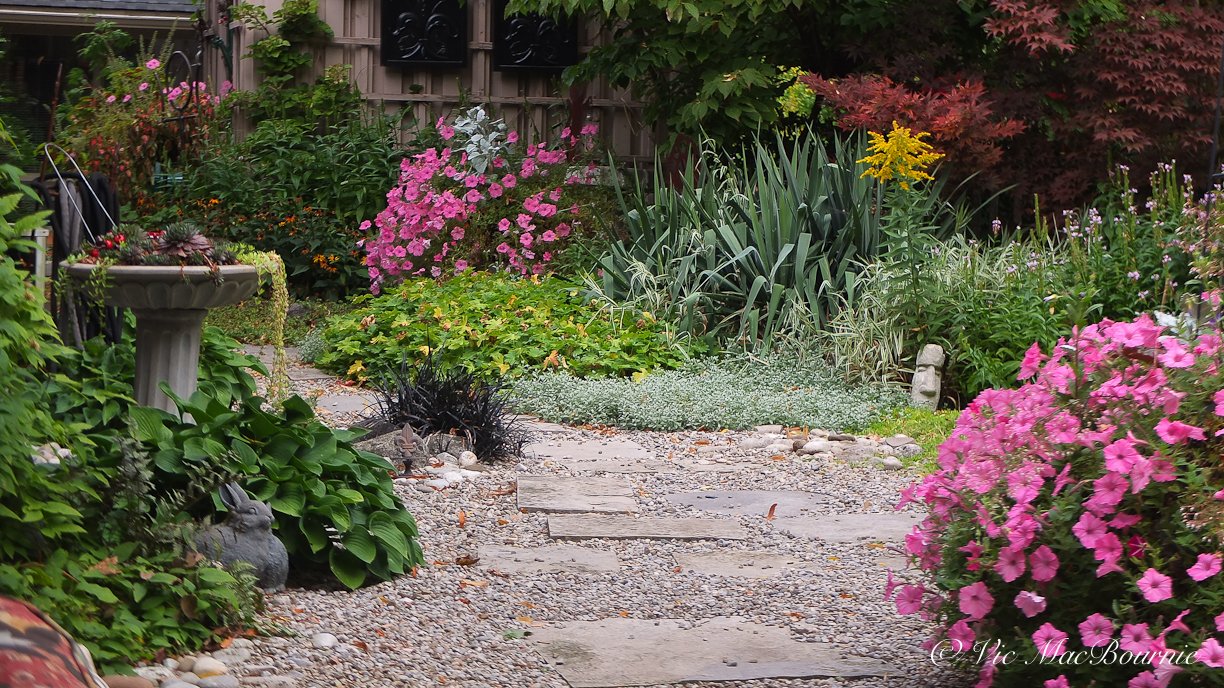
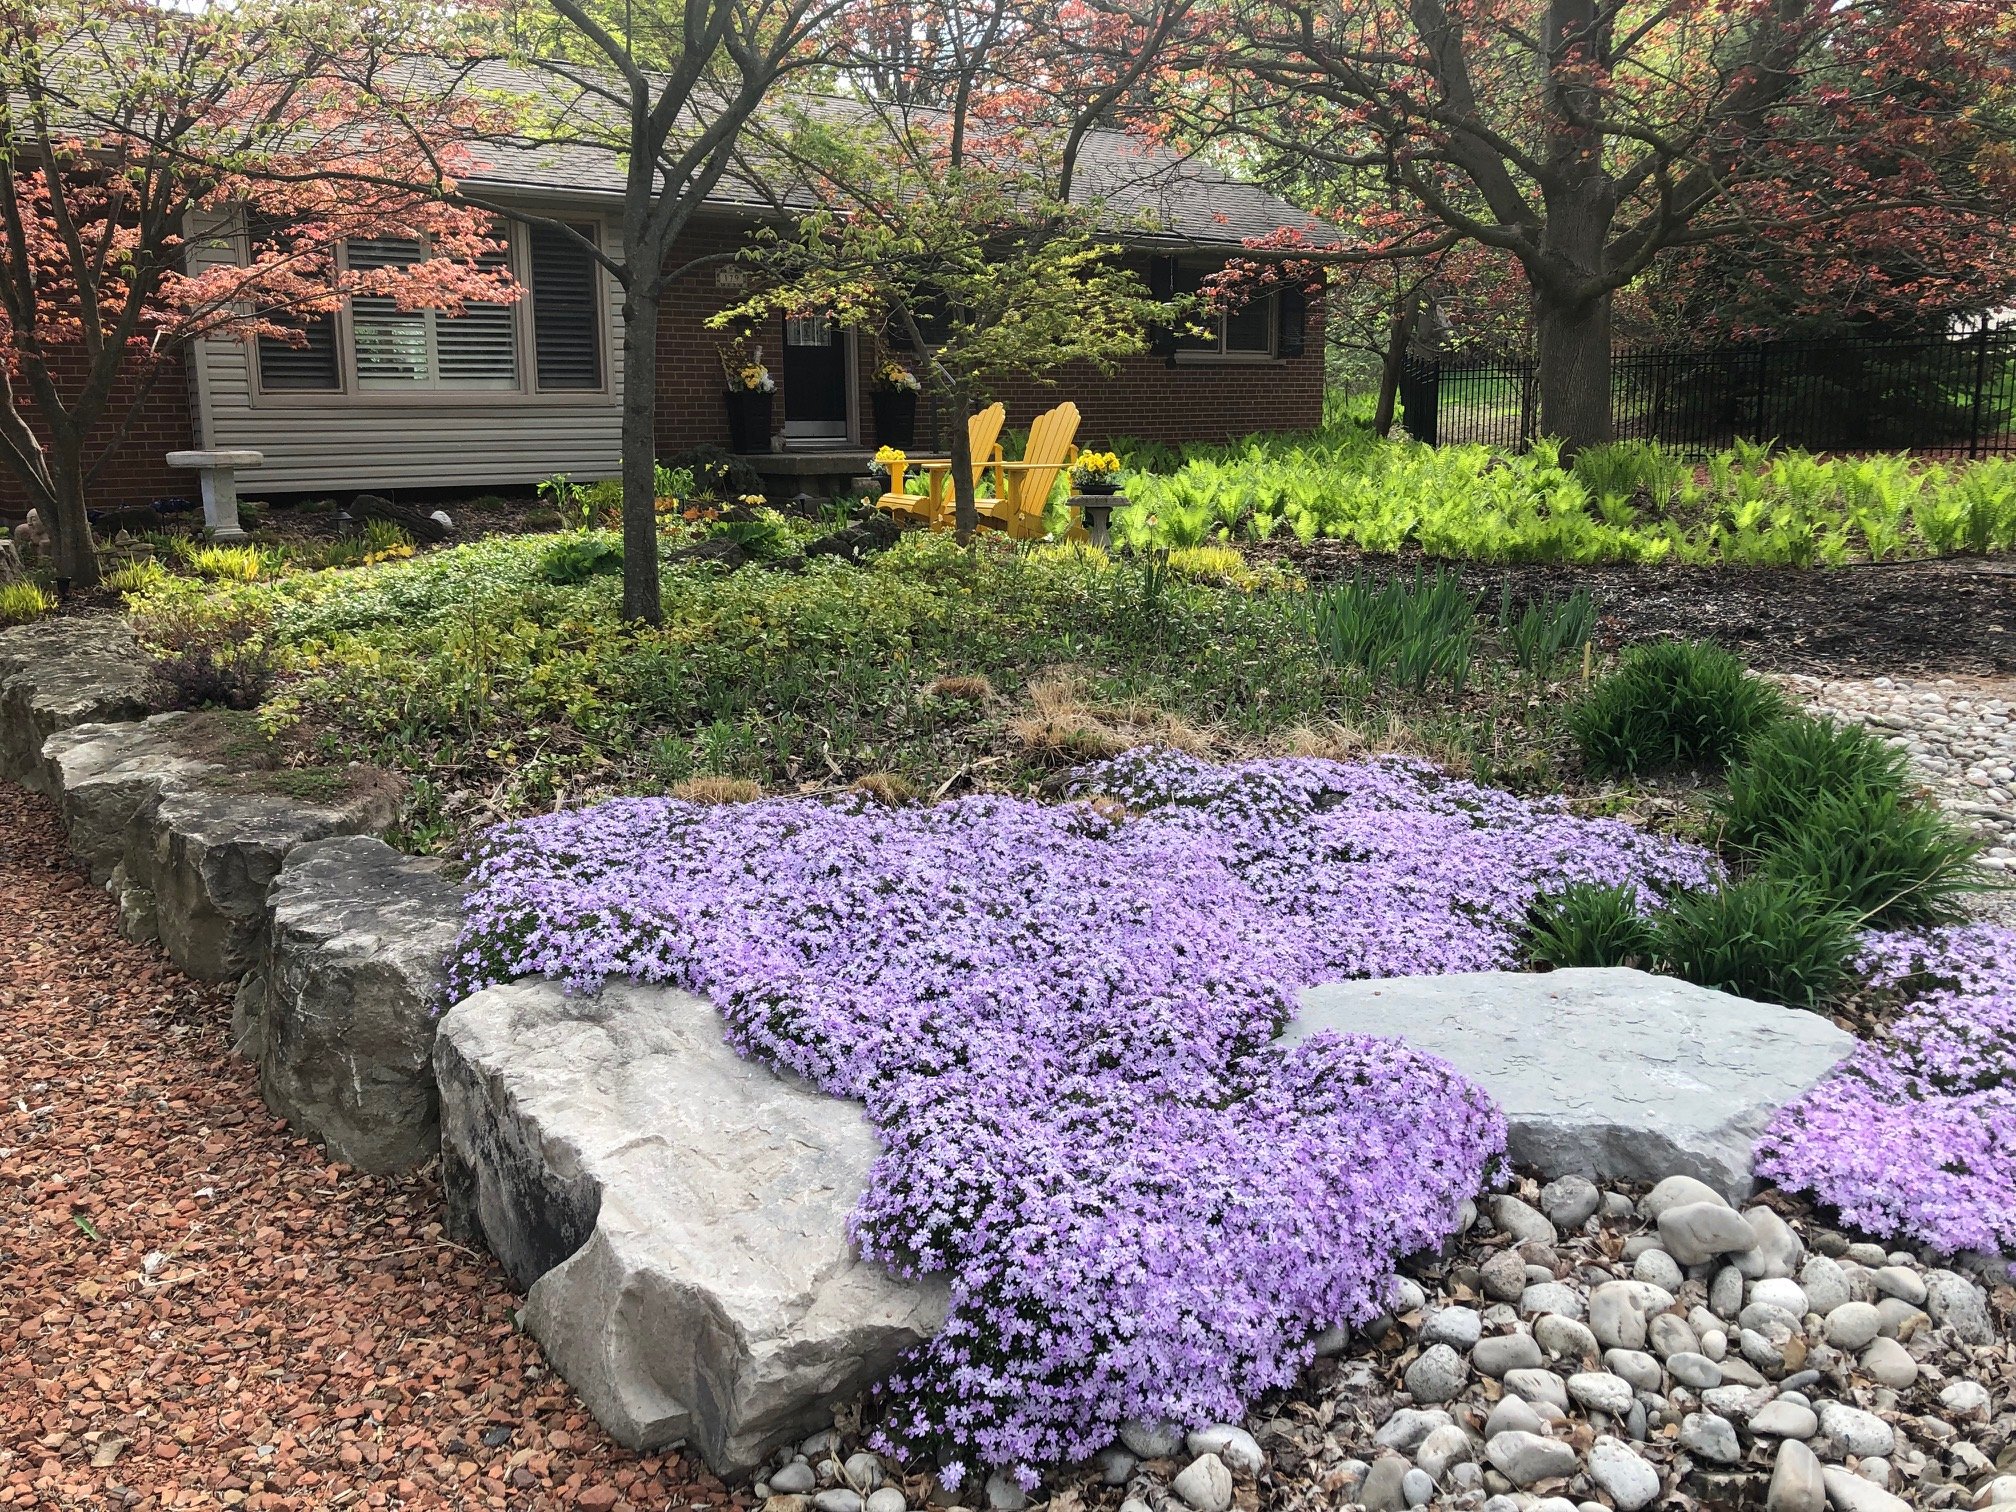
Front and backyard landscaping with rocks, gravel and mulch
Rocks, whether they are massive boulders, smaller rocks, river rock or pea gravel, all have their place in a natural woodland garden. Placing them properly can be tricky. Here are some tips to help gardeners feel confident using them as a landscape feature.
Look to nature to create a natural, rockin’ landscape

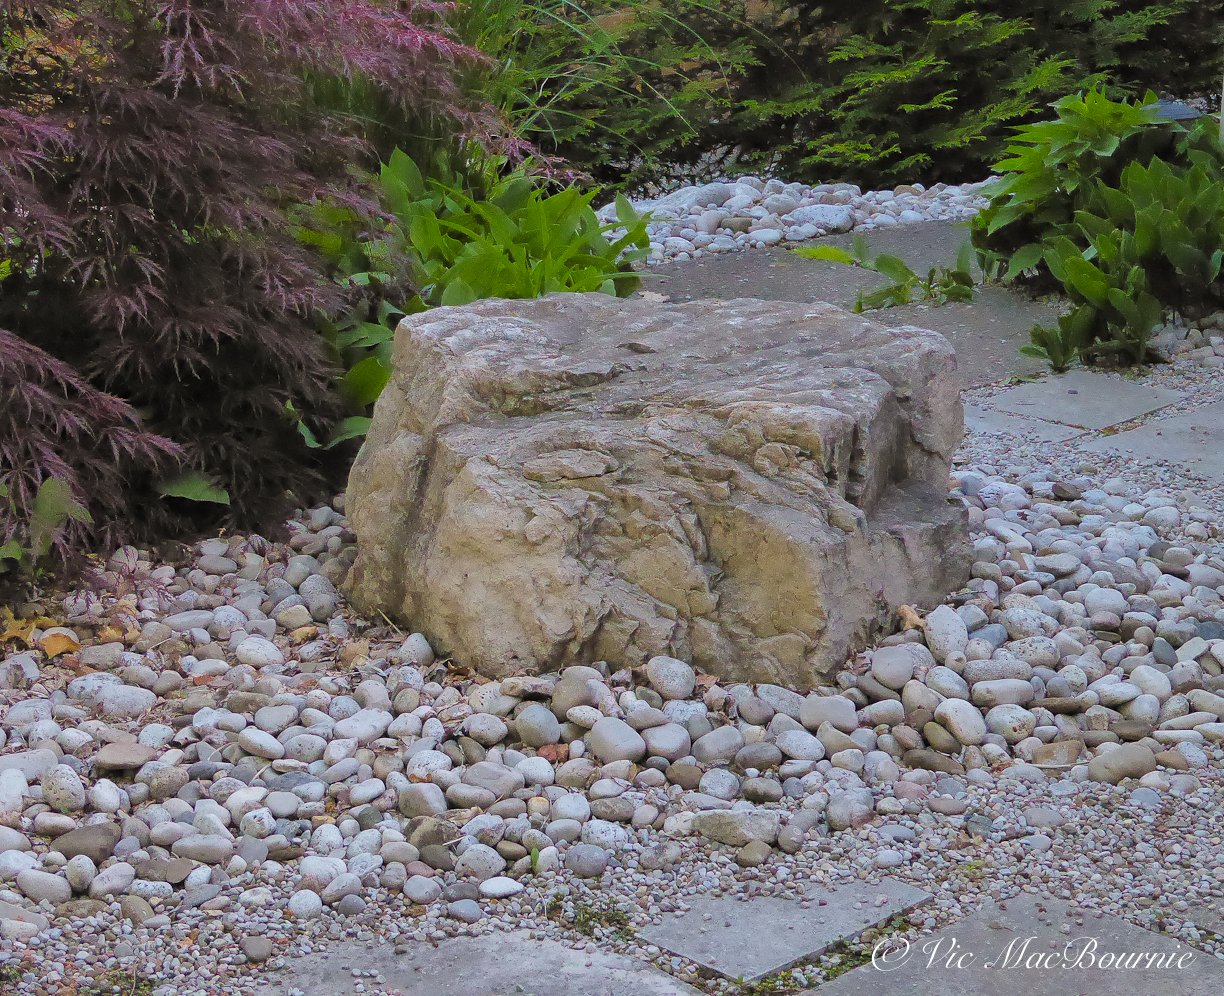
This large boulder creates a beautiful backdrop for fall’s stunning colour. It sits in our Japanese-inspired garden along with several other large boulders, pea gravel and large river rock.
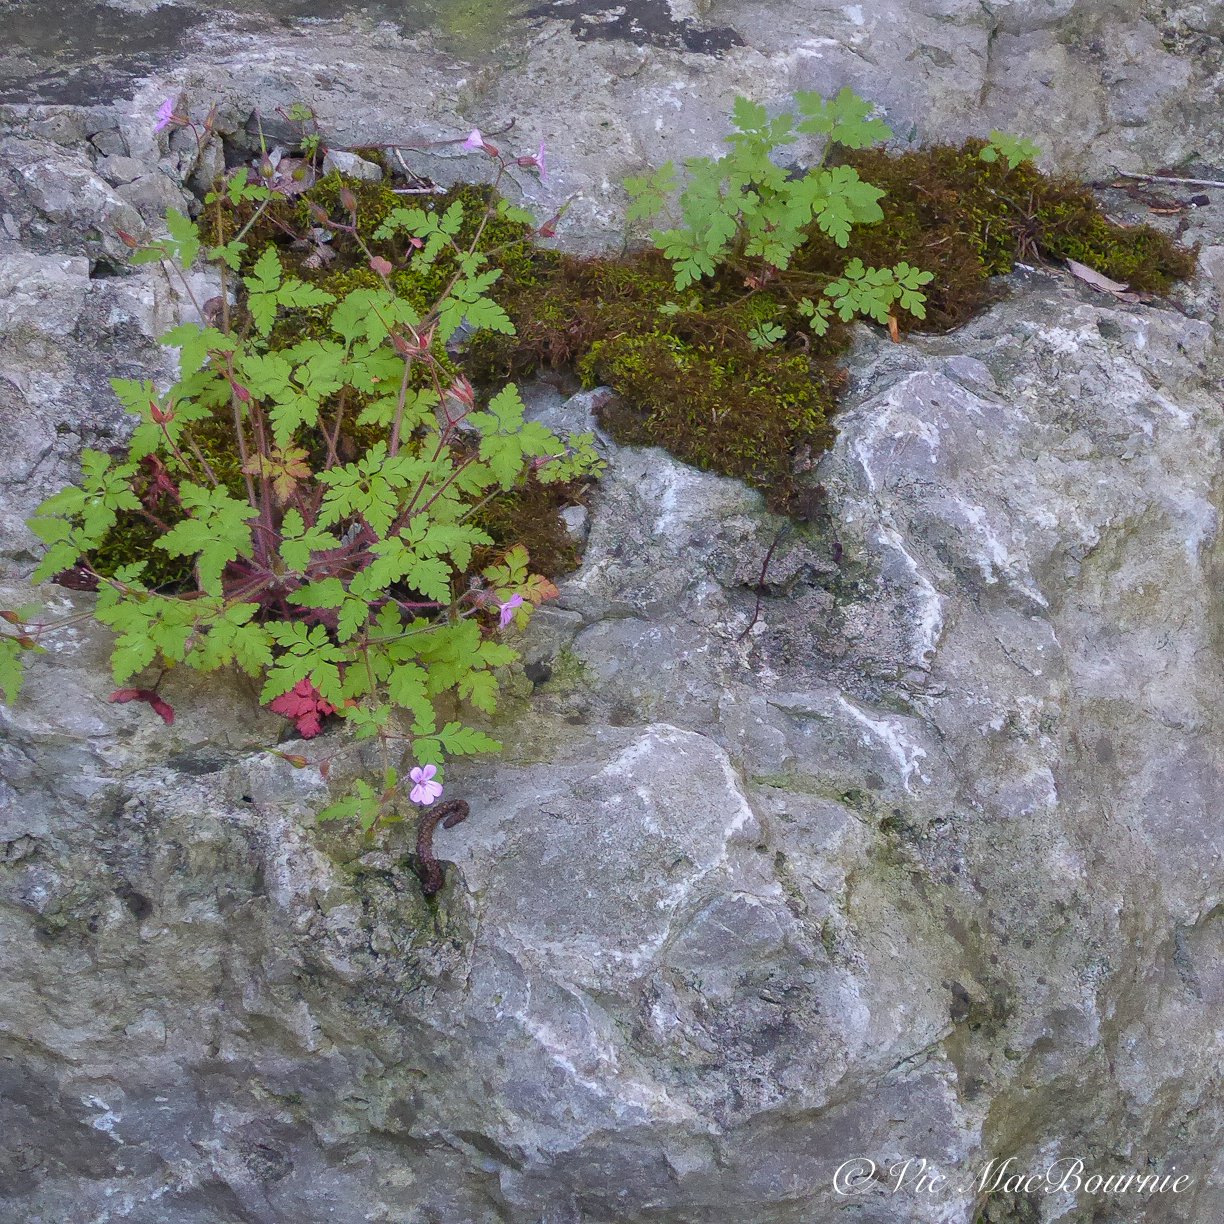
There is nothing like a moss-covered rock placed perfectly in a garden to create a natural focal point.
But take that same moss-covered rock and place it improperly in the garden and it quickly creates an unnatural look that suggests the gardener or landscaper was decorating with stone rather than using it to create a natural feeling in the garden.
Decorating with stone is the single biggest mistake gardeners and landscapers make when using boulders, rocks and stone in the landscape. If your goal is to create a natural-looking garden, try not to get caught in the decorating mode.

An example from my garden on how not to place a rock. Notice that it is sitting on top of the mulch (Chipmunks have appeared to even have burrowed under it). In addition, the rock is standing on its end in an attempt to maximize its size. Much better to let it lie on its side while using it to hold back a little soil. (I have some digging to do.)
Always take your cues from nature. In fact, it never hurts to find some rock moss to grow on the rocks to help with the natural look.
There are many reasons to use rock and stone in the garden: for utility purposes such as a retaining wall to hold back soil; to create garden design elements such as a dry river bed or a natural stone pathway; or as a focal point such as large moss-covered boulders rising out of the ground.
“The job of the natural gardener is to place elements in the garden as nature does. The site of every object in the garden should answer the question “why is that there?” We may choose to place a boulder where it might have ended up had it rolled sown a hill to our garden. Or where it may have emerged from a glacial till as the surrounding soil was washed away by 10,000 seasons.””
All of the above projects can be made to look natural to some degree or more decorative if the wrong choices are made such as using a type of stone or rock that is not indigenous to the area. Bright white quartz rarely has a place in a natural landscape.

Using boulders, rocks and pea gravel in a natural landscape creates wonderful opportunities to capture stunning moments in the garden.
A walk through most neighbourhoods reveal the “decorating” mistakes. There are those who place small rocks meticulously around the edge of a border; or those who place river rock in a half circle to replicate a dry river bed; or, the worst sin of all, placing boulders on top of the soil rather than digging them into the landscape. To make matters worse, these boulders sitting atop of the landscape are often placed on sloped ground making it look like our beautiful boulder is about to roll down the hill.
Placing stones to look natural in the landscape
So what’s the secret to placing stones properly?
Jeff Cox, in his book Landscape with Nature provides this solid explanation: “The job of the natural gardener is to place elements in the garden as nature does. The site of every object in the garden should answer the question “why is that there?” We may choose to place a boulder where it might have ended up had it rolled sown a hill to our garden. Or where it may have emerged from a glacial till as the surrounding soil was washed away by 10,000 seasons.”
He asks readers if they can “feel the presence of large boulders somewhere down under the earth? Can you feel them slowly rising toward the surface or rather the surface slowly descending toward them? Look at your site. Where would one of these boulders emerge? Get a feel for it. Then bury the bottom 2/3 of the boulder to make it look like its coming out of rather than going into the ground,” says Cox.
“Take any three objects such as three different rocks and arrange them anyway that seems balanced,” he adds. '“An evenly spaced straight line seems very static and unsubtle. A much more satisfying arrangement is for the two smallest rocks to be relatively close together and the third larger rock at sOme distance, their masses balancing on an unseen focal point somewhere between them.”
“In a natural garden try to use plants as nature might. The goal is not to border our beds with bright colours but to pay homage to natural beauty with artistic interpretations of it,” Cox concludes.

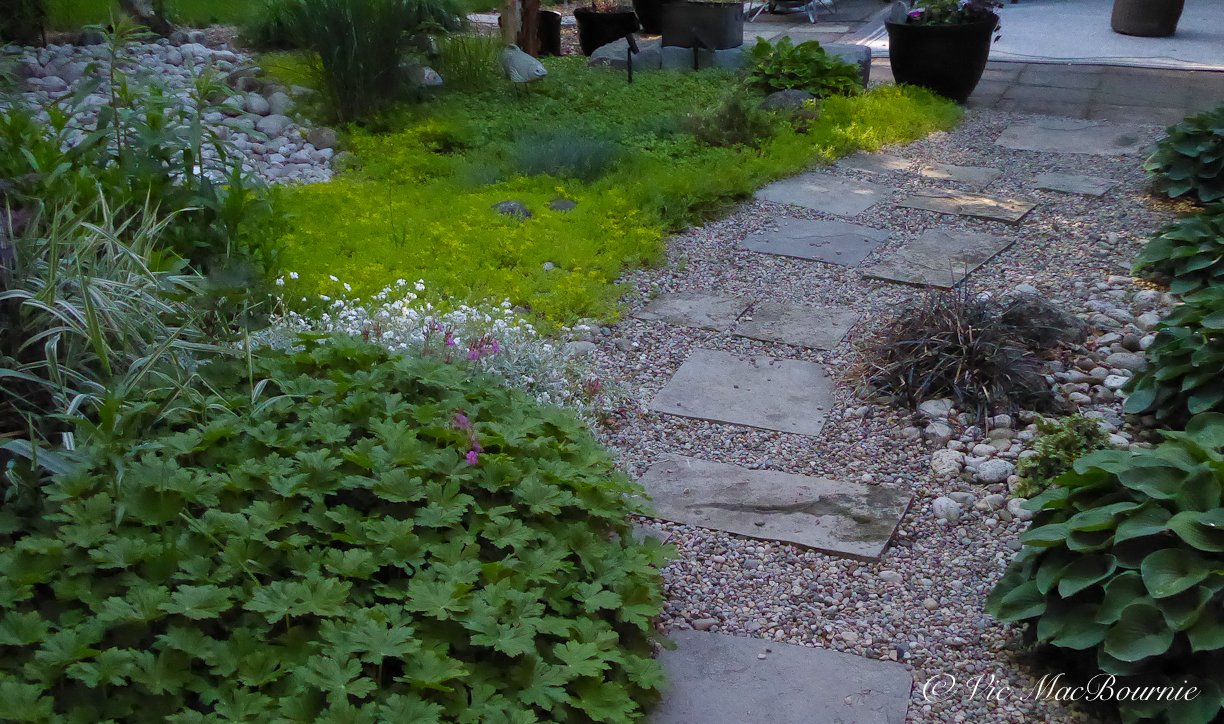
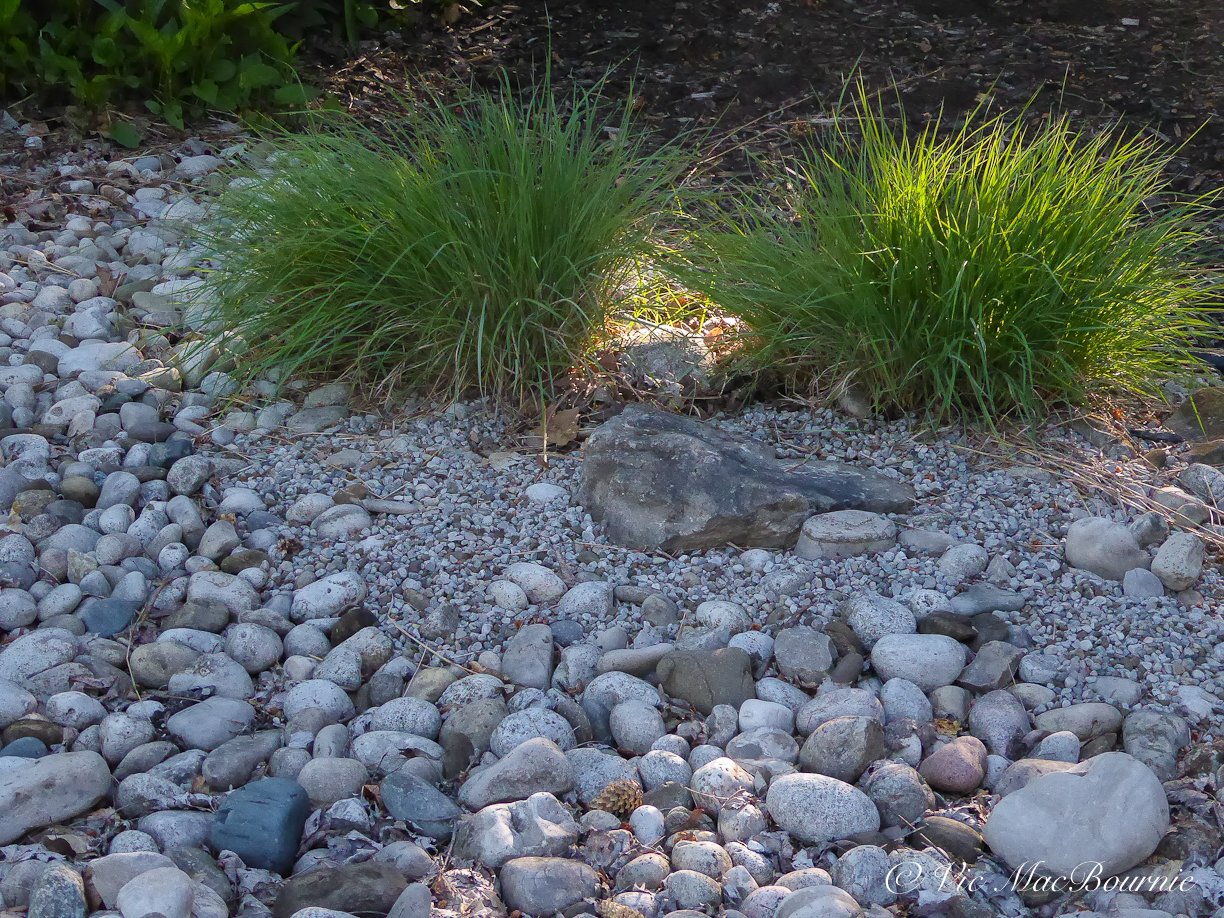
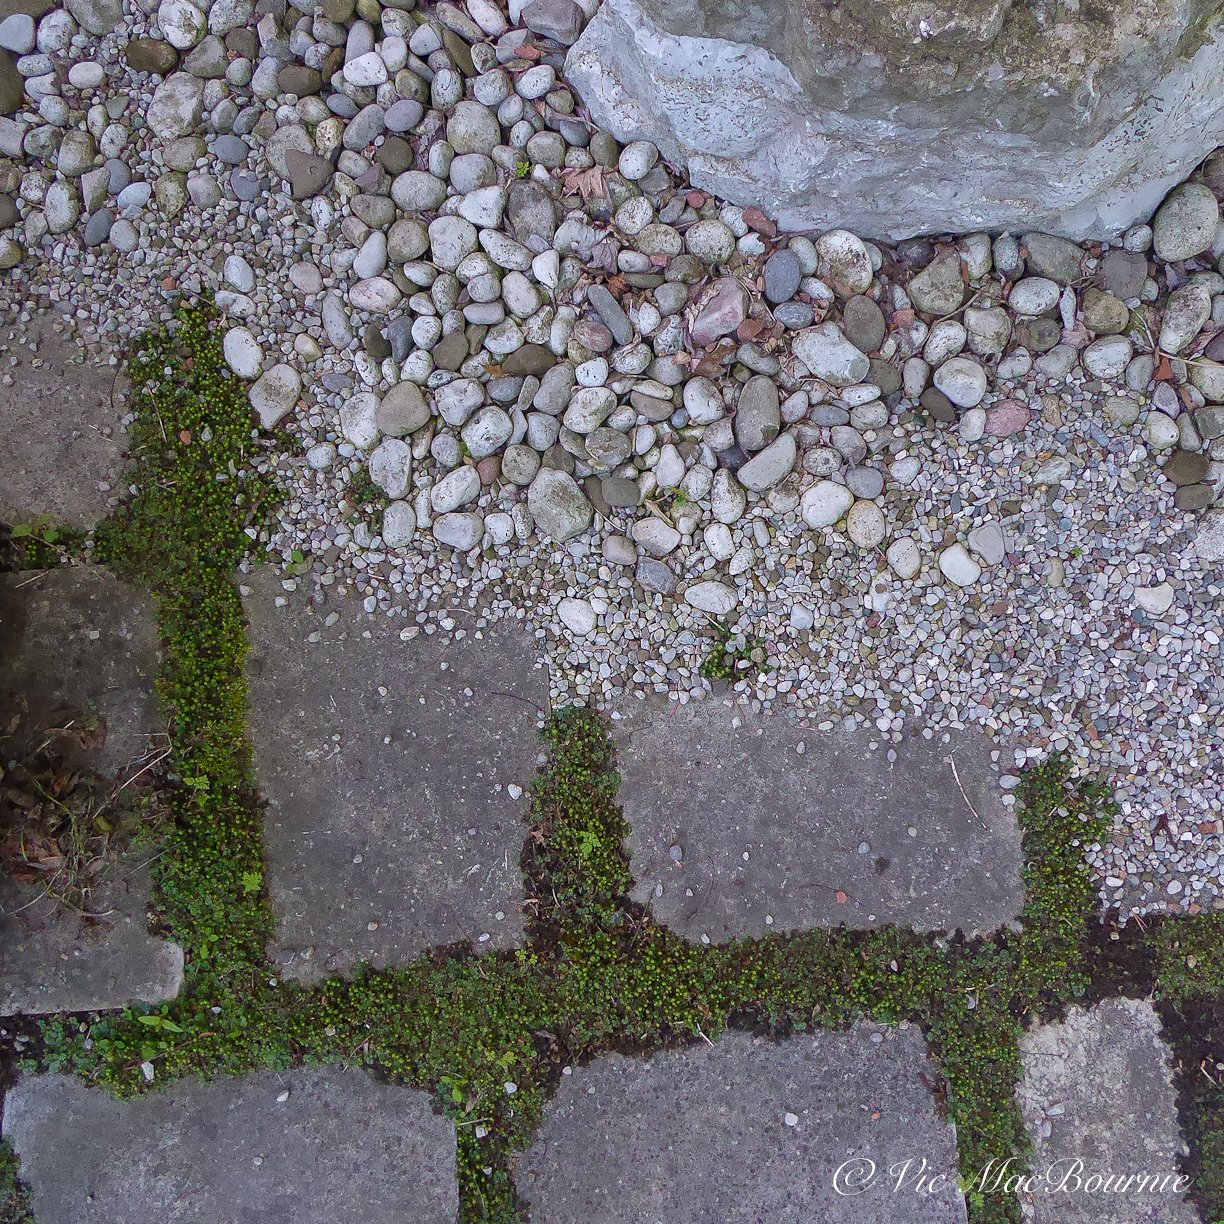
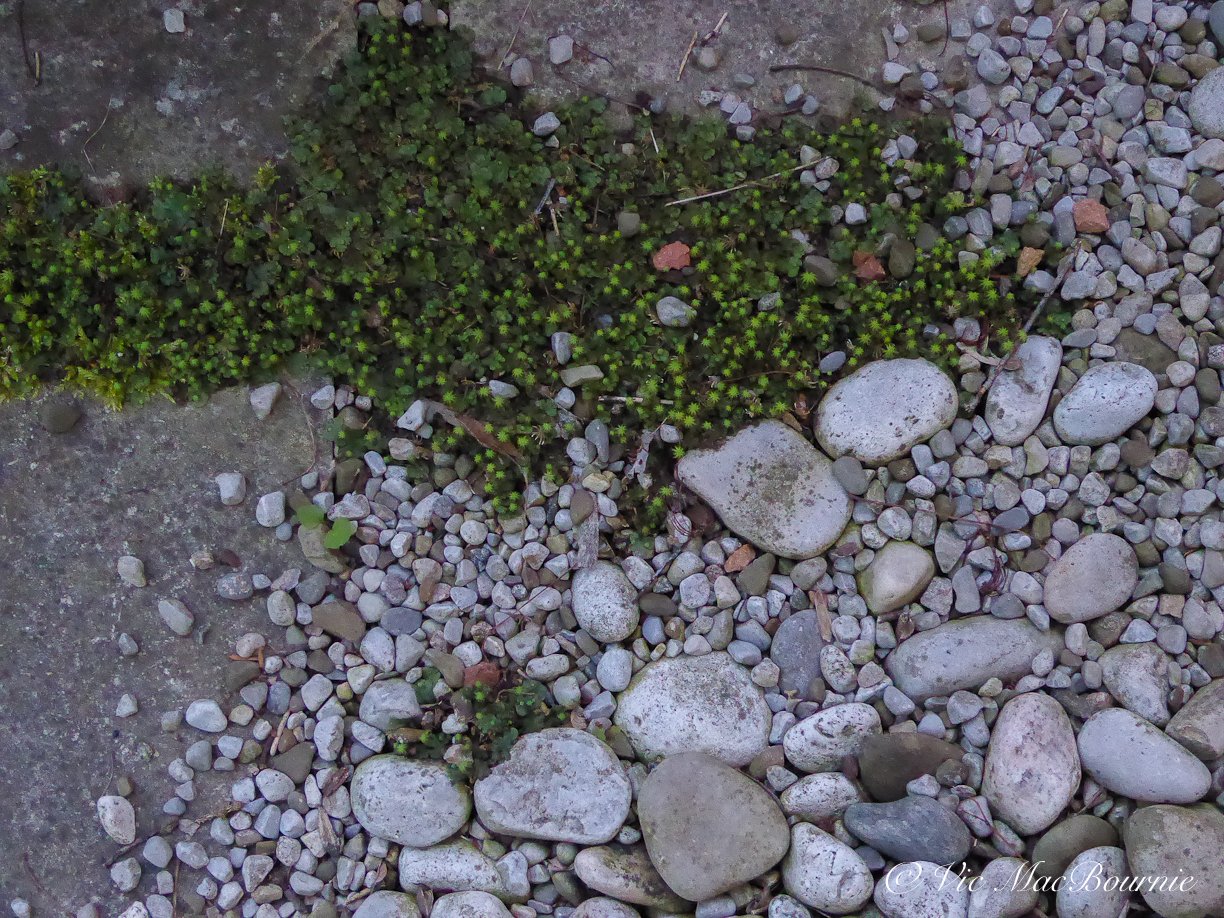
Here is an example of using different-sized river rocks and pea gravel along a dry-stream-look path that looks to nature to give the garden vignette a natural feel. In nature, a black mondo grass seed may have gotten caught up in the rocks and began growing. The natural vignette helps create interest to slow the visitor along the pathway. I used black mondo grass so that the plant blended in to the more or less black and white scene. A brightly coloured flower would have spoiled the lovely monochrome garden vignette.

The simple answer: try to place the stones as they would appear in nature.
Not sure how they would appear in nature?
Learning from nature’s rock placement
Take an afternoon to visit a natural stream and study how Mother Nature places the rocks and stones with the larger ones anchoring the stream, smaller ones closer to the edge of the stream and pea gravel and or sand filling in the edges suggesting areas where the water has a gentler flow. Notice how, in nature, not all the river rock is the same size. There are boulders, large rocks and smaller rocks. Often there will be several sizes of river rock as well as pea gravel and sand.
(Looking for inspiration, check out my post on using local woodlands as inspiration for your garden.)

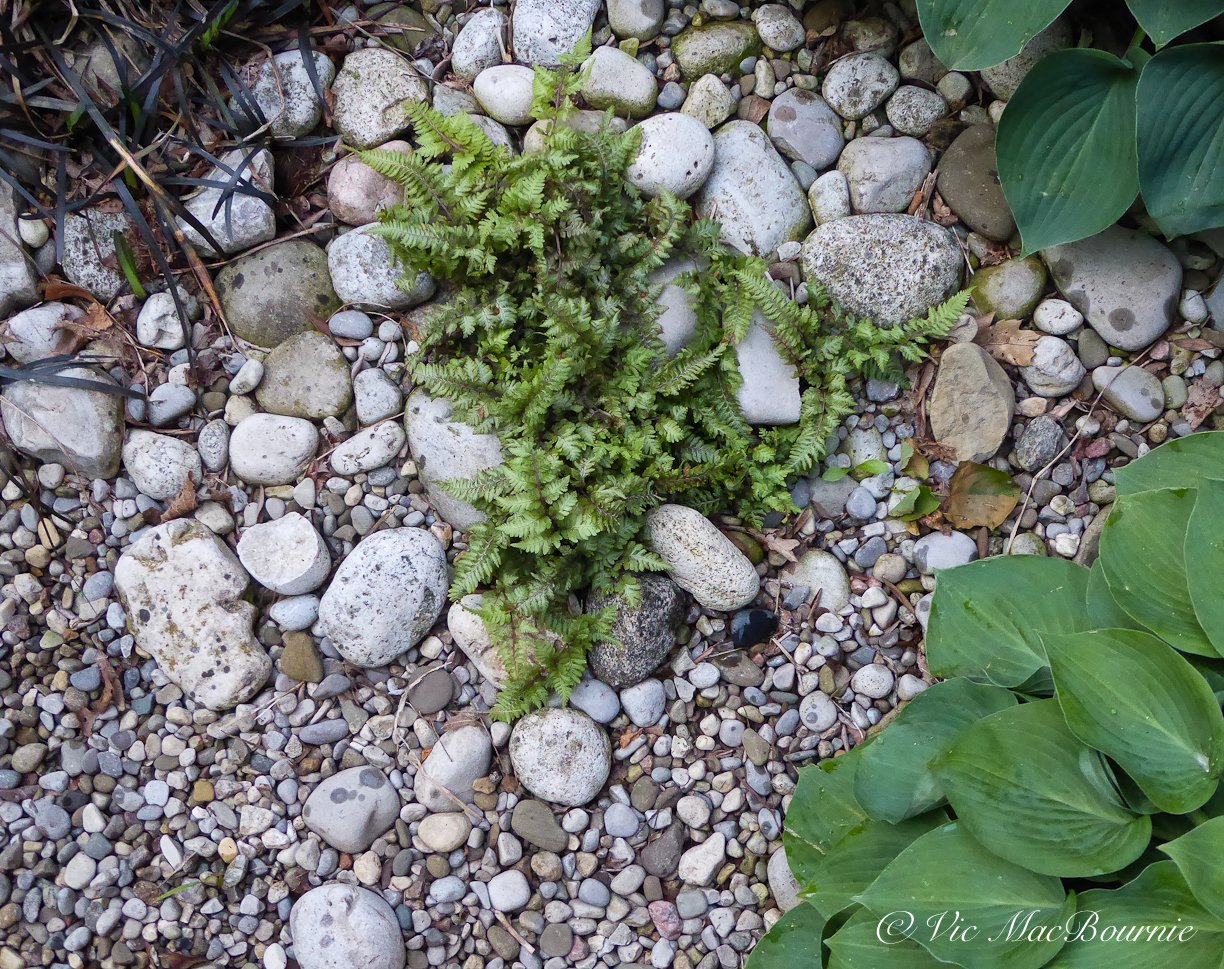
To create a realistic dry river bed, you don’t need to include all the sizes, but using only one size of river rock for the entire stream bed, is unlikely to look natural. When you are ordering from the rockery, include at least two sizes of river rock, some larger boulders and pea gravel.
The result will have a more natural look and allow you to transition down from the larger rocks to the smaller ones right down to the pea gravel on the edges of the stream filling in any holes between the larger rocks.

Placing larger boulders in the landscape
When it comes to placing large boulders, plan to do some digging.
In nature, boulders sit in the landscape, not on top of it. Even if a piece of a large boulder has broken off another boulder, it will in time be absorbed into the landscape through a combination of sinking into the soil through regular freezing and thawing, and soil building up around the boulder as leaves and forest detritus gets blown around the base of the boulder.
You may have thought you purchased a large boulder for your garden, but if I said you may have to bury a quarter to a half of the boulder underground for it to look right, it doesn’t take long to realize that boulder you purchased is not going to make as big a statement in the landscape as you might have thought. Most boulders need to be buried deep in the ground to look natural in the landscape. Boulders should look like they are rising out of the landscape.

Depending on the boulder, you may get away with sinking it just a couple of inches into the ground. Just make sure that the boulder looks like it was always part of the landscape.
If you are placing boulders, it’s best to think odd numbers. Not unlike planting flowers in groups of 1-3-5, using the same way of thinking also works for placing rocks.
In our Japanese-inspired garden, I was lucky enough to scoop up a number of massive boulders from a neighbour's backyard project.
The trick was how to use them effectively. By using three of them in one grouping and a single one on the other side of the Japanese-inspired garden, I was able to keep the groupings to odd numbers. The boulder sitting by itself on the one side is teamed with large grasses and a weeping Japanese Maple providing visual balance between the two groups of boulders.
Staying with the Japanese-inspired garden and placement of the large boulders. In true Japanese style, a single boulder may be all that is in the garden surrounded by sand or fine pea gravel that is meticulously raked to give the appearance of waves surrounding the boulder.
In our design, I chose to use the boulders as if they represented mountains. Around the outside of the boulders I placed river rock in two sizes and then used pea gravel to fill in any holes and tie into the pea gravel throughout the garden and around the square-cut flagstone that take visitors through the garden into the backyard.

Using rocks along a pathway between houses
Our Japanese-inspired garden runs across the front of our home with a pathway leading through it to another pathway that leads into the backyard. By continuing the use of stone from the Japanese garden along the pathway leading to the back yard, the two spaces work together to create a natural flow.
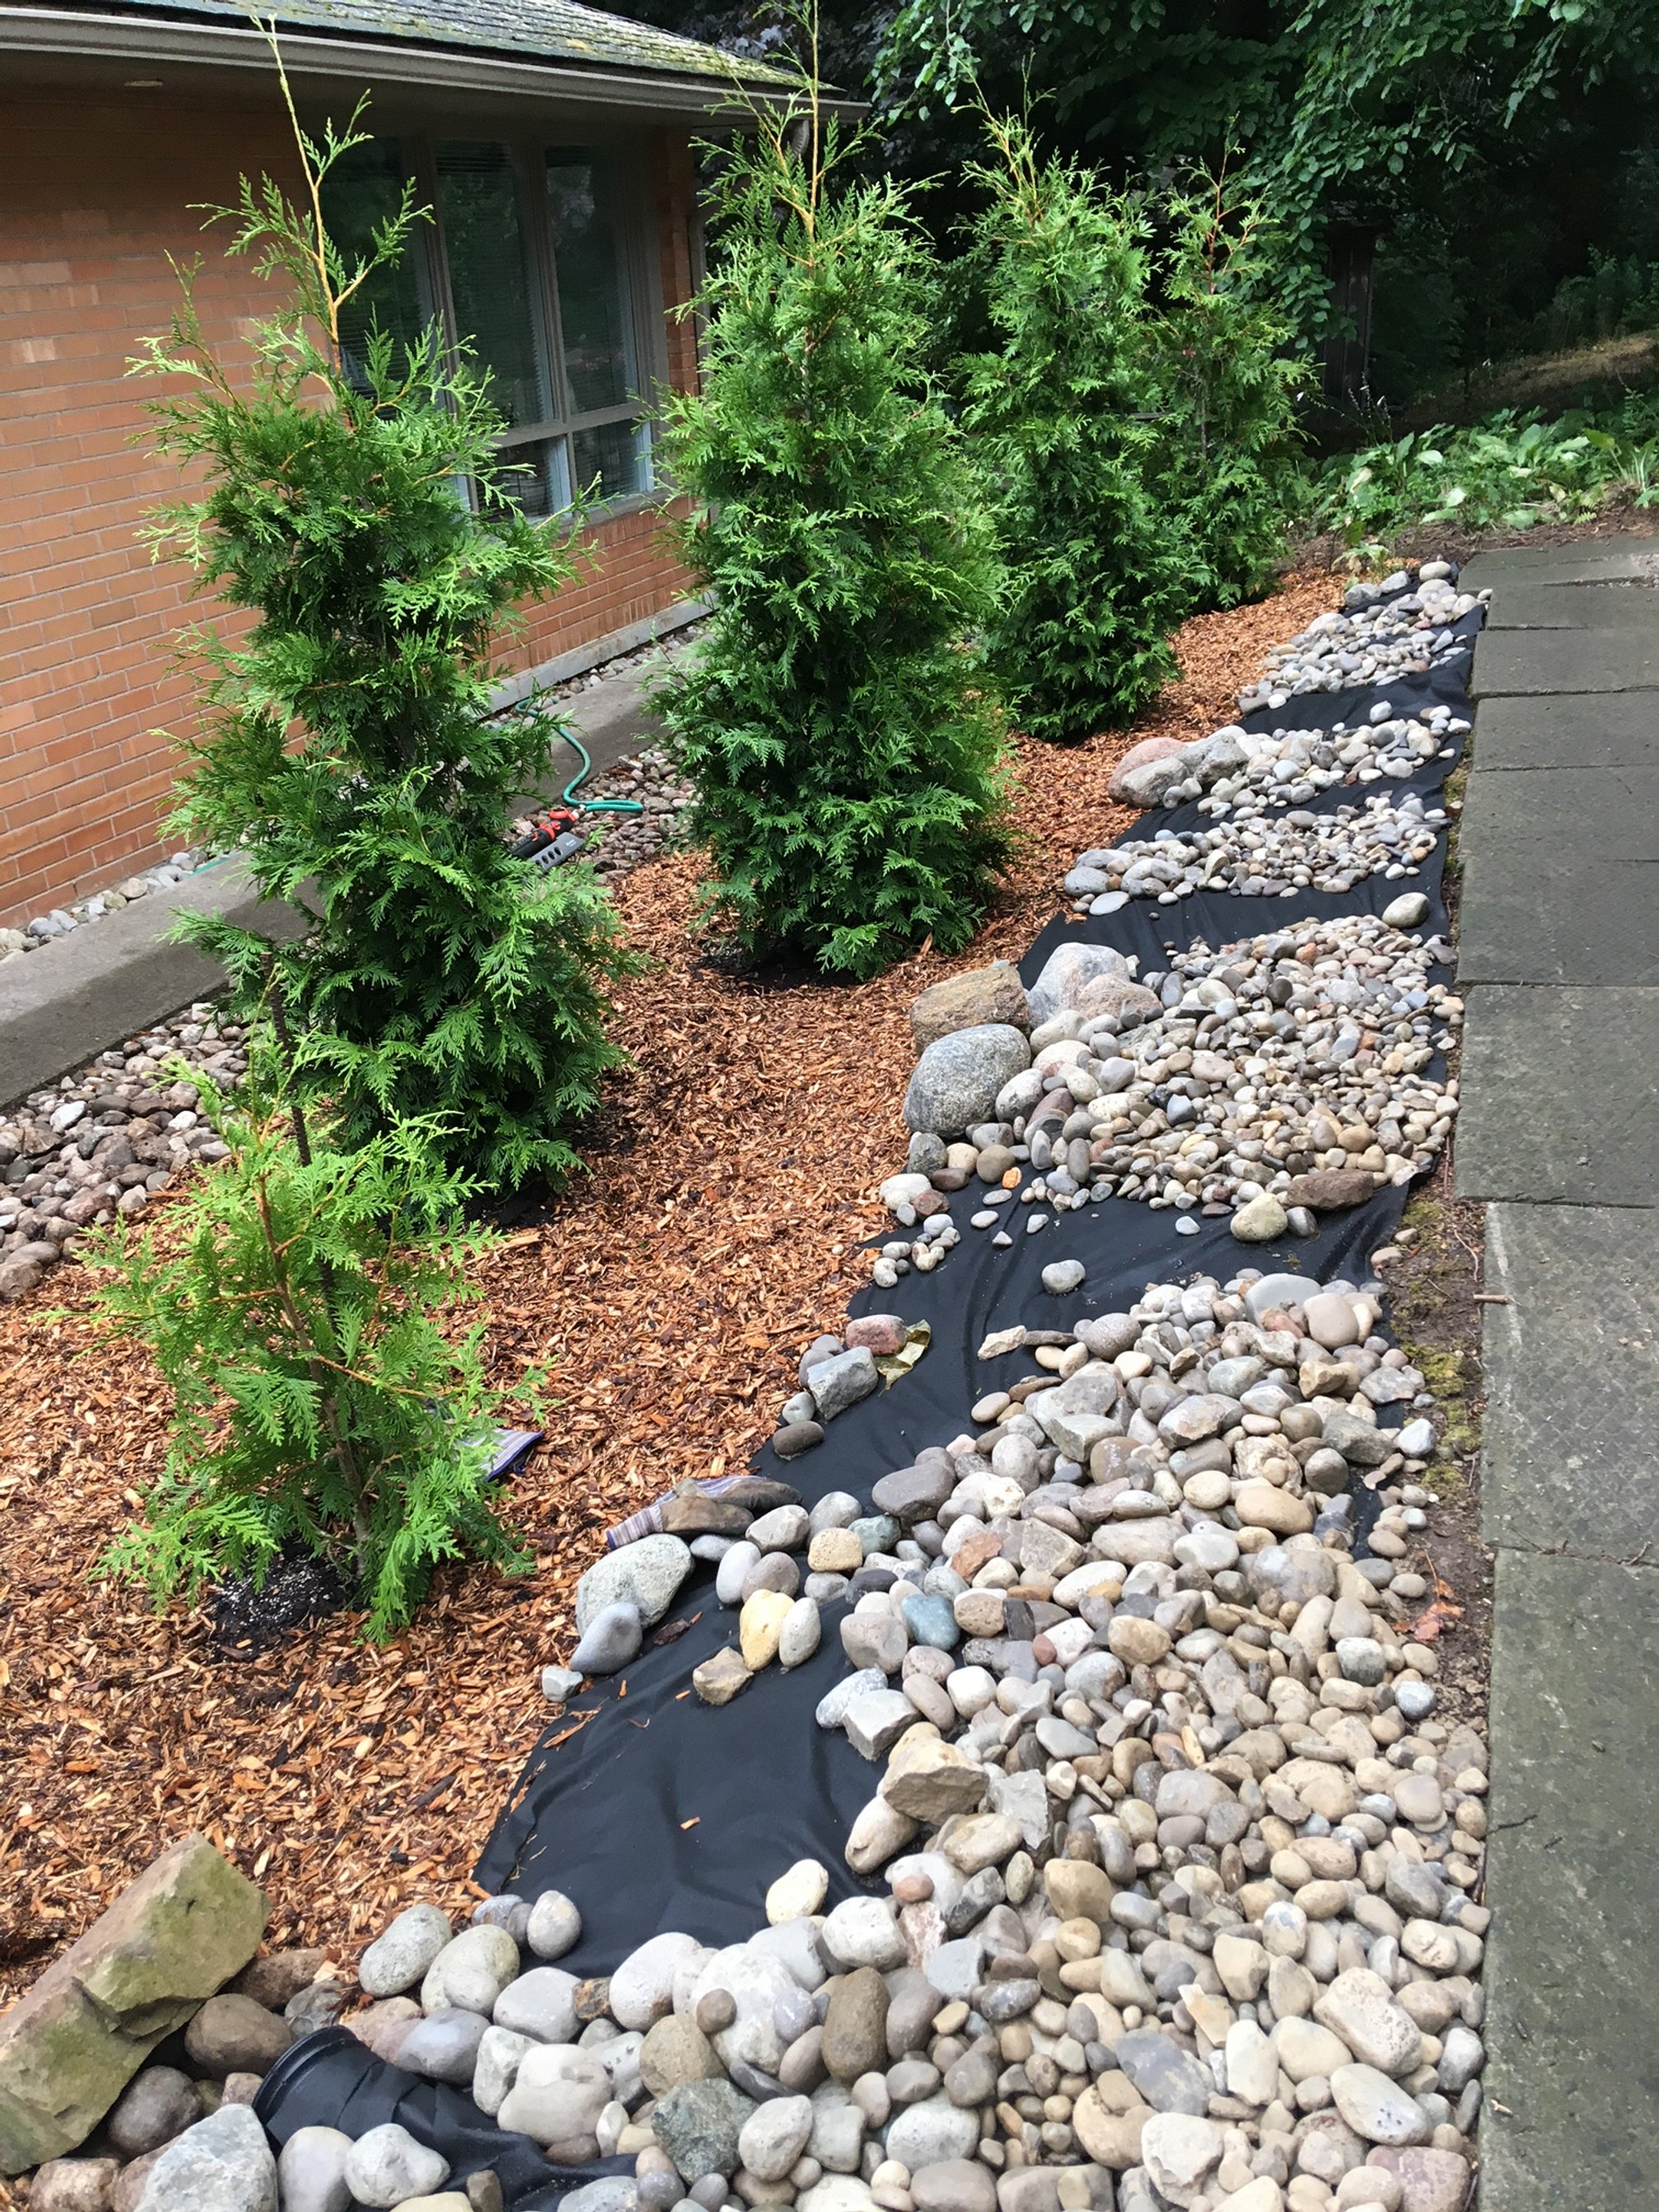
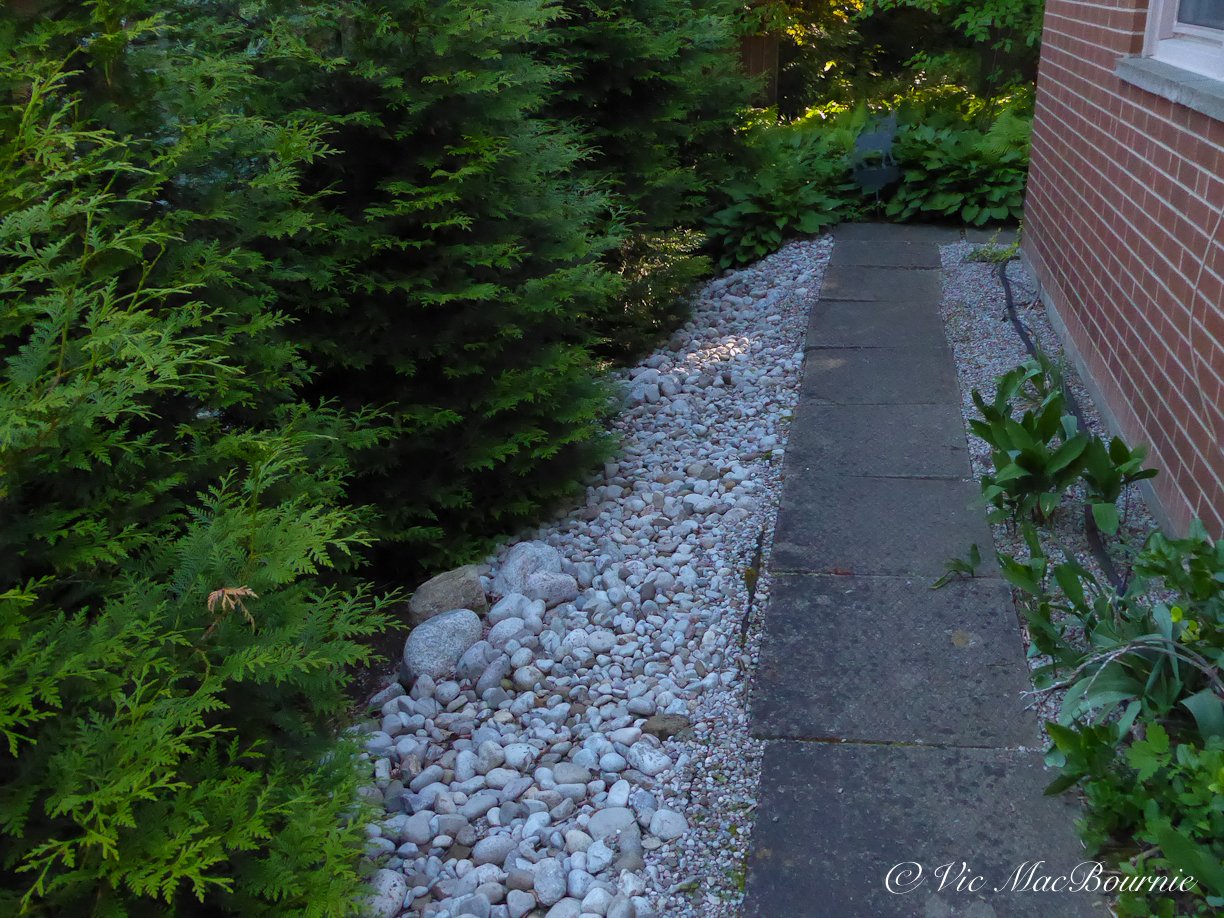
Green Giant cedars separate our property from our neighbours creating privacy and a beautiful green backdrop that opens up at the end of the pathway into a view of our neighbour’s lovely yard and our woodland garden. (The three pictures above show how we installed the river rocks between the path and the Giant Green cedars using a combination of three sizes of river rocks and finishing with pea gravel. The pictures also show how much the cedars have grown in just four years.
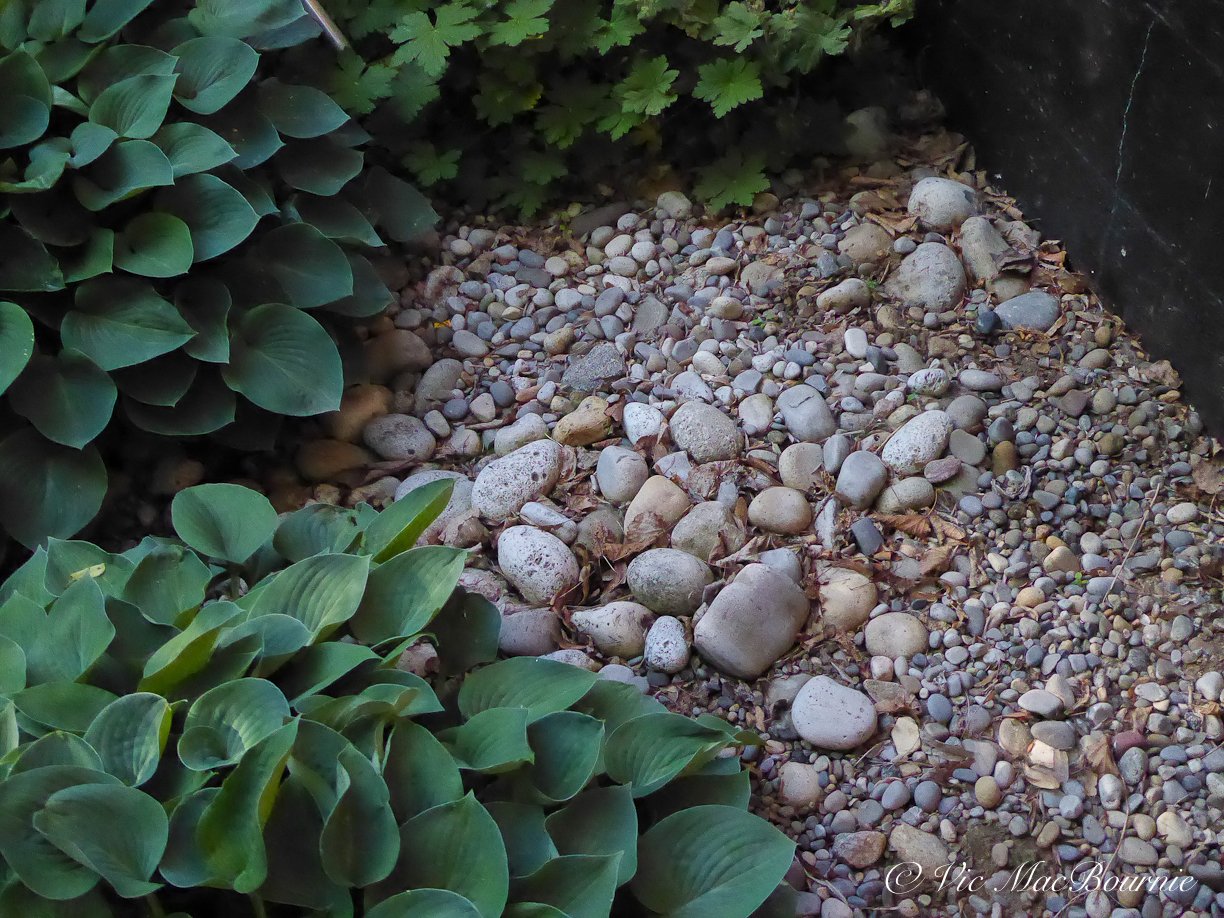
On both sides of this pathway we have used stone as a mulch to tie in the back and front gardens. The same dry-river pathway is picked up across the back of the home helping to tie the entire garden from front to back.
Along the side pathway, several layers of black landscaping cloth were laid down to keep weeds at bay. This was followed up by using large river rocks (hand picked at the rockery) to form small rockfalls along the pathway just to add interest rather than having all the same size river rocks. Once the larger rocks were in place, we began adding wheelbarrows full of river rock followed by shovel fulls of pea gravel to fill in any holes between rocks and add more texture to the vignette. Closer to the trees’ roots, we laid down a thick layer of natural shredded cedar bark.
The result is a completely maintenance free landscape that looks natural and makes walking down the path a lovely experience.

Author Profile: Vic MacBournie is a former journalist and author/owner of Ferns & Feathers. He writes about his woodland wildlife garden that he has created over the past 25 years and shares his photography with readers.
The first step to building our Woodland Garden
Building your dream garden may start with planting a tree or your favourite shrub. For us it began by escaping our new-home subdivision and taking the leap to an older fixer-upper that provided us with the property we needed to start our dream Woodland garden.
Our woodland garden began with a pool in our neighbour’s backyard. We didn’t know it then, but life in a brand new home in the middle of the suburbs where late-night pool parties, loud teenagers and the never-ending drone of gas powered mowers was the norm, was enough to push my wife and I to extremes.
These weren’t our dreams – the pools, the parties the close proximity to neighbours.
So, it was time to sell and move into a home that, in the end was totally opposite to the one we were living in at the time.
A for-sale sign went up and before long we were in ‘our’ dream home. Well not exactly a dream home, more like a dream property. We only had one child, so my wife and I decided to go against the grain and buy a small house on a big property rather than a big house on a small property.
It was the best decision we ever made for our sanity.
In the end, we compromised a little and bought a small home (at least by 1980s standards) on a decent-size lot pushing a half acre. To say the home was a fixer-upper would be a bit of an understatement.
What does this all have to do with building a woodland garden, you ask?
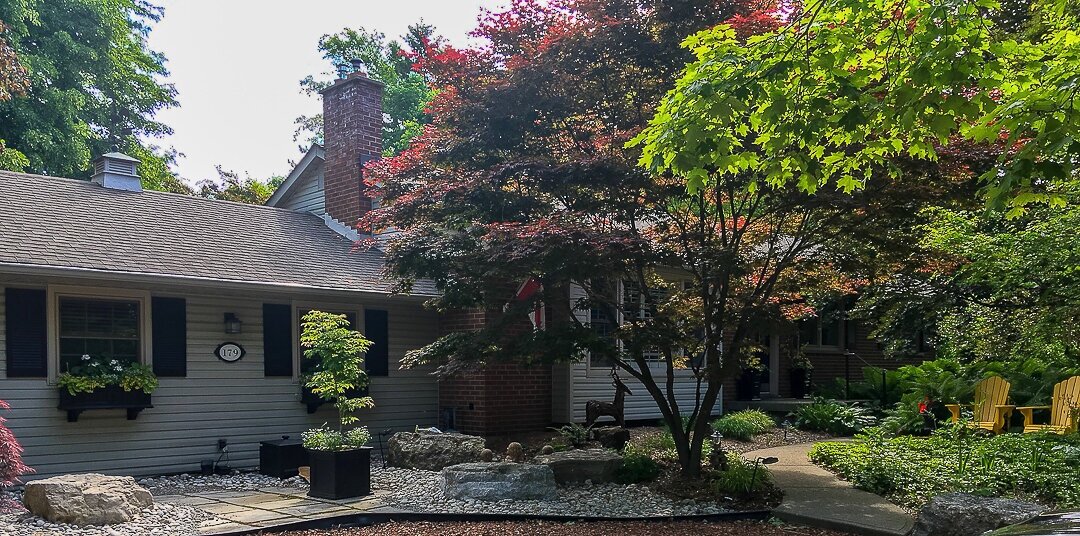
The Woodland garden starts in the front and carries through to the back. We’ve included a Japanese-inspired garden (at left) in the front garden.
Focus on the garden for long-term happiness
Our dream was never really to own a huge multi-level home. We realized we wanted to create a peaceful, natural area around us where we could enjoy nature rather than jumping in the car every weekend to go to cottage country to escape the neighbourhood noise.
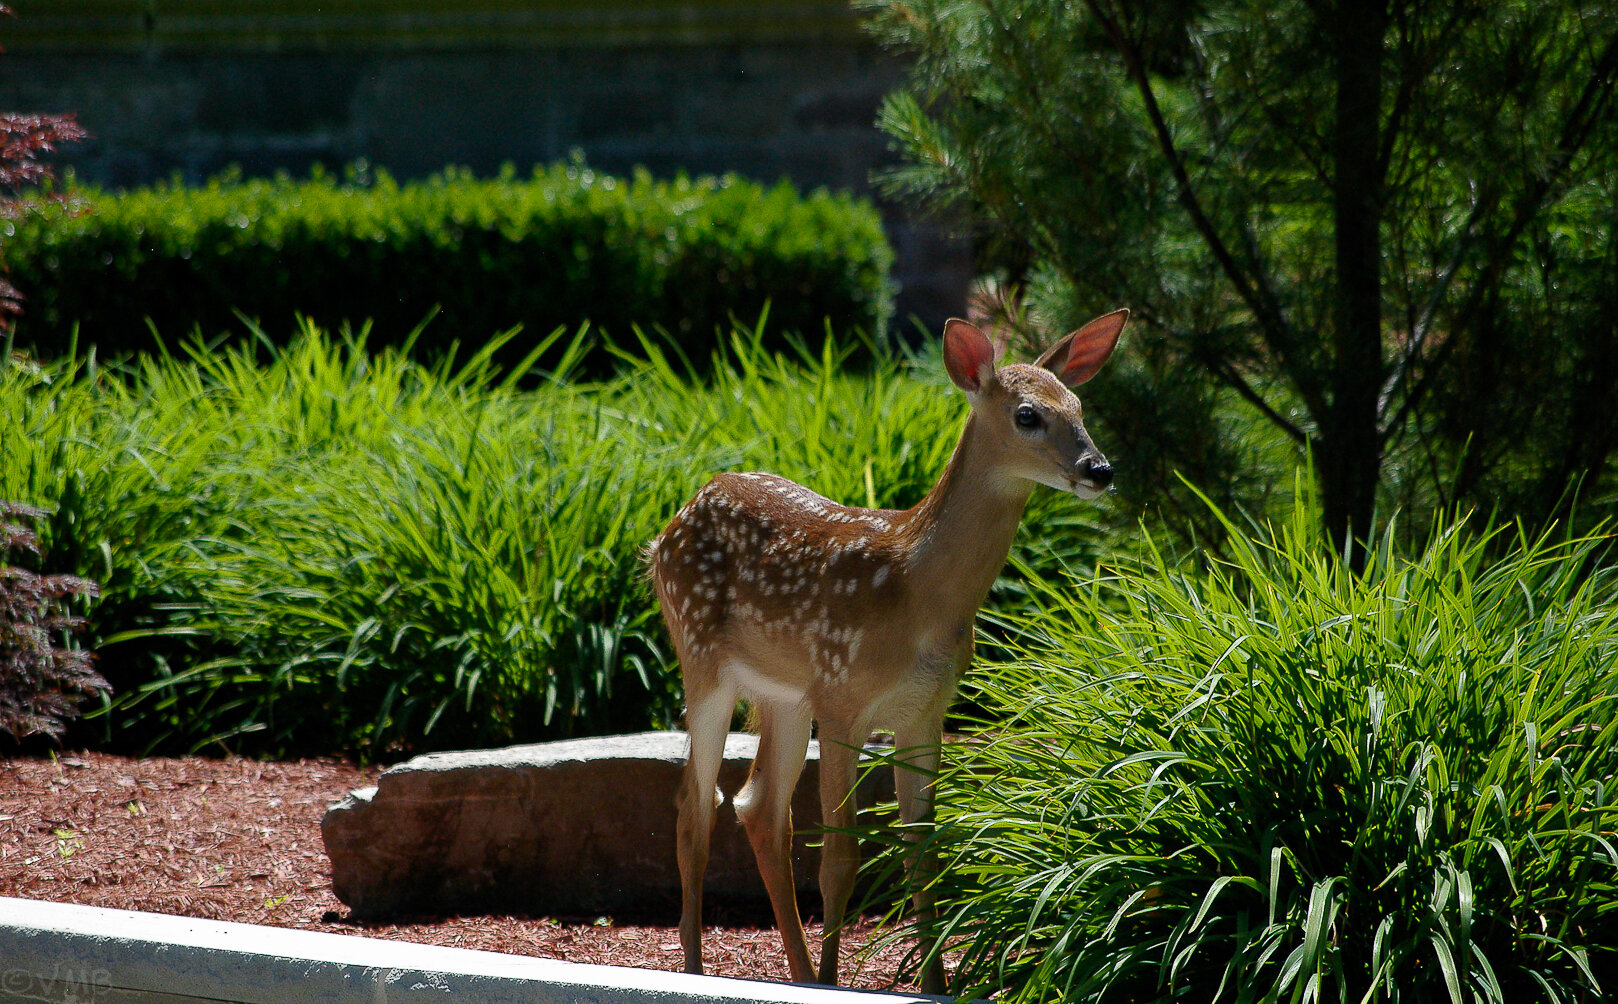
The final selling factor, at least for me, was a photo album left on the table of the house left opened to a photo of a group of deer in the backyard of the very home we were touring. For many gardeners, this would be a deal breaker. For me it only made me want it more.
SOLD.
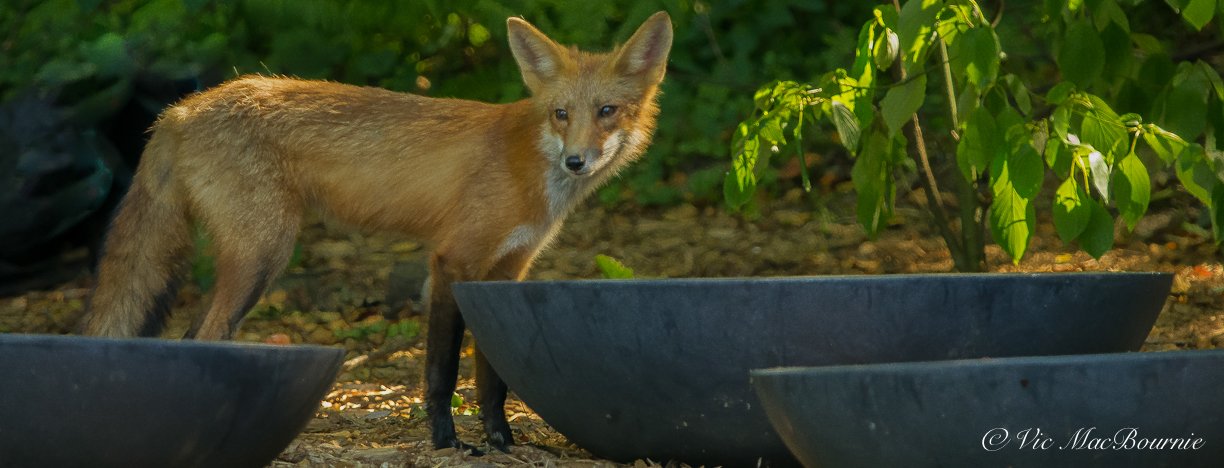
A fox stops by to take a drink from one of our water bowls.
Building the woodland garden
Then the slow process of building the garden began in fits and starts. Not unlike the home, the garden, what little of it there was, needed a lot of work.
We brought in soil and mulch, planted trees and native wildflowers. Expanded the gardens and eliminated grass. Then eliminated more grass. Check out my post on the benefits of eliminating grass.
We brought in boulders, lugged hundreds of wheelbarrows of stone, pea gravel, mulch and soil into the backyard. Check out my post on the importance of using stone in the garden
My wife and I made paths, created dry-river beds in the front and the back and it continues to this day.
Check out my post on some of the DIY projects my wife and I tackled over the years.
Finally, more than 20 years later, the combination of time and a lot of hard work is turning our patch of rural suburbia into a woodland garden rather than a patch of grass surrounded by neighbouring patches of grass surrounded by forest.
Now, most mornings my dog, Holly, and I step outside on the patio and enjoy some peaceful time together before the neighbourhood wakes up.
Be sure to check out some of my other posts on putting together a woodland garden or natural garden. Ken Druse’s book The Natural Garden is a great place to start. His newer book The New Shade Garden is an excellent source of information. Or take a minutes to check out this post on the 5 best books for woodland gardening.
The birds are at home here. On any given morning, a young fox wanders through looking for breakfast and maybe a deer or two comes through and offers me a chance to photograph them before they are off for their daily adventure. I’ve watched skunks wander through the yard, rabbits, more chipmunks and red squirrels than I can count and even a lone coyote. Snakes have returned to the property after not seeing a single one for many years here. Toads, fireflies and a host of native bees and butterflies call our property home.
It’s taken a while to get here, and we know we will never be done. But we took that first step that needed to be taken.
Your first step might not be to sell your home, it might be to go out and plant your first tree, shrub or native wildflower.
So what are you waiting for? Take that first step. You never know where it will lead you.

Nature’s garden art (Five tips and DIY ideas)
Garden art comes in many forms in a Woodland Garden, from nature in the form of a moss-covered boulder or a fallen tree branch to a rusty buck standing watch over the garden. Garden art can be subtle or add a little whimsy to your outdoor space.

This late winter image shows how garden art like this Easter Island head, can add interest to the garden even in late winter when the garden is not at its best.
Mother nature provides its own artistic touch
If you are looking for garden art to enhance your woodland, look no further than Mother Nature – a mossy boulder, an elegant tree branch rising out from a bed of ferns. This is nature’s art at its finest.
If we take the time to really look carefully, nature often provides her art to us for free.
Fallen pine cones that “litter” the ground are works of art in themselves.
The moss-covered tree trunk works perfectly placed along the woodland pathway.
These are the gifts nature gives us if we look for them.
Look for natural materials that get better with age
But relying entirely on natural elements as art may not be enough to satisfy every gardener’s desire to inject a little sophistication and a touch of elegance into their woodland.
If you are looking to purchase artistic elements for your garden, consider investing in natural materials that age gracefully. Almost anything made with copper will improve with age.
That patina copper takes on with age is just too beautiful not to invest in if given the chance.
I think garden art works best when it is not only elegant and sophisticated, but serves a useful purpose.
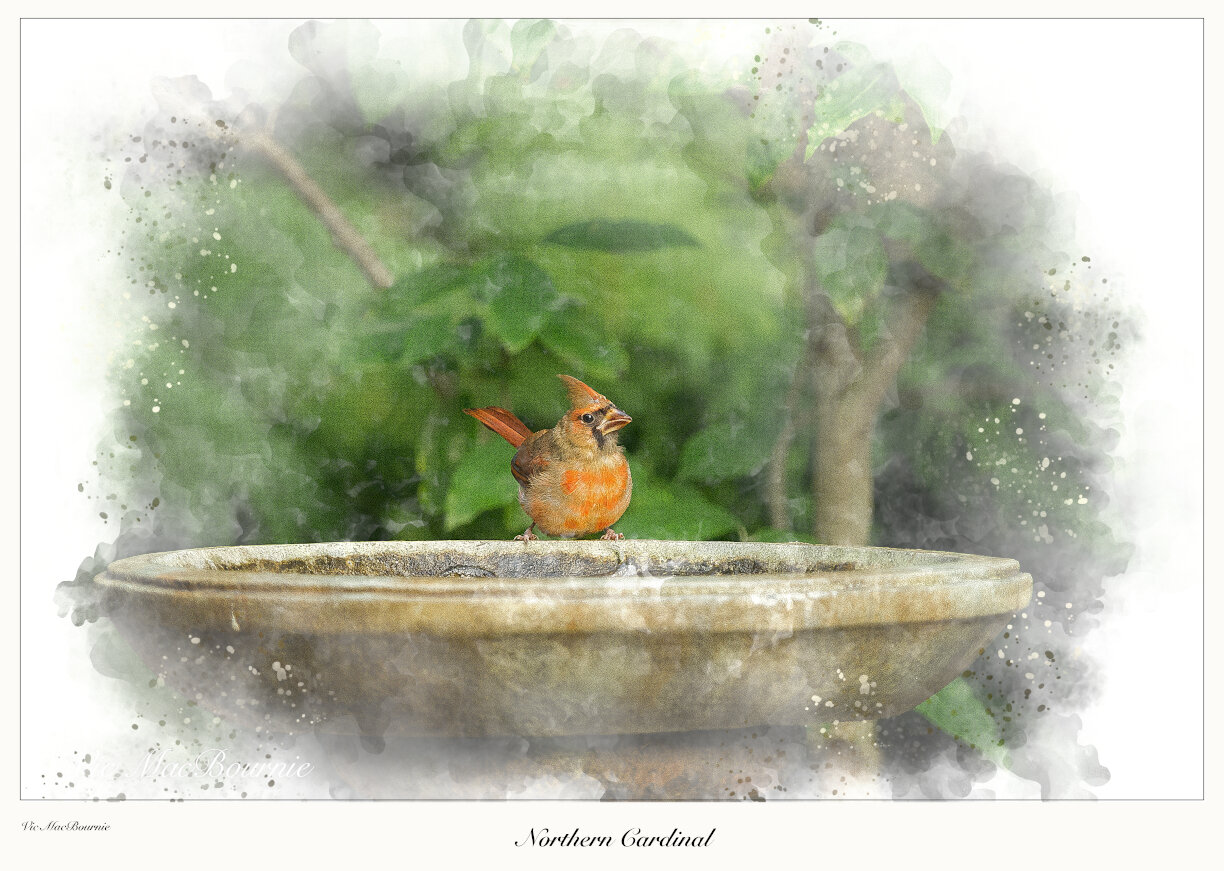
An elegant birdbath is itself a piece of garden art. But, when a cardinal is added to the scene, nature’s art truly shines.
Copper birdhouses and birdbaths ideal for the woodland
Birdhouses and birdbaths are perfect examples of garden objects that, if chosen well, can not only add sophistication to a corner of the garden, but attract our feathered friends – one of nature’s finest work. How can we resist a cardinal on a birdbath or a goldfinch at a beautiful feeder?
Many of the finest bird feeders are being made by artisans and can be found on places like Etsy. The copper-enhanced Baltimore Oriole and hummingbird feeders found on Etsy are just two examples of how artisans are recognizing the value of garden art and meeting our needs for a more sophisticated approach to garden art.
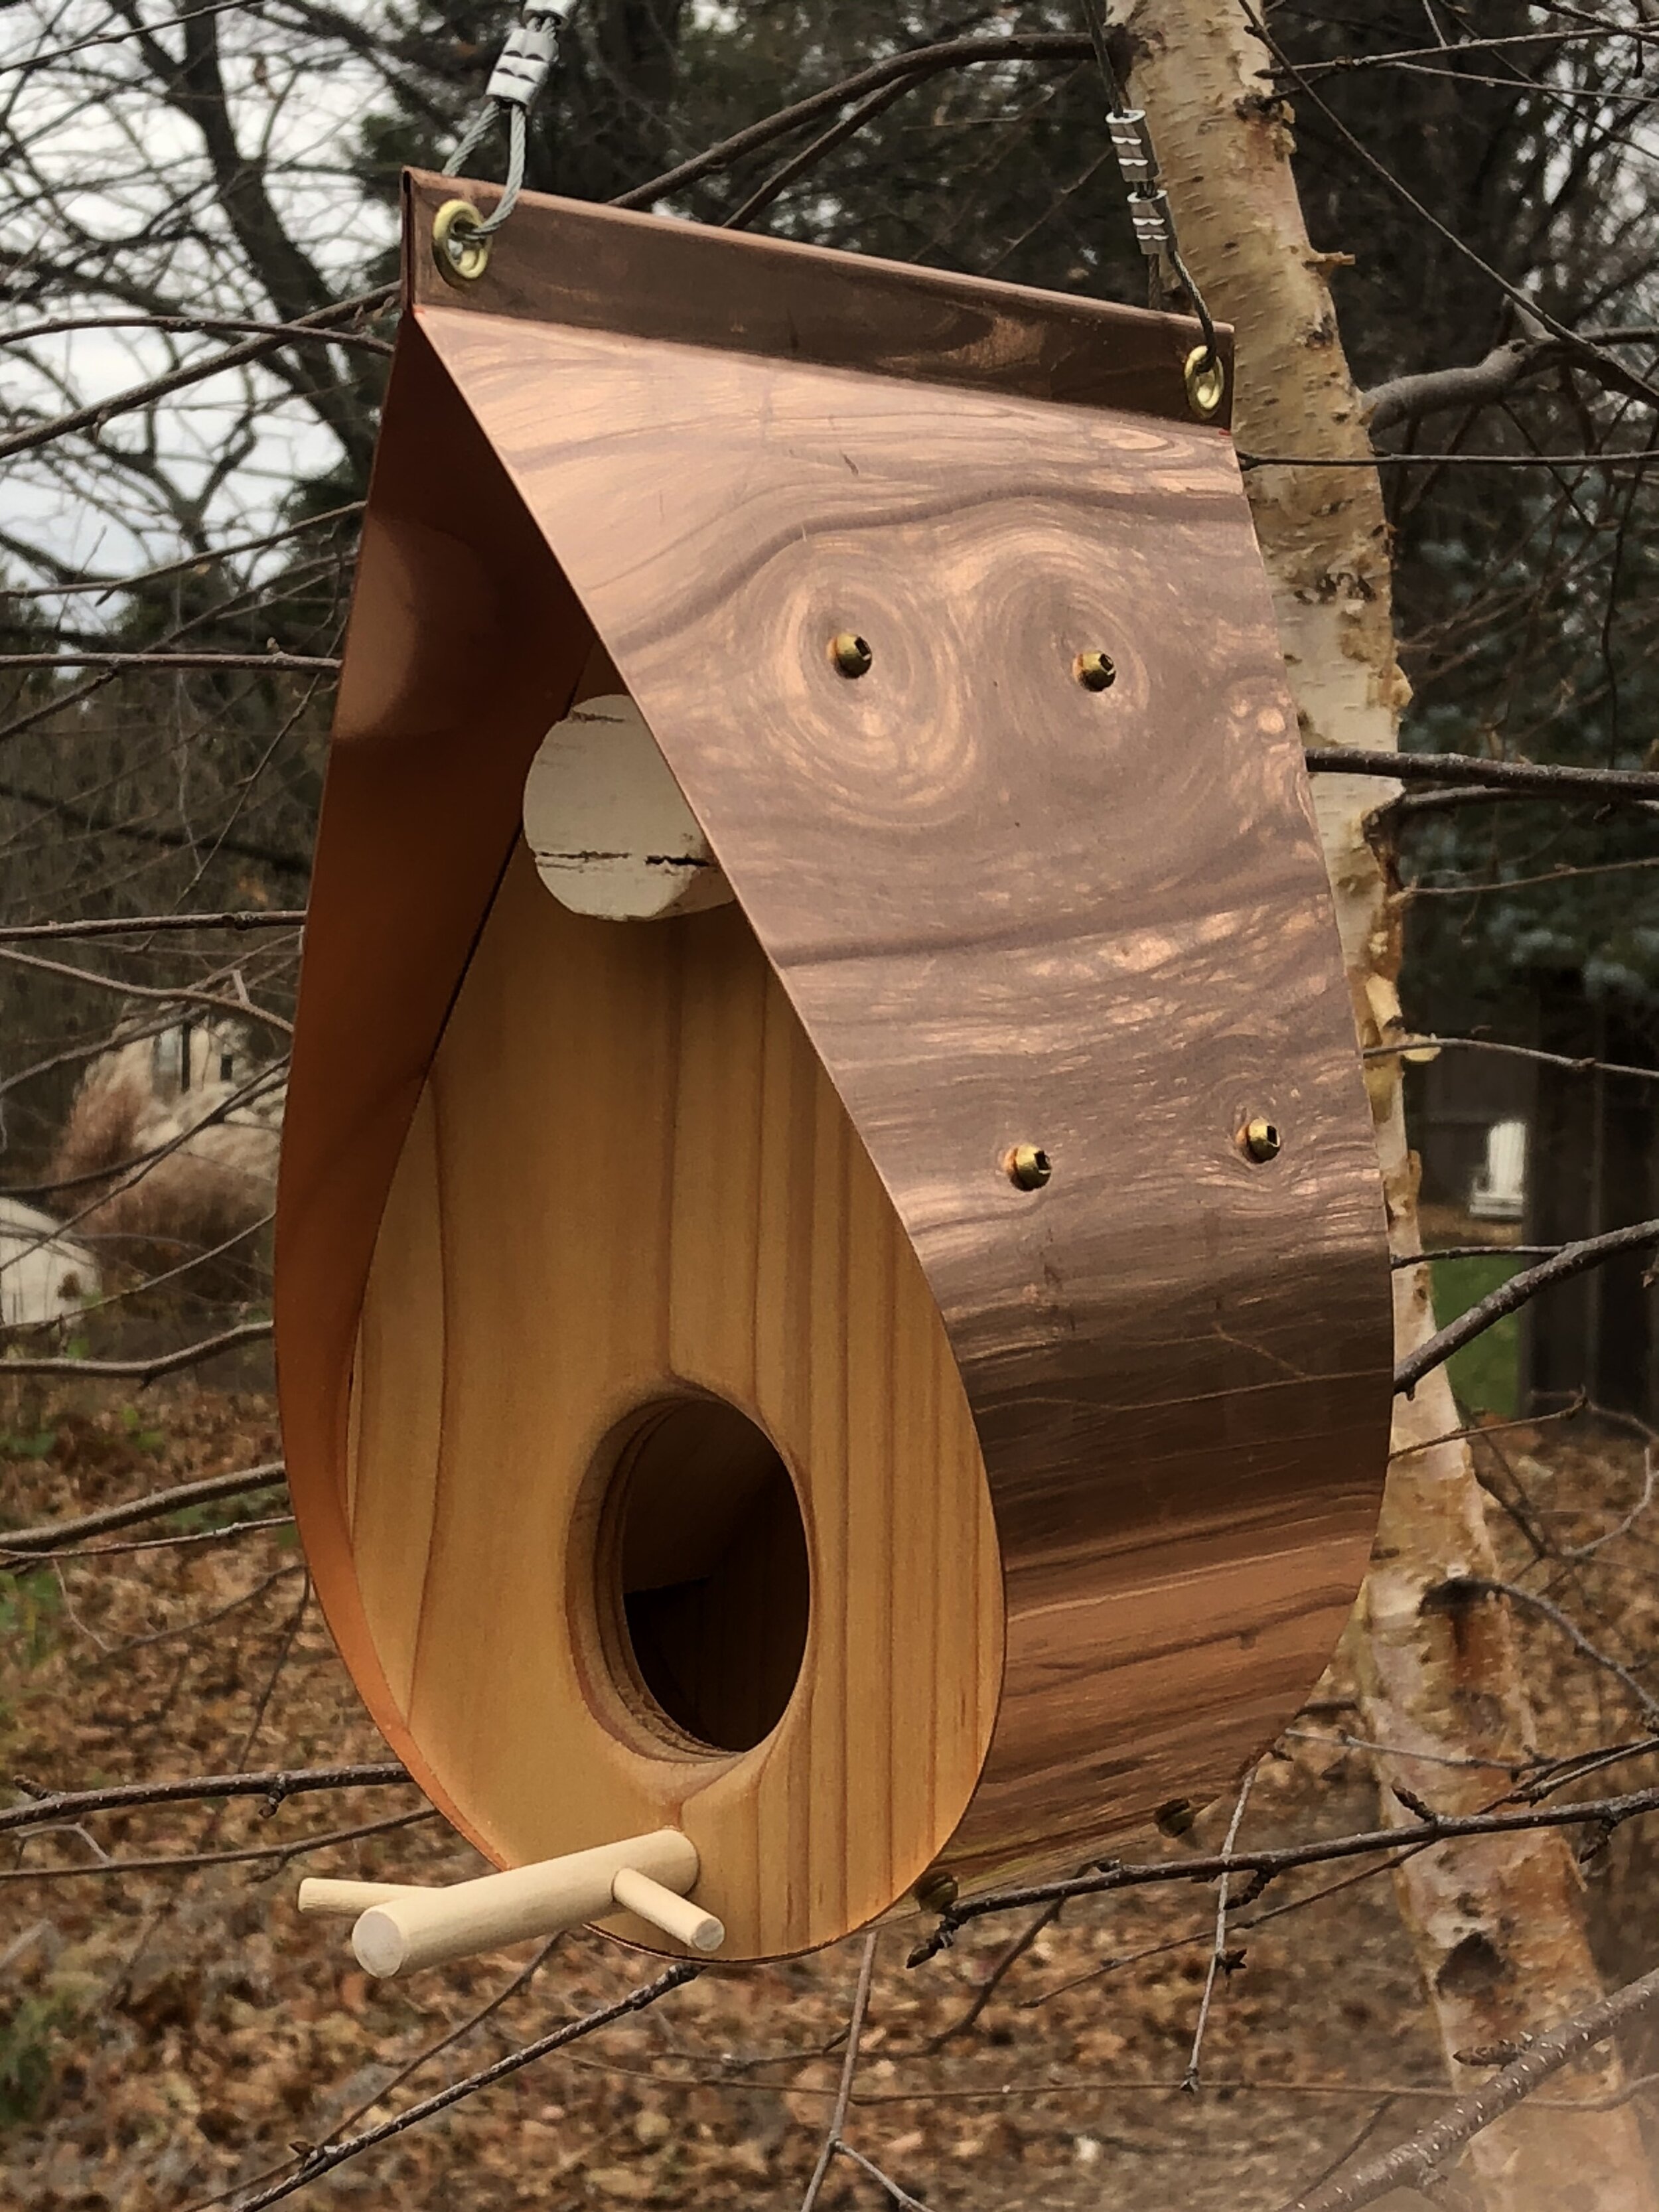
The ultimate bird feeder made with copper and cedar.
There was a time not too long ago when the only garden art available amounted to plywood cutouts of an elderly husband and wife from ‘behind’ out weeding in the garden. You remember them. Everyone had a good laugh at the couple’s expense.
But those times have changed.
I wrote a post about an architect couple from France who moved to Toronto and started a business combining their architectural skills and love of natural materials to create an exquisite bird feeder made from copper and cedar. (see picture) This feeder, although expensive, will provide a lifetime of joy and can be passed on to your children. It is available in new copper (as illustrated) or copper that has already been chemically aged with a lovely verdigras patina.
There are, of course, other bird feeders that are works of art, but don’t expect to find them at your discount store.
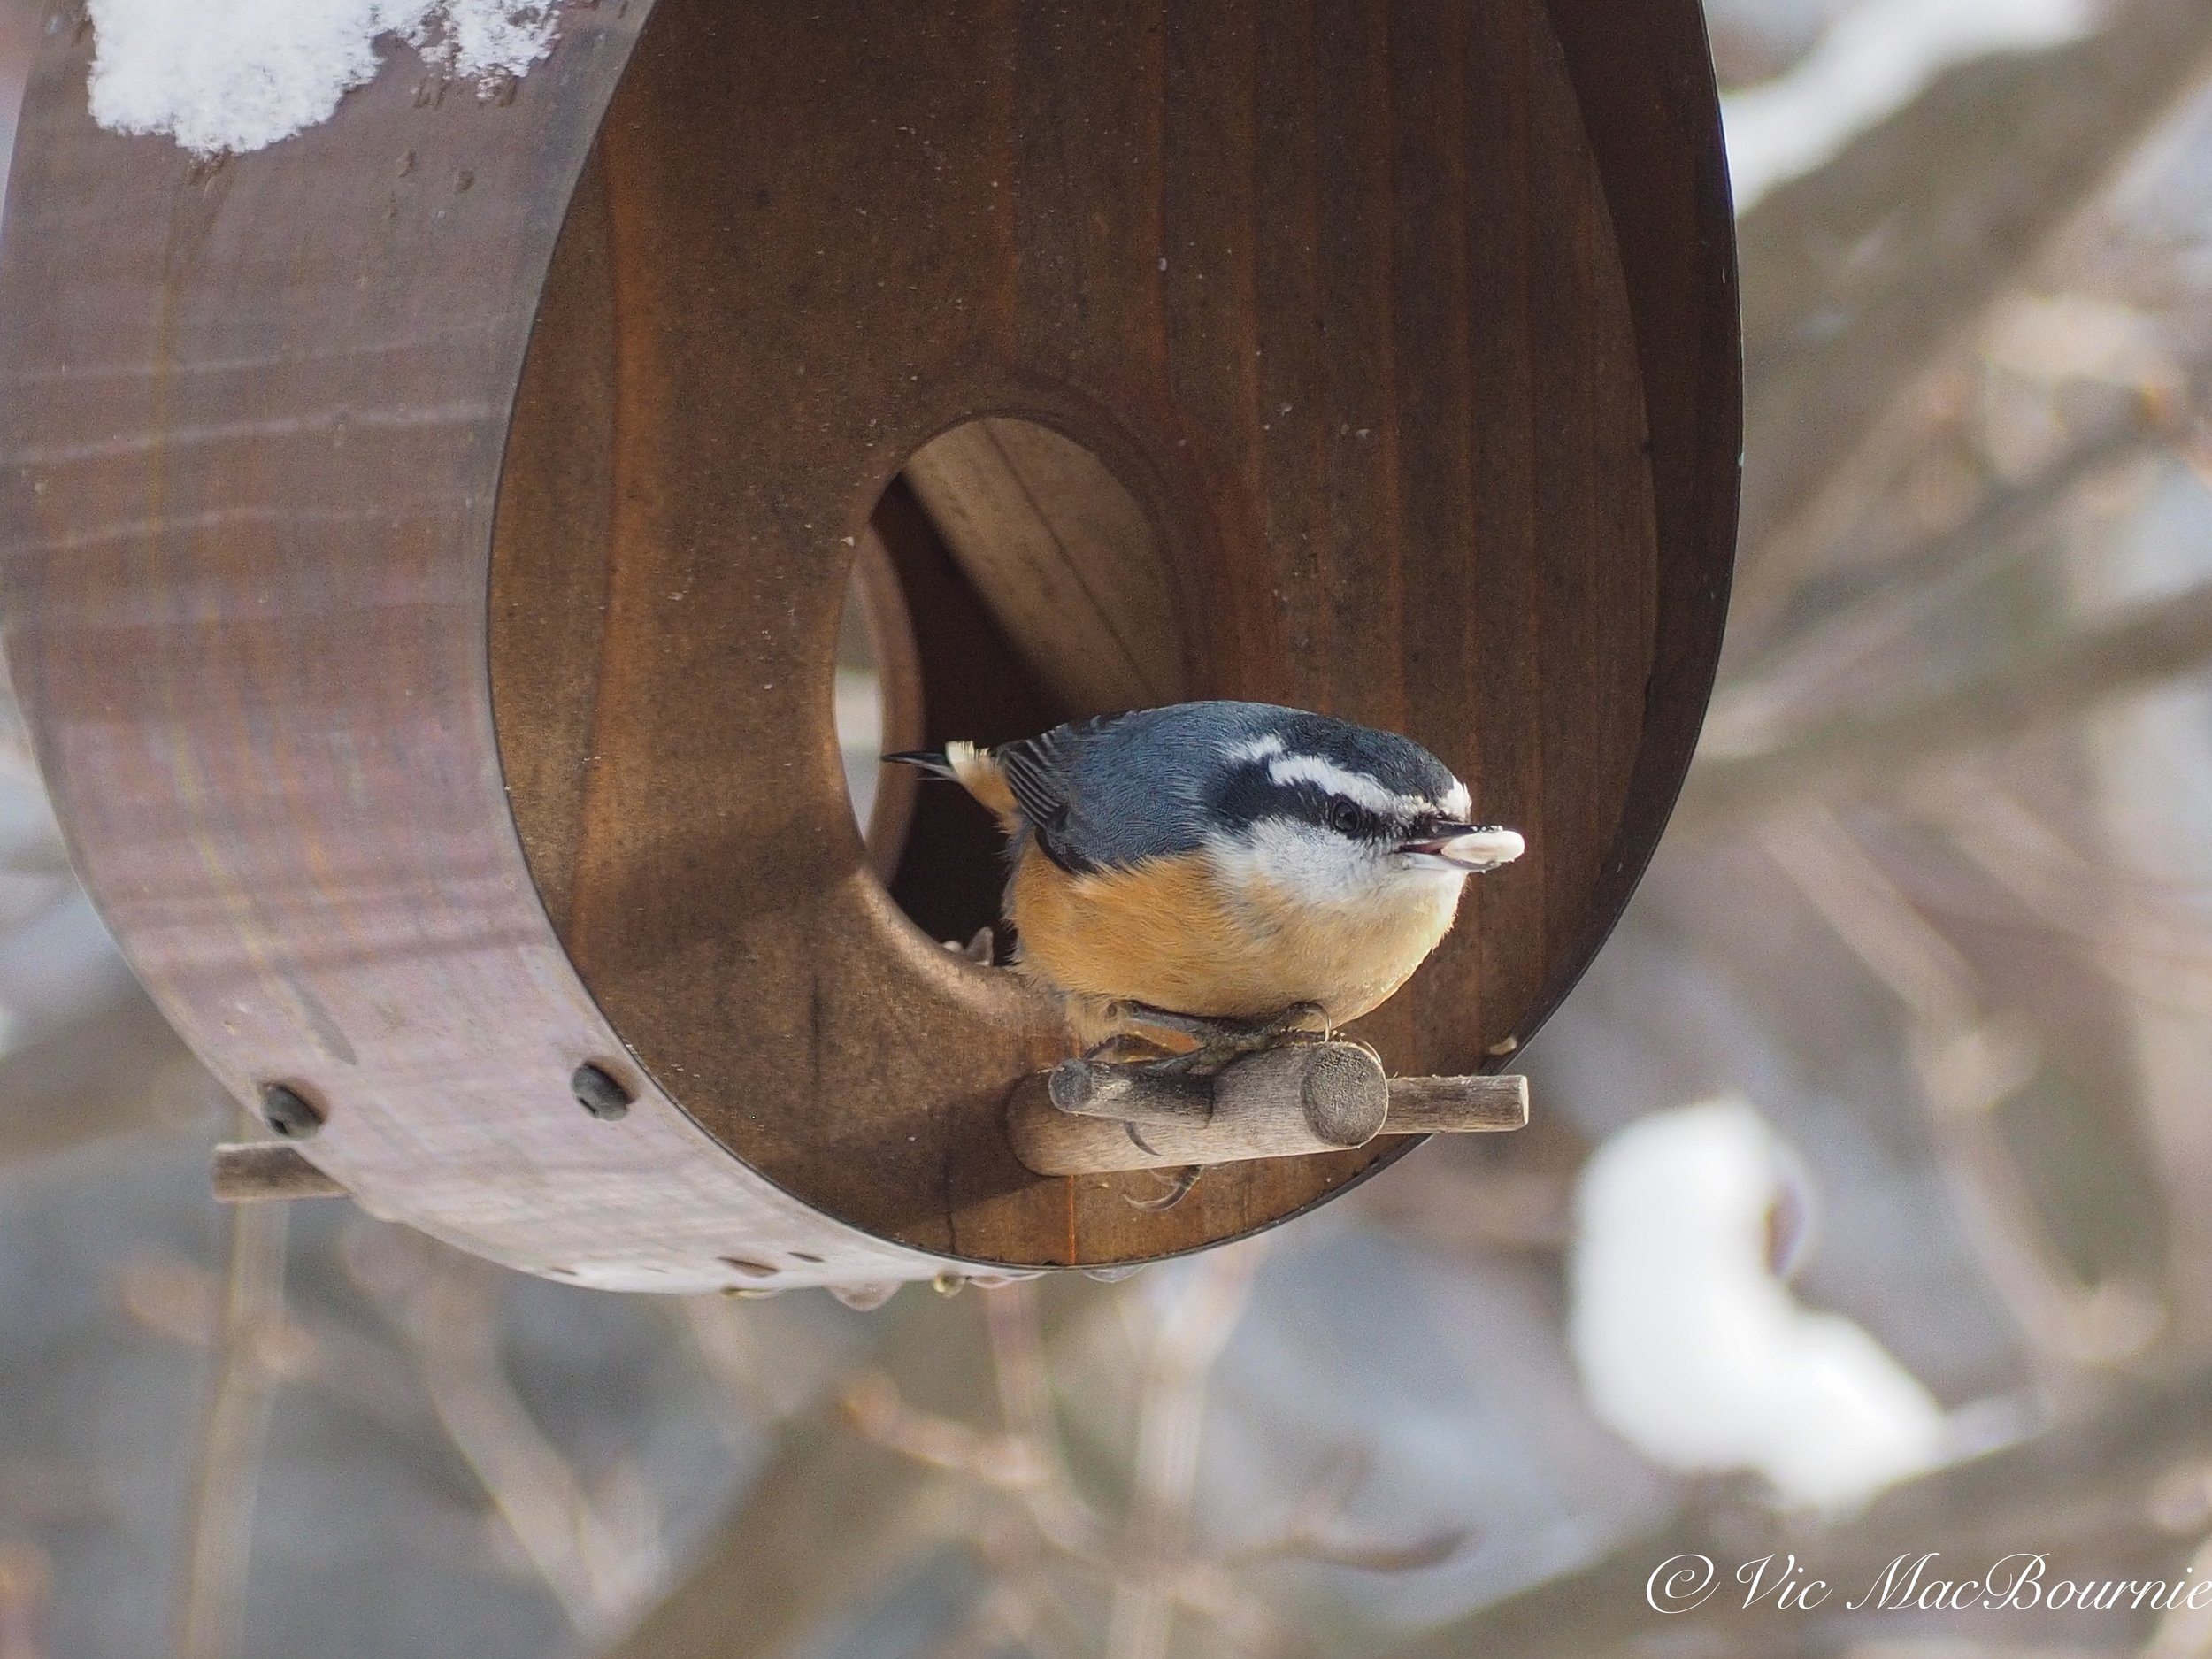
The copper and cedar bird feeder has aged nicely and taken on a lovely patina in only a few short years. And the birds love it too.
Although a finely aged concrete bird bath has been a staple in so many gardens, copper birdbaths not only look beautiful, they have natural microbial benefits that can make them a better choice.
I wrote about an elegant copper bird bath available at a fine garden and home boutique, but similar ones are available at many bird and home stores.
For more on growing your garden on a budget, check out my in-depth article here.
Use the iconic garden bench as art

The garden bench – especially an older, moss and lichen covered bench – can be a beautiful, yet useful addition to the garden.
Many years ago – certainly more than 20 years – I was desperate to get a garden bench. We lived in a typical subdivision and I was working diligently to create a mini woodland garden in the yard. The bench represented a destination along a simple path in this tiny garden. I wrote an earlier post on designing a woodland garden in a small yard and focused on the importance of a pathway in a small garden to help the viewer experience the garden as they walked through it.
Not only did our traditional garden bench provide a destination for the visitor, it offered the gardener a place to rest and enjoy the garden from a different perspective.
It’s another excellent example of how we can turn a utilitarian garden object into a wonderful piece of garden art.
Creating your own garden art is always the best approach.
Five tips and DIY ideas to add art to your backyard landscape
Look for naturally-aged garden objects such as birdbaths, birdhouses and garden benches that people are selling either at garage sales or at on-line sites such as Kijiji. I have picked up some of my favourite “art” pieces this way.
Use techniques (like the one described below) to age newer items rapidly so they better fit into your woodland setting
Most “artistic” elements are best discovered rather than presented for everyone to see. Consider using vegetation to hide your art, especially more whimsical pieces that, when unexpectedly discovered, will bring a smile to your visitor.
Purchase lasting pieces that incorporate natural materials like copper, cedar and even rusty steel that will add a rustic element to your garden.
Whenever possible, look to nature for its existing art forms. The beautifully coloured rock, an old cedar tree root, an elegant piece of driftwood. These are often found objects that add a natural element to the garden and be combined with bought items to create a lovely juxtaposition of old and new.
In those days garden art, even a nice garden bench was not easy to find. I did, however, find an inexpensive wooden bench at a discount department store and bought two. More than 20 years later they still form a focal point in our woodland garden. Never, however, do I actually sit on them. These inexpensive garden benches have taken on an incredible aged look, covered in lichen and mosses. After a spring rain, they more or less turn a soft green as the thick moss bursts to life from its more dormant state.
Our two benches now hold large black containers that are planted with colourful, hard-working annuals that create a hit of colour in the garden and draw attention to the beautiful wooden benches.
In another part of the garden, we have a small cement garden bench that is beginning its aging process. Letting it age naturally is a slow process. It might be time to help it along a little using the following method. It’s perfect for quickly aging cement containers, benches and garden statuary.
How to give concrete a mossy, aged patina
A quick search on the internet provides several alternatives to creating an aged look for new concrete. It works on statuary as well as concrete containers. Mother nature and time does most of the work naturally, but some simple steps help to hurry the effect along. What might take mother nature years to create, can be done in a few weeks or months by following these steps.
• Start by mixing a weak solution of water and black acrylic or water-based paint and apply it to the cement statuary. Let dry and apply a second or third coat. The effect is simply to give the statuary a ‘dirty’ look rather than the stark white one it often has when it is new.
• Mix yogurt or buttermilk in a bucket with equal amounts of water, compost or soil and even some manure. You can add in some crushed moss at this stage as well. The result should be a thick spreadable paste.
• Paint on the mixture to the cement statuary or container ensuring you cover all areas especially creases where moss would naturally take hold.
• Take a handful of moss and rub the surface of the concrete to spread the moss spores into the concrete.
• Finally, store the concrete statuary or container in a moist and shady spot to encourage the aging process and keep it moist for a number of weeks until you see the moss get established.
Our gardens need to be inspirational places and what better way to achieve that than to add a few pieces of garden art, whether they are nature’s art like the boulder or store-bought statuary.
Statuary is great addition for the woodland garden
Garden statuary has always been a part of the garden and works well as it ages, often taking on a mossy patina.
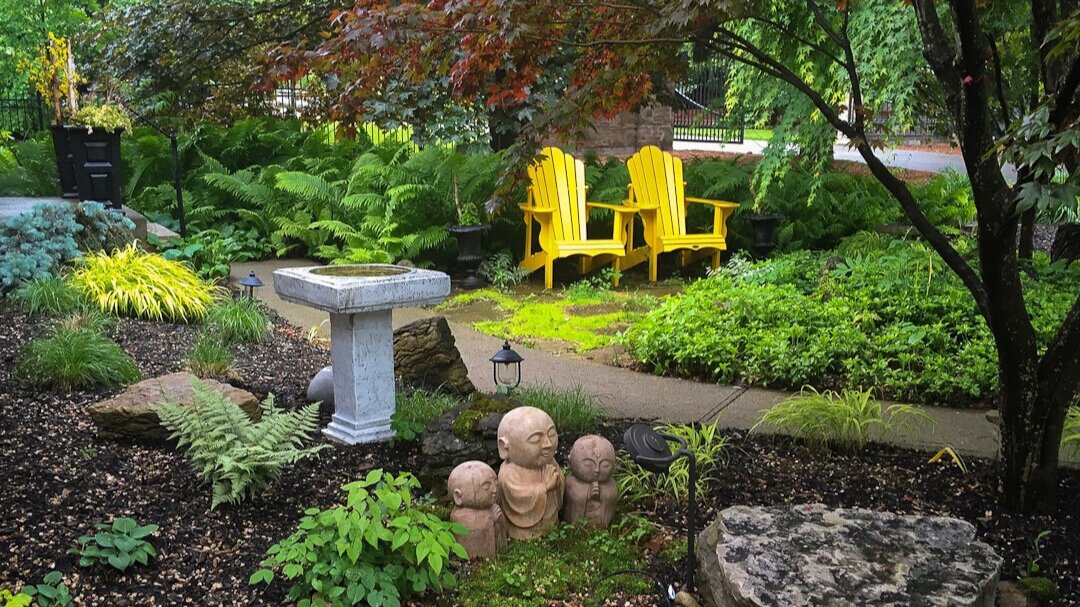
In my Japanese-inspired woodland garden, we have incorporated traditional Japanese statues praying together surrounded in a patch of moss. With a little encouragement, I am hoping they will take on a mossy appearance for a truly aged look.
In another area of the garden, a statue of Saint Francis, the patron saint of animals, would be a perfect addition.
We have a number of aging cement statues of small animals tucked away throughout the garden. For much of the growing season they are mostly hidden from view, tucked away in the vegetation. It would be easy to miss them on a walk through the garden.
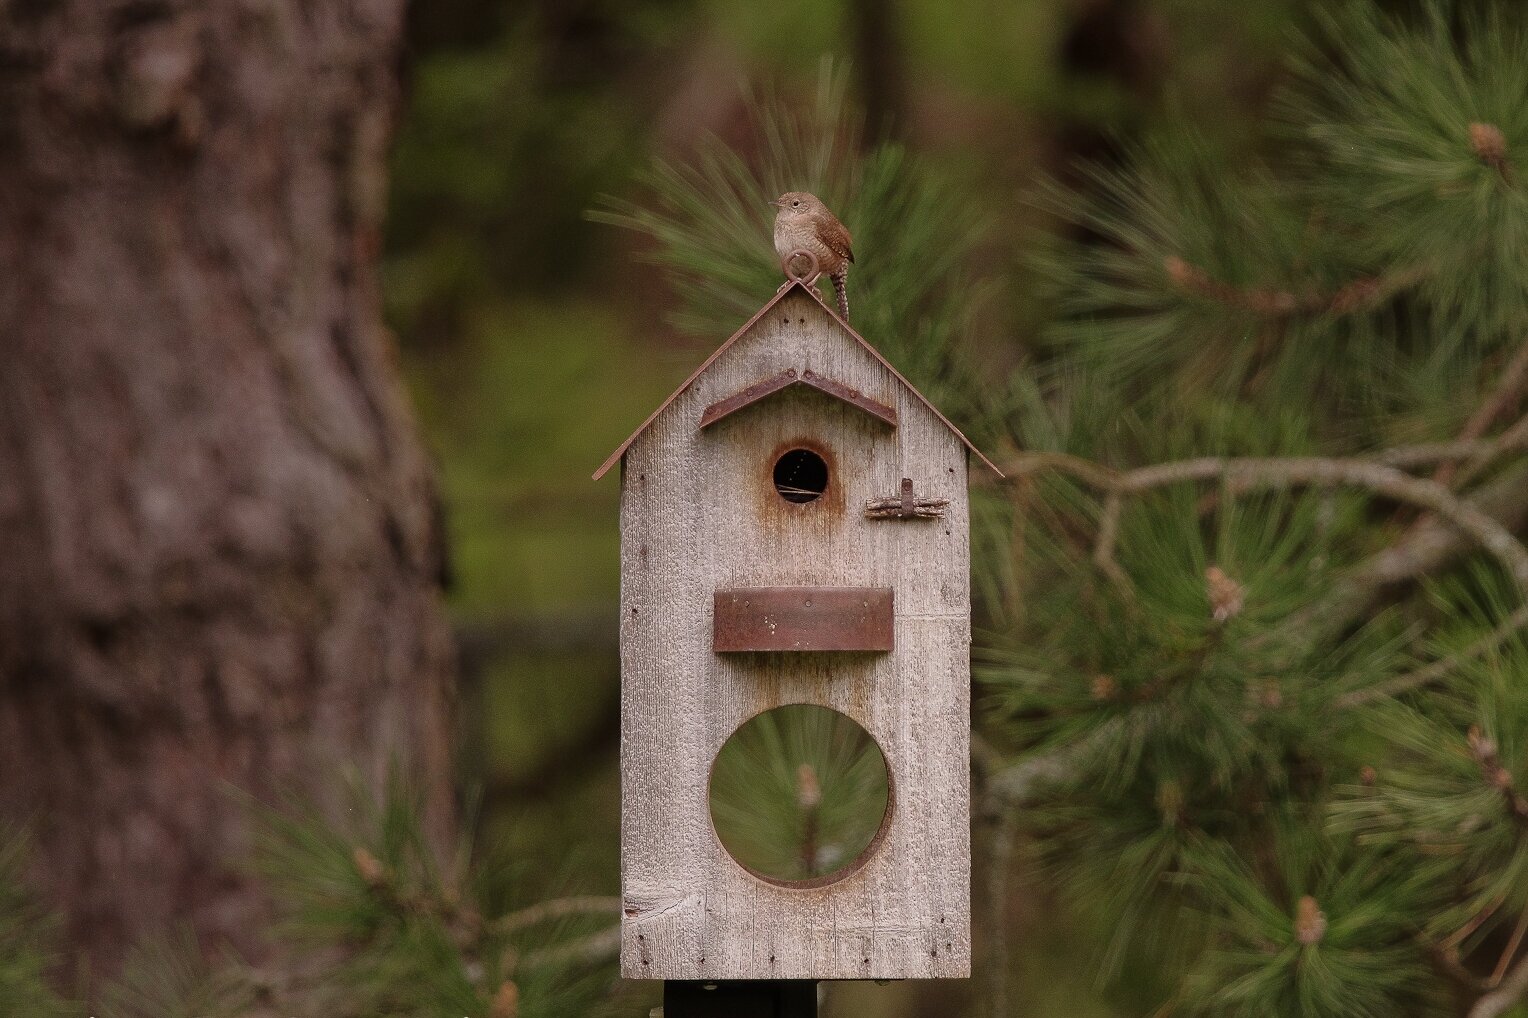
This rustic bird house and feeder fits the woodland theme and provides the ideal home for this Carolina wren.
In most woodland gardens, however, garden art should be more subtle. Consider a trip to your local nursery or rockery in the spring and scour their new moss-covered boulders to find the one that works perfectly in your woodland setting.
In another area, a gnarly branch that fell from a tree can serve as art. Place it somewhere in the garden where it’s natural beauty can age gracefully and work its way back into the soil while it provides homes for insects, small reptiles like red-backed salamanders and toads.
The moss-covered rock or twisted branch may also form the perfect natural landing spot to catch some great photographs of birds in your garden. Encourage moss and lichens to grow in the cracks but leave enough room to tuck in a few sunflower seeds to attract the birds to the exact spot you want to photograph them.
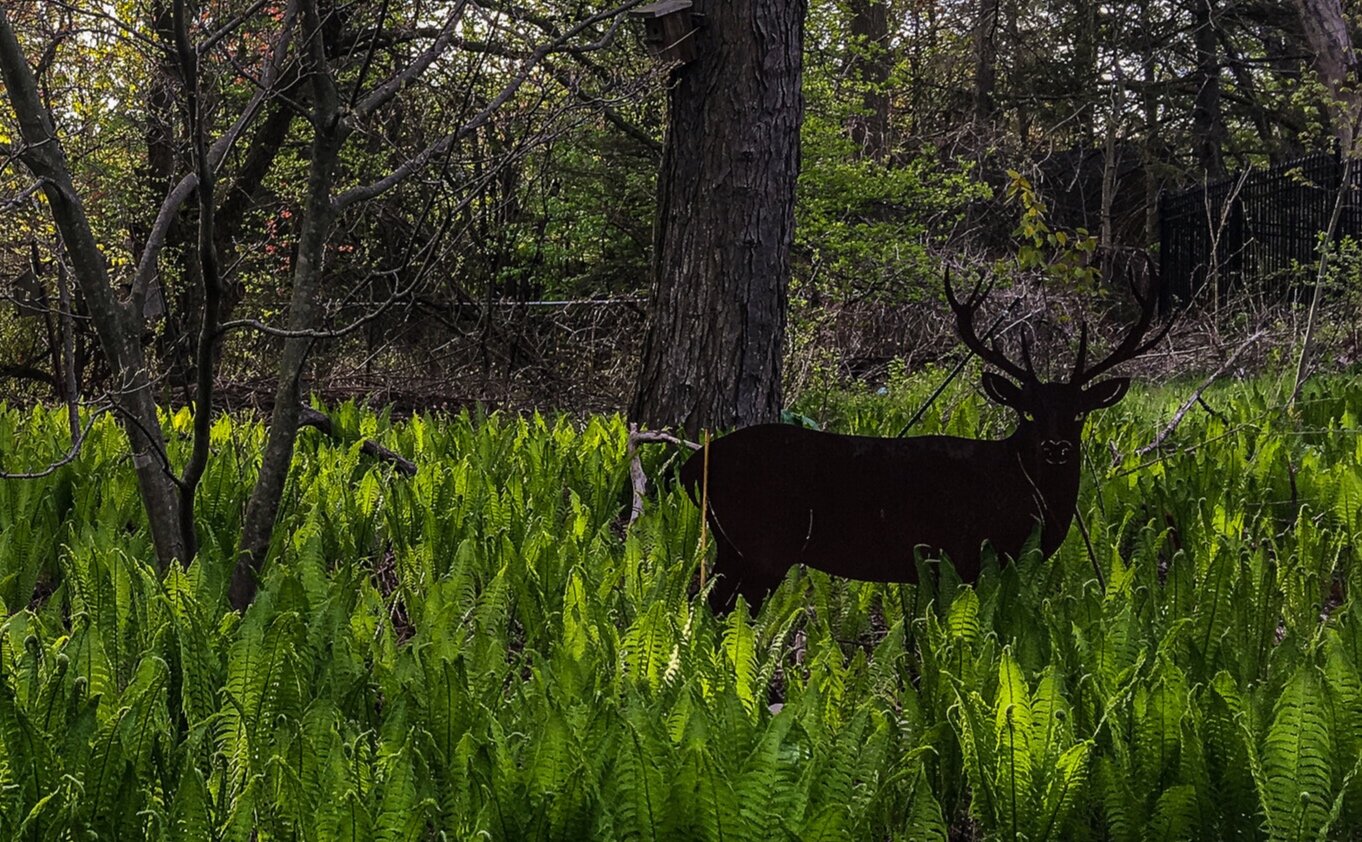
Rusty Buck standing guard in the ferns ties in to the rustic theme of the garden art in this section of the garden.
The rusty buck as garden art
Probably our favourite piece of garden art my wife and I purchased was from a boutique garden store we noticed on a day-outing. The store was tucked away in a small Mennonite community about an hour and a half drive from our home. We both noticed it as we drove by and immediately turned around to check it out. It’s another example of a piece that gets better with age. Now every time we see our rusty buck tucked in the ferns, it brings a smile to our face. Not sure what the native male deer think when they see our rusty buck, but it’s been knocked over on the ground in the morning more than once. Could be the wind, could be a jealous buck. We may never know.
Gardening on a budget links
Ten money-saving tips for the weekend gardener
DIY Bark Butter feeder for Woodpeckers
DIY reflection pond for photography
Click & Grow is ideal for Native Plants from seed