
How to create bird artwork from digital watercolour paintings
Creating artistic interpretations from photographic images can be an extremely rewarding endeavour that is not only a way to get your creative juices going during the cold days of winter, but an excellent way to see your photographs in a different light.
Turn backyard birds and garden photos into works of art
Since digital images became mainstream in the world of photography, learning to manipulate pixels has become increasingly important for serious photographers.
For garden photographers, artistic interpretations can turn your favourite flower and bird images into beautiful works of art. And who doesn’t appreciate artwork of birds.
There was a time photographers really didn’t need to know about software programs. Jpegs, tiffs and RAW images had not been born and perfect exposure was crucial to keeping an image or throwing it in the wastebasket.
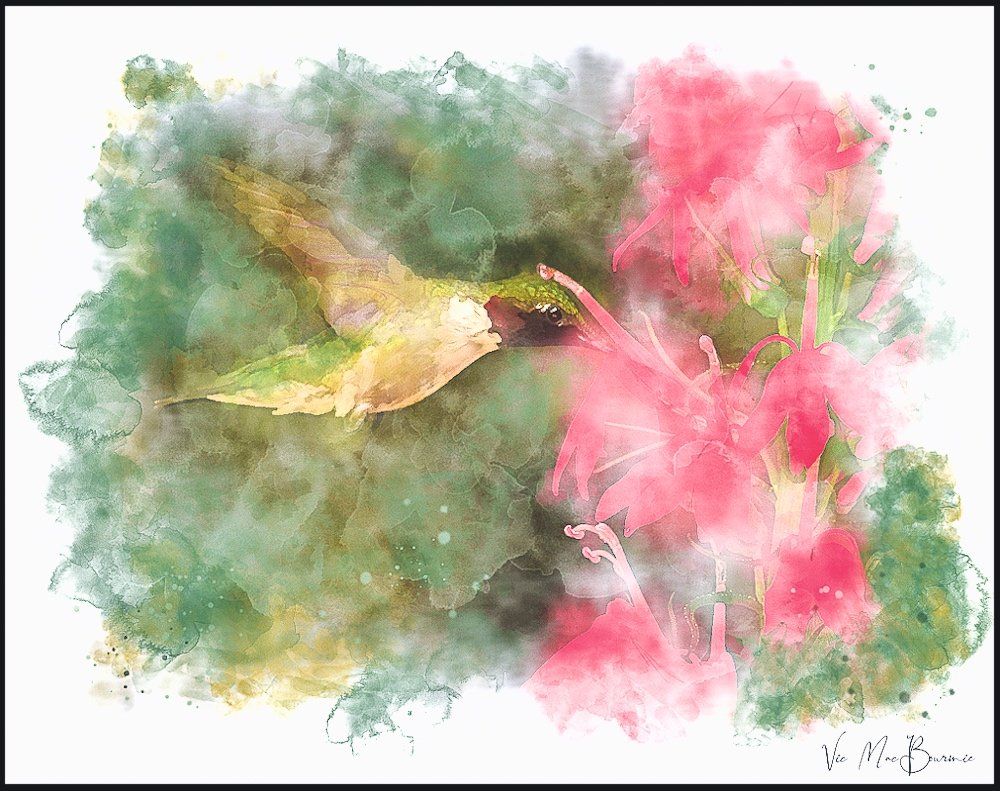
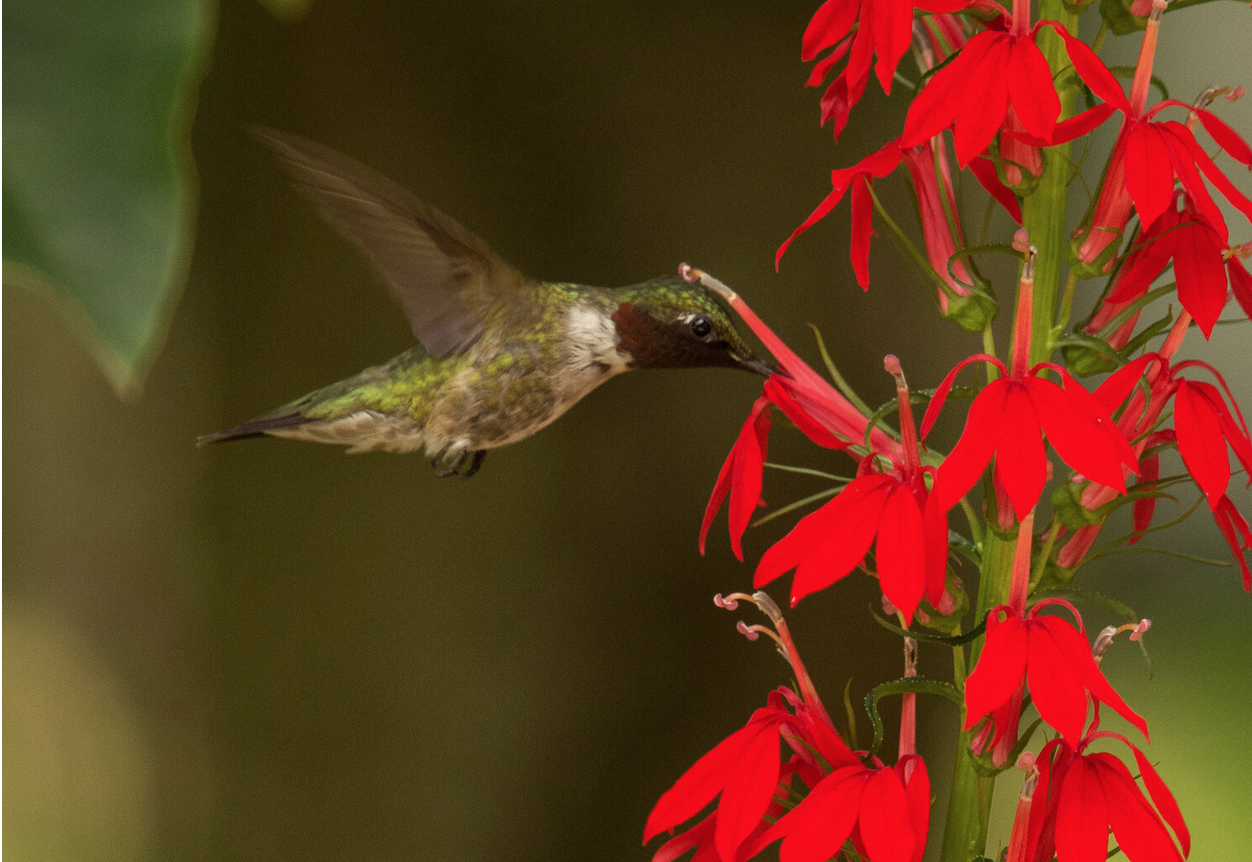
This digital image of a hummingbird at a Cardinal flower is a good example of how it’s possible to create works of art with your photographs.
Go here for more Hummingbird images including digital art.
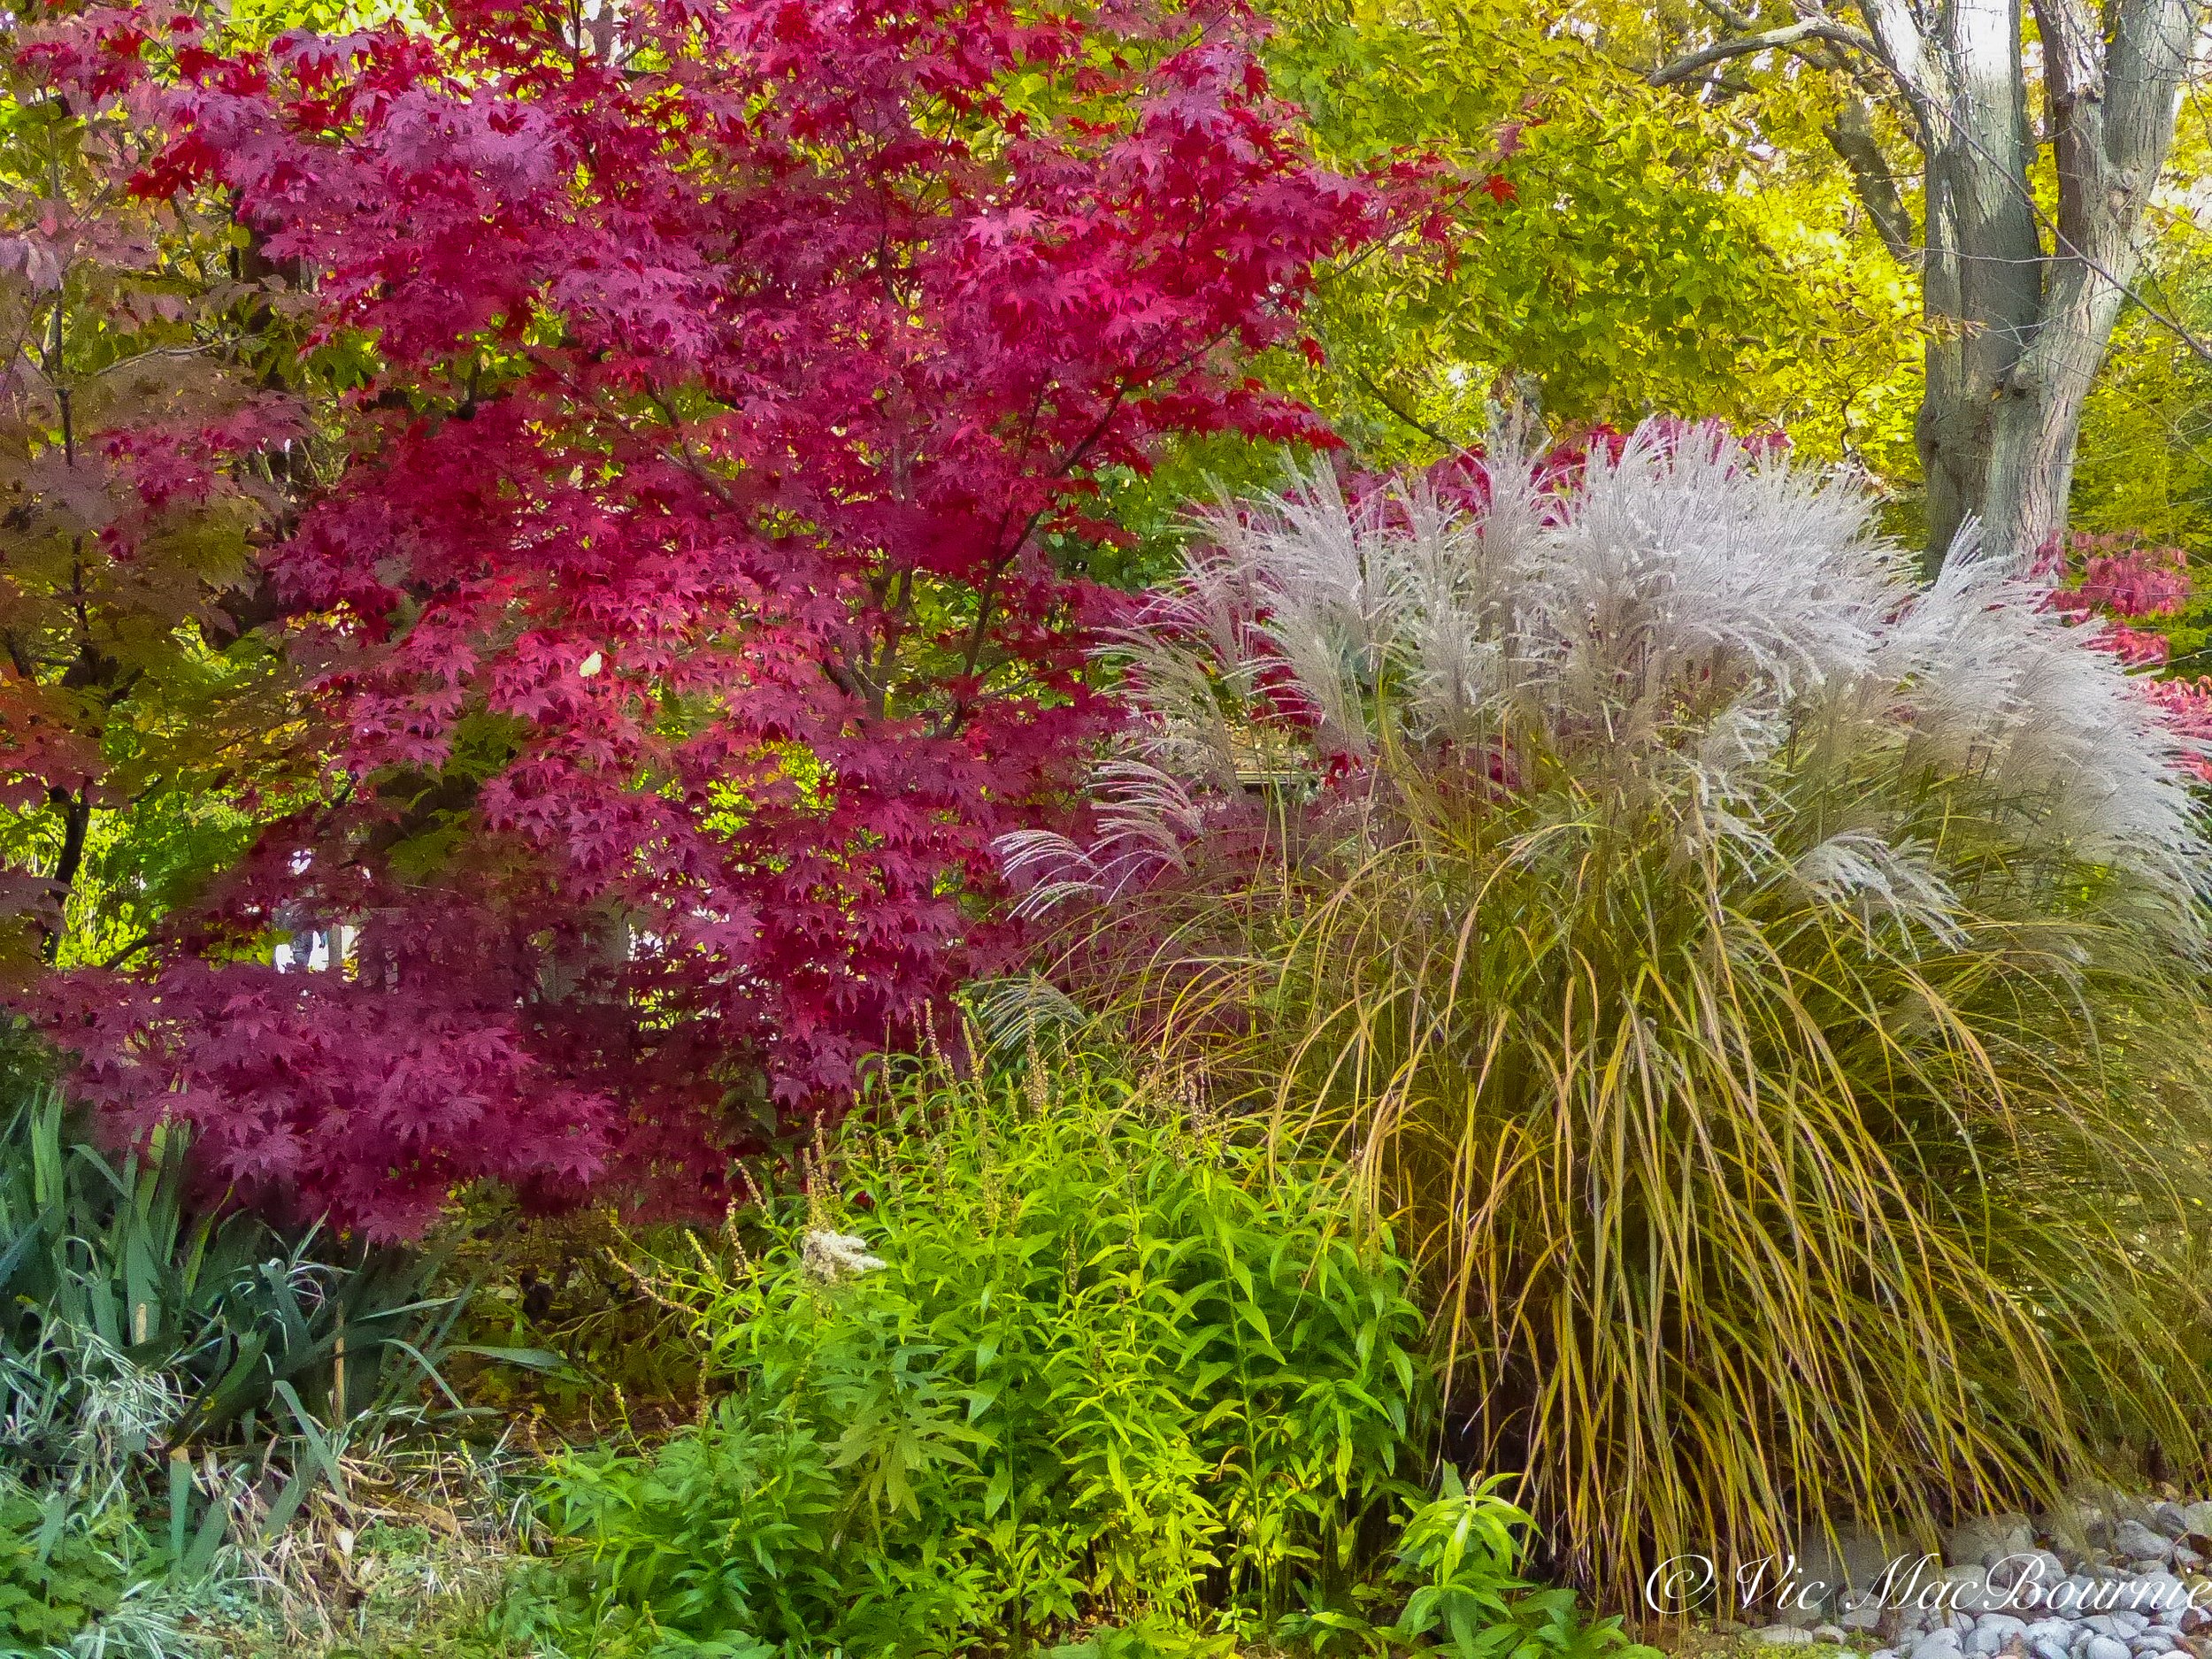
Much of their “artistic creations” centered around in-camera techniques such as selective focus as shown by the colourful tulips (above).
For more on selective focus in garden photography check out my article on photographing snow in summer.
(If you are interested in exploring garden photography at a higher level, be sure to check out my comprehensive post on the Best camera and lens for Garden Photography.)
Today, if you take photography at all serious, you not only need to know the basics of photo manipulation, you almost need to be an expert in some way.
These days my main photo data base and manipulation program is without a doubt Lightroom Classic, but it’s not the program I use to transform my photographic images into watercolour paintings.
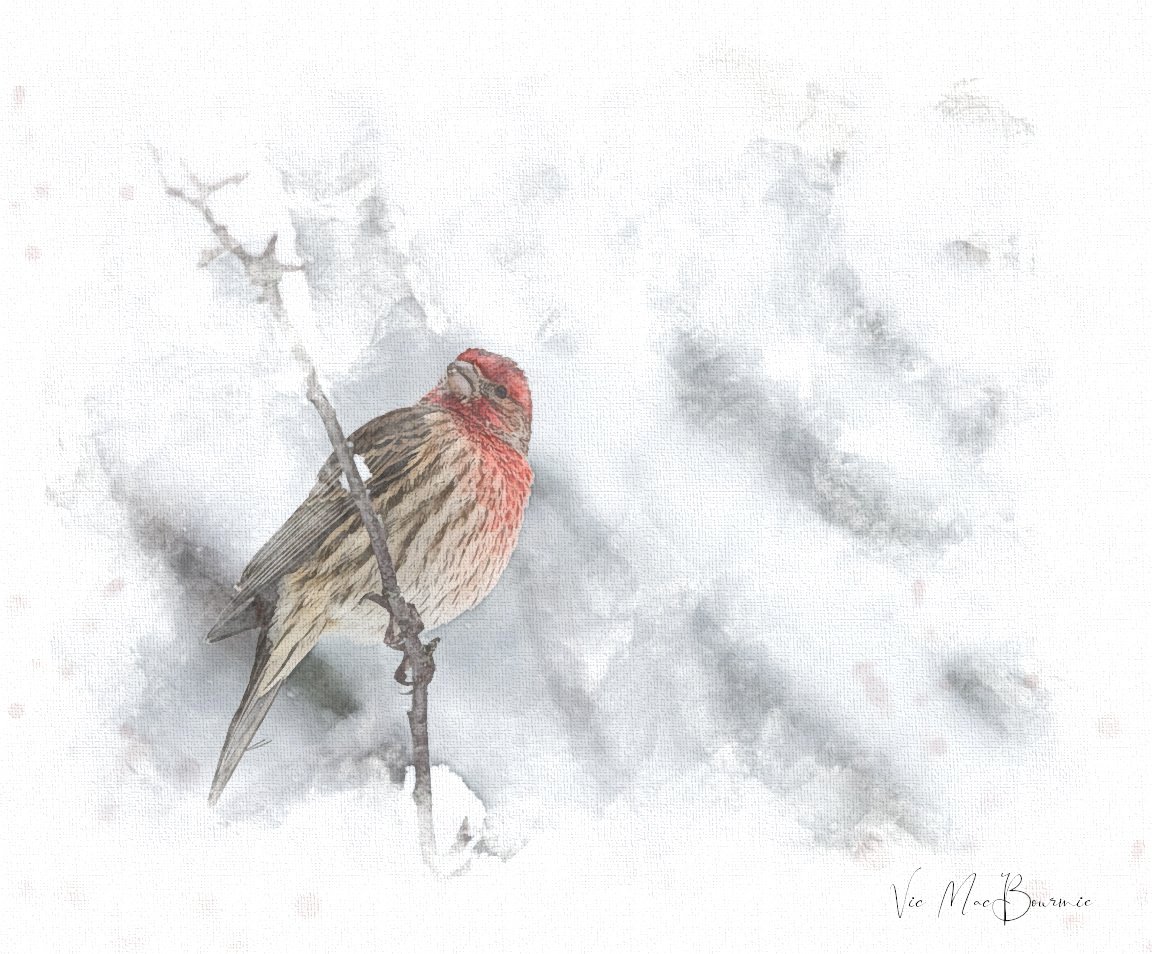
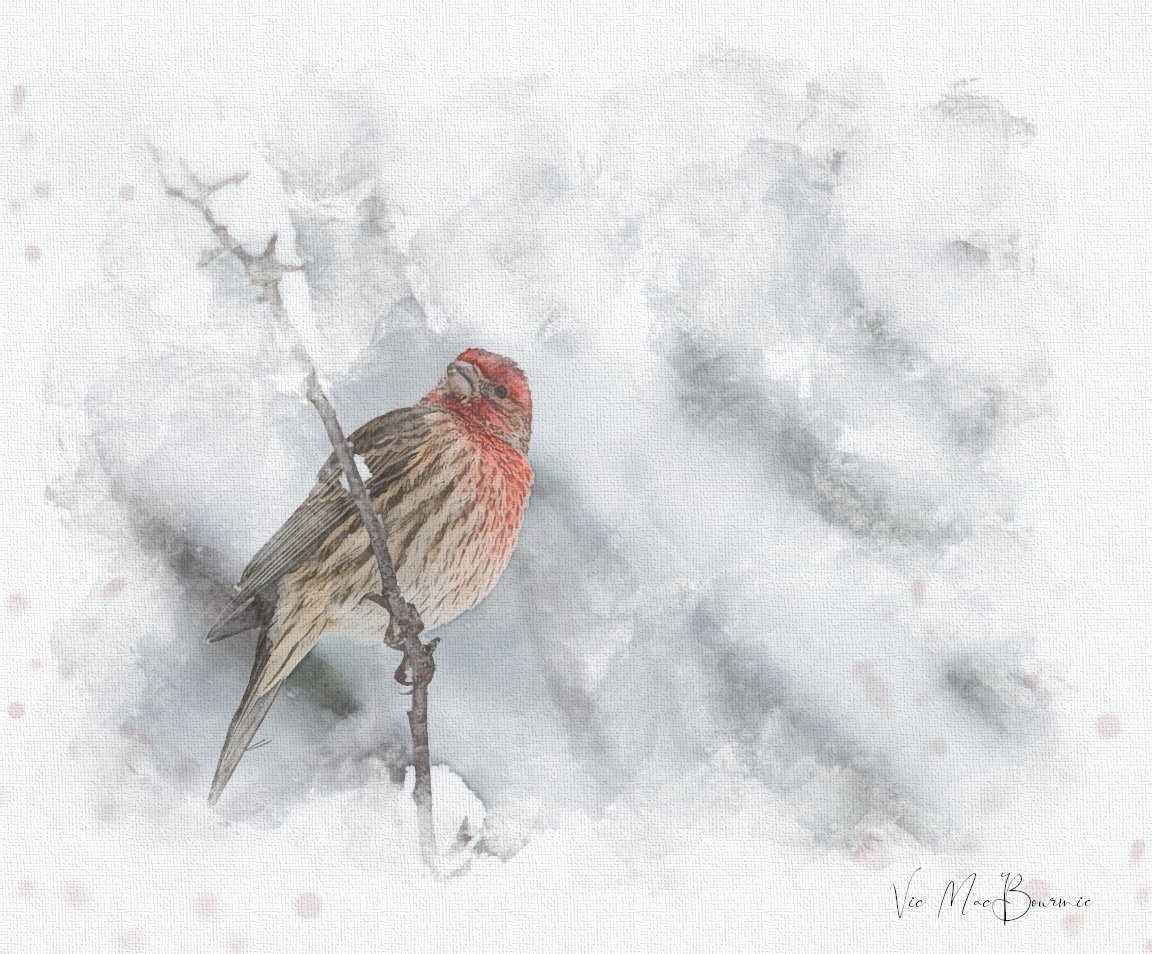
This artwork of a bird was created from a photograph taken in the garden and then manipulated in post processing with programs like Photoshop and Lightroom.
While most photographers focused on improving their images, I have always been interested in transforming my images into a more artistic interpretation of that same photograph. Over the years, I’ve spent a lot of time playing with the likes of the many variations of Photoshop before discovering Painter (Mac Link) (Windows Painter link) – a program that can best be described as a fine artists’ version of Photoshop. In other words Painter is to artists, what Photoshop is to photographers.
This seemed a perfect marriage to achieve my goals of turning photographic images into works of art, accept without any formal training in fine art, and facing more tools, paintbrushes and artistic choices than I could imagine, to say I was a little overwhelmed was an understatement.
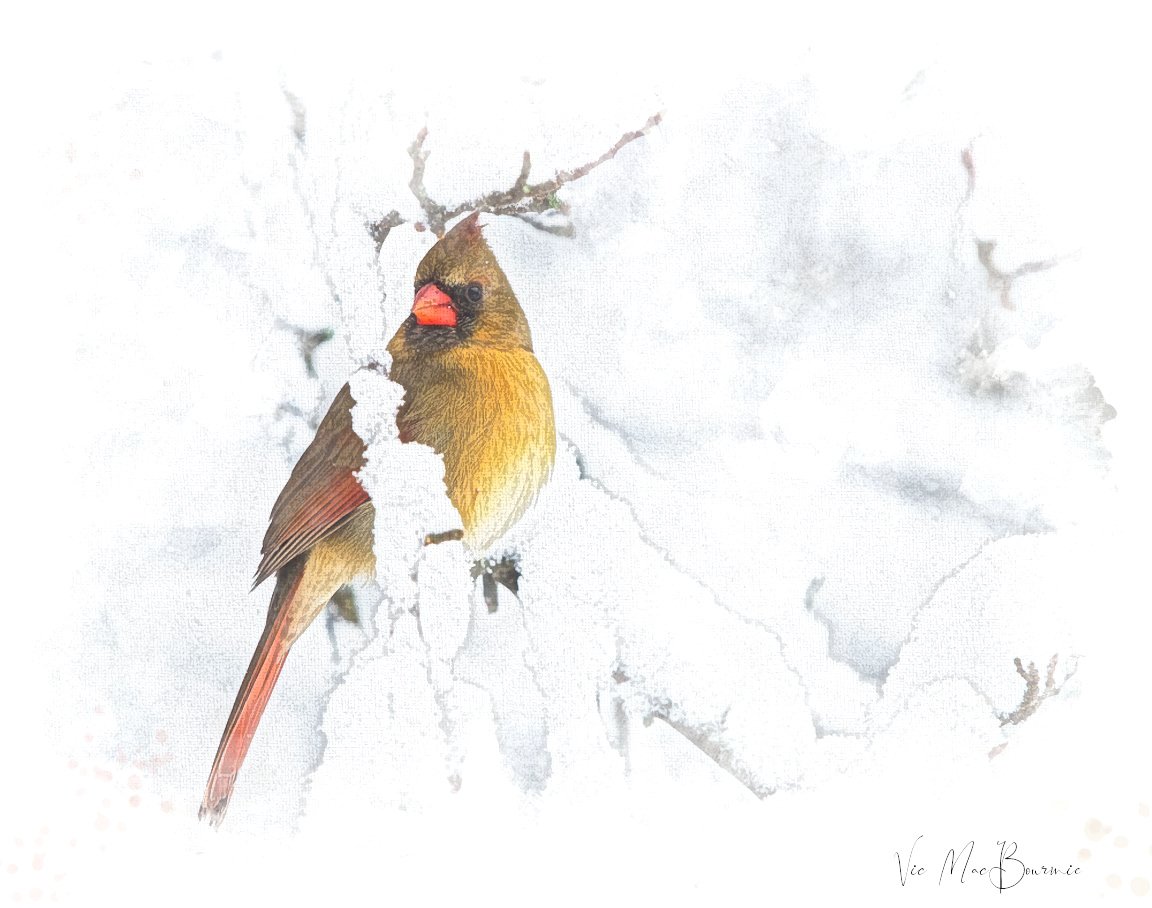
This artwork of a female cardinal was created from a photograph that got the creative treatmen in programs like Photoshop, Painter and Lightroom.
After “a lot” of computer time trying to understand the intricacies of Painter, I eventually taught myself the basics and proceded to work on animal portraits for hours and sometimes days to get them where I wanted.
For my animal portraits, I used a process that involved meticulously going into the original photograph and softly smudging tiny areas of the image to create a sort of painterly effect. For the most part, all this tedious work went unnoticed in the final versions, but it all served as a learning process and, to this day, I still like the results.
Since the animal portraits, I have continued experimenting with painterly images.
Fast forward to today. I no longer use Painter for my artistic endeavours and still can honestly say that I have no clue what I’m doing, but I am getting happier with some of the results.
And, there is no better way to pass time in the cold winter months than taking an afternoon going over some of your favourite images, isolating ones that you think might make nice watercolour images, and experimenting with one of the many programs you may already have to create your own works of art.
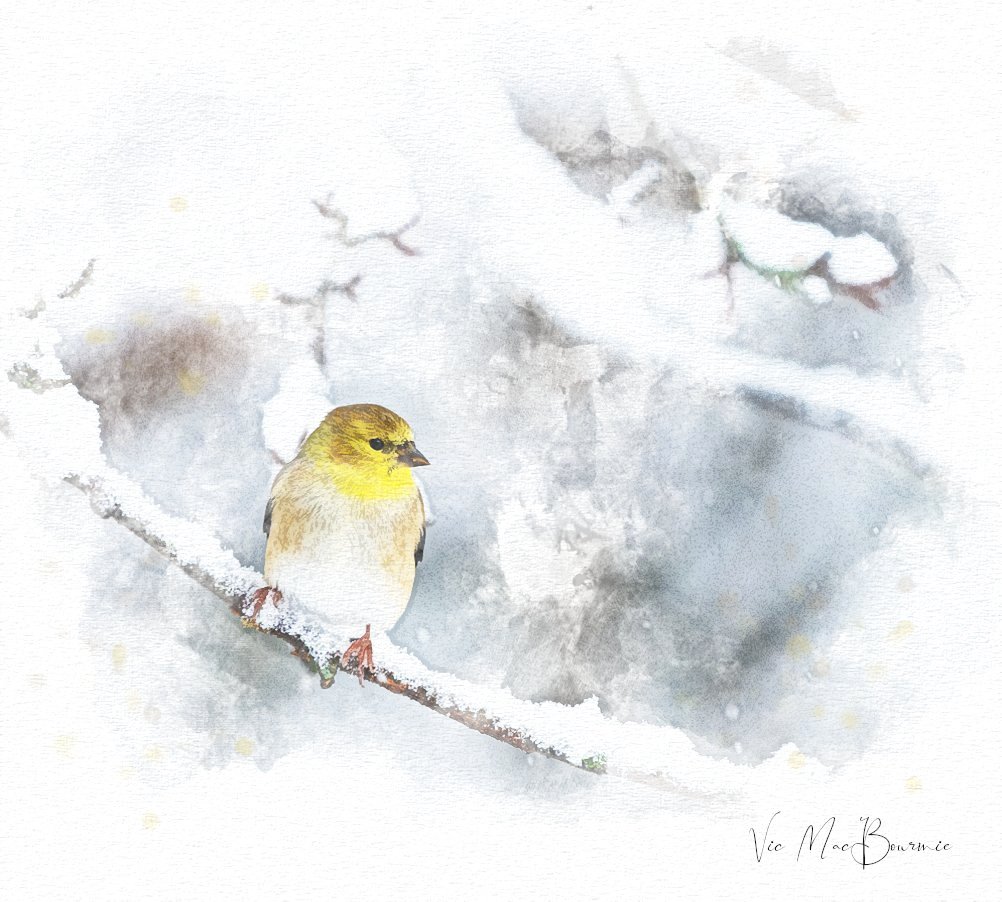
This creative interpretation of a Goldfinch in a snowstorm was created from a photograph and turned into artwork of a bird.
Right now I’m using a free program that you download from the web called GIMP, which is an excellent substitute for Photoshop.
The equivalent “free” program for Painter fans is Krita, another excellent program that has endless possibilities for artists looking to experiment in the digital world.
The GIMP community – particularly the available YouTube videos – make learning the program relatively easy and extremely enjoyable. Following the step-by-step procedures on the various YouTube channels will have even the most inexperienced user creating nice images in a relatively short time.

Prior to Photoshop and other digital manipulation programs, photographers used selective focus techniques like the tulip image above to create more artistic images. Selective focus can still be a very effective way to bring an artistic feel to your garden images.
Try searching “Turning photos into art” and you will be rewarded with a host of videos that will start you down the path to your particular artistic vision. Not all the videos focus on turning your images into watercolour images. Many focus on pencil drawings (which I have also experimented with), digital drawings, pastels…
After learning the basics from YouTube, I proceeded to develop my own method of creating the watercolour images from my photographs. Although the procedure for each image is similar, I like to let the original image dictate the various steps needed to attain the finished result.
It’s difficult to give you a step-by-step guide on how to create these images because I like to think each image is it’s own work of art and I rarely approach each image in the same manner.
I will, however, provide some guidelines that will help you get started as well as a general guideline of the steps I take in creating an image.
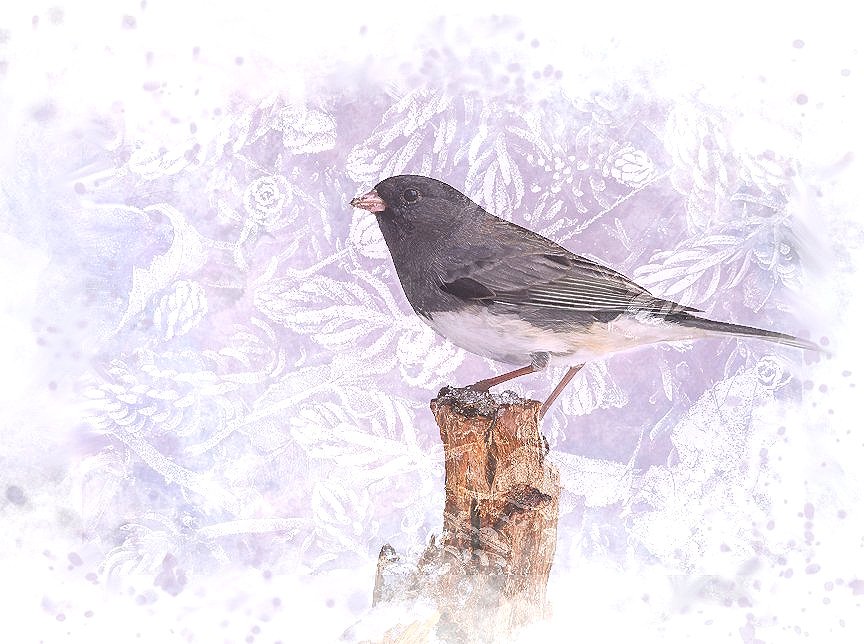
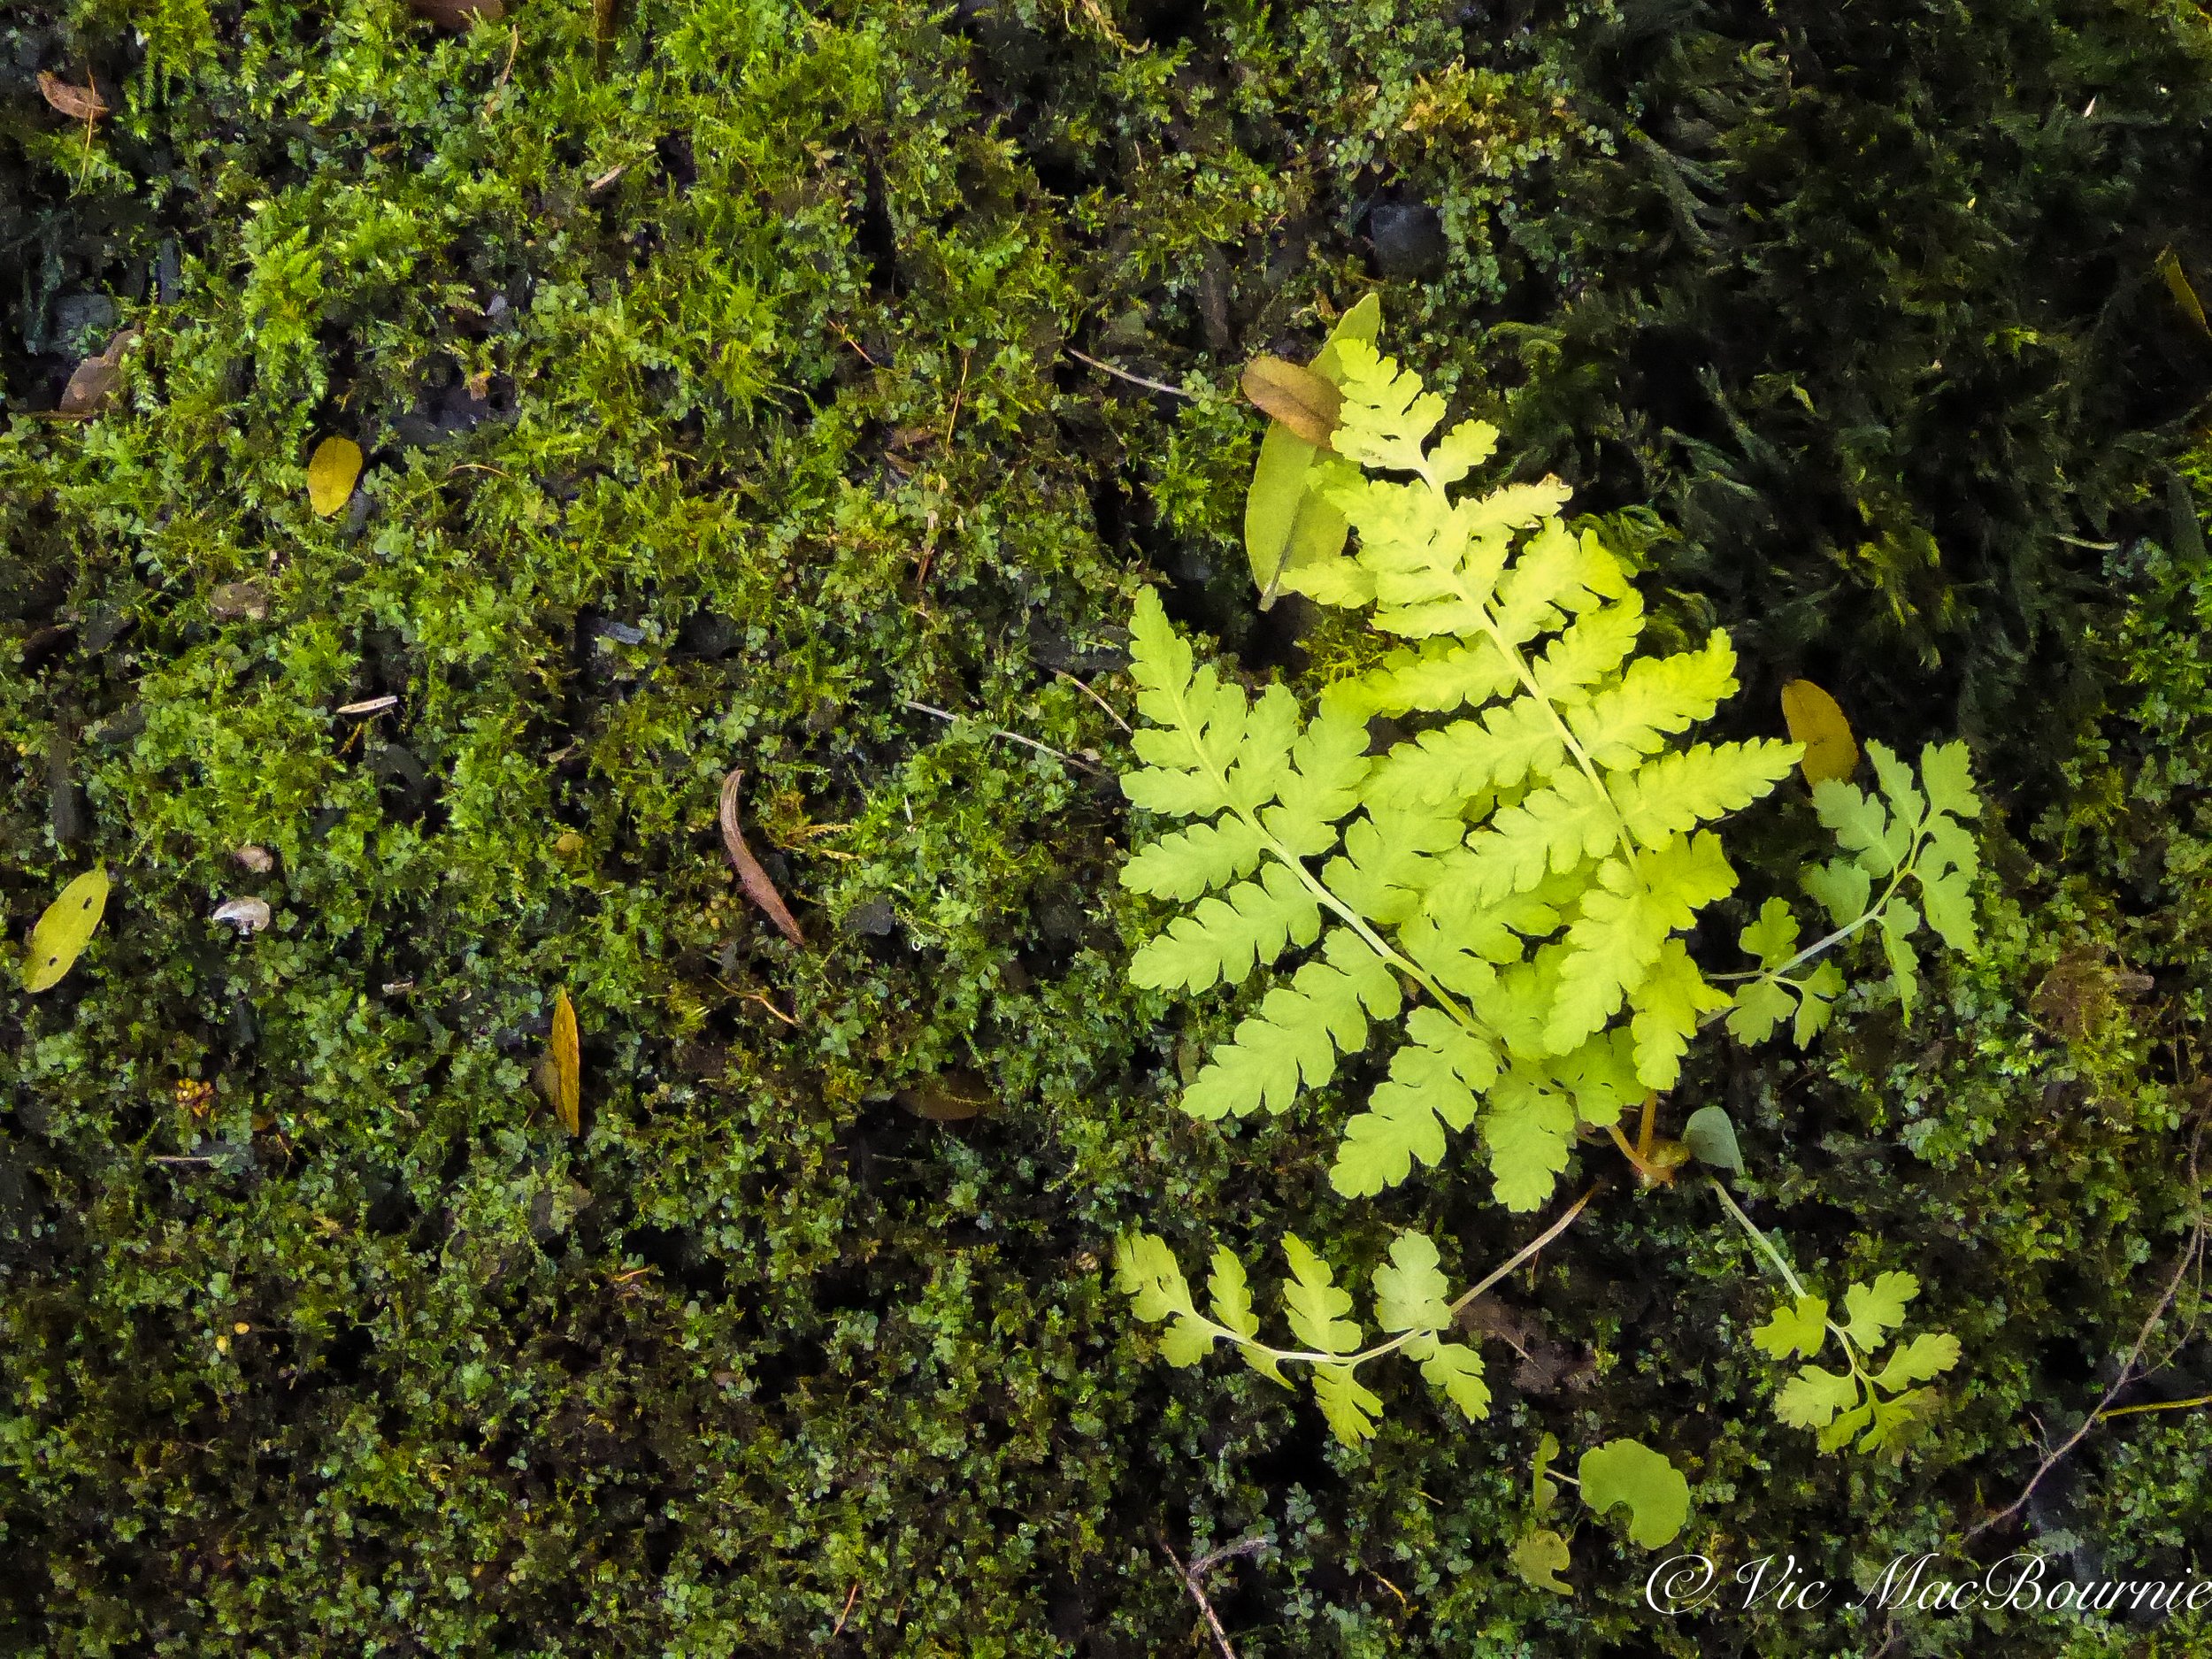
This image combines a Junco and a background of a frost-covered forest floor for an interesting example of using photography to create bird artwork.
Five tips to turn your photographs into artistic interpretations
1) Start with a slightly overexposed image to provide the basic structure of a delicate watercolour image.
2) Recognize that the subject does not have to be tack sharp for an effective image. The process of transforming the image into a digital painting does not call for tack-sharp images.
3) Always use layers (photoshop, Painter, GIMP and KRITA and most photo manipulation programs offer them) so that each manipulation can be done separately and the layer can be discarded and redone if you have problems.
4) Consider purchasing a Wacom drawing tablet or adding a pen to your existing ipad if it is compatible that allows you to paint directly on the screen.
5) Your finished result looks its best if the main image has a gradual softening leading to the edge of the image and includes a white border surrounding the edge of the painting.
6) When you are satisfied with the image, you must flatten the layers into a single image to save it as a jpeg. Be sure to first save it with all the layers first, so that you can go back to it and make changes.

This Tufted Titmouse, with its hint of rust under its wing, created a lovely painterly image.
Creating the image in GIMP: A step-by-step guide
To put it mildly, the process can be complicated.
Without getting too specific, let’s just say the process starts by creating 6 or 7 layers of the original image.
Each layer is given an appropriate name to help identify it while you are working.
The first layer I create is a rough watercolour layer using the filter “waterpixels.” I follow that layer up with another “waterpixel” layer that has finer details.
The next layer is created using the cartoon filter and manipulated in such a way as to obtain what you think is just the right amount of underlying black lines in the image. This helps to create the illusion that the image was first sketched out with a light pencil
The next layer is usually created with a white tracing paper over it. By reducing the opacity slightly, the image faintly emerges through the tracing paper.
Now take the erasure, pick one of the texture brushes from the assortment of brushes or you can create your own. Set the opacity to somewhere between 60-80 per cent. Begin dabbing the image, starting in the centre or on the main subject. Continue dabbing it (removing the tracing paper) but leaving the edges white.
At this stage you can turn the opacity on this layer to its maximum to see how the image is developing.
Next, continue erasing the white tracing paper until the image emerges the way you like it.
It’s a good idea to change brushes and opacity as you are working the image with the erasure tool.
Once you get it looking the way you want, it is time to add some paint splatters. This time choose the paint brush rather than the erasure and pick one of the splatter brushes.
Use the eyedropper to obtain a colour you think will work well as paint splotches. I usually try to keep the splotches very subtle.
Splatter the corners of the image but keep it subtle by leaving the opacity of the spatters very low.
Finally, add another layer with a white background and pick the filter “canvas” or “clothify” or, if you have them, various art papers. This one will need major adjustment to get it to blend in with the image without obstructing the visual presence. I find using the “multiply” mode can work well.
At this point you have the basic elements of the painting, but you now have to go into each layer, find the best opacity for your particular image and the best blend mode. That can take a lot of time and experimentation to get it looking the way you want.
Obviously, this process is not created with a one-click “painterly image filter” in photoshop.
There are programs and apps that will allow you to turn an image into a photograph, but the results vary too much to depend on them to create the image you desire.
Besides, it takes all the creative inspiration out of the finished result.
This process is not meant to provide immediate satisfaction for the artist. Each image needs its own approach, but once you have mastered the process, recognizing the necessary steps given a particular type of image, becomes a simpler process.
The amount of time it takes to create an image might come down to an hour or two rather than an entire afternoon. And, if you save it properly, you can go back later and continue to work with it.
Who knows, maybe if you like the results you’ll be inspired to turn your works of art into a lovely book or your garden art. This year I created my first Garden Photographic Book, maybe next year it’ll be a book of Garden Watercolour images.
In conclusion
There are days, especially in the cold of winter, that I barely come out of my office because I am too wrapped up in working on digital images of some of my favourite garden images. Some are a complete failure and I am still trying to figure out which images work best. I think, snow images work well simply because of the already delicate feel to the them.
No matter, there is no better way to pass the time than to sit down at your computer, push some pixels around and work some artistic magic with a fine cup of coffee (or wine) and your favourite music playing.
It doesn’t matter if you are the only one who feels the magic.
Take your Travel camera to the backyard to capture great garden photography
A Travel camera like the Panasonic Lumix camera is the ideal choice for capturing fall in your woodland garden. It’s portability makes it easy to carry around on your daily chores, yet its list of full features leaves nothing to chance. From long telephoto lenses to capture wildlife, to excellent macro capabilities and video, one camera really can do it all.

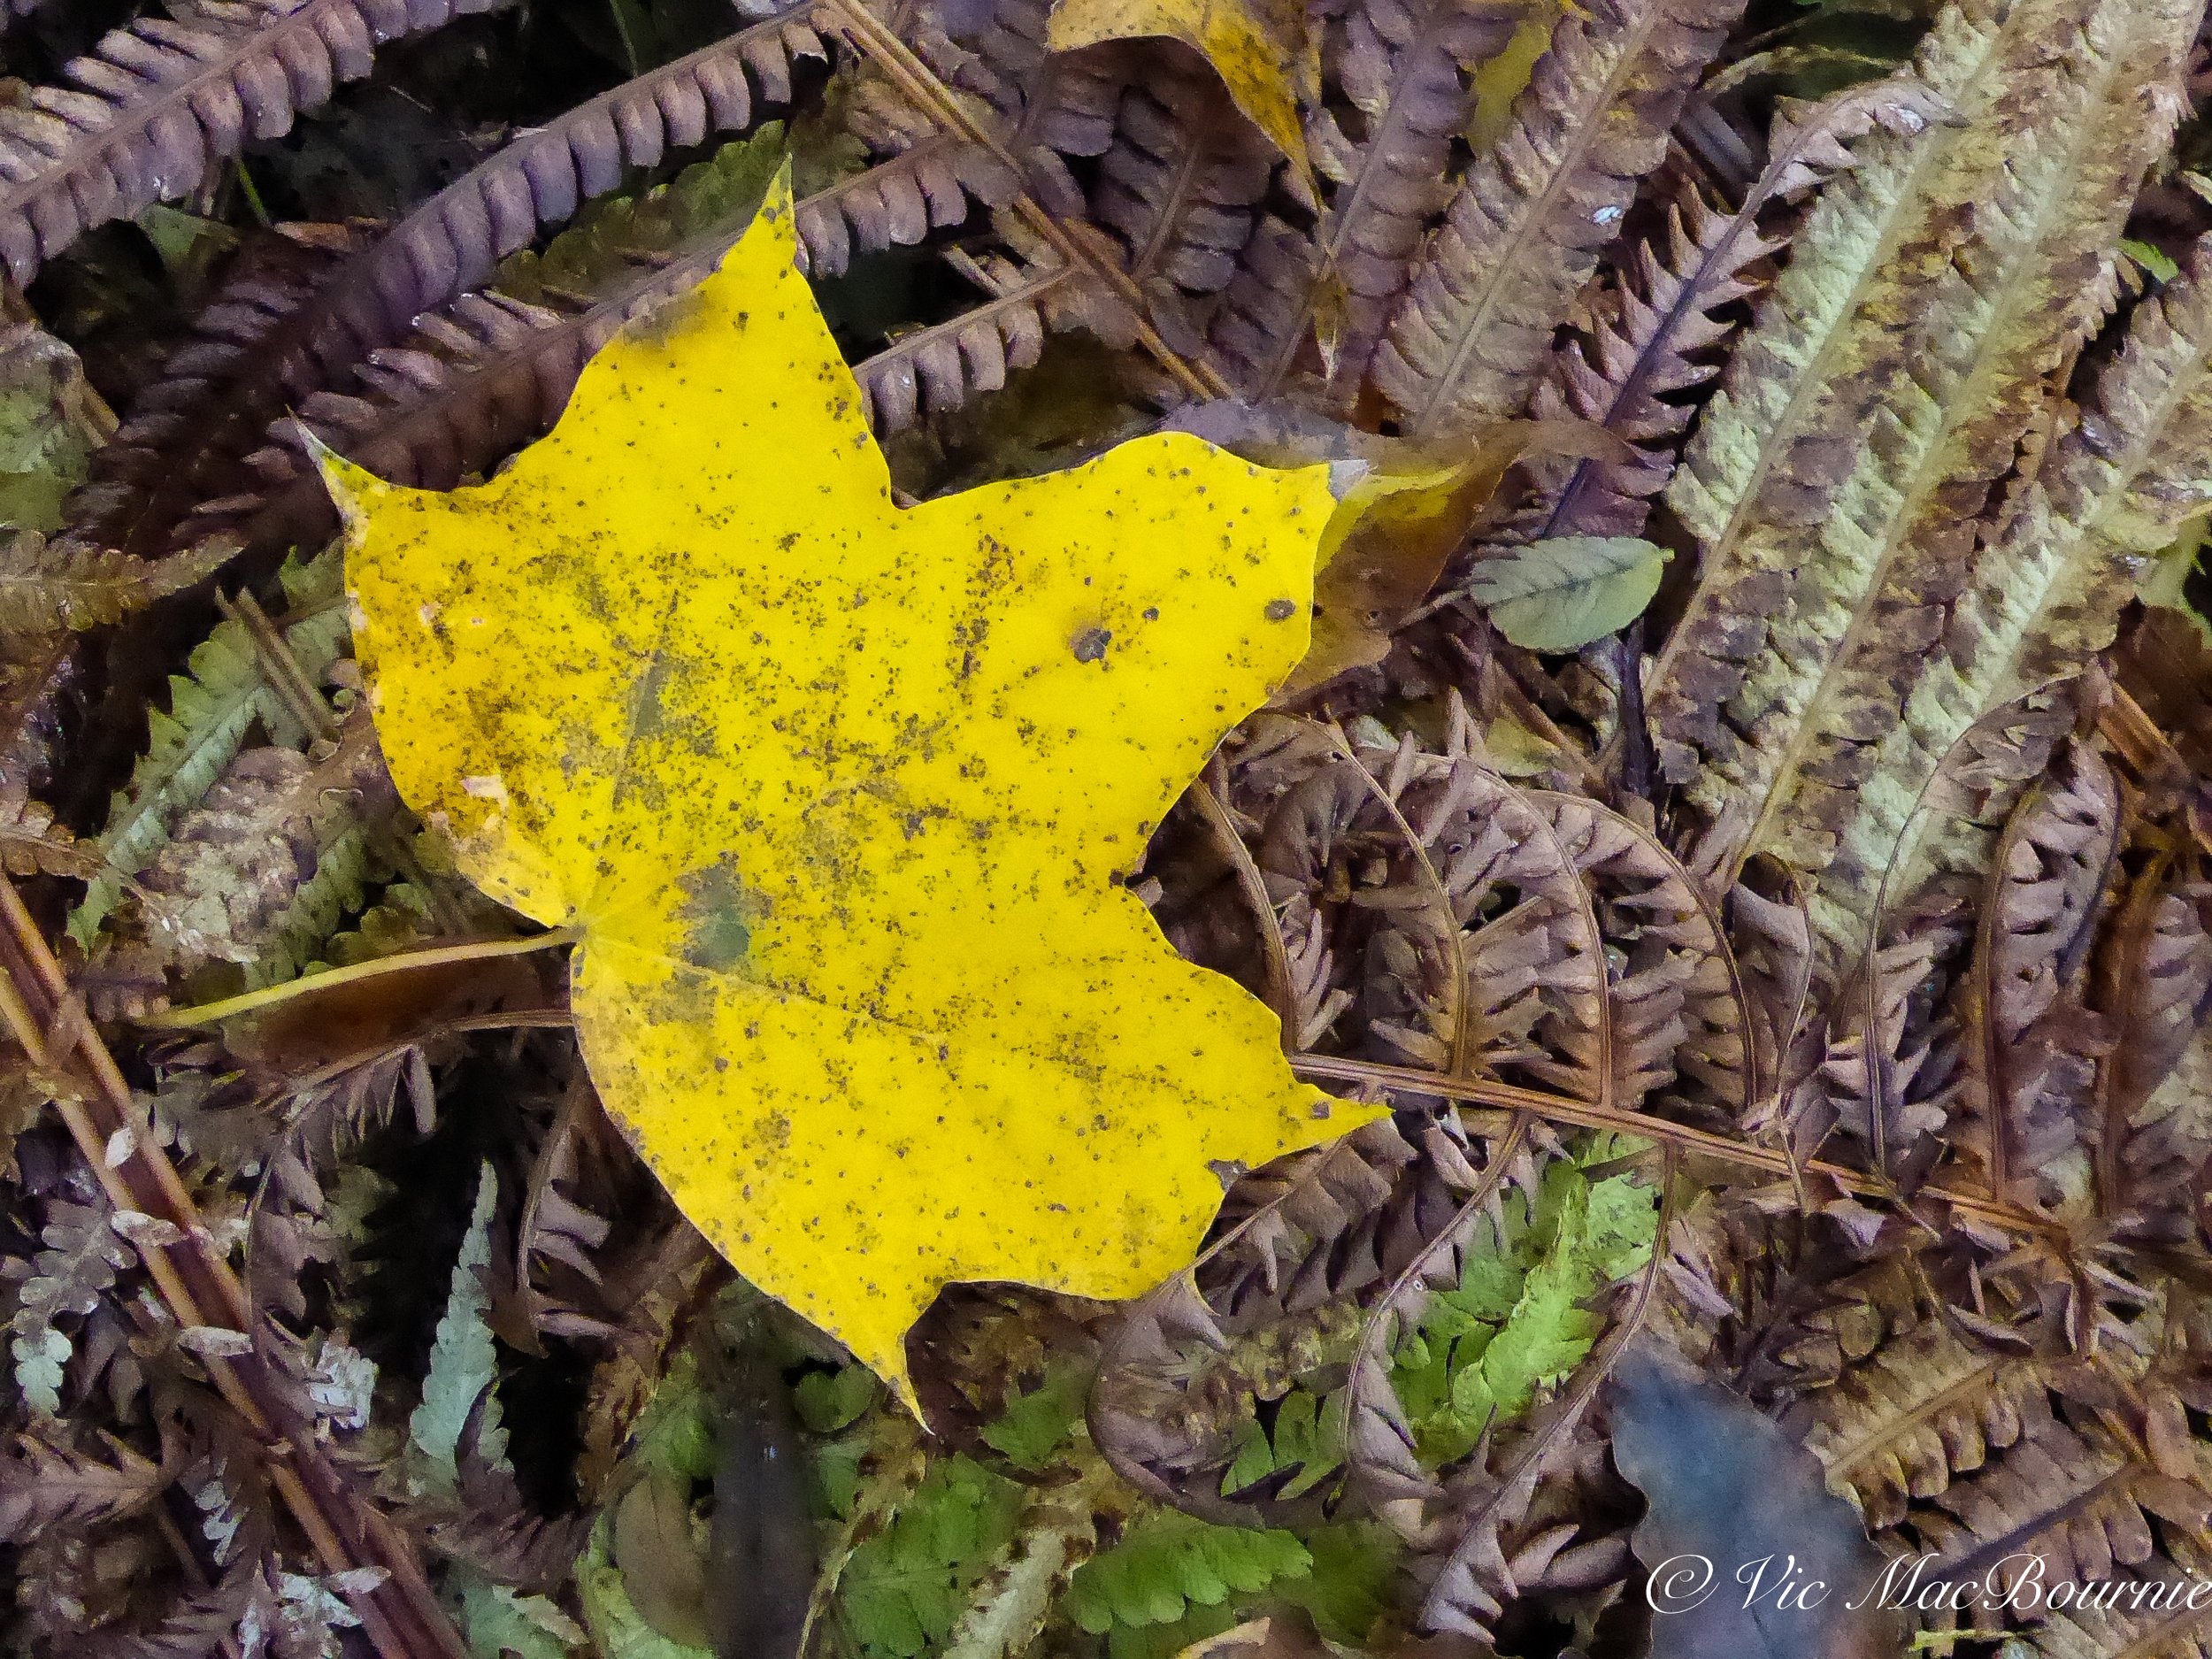
A maple leaf stands out in its bright fall colour among the spent ferns in the Woodland garden.
What’s the best camera for garden photography?
Can you use a travel camera to document your garden?
Absolutely you can. Not only can you use a small, point and shoot travel camera to photograph your woodland garden, but it just might be the ideal camera to get the job done.
A high-quality travel camera is small enough to easily fit into a pocket, but most pack a full set of features including a very long zoom lens that lets you get in close to most birds and wildlife. Their macro capabilities are also perfectly acceptable to photograph garden flowers, butterflies and insects, and their list of built-in filters turns the art of photographing and documenting your garden over the seasons into a creative adventure.

This Panasonic Lumix Travel camera is an ideal choice for garden photography.
Although the travel camera category was designed as the one-stop solution to capture a vacation with a single point-and-shoot camera that tucks nicely into a purse or pants pocket, what’s not to say it can’t be used as the ideal “staycation” camera in your backyard?
Click on the link to see a complete list of Panasonic’s Point and Shoot cameras.
Using it on a regular basis in the garden is also great practise for the time you need it to document that epic vacation. There is no better way to learn the ins and outs of a camera than to use it on a regular basis.

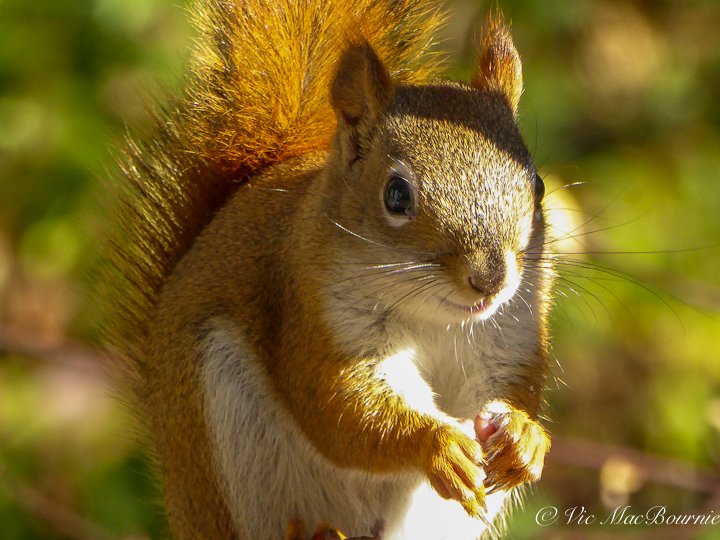
This close-up of a red squirrel shows the telephoto capabilities of the Lumix DMC-ZS50 camera.
(If you are interested in exploring garden photography at a higher level, be sure to check out my comprehensive post on the Best camera and lens for Garden Photography.)
Many travel cameras are about the same size as a smartphone but offer so much more flexibility and creativity.
Let’s make this clear, this is not a review of a specific camera. I’ll let camera experts do that on their blogs or YouTube channels.
This is a general article to help guide gardeners with their photography needs. Although it focuses on a particular camera, this is not the latest travel camera and lacks features many modern cameras now support. The article explores the “travel camera niche” and how gardeners can get the most out of using these types of cameras on an everyday basis in their backyards or travelling to some of the great gardens of the world.
In this article, we’ll use the Panasonic Lumix DMC-ZS50 travel camera (about 6 years old now) and feature a number of photographs taken with it one fall morning.

Image of raccoon high in the forest canopy. The image was taken with the DMC-ZS50 at the full 700mm telephoto.
Although I am using the Panasonic Lumix, the article pretty much pertains to any good point-and-shoot camera on the market today.
The modern Panasonic Lumix travel camera is the Lumix DV-LX100 Mark ll, which sells for upwards of $1,000. For those who like to compare specifications, this 21.7 MP Four Thirds MOS sensor camera sports a 24-75mm Leica DC Vario-Summilux F1.7-2.8 lens, comes with wi-fi and bluetooth and a 3-inch touch screen monitor. It has 4K video and 4K photo technology at 30 frames per second.
As you can see, these new cameras are packed with high-end features.

Using a soft focus filter gives a dreamy effect to this image of a Flowering Dogwood in fall colour.
I decided to use my Panasonic Lumix DMC-ZS50, a travel camera that made its debut back in 2015, to document my fall garden. The camera, which originally sold for as much as $500 back then but can now be purchased used for a fraction of that cost, comes with a 30X optical Leica zoom lens ranging from a lovely 24mm wide angle to an almost unbelievable 720mm telephoto lens. This kind of power will easily fill your viewfinder with everything from a humminbird to that colourful cardinal.
It handles low light conditions admirably and includes a Live View Finder to enable you to take photographs when lighting conditions make it difficult to use the 3-inch LED screen. The technology available in these point-and-shoot cameras, even a six-year-old model, is impressive. An eye sensor in the camera, for example, automatically detects your viewing preferences and switches image display to the Live View Finder when you are ready to use it.
If you are looking to purchase a new travel camera, deciding which of the many cameras to purchase involves some research on what features mean the most to you.
Besides the high quality Leica lens in the Panasonic cameras, I particularly like the ability to easily be in control of the camera settings. The Lumix DMC-ZS50, for example, includes a control ring around the lens that reminds me of my older manual focus cameras.
The Control Ring provides smoother manual control of the exposure, zoom and focus: leaving the photographer free to concentrate on shutter operation with their other hand.
The camera maker describes it this way: “Its intuitive design, precise focusing; plus smooth and silent operation, gives you total control over every picture and video taken.”
Speaking of video, these travel cameras’ abilities to shoot high-quality video just keeps getting better with the introduction of each new model.
Many models even allow you to easily shoot time-lapse sequences.
Why would I want that, you ask? Imagine setting up your camera on a tripod in front of your favourite flower and watching it open up over the course of the day, but seeing it all happen in 20 seconds on your computer screen or television. Or, set up the time lapse feature on a monarch butterfly about to emerge from its pupae and experience its transformation before your eyes.
Maybe you just want to set up the camera to document a day in the garden and how the sunlight changes over the course of the day. The time-lapse feature will get the job done.
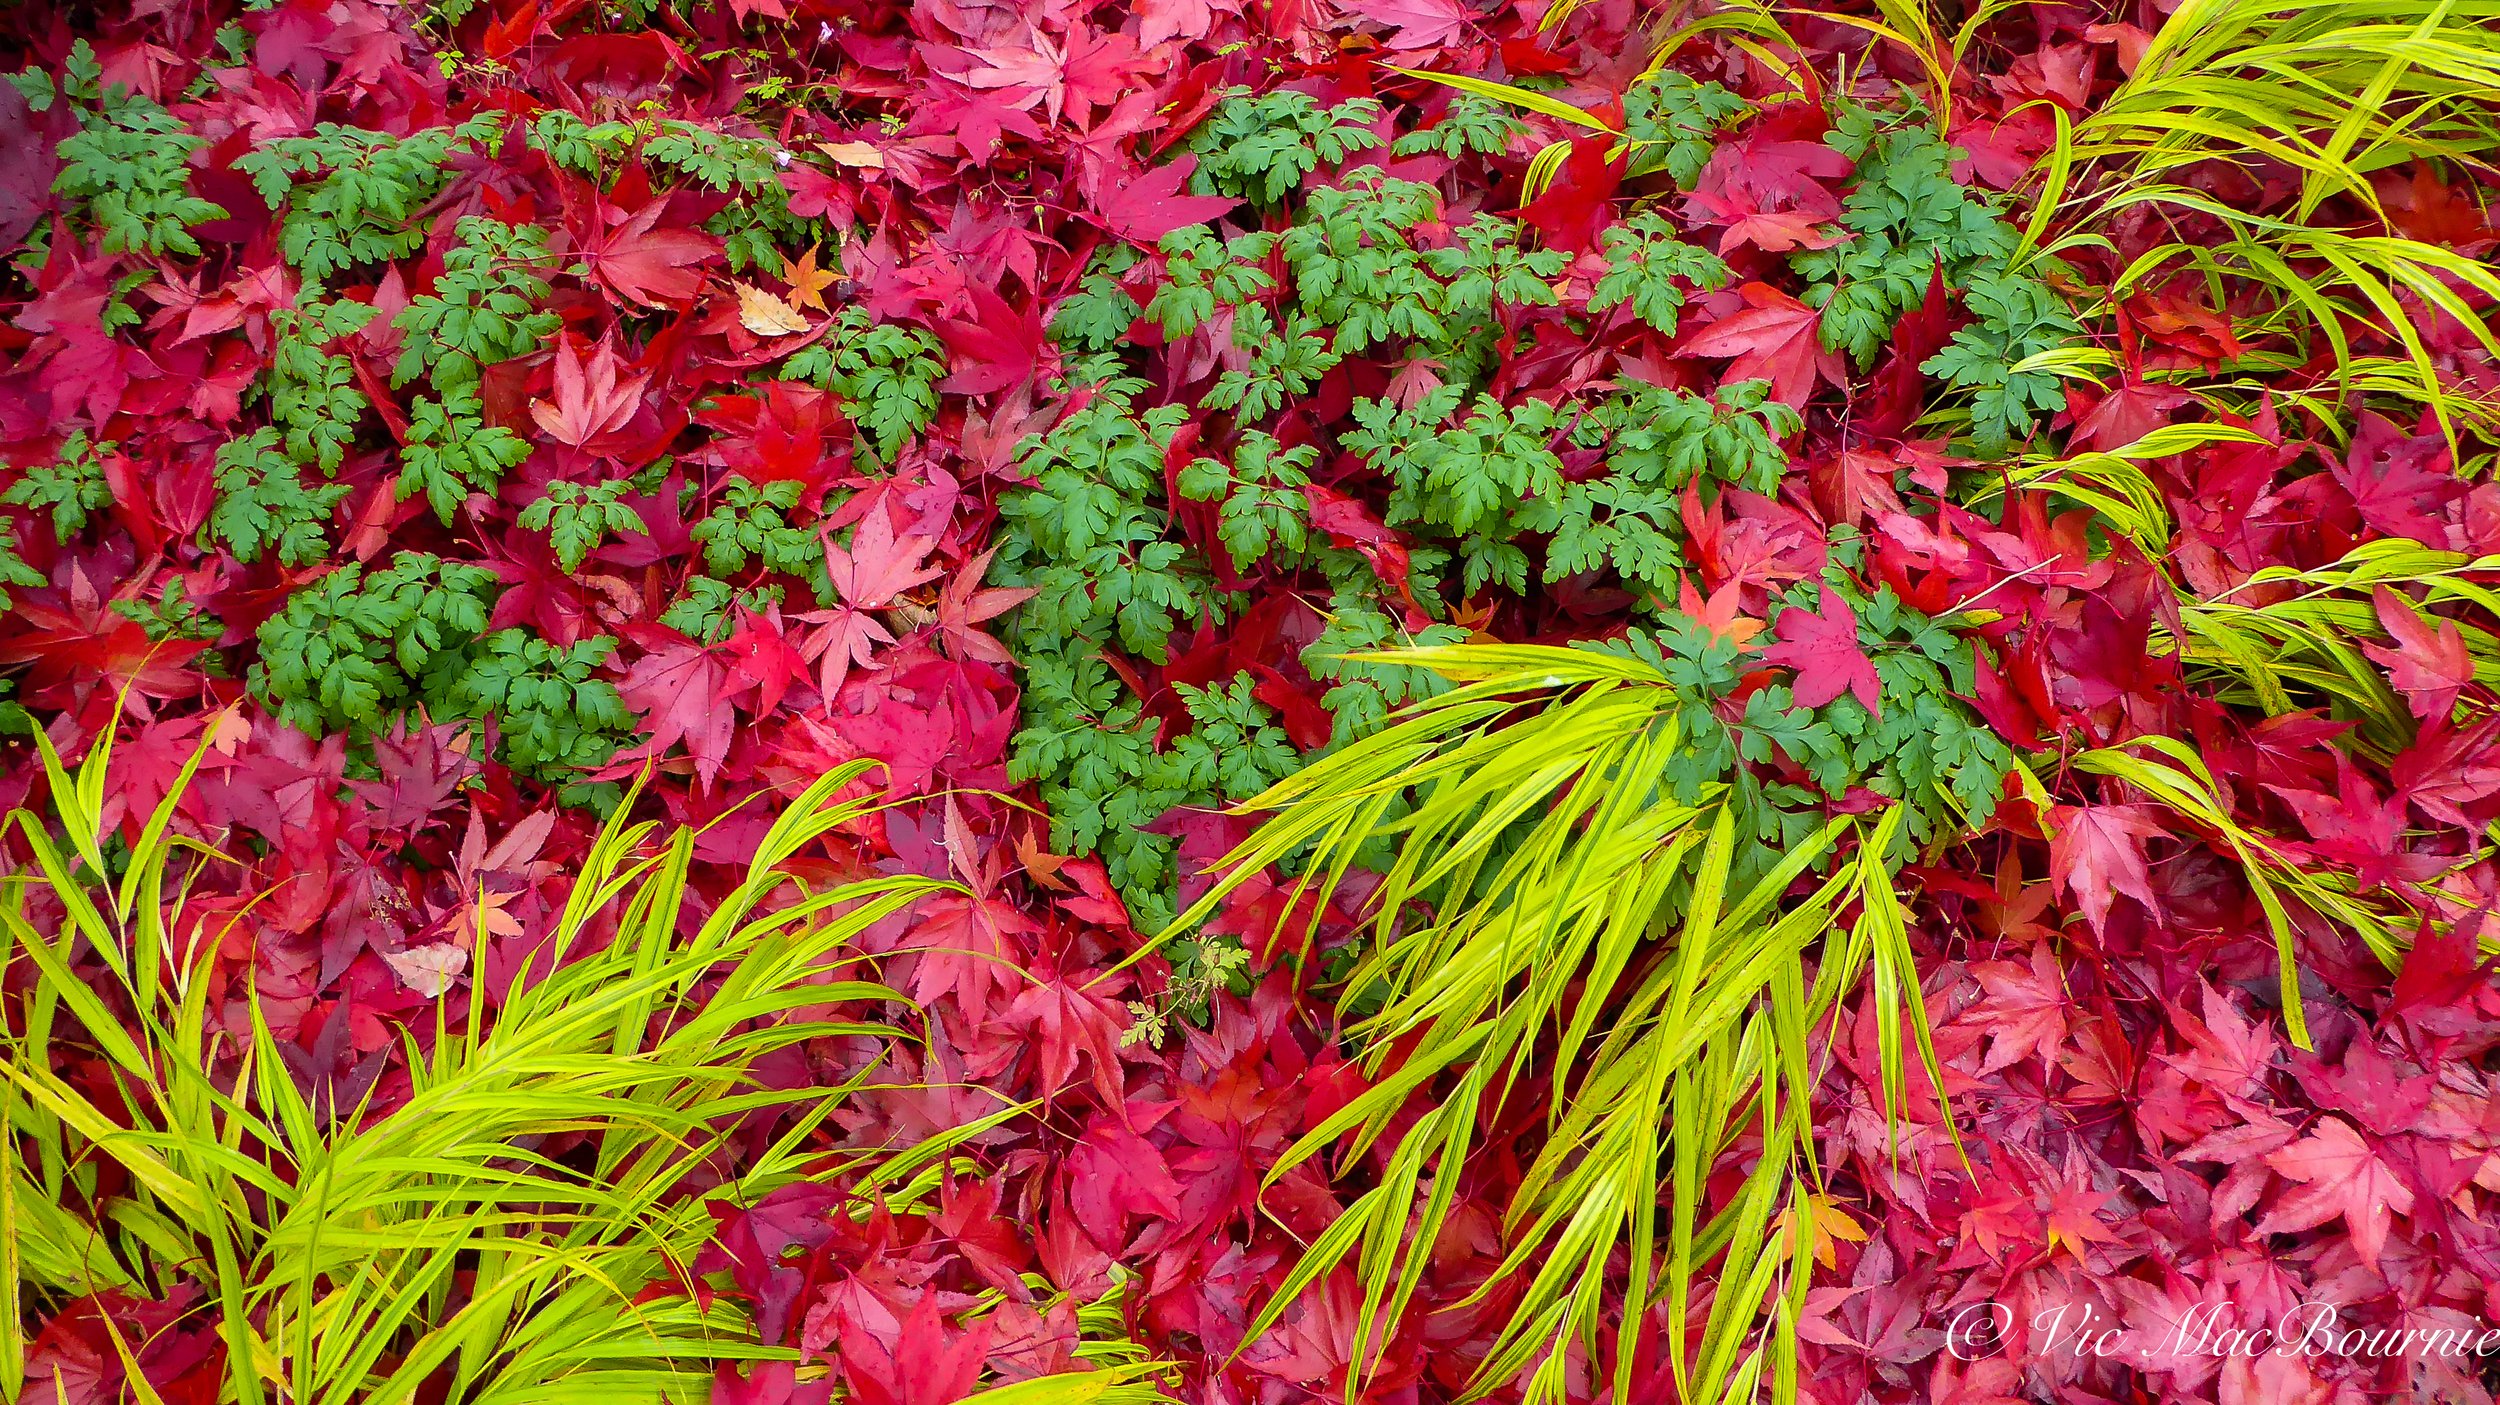
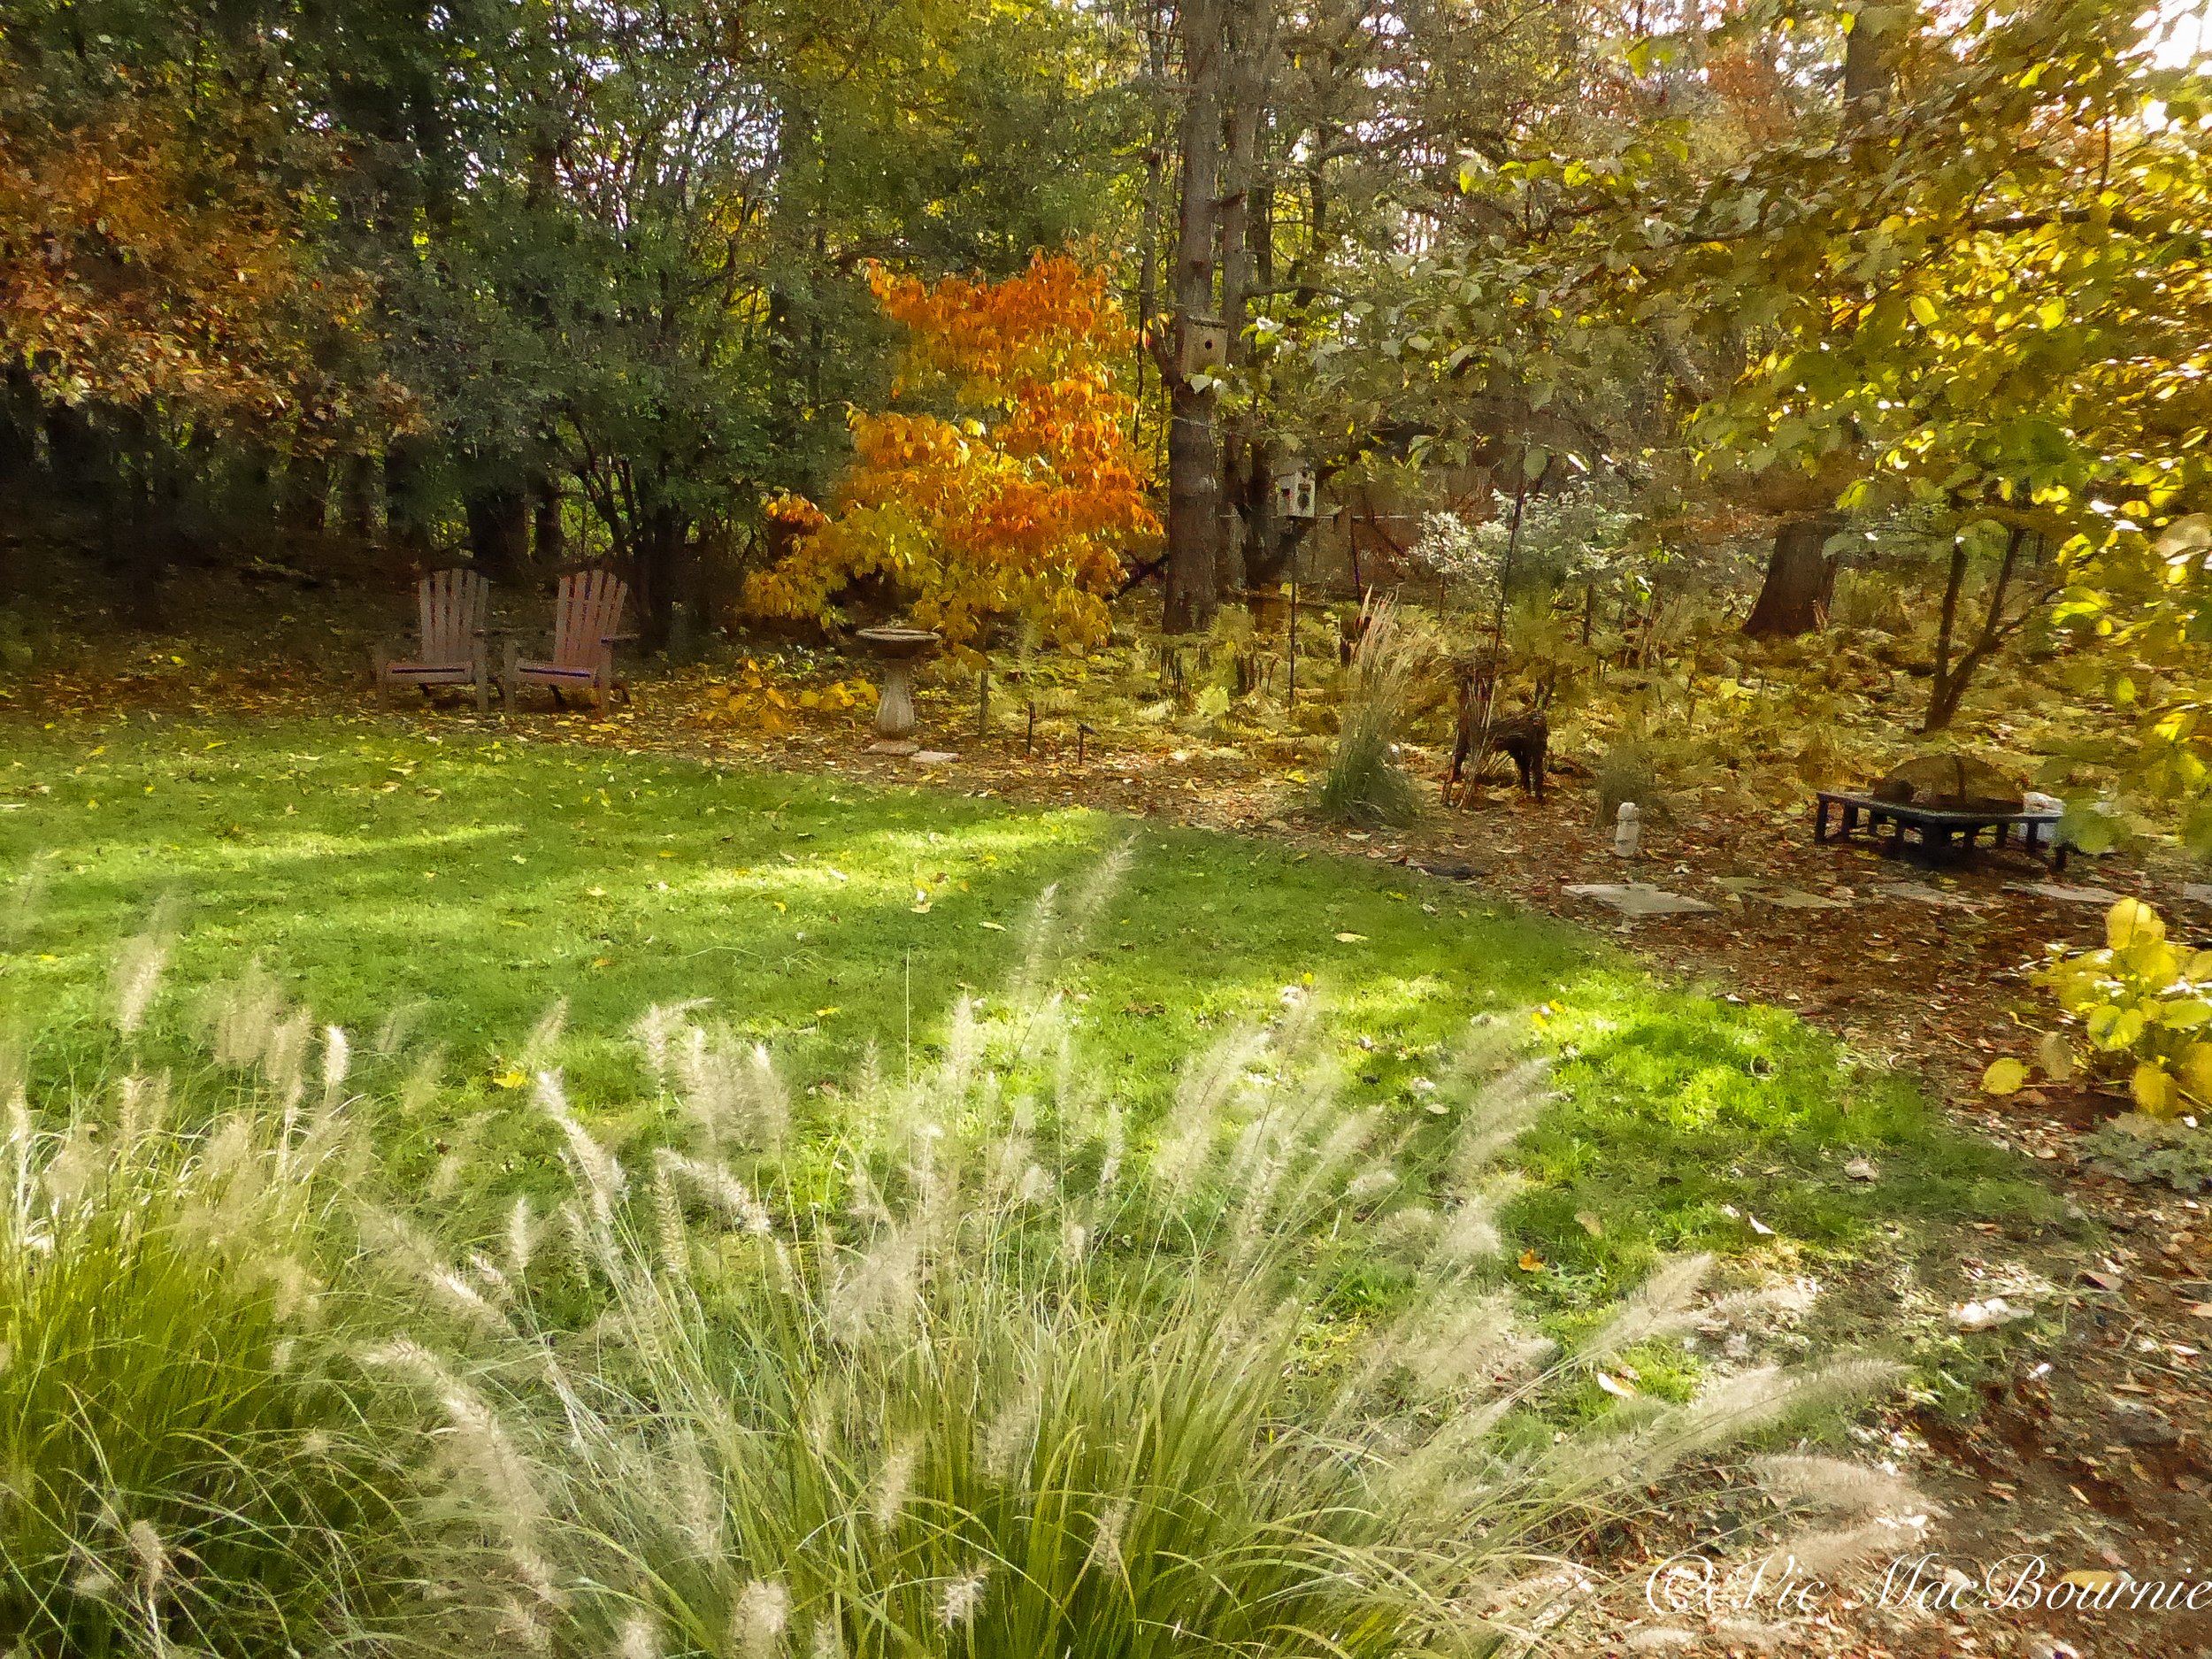
Japanese Maple leaves in fall colours cover ornamental grasses and wildflowers.
Today’s Travel Cameras
Modern travel cameras come equipped with an even larger array of features, larger sensors that produce even higher quality images and videos. You can expect to pay anywhere from about $500.00 to more than $1,000.
The highly rated Sony ZV-E10 is priced at more than $1,000 Canadian, while Panasonic’s Lumix G100 sells for close to $700. Nikon’s Z fc will set you back almost $1300 U.S. or close to $1,400 Cdn.
Many have adopted features such as touch control focus on the back screens similar to a smartphone or tablet.
This article is not a review of the latest cameras. For a full comparison of modern travel cameras, check out this link from Digital Camera World for the latest in portable travel cameras for 2021.
Garden photography: Tips to photographing hummingbirds in flight
Backyard bird photography involves planning, patience and the right equipment. Months of planning, hours of waiting and about five seconds of shooting resulted in this photograph of the hummingbird at a native cardinal flower.
Planning, patience: Key to capturing garden bird photographs
Garden photography isn’t always easy. In fact, I figure the photo took about six hours of patience and five seconds of shooting.
The result, pretty close to what I hoped for photographing with natural light in the shade of a magnolia tree. An electronic flash would certainly have punched it up both in colour and sharpness, but I decided to go with natural light.
The flash photo can wait for now.
Was luck involved? There is always a certain amount of luck in any good image, but to me luck would have meant getting the photograph in the first half hour, not the sixth.
Photographers looking to do more backyard bird photography might find it helpful to delve a little deeper into the creation of this image.
If I could have only one lens for wildlife and birds in the garden, it would be my F* 300mm F4.5. Check out my full story on the lens by clicking the link.
Much like most bird photography, good planning, lots of patience, and the right equipment went a long way in capturing the image.

Hummingbird feeds from a cardinal flower in the garden.
Planning: The planning started when I ordered the native plant from Onplants.ca back in the spring. I knew hummingbirds loved Cardinal flowers so I ordered three and planted them in an area where they would prosper. Then, I planted it where I would have easy access to them for photography. Beside the patio and a couple of feet from where I normally sit is the ideal location. And, so, that’s where the plants found a home. Nearby, there are three hummingbird feeders that encourage the birds to the general vicinity to where the plant is located.
Patience: Six hours speaks to the patience it took to get the shot. That length of time can be extremely long if you are out in the field, but sitting in a comfortable chair in the backyard makes the wait much easier. It’s one of the big benefits of practising backyard bird photography. Have a coffee, a beer or maybe a glass of wine and take your best shots. Couldn’t be easier.
In most cases a photography blind is not needed when shooting hummingbirds providing you take the time to acclimatize the birds to your presence.
(If you are interested in exploring garden photography at a higher level, be sure to check out my comprehensive post on the Best camera and lens for Garden Photography.)
Even if you’re not taking pictures, sitting out in the same chair and moving slowly will eventually cause the birds to recognize you as nonthreatening and allow them to go about their day as if you are not really even there.
This will not work with all birds, but many, especially Hummingbirds will eventually simply ignore you if you are always around their feeders.
Equipment: Bird photography has always been a specialty field involving high-powered cameras, motordrives and long, fast, expensive lenses. A visit to Point Pelee during spring migration, or any other of the birding hot spots around the globe, will certainly convince you that admission into serious bird photography requires more than an iphone or a point-and-shoot camera.
That’s not to say that with very careful planning you can’t get some good shots with these cameras. It’s just that it would be hard to do it consistently and the effort put forward might not be worth the results.
The small size of the hummingbird makes it even more difficult to get good results with these cameras.
So, with that in mind, I took the hummingbird challenge armed with a 35mm SLR camera with built-in motordrive and a 300mm F4.5 close-focusing telephoto lens (with a focal lens of around 450mm on the cropped sensor).
If I could have only one lens for wildlife and birds in the garden, it would be my F* 300mm F4.5. Check out my full story on the lens by clicking the link.
But this was not really the secret behind getting the photograph. They are merely the tools that helped make it possible.
The secret was a tripod, an electronic shutter release, and a camera set on backfocus.
With the camera locked into place on the tripod, and the electronic release ready to trip the shutter without moving the camera, the plan was almost complete.
However, one big problem remained. Normally, when you press the shutter halfway down, the camera refocuses, often going into search mode to find something to focus on. Trying to focus blindly with the hummingbird moving about makes it close to impossible.
That’s where back focus came into play.
What’s back focus you may ask?
On the back of most higher-quality 35mm SLRs is a button that enables the photographer to focus separately from the shutter control button. By using the back focus button, I was able to prefocus on the flowers and then release the shutter without it refocusing when the hummingbird reached the area where I expected it would be in-focus.
Focusing on the flower and then putting the camera into manual focus mode would also have worked.
In the end, the combination of planning, patience and equipment came together to create a pleasing shot. Months in the planning, hours of waiting for the plan to come together and a few seconds of actual shooting made it all happen.
A lucky shot if I ever saw one.

A female ruby-throated hummingbird feeds from a cardinal flower on a sunny afternoon.
Later in the season, I set up a similar situation where the Cardinal flower was primarily in the sun.
The higher shutter speed that the additional light provided helped to get the frenetic little bird in focus and brightened the colours in its feathers. I’m not sure I like the photos any more than the earlier images taken in a shadier part of the garden, but taking it was certainly a simpler process.
Again, patience was the key. The process was similar. Camera on a tripod focused on the flower (again using the back focus button) and a remote release attached to the camera. Every time the hummingbird came to feed, I took several photographs hoping that enough of them would be in focus and sharp.
As I said earlier, photographing the bird in a sunny location brought out the colours, provided a highlight in the bird’s eye and allowed me to shoot at a higher f-stop which helped to capture more of the bird in focus.
This page contains affiliate links. If you purchase a product through one of them, I will receive a commission (at no additional cost to you) I try to only endorse products I have either used, have complete confidence in, or have experience with the manufacturer. Thank you for your support. This blog would not be possible without your continued support.
Garden photography: Tragopan blinds help get you up close to backyard birds
It’s not always about getting photos, but nothing is better than nailing the photograph you’ve been trying to get for weeks. A Tragopan photographic blind just may be the best tool to get up close and personal with your favourite birds and woodland creatures. Not only will it improve your photography, it may also provide some memorable moments as you experience your backyard wildlife in a whole new way.

The Tragopan blind allowed a close approach to this young fox who regularly visits the garden.
Memorable moments and favourite photographs
It’s not always about the photos, but when you nail the shot you’ve been trying to get for weeks, it’s always a good day.
And just about every day has been good since I landed a Tragopan V6 photographic blind.
Like I said, though, it’s not always about getting a good shot. One of the greatest joys I’ve experienced in the first full week of using the blind is getting the opportunity to experience our backyard birds and squirrels up close and personal. Observing the wildlife has been almost as much fun as photographing them.

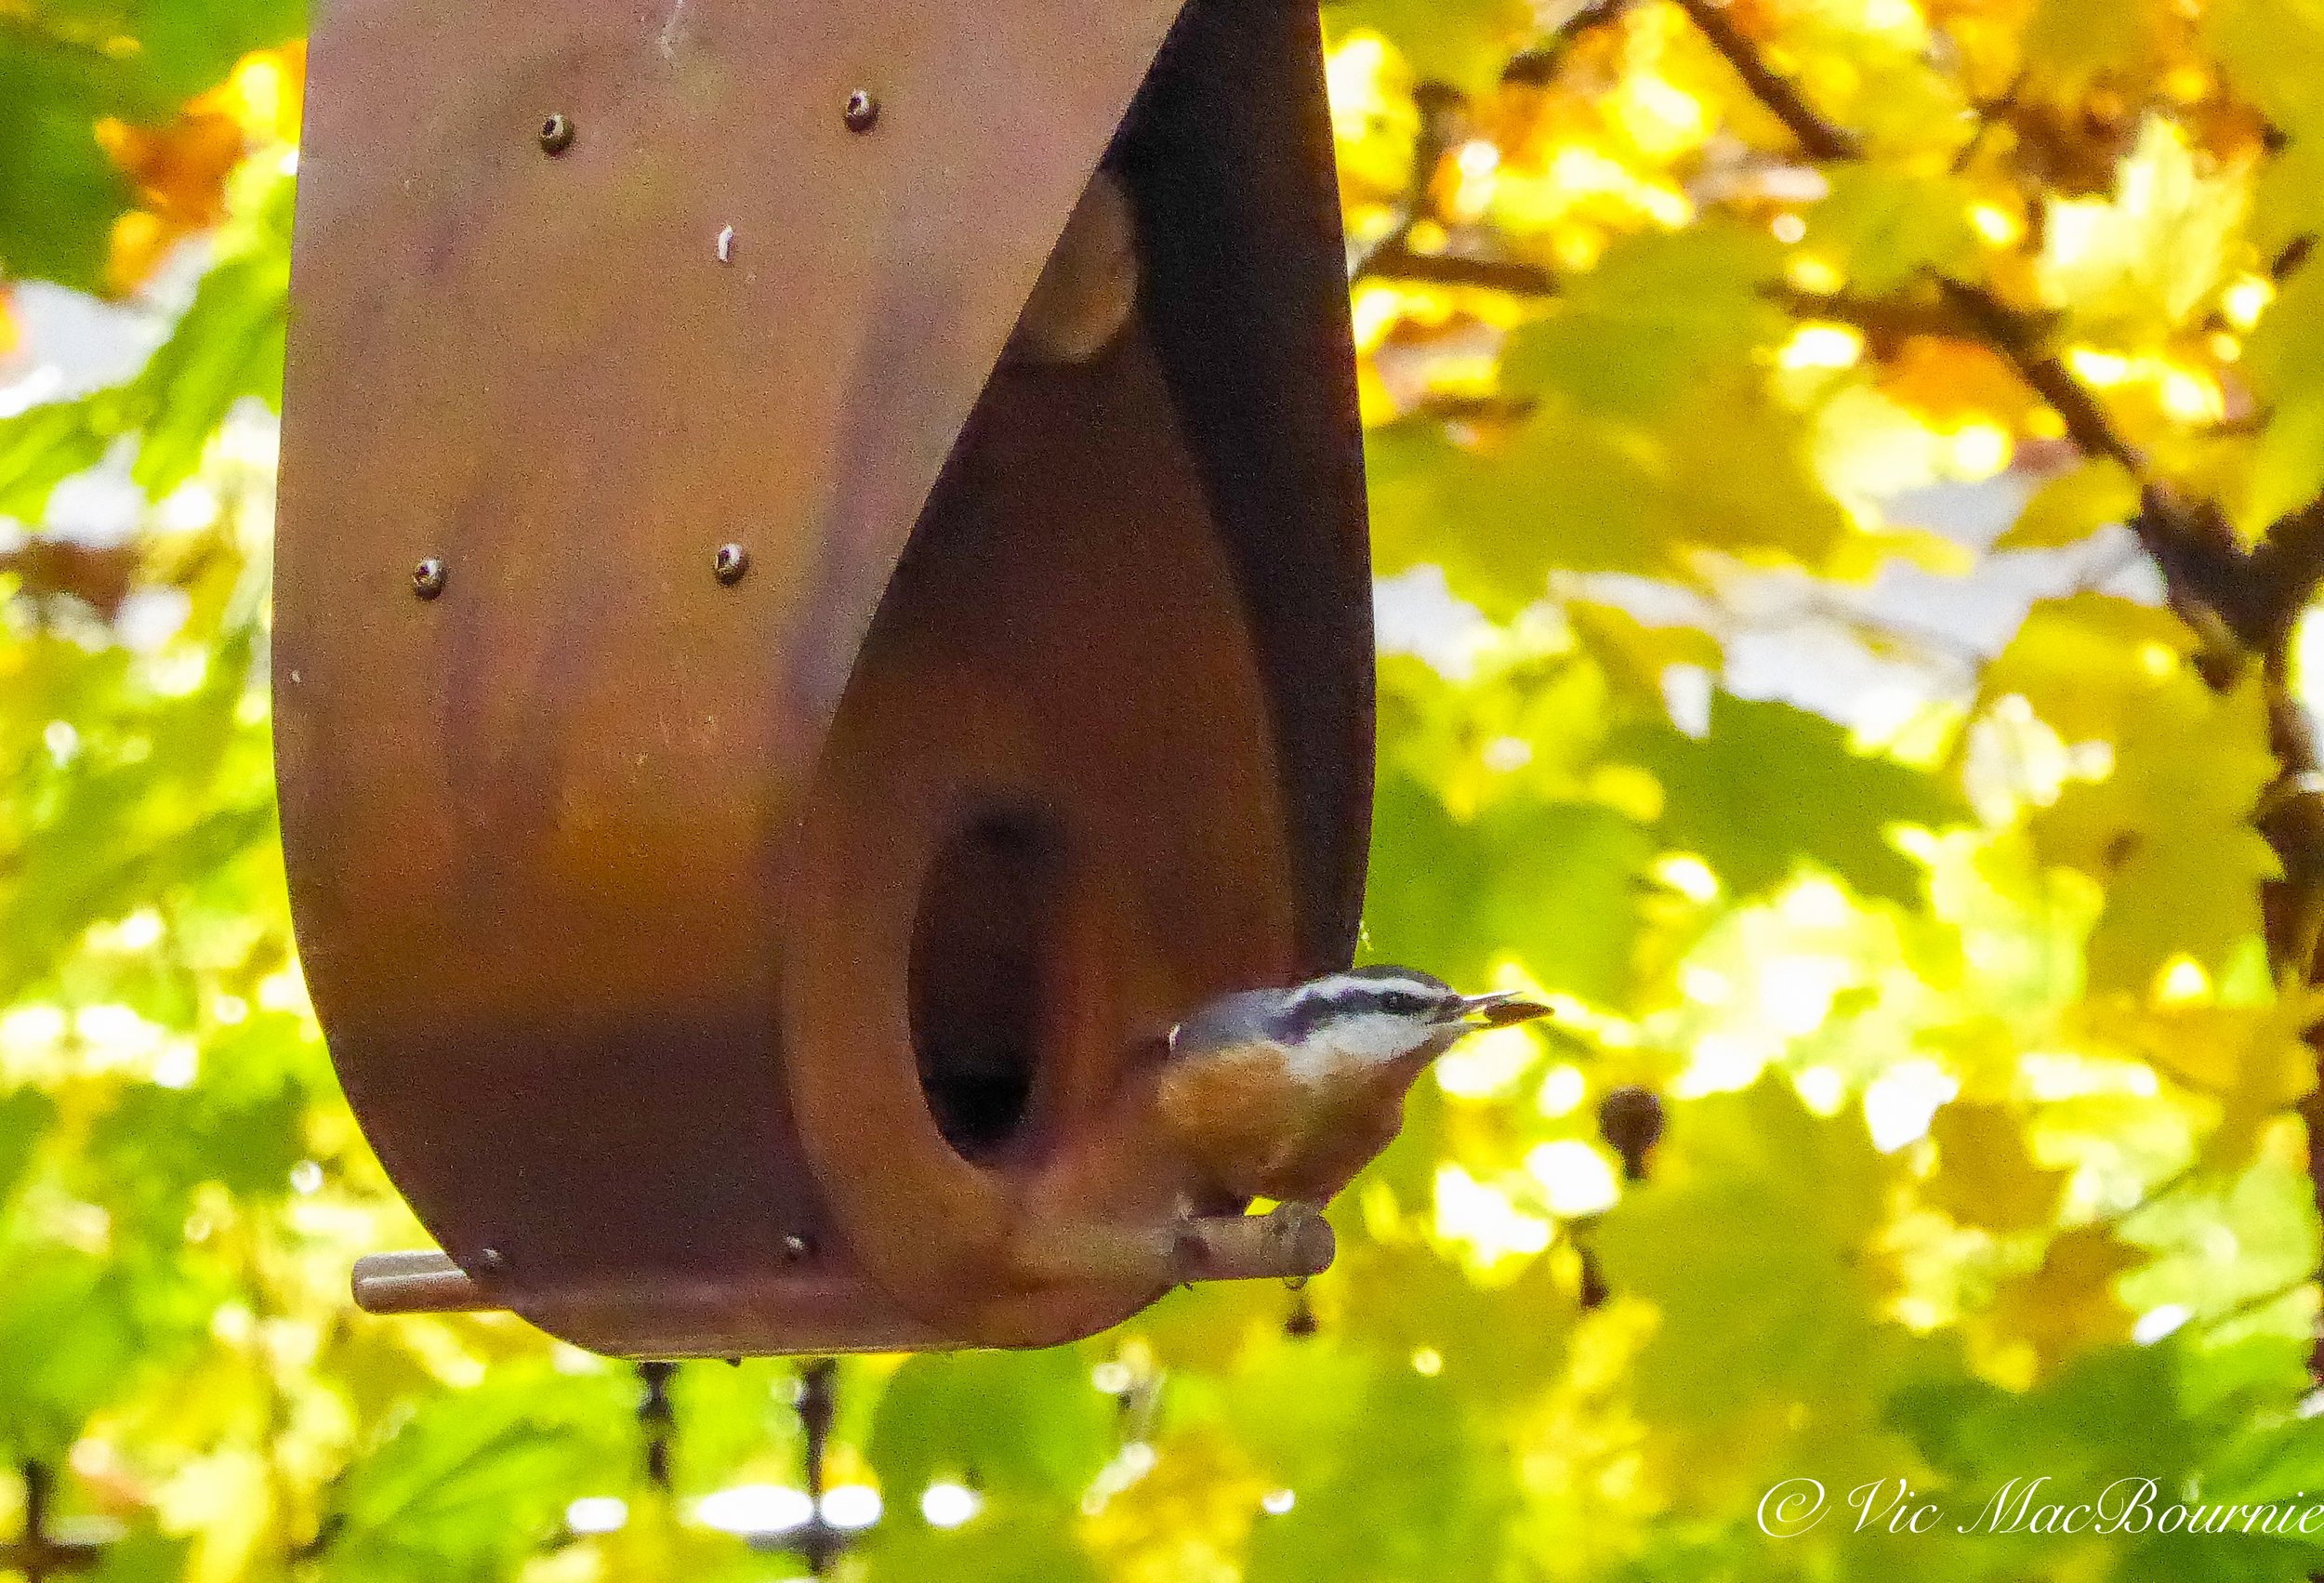
White-breasted Nuthatch, taken from inside the Tragopan photographic blind.
I’ve even come to know a couple of the squirrels on a more personal basis. There’s the very timid little baby red squirrel who likes to hang out under the bird feeder but scampers up the pole and hides under the squirrel baffle at the least sign of danger. Then there’s the small female black squirrel who obviously has given birth recently and likes to hang out close to the blind.
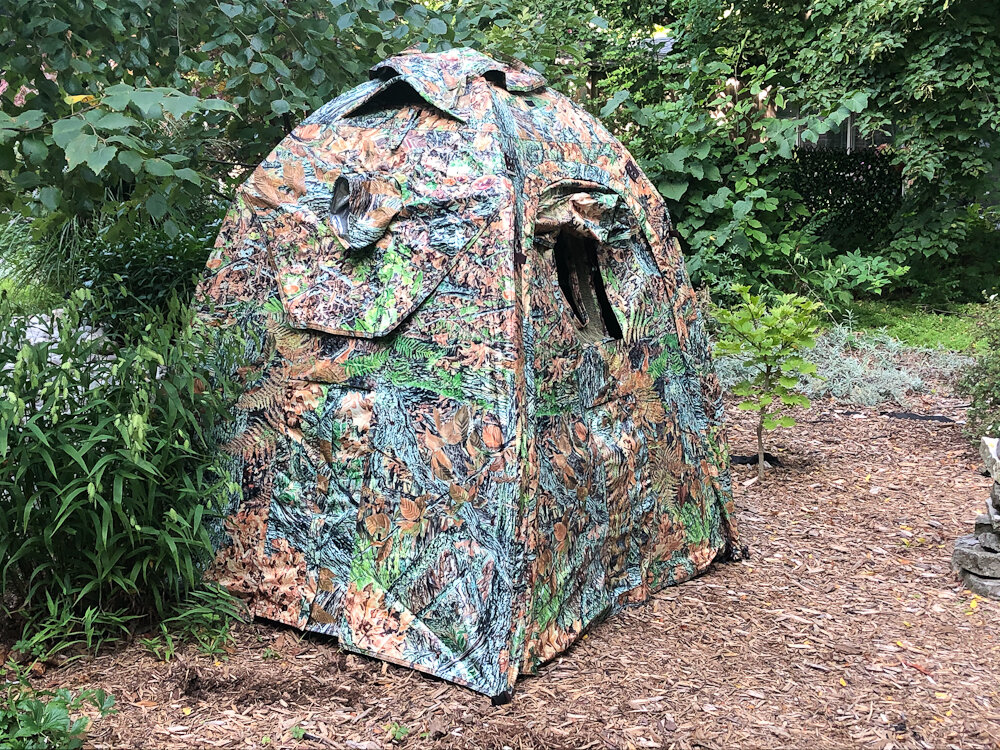
The Tragopan V6 photography blind set up in the woodland garden.
This blind has given me new insights into the goings on in the backyard. At one point, a hawk flew over the yard and the birds and animals scattered in all directions. The yard grew completely silent and I noticed that all but one small Downy woodpecker found refuge. The little Downy clung motionless to the hanging feeder for at least 10 minutes until it felt the danger was completely gone. It was fascinating to watch from a mere 6-8 feet away.
It was just one of a host of memorable moments that I experienced since UPS delivered the one-person blind made specifically for photographers.

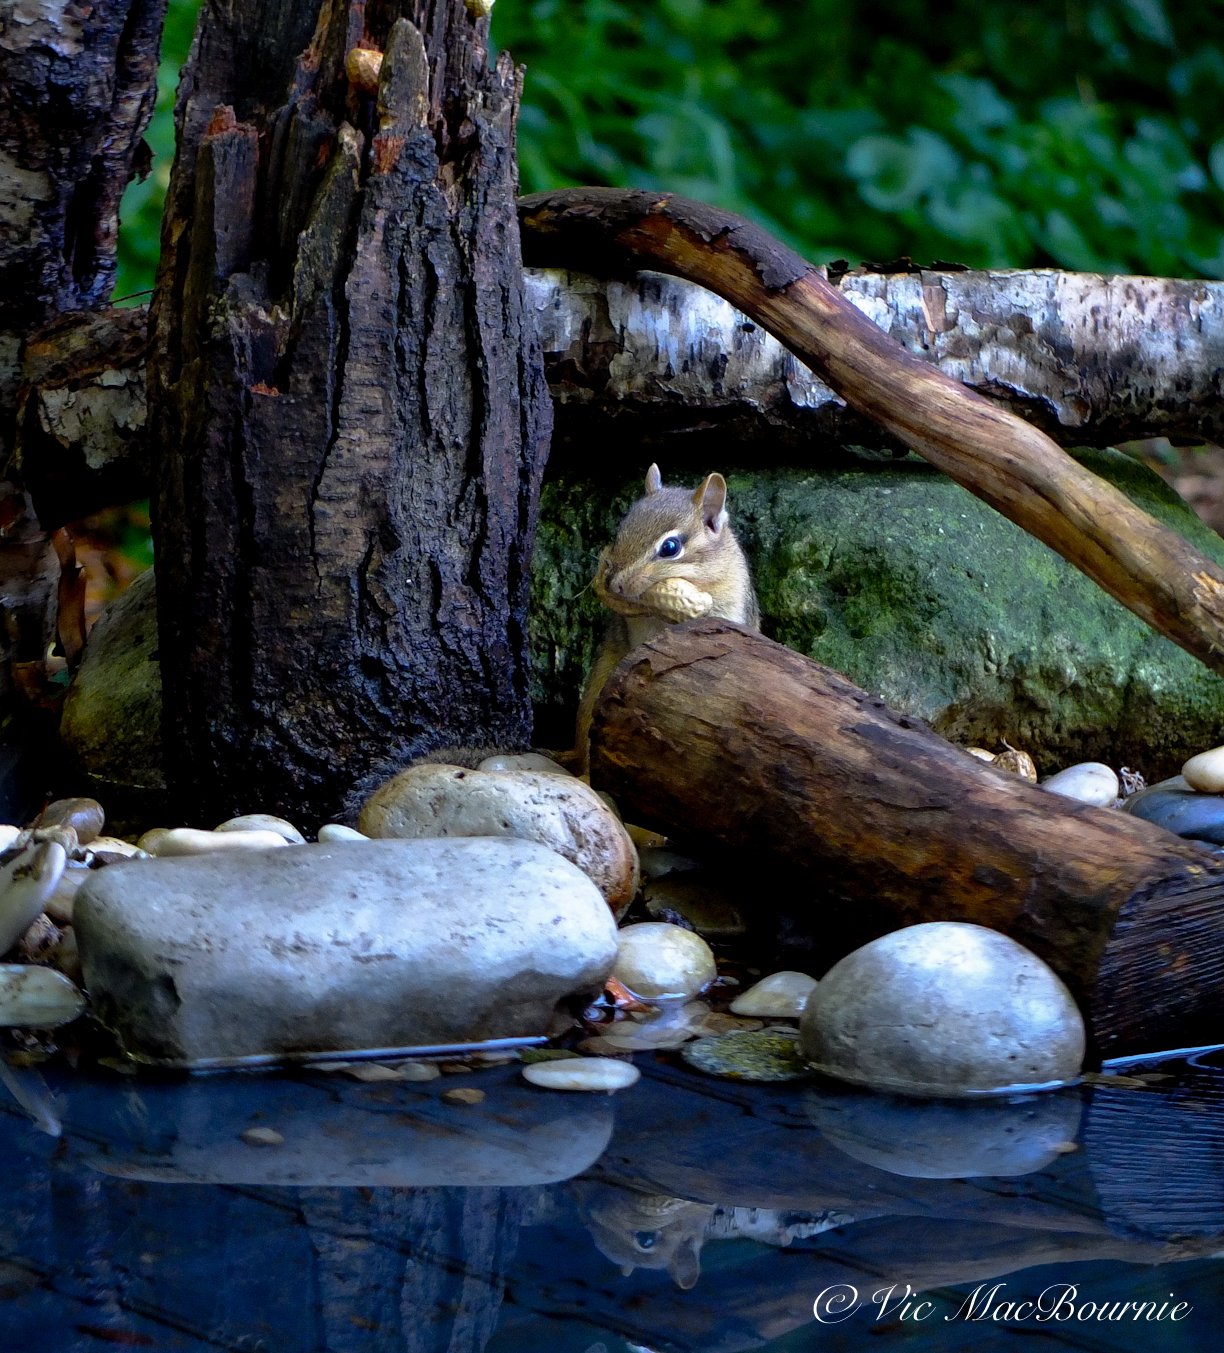
This image of a chipmunk was photographed with a compact camera equipped with a 112mm lens in the Tragopan blind.
How close can you get with a Tragopan blind?
I decided to put the Tragopan photo blind to a real test. How close could I get to wildlife using my Fujifilm X10 compact camera equipped with a mere 28-112mm lens. Of course, in the garden where many of the backyard wildlife are more accepting of me, it can be easier to get close. However, most wildlife photographers invest a lot of money in cameras and lenses that enable them to get up close.
Good planning is critical to successful wildlife photography and be combining the Tragopan blind and my outdoor nature reflection pond, I was able to capture the above image of the chipmunk. In the same photo session, a bluejay also paid me a visit.
So, even if you can’t afford an expensive lens, a Tragopan photo blind might just be all you need to get in close to backyard wildlife.
Many memorable moments in the blind
The other memorable moments have been digitized on photo cards and now sit proudly in Lightroom’s digital database on my computer’s hard drive. There are the woodpeckers, the blue jays, the white-breasted nuthatch, red-breasted nuthatch, the many squirrel shots and chipmunks. In exactly one week in the blind, my success ratio of good shots is through the roof.
I’ve never owned a blind. The closest I’ve come to using one was the purchase of a camo throw that I used to try to photograph deer at a local conservation authority years ago. I tucked it away in tall grass under a tree thinking it was a safe hiding place only to come back the next day to find it gone.
So, this is a new experience for me.
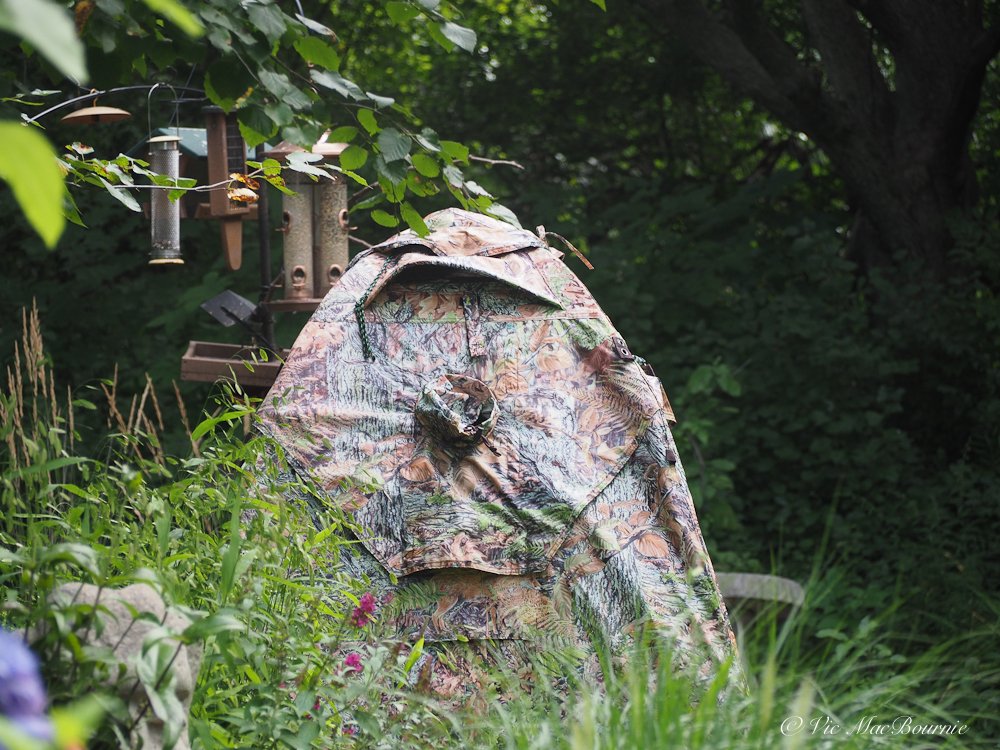
My Tragopan blind set up near the bird feeders in a corner of the yard. The Tragopan blind is an essential photographic accessory that works as well in the garden as it does in the field.
(If you are interested in exploring garden photography at a higher level, be sure to check out my comprehensive post on the Best camera and lens for Garden Photography.)
I could write about the high build quality of the blind. The fact that everything is double stitched, and that the inside has a silver thermal lining that keeps out the heat of the sun, holds in the warmth in fall and winter and blocks any movement in the blind especially when it is backlit. I could write about all the small things that, unlike a blind made for hunting, makes this blind perfect for photographers.
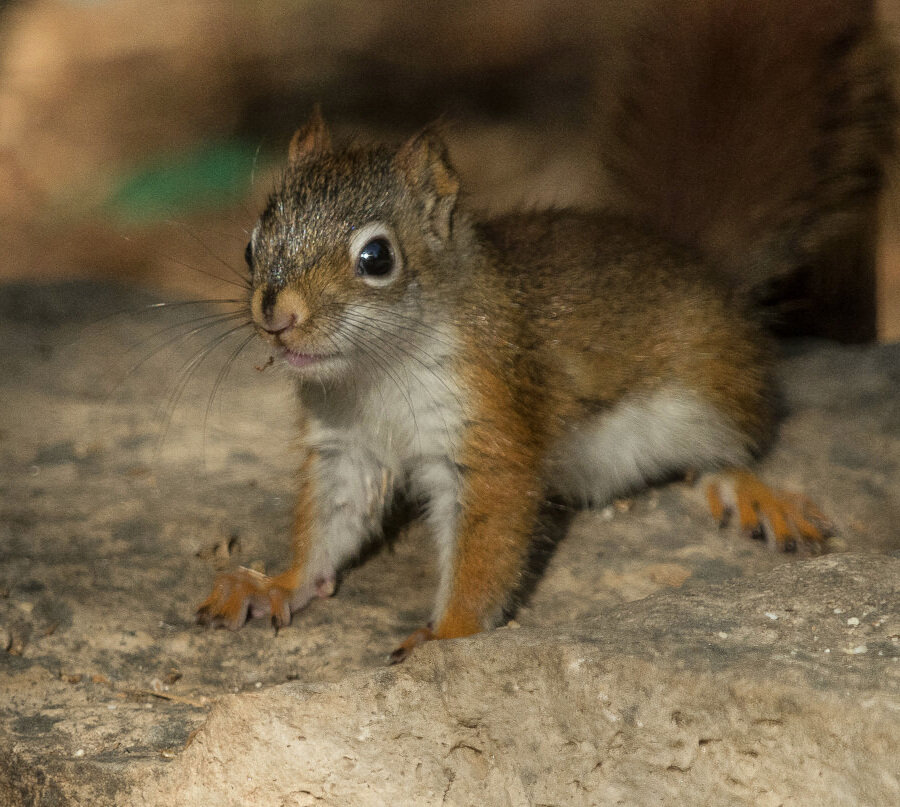
One of our baby red squirrels looking as cute as ever. The photo blind makes getting pictures like this much easier without the need for extremely long lenses.
And did I say that the blind is built specifically for photographers. It is NOT a hunting blind converted for photographers. Ethically, that makes me feel a whole lot better.
“Designed for photographers by photographers” is how Tragopan describes their line-up of blinds. “We’ve tried to think of everything you’ll need to stay concealed and keep yourself and your subject comfortable. Our goal is to make your job of creating great images easier.”
It’s no surprise that one of the company’s goals is to make our job of creating great images easier. What I love, is that one of their goals is also to keep your subjects “comfortable.” I can’t imagine a hunting blind that would make that claim.
I could go on about what makes this blind better for photographers than even the best “hunting” blinds, but I’m not sure readers of this blog need all those details in this post. (There will be other more detailed reviews later.)
The real question for readers here is: who needs this blind and why?
You might think that only dedicated wildlife photographers would go to the trouble of buying a photo blind. In this age of social media, however, many of us are looking for simple, inexpensive ways to improve our Instagram and Facebook posts. Many of us just want to document our gardens and the birds and animals that either call it home or visit it on a regular basis.
Let me say that there might not be a better photographic tool than a blind to improve your backyard bird and wildlife photography, especially if your photography equipment is limited to a few kit lenses and your longest telephoto is a 70-200mm zoom.
There are basically two ways to get closer to your subject. Either buy a longer lens in the realm of 300-400mm for several thousand dollars, or figure out a way to get closer to your subject.
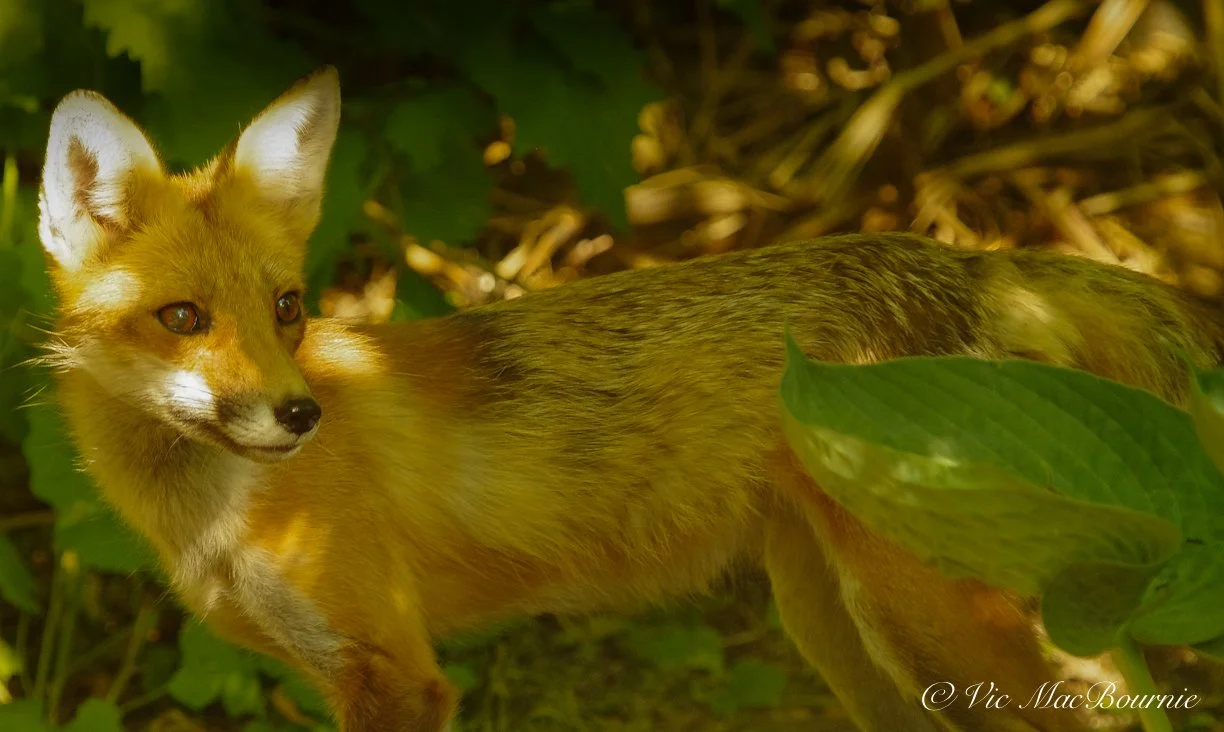
The Tragopan blind made getting this image of a young fox possible.
The blind gets you a whole lot closer for under $300. And because it’s small and light, (sets up in less than a minute or two) it can be easily moved anywhere in the yard or taken out into the field to photograph or observe a host of other subjects.
One of the benefits of photographing in our yard is that many of the birds and wildlife are already accustomed to our movements and accept a closer approach than they would in the wild. But there are many birds and backyard wildlife that do not allow a close approach. The blind not only allows your subjects to become more comfortable, it also allows a close approach to more skittish birds and wildlife. You might be able to get a shot of a bold little chickadee without a blind, but what you really want is a closeup of the sparrow hawk that visits every afternoon looking for dinner.
And, because the blind is mostly used in your yard, you can leave it up for days, even weeks without worrying about someone walking off with it. Set up and tear down is is so easy that I simply store my blind in the shed overnight and pop it up in the morning or evening when I want to use it.
A photographic blind may not be for everyone, but for anyone interested in improving their photography, whether it’s to take their hobby to a higher level, or just to document the wildlife in the yard for their social media accounts, a photographic blind might be the ideal investment.
I hope to use the blind to get photographs of fox, deer, wild turkeys and more. Stay tuned for future posts on how the Tragopan performs under different conditions throughout the fall into winter and finally into the spring months.
For more information on Tragopan Photographic blinds, go to www.photographicblinds.com. or just click on to one of these links.
* I want to disclose that Tragopan Photographic Blinds have provided me with a blind to use for a period of time to test and review. I was required to pay delivery costs of the blind and GST. In no way have they required me to write positive reviews of the product.
• This page contains affiliate links. If you purchase a product through one of them, I will receive a commission (at no additional cost to you) I try to only endorse products I have either used, have complete confidence in, or have experience with the manufacturer. Thank you for your support. This blog would not be possible without your continued support.
