

The making of a meadow
Landscape designer Angela den Hoed shares how she creating an impressive meadow garden in the side yard of her Pennsylvania home to be used a show garden for her landscape design clients. The result is a stunning garden that will slowly evolve each year to become a beautiful meadow garden teeming with insects, bees and other wildlife.

Angela den Hoed in front of her impressive meadow garden at her Pensylvannia home.
Landscape designer shares how she made her meadow garden
Removing sod and replacing it with a meadow is slowly taking root with progressive gardeners looking for a more natural approach to their landscape.
These gardeners are building meadows in the front, back and side yards to welcome wildlife that has had to make due with small islands of native and non-native plants and flowers for so many years.
Landscaper Angela den Hoed is one of these gardeners who have recognized the importance of meadow and prairie gardens and have taken the challenge of converting a large swath of turf in the front/side of her Carlisle, Pennsylvania home into a meadow.
It was a project that certainly came with its challenges. She chose to go with the most labour-intensive approach and, although the results after the first year appears incredibly successful, she admits it was a real learning process.
It just so happens, that was actually one of the key points of the entire project.
• If you are looking for ideas on using low-growing ornamental grasses, be sure to check out my post on Five low-growing ornamental grasses for the garden.
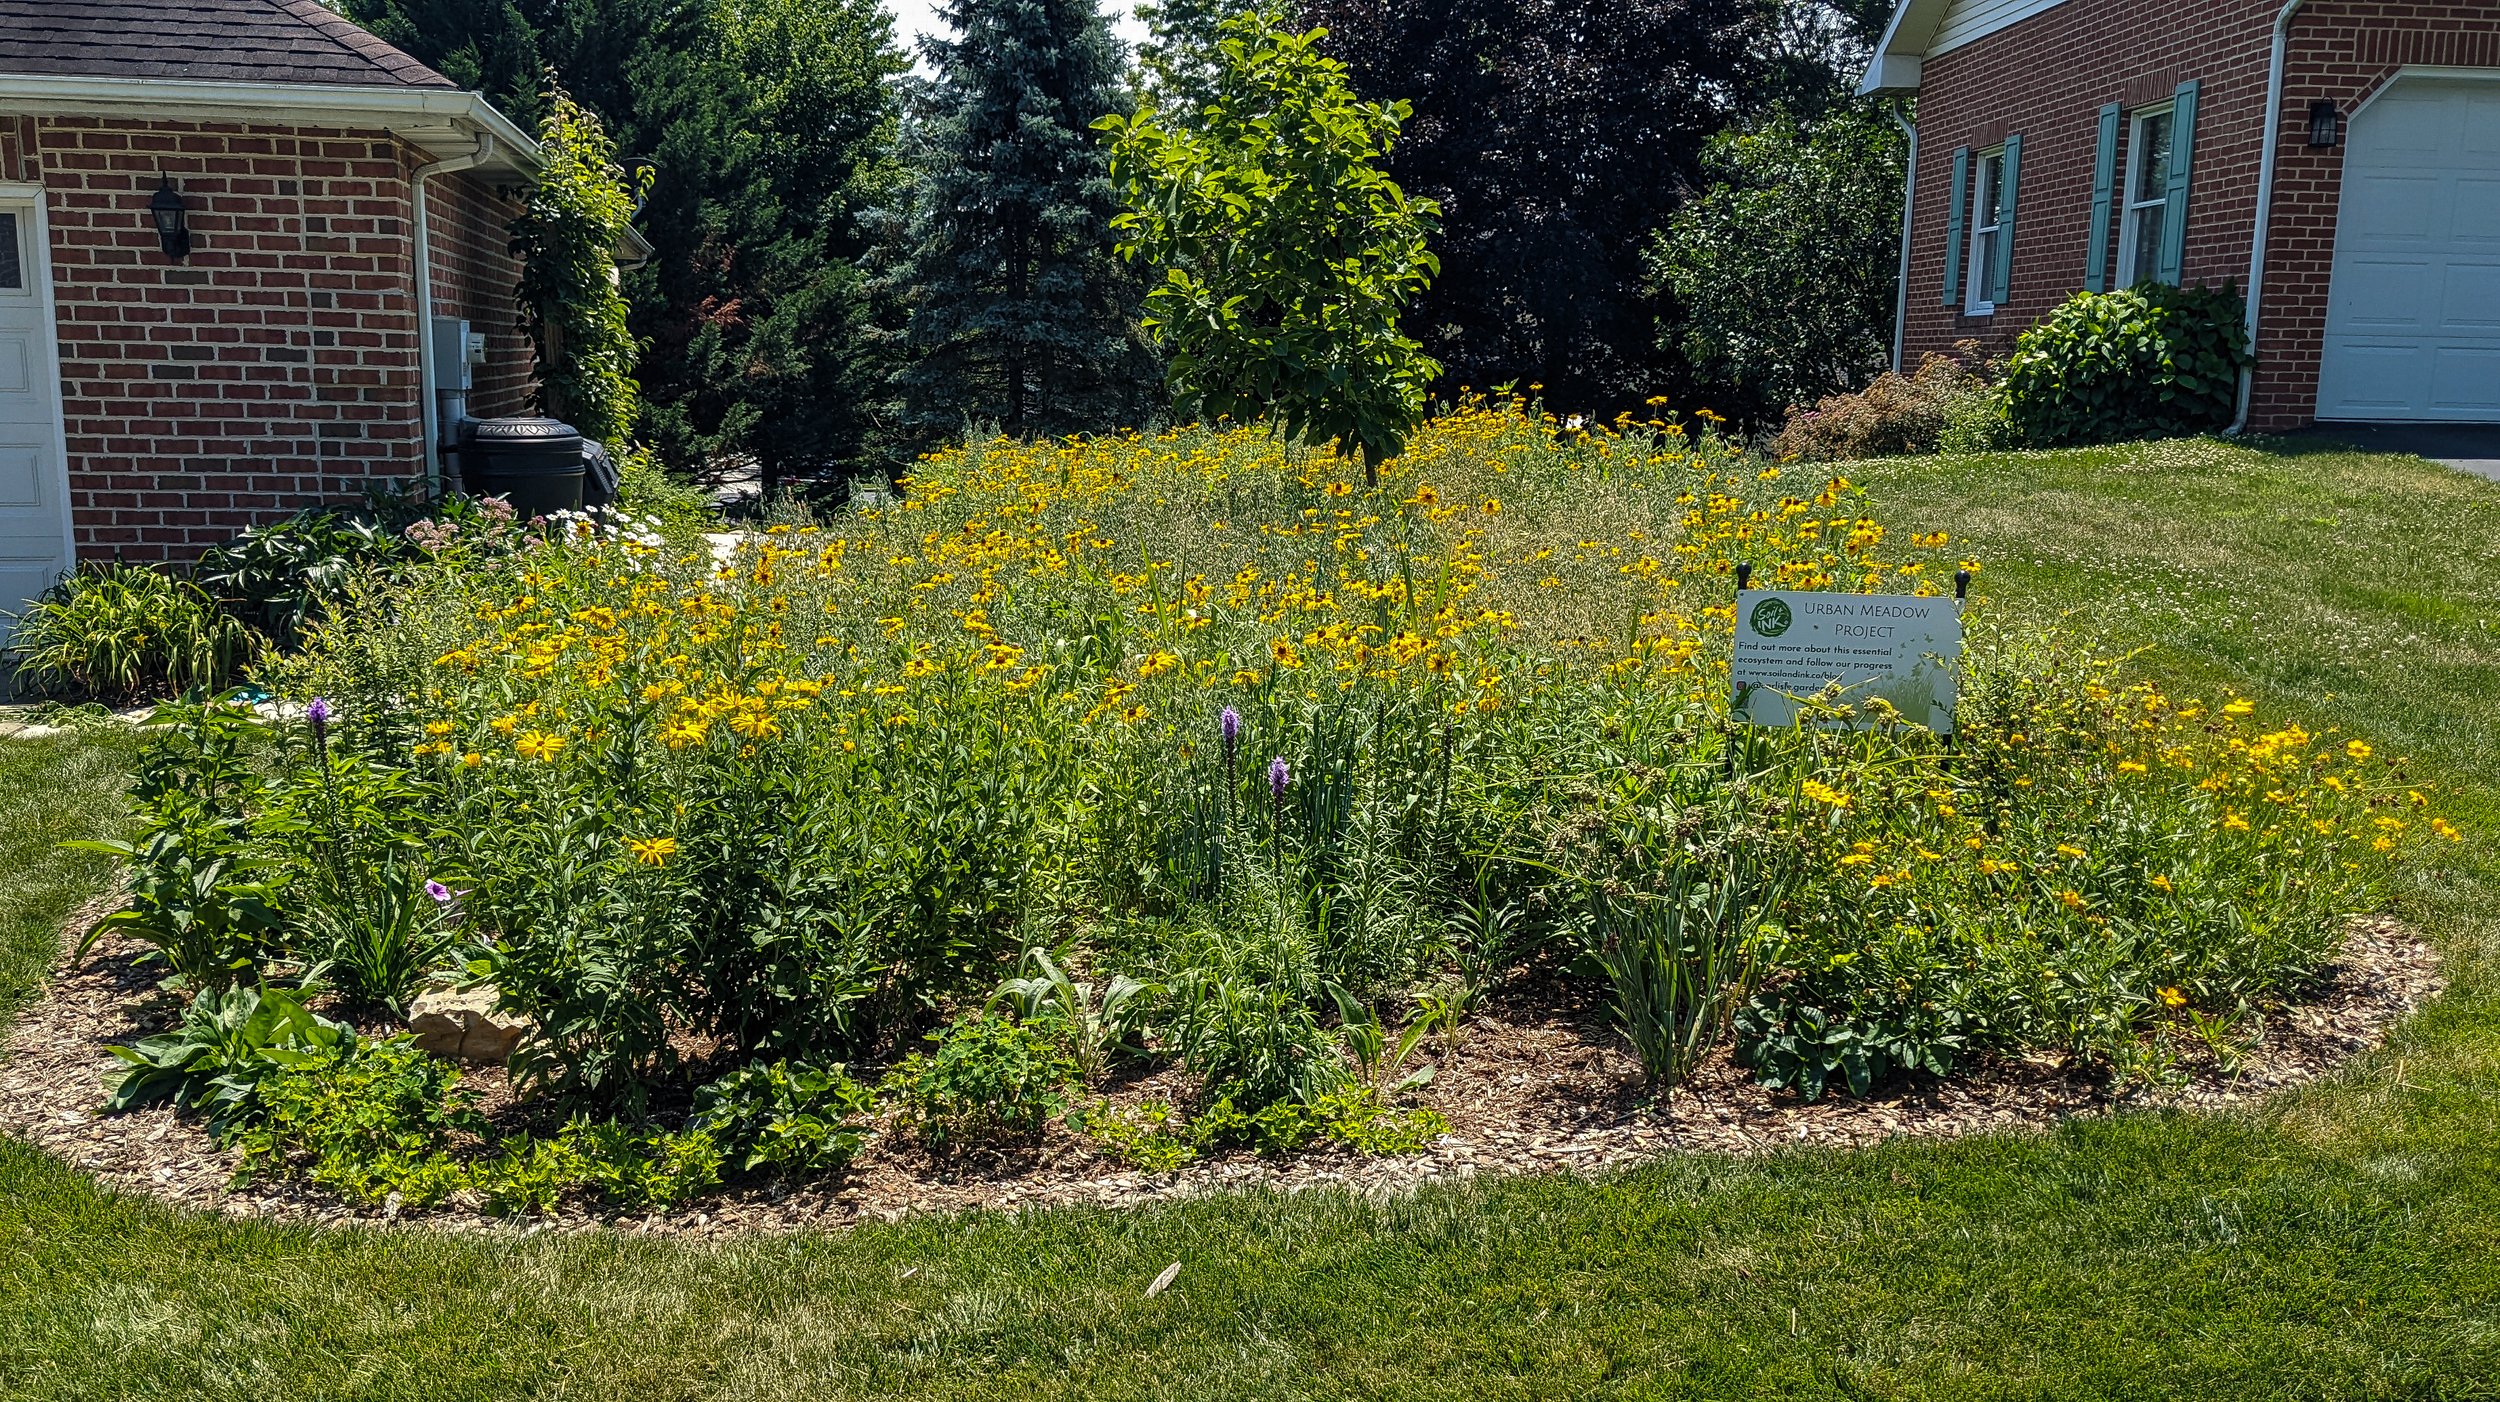
The meadow garden in Angela’s side yard with Black-eyed Susan, Blazing star, grasses and Purple coneflower just to name a few.
• More on Angela’s move from Engineering to Landscape designer here.
• More on Angela’s Woodland Garden design here.
Angela explains that installing the meadow was an important learning opportunity which she hopes to be able to take advantage of in future work with her landscaping clients, many of whom are beginning to ask about removing some or all of their grass in areas of their landscape to create a meadow garden.
In their book, Garden Revolution, How our Landscapes can be a source of Environmental Change, Larry Weaner and Thomas Christopher, write: “Native meadow is likely the best answer to North America’s over reliance on lawn, a means of saving the enormous quantities of water, fertilizer, herbicides, pesticides, and fossil fuels annually invested in the cultivation of turf. Unlike shrublands and forests, meadows can be established from seed in a relatively short time to gravitate toward open space and expansive views, attributes not common in a forest or shrubland.”
The authors ask why, then, does grass continue to dominate our landscapes?
They point to the quality of seed that has been sold in the past to create these meadows and the desire by homeowners to have an instant meadow in a single season.
For more on meadow gardening, check out my post: Fields of Gold: Sunflowers and Goldfinches.

“Meadows can work, but only if the gardener selects plants and uses techniques that reflect the local habitats and ecological processes that will affect their survival and proliferation. This is why successful meadow will look quite different in different regions.”
Their approach to creating a successful meadow is a fascinating look at working with nature using native plants and a more ecological approach. Although it is aimed at creating and maintaining large meadows with the least amount of work, their approach is certainly one that works in a mini meadow-inspired garden.
If you have visions for a larger meadow, Garden Revolution is a must read gardening guide to creating meadows and other inspirational gardens by working with native plants.
If you are interested in exploring this approach in greater detail, check out my more extensive post on Garden Revolution here.
Back to Angela’s experience installing her meadow garden. I could try to explain the process in my own words, but I think it’s best to allow Angela to tell her story in her own words.
The following is a series of questions and answers for Angela about her experience.

Stairs leading to the back yard provide visitors with an impressive view of the side meadow garden.
1) What are your short- and long-term goals with the creation of your meadow garden?
My immediate goal with the meadow project is to gain experience in meadow making that I can share with my clients and followers. My clients are starting to ask for seeded meadows, and I felt the best way to really understand it was to do it myself on my own property, using materials available to regular homeowners rather than landscape companies. Long-term I want the meadow to be an example for my clients, neighbours, and the general public to see what is possible in a typical residential site. I hope it shows the ecological and economic advantages of a native planting vs. mowed lawn.
2) I have been following your progress on Instagram an it showed that the creation of the meadow seemed like a lot of work. Would you recommend it for the average do-it-yourselfer or do you think it is better left to professionals like yourself?
The average do-it-yourselfer is totally capable of planting a seeded meadow on this scale. Once you get to maybe 1/2 acre or more, it may be better to hire a trained landscape crew. We did go with the most labour-intensive method of site prep, which I would definitely NOT recommend.
Our options for sod removal were to solarize, use herbicide, or cut it out with a sod cutter. We missed our window of sunny summer months for solarization and didn’t want to spray glyphosate on 1000 ft² of lawn. So, the sod cutter was an experiment. Rolling up and hauling away the sod was the labor-intensive part, and we still ended up needing to spot spray with glyphosate anyway.
The other site prep methods take a lot less hands-on time.
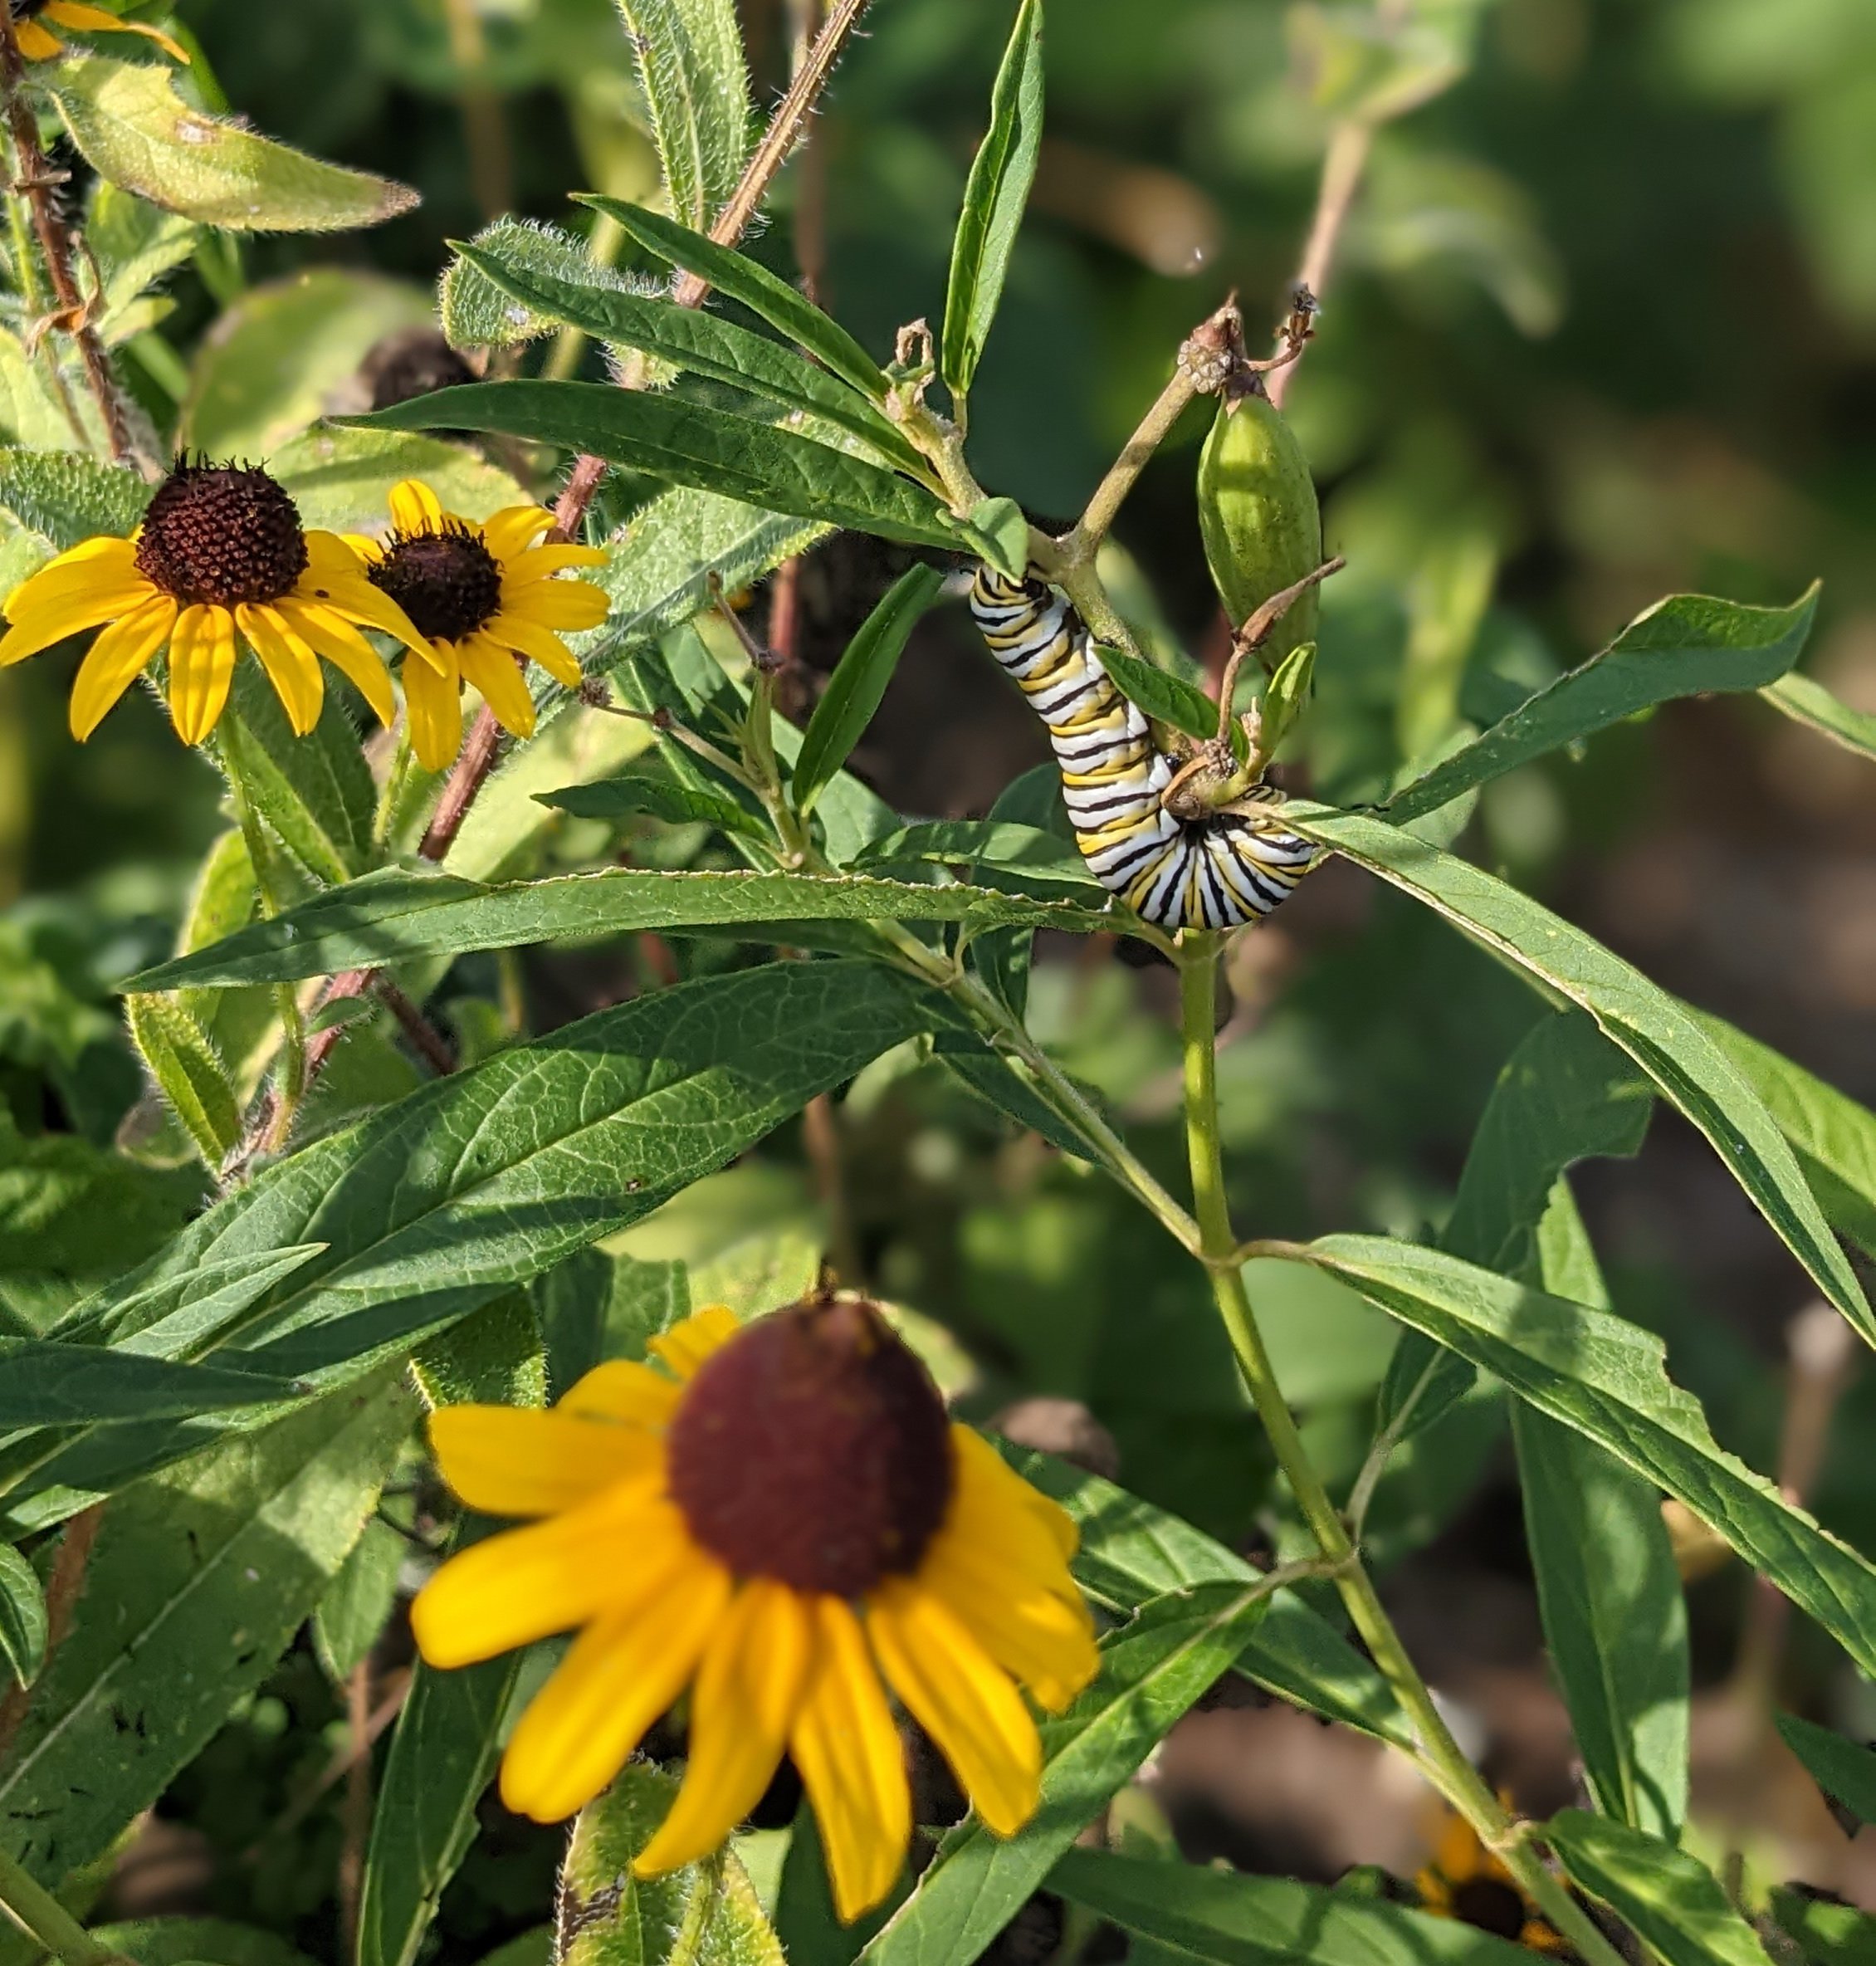
A monarch caterpillar at the milkweed in the newly created meadow garden.
Is there a lot of maintenance in a new meadow garden?
3) How about up-keep since you put it in. Has it taken up a lot of your time keeping weeds etc under control?
With the sod cutter, I was hoping to not only cut out the grass, but any weed seeds as well. Unfortunately, here in the Mid-Atlantic we have centuries of weed seed deposits in the soil (the seed bank) and they can remain viable for a very long time. I was shocked at how many weeds came up, both before and after we seeded the meadow plants.
Afterall, this area had been lawn grass for 25 years. Weeds are generally a problem if they interfere with the meadow plants germinating (blocking their light) so I wanted a clean slate for seeding. I used the scuffle hoe at first, but eventually I resorted to glyphosate.
After planting, more weeds germinated. Most of these were benign albeit surprising (petunias?). Once the meadow plants germinate, they can generally outcompete the weeds, but a few more thuggish ones needed to be removed like mugwort, thistle, morning glory, mulberry trees, even a butterfly bush.
The biggest problem is the yellow nutsedge, which I will need to stay on top of for a few years. Weeding actually doesn’t take much time at all. I'm out there all the time checking out what’s going on, but only go after the weeds maybe twice a month. Most of them would not have had the chance to germinate if we had used a different site prep method. I anticipate a lot less problematic weeds in year two.
4) Where did you get your inspiration to create the meadow?
I’m not sure there was just one point of inspiration to create the meadow. It was probably a combination of naturalistic design books and classes that I’ve taken – I’m inspired by the work of Claudia West, Benjamin Vogt, Kelly Norris, Roy Diblik, Adam Woodruff, Noel Kingsbury, James Hitchmough, and others.
Naturalistic design and science-based ecologically beneficial plantings are where my heart is but are a pretty foreign concept for most homeowners. It’s a hard sell to clients when there’s no local example to refer them to. My garden has always been my experimental space, and now it's becoming demonstration space as well. A seeded meadow is at the far end of the “wildness” scale in terms of garden design. I hope to do a more intentionally designed plug-planted perennial “meadow” garden in the future, which I think bridges the gap between a seeded meadow and a traditionally planted garden with larger groupings of plants.

Black Eyed Susans dominate the meadow in the first year of growth. Angela expects a greater variety of blooms in the second year in the garden.
5) What are your plans for the meadow this year. Any additions, plant removals?
This will be year two for the meadow. In the first year the most visible plants were the nurse crop of oats and the mass of Rudbeckia. These will be significantly less prominent as more perennials and grasses start to take hold and bloom.
The first thing we will do this year is the cutback in late March, along with spot-spraying the clumps of lawn grass that came back up in year one. The front street-facing edge of the meadow was planted with potted plants in a more traditional garden arrangement to indicate intentionality. This part of the garden may get rearranged a bit this year, I am still holding space for a bit of artwork to be added there as well.
How long before wildlife show up in a meadow garden?
6) What wildlife did you see in the meadow this year?
I think it takes a while for the wildlife to find your new native plants. At least in the rest of my property that seems to be the case. However, there was a small flock of birds that were always hanging out at the bottom of the hill during the summer; they would all fly out when I walked by. There were plenty of bees, and a handful of monarch caterpillars on the milkweed. We also saw a hawk sitting on the roof looking over the meadow, he must think it’s a good place to hunt. I imagine a lot of the neighborhood rabbits will be moving in this spring.
7) What has been the reaction of neighbours on the street about the meadow.
The reaction has been positive. I’m sure they all thought we were crazy when we removed the sod last fall and it looked like a giant swath of bare soil until the seeds germinated in May. One neighbour said she wished she was brave enough to do the same thing. I have noticed a lot more walkers on our street since plants started blooming.
8) Is there anything you would have done differently if you could design and install it again. Tips for people thinking about creating one of their own.
I would definitely have used solarization as my site prep method. This requires more planning and patience. Basically, you must scalp the grass and then cover with black or clear plastic starting in June when the weather heats up, then leave it in place until just before you seed. This kills both the grass and the seeds in the very top layer of soil, and you can seed in the fall, winter, or spring. Giant sheets of plastic are not super neighbour-friendly though, so if doing this in a very visible area, glyphosate may be a better option. It also depends on the size of the meadow, as sheets of plastic will end up in the landfill. It’s a balance of size and your priorities. A few applications of glyphosate in the months before planting will also do the job, but many are uncomfortable with that.
I also should have eliminated the nutsedge ahead of time. The nutlets live 8+ inches below the surface and can prevent other seeds from germinating.
It will be a while before I know if I’m happy with my seed selection. I decided to not complicate it too much with a totally custom seed mix. I started with a readily available mix from Ernst Seeds and had them modify it by upping the percentage of perennials and lowering that of grasses. That’s primarily to get a heavier floral display in the meadow and help the neighbours see it as more of a garden. I also put in some plugs of Echinacea pallida (pale purple coneflower) and Eryngium yuccifolium (rattlesnake master) in small groupings for a little added interest. Hopefully the rabbits didn’t eat all of them! I can always add in a few other species in the future.
Five favourite plants for the meadow garden
9) What agricultural zone are you growing it in and what are the top 5 plants in your meadow?
I am in USDA growing zone 6b, in the Ridge and Valley ecoregion.
I would say the top most recognizable plants in the meadow would be:
• Echinacea purpurea (purple coneflower)
• Rudbeckia hirta (Blackeyed Susan)
• Asclepias syriaca (common milkweed)
• Aster novae-angliae (New England Aster)
• Monarda fistula (wild bergamot).
Why is a meadow is so important to the ecosystem?
10) Why is creating a meadow so important for gardeners and lovers of the natural world?
A meadow is an alternative style of garden that more accurately mimics how plants grow in nature. There is a much higher plant density than you find in a traditional garden setting, and consequently opportunity for much higher diversity – both in the plant species and the wildlife it can serve.
Even a tiny micro-meadow can pack in a lot of diversity.
There are 23 different plants in my seed mix plus the two plants added as plugs. With a seed mix, you can plant any size of garden with that much diversity in it. You are also hedging your bets against plant failure – if one or two plants don’t thrive in your specific conditions, there are plenty of other species that will fill in the gaps.
The obvious benefits of planting natives include providing food and habitat for local wildlife and supporting the local food web (hawks included!).
Beyond these are the reductions in fertilizer, fossil fuels, and noise and air pollution generated by lawn maintenance. We also get the additions of better stormwater absorption, improved soil health, and much higher carbon sequestration. These are ecosystem services that have been stripped from the original landscape and need to be restored as best we are able.

Wildlife Rescue: Volunteers are lifeblood for Rescue and Rehabilitation Centres
Rescuing and rehabilitating wildlife is critically important for the survival of so many of our backyard birds, animals, reptiles and amphibians. The dedication and commitment of volunteers is what keeps these wildlife centers working hard to save local wildlife.
Wildlife is such an important part of our gardening experience that we need to do everything we can to not only provide them with the basic necessities of food, water and good habitat to raise their young, there are times we also need to protect them and even save them from dangerous situations that threaten their lives. While we, as Woodland/Wildlife gardeners, can provide assistance in some ways, we often need professionals to provide care for the most sick and injured we come across in our gardens.
This article is part of a series on Wildlife Rescuers/Rehabilitators and the important part they play in saving our woodland friends, whether these little friends are an injured bird, a sick fox, fawn, raccoon, snake, turtle, squirrel, even a mouse.
If you require the assistance of a wildlife expert, please take a moment to check out the resources provided throughout the article, but especially at the end of this article to get help from a caring wildlife rescuer/rehabilitator. And, if possible, consider donating to your local wildlife center.
It’s important to note that Humane Societies and Animal Control locations are not geared for wildlife and will likely put the animals down if you take them there or call them for assistance. While Humane Societies may provide homeowners with a list of rehabilitators (as seen by the links at the end of this article) they are not the first stop in your road to rescue wildlife in need.

Jennifer Howard, a wildlife rescue and rehab volunteer, works with an injured hawk at the Procyon Wildlife Center in Beeton Ontario.
New beginnings and broken hearts: A wildlife rescuer’s story
All photos courtesy Jennifer Howard
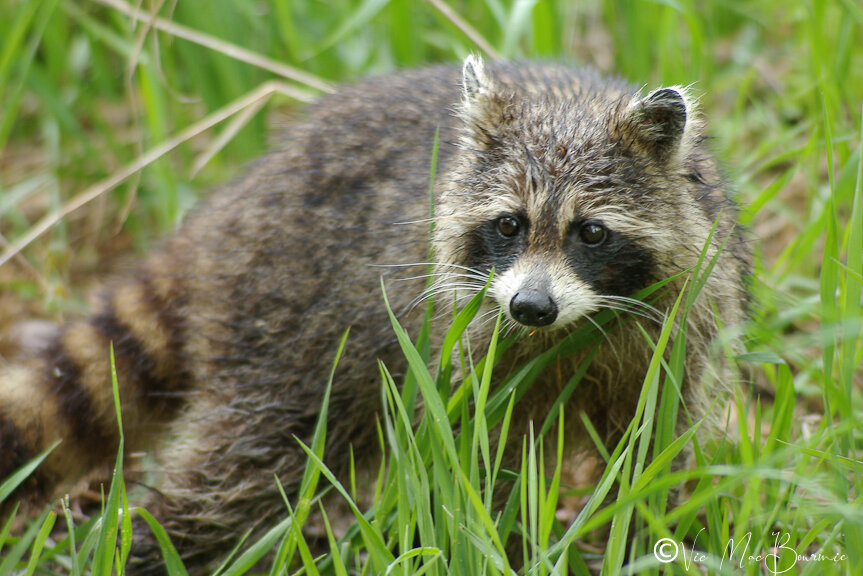
It all began seven years ago with a young raccoon curled up on her neighbour’s front lawn.
The little raccoon’s death was the first time her heart would be left broken, but as a dedicated, volunteer wildlife rescuer and rehabilitator, it certainly wasn’t going to be her last.
“A raccoon curled up in the middle of the day, unafraid, most likely has distemper,” explains Jennifer Howard. “It has a bad headache and doesn’t know what to do. It’s so sad.”
At that time, Howard spent most of her time capturing local wildlife on film as a wildlife photographer, but the encounter with the sick raccoon and the volunteers at Procyon Wildlife Centre in Beeton, north of Toronto, changed her life’s direction and set her on a road leading to some of her most memorable experiences, rewards and satisfaction as a volunteer wildlife rescuer and rehabilitator.
This same dedication and commitment to helping local wildlife is what drives the estimated countless thousands of volunteer wildlife rescuers and rehabilitators in the United States, Canada, the United Kingdom and around the world.
Although paid positions in the United States average about $50,000 annually and can go up to $80,000+, there are countless volunteers who work for little to no pay just for the joy of helping wildlife.
“Your releases make everything worthwhile. That special day they go home, run free. Some back home after sickness or injury and those little orphans seeing the world for the first time. Exploring, sniffing around, romping with each other in excitement. That is what we wait for and work so hard for. That makes it all worthwhile.”
— Jennifer Howard
Wildlife Centres count on volunteers and donations
In Ontario, for example, the government does not fund wildlife centres and most are heavily dependent on volunteers. Ontario Wildlife Rescue, an umbrella group for the province’s approximately 50 wildlife centres, urges everyone who can donate time or funds to help the wildlife centres to step forward.
“If you are able to donate even a few hours a week, it can make a big difference. There are a lot of ways you can help out at a wildlife centre. Do you have a skill or a trade? Do you have a car? Can you help with administration, animal care, maintenance or fund raising? There are lots of jobs necessary to keep a wildlife centre running, so volunteer,” the website urges readers. Just some of the jobs listed include: In-centre volunteers, drivers, public relations, foster parents, building and maintenance.
The Ontario groups are just an example of what similar centres around the world face in their quest to help wildlife.
What is the point of wildlife rescue and rehabilitation?
Wildlife rescue and rehabilitation plays a critically important part in preserving and monitoring the health of our local wildlife and are often the ones on the front lines that are able to provide the initial early warning signals that a local animal species is at risk from disease such as mange or rabies. Obviously, they also provide care for injured animals that are able to be eventually re-released to live their lives in the wild.
Young volunteers are on the rise
The good news is that young people have recognized the important work these groups do and are offering to help the movement.
In the U.K. alone, there are an estimated 4,800 people volunteering with wildlife rehabilitation and a new base of younger volunteers has emerged with 66% of volunteers under 35, and 34% under 25-years-old.

Jennifer assists with Scout, a rescued fox, at the wildlife center.
“But even the ones you lose you still helped. Even though you have bad days, you just have to enter into one animal’s room, you look at it, it looks at you. Right there, you know you need to keep going, to save the lives you can, which way outweigh the numbers you can’t. It changes your life forever. And animals are the best therapy a human can ever have.”
— Jennifer Howard
Respect: Key to helping wildlife
Rescuing and rehabilitating wildlife has more than its share of heartbreak. In fact, heartbreak can be a weekly even a daily experience, but it’s always tempered by the knowledge that, when the time comes to put the animal down, the sick or injured little life the rehabilitator rescued was not alone, left to die in freezing temperatures or in severe pain. It doesn’t matter if it was a deer fawn, a young fox, raccoon, bird or even a mouse – all wildlife get treated with the utmost of respect.
Jennifer will never forget the little raccoon that lost its life, but in turn, set her on a path to become a volunteer wildlife rehabilitator.
“This little raccoon was so young it just broke my heart. One of the many,” she admits.
The wildlife centre where Jennifer works is similar to the thousands of centres spread across the United States, Canada, the United Kingdom and other countries around the world.
Toronto Wildlife Centre handles up to 30,000 calls a year
Some are large, like the Toronto Wildlife Centre whose skilled wildlife rehabilitation staff provide supportive care to thousands of animals a year representing more than 270 different species, including many listed as species-at-risk.
The Toronto Centre states that it is the busiest Wildlife Hotline service of its kind in Canada and handles approximately 30,000 calls per year. The Toronto Centre currently includes three expert rescue staff and even have two rescue vehicles. “Providing medical care for wildlife requires skill and innovation: repairing a crushed turtle shell, diagnosing lead poisoning in a loon and stitching a fox’s wounds is just a day in the life of Toronto Wildlife Centre’s expert veterinary team.”
Hope For Wildlife raised the awareness of wildlife rescue and rehabilitators
Hope for Wildlife, a rehabilitation centre in Seaforth, Nova Scotia Canada since 1997, has gained a huge following from its successful television show that went a long way to raise the awareness of the work wildlife rescuers and rehabilitators face every day. The documentary series has aired in more than 100 countries. Even with a successful television show, however, Hope for Wildlife has to work hard to keep up with its wildlife needs. At last count, Hope For Wildlife takes in more that 4,500 wild animals into their care each year.
“Since 1997, we have rescued, rehabilitated, and released over 50,000 injured and orphaned wild animals representing over 250 species,” their website states.
Take a few minutes to check out Hope For Wildlife’s story.
In the United States, the National Wildlife Rehabilitators Association acts as an umbrella group and a voice for the profession providing a job board for wildlife rehabilitators, as well as events such as seminars, workshops and symposiums. Their site also includes a helpful link to wildlife rehabilitators across the United States.
Its stated purposes are:
To foster continued improvement of the profession of wildlife rehabilitation through the development of high standards of ethics and conduct
To encourage networking and to disseminate knowledge
To engender cooperation among public and private agencies and individuals in support of our mission
To foster respect for wildlife and natural ecosystems
While the Toronto Wildlife Centre and other major metropolis centres benefit from a larger donor base, most are tiny organizations relying on a handful of volunteers to get them through from one week to another on donations from the public and, if they are lucky, some local businesses.

Jennifer Howard with a rescued fox prior to taking it back to the wildlife center for care.
“At Procyon Wildlife Rehabilitation and Education Centre, we take everything in from tiny baby mice to white tail deer fawns,” Jennifer explains. “As a rehabilitation centre you do everything in your power to save each and every life. But that is not always possible. But even the ones you lose you still helped. Even though you have bad days, you just have to enter into one animal’s room, you look at it, it looks back at you. Right there, you know you need to keep going – to save the lives you can – which far outweigh the numbers you can’t save. It changes your life forever. And animals are the best therapy a human can ever have.”
Jennifer says that at the wildlife centre where she works they “are all volunteers and it’s hard work,” she adds. As a phone volunteer, she and other volunteers work from home one, six-hour shift a week, “taking messages and admitting the animals after checking to make sure we can. Sometimes we are full. But we will always take emergencies.”
How do wildlife rescuers deal with animals dying?
“I had to teach myself that when an animal I rescued didn’t make it in spite of everything the rehabbers and or veterinarians did, I still saved that animal from any more suffering, from starving or freezing to death, from pain or worse,” Jennifer says.
“It takes some practice. I’ll tell you, when you lose an animal, to deal with it in these terms. But becoming part of a rehabilitation team you learn you must or it can literally eat you up. And trust me, some hit you way harder than others. And it’s tough. And we do shed tears. But you need to remember, they were not alone, they were warm and comfortable and pain free, and with loving caring people. That’s what gets you through your losses.”
According to the National Wildlife Rehabilitators Association based in Minnesota: “Wildlife rehabilitation is the treatment and temporary care of injured, diseased, and displaced indigenous animals, and the subsequent release of healthy animals to appropriate habitats in the wild. As such, wildlife rehabilitation is generally done to help an injured animal. However, through wildlife rehabilitation, individuals make an impact far beyond that one animal.”
Jennifer’s roots in wildlife rescue actually go back before the little raccoon on her neighbour’s lawn.

A group of foxes hanging out at a playground. The foxes are harmless and will likely disappear once humans come to use the park.
Parents play key role in teaching children respect for wildlife
In fact, Jennifer can trace her love of animals back to her parents and grandparents.
“I was destined to be who I am today even way back then. And I have my parents to thank,” she explains.
“The biggest thing we were taught was respect. Always respect that animal’s space, and keep them wild. I have helped save habitat for wildlife along with species at risk. Monitoring as a team member and working with species-at-risk through a family conservation club (Six Mile Lake Conservationists Club) my sister founded, run by my three sisters and my son.”
The club has since disbanded, but during its time it did some great work for wildlife, she adds.
More related articles from Ferns & Feathers you might be interested in exploring:
Before her experience with the young raccoon on her neighbour’s lawn, Jennifer “dealt with a couple other wildlife rehabs… I became good friends with a rescuer … who helped me and taught me and became my mentor, I guess you could say. Working alongside him was amazing. He helped me get swans, geese, foxes, etc. and we still get the occasion to work together. I love it,” she adds.
Jennifer has even been able to use her photography skills as a volunteer.
“I did a bit of animal care at the beginning, but … we started doing photo shoot fundraisers about 5 years ago and it took off amazingly well,” she explains.
People loved getting their pet pictures taken with Santa, and the Easter Bunny and, the year before Covid hit, a fall photo theme.
“It was a lot of fun. We had turtles, snakes, miniature horses, hamsters, dogs and cats and even just families. Just an overwhelmingly amazing response. Then Covid hit us and that was it for fundraisers, until this Christmas” when they took the photo shoot outdoors.
“I still do a bit of animal care when needed, and I’m always learning. I assist with some animals and their treatment and care, and sit in on some vet checks and surgical procedures to photograph for ourselves and our viewers to give them updates,” she explains.
Jennifer, who is also an award winning author, also puts her skills to work writing an article every month for the wildlife centre’s online newsletter. Sometimes the articles are purely educational for readers and other times she writes about and provides update on the animals the Centre is caring for at that time.
Jennifer’s dedication to helping wildlife has earned her two education awards – one from Lake Simcoe Region Conservation Authority in 2011, and another from Ontario Nature in 2016.
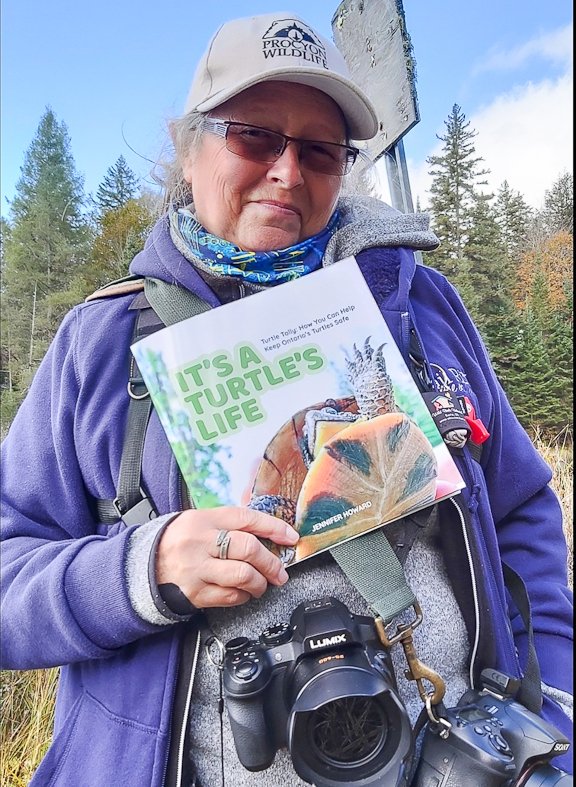
Jennifer Howard with her children's book It's a Turtle's Life available at the Toronto Zoo.
She has also written a children’s book on Ontario’s native turtles called: It’s a Shell’s Life. The book was published by the Toronto Zoo’s Adopt a Pond program in 2019 and can be ordered from from the Toronto Zoo @ [email protected]
“The books are geared to children, but I have had adults getting back to me saying they love it and learned a lot from reading it,” she says. “Part of the proceeds go back into the Adopt a Pond program to help them continue on with the good work they do with our turtles. It’s a win, win,” she adds.
Whether rescuing wildlife from dangerous situations, working to rehabilitate them or using her extensive skills to raise funds for or the profile of the Procyon Wildlife and Education Center, there is nothing that gives her and other wildlife rescuers the joy and sense of accomplishment quite like releasing one of their patients back to the wild.
“Your releases make everything worthwhile, Jennifer says. “That special day they go home, run free. Some back home after sickness or injury and those little orphans seeing the world for the first time. Exploring, sniffing around, romping with each other in excitement. That is what we wait for and work so hard for. That makes it all worthwhile.”
In conclusion
It’s impossible to tackle the world of wildlife rescuers and rehabilitators in a single article — the work they do is so far reaching and inspirational.
Today, some of their stories are beginning to be told around the world. YouTube, for example, is full of short videos of incredible rescues that warm our hearts. Many involve dogs and cats and other pets, but others simply tell the story about a local hero wandering out onto the ice to save a stranded young moose or a deer that cannot find its way back to shore across the treacherous ice.
While YouTube has brought these rescues to the masses, wildlife rescuers and rehabilitators have been saving animals for years quietly behind the scenes with no cameras rolling. In fact, they continue to carry out these rescues and incredible rehabilitations everyday.
They do it quietly, without fanfare and with only the joy they get in their hearts and the knowledge that — despite the many heartbreaks they experience — the animals are counting on them in times of need.
The following are helpful Resources for homeowners looking for wildlife rescue and rehabilitation assistance
Worldwide
In Canada
https://www.nwrfcanada.org/what-we-do
http://www.ontariowildliferescue.ca/contact.php
https://www.ontario.ca/page/find-wildlife-rehabilitator
In the United States
• Here is an extensive state-by-state listing from the Humane Society of the United States on how to find a wildlife rehabilitator
https://www.humanesociety.org/resources/how-find-wildlife-rehabilitator
In the United Kingdom
https://www.rspca.org.uk/adviceandwelfare/wildlife/findarehabilitator
• The British Wildlife Rehabilitation Council includes a clickable download of UK rehabilitators
http://www.bwrc.org.uk/FindaRehabilitator
• Here is an extensive list of UK Animal Rescuers from Animal Rescuers.co.uk
Creating a wildlife friendly garden (7 simple steps)
If you have the basis for a woodland garden, you are on your way to creating a wildlife garden in your backyard. The two landscape designs work in harmony but there are specific elements to focus on to create a successful wildlife garden.
Woodland garden provides groundwork for wildlife garden
If you already have the makings of a woodland garden, you also have the groundwork for a wildlife garden.
Woodland and wildlife garden design styles are similar and can work in harmony together, but there are definitely key elements to focus on to create a successful wildlife garden.
I have found that encouraging more insects, reptiles, amphibians, birds and mammals to my garden demands a more detailed focus on the shrub and flower layers of my multi-layered woodland garden.
Generally speaking, in a woodland garden the shrub layer is often as visually pleasing as it is beneficial to wildlife. In a wildlife garden, that approach is reversed and the shrub layer’s primary purpose is to provide food and habitat for a myriad of wildlife. The flower layer also requires a more wildlife-friendly approach.
So how do we get started?
Here are the seven basic principles to create a wildlife garden. (More detailed examination lower in article)
Provide food, water and shelter
Add a variety of plants
Create islands of habitat
Create layers in the garden
Use native plants
Reduce or eliminate pesticides and herbicides
Refrain from any real fall garden cleanup

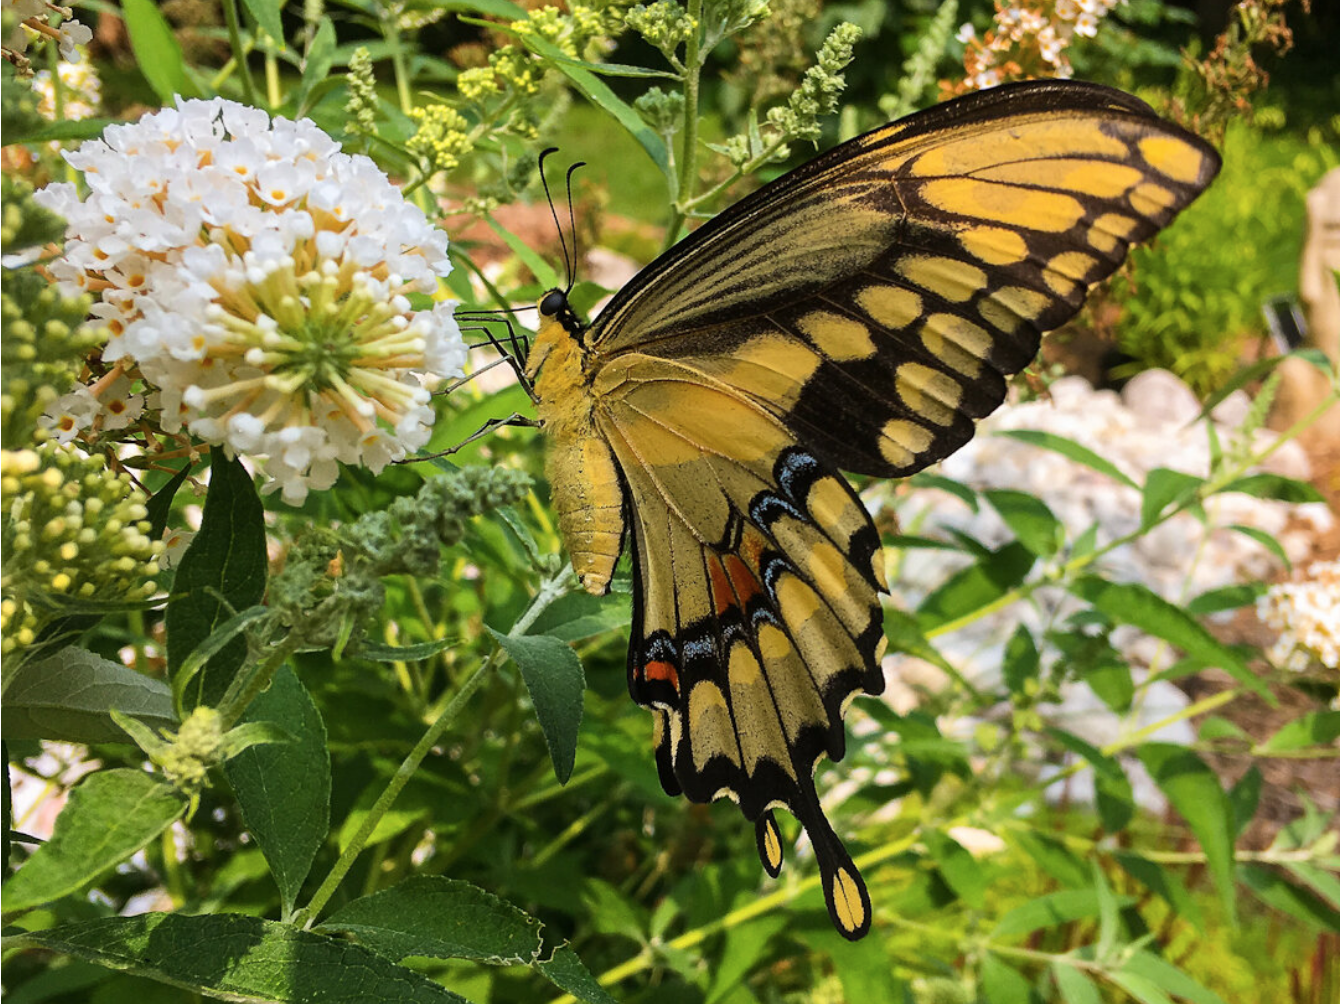
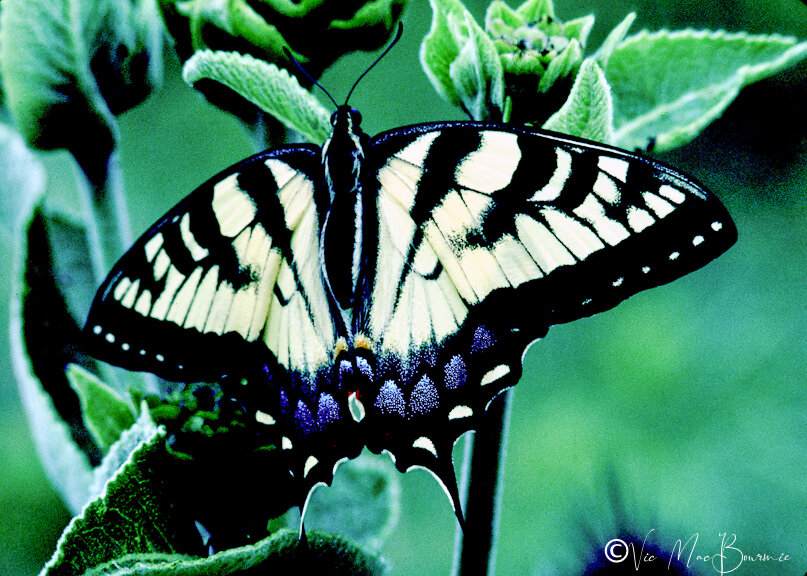
An impressive example of a giant yellow swallowtail works a butterfly bush in the garden.
Gardeners who are looking to create a successful wildlife habitat need to focus on two primary garden design elements: First, putting an emphasis on providing sources of water (preferably a natural pond), and, two, a focus on creating an edge habitat of native plants that provides both food and a safe habitat for nesting. These two factors together with an already established woodland garden will go a long way to creating a successful wildlife garden.
Habitat loss makes wildlife-friendly garden more critical
The loss of habitat is the most important single factor responsible for the reduction of wildlife numbers in Canada, the United States, Great Britain and elsewhere. The burning issue is: Can we as homeowners take action to reverse this trend in our own yards. The answer, of course, is a resounding yes. Gardeners should also be encouraged to know that creating a wildlife garden can be created and maintained in less time and using less energy than is required in a traditional garden.
Many of us get great pleasure in feeding birds at our backyard feeders, but very few landscape their properties to create a habitat for birds and many other species of wildlife.
As Irish garden designer Mary Reynolds expounds in her book The Garden Awakening, the goal of every gardener is to create an island of native plants that will provide a path for wildlife to travel through our neighbourhoods. She refers to them appropriately as ‘arks’ and is busy creating a movement bringing homeowners around the world together to create arks. (see link at bottom of article)
By using ecological principles in the design of your ark, and incorporating native plant species whenever possible, the wildlife garden will take shape and begin attracting a greater variety of fauna to your garden.
I think Reynolds ark concept can be taken a step farther in a large landscape by creating islands within your ark. Rooms, if you will, that provide more specific food sources and habitat that is particularly suited to that area in your garden. A sunny clearing in the woods, for example, is an opportunity to grow a fruiting shrub and more sun-loving flowers. A wet area provides a different opportunity to create an island to encourage everything from toads and salamanders to dragonflies and other wetland insects and butterflies as well as aquatic loving native plants, everything from native iris to orchids and blueberries.
By using environmentally sound gardening methods, landscaping for wildlife is not only landscaping for the ecosystem, it is also a people-friendly design that family and friends will appreciate and enjoy for years to come.
Begin wildlife-friendly garden with a brush pile
Probably the single most effective step you could take besides eliminating herbicides and pesticides in your garden is to create a brush pile for wildlife. It is such an important resource for wildlife – everything from insects, reptiles, birds and mammals – that creating even a simple, small brush pile will go a long way to kick-start your wildlife garden.
In our garden, we actually have two on the go. One is more of an open pit compost pile that is made up of primarily cuttings from plants and shrubs that gets topped up in spring and fall with spent soil from our many containers. Several branches placed on the pile keeps it open and accessible to small mammals. Some food scraps make it to the pile but it is not a traditional compost. Almost all the soil is left in place on the pile to encourage biodiversity in the pile. I have seen Coopers hawks hunting there on a regular basis as well as fox and snakes.
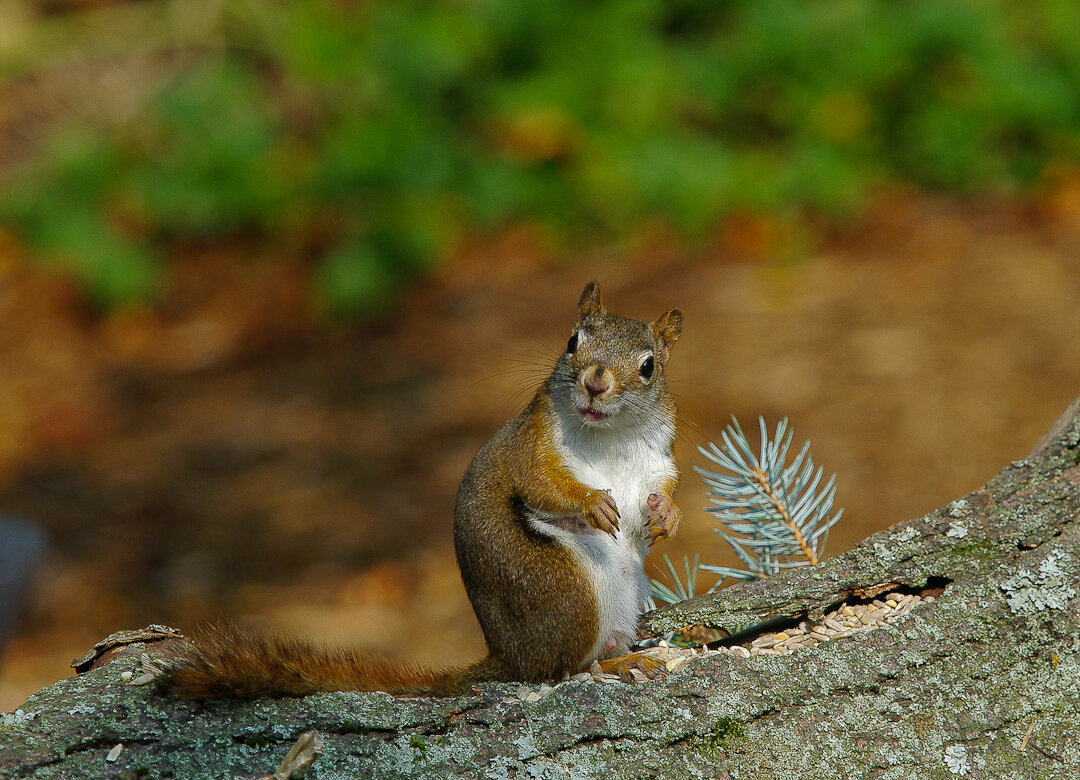
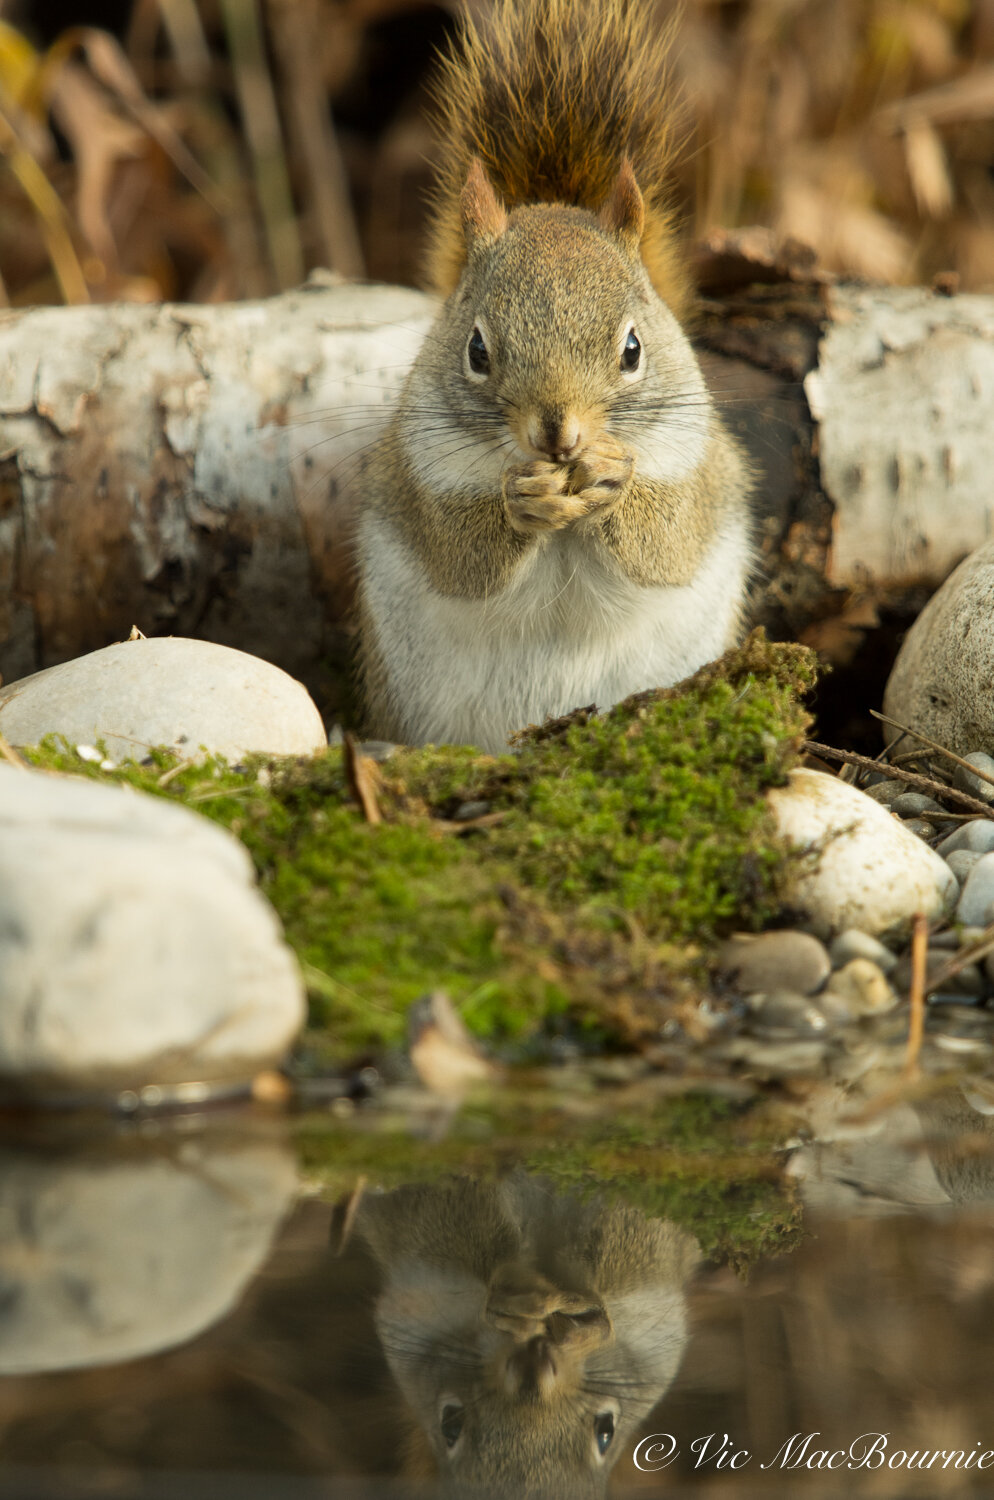
The second pile is a more traditional woodpile made up of large, medium and small branches, the result of a recent tree trimming. It became the main dumping ground for small amount of fall leaves we collected this year. In a few short months, it has become a favourite spot for a family of red squirrels as well as a number of insect eating birds that patrol the pile on a daily basis for insects, eggs and pupae. For more on the importance of a woodpile, go to the bottom of this story for a link to an earlier story.
Difference between wildlife-friendly and traditional landscaping
Traditional landscaping usually means a carpet of lawn and a collection of decorative, exotic plants. These landscapes are more concerned with visual and esthetic goals, such as choosing hybrid shrubs and flowers more for their form, colour and texture than the benefits they may have for wildlife. Benefits to wildlife, in these instances, are more unintentional than intentional.
These traditional landscapes usually put high demands on the use of water, energy and chemicals to remain healthy. These landscapes are not any more healthy for we humans as they are for the local wildlife species who cannot thrive in these environments.
As Reynolds explains: “I’ve discovered that gardens can become something very special if we approach them differently. If we invite Nature to express her true self in these spaces and then work to heal the land and bring it back into balance, something magical happens. Nature begins to interact with us on an energetic, emotional and physical level.”
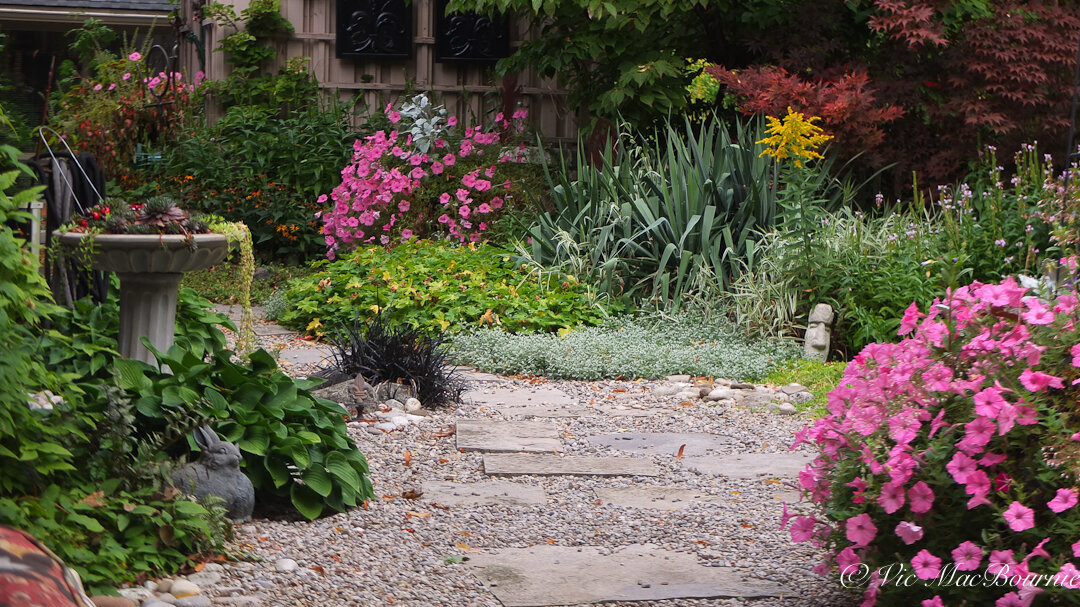
A natural garden path with a combination of native perennial and annual flowers and wildflowers creates a welcoming habitat for backyard wildlife.
Ecological guidelines for planning and maintaining a wildlife garden
Reynolds, in her ground breaking gardening book, gores on to say: “If nature is left to its own devices and without imbalances in the ecosystem such as the overpopulation of hungry deer or and infestation of rabbits it will reclaim its territory and become Woodlands once more.”
Those same sentiments were emphasized in another outstanding book, Garden Revolution by authors Larry Weaner and Thomas Christopher. They ask: “if I do nothing, what will happen?” your answer will be “A forest will develop.”
Providing water is critical for wildlife to survive. A small pond allows access for small mammals, birds and amphibians.
Weaner goes on to say that “There are powerful environmental reasons for bringing our gardens into a sounder relationship with nature. I honestly believe that having once sampled an ecologically driven approach, gardeners won’t want to do anything else.”
So, by letting our gardens go and doing very little maintenance, a wildlife garden will emerge. However, with a little help on our end, it can be done a lot quicker by following these seven basic principles.
Seven steps to a successful wildlife garden (explained)
1) Provide the three basic requirements: Namely food, water and shelter. The proper selection of native plants can create a reliable supply of food throughout the seasons. these same plants can provide shelter and nesting ha and bird baths, both raised and on-ground or a small pond can provide water.
2) A variety of Plants: Wildlife come in many different forms. It’s easy to focus on seed-eating birds that we are so familiar with at our bird feeders. But, just as we try to provide a variety of food at our feeders, it is just as important to ensure a diversity of food and cover in our gardens to provide for a greater variety of wildlife.
3) Islands of habitat: Creating clumps of vegetation and habitat is much more valuable than planting individual shrubs and trees spaced widely apart in our lawns. Better shelter is provided by planting shrubs and trees in natural looking clumps, hedgerows and thickets. Open areas of grasses and flowers between these islands creates an attractive habitat for birds and small mammals that can move through the garden from island to island in relative safety.
4) A layered approach: Much like a traditional woodland garden, the wildlife garden benefits from a layering of plants and trees. Unlike a woodland garden that focuses on the general layering of trees, the wildlife garden goes into more detail and looks at the layering of the lower storeys of the woodland garden. Food and cover needs to be offered at a variety of levels. The focus is more on layering at the ground cover and shrub/small tree levels where the majority of wildlife live and feed.
5) The use of native plants: In his book Bringing Nature Home, How you Can Sustain Wildlife with Native Plants, Douglas Tallamy makes a convincing argument for the use and importance of native trees, shrubs and plants in our gardens. He explains that if gardeners continue to “landscape predominantly with alien plants that are toxic to insects…. We may witness extinction on a scale that exceeds” anything ever experienced on this earth.
It’s important to note that our native wildlife evolved in these habitats so they are better adapted to our native plant communities.
Tallamy explains that: “Because life is fuelled by the energy captured by the sun by plants, it will be the plants that we use in our gardens that determine what nature will be like 10, 20, and 50 years from now.”
Take it from Tallamy, native plants are key to creating a working wildlife garden.
Purchasing native plants rather than the hybridized versions often sold at parking lot garden centres or many large nurseries is not always easy. Get to know your plants names (including the latin names) before you go to the nursery so you can be sure to purchase the native varieties. Also there are on-line sources for native seeds and plants that are available in many areas. Just be sure to purchase native plants to your area.
6) Chemical use: We have come a long way in the use of chemicals in our gardens but it continues to be a major problem. Synthetic fertilizers and pesticides may result in lusher greener lawns, but they kill organisms that are vital to the natural processes of pollination and decay. These very organisms, often caterpillars, insects and larvae, are food for many wildlife species, including birds especially when they are feeding their young in spring.
In a wildlife garden, choose to use a natural and ecological approach such as mulching to reduce weeds, planting hardy natives plants and weeding by hand if necessary.
7) Fall cleanup: It is extremely important to wait until spring to do a garden cleanup involving the removal of fall leaves and dead plant material. Even better, wildlife gardeners should leave areas of the garden as a no-maintenance zone to provide cover and food for wintering wildlife. Insect pupae, spider eggs, seeds and berries left over from the fall can be important food sources for spring migrants at a time when there is little other food available to them. Refrain from trimming lower branches of shrubs and evergreen trees to provide a safer refuge for animals from the freezing temperatures and winds of winter.
What can you expect from your wildlife design?
The closer you live to a piece of native habitat, like a woodlot or open meadow, the more wildlife you can expect to visit your property. Also, these wilder areas will attract a greater variety of wildlife as well as animals and birds (primarily carnivores) that exist higher up the food chain. Fox, coyotes, and depending where you live bobcats, bears and cougars, in addition to birds of prey could be regular visitors to your yard if you are fortunate enough to live near large wild areas.
But even if you live in the heart of an urban or suburban area, a well-designed wildlife garden can attract an astonishingly larger variety of birds and animals than one might think. During migration, for example, uncommon birds may “drop down” for a few days to feed on insects or small rodents. Urban foxes, owls and hawks may decide to make it their home or an important part of their daily hunting routines.
How long will it take to get results?
Patience is key. A successful wildlife garden does not happen overnight or even in a single growing season.
That’s not to say you can’t see instant success. The simple act of planting cardinal flowers will encourage hummingbirds in the area to visit your garden. Planting a single serviceberry or chokecherry bush could bring in plenty of fruit-eating birds and other wildlife that were rare or uncommon visitors to the garden prior to the planting.
A more reasonable expectation is to tackle the project as a five-year plan, building on it each and every year as an ever increasing number and variety of wildlife begin to appear on your property.
“I’ve discovered that gardens can become something very special if we approach them differently. If we invite Nature to express her true self in these spaces and then work to heal the land and bring it back into balance, something magical happens. Nature begins to interact with us on an energetic, emotional and physical level.”
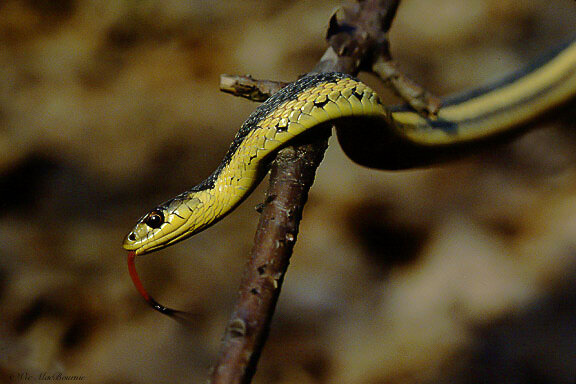
Garter snakes are a welcome addition to any woodland wildlife garden.
A personal experience: Where are the snakes?
Let me give you an example from our garden experience. When we first moved in more than 20 years ago, our front and backyards were grass covered dead zones with a few large trees. What little wildlife there was came from the large woodlands that surrounded our neighbourhood. The animals, deer and fox often wandered through the yard but rarely stayed long enough for us to appreciate them in any way.
One thing that really shocked me in those early days was that I could find no snakes on our property. For years, there were no signs of the completely harmless little garter snakes that should have been common in our large rural garden.
But that slowly changed as the property became more naturalized.
By no means are we now overwhelmed with these small snakes, but it is now not uncommon to see a garter snake, especially if you know where to look. Rock piles, leaf litter, large boulders, wood piles and an abundance of prey have encouraged these wonderful snakes to call our property home.
This spring, our neighbours asked me if I had ever seen any snakes on our property, after they saw two strolling down our side pathway together. They were surprised to see them despite being surrounded by hundreds of acres of natural woodland owned by the local conservation area on the Niagara escarpment where snakes are no doubt abundant.
It wasn’t that they disliked the snakes, it was that after more than 20 years of not seeing them, they were surprised to all of a sudden see two.
Our neighbours were also surprised after I told them I was installing owl boxes on my property. They really didn’t know, or had never given it much thought, that owls existed in and around our heavily forested neighbourhood. Despite an abundance of huge trees and surrounded by acres and acres of natural forests, the many years of living with a lack of wildlife in our neighbourhood dead zone of highly chemical-laden lawns and pesticide-covered properties made owls and other predators a rarely observed presence in the area.
Government regulations to herbicide and pesticide use is beginning to change the amount of wildlife in urban and suburban areas, but we still have a long way to go.
I’m happy to report, however, that just recently the same neighbours told us that they had seen an owl in their backyard.
Earlier this summer, I watched a fox sitting on one of the large boulders in our front yard grab a garter snake that was sunning on the rocks. I hope it wasn’t the same one that I saw sunning itself on a rock in the backyard in early spring.
And so, the cycle of life continues to grow twenty-plus years after the wildlife garden began to take root.
I expect it to continue to evolve and to watch the emergence of a greater variety of insects, butterflies, reptiles and mammals slowly appear over time.
Planning your wildlife garden
If you are beginning with a blank slate, planning your landscaping will save you time and money and the final product will be better.
A three-step process beginning with a yard survey will set the groundwork for a detailed preliminary plan.
The preliminary plan should incorporate all seven principles of the wildlife garden introduced earlier in this post.
The final stage is the planting of the garden. This stage can be tackled in a single planting if the garden is small or preferably over the course of several years for a larger property.
Plants, shrubs and trees to consider for your wildlife garden
Consider the following small trees and shrubs
Alternate-leaved Dogwood
American Elder
American Mountain Ash
Chokecherry
Common Juniper
Crabapples
Eastern red cedar
Hawthorn tree
High bush cranberry
Pin cherry
Red mulberry
Serviceberry
Staghorn sumac
White Cedar
Flowers and vines to consider for wildlife garden
• Black-eyed Susan
• Coreopsis
• Evening Primrose
• New England Aster
• Native milkweed
• Spotted Jewel weed
Vines to consider
• Virginia Creeper
• Trumpet Creeper
Large trees to consider planting
Trees, especially evergreens, are central to any wildlife landscape. Evergreens such as Eastern white pine provide year-round cover and produce cones as a food source for small mammals and songbirds.
Deciduous trees provide a wider variety of food types – nuts, berries, and seeds – but are best suited as summer cover and nest sites. These trees also have larger canopies providing more shade and more conducive environments for spring flowers.
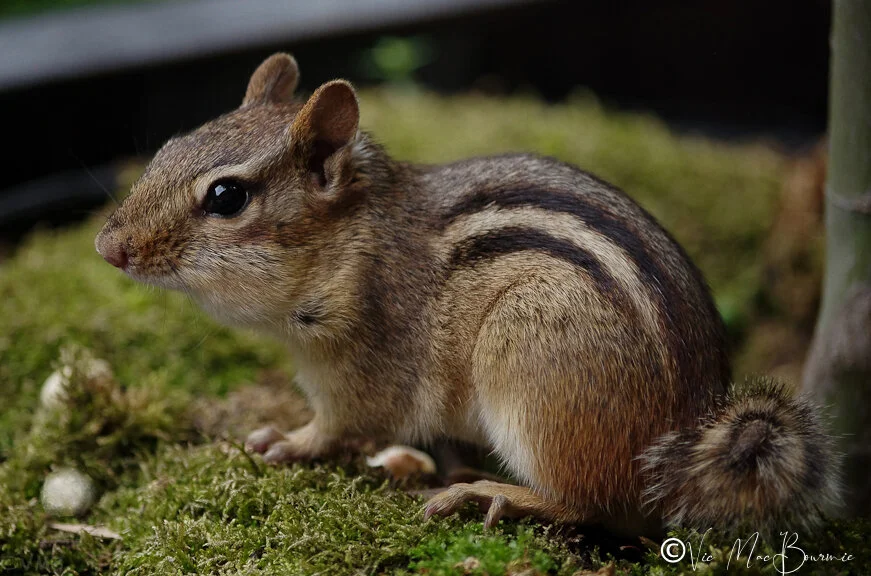
As noted in Tallamy’s book Bringing Nature Home, Oaks are especially valuable as a food source for a number of species, such as blue jays, squirrels, chipmunks and woodpeckers as well as insect-eating birds that feed on the many insects and caterillars that depend on oaks as a host tree.
Cherries are an excellent choice for a berry tree. Birches attract small finches, such as redpolls, goldfinches and siskins, to their catkins.
The Eastern red cedar (Juniperus virginiana) is one of the best evergreens to provide cover and nest sites for songbirds. The gin-flavoured berries are a favourite food of cedar waxwings.
Consider the following Evergreen trees
• Red Pine
• Eastern white pine
• white cedar
• Balsam fir
• White spruce
• Eastern hemlock
Consider the following large Deciduous trees
• Oaks
• Maples
• White birch
• White ash
• Butternut
• Shagbark hickory
• Black cherry
• Hackberry
The importance of shrubs in the wildlife garden
Unlike a woodland garden, shrubs are the stars of the wildlife garden. They can provide denser cover, reach maturity faster and provide resources for wildlife that live closer to the ground. Many of the berry-poducing shrubs are important food sources for spring and fall migrant birds.
The American yew and common juniper are excellent native evergreen shrubs for wildlife.
There is a much wider variety of native deciduous shrubs to consider, including red-osier, gray and alternate-leaved dogwoods. Honeysuckles provide good shelter for birds and nectar for hummingbirds. Rosa rugosa is a good choice to include in plant islands in the garden.
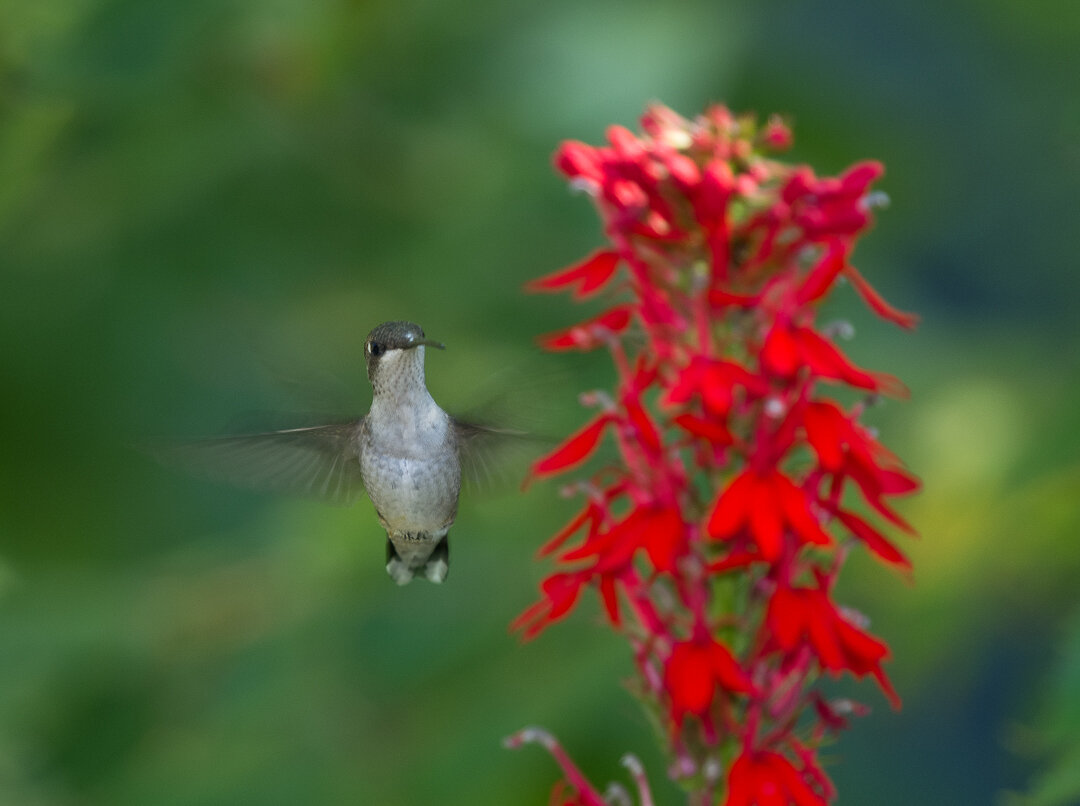
A ruby-throated hummingbird eyes a native cardinal flower as a source of nectar.
Plants for hummingbirds
Don’t forget to provide plants for hummingbirds. These entertaining little birds can be attracted in very urban areas if they are provided with the proper habitat. Red flowers are the most enticing but they are also attracted to orange and yellow flowers. Consider planting coral bells, hollyhock, columbine, morning glory, larkspur, scarlet sage, spotted jewelweed, wild bergamot and scarlet bee balm.
Plants for butterflies
Plant purple, blue, yellow and pink flowers to attract butterflies. Try to use species (non cultivated) plants to attract butterflies because nectar production and fragrance are often sacrificed to obtain showier plants.
Most of these plants will also attract bees to your garden.
Consider planting asters, goldenrods, thistles, dogbane, zinnia, lupines, bergamots, black-eyed susans, coneflowers, coreopsis, daisies, phlox, verbena, yarrow and milkweeds. If you want to encourage black swallowtail butterflies, plant dill, parsley or Queen Anne’s lace.
Important links related to this story:
We are the Ark - Chelsea Gold medal winner and Irish Garden designer Mary Reynolds’ site aimed at uniting gardeners around the world to build natural islands of native plantings. Link here.
More links from this website
Building a woodpile - This is a link to an earlier post on the importance of building a wood or brush pile.
Helping birds and other wildlife in our gardens. This post zeroes in on what we can do to help our garden visitors. Go to the post here.
How to help birds survive winter. Go to post here.
Tips for using water to attract birds. Go to post here.
Attract birds in winter with DIY heated birdbath. Go to post here.
Bringing Nature Home book review. Go to earlier post here
This page contains affiliate links. If you purchase a product through one of them, I will receive a commission (at no additional cost to you) I try to only endorse products I have either used, have complete confidence in, or have experience with the manufacturer.

How to help birds survive winter in our wildlife gardens
Winter is never easy for backyard birds. Thankfully there are steps we can take to help our feathered friends get through the worst winter has to offer. In return they just might provide us with some exceptional photographs.
Use a bird’s natural survival instincts to get great photos
An approaching winter storm should be a signal for us to begin preparing to ensure our backyard wildlife will be safe.
Birds use their natural survival instincts to gather in large numbers to stock up on food to survive the coming storm.
Knowing this behaviour creates an opportunity both to photograph a larger variety of birds and, more importantly, provide them with the resources they need to get through these difficult times in our wildlife-friendly and woodland gardens.
So, we know that an important survival tactic backyard birds use to survive winter storms is by stocking up on seeds before the storm makes obtaining food extremely difficult.
Now, let’s explore other tactics they use to cope with severe weather.
So how do birds and animals survive winter?
Birds and other wildlife have several ways of surviving severe winter weather. Our job is to help them take advantage of these built-in survival tactics by providing wildlife-friendly habitats they can use in severe weather. We should provide them with high-value food sources so they can use these hereditary survival tactics to store the food for these difficult times. We need to provide them with evergreens like cedars, where they can go for protection from the winds to conserve heat and energy. Finally, we need to provide reliable water sources.

A male cardinal waits out the first snow of winter in our backyard crabapple tree.
Here are five ways to help birds survive severe weather:
1)Provide natural shelters.
2)Provide reliable water sources
3) Put up extra feeders.
4) Add a roosting box
5) Provide high-value food in the form of seed and suet
Birds have built-in survival tactics
How often have you looked out the window in the middle of a major snowstorm with great concern for our feathered friends?
Birds, as well as other woodland creatures, have very specific ways to cope with this severe weather.
Birds survive by focusing on three survival tactics: Finding a safe location to ride out the storm; long-term adaptation to severe temperatures; and, finally, early preparation for the storm.

A red-breasted woodpecker searches for insects in the bark of a tree during a winter snowstorm.
How birds find shelter in a storm
Birds are well aware of the existing microhabitats in and around where they live. A thick cedar hedge where they can tuck into and escape winds and heavy snow is ideal for many small- and medium-sized birds.
Larger birds might simply find a tree branch or even a building on the downwind side of a tree to protect themselves from wind, snow, heavy rains and even extreme cold.
Mature spruce, hemlock and pine trees are also excellent places for larger birds such as owls and hawks to wait out a storm.
Many birds will even go to existing tree cavities or birdhouses to seek protection. It’s important that we leave these snags (or dead and dying trees) up in our gardens to act as natural safe havens from storms and other severe weather conditions.
The growing importance of roosting boxes
The growing popularity of commercial or DIY roosting boxes is a sign of how important they have become for our feathered friends. One of the biggest problems birds face, especially those living in an urban or suburban environment, is the loss of nesting habitat created by dead and dying trees (snags).
Too many homeowners and even municipalities are removing every sick, dying or dead tree, eliminating tree cavities that are vital for the survival of many cavity-nesting birds such as woodpeckers, nuthatches, bluebirds, Tufted Titmouses, chickadees, Kestrels, owls, the Prothonotary warbler and even several ducks including the wood duck and mergansers. Whenever possible, it is best to leave these older trees in your yard even if it means removing some of the more dangerous branches but leaving the main trunk for the birds.
““Feed the birds in winter; in return, they will feed your soul with the look of gratitude!””
As the Canadian Wildlife Federation explains on its website: Some species, like the Eastern Bluebird, once faced serious decline because of the dwindling number of natural cavities available to them, but rebounded because of nesting box programs organized throughout their range.”
Bird houses and roosting boxes are stepping in to replace many of these missing tree cavities.
Although birds will use regular nesting boxes to escape severe weather, roosting boxes are designed to offer more birds an escape from harsh weather, and a potentially warmer environment than even a birdhouse can provide.
Not only are the roosting boxes larger – designed to fit more birds into them – the entrance hole is often located at or nearer the bottom of the box rather than the top where warmth generated from the other birds using the unit would escape. These two factors, in addition to an abundance of perches for the birds, can create a warm and comfortable place to ride out the storm.
Owl box conversion to roosting box
The importance of roosting boxes has convinced me to convert an existing screech owl box into a roosting box for the winter. I think one owl box on our property is probably sufficient, so our second box will be getting a small makeover involving putting in several twiggy branches to give the birds places to perch on and caulking the box to hold in more heat. The entrance hole is already closer to the centre of the box than the top, so it should hold the heat sufficiently.

Tufted Titmouse sits in crab apple patiently waiting its turn at the bird feeder.
Five ways we can help birds survive winter
1) Natural shelters: Provide a cedar hedge or plant other natural habitat where backyard birds can escape to during inclement weather. A large cedar hedge provides sheltered places for birds during cold spells and even extremely hot times of year. They also provide food in the form of insects and seeds as well as excellent nesting habitat. During severe weather, consider hanging a bird feeders in the cedars so birds can get food without expending too much energy wandering far from their roosting spot.
2) Water source: Don’t forget to provide birds with a reliable source of water during difficult weather. Although the birds can likely get drinking water from the snow, they still need to keep their feathers clean and in top shape to provide the insulation they need to maintain their body heat. There is some evidence that suggests birds bathing in extremely cold weather could get into trouble if water on their feathers freezes. Take precautions to provide access to a birdbath that allows the bird to drink without having to get wet. A gentle slope into the heated birdbath or rocks where they can perch to get a drink are good choices.
3) Extra Feeders: Ensure your feeders are full and accessible. Often, snow covers critical areas of your feeders making it difficult for the birds to access the food. This is particularly important with tray feeders that can quickly get covered with snow burying the seed. Consider adding an extra feeder during difficult times to accommodate additional birds that may be counting on them for survival.
4) Roosting boxes: Provide roosting boxes and leave your nesting boxes up throughout the winter to give birds a place to hide out storms. If possible, seal up any air vents of your traditional nesting boxes in an attempt to hold more heat in the birdhouse. Locate houses and roosting boxes in sheltered areas where they get lots of sun to warm the boxes during the day.
5) Provide high value food: Feeding high quality, high fat food sources is always important but takes on a greater importance in severe weather. Fat balls, high-value suet and meal worms will be greatly appreciated by your feathered friends as the weather turns ugly. Providing food in our feeders is certainly a good first step, but natural food sources are also critical for our wildlife. Allowing areas of our garden to naturalize and leaving fallen leaves (earlier post) on the ground encourages insect-eating birds to forage for high-value food sources such as insect larvae, eggs and small mammals that depend on the leaves for winter survival.
Birds are built for bad weather
There are days I go out to fill the feeders and just walking to them chills me to the bone. It doesn’t take long before my frozen fingers are struggling just to open the steel feeder top. It’s often so cold that getting the feeders filled feels like a race against frost bite.
The good news for birds is that they have physical and behavioural adaptations to help them survive throughout the year.
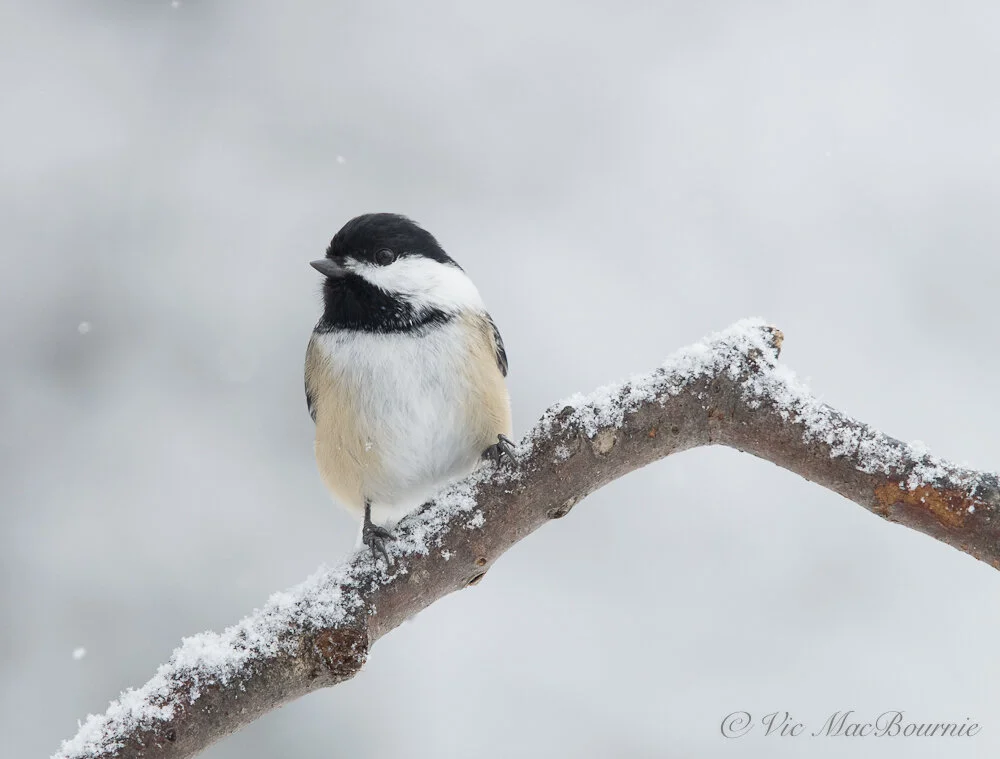
Did you know: Some small birds such as kinglets and chickadees can drop their body temperature and go into controlled hypothermia to save energy.
Birds’ feathers are the first line of defence. Birds fluff their feathers to trap air between their feathers and bodies. The result is a natural layer of insulation, not unlike a down jacket or sleeping bag. The importance is made evident by the fact that birds even tuck their bills under their wing feathers in order to breathe in the warmer air.
Did you Know: Birds have oil producing glands that allow them to preen a coating of waterproof onto their feathers to avoid the down coats getting wet.
Birds are warm-blooded and have a high metabolic rate and so, in winter especially, they must eat regularly to maintain their heart rate. They also need this energy to shiver, which is an important way they generate heat to maintain their body temperature.
Okay, that is all well and good, but as I’m filling the feeder, the chickadees are standing on the cold steel feeder hangers scolding me for taking their food source away for a few short minutes.
How do their feet not stick to the freezing steel? If I so much as touched it, I would need a kettle of hot water to “unstick” my hand.
How does countercurrent actually work?
The birds that come to our feeders have naked feet, (imagine having to live outside in the snow barefoot.) But, a countercurrent blood exchange in the feet helps keep the heat loss to a minimum while preventing frostbite. The Countercurrent blood exchange is complicated but in simple terms: as cold blood runs up the leg from the foot and passes by the arteries, it picks up most of the heat from the arteries through conductance. As it travels, the blood flowing down is cooled, and the blood flowing up is warmed. Thus, by the time arterial blood reaches the foot, it is cool and does not lose too much heat standing in snow, on steel or even in cold water.
In extreme cold, you may also notice a bird warming its feet by alternatively tucking up one of their feet under its feathers, while standing on a single leg.
Putting on weight to fend off a storm
If your feeders are busier than usual, chances are a storm is brewing. The birds seem to know that a higher fat content helps to guarantee them a much better chance of surviving a severe winter storm. When they sense changes in the air pressure you will notice them zeroing in on your bird feeders. (This is a good time to ensure your feeders are full and ready for the onslaught). The birds will eat as much high-fat food at your feeders as possible and then stash as many seeds and nuts as possible in case the severe weather continues for several days.
This brings us back to birds lining up at our feeders prior to and during a snowstorm.
Our backyard birds use it as an opportunity to fatten up before the storm officially grounds them for hours and possibly days before breaking.
We photographers can also use it as an opportunity to focus on the activity of our feeders to capture the birds that are too busy filling up to really care much about our presence.
It’s important not to interfere with their feeding habits at this critical time. If you use a photographic blind or keep a respectable distance the birds will go about their business and provide you with a frenzied feeding situation in a fairy-tale environment of snow-covered branches.
This is the time to get out of your comfort zone (in a warm, dry house) and get out in the snow to capture these special moments that only happen a few times of year.

Tips to photograph birds in a snowstorm
If your past attempts of photographing your garden or backyard birds have resulted in dark photographs with a very strong blue cast, you are not alone. In this article, I am going to gear most of the information to amateur photographers. Afterall, most of us are woodland gardeners, not professional bird photographers.
But that doesn’t mean we can’t get some stunning bird shots. The combination of a good snowstorm and a Tragopan Photographic Blind can produce some very impressive images without the expense of large telephoto lenses.
However, even today’s modern cameras with advanced exposure technology, struggle to deal with the extreme exposures of snow scenes. The results are almost always underexposed images. Snow scenes almost always have a dark blue tone to them.
But it’s not just the blue tone to the images that detract from the final result.
If you’re photographing a bird in that scene, for example, it will also be underexposed. Depending how much it is underexposed will mean the difference between whether the image can be saved in post processing via Lightroom, photoshop or any other digital photo software you might be using.
Why are my snow shots blue and underexposed?
Photographing a relatively small subject in a sea of white is not always easy. Even with today’s modern cameras, there is no guarantee that you are going to be able to get the proper exposure. The problem is that the camera’s exposure meter is trying to turn the beautiful pure white snow into middle-gray, dirty-looking snow.
If the image was converted to black and white, you would get dirty-gray snow. In colour photography, the image takes on a blue cast reflecting the colour of the sky, much the same as large bodies of water.
Solving the problem is not difficult but it does require some thought. The photographer needs to make an adjustment to the exposure “to put back the white in the snow.”
When shooting in the snow, the photographer needs to overexpose the image by one or two F-stops depending how much snow is in the scene. If, for example, the bird takes up 50 per cent or more of the image, probably no exposure compensation is necessary. If the bird takes up 25 per cent or less of the image, 1-1.5 overexposure would probably be necessary to get the correct exposure.
The beauty of today’s digital cameras is that they allow you to take test shots to help determine the correct exposure. Look for an exposure that gives you fairly clean white snow. Any further compensation could probably be achieved in post processing of the image.
How do you achieve proper exposure compensation
Depending on your camera, achieving exposure compensation usually involves one of three choices.
If you are using a digital SLR in shutter priority mode, use the camera’s suggested exposure setting and then open up the f-stop of the lens 1-2 stops to add more light to the image. (If this sounds like jibberish to you, don’t worry. There is an easier way.)
For most cameras, including DSLRs, there is an exposure compensation dial that allows the photographer to dial in more exposure (+) or less exposure (-). In many point-and-shoot cameras, these settings need to be changed in the camera’s screen settings. I suggest you do that in the house before you even step outside.)
The best way to guarantee a proper exposure is to experiment in the field with these settings. Take some test shots to get a feel for the exposure. Look for white snow. A little blue in the snow is fine. If your image has pure white snow without any detail, you may be overexposing the image a little too much. In that case, it’s probably better to reduce the exposure 1/3 to 1/2 a stop to keep the snow from overexposing. If this too is confusing and overwhelming, don’t worry, there is an even easier way to achieve proper exposure.
On almost all amateur digital cameras, there is a setting for snow scenes. Some are easy to find; others may be buried in the menu of the camera and require going deeper into the menu items until you find the “scenes” module.
Choose snow scenes and you would probably be safe to shoot away. If, however, you are taking closeups of birds, your need for any exposure compensation is probably unnecessary.
I know it can seem complicated and it was when we were shooting film. But the ability to take test shots and see the results immediately on the screen, certainly simplifies the whole process.
Just don’t let the next snowstorm stop you from getting out. It very might well be the best bird photography you ever experienced.
But don’t forget, dress warmly. You’re not a bird.
This page contains affiliate links. If you purchase a product through one of them, I will receive a commission (at no additional cost to you). I try to only endorse products I have either used, have complete confidence in, or have experience with the manufacturer. Thank you for your support.
How to design a woodland wildlife garden for a small yard
Can a woodland garden work in today’s smaller urban or suburban backyards. Absolutely. In fact, for many reasons, a woodland garden can be the perfect choice for today’s smaller backyards, providing the ultimate low-maintenance landscape design.
Backyard tips and ideas to design and rewild a small woodland garden
A woodland and wildlife garden is not measured by the number of trees or the size of your backyard.
Size certainly plays a role, but a woodland garden design has always been as much about an experience with nature as it is about a physical space.
My garden, for example, is not huge. I am lucky that it sits on about a half-acre lot in an urban area, but is surrounded by acres of woodland connected to a large conservation area.
How many of us have taken great joy sitting beneath a small tree in a natural woodland, birds flitting about busily searching for insects to feed their young?
Just imagine reliving that experience every spring in your own backyard landscape.
It’s an experience that can be created in a tiny backyard as easily as it can on a sprawling acreage property.
Can you create a woodland garden design in one of today’s typically compact backyards? Absolutely. Not only can you create a stunning woodland garden in a small backyard, in many ways rewilding a successful woodland design in today’s smaller yards is much easier. Use neighbouring trees as part of a borrowed landscape and as an upper canopy and then create your understory with a few smaller trees, and shrubs. Now, add an area of shade-loving plants and a woodland ground cover. A bench to enjoy the garden and you are well on your way.
“A way to make a small garden unusually satisfying is to focus on the stimuli reaching two or more of the senses simultaneously – and with equal intensity.”

The woodland garden can be a beautiful but natural retreat for gardeners looking for a low-maintenance garden.
Whether you do-it-yourself or hire a landscaping company, rewilding the smaller garden helps to focus the garden designer on what factors make up a woodland garden and how to create woodland vignettes (earlier post) within those small spaces.
If you are looking for more help in the process of building your woodland garden, you might want to check out the informative book The Woodland Garden by Robert Gillmore, who explains how to turn an existing woodland area into a low-maintenance, lush woodland garden that brings the world of nature into your own yard.
In addition, consider picking up The American Woodland Garden, by acclaimed author Rick Darke, Capturing the Spirit of the Deciduous Forest. It can be difficult to find, but is often available on the used market. Alibris, an U.S.-based used book seller, has copies of The American Woodland Garden for approximately $25 if readers are interested.
In a larger garden, too much focus is often put on just keeping up with garden chores to perfect the vignettes that make the woodland garden such a special place. A large garden may be made up of several smaller vignettes or garden rooms, while a smaller suburban garden may include just two garden rooms or vignettes and a tiny urban garden might incorporate only a single woodland garden vignette.
Landscape designer Angela den Hoed has taken a typical suburban backyard and created a magical woodland garden for readers of Ferns & Feathers.
Here at Ferns & Feathers we actually provide our readers with a highly detailed landscaping plan suitable for today’s typically-sized backyard. By simply following the design, readers can either create the woodland garden themselves or use the plan as part of a larger garden plan. For the complete details of the plan, including a list of native plants to consider, check out my post here.

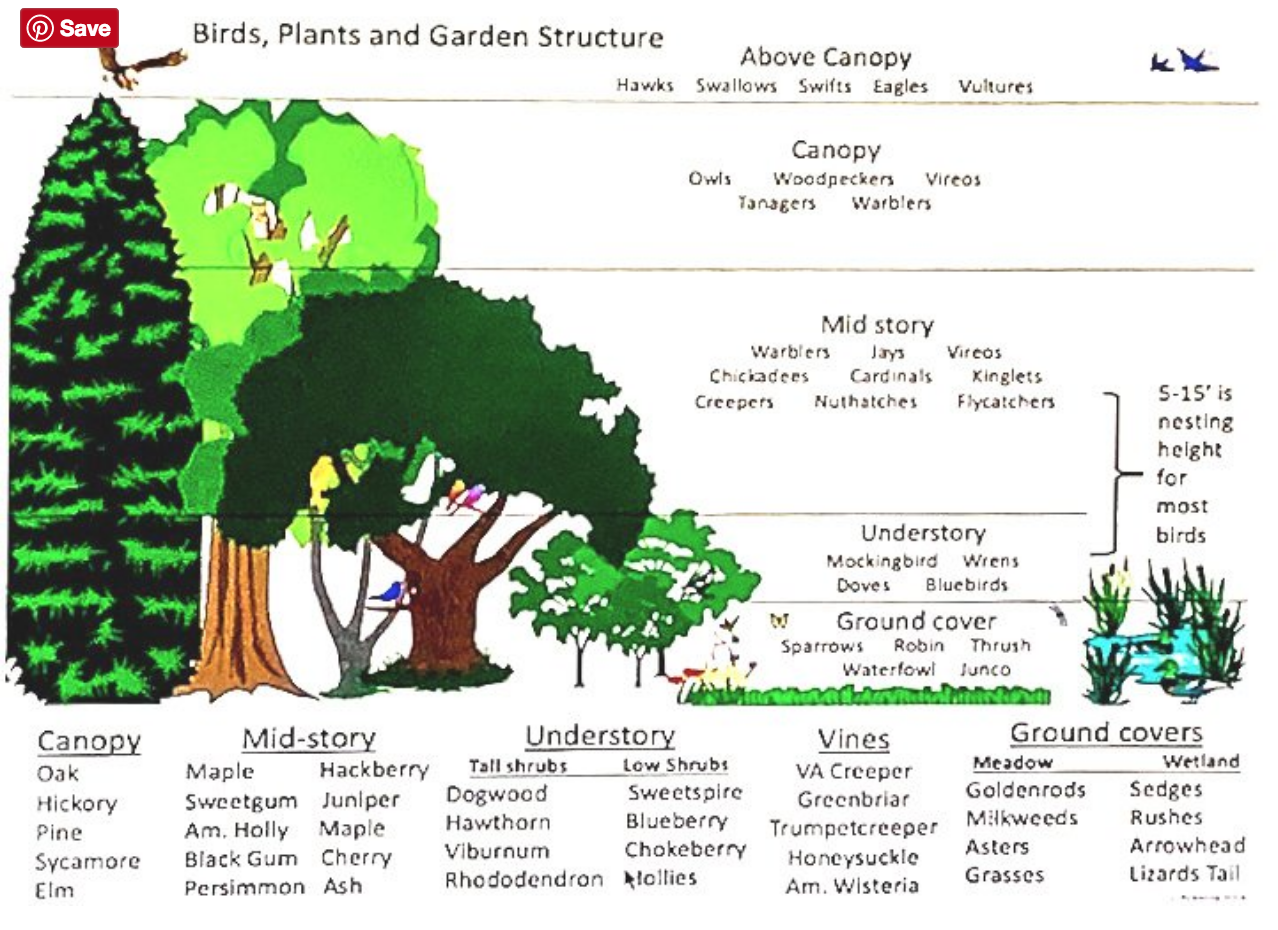
This illustration shows the ideal layering in a woodland garden and the birds that take advantage of the different layers.
How to create and rewild your small yard into a wildlife garden
Unlike a typical or traditional garden, a woodland wildlife garden is primarily a shade garden. It’s important to note, however, that a shade garden is not necessarily a woodland garden. Within the woodland garden, there may be sunny borders or openings in the forest canopy that provide gardeners the opportunity to experiment with sun-loving plants.
It’s these openings that give gardeners an opportunity to plant native berry-producing shrubs for birds and native flowers for pollinators in the wildlife garden. The edges of the woodland also provide ideal areas to explore berry-producing shrubs and other plants that attract insects and provide nesting habitat for birds and small mammals.
A woodland garden’s primary feature is a layering effect. From the tallest trees in the upper canopy to the mid canopy of smaller shade loving trees, down to the shrubs, perennial flowers and finally to the ground-cover layer.
Below the ground cover is the all-important soil that gives life to insects, invertebrates and microbes that form the roots of our woodland garden’s success. (I explore the details of creating the ultimate woodland garden soil in other posts that will be linked to at the bottom of this post.)
Together, this combination engages our senses and let’s us know, even subconsciously, that we are in a special place.
If you are still unsure whether you want to create a woodland garden, consider that once the garden is designed and installed, it should be an extremely low-maintenance garden that requires very little effort on your part to keep it looking its best.
Why you might ask?

Why is a woodland garden considered low-maintenance
Chelsey garden show Gold medal award-winning garden designer Mary Reynolds’ explains it best in her book The Garden Awakening.
Consider her explanation about the land we are looking to build our gardens on: “Most land that is used for agriculture and gardens has the same core truth: it strives to become a mature woodland – a stable and intelligent ecosystem that has evolved over many thousands or even millions of years.”
In her book, The Gardening Awakening, Mary explains that: “Achieving a classic woodland ecosystem is impossible for most people because the individual plots of land are too small. However, it is possible to create a replica of a complete woodland ecosystem in smaller places. “
Mary argues that unless land stewards, such as ourselves, “allow the land to express its own truth, we are doing it an injustice.”
Not only are we doing it an injustice, we are also working against Mother Nature.
By working with nature, especially in a small garden where the amount of work is already more manageable, we create a very low-maintenance garden that more or less looks after itself and does not require hours of weeding, garden cleanup and lawn maintenance.
The design and creation of the small woodland garden requires a little more attention to detail.
To create a successful small woodland garden it becomes even more critical to maximize every opportunity to explore our senses. Garden designer Vince Healey, who specializes in creating gardens for children and hospices for the dying, points out that: “A way to make a small garden unusually satisfying is to focus on the stimuli reaching two or more of the senses simultaneously – and with equal intensity.” An example Healey provides is a stand of aspens blowing in a breeze. The rustle and the shimmer of the leaves appeal to both your sense of hearing as well as the visual beauty the stand of trees provide.
In my garden, similar to Healey’s aspen example, a stand of three clump birch trees form a canopy over a bubbling rock and dry river bed. The combination of the trees together with the sound and visual stimuli of seeing the water bubble out of the rock, works hard to appeal to a visitor’s multiple senses.
In a much smaller garden, this birch grove and bubbling rock underplanted with a tiny Japanese maple, maybe a native cranberry bush that flowers and provides a profusion of red berries in the fall, a container or small planting of annual or perennial flowers, and a ground cover of moss or thyme is enough to form a woodland garden in itself. Add a bench where you can sit under the canopy of birch, and you have recreated the memorable experience you had that spring day in the forest.
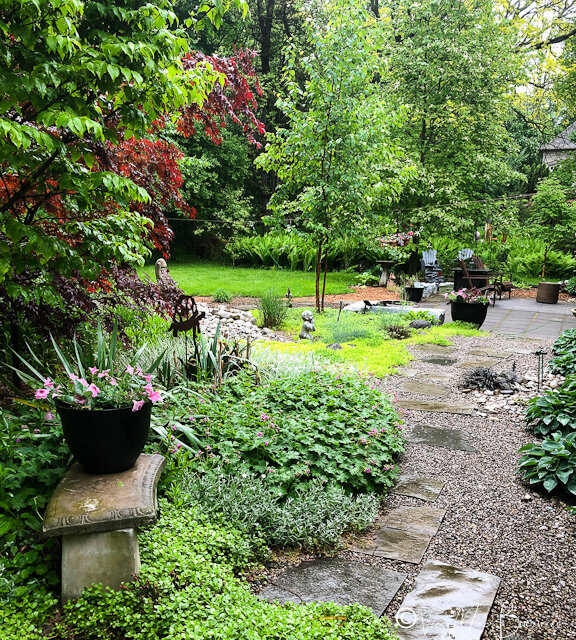
A simple garden path in our woodland garden made from pea gravel and square-cut flagstone. Simple materials and natural products are preferred.
Healey writes that this sensual stimuli appealing to more than one sense with equal intnesity: “has the effect of mesmerizing the viewer.” And, don’t we want all our visitors to be mesmerized by the beauty of our garden?
Because trees will form an important part of your compact woodland garden, it’s important to consider trees with the best bark features. Tree bark itself can appeal to so many senses. Birch trees, especially river birch (Betula nigra) with its subtle copper-coloured bark that peels profusely away from the trunk in shaggy strips, and European White birch (Betula pendula) that brings a touch of elegance with its stark white trunks and fine papery peeling bark, are good examples of trees that appeal to multiple senses. In a large garden, they could form part of the understorey. In a smaller woodland, they can take the place of the top canopy.
Other trees to consider for their bark features might include pine trees such as the Lace-bark pine (Pinus bungeana) with a wonderful mottled appearance. The bark flakes off to reveal patches of green, cream and red. Consider also the Scotch pine with its cinnamon brown bark and, of course, our native Northern White pine whose bark as a young tree is thin, greyish-green and smooth but gives way to a mature tree sporting thick bark with broad ridges and dark-tinged scales. Our white pine’s bark may not be the most exciting, but the tree’s other features make it a standout in any woodland garden. The blue-green needles are feathery soft with a heavenly aroma when crushed. The combination of the soft needles and strong aroma appeals to so many of our senses.
Beeches are known for their smooth, gray or shiny bark. Paperbark maples (acer griseum) are especially noteworthy as a small under storey tree with outstanding curling, papery strips of cinnamon brown bark. Few trees are more at home in the woodland garden than the flowering dogwood which, besides offering a profusion of outstanding white flowers or bracts followed by red fruit, also boasts an impressive bark with an amazing rectangular pattern on its trunk that looks almost reptilian. The Kousa dogwood has gray- and tan-patched bark. The bark combined with its profusion of cream flowers and outstanding red fruit in fall make it a show stopper in the woodland garden. I have several in our garden, despite the fact that it is no a native tree.
For more on native Dogwood trees and shrubs, be sure to check out our full story here on six of my favourite dogwoods for the woodland garden.
Few trees can compare to the Redbud, whether you choose multi-stem or single-stem versions, for its spectacular spring magenta flowers that cover its branches early in the season. For more on the outstanding Redbud tree (Cercis Canadensis), check out my full story here
Five important design elements of a woodland garden
1) Create at least one natural garden path that either takes you to a special place in the garden or leads visitors around and through it.
2) Strive to create multiple layers in your garden. The woodland garden requires an upper canopy of large shade trees, followed by a mid-canopy of under storey trees like dogwoods or serviceberries above a layer of mid- and small-size shrubs followed by ground covers and groupings of perennials.
3) Include natural-looking garden art. A large moss-covered boulder, an artistically twisted branch or a natural-looking stone bird bath. Alternatively, a copper bird house or bird bath can add an exquisite touch to your woodland and age gracefully along with the garden.
4) Always strive to use native woodland plants wherever possible. Not only do native trees, plants and shrubs look appropriate in the landscape, they usually perform at their best if they are planted in the right location. Even more importantly, they are hosts to native insects and pollinators that provide critical food to our native birds.
5) Use a variety of ground covers to ensure your soil is never exposed to direct sun. Protecting the soil is critical to building microbial life that will ensure it can provide your plants and trees with life-giving energy. Organic and non-organic mulches can take the place of living ground covers. (I will link to a separate post on using mulches at the bottom of this article.)
A subtle approach is best
It’s important to incorporate a subtle approach to woodland gardening. Nature is never gaudy. Although gardens appeal most strongly to our visual sense, the woodland gardener needs to take a step back and control the urge to create large swaths of violently coloured flowers to make a strong visual statement. Over doing this can easily end in a visual assault.
Nature rarely makes a visual assault, and neither should the woodland gardener.
Woodland gardeners need to take pleasure in the simple textures of leaves, subtle shades of green highlighted by the quiet colours of native wildflowers, grasses and sedges.
Angela den Hoed’s woodland garden landscape design incorporates a critical element that belongs in every woodland garden. It’s a path that takes visitors around and through the garden so they can experience its subtle beauty. In many traditional gardens viewers can afford to simply stand back and experience the riot of colour. The woodland, however, begs you to come inside and engage the senses in a very intimate way.
The value of the woodland path
In his book Landscaping with Nature, Using Nature’s Designs to plan your Yard, Jeff Cox writes about the woodland path and notes that a walk in the woods can be built into even small backyards.
“Walking down a woodland path is one of our favorite ways to enjoy nature. The path is usually shady, and we enjoy the cool, protective shade thrown by a canopy of trees… Interesting and beautiful plants on either side of us provide plenty to look at as we walk the path. Following the path is an adventure ; we never know what’s around the bend…. And as we walk, we have time to think, dream, or just listen to birds’ songs.”
The path itself does not have to be large. It should blend in to the natural landscape rather than drawing attention to itself. There is no place for concrete and even a more subtle brick pathway is probably unnecessary in the woodland.
A simple grass pathway cut occasionally throughout the summer, or a path made by putting down a thick layer of shredded cedar mulch or pine needles will provide a more natural pathway that is at home wandering and weaving through the woodland garden.
In a very small urban yard, the garden path could be the main feature of the entire backyard, taking the visitor from the home’s small patio and winding its way through the garden features to the back of the property. Along the way, you might have to walk around a clump serviceberry (Amelanchier laevis) underplanted with trilliums and irish or scotch moss. You may pass a small pond or, even simpler, a beautiful copper bird bath and garden seat that provides a quiet place for you to sit and take in the birds that have discovered your small oasis in the heart of the city.
Along the path in your woodland try to use native plants. In an Eastern United States, Southern Ontario (zones 5-7) path, Jeff Cox suggests planting a Scarlet oak, and underplant it with a bed of maidenhair ferns (Adiantum pedatum) or hay-scented ferns (Dennstaedtia punctilobula). He explains how the oak (the best tree to attract and provide habitat for insects, caterpillars and pupae vital for the survival of our native birds) will “provide partial shade for the ferns as it arches over them.”
This area could also be planted with spring bulbs for early spring colour adding that late colour will “take care of itself with the oak’s blazing scarlet red foliage.” Behind the oak, he suggest a tall high bush cranberry (viburnum trilobum), with its showy red berries in the fall.
On the left side of the path, Cox suggests planting an eastern hemlock (Tsuga canadensis) and white pine (pinus strobus). These two evergreens will provide a dark background for the foreground planting of birch trees and serviceberry (Amelanchier laevis). The birch bark and early spring flowers of the serviceberry will “glow against the evergreen background.”
Virginia bluebells (Mertensia virginica) planted among the birches and serviceberries will provide delightful flowers in the spring.
In other areas of the country, with different garden zones, these plants should be substituted with plants native to that zone.
Angela’s garden pathway in our second Naturally Native newsletter is quite different from Jeff Cox’s plan. It takes the visitor around the entire garden and offers quiet places among areas dedicated to childrens’ play and family gatherings.
The two designs are good examples of how small garden areas are not limited to a deck a patch of grass and a decrepit play structure in a corner of the yard.
With proper planning, we can create the low-maintenance garden of our dreams, whether we live on a large rural property surrounded by forests, or in a small urban or suburban garden surrounded by a sea of high-maintenance grass.
If you are considering creating a woodland garden, or simply converting an area of your existing garden into a woodland retreat, be sure to sign up for our free newsletter.
The newsletter focuses on attracting and photographing backyard birds using native plants in a woodland garden setting. In addition to providing readers with a detailed woodland garden design plan, the 13-page newsletter features a DIY article on creating a large, reflection pond/backyard photo studio that includes an epic hack of a common household product. In addition, we feature tips on feeding specific backyard birds and the tools needed to get up close and personal with our feathered friends. You can sign up at the bottom of the Ferns & Feathers home page.
Important links for the woodland gardener
Below, I have included a list of links for anyone who would like to further explore the information mentioned in the above article.
• In case you missed the link earlier, Landscape designer Angela den Hoed has designed a full-featured, detailed Woodland garden plan for Ferns & Feathers readers. Here is the link for a comprehensive design for a typically-sized woodland garden.
• Landscape designer Angela den Hoed. See my earlier post about her here. Go to her website here
• Chelsea Award winning garden designer Mary Reynolds. See my earlier post about her book here. Go to Mary’s popular website here where she promotes land stewards to create natural Arks to help protect and restore our natural environments.
• Earlier post on Garden mulch: organic vs non-organic. Link here to my earlier post.
• Earlier post to my favourite ground covers for the woodland garden. Link here to my earlier post
• Earlier post on using a local woodland as inspiration for the woodland garden design. Link here to my earlier post.
• Jeff Cox’s book Landscaping with Nature. Amazon link here
• An earlier post on Five great books for Woodland Gardeners. Link here for my earlier post.
• An earlier post on the book Bringing Nature Home about why Native plants are critical to saving our birds. See the link to my earlier post here.
• Another book definitely worth considering is The American Woodland Garden by Rick Darke. Amazon link here
This page contains affiliate links. If you purchase a product through one of them, I will receive a commission (at no additional cost to you). I try to only endorse products I have either used, have complete confidence in, or have experience with the manufacturer.