
How to attract the Hummingbird Clearwing and Hawk Moths to your garden
Hummingbird moths are fascinating creatures that mimic both the look and flight patterns of our native hummingbirds.

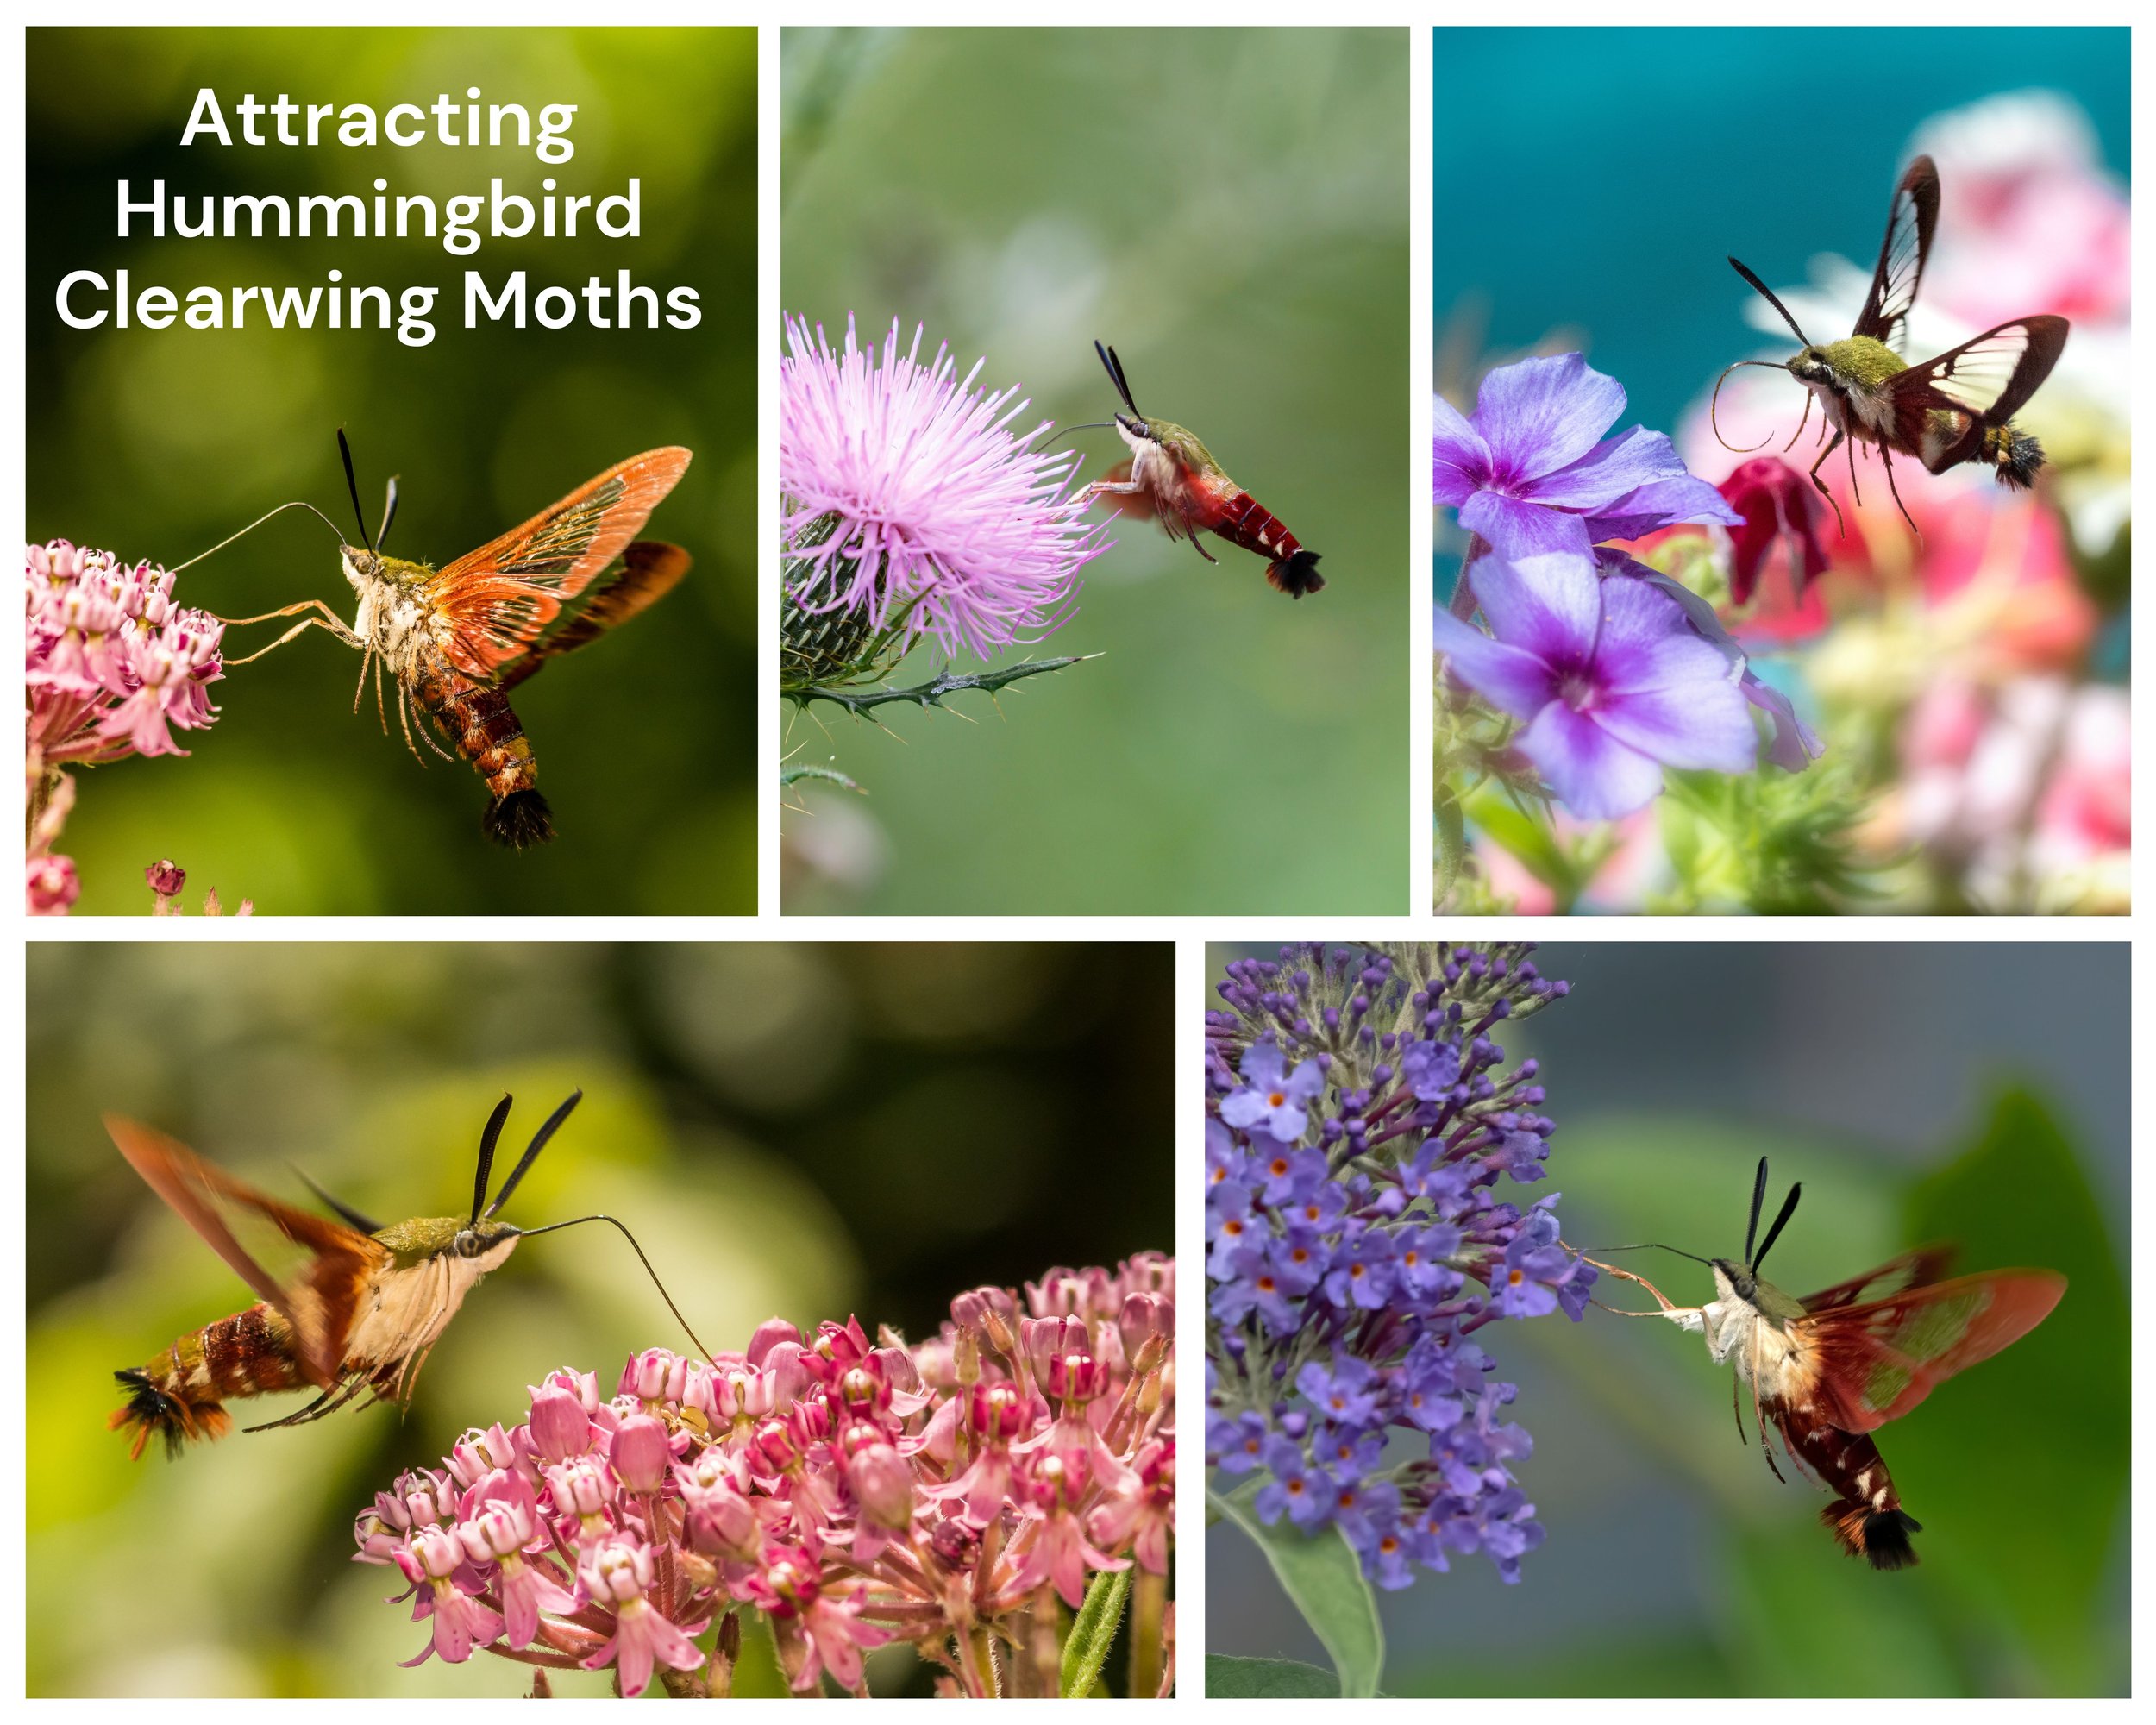
This montage of hummingbird moth images shows the caterpillar stage (top) and the moths feeding on various garden plants.
The first time you see one visiting your flowers it’s likely to bring a smile to your face knowing that hummingbirds have found your flowers. But it’s not long before you realize that this little fella buzzing around your flowers is the oddest looking hummingbird you’ve ever seen.
That’s because the Clearwing and Hawk moths are not hummingbirds at all despite the fact they look and fly so much like a hummingbird that even knowledgeable hummingbird watchers can be fooled at first glance.
In fact, several years ago a neighbour called me over to tell me that they had seen an unusual hummingbird in their garden and that no bird book they could find listed this particular species of hummingbird. It was not until I pointed out that these little expert flyers were not birds at all, but a type of moth that mimicked hummingbirds.
Hummingbird moths are from the family of sphinx moths. In North America, there are four types of hummingbird moths: hummingbird clearwing moths, white-lined sphinx moths, snowberry clearwing moths and slender clearwing moths.
The hummingbird clearwing moth (Hemaris thysbe) are most often seen during the summer fluttering about in open and second-growth habitats, including gardens. They occupy a similar range as our hummingbirds and feed on many of the same plants.
Adult clearwing moths generally have a wingspan of 4–6 cm. The head is olive to tan. The thorax is olive to golden-olive; the abdomen is dark burgundy, with light olive to dark golden patches dorsally. Their wings are clear with a reddish-brown border and veins. Their legs are yellowish or pale coloured.
The larvae or caterpillars are bright green with a line of white dots that end in a fleshy, pointy horn that resembles a tail. There are also small reddish spots along its side. They most often can be found dining on the leaves of honeysuckle, snowberry, hawthorns, cherries and plums, as well as the European cranberry bush.
Unlike most other moths, the hummingbird clearwing moths fly and feed during the daytime.
For more on hummingbirds in the garden, check out the following posts:
• How to help Hummingbirds during migration
• Five tips to attract hummingbirds

Notice how the wings of these moths show clear areas – much like a bee’s wing – as they feed on colourful native and non-native garden flowers.
What’s the difference between Hummingbird moths and Hummingbird clearwing moths?
Hummingbird moths and Hummingbird clearwing moths may sound similar, but they are actually two different species. While both are often mistaken for hummingbirds due to their similar appearance and behaviors, there are some key differences between them.
One major difference is their scientific classification.
Hummingbird moths belong to the family Sphingidae, while Hummingbird clearwing moths belong to the family Sesiidae. This difference in classification reflects their distinct evolutionary lineages.
Another difference lies in their physical characteristics. Hummingbird moths have a plump body, similar to that of a bumblebee, and their wings are usually brown or gray. On the other hand, Hummingbird clearwing moths have a more slender body, resembling a wasp, and their wings are transparent or clear, hence their name.
In terms of behavior, both species exhibit similar hovering and darting flight patterns, as well as a preference for nectar-rich flowers.
However, Hummingbird moths tend to be more active during the day, while Hummingbird clearwing moths are primarily active during dusk and dawn.
Understanding the differences between these two moth species can help us appreciate their unique characteristics and behaviors. Whether you encounter a Hummingbird moth or a Hummingbird clearwing moth in your garden, take a moment to observe and appreciate their fascinating adaptations and beauty.
What hummingbird moths live in Canada and the United States?
Hummingbird moths are fascinating creatures that can be found in both Canada and the United States.
Two common species of hummingbird moths in these regions are the Hummingbird Hawk-Moth (Macroglossum stellatarum) and the Snowberry Clearwing (Hemaris diffinis).
The Hummingbird Hawk-Moth is a migratory species that can be found in various parts of Canada and the United States. It is known for its ability to hover in mid-air, just like a hummingbird, while feeding on nectar from flowers. This moth has a long proboscis that it uses to reach deep into flowers for nectar. It is often seen in gardens and meadows, especially during the summer months.
The Snowberry Clearwing, as its name suggests, has clear wings and a body that resembles a hummingbird. It is commonly found in woodland areas and gardens across Canada and the northern parts of the United States.
This species is attracted to flowers that produce a lot of nectar, such as bee balm and phlox. The Snowberry Clearwing is also known for its ability to hover and feed on the wing, just like a hummingbird.
In most parts of the United States and in southern areas of Canada, these moths will produce two broods: one from March-June and a second from August-October. The farther north they go results in only a single brood from April-August.
As fully-grown caterpillars, they burrow in the leaf litter to pupate in cocoons, emerging soon after or waiting until the following spring.
Both of these hummingbird moth species are important pollinators, as they transfer pollen from one flower to another while feeding. By attracting these moths to our gardens, we can help support their populations and contribute to the overall health of our ecosystems.
In the next section, we will explore the diet of clearwing moths and how it differs from that of hummingbird moths.
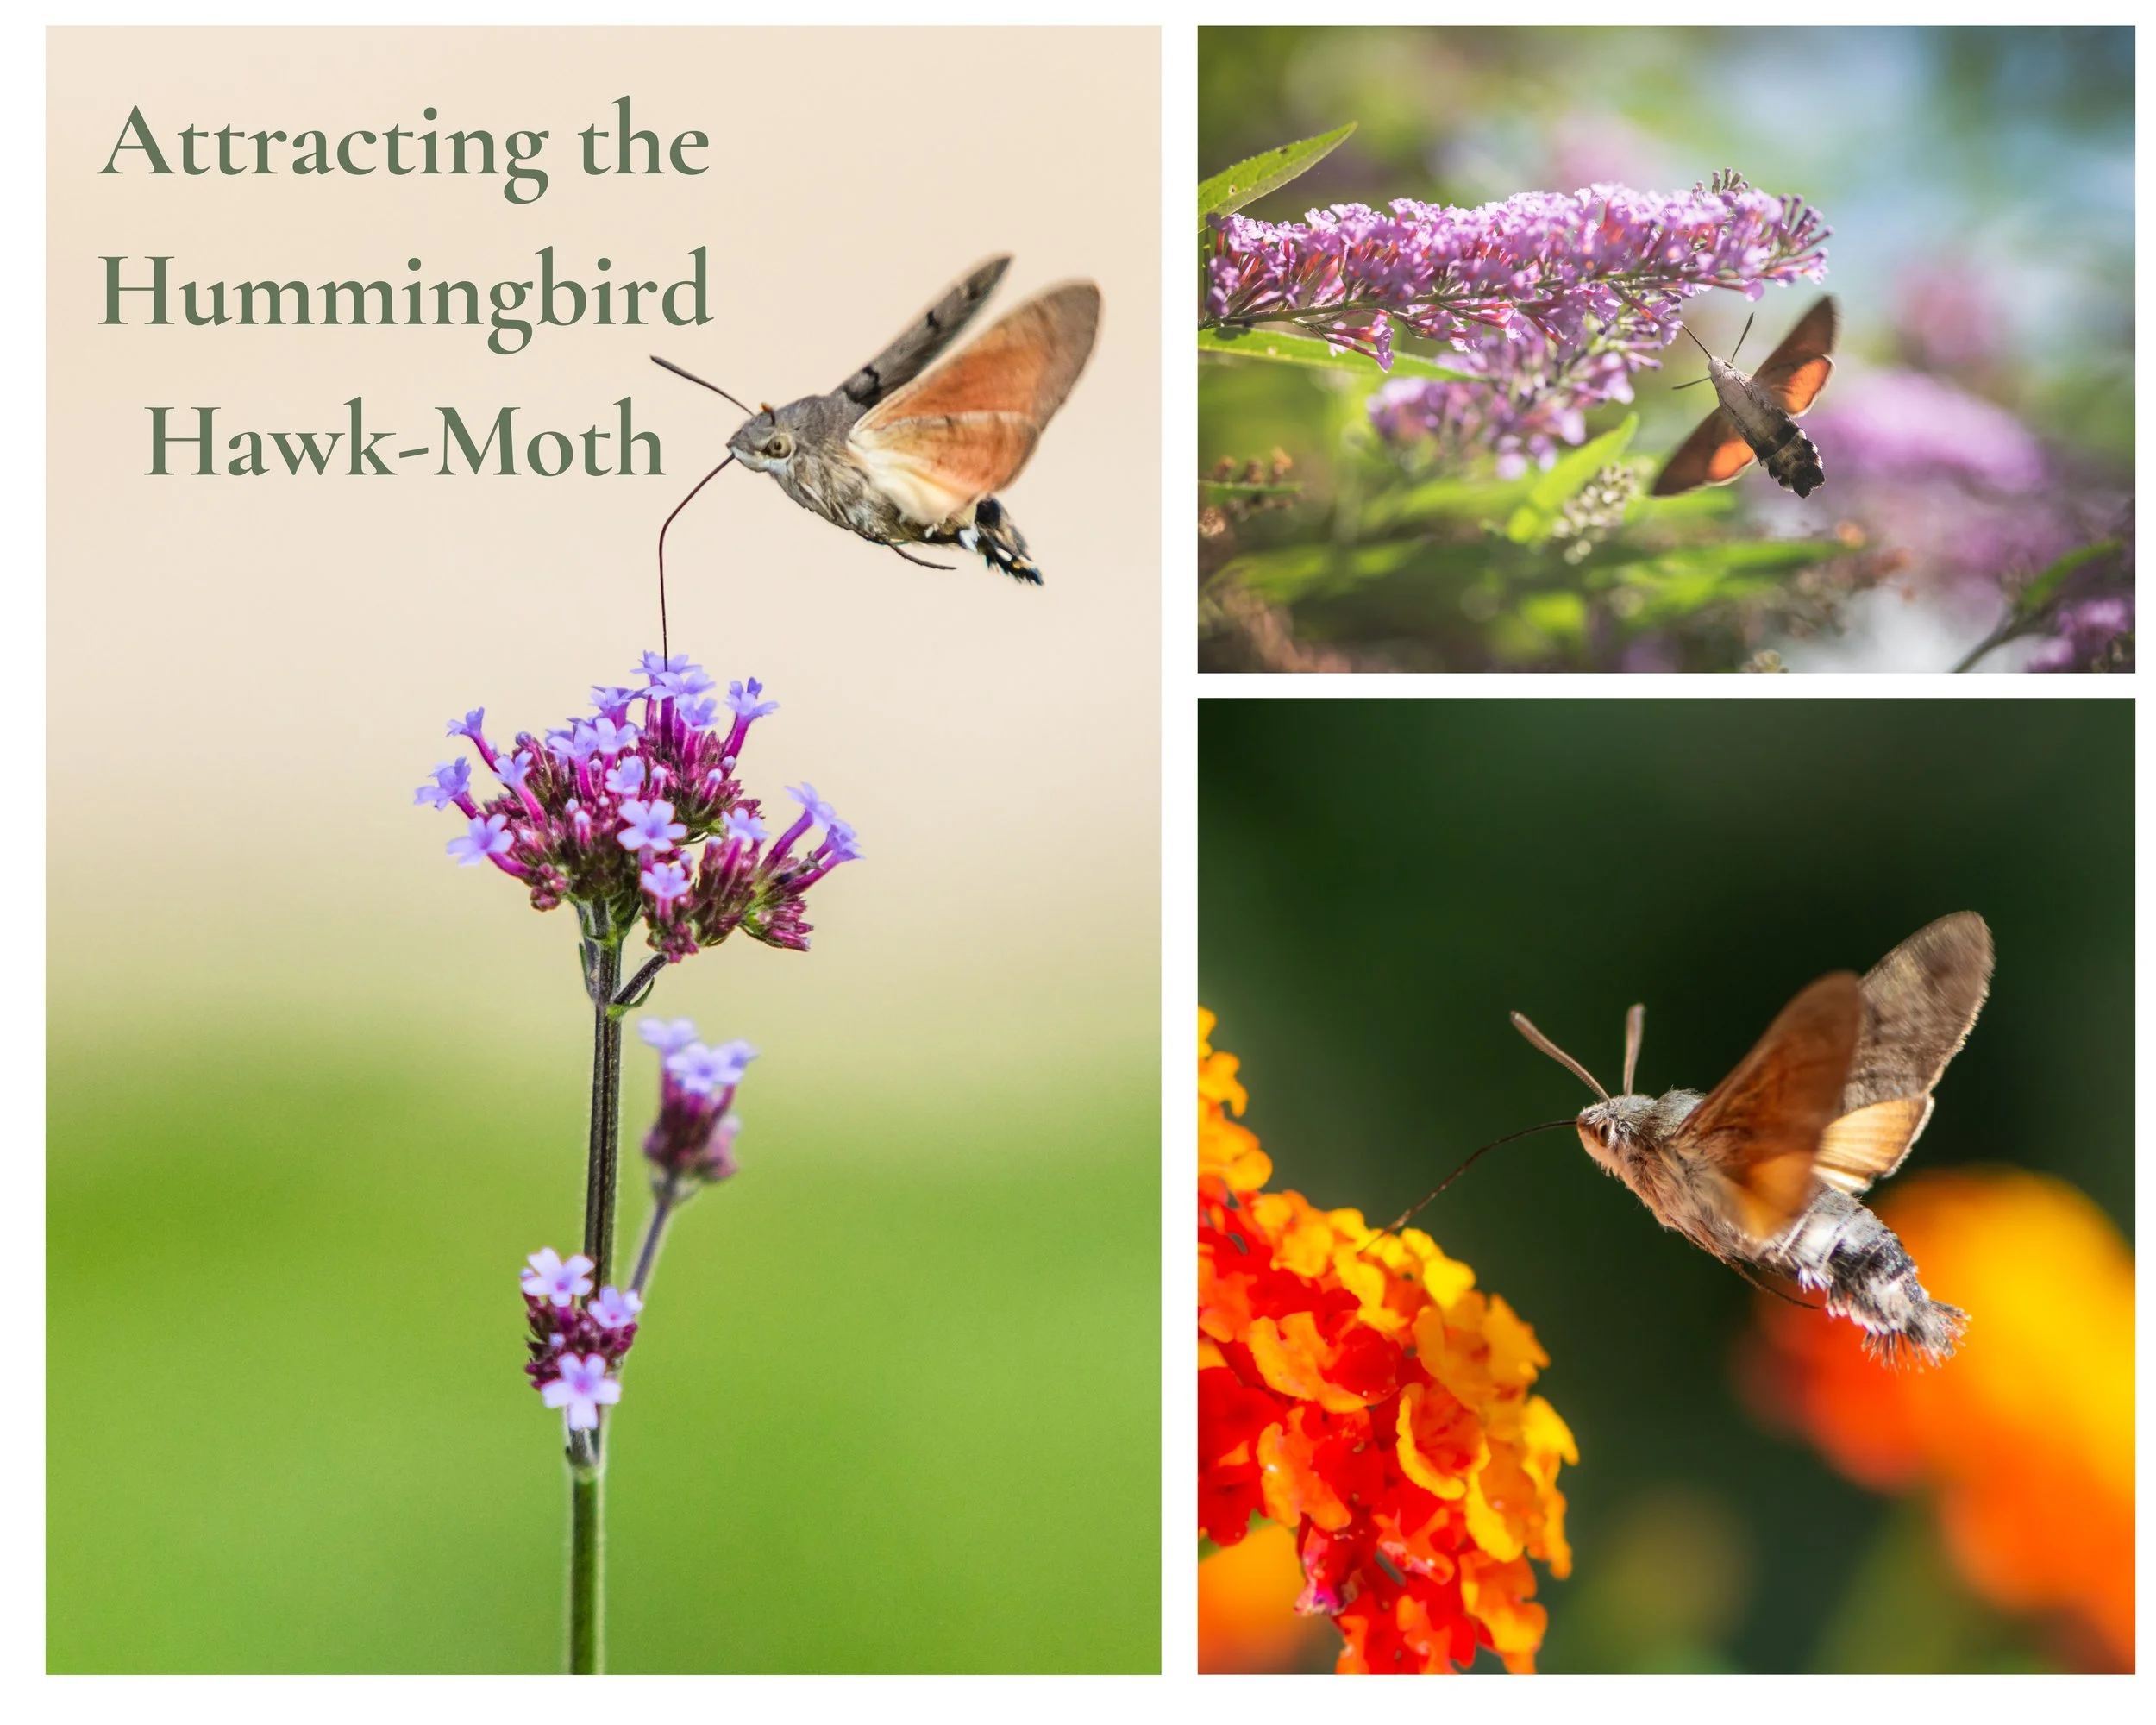
Hummingbird moths feed on colorful garden flowers. Notice the incredible length of the proboscis in the first image allowing the moths to get deep into the flowers.
What do Clearwing moths eat?
Clearwing moths have a unique diet that sets them apart from hummingbird moths. These moths primarily feed on nectar from a variety of flowers, just like their hummingbird counterparts. However, they also have a preference for specific types of flowers that produce ample amounts of nectar. You can often find them feeding on flowers including Japanese honeysuckle, beebalm, red clover, lilac, phlox, snowberry, cranberry, blueberry, vetch, and thistles.
One of the favorite flowers of clearwing moths is the bee balm (Monarda), which is known for its vibrant colors and sweet nectar. The clearwing moths are attracted to the bright red, pink, or purple flowers of the bee balm and will hover around them, inserting their long proboscis to extract the nectar.
Another flower that clearwing moths are fond of is the phlox (Phlox paniculata), which produces clusters of fragrant flowers in various shades of pink, purple, and white.
In addition to these flowers, clearwing moths also feed on other nectar-rich plants such as honeysuckle (Lonicera), butterfly bush (Buddleja), and milkweed (Asclepias).
These plants provide the necessary nourishment for the moths to sustain their energy levels and continue their important role as pollinators.
By planting a diverse range of nectar-rich native flowers in our gardens, we can attract clearwing moths and provide them with the sustenance they need to thrive. This not only adds beauty to our outdoor spaces but also supports the overall health of our ecosystems by promoting pollination.
Where do clearwing moths go in winter?
During the winter months, clearwing moths undergo a fascinating transformation. Unlike other moths that hibernate in cozy cocoons, clearwing moths have a unique strategy to survive the cold temperatures.
These moths enter a state of diapause, which is similar to hibernation but with some distinct differences. Clearwing moths seek out protected areas to spend the winter, such as leaf litter, crevices in tree bark, or even underground burrows. They choose these locations because they provide insulation and protection from the harsh winter conditions.
Once settled in their chosen spot, clearwing moths enter a dormant state, slowing down their metabolism and conserving energy.
During diapause, clearwing moths do not feed or engage in any reproductive activities. Instead, they rely on their fat reserves to sustain them throughout the winter. This survival strategy allows them to conserve energy and survive until the warmer months when they can resume their normal activities.
In the spring, as temperatures rise and food sources become abundant, clearwing moths emerge from their winter hideouts. They begin their search for nectar-rich flowers to replenish their energy reserves and engage in mating behaviors to ensure the survival of their species.
Their search for early sources of nectar is a good reason to ensure your garden has a good source of early spring blooming plants.
Understanding where clearwing moths go in winter is crucial for creating a welcoming environment for these fascinating creatures in our gardens. By providing suitable overwintering habitats, such as leaf piles or undisturbed areas in our gardens, we can support their survival and enjoy their presence during spring, summer and into the fall months.
What do clearwing caterpillars eat?
Clearwing caterpillars have specific dietary preferences that contribute to their unique life cycle.
These caterpillars are known as "stem borers" because they tunnel into the stems of various plants. They feed on the inner tissues of the stems, which provides them with both nutrition and protection from predators.
One of the primary food sources for clearwing caterpillars is the sap of plants. They have specialized mouthparts that allow them to extract sap from the stems they inhabit. This sap contains essential nutrients that the caterpillars need for growth and development.
Clearwing caterpillars are also selective in their choice of host plants. Different species of clearwing moths have specific plant preferences, and their caterpillars will only feed on those particular plants.
For example, the raspberry clearwing moth caterpillar feeds exclusively on raspberry plants, while the dogwood clearwing moth caterpillar feeds on dogwood trees. By feeding on specific plants, clearwing caterpillars play an important role in pollination and plant reproduction.
As they tunnel through the stems, they inadvertently transfer pollen from one flower to another, aiding in the fertilization process.
Understanding what clearwing caterpillars eat is crucial for creating a suitable habitat for these fascinating insects. By planting their preferred host plants in our gardens, we can attract and support clearwing moths throughout their life cycle, contributing to the overall biodiversity and health of our ecosystems.
What do Clearwing moths look like?
Clearwing moths are fascinating insects with unique physical characteristics.
They are often mistaken for hummingbirds due to their similar appearance and behavior. These moths have a distinct body shape, resembling a small bird in flight.
They have long, slender bodies and narrow wings that beat rapidly, allowing them to hover in mid-air while feeding on nectar.
One of the most striking features of clearwing moths is their transparent wings. These wings are clear or lightly tinted, giving the moths their name. The transparent wings, combined with their rapid wingbeats, create the illusion of a hummingbird in flight.
Clearwing moths also have a furry body, similar to that of a bumblebee. This fur helps to insulate their bodies and provides camouflage when they are feeding on flowers.
The coloration of clearwing moths varies depending on the species, but they are often a combination of brown, black, and yellow.
Another distinguishing characteristic of clearwing moths is their long proboscis. This tubular mouthpart is used to extract nectar from flowers, just like a hummingbird’s beak. The proboscis is coiled when not in use and can extend to reach the nectar deep within the flower.
Overall, clearwing moths are remarkable creatures and their transparent wings, furry bodies, and long proboscis make them a captivating sight in gardens and natural habitats.
How do Clearwing moths feed?
When feeding, clearwing moths use their long proboscis to reach deep into the flower to access the nectar. The proboscis is a tubular mouthpart that is coiled when not in use and can extend to remarkable lengths. This allows the moths to access nectar from flowers with long corollas or narrow openings.
Clearwing moths are particularly attracted to flowers that are brightly colored and have a strong fragrance. They are especially fond of flowers that produce a lot of nectar, such as honeysuckle, phlox, and bee balm.
In addition to nectar, clearwing moths may also feed on tree sap or rotting fruit. They are known to visit sap wells created by woodpeckers or other insects, where they can obtain additional nutrients.

Author Profile: Vic MacBournie is a former journalist and author/owner of Ferns & Feathers. He writes about his woodland wildlife garden that he has created over the past 25 years and shares his photography with readers.
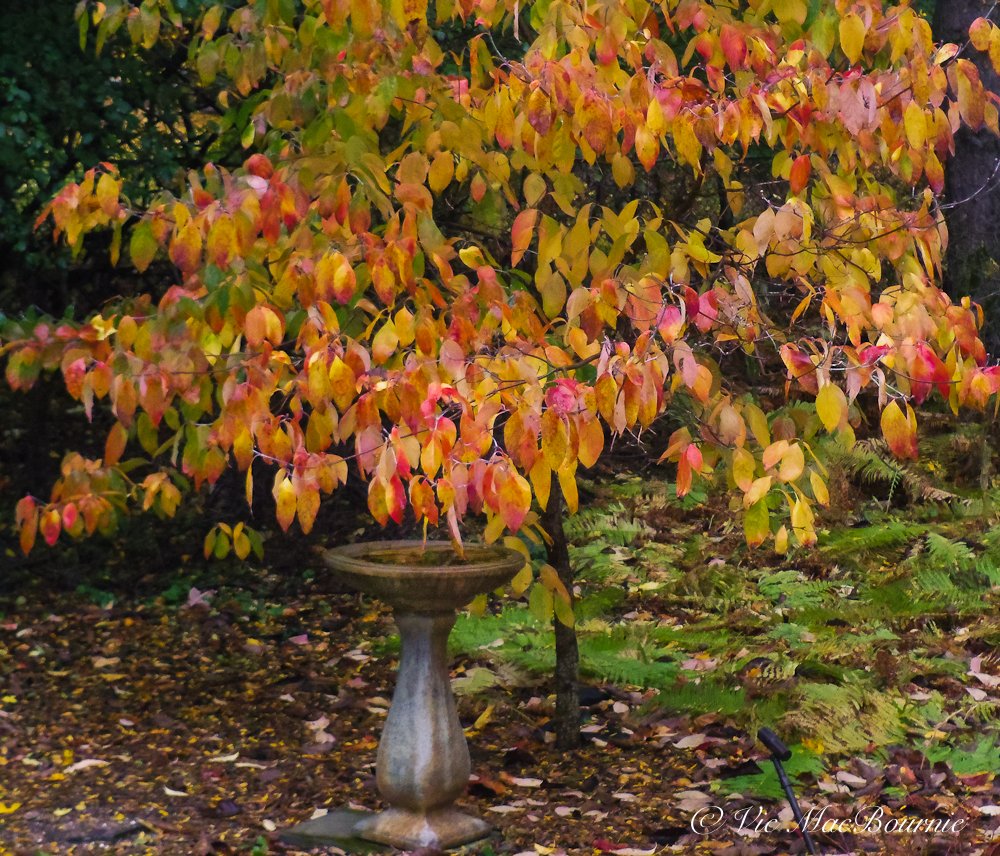
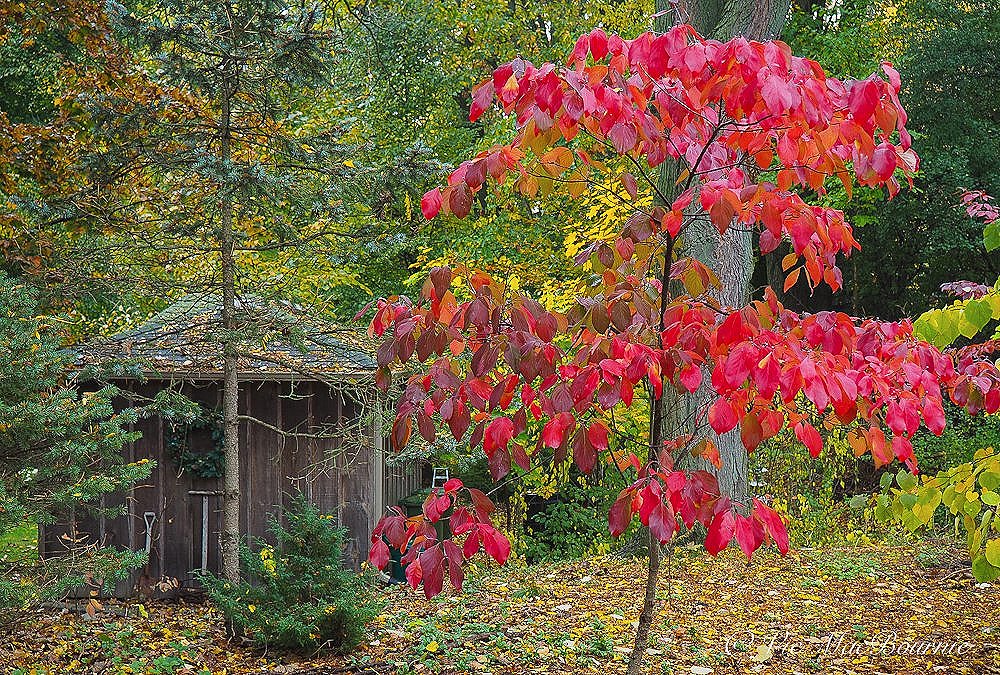
Dogwood tree leaves shine spring, summer and fall
Dogwood leaves can be a beautiful addition to the garden both in spring when they emerge through to fall when they introduce an incredible variety of color to the garden.

The exceptional color of the Flowering Dogwood in fall colors of orange, red, yellow with hints of burgundy later in the fall.
What makes Dogwood foliage so interesting?
Anyone who has followed my posts on Ferns & Feathers knows my deep appreciation and love for Dogwoods in the garden. These plants, shrubs and small understory trees are both a versatile and highly welcome addition to any garden, but fit in especially well in a woodland style garden.
Obviously, the spectacular spring and early summer flowers of the Flowering Dogwood (Cornus Florida), Cornus Kousa (Cornus Chinensis), and even the diminutive Bunchberry or (Cornus Canadensis) are the primary reasons to plant these Dogwoods in your garden. It can be argued, however, that the foliage of both the Cornus Florida and Cornus Kousa, as well as those of the Pagoda dogwoods and Bunchberry are impressive in their own right and add to the garden’s aesthetic.
In our garden, I’ll add the variegated leaves of the Cornus Mas (see image below) as another stalwart in woodland garden.
Even Paul Cappiello, in his comprehensive book, Dogwoods has praise for the foliage of the Dogwood genus.
“Most dogwood species sport medium green summer foliage, and, with the exception of the many variegated forms, few are standouts in this regard,” Cappiello writes.
“But it is in autumn that the leaves can really shine. Reds, yellows, oranges, and burgundy shades can develop alone or in concert to form spectacular autumnal dress. To be truthful, on the full-family scale, there are as many poor fall-coloring species as there are those that would inspire poets. Dogwoods seem to have benefited from wonderful public relations in this realm.”
The incredible fall color of this flowering dogwood shows how beautiful these trees can be in the woodland garden.
In fact, Dogwood foliage possess several positive traits that make them highly desirable in gardens and landscapes.
One of the key advantages of dogwood leaves is their attractive shape and texture. The leaves are typically oval or elliptical, simple, with smooth edges and a glossy surface. The lower leaf surface is often covered with copious amounts of single-celled T-shaped trichomes (hair-like structures) that are loaded with calcium carbonate.

This image of flowering dogwood leaves shows the distinct veining in the leaf structure.
How to identify dogwood leaves
“All dogwood leaves show a rather unique arcuate veination, the major veins arranged much like lines of longitude on the globe. In addition, the major leaf veins contain a latex-like substance that form strands when pulled apart,” explains Cappiello, in his book.
You might even describe the leaves of dogwood as giving a refined and elegant appearance, adding a touch of sophistication to your garden throughout the season.
“But it is in autumn that the leaves can really shine. Reds, yellows, oranges, and burgundy shades can develop alone or in concert to form spectacular autumnal dress. To be truthful, on the full-family scale, there are as many poor fall-coloring species as there are those that would inspire poets. Dogwoods seem to have benefited from wonderful public relations in this realm.”
Their emergence in spring marks the beginning of a stunning display of beauty that lasts throughout the year. From the moment they unfurl, dogwood leaves captivate with their vibrant green hues and delicate, unique shapes. Whether it’s the iconic native flowering dogwood or the lesser-known native Pagoda dogwood, their leaves never fail to make a statement.
In our garden, the emergence of the bright green dogwood leaves is almost as special as the first sign of their flowers in spring. The emerald greens and the deep veining of the leaves, contribute to dogwoods’ distinctive look.
For more of my posts on Dogwoods, be sure to check out these articles:
Flowering Dogwood: Queen of the Woodland garden
Cornus Kousa: Impressive non-native for the woodland garden
Bunchberry: The ideal native ground cover
Pagoda Dogwood: Small native tree ideal for any garden
Cornus Mas: An elegant addition to the Woodland Garden
Dogwood leaves are good indicator of problems
The leaves of the Dogwood will often inform us of disease or other problems our Dogwoods are facing. Watch for black spots or curling of the leaves as indicators of possible problems. Curling leaves may be nothing more than the tree protecting itself from the harsh sun, but they could be an indicator of more serious problem. More information on potential problems later in this article.
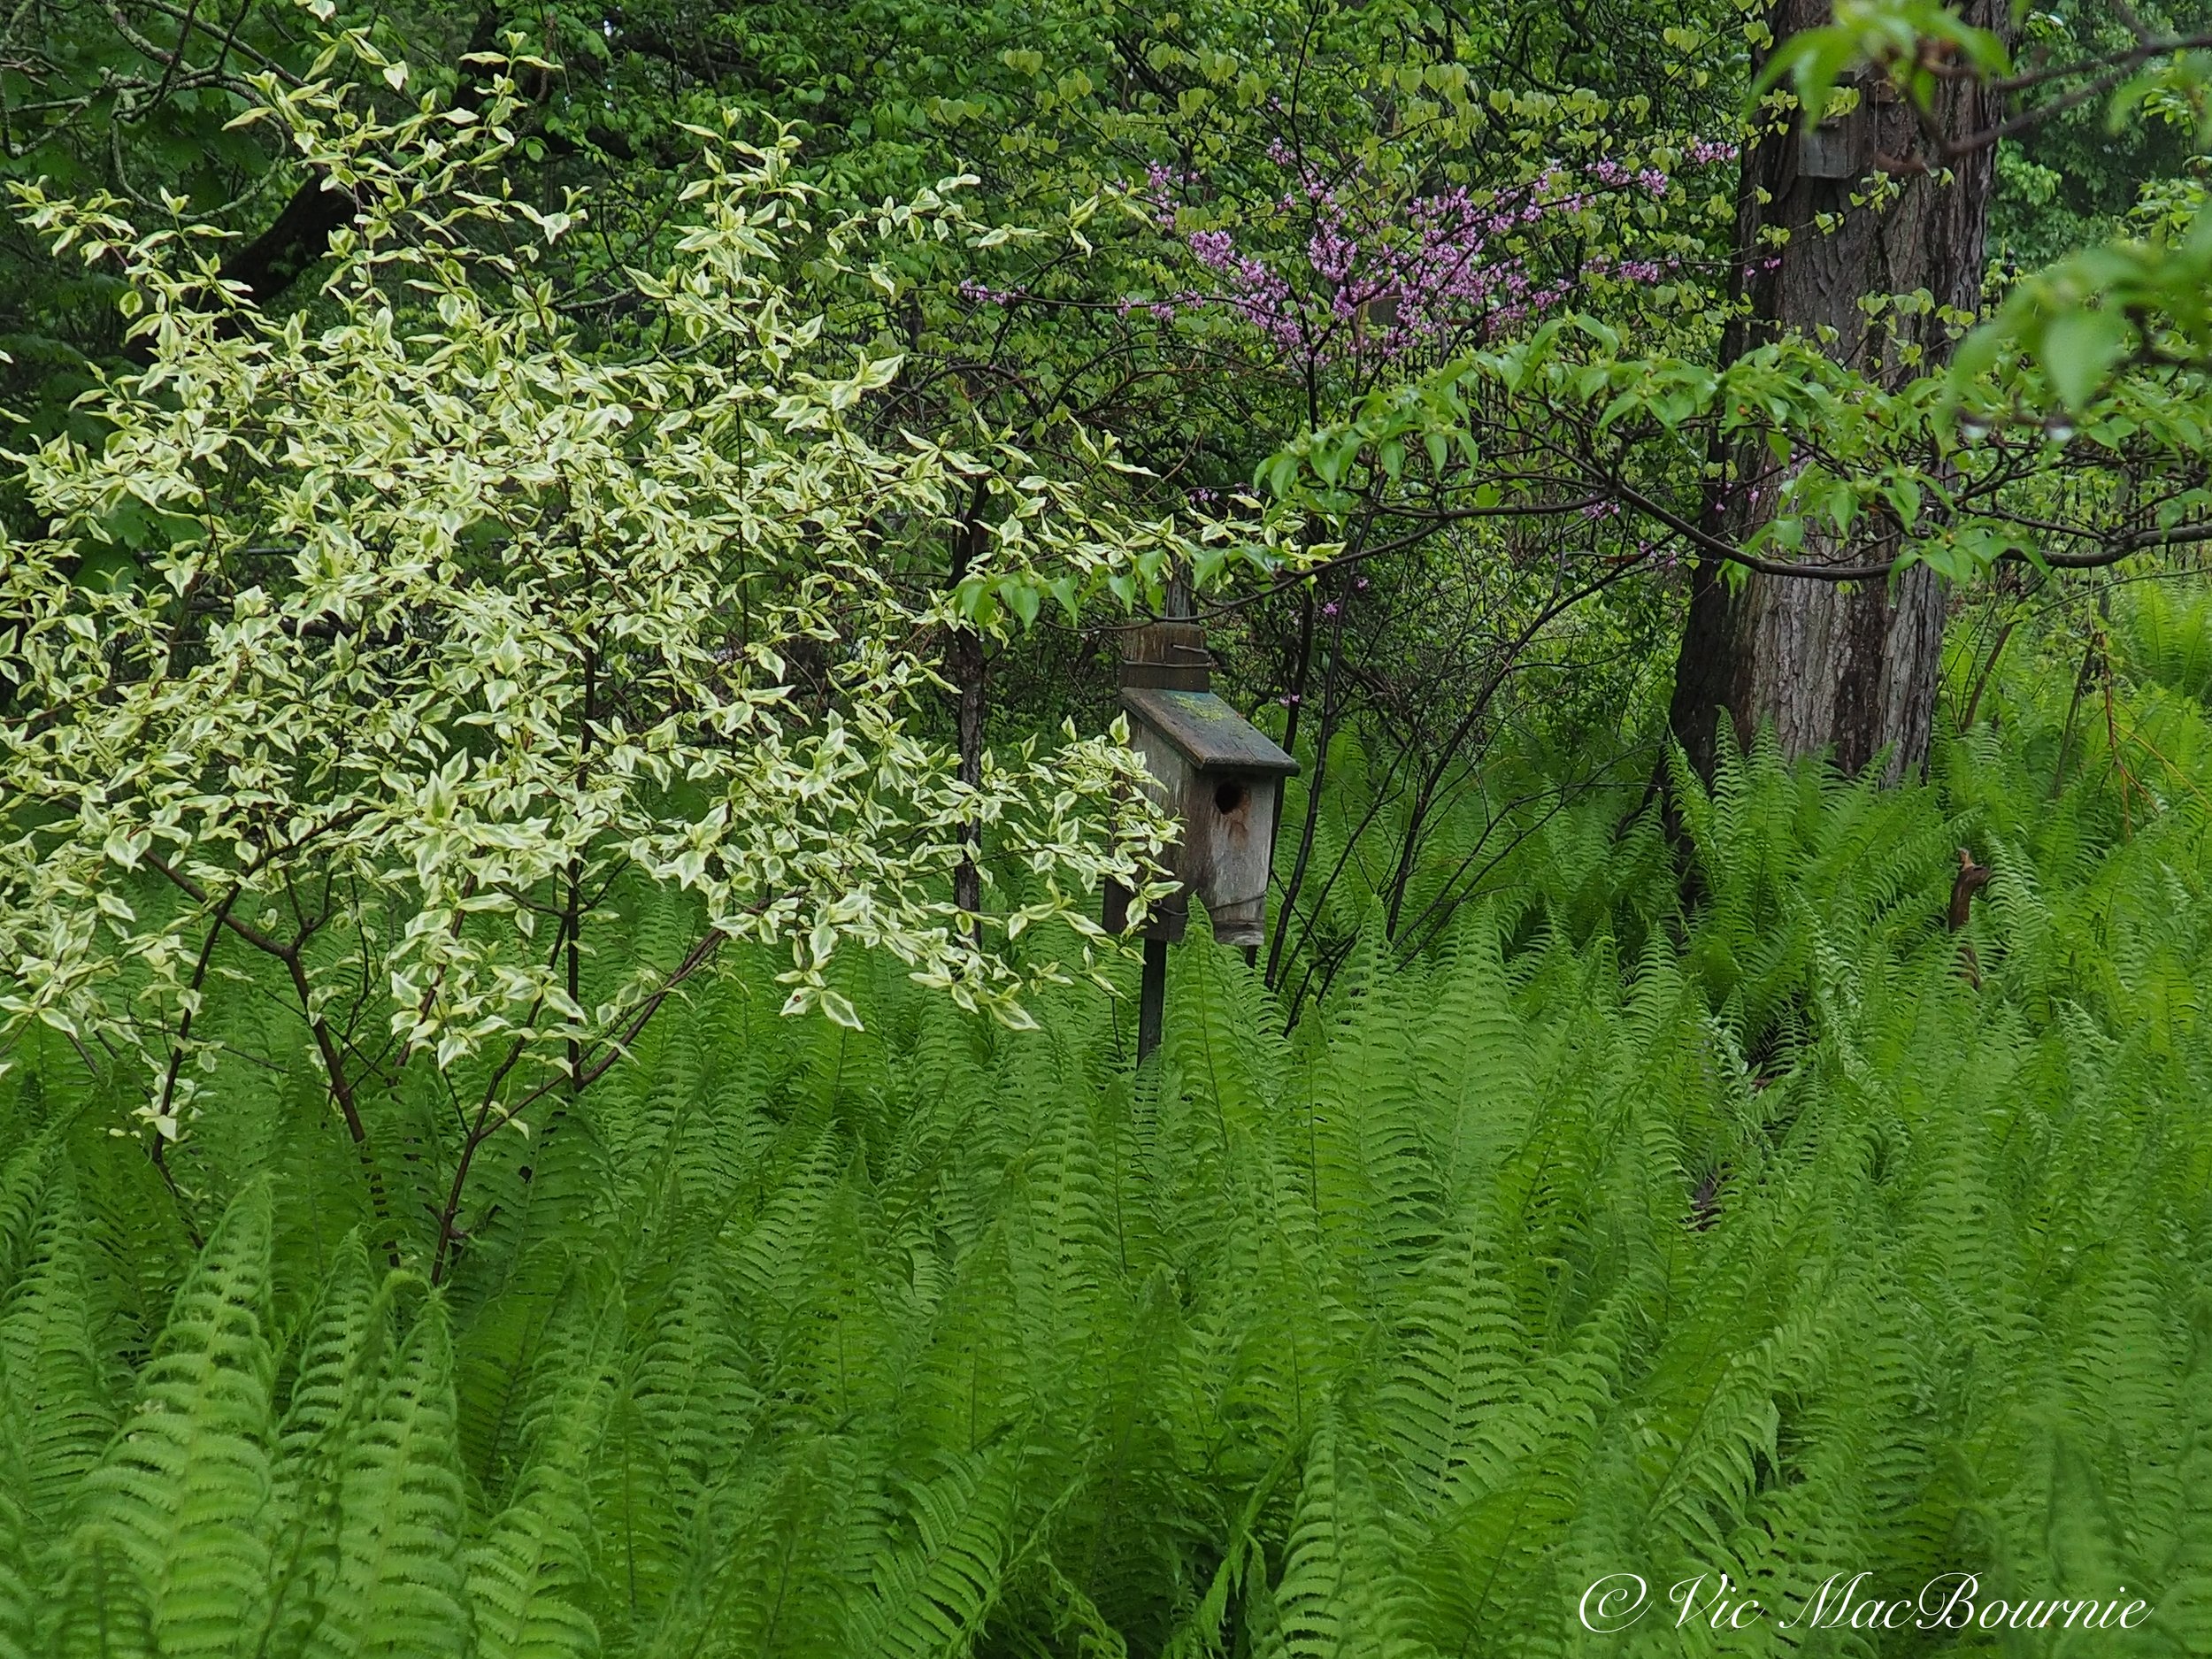
A variegated Cornus Mas shows off its lovely bright leaves as it grows up through the fern garden and alongside a Cornus Kousa. A Redbud is just coming into flower in the background.
Dogwoods are impressive in their fall colors
Another positive trait of dogwood leaves is their versatility in terms of color.
While some varieties are known for their vibrant fall foliage, others exhibit stunning colors throughout the year. From deep greens in spring and summer to rich reds, oranges, and purples in autumn, dogwood leaves provide a dynamic and ever-changing display of color in our gardens.
In addition to their visual appeal, dogwood leaves offer practical benefits as well. They provide shade and shelter for birds and other wildlife, making them an important part of the ecosystem.
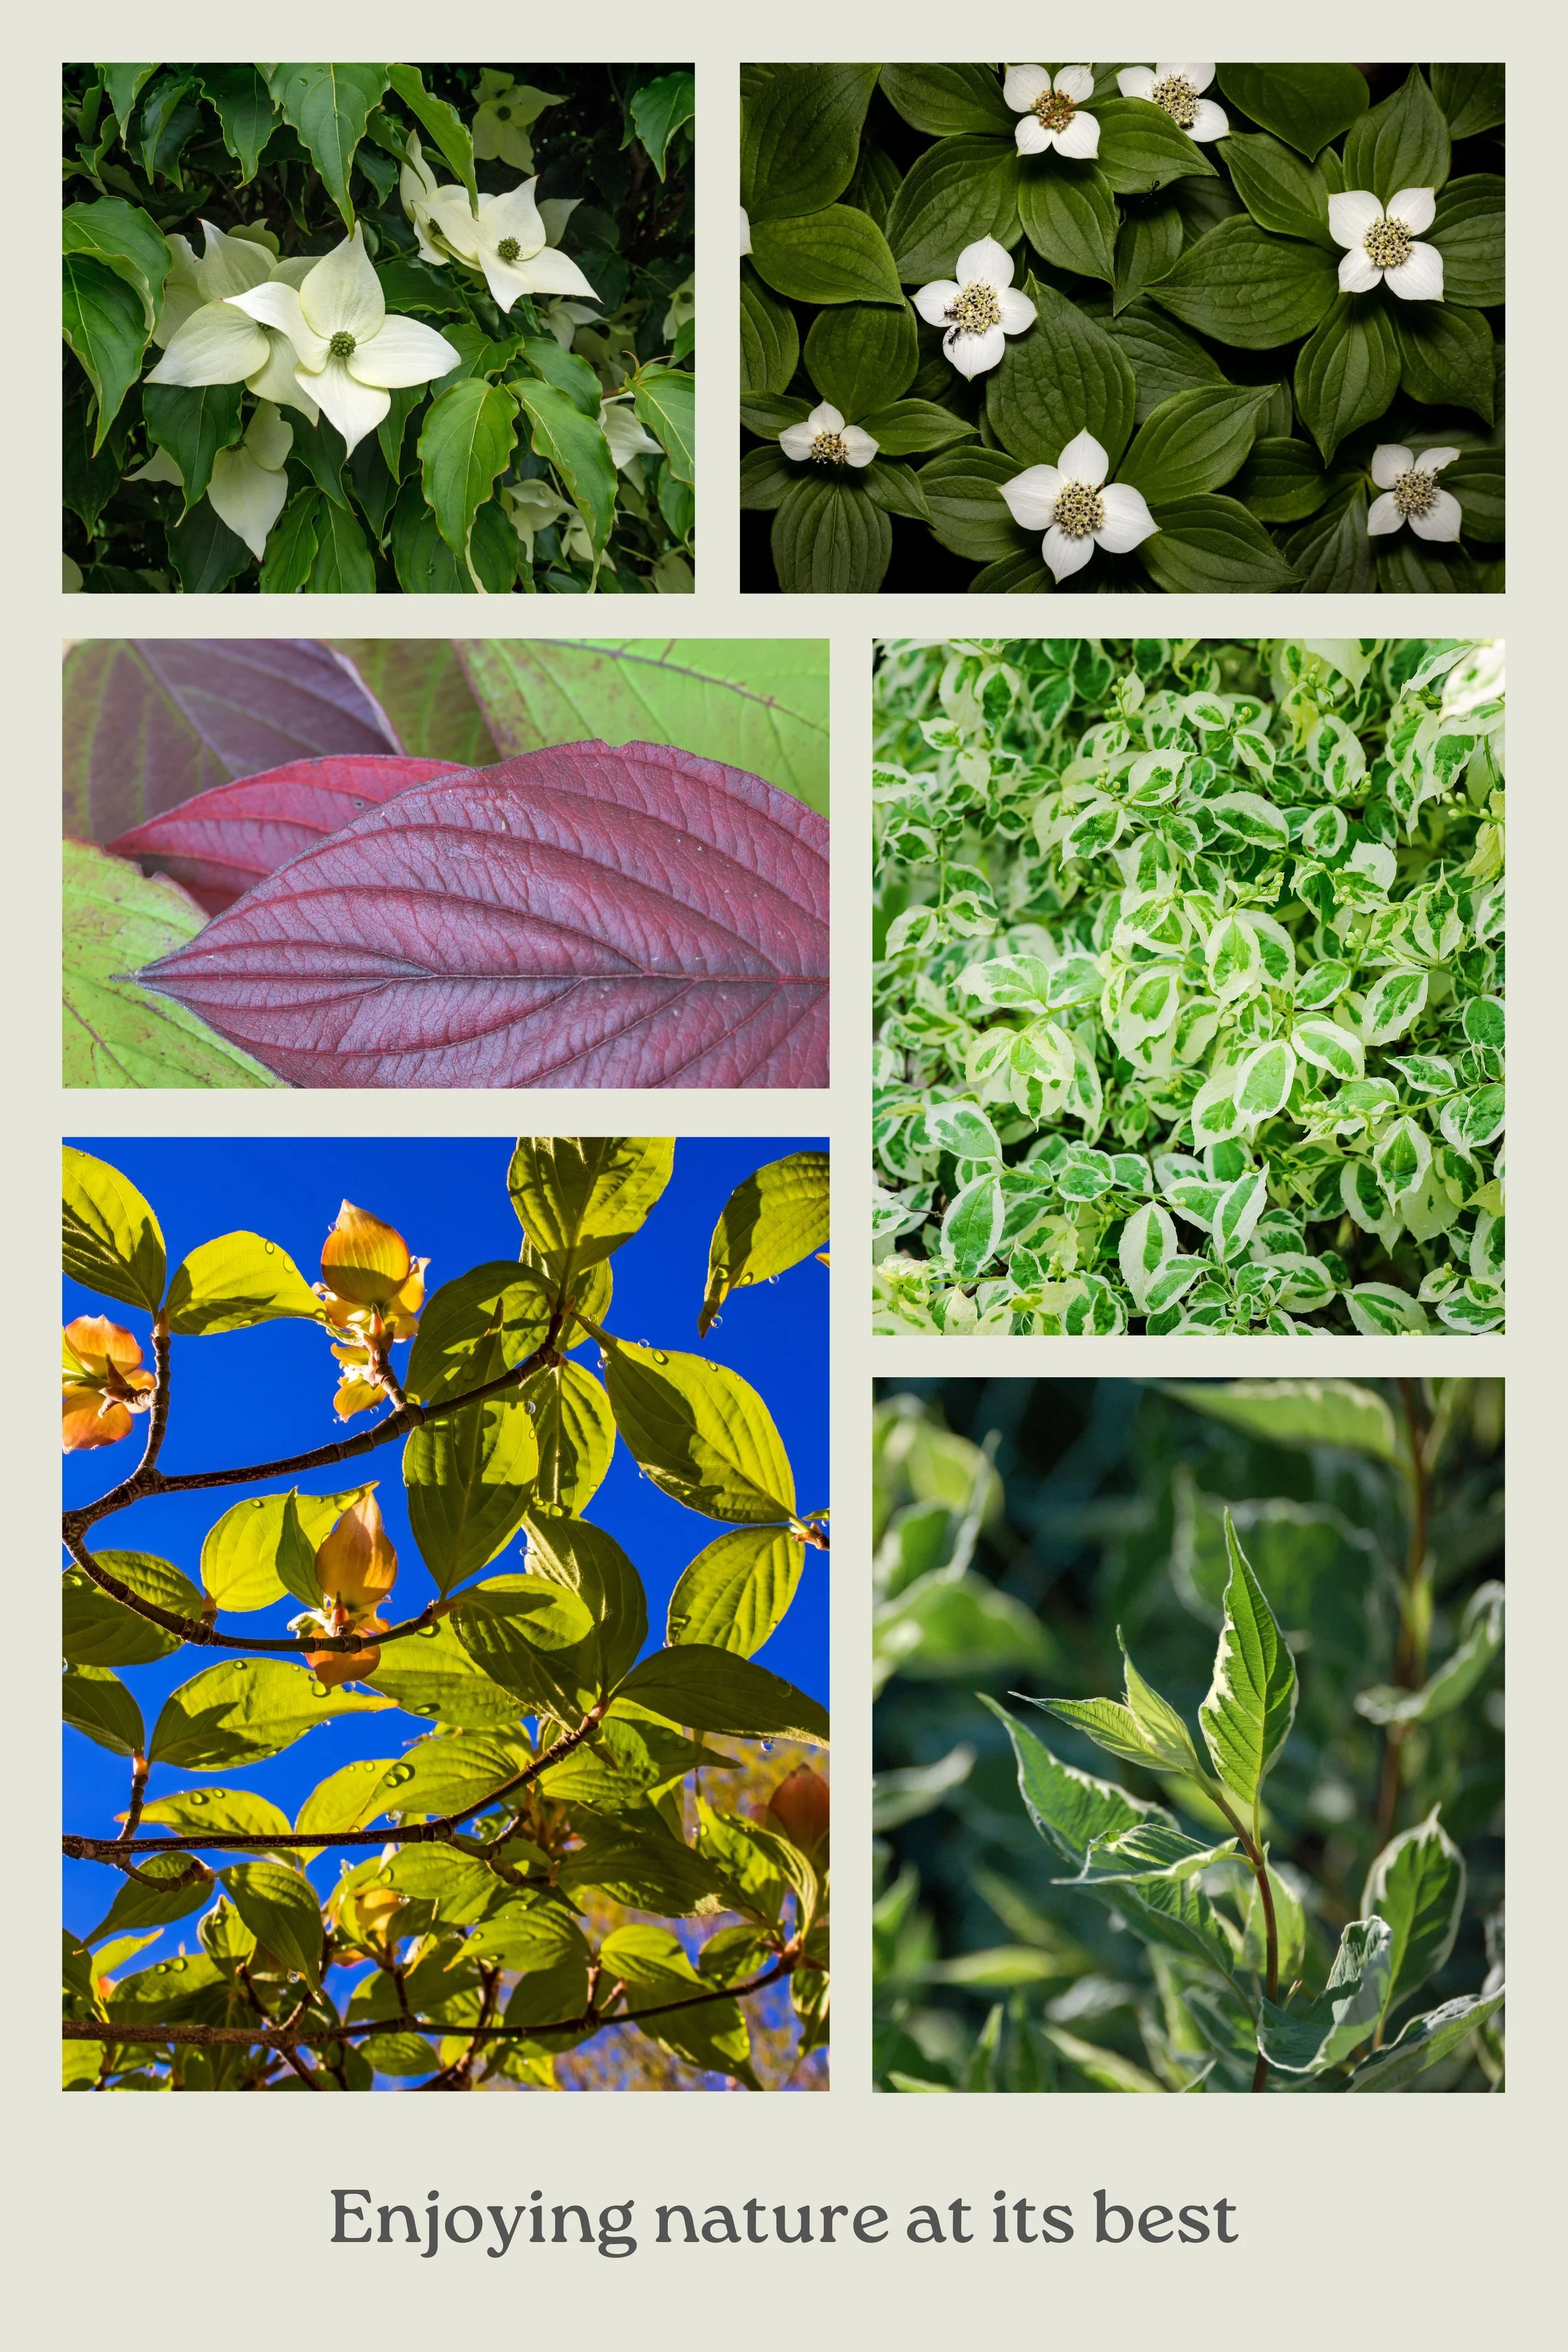
A collection of images showing the beauty of the dogwood leaf from the Bunchberry (top right), Cornus Kousa (top left) to the more shrubby and variegated dogwoods.
The leaves of the Dogwood also contribute to soil health by decomposing and enriching the soil with organic matter.
Furthermore, dogwood leaves are relatively low-maintenance. They are resistant to many common pests and diseases, making them a more or less hassle-free choice for gardeners.
The trees’ and shrubs’ moderate size and density also reduces their potential negative effects on turf, if that is a concern.
As the seasons progress, dogwood leaves continue to enchant. In the summer, their lush foliage provides a refreshing canopy of shade, creating a cool and inviting area to plant woodland-loving plants. Try acid-loving plants like ferns and spring ephemerals such as trilliums and native geraniums.

This image shows the umbrels of the Pagoda Dogwood, but take note of the elegance of the trees deep green leaves that are heavily veined and create the perfect backdrop to show off the creamy flowers.
It is in the fall that dogwood leaves truly shine.
As the temperatures drop, these leaves transform into a kaleidoscope of colors, ranging from fiery reds and oranges to rich purples and yellows. Their vibrant hues create a breathtaking spectacle, turning our landscapes into a picturesque scenes.
Moreover, dogwood leaves have a unique ability to retain their color well into the late fall, ensuring that their beauty lasts longer than many other tree species. This extended display of color adds an extra touch of magic to the autumn season.

This image shows the leaves of a Flowering Dogwood in early fall color with next year’s flower buds.
In conclusion, the special and attractive qualities of dogwood leaves lie in their year-round beauty, from their emergence in spring to their stunning fall colors. Their vibrant hues, intricate veining, and long-lasting color make them a standout feature in any landscape.
So, whether you’re admiring the flowering dogwood or the Pagoda dogwood, take a moment to appreciate the exceptional beauty of their leaves.
What diseases should we look for in dogwood leaves?
Anthracnose is indeed a common disease that affects the leaves of Flowering Dogwood. However, there are other diseases that can also show up in dogwood leaves.
It’s important to be able to recognize the early signs of disease in order to take appropriate action and prevent further damage to the tree.
One of the early signs of disease in dogwood leaves is the presence of spots or lesions. These spots can vary in size, shape, and color depending on the specific disease.
For example, anthracnose may cause small, dark brown or black spots with a purple halo, while powdery mildew may result in white or grayish patches on the leaves.
Another sign to look out for is leaf discoloration. Diseased dogwood leaves may exhibit yellowing, browning, or even reddening, depending on the disease. This discoloration may be localized or spread throughout the entire leaf.
In addition, wilting or drooping leaves can indicate the presence of disease. Diseased dogwood leaves may lose their turgidity and appear limp or wilted, even if the soil moisture is adequate.
It’s also important to pay attention to leaf deformities. Some diseases can cause the leaves to become distorted, curled, or misshapen. These deformities can range from minor abnormalities to severe malformations.
If you notice any of these early signs of disease in dogwood leaves, it’s crucial to take action promptly. Consult with a professional arborist or horticulturist to accurately diagnose the disease and determine the appropriate treatment. Early intervention can help prevent the spread of the disease and protect the overall health of the dogwood tree.
For a complete breakdown of diseases that face Dogwoods, check out this page from the University of Maryland.

The captivating colors of a Flowering Dogwood in early all color with its combinations of greens, yellows, reds and hints of purple.
What are the best dogwood leaves for fall color?
Dogwood trees are known for their stunning fall foliage, and some varieties have leaves that are particularly exceptional in terms of color. When it comes to the best dogwood leaves for fall color, two varieties stand out: the Kousa dogwood (Cornus kousa) and the Red Osier dogwood (Cornus sericea).
The Kousa dogwood is native to East Asia and is highly regarded for its vibrant fall foliage. Its leaves turn a beautiful deep red or purple, creating a striking contrast against the tree’s dark bark. The Kousa dogwood’s leaves also tend to stay on the tree longer than other varieties, prolonging the enjoyment of their autumn hues.
On the other hand, the Red Osier dogwood, also known as the Red Twig dogwood, is native to North America. While its fall foliage may not be as showy as that of the Kousa dogwood, it’s bright red stems offer a stunning display of color throughout the winter months. The leaves of the Red Osier dogwood turn shades of red, orange, and purple, adding warmth and vibrancy to the autumn landscape.
Both the Kousa dogwood and the Red Osier dogwood are excellent choices for homeowners looking to enhance their fall gardens with colorful foliage. Whether you prefer the intense reds and purples of the Kousa dogwood or the warm tones of the Red Osier dogwood, these varieties are sure to bring beauty and visual interest to your outdoor space during the fall season.
Do dogwood leaves make good tea?
Do dogwood leaves make good tea? This is a question that many people have when they see the beautiful leaves of the dogwood tree. While dogwood leaves are not commonly used for tea, they do have some potential benefits.
One of the main benefits of dogwood leaves is their high antioxidant content. Antioxidants help to protect the body against damage from free radicals, which can contribute to aging and disease. By consuming dogwood leaf tea, you may be able to boost your antioxidant intake and support overall health.
In addition to antioxidants, dogwood leaves also contain certain compounds that have anti-inflammatory properties. These compounds can help to reduce inflammation in the body and alleviate symptoms of conditions such as arthritis and allergies.
To make dogwood leaf tea, simply steep a handful of fresh or dried leaves in hot water for about 10 minutes. You can add honey or lemon for flavor if desired. However, it's important to note that dogwood leaves may have a slightly bitter taste, so you may want to adjust the amount of leaves or steeping time to suit your preference.
While dogwood leaf tea may not be as well-known as other herbal teas, it can be a unique and potentially beneficial addition to your tea collection. Just remember to consult with a healthcare professional before incorporating any new herbal remedies into your routine, especially if you have any underlying health conditions or are taking medications.
Author Profile: Vic MacBournie is a former journalist and author/owner of Ferns & Feathers. He writes about his woodland wildlife garden that he has created over the past 25 years and shares his photography with readers.

Tips to attract Cardinals to your gardens
Cardinals are one of our favourite birds to have around the garden. It’s no surprise considering their beautiful colors and their cheery songs.

A bird bath is essential if you are looking to attract Cardinals to your yard. They readily come to bird baths to drink and bathe.
Why Cardinals are special and why we want them in our garden
It’s difficult to imagine a more sought after bird in our gardens than Cardinals. It really doesn’t matter if it is the vibrant male in his bright red coat of feathers or the equally gorgeous female in her beautifully buff attire.
Both are welcome in our garden and I’m sure every garden where they can be found throughout the United States and parts of Canada. They are native to North America and are a common sight in gardens, parks, and woodlands, as well as suburban areas.
Cardinals prefer habitats with dense shrubs and trees, such as forests and thickets, where they can find cover and protection. An open woodland garden is perfect for these omnivorous birds that are as happy eating sunflowers at our bird feeders as they are foraging for insects or hitting the nearest serviceberry bush when it’s in fruit.
While Cardinals are generally non-migratory birds, their behavior can vary depending on their location.
In the northern parts of their range, Cardinals may migrate short distances to find food and shelter during the colder months. However, in more temperate regions, Cardinals tend to stay in their breeding territories year-round.
During the breeding season, Cardinals establish territories and defend them fiercely against intruders. So, it you see a particularly aggressive cardinal pair, chances are they have young nearby.
Check out this post for more on Attracting Colorful Birds to your garden.
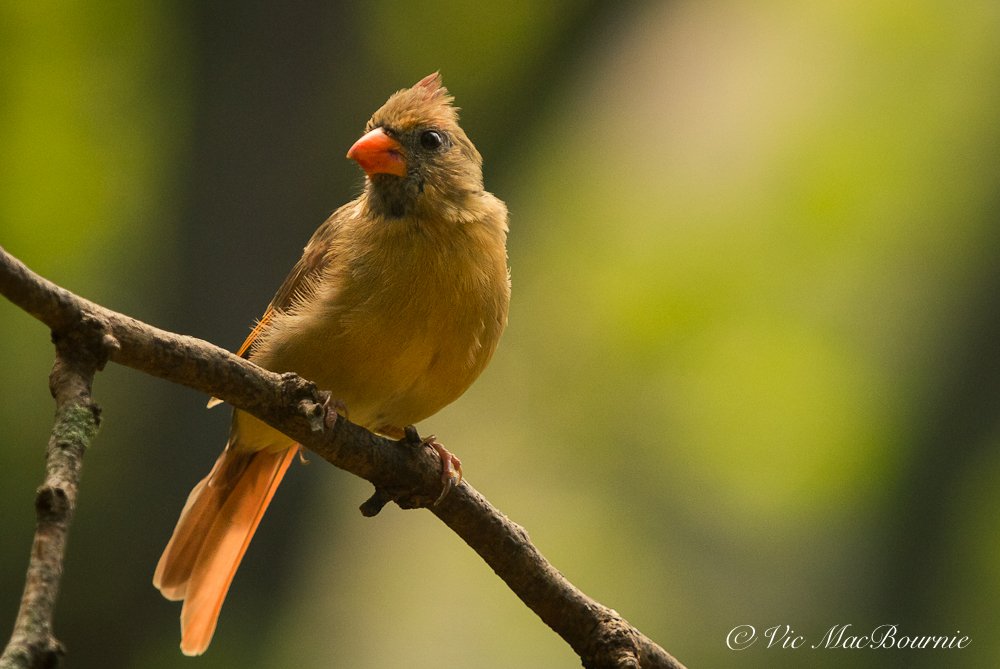
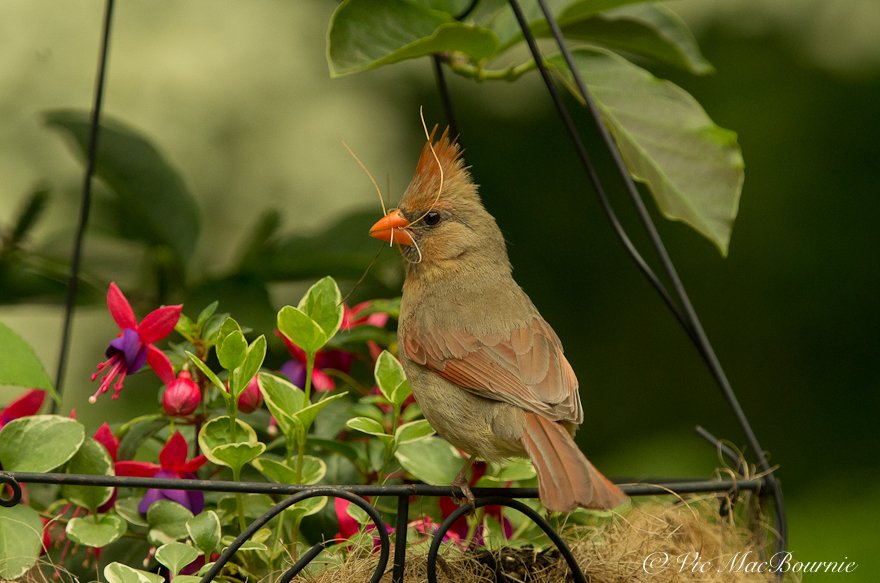
A lovely female cardinal stops on a branch before proceeding to the bird feeders.
Why are Cardinals so special to have in the garden?
They are considered special because of their beauty and unique characteristics.
Not only do Cardinals have a melodious song that adds a delightful ambiance to any garden, their mere presence bring joy and a sense of tranquility to outdoor spaces.
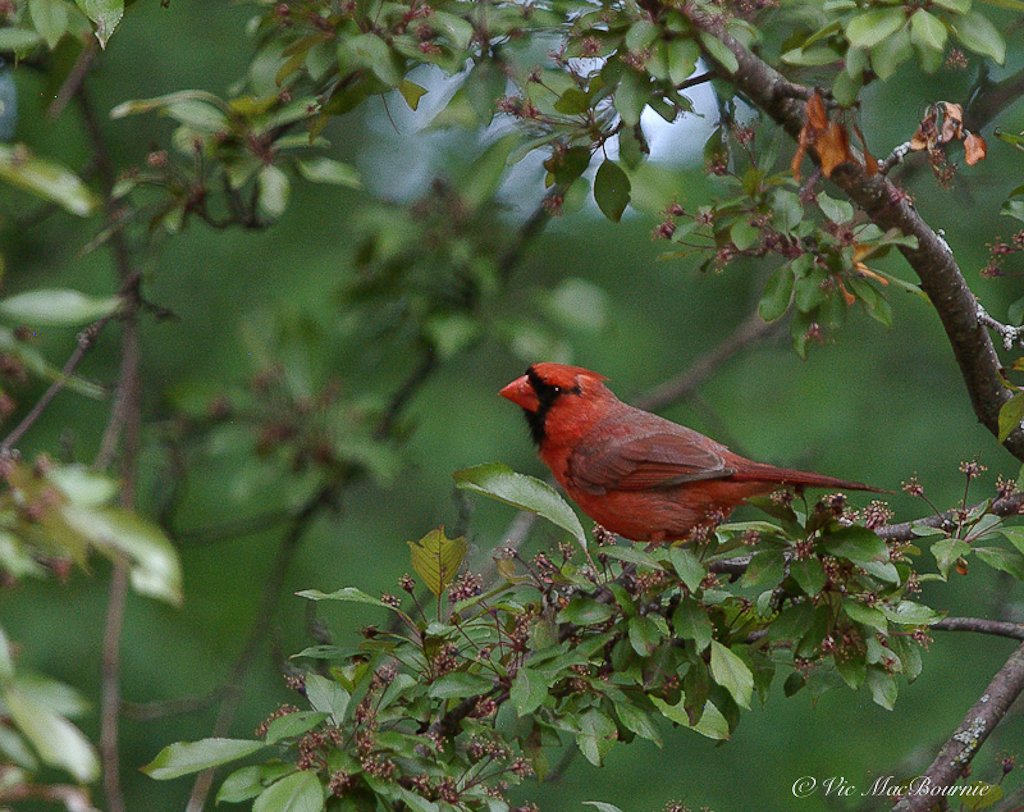
A colorful male cardinal sits in a crabapple watching for insects.
There are several reasons why we would want to attract Cardinals to our garden.
Firstly, Cardinals, not unlike most birds, are beneficial for pest control as they feed on insects and pests that can damage plants.
Secondly, they are excellent pollinators, helping to spread pollen from one flower to another, which promotes plant growth and reproduction.
Additionally, Cardinals are territorial birds, and having them in the garden can deter other unwanted birds or animals.
By creating an inviting environment for Cardinals, we can enjoy their beauty and benefit from their ecological contributions.
Providing food sources such as bird feeders with their favorite seeds, as well as planting trees and shrubs that offer shelter and nesting sites, will go a long way to attract Cardinals to our gardens.
Check out my comprehensive post on the Best Bird Feed Choices for Backyard Birds.
What are Cardinals’ favourite plants and trees?
To attract Cardinals to your garden, consider incorporating their favorite plants and trees.
One of the favorite plants of Cardinals is the Eastern Redbud (Cercis canadensis). This tree produces beautiful pink or purple flowers in the spring, which attract Cardinals in search of insects to feed their young.
Cardinals also love Blackberry stands (Rubus spp.). The berries of this plant provide a delicious food source for Cardinals, and the thorny branches offer them protection from predators.
Cardinals are also fond of the American Holly (Ilex opaca). This evergreen tree provides year-round shelter and its bright red berries are a favorite food source for Cardinals during the winter months.
Additionally, Cardinals are attracted to one of our favourite native understory trees, the Flowering Dogwood (Cornus florida). The clusters of white or pink flowers on this tree attract insects, which in turn attract Cardinals. Later the berries of the Flowering Dogwood provide an excellent food source to Cardinals and other fruit eating birds and mammlas.
In addition to these plants, Cardinals are also attracted to gardens with a variety of shrubs such as the Red Osier Dogwood (Cornus sericea) and the Spicebush (Lindera benzoin). These shrubs provide dense cover and berries that Cardinals find appealing.
By incorporating these favorite plants and trees into your garden, you can create an inviting habitat that will attract Cardinals. Providing a diverse range of food sources and shelter options will increase the likelihood of Cardinals not only visiting your garden but setting up a nest and raising their young.

A beautiful male Cardinal in full winter color sits in a tree following a winter’s snow.
What are Cardinals favourite seeds and the bird feeder?
Cardinals have specific preferences when it comes to seeds and bird feeders.
To attract these beautiful birds to your garden, it’s important to provide them with their favorite seeds and a suitable bird feeder.
One of the favorite seeds of Cardinals is the black oil sunflower seed. These seeds have a high oil content, which provides the Cardinals with the energy they need throughout the year, but especially in the winter when other food sources are more scarce.
Cardinals also enjoy eating safflower seeds, which have a bitter taste that squirrels and other birds tend to avoid. By offering safflower seeds, you can attract Cardinals while deterring unwanted visitors.
At our feeding station, I try to offer safflower in a separate, larger feeder that Cardinals can easily access.
When it comes to bird feeders, Cardinals prefer platform or tray feeders. These feeders have a flat surface that allows Cardinals to easily perch and access the seeds. It’s important to choose a feeder with a large enough platform to accommodate the Cardinals’ size.
To further attract Cardinals, consider placing the bird feeder near shrubs or trees that provide cover and protection. Cardinals. like most birds, prefer to have nearby perches where they can retreat to if they feel threatened.
By providing Cardinals with their favorite seeds and a suitable bird feeder, you can create an inviting environment that will attract these stunning birds to your garden.
Remember to regularly clean and refill the feeder to ensure a steady food supply for the Cardinals throughout the year.
Why do I hear Cardinals singing so early in the spring?
The male cardinals begin calling out for a mate at the first signs of spring in our garden. They are known for their beautiful songs, which they use to communicate and attract mates. Cardinals are monogamous birds and form strong pair bonds that can last for several years.
In the winter, Cardinals often gather in flocks, which can include both males and females. These flocks provide safety in numbers and help Cardinals find food more easily.
They are particularly attracted to areas with abundant food sources, such as bird feeders stocked with their favorite seeds.

A partially bald male cardinal at the feeders in mid summer.
Why are some cardinals bald in the summer?
During the summer months, you may notice that some cardinals appear to be bald or have patches of missing feathers.
This phenomenon is known as “cardinal molting,” and it is a natural process that occurs in many bird species.
Molting is the process of shedding old feathers and growing new ones. It is essential for birds to maintain their feathers in optimal condition for flight, insulation, and protection. Cardinals, like other birds such as Blue Jays, molt their feathers once or twice a year, typically in the late summer or early fall.
For more on bald birds and molting, check out my earlier post here.
The reason why some cardinals may appear bald during the molting process is that they shed their feathers in a specific pattern. Feathers are not shed all at once but rather in a sequential manner. As a result, cardinals may have areas of exposed skin or patches of missing feathers during the molting period.
It’s important to note that cardinal molting is a temporary condition, and the missing feathers will eventually be replaced with new ones. During this time, cardinals may appear less vibrant and colorful than usual, but once their new feathers grow in, they will regain their striking appearance.
To support cardinals during the molting process, provide them with a balanced diet rich in protein, such as mealworms or suet. These food sources can help promote healthy feather growth and ensure that cardinals have the necessary nutrients to thrive.
Understanding why some cardinals are bald in the summer can help you appreciate the natural processes that birds go through to maintain their plumage. By providing a welcoming environment and nutritious food, you can support cardinals during this important stage of their life cycle.
A female cardinal gathers nesting material at one of our handing baskets.
Where do cardinals create their nests?
Cardinals are also known as skilled nest builders. They prefer to build their nests in dense shrubs and trees, providing them with protection and privacy.
One common location where cardinals create their nests is in the branches of evergreen trees, such as pine or spruce trees. The dense foliage of these trees offers excellent coverage and helps to conceal the nest from predators.
In our garden, cardinals are regulars in our neighbour’s large spruce trees that run down the side of our property and provide year round habitat for Cardinals and other backyard birds.
Another favored nesting spot for cardinals is in thick shrubs or bushes, such as holly or azalea bushes. These plants provide ample coverage and protection, making them ideal nesting sites for cardinals.
The female cardinal takes the lead in nest construction, using twigs, grass, leaves, and other plant materials to create a sturdy and well-hidden nest.
Providing a variety of vegetation in your garden can attract cardinals and encourage them to build their nests nearby.
Additionally, having a water source, such as a birdbath or fountain, can further entice cardinals to choose your garden as their nesting site. By understanding where cardinals create their nests, you can create a welcoming environment in your garden.
Offering suitable vegetation and a water source can increase the chances of cardinals choosing your garden as their nesting site, allowing you to enjoy their presence and observe their nesting behaviors up close.

Male cardinal stops at our natural bird bath for a drink.
How many babies do Cardinals usually have in one year?
Cardinals can also be prolific breeders. In a single breeding season, a pair of cardinals can produce multiple broods, resulting in a significant number of babies. The breeding season for cardinals typically begins in early spring and extends into mid-summer.
During this time, the female cardinal will lay a clutch of eggs, usually ranging from 2 to 5 eggs. Incubation lasts for about 11 to 13 days, with both the male and female taking turns to keep the eggs warm. Once the eggs hatch, the parents work together to feed and care for the nestlings.
Cardinals are diligent parents, providing a steady supply of insects, seeds, and fruits to their hungry offspring. The nestlings grow rapidly, and within 9 to 11 days, they are ready to leave the nest.
After the first brood fledges, the female cardinal may lay another clutch of eggs and repeat the breeding process. This can result in multiple broods throughout the breeding season, with each brood consisting of 2 to 5 nestlings.
Overall, cardinals can have anywhere from 2 to 4 broods in a single breeding season, depending on factors such as food availability and nesting success. This high reproductive rate ensures the continued population growth of these beloved backyard birds.
Are Cardinals in danger of going extinct?
Cardinals are not currently in danger of going extinct.
In fact, they are one of the most abundant and widespread bird species in North America. Their population has remained stable over the years, thanks to their adaptability and ability to thrive in a variety of habitats. One of the reasons why Cardinals are not at risk of extinction is their ability to adapt to different environments.
They can be found in a range of habitats, including forests, woodlands, gardens, and urban areas. This adaptability allows them to find food and shelter in various settings, ensuring their survival.
Another factor that contributes to the Cardinals’ population stability is their generalist diet. Cardinals are omnivorous birds, meaning they eat a wide variety of foods, including seeds, fruits, insects, and even small vertebrates.
This flexibility in their diet allows them to find food sources even in changing environments.
Furthermore, Cardinals are not heavily impacted by human activities. Unlike some bird species that are affected by habitat loss or pollution, Cardinals can coexist with humans and even benefit from human-made landscapes, such as gardens and parks.
While Cardinals may face localized threats, such as predation or severe weather events, their overall population remains healthy and stable.
By continuing to provide suitable habitats and food sources, we can ensure that Cardinals continue to thrive and bring joy to our gardens for years to come.
Author Profile: Vic MacBournie is a former journalist and author/owner of Ferns & Feathers. He writes about his woodland wildlife garden that he has created over the past 25 years and shares his photography with readers.

Hanging baskets: Simple designs ensure success with Supertunias
If you have never tried Supertunias in your hanging baskets, there’s a good chance you don’t know what you are missing. These Proven Winners plants are bred to perform in containers as well as in the landscape.
Create stunning hanging baskets using a single flower
Every spring I get excited about creating our many hanging baskets.
I imagine spectacular baskets rivalling the massive ones that line the streets of our town, or the hanging baskets that take our breath away in tourist areas like Niagara On The Lake or along the main road of Michigan’s Mackinac Island.
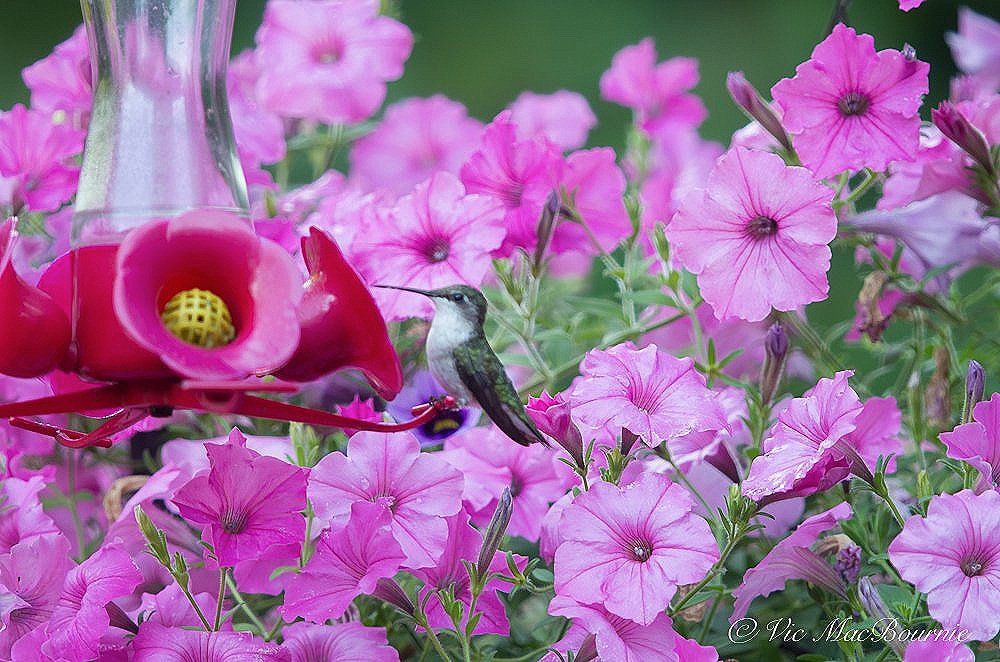
A hummingbird feeds from a feeder among the Supertunia vista Bubblegum growing in a hanging basket.
Of course, these massive hanging baskets in tourist areas are created with no cost restrictions when it comes to plants or maintenance. They’re also often designed by professional landscapers whose primary job is to keep them looking beautiful from the day they are planted until the day they are taken down.
Few of us can hope to duplicate these magnificent baskets, but by taking a simple approach and tapping into the suggestions from Proven Winners and others, it’s possible to create stunning baskets that perform well from spring through fall and require nothing more than regular watering and fertilizing.
Tips to create simple, easy-to-care-for hanging baskets
In other words, unless you are a super diligent gardener (that’s not me), chances are your hanging baskets, window boxes and container plantings are not going to look as good as these magnificent professional plantings. Instead, we need simple, easy-to-care-for hanging baskets that will look great even if they’re ignored for a couple of days.
Choose the right plant material
Thankfully, by choosing the right plant material, we can create hanging baskets that are both beautiful in their simplicity, and easy to maintain.
Most of my success with hanging baskets, window boxes and container plantings have almost always been the result of using Proven Winners supertunia series of plants. It’s important to note that there are different series of supertunia to choose from depending on your wants and needs.
To get the most out of these plants, it’s important to place them in an area that gets full sun or at least six hours of sun a day. They can survive on less sun, but may not flower as profusely.
These petunias take centre stage in the trio of hanging baskets.
Supertunia offers different series to best meet your needs
The Supertunia series offers a wide variety of beautiful flowers that are perfect for hanging baskets. One popular series is Supertunia Vista, which includes stunning varieties like “Supertunia Vista Bubblegum” and “Supertunia Vista Silverberry.” These flowers are known for their vibrant colors and vigorous growth, making them ideal for creating eye-catching hanging baskets.
Another series to consider is the Supertunia Mini Vista, which features smaller flowers that are perfect for adding delicate charm to your hanging baskets. Varieties like “Supertunia Mini Vista Pink Star” offer dainty pink star-shaped blooms that create a serene and graceful look.
Supertunia vista Bubblegum is an excellent flower to grow by itself in a hanging basket because of its incredible flowering throughout the season.
If you prefer a more sophisticated and elegant display, the Supertunia Bordeaux series is a great choice.
The deep burgundy flowers of the “Supertunia Bordeaux” variety add a touch of luxury to your hanging basket, especially when paired with the bright yellow blooms of the “Supertunia Limoncello” variety.
Lastly, for a bold and attention-grabbing display, consider the Supertunia Royal Velvet series. The rich purple flowers of the “Supertunia Royal Velvet” variety create a striking contrast when combined with the vibrant fuchsia blooms of the “Supertunia Vista Fuchsia” variety.
Supertunia Bordeaux is a standout from Proven Winners.
By choosing from the various Supertunia series, you can create visually stunning hanging baskets that are sure to impress. Remember to consider the light and water requirements of each variety to ensure their success.
Proven Winners Supertunia categories
Breaking down Proven Winners’ various categories can be a bit confusing, but here is a simplified explanation:
The Vista series: Proven Winners describes its Supertunia Vista series in the following way. “Supertunia Vista® petunias are very vigorous, with mounding habits that can reach up to 2 feet in the landscape and will trail over the edges of baskets and containers up to 3 feet by the end of the season. They are fantastic landscape plants and are great in large containers, where they function as both fillers and spillers. In garden beds, they will work either in the front or middle of the bed. They have medium-sized flowers. They are the largest Supertunias both in height and width.”
Flowers in this series include: Silverberry (white with a dark fuschia interior), Jazzberry (Fuschia with a darker interior), Fuchsia, Bubblegum, Snowdrift and Paradise.
Mini Vista series: Proven Winners describes its Mini Vista series in the following way. “Supertunia Mini Vista petunias are mounded, but will also spill over the edges of containers. They are great container plants and will function as both spillers and fillers in combination planters. They are incredibly good landscape plants, best used at the front of beds. They are very densely branched plants. They have small to very small flowers, similar in size to a large Superbells Calibrachoa flower. They are a great substitute for Calibrachoa in landscapes without excellent drainage – Calibrachoa require excellent drainage to thrive, while petunias are much more forgiving.
Flowers in this Mini Vista category include: Ultramarine (deep purple), Yellow, Midnight and Scarlet.
Bordeaux series: This appears to be a single flower style with purple outer flower and deeper color in the inside.
Standard Supertunia: Proven Winner’s describes their other Supertunias in the following way. “Standard Supertunia petunias are vigorous with slightly mounded habits that function as both fillers and spillers in containers. They are also excellent landscape plants, best suited to be placed near the front of beds. They have medium to large sized flowers. Compared to Supertunia Vista, these plants are shorter, but over time can almost match the spread of a Vista. They function as fillers and spillers in combination recipes.

These purple supertunias from Proven Winners take centre stage in this window basket.
Supertunia Bubblegum is my favourite
I particularly like the performance of Supertunia supervista Bubblegum. It’s one on the colour indulgences I allow in my garden and by looking at the Proven Winners page on this plant, it’s easy to understand why I lean into Bubblegum. Check out this Proven Winners page of Bubblegum magic.
Now, that’s not to say similar results can’t be achieved by say, Wave petunias or any of the other brands of petunias, but I have to admit that Proven Winners products have never let me down.

Supertunia vista snowdrift is an excellent addition to any basket to lighten it up and intensify the colours of other flowers in the hanging basket.
For smaller hanging baskets, try using a single flower
More often than not, my greatest successes has come by using a single flower or at best combining two supertunias in a single basket.
Imagine a hanging basket dripping with lovely pink bubblegum-colored-flowers in your landscape. I use supervista bubblegum in containers throughout the landscape to add colour in distant areas of the garden.
How many plants should I put in a hanging basket?
One plant is usually enough to eventually fill out our rather small hanging baskets, but two plants helps to get the process started quicker and ensures a more fuller-looking basket.
Creating a simplified hanging basket using a minimal approach can greatly contribute to the visual success of your display.
By focusing on a single supertunia variety, you can achieve a cohesive and visually pleasing arrangement. This approach not only simplifies the design process but also ensures that the plants in your hanging basket have similar watering and sunlight needs.

Supertunia vista Bubblegum is a stunner in any landscape.
Using a single supertunia allows you to highlight the unique characteristics and vibrant colors of the chosen variety. Whether it’s the bold red of the Supertunia® Royal Velvet or the delicate pink of the Supertunia® Vista Bubblegum, a single variety can make a strong visual impact.
This minimalistic approach also prevents overcrowding and allows each plant to thrive and reach its full potential. Moreover, focusing on a single supertunia variety simplifies maintenance. Watering and fertilizing become easier since all the plants in the hanging basket have the same requirements. This ensures that each plant receives the appropriate care, leading to healthier growth and more abundant blooms.
In summary, creating a simplified hanging basket using a minimal approach not only enhances the visual appeal but also simplifies maintenance. By choosing a single supertunia variety, you can achieve a cohesive and visually stunning display while ensuring that all plants receive the care they need.
Single plants Simplifies watering
When you choose a single supertunia variety, you can easily determine the watering needs of the plants.
When plants in a hanging basket have similar needs, it becomes easier to provide them with the right care and maintenance.
This is especially important in hanging baskets, as they tend to dry out more quickly than plants in the ground. By selecting plants with similar water requirements, you can avoid overwatering or underwatering certain plants, leading to healthier growth and more vibrant blooms. Similarly, sunlight needs can vary among different plant varieties. By using a single supertunia, you can ensure that all the plants in the hanging basket receive the appropriate amount of sunlight. This prevents some plants from becoming leggy or weak due to insufficient light, while others may become scorched from too much sun exposure.

Here is an example of using supertunias in containers to add colour to a corner of the garden.
When a single variety just won’t cut it
Proven Winners, a renowned gardening brand, emphasizes the success of using combinations of supertunias in creating cohesive hanging baskets.
By selecting different varieties of supertunias, you can achieve a stunning display of colors, textures, and growth habits.
One advantage of using combinations is the ability to create visual interest. By mixing supertunias with varying flower colors, such as the vibrant "Royal Velvet" and the delicate "White Charm", you can create a captivating contrast that adds depth and dimension to your hanging basket.
Additionally, combining supertunias with different growth habits, like the trailing “Vista Bubblegum” and the mounding “Pretty Much Picasso”, adds visual variety and creates a more dynamic arrangement.
Another benefit of using combinations is the opportunity to cater to different light and water requirements. While all supertunias have similar needs, some varieties may prefer slightly more shade or moisture than others.
By selecting a mix of supertunias that thrive in different conditions, you can ensure that your hanging basket remains healthy and vibrant, even in challenging environments.
Proven Winners also highlights the importance of selecting supertunias with similar growth rates. This ensures that no single variety overpowers the others, resulting in a harmonious and balanced display.
By considering the growth habits and characteristics of each supertunia, you can create a cohesive hanging basket that showcases the beauty of each individual plant while maintaining an overall sense of unity.
In summary, Proven Winners encourages the use of combinations of supertunias in hanging baskets to create visually stunning and cohesive displays. By selecting supertunias with different colors, growth habits, and light and water requirements, you can achieve a vibrant and thriving hanging basket that will be the envy of all.
Proven Winners’ combinations that work well together
Finally, let’s explore some Proven Winners combinations of supertunias that work well together. For a complete list of Proven Winners Supertunias, check out the post on their site entitled 23 Colorful Supertunias for your garden
These combinations have been carefully curated to ensure visual appeal and harmonious growth. One popular combination is the “Supertunia Vista Bubblegum” and “Supertunia Vista Silverberry.” The vibrant pink blooms of the Bubblegum variety contrast beautifully with the soft purple flowers of the Silverberry. This combination creates a stunning display of color and texture in your hanging basket.
Another winning combination is the “Supertunia Bordeaux” and “Supertunia Limoncello.” The deep burgundy flowers of the Bordeaux variety pair perfectly with the bright yellow blooms of the Limoncello. This combination adds a touch of elegance and sophistication to your hanging basket.
For a more subtle and delicate look, consider the “Supertunia White” and “Supertunia Mini Vista Pink Star.” The pure white flowers of the White variety create a serene backdrop for the pink star-shaped blooms of the Mini Vista Pink Star. This combination exudes grace and charm.
If you prefer a bold and eye-catching display, try the “Supertunia Royal Velvet” and “Supertunia Vista Fuchsia.” The rich purple flowers of the Royal Velvet variety complement the vibrant fuchsia blooms of the Vista Fuchsia, creating a striking contrast that demands attention.
By choosing these Proven Winners combinations of supertunias, you can create visually stunning hanging baskets that are sure to impress. Remember to consider the light and water requirements of each variety to ensure their success. With these combinations, you can enjoy a beautiful and thriving display of supertunias in your hanging baskets.
Author Profile: Vic MacBournie is a former journalist and author/owner of Ferns & Feathers. He writes about his woodland wildlife garden that he has created over the past 25 years and shares his photography with readers.

Front and backyard landscaping with rocks, gravel and mulch
Rocks, whether they are massive boulders, smaller rocks, river rock or pea gravel, all have their place in a natural woodland garden. Placing them properly can be tricky. Here are some tips to help gardeners feel confident using them as a landscape feature.
Look to nature to create a natural, rockin’ landscape

This large boulder creates a beautiful backdrop for fall’s stunning colour. It sits in our Japanese-inspired garden along with several other large boulders, pea gravel and large river rock.
There is nothing like a moss-covered rock placed perfectly in a garden to create a natural focal point.
But take that same moss-covered rock and place it improperly in the garden and it quickly creates an unnatural look that suggests the gardener or landscaper was decorating with stone rather than using it to create a natural feeling in the garden.
Decorating with stone is the single biggest mistake gardeners and landscapers make when using boulders, rocks and stone in the landscape. If your goal is to create a natural-looking garden, try not to get caught in the decorating mode.

An example from my garden on how not to place a rock. Notice that it is sitting on top of the mulch (Chipmunks have appeared to even have burrowed under it). In addition, the rock is standing on its end in an attempt to maximize its size. Much better to let it lie on its side while using it to hold back a little soil. (I have some digging to do.)
Always take your cues from nature. In fact, it never hurts to find some rock moss to grow on the rocks to help with the natural look.
There are many reasons to use rock and stone in the garden: for utility purposes such as a retaining wall to hold back soil; to create garden design elements such as a dry river bed or a natural stone pathway; or as a focal point such as large moss-covered boulders rising out of the ground.
“The job of the natural gardener is to place elements in the garden as nature does. The site of every object in the garden should answer the question “why is that there?” We may choose to place a boulder where it might have ended up had it rolled sown a hill to our garden. Or where it may have emerged from a glacial till as the surrounding soil was washed away by 10,000 seasons.””
All of the above projects can be made to look natural to some degree or more decorative if the wrong choices are made such as using a type of stone or rock that is not indigenous to the area. Bright white quartz rarely has a place in a natural landscape.

Using boulders, rocks and pea gravel in a natural landscape creates wonderful opportunities to capture stunning moments in the garden.
A walk through most neighbourhoods reveal the “decorating” mistakes. There are those who place small rocks meticulously around the edge of a border; or those who place river rock in a half circle to replicate a dry river bed; or, the worst sin of all, placing boulders on top of the soil rather than digging them into the landscape. To make matters worse, these boulders sitting atop of the landscape are often placed on sloped ground making it look like our beautiful boulder is about to roll down the hill.
Placing stones to look natural in the landscape
So what’s the secret to placing stones properly?
Jeff Cox, in his book Landscape with Nature provides this solid explanation: “The job of the natural gardener is to place elements in the garden as nature does. The site of every object in the garden should answer the question “why is that there?” We may choose to place a boulder where it might have ended up had it rolled sown a hill to our garden. Or where it may have emerged from a glacial till as the surrounding soil was washed away by 10,000 seasons.”
He asks readers if they can “feel the presence of large boulders somewhere down under the earth? Can you feel them slowly rising toward the surface or rather the surface slowly descending toward them? Look at your site. Where would one of these boulders emerge? Get a feel for it. Then bury the bottom 2/3 of the boulder to make it look like its coming out of rather than going into the ground,” says Cox.
“Take any three objects such as three different rocks and arrange them anyway that seems balanced,” he adds. '“An evenly spaced straight line seems very static and unsubtle. A much more satisfying arrangement is for the two smallest rocks to be relatively close together and the third larger rock at sOme distance, their masses balancing on an unseen focal point somewhere between them.”
“In a natural garden try to use plants as nature might. The goal is not to border our beds with bright colours but to pay homage to natural beauty with artistic interpretations of it,” Cox concludes.

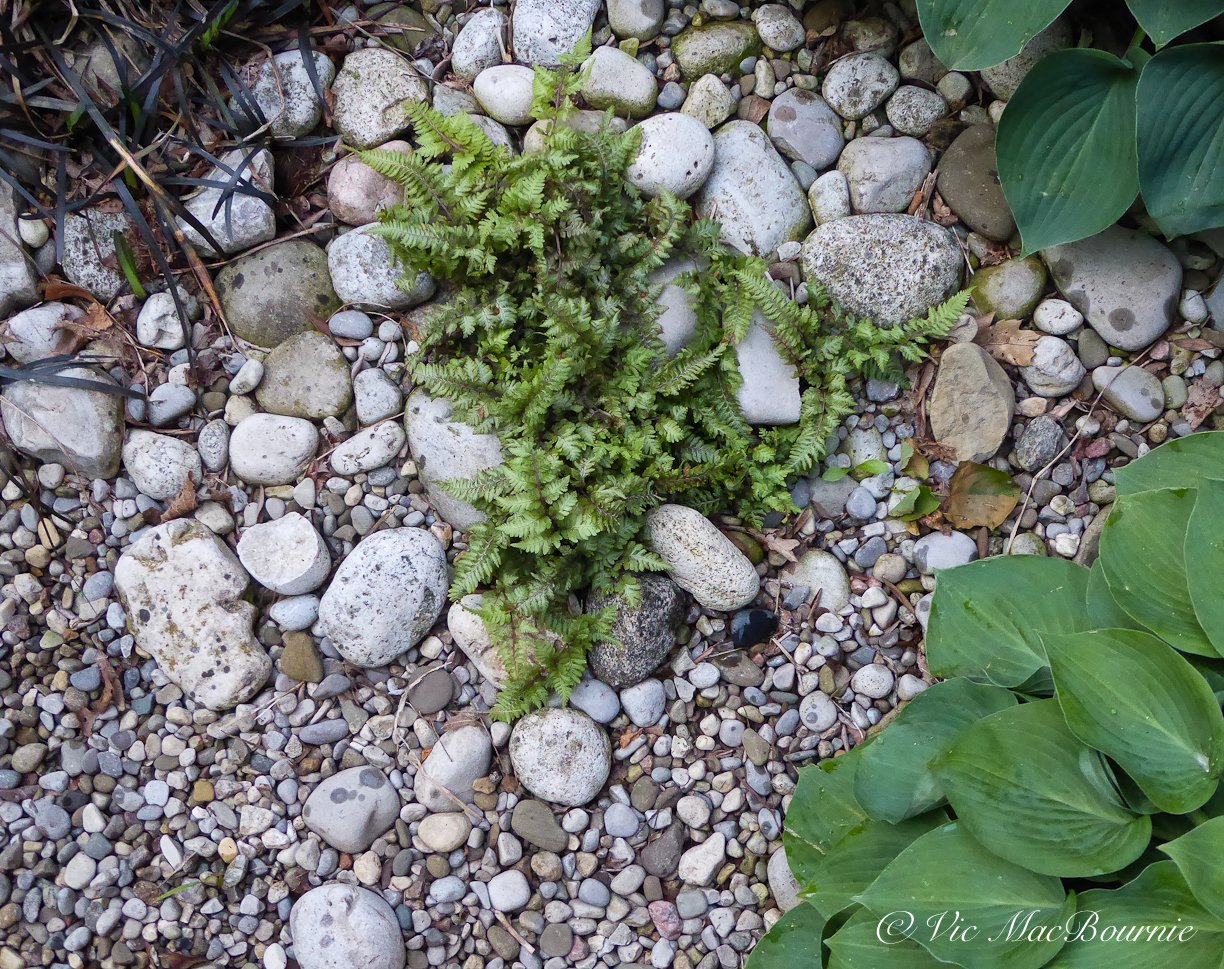
Here is an example of using different-sized river rocks and pea gravel along a dry-stream-look path that looks to nature to give the garden vignette a natural feel. In nature, a black mondo grass seed may have gotten caught up in the rocks and began growing. The natural vignette helps create interest to slow the visitor along the pathway. I used black mondo grass so that the plant blended in to the more or less black and white scene. A brightly coloured flower would have spoiled the lovely monochrome garden vignette.


The simple answer: try to place the stones as they would appear in nature.
Not sure how they would appear in nature?
Learning from nature’s rock placement
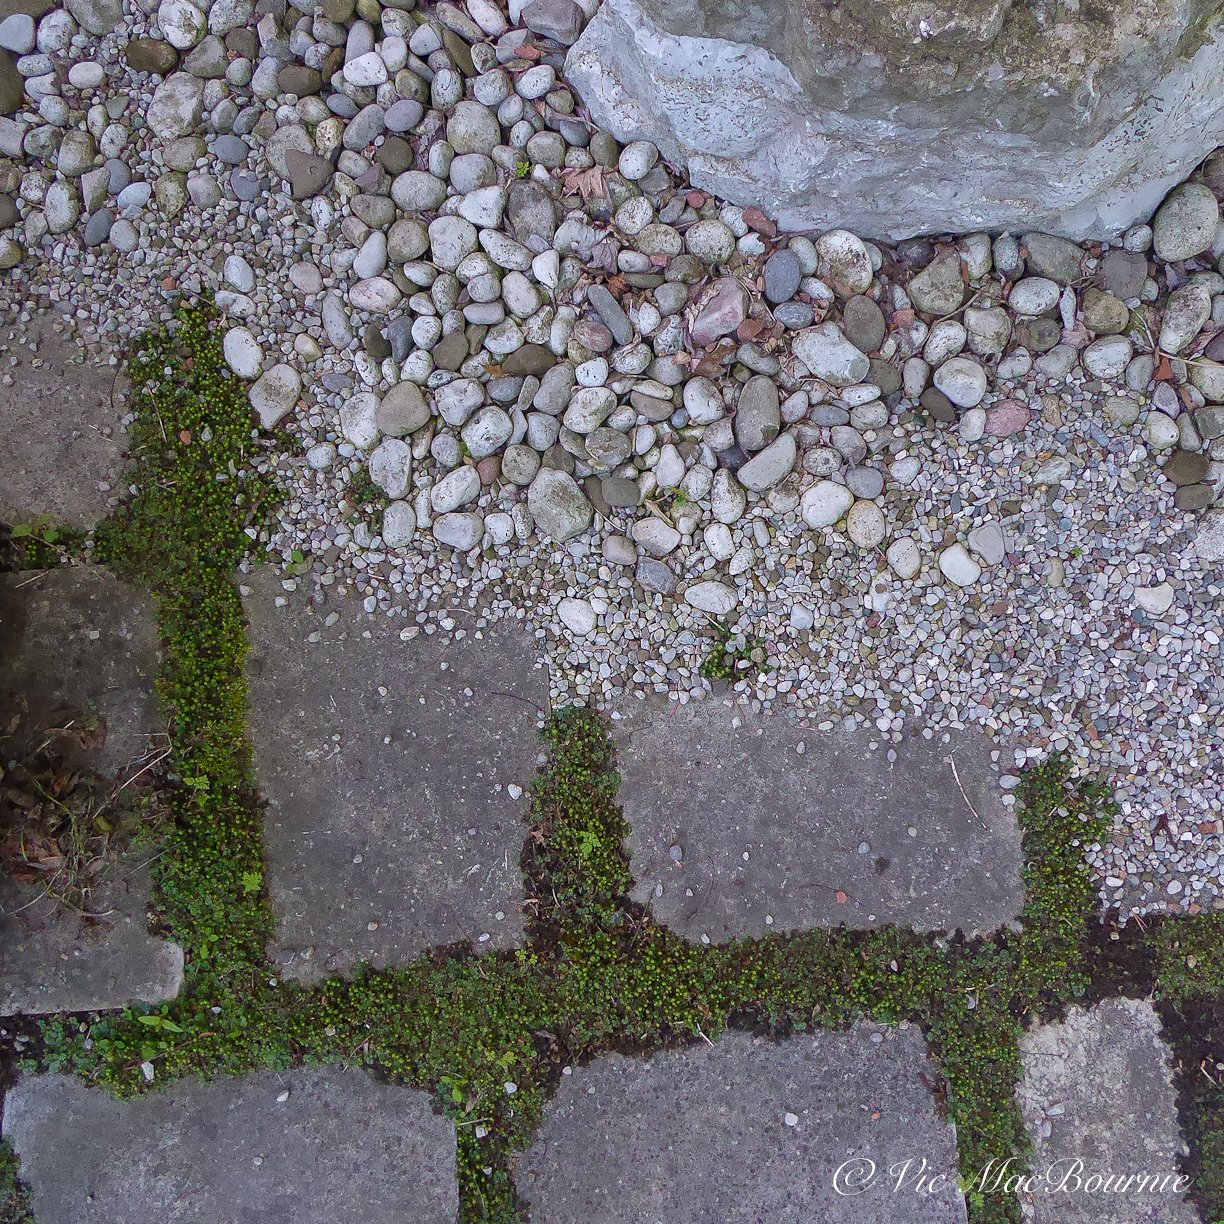
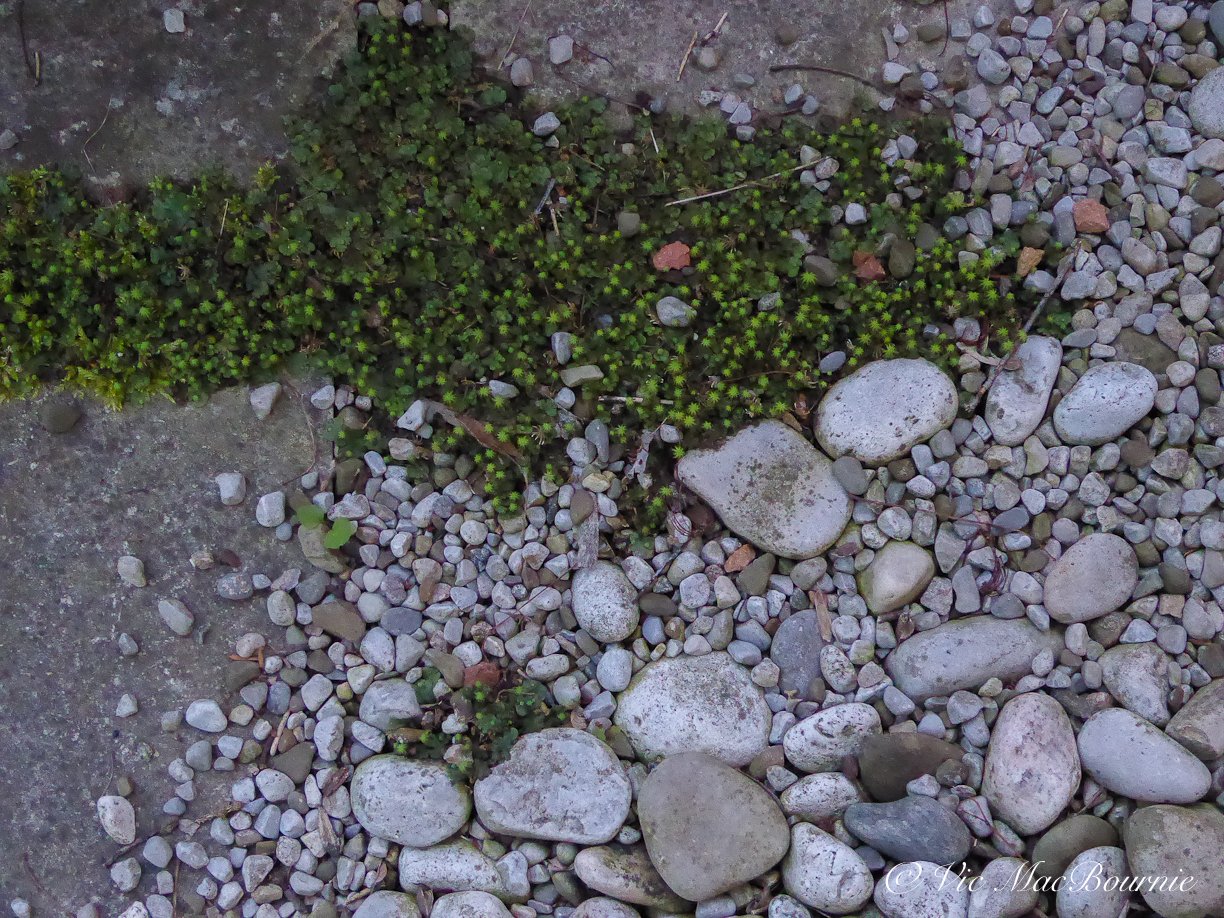
Take an afternoon to visit a natural stream and study how Mother Nature places the rocks and stones with the larger ones anchoring the stream, smaller ones closer to the edge of the stream and pea gravel and or sand filling in the edges suggesting areas where the water has a gentler flow. Notice how, in nature, not all the river rock is the same size. There are boulders, large rocks and smaller rocks. Often there will be several sizes of river rock as well as pea gravel and sand.
(Looking for inspiration, check out my post on using local woodlands as inspiration for your garden.)


To create a realistic dry river bed, you don’t need to include all the sizes, but using only one size of river rock for the entire stream bed, is unlikely to look natural. When you are ordering from the rockery, include at least two sizes of river rock, some larger boulders and pea gravel.
The result will have a more natural look and allow you to transition down from the larger rocks to the smaller ones right down to the pea gravel on the edges of the stream filling in any holes between the larger rocks.

Placing larger boulders in the landscape
When it comes to placing large boulders, plan to do some digging.
In nature, boulders sit in the landscape, not on top of it. Even if a piece of a large boulder has broken off another boulder, it will in time be absorbed into the landscape through a combination of sinking into the soil through regular freezing and thawing, and soil building up around the boulder as leaves and forest detritus gets blown around the base of the boulder.
You may have thought you purchased a large boulder for your garden, but if I said you may have to bury a quarter to a half of the boulder underground for it to look right, it doesn’t take long to realize that boulder you purchased is not going to make as big a statement in the landscape as you might have thought. Most boulders need to be buried deep in the ground to look natural in the landscape. Boulders should look like they are rising out of the landscape.


Depending on the boulder, you may get away with sinking it just a couple of inches into the ground. Just make sure that the boulder looks like it was always part of the landscape.
If you are placing boulders, it’s best to think odd numbers. Not unlike planting flowers in groups of 1-3-5, using the same way of thinking also works for placing rocks.
In our Japanese-inspired garden, I was lucky enough to scoop up a number of massive boulders from a neighbour's backyard project.
The trick was how to use them effectively. By using three of them in one grouping and a single one on the other side of the Japanese-inspired garden, I was able to keep the groupings to odd numbers. The boulder sitting by itself on the one side is teamed with large grasses and a weeping Japanese Maple providing visual balance between the two groups of boulders.
Staying with the Japanese-inspired garden and placement of the large boulders. In true Japanese style, a single boulder may be all that is in the garden surrounded by sand or fine pea gravel that is meticulously raked to give the appearance of waves surrounding the boulder.
In our design, I chose to use the boulders as if they represented mountains. Around the outside of the boulders I placed river rock in two sizes and then used pea gravel to fill in any holes and tie into the pea gravel throughout the garden and around the square-cut flagstone that take visitors through the garden into the backyard.


Using rocks along a pathway between houses
Our Japanese-inspired garden runs across the front of our home with a pathway leading through it to another pathway that leads into the backyard. By continuing the use of stone from the Japanese garden along the pathway leading to the back yard, the two spaces work together to create a natural flow.
Green Giant cedars separate our property from our neighbours creating privacy and a beautiful green backdrop that opens up at the end of the pathway into a view of our neighbour’s lovely yard and our woodland garden. (The three pictures above show how we installed the river rocks between the path and the Giant Green cedars using a combination of three sizes of river rocks and finishing with pea gravel. The pictures also show how much the cedars have grown in just four years.
On both sides of this pathway we have used stone as a mulch to tie in the back and front gardens. The same dry-river pathway is picked up across the back of the home helping to tie the entire garden from front to back.
Along the side pathway, several layers of black landscaping cloth were laid down to keep weeds at bay. This was followed up by using large river rocks (hand picked at the rockery) to form small rockfalls along the pathway just to add interest rather than having all the same size river rocks. Once the larger rocks were in place, we began adding wheelbarrows full of river rock followed by shovel fulls of pea gravel to fill in any holes between rocks and add more texture to the vignette. Closer to the trees’ roots, we laid down a thick layer of natural shredded cedar bark.
The result is a completely maintenance free landscape that looks natural and makes walking down the path a lovely experience.
Author Profile: Vic MacBournie is a former journalist and author/owner of Ferns & Feathers. He writes about his woodland wildlife garden that he has created over the past 25 years and shares his photography with readers.
Dogwoods: Find the perfect dogwood(s) for your woodland
Dogwoods are an integral part of any woodland garden. From the tiny ground cover known as Cornus canadensis or bunchberry, to the ever popular Flowering Dogwood tree.
Native dogwood trees and shrubs are perfect for yards big and small
When it comes to creating a woodland garden, I think it’s safe to say that no single genus is as important than the group of plants known as Cornus or, more commonly, the dogwoods.
In our backyard, dogwoods definitely dominate the woody plantings and, after pouring over the 2004 book Dogwoods, The Genus Cornus, (Amazon link) I am convinced that I need more … a lot more.

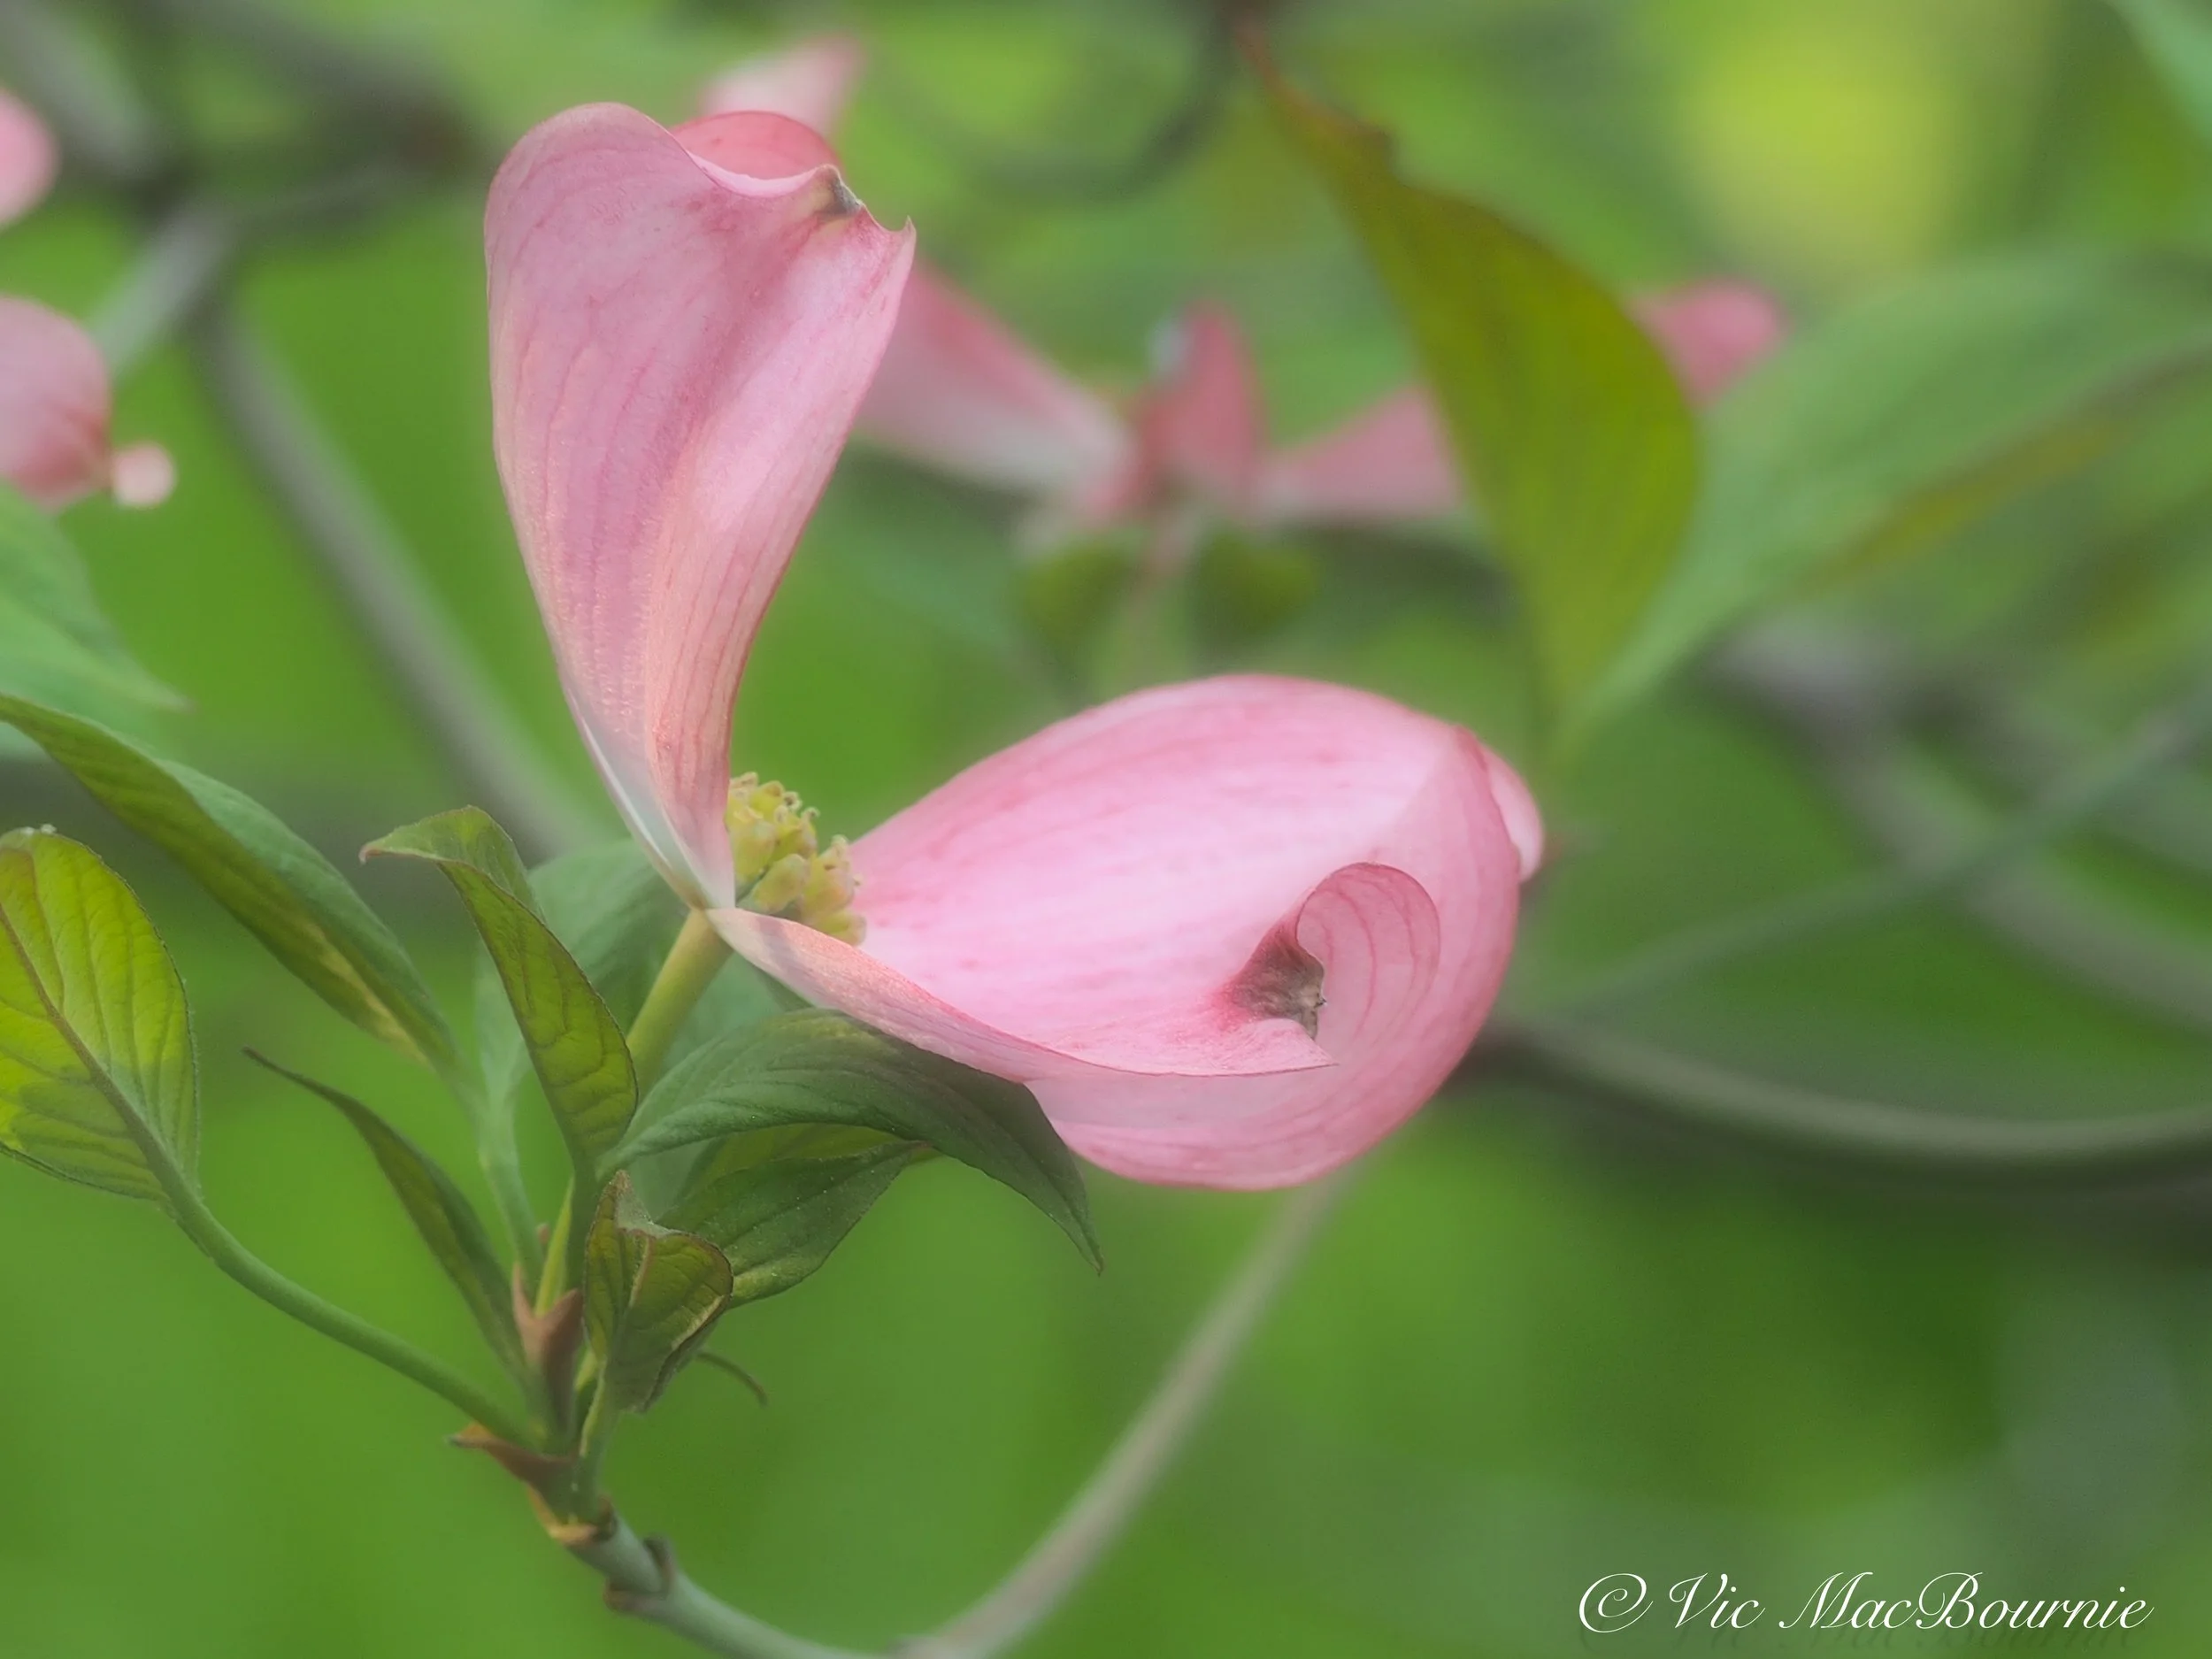
A lovely dogwood in full bloom in our backyard in early summer.
Authors Paul Cappiello and Don Shadow dive so deep into the genus dogwoods that any homeowner/gardener who takes the time to read this entertaining and incredibly informative book and doesn’t fall in love with dogwoods, is either ignoring the inherent qualities of this wide ranging species of primarily woody plants, or has yet to discover the importance, beauty and usefulness of under story trees and shrubs in the landscape.
Small trees like the Flowering Dogwood can take center stage in any garden, while the lower growing shrubby dogwoods such Cornus alba are happy to sit back and take a supporting role for most of the spring and summer. Together dogwoods form the backbone of the under story layer going from a ground cover (cornus canadensis) or bunchberry, to magnificent mature Flowering dogwoods (cornus florida) with stunning spring flowers, delicious summer berries for wildlife, finishing the season in a spectacular fall colour display.
More of my posts on Dogwoods
For more information on Dogwoods, please check out my other posts listed here:
Flowering Dogwood: Queen of the Woodland garden
Cornus Kousa: Impressive non-native for the woodland garden
Bunchberry: The ideal native ground cover

The same Cornus florida as above in early fall colour in our back garden.
How can you not love dogwoods?
Most prominent in the northeastern United States into the Carolinas and stretching as far north as the Carolinian zones in southeastern Ontario, Canada, this group of both native and non-native plants offer such a variety to choose from that it’s not surprising most become overwhelmed.
To complicate things further, dogwoods also play a significant role in the landscapes of the Pacific northwest with their stunning Cornus nuttallii and its countless cultivars
I think it’s fair to say that there are few places in the U.S. or Canada where you can’t find a dogwood for your garden.

The hardcover book Dogwood: The Genus Cornus is an exceptional resource for information on this massive plant species
All of these dogwoods are explored in great detail in the 2005 book Dogwoods, The Genus Cornus by authors Paul Cappiello and Don Shadow published by none other than Timber Press.
If you are looking for a great deal on a used copy of Dogwoods, be sure to check out these incredible prices at Alibris, an umbrella group of independent book sellers, starting as low as $2-$7 for this lovely hardcover book. This link will take you the page on their website featuring the book Dogwoods.
Is it out of date? Obviously, yes. But, if you love dogwoods half as much as I do, I don’t think you will find a more comprehensive book on the subject. The more than 220 pages explore every dogwood imaginable and provides detailed information on each group.
Author Paul Cappiello describes himself first and foremost as a gardener and yet, his formal training is in both environmental planning and design, and horticulture. His expertise and passion for dogwoods comes out in the incredible detailed way he explores each sub-category of the Cornus species.
He writes: “Finally, my approach in this book has been from the standpoint of and for the benefit of the gardener. I make no attrmpt to rewrite the taxonomic treatment of the genus Cornus. I have no desire to rewrite the natural history of the genus. Any such indication in the following pages is simply due to my inability as a writer. I hope simply to provide some information, possibly a little inspiration and a bit of enjoyment.”
That he does.

The bright red fall colour of this dogwood is a showstopper in our woodland garden.
In the introduction he explains how “almost immediately after the first ships returned to England from the New World, seedlings of the Cornus florida began showing up in British nursery catalogs.
He explains how dogwoods have “been with us since the time of the dinosaurs and have moved over most of the Northern Hemisphere and occasionally south of the equator as well. In the present day plant world, Cornus species are known from Venezuela (C peruviana) to subarctic North America (C. canadensis, C suecica), across Europe (C. sanguinea), and through much of Asia (C kousa, C macrophylla).”
The authors explore everything from Dogwood characteristics, growth habits as well as the fruit and bark that can be found in various species. In addition, no book on Dogwoods would be complete without an in depth exploration of insect and disease problems dogwoods face – especially canker, dogwood and spot Anthracnose, powdery mildew and dogwood borer.

The Pagoda dogwood (Cornus alternifolia) in early fall colour with some of its blue berries still hanging on.
The meat of the book, however, dives deep into the variety of dogwood species and their many cultivars. I am sure that, since the printing of this book, many new and improved cultivars have been introduced, but I doubt there have been any ground-breaking introductions not already tackled in this comprehenive book.
Beginning with the smallest of dogwoods, Cornus canadensis (also known as Bunchberry, Bear Berry, Bear Grape and Kinnikinick) the authors provide valuable information from growing zones to best growing conditions, propagation sub species and cultivars.
More than 130 Cornus florida cultivars.
Did you know that in the Cornus florida group of trees, there are more than 130 cultivars ranging from Cornus florida ‘Autumn Gold’ selected for it bright yellow and orange stems, to ‘Cherokee Chief’ with its deep red bracts through a multitude of varieties including variegated varieties such as ‘Daybreak’ with its white and green leaves, and ‘first lady’ with a green and gold variegated leaf.
Each of the more than 130 cultivars is described in the book spanning more than 37 pages with high quality images for many of the cultivars.
If you are looking for the perfect dogwood, this type of detail is indespensible.
I would be remiss, however, not to point out that the native species of plant or tree is always the best choice if you are hoping to attract and provide habitat and food for backyard wildlife.
Not to be outdone, The Cornus Kousa chapter details a total of 137 cultivars.
Even Cornus nuttallii (Pacific Dogwood) lists ten cultivars.

Cornus Kousa branch in full flower with a variegated Cornus Mas in the rear
Section on Cornus florida group hybrids is eye opening
I was surprised to find out the incredible work being done on hybrids combining the best of Cornus florida with C. nuttallii and C. Kousa.
The cross between C. florida and C. kousa known as Cornus xrutgersensis is represented by a group of hybrids developed by Elwin Orton of Rutgers University m New Brunswick, New Jersey dating back to 1961.
According to the author: “After more than 20 years of work, Orton and Rutgers released a group of six patented cultivars under the trademarked names Aurora, Constellation, Celestial, Ruth Ellen, Stellar Pink and Stardust.” …
“These hybrids are low branched, mostly with strongly ascending tendencies and an upright overall shape. Flowering time begins with Ruth Ellen just as the last of the Cornus florida fade, with Constellation being about the latest to flower.”
These hybrids have proven resistant to powdery mildew and free from dogwood anthracnose. With proper watering they also show good resistance to borers.
Dogwood book covers a wealth of information
Of course Dogwoods goes well beyond covering the popular dogwood species like C. florida. Extensive chapters are dedicated to the less popular but equally important shrubby forms as well as an extensive chapter on our native Cornus alternifolia (Pagoda dogwood). Separate chapters on the Cornus Alba group and the Cornus Mass Group of shrubs and small trees rounds out this book.

Blue Jay in Flowering dogwood tree.
Dogwoods: In conclusion
Whether you are a little obsessed about dogwoods like I am, or are just looking for a few to add spring interest, colour, berries and fall interest to your yard, the book Dogwoods: The Genus Cornus can be a great addition to your gardening library. While the author shares anecdotes and does his best to make the story as interesting as possible, the book should be seen primarily as resource material providing detailed descriptions of a family of plants. To put it in other words, this is best used as a source of information rather than great bed-side read.
But it’s indespensible if Dogwoods are your thing.
Just be careful. I can almost guarantee the book will be sending you to your nearest garden centres to explore and compare their selections of Cornus species that absolutely need a spot in your garden.
Author Profile: Vic MacBournie is a former journalist and author/owner of Ferns & Feathers. He writes about his woodland wildlife garden that he has created over the past 25 years and shares his photography with readers.
Five of the best backyard birding books
Winter is approaching an time for woodland gardeners to change focus from their gardens to backyard birds and wildlife. Here are five outstanding books that will help birders get the most out of their backyard feeders by attracting the greatest number and variety of birds to their backyard.
Tips to attract more birds to your backyard
Winters can be hard on us, but have you ever wondered what our feathered friends go through when the temperatures drop and snow covers the ground and their normal sources of food?
For birds and other wildlife, winter is a difficult time and finding a reliable source of food often becomes a matter of life and death.
As more and more native plants disappear, bird feeders become more and more important to backyard birds.
In our garden, many of the traditional backyard birds are already busy stockpiling sunflower seeds in every nook and cranny they can find, whether its tree bark or tucked between crevices in garden benches and other secret backyard hideouts known only to them.
How successful we are in attracting birds and wildlife depends on many factors. Thankfully, many of these factors are within our control.
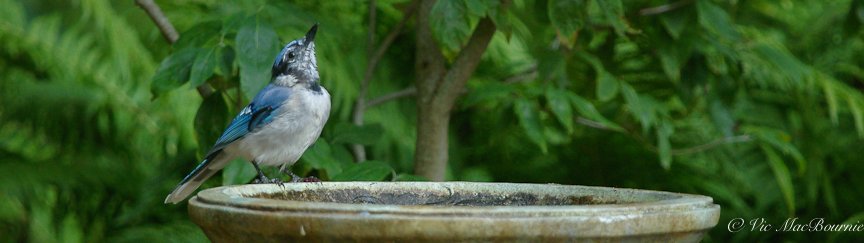
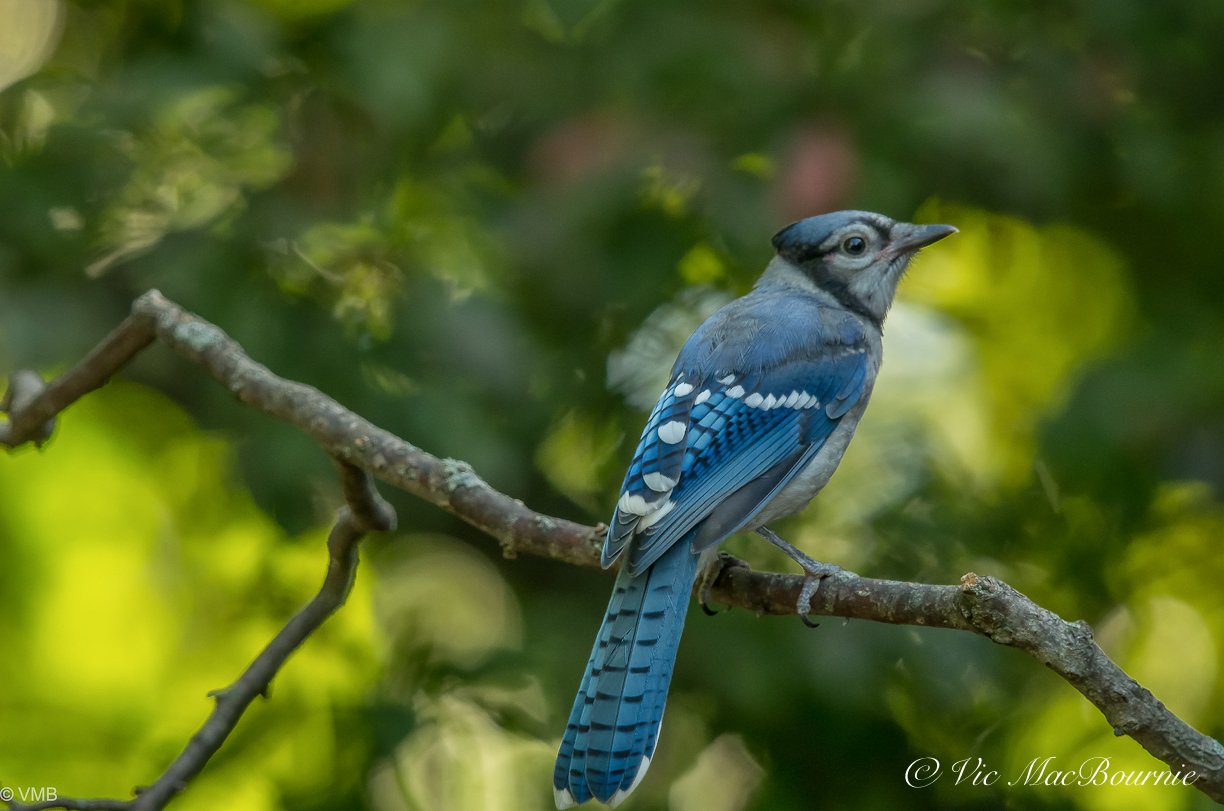
Blue Jay getting a little drink at the bird bath.
Providing habitat for our feathered friends, for example, is an ongoing project created over time. There are steps, however, we can take immediately to provide a safe haven for our woodland wildlife. A brush pile (click here for earlier post) is one such addition that will help bring in a greater variety of birds including owls and other predators (click for earlier post on attracting owls) that will begin to see it as a source of food in the form of mice and other small critters that call it home.
If you are looking to purchase one of these books, or any Gardening or birding book for that matter, be sure to check out the incredible selection and prices at alibris books.

A naturalized garden is an excellent way to entice birds through natural food sources. Here, a goldfinch feeds on sunflower seeds.
Native plants that include berries and fruit will attract fruit-eating birds and mammals that may not be attracted to our bird feeders. Please take a moment to read my complete story on using native plants in our garden
Winter is also the ideal time to learn more about helping out the wildlife that either call our gardens home or visit it on their neighbourhood rounds. The following are five of the best books available for backyard bird watchers and those who want to attract more of them to our yards. They are conveniently linked to Amazon, but many can be found or ordered through your local bookseller.
Alibris is an umbrella group of independent booksellers from the U.S. and the U.K. that provide exceptional deals on used books and music. Be sure to Also check Alibris for great prices on new and used books.
1) All About Backyard Birds: Eastern and Central regions.
Available in paperback new and used.
Most birders are familiar with the Cornell Lab of Ornithology’s excellent birding website and handy app on their smartphone. In fact, I doubt there are many serious birders who are not using the handy birding app to help us identify unusual birds in our garden either by sight and unusual markings, or through their many songs and calls. This book is based on that website, which has had more that 14 million unique users to date.
It’s perfect for a new birder, young and old.
The highly regarded book, published in 2017, has an impressive has a very positive rating with 60 on-line ratings.
The publisher notes that the book: “delivers best-in-class content and proven user-friendly formats. Each regional version – eastern/central North America and western North America – provides 120 of the most popular species and is filled with beautiful illustrations by Pedro Fernandes. With charts, maps, and other bird identification tools, All About Backyard Birds offers beginner birders the ideal way to start birding.”
The book also includes a tutorial for the MERLIN app (available for free on line) already being used by more than 1 million birders.
A portion of the net proceeds for the sale of the book goes directly to the Cornell Lab to support projects, including children’s educational and community programs.
2) National Geographic Backyard Guide to the Birds of North America, 2nd Edition.
Available in paperback both new and used for very reasonable prices.
This is another top notch general source for backyard birders, and it’s hard to go wrong with any product from National Geographic. For travellers, at least in North America, this guide offers an excellent source of information.
The publisher writes: “This comprehensive and beloved guide reveals the most ubiquitous and remarkable species of North American birds, clearly organized by family and paired with identification tips, behaviour, vocal descriptions, and more. The new edition features a "Backyard Basics" section from the world's most prolific birdwatcher, Noah Strycker, with tips on attracting and feeding your favourite birds and creating bird-friendly landscapes. Also included are updated descriptions of 150 common North American species, paired with comprehensive range maps, as well as lush indentification artwork and bite-sized facts. With new contributions from Strycker and a modern redesign, the second edition of this perennial favourite will appeal to new and experienced bird enthusiasts alike.
3) The Backyard Bird Feeder’s Bible: The A-to-Z Guide To Feeders, Seed Mixes, Projects And Treats.
Available in both hardcover and paperback both new and used formats.
Rodale has always been a strong publisher when it comes to gardening books. I have a number of them that I go back to on a regular basis. In fact, Landscaping with Nature, Using Nature’s Designs to Plan Your Yard by Jeff Fox published by Rodale Press, was my go-to book for planning and designing much of my woodland gardening book going back at least ten years ago. The book explains the fine details of creating a natural garden right down to using classical music to place large boulders in your garden. It’s proven to be a very valuable resource.
The author of the Backyard Bird Feeder’s Bible, Sally Roth, will help guide backyard birders to focus on which foods attract which birds, hints on choosing and maintaining feeders and the best native fruit-bearing trees, flowers and shrubs to plant to attract birds.
The publisher writes: Pull up a chair next to the window looking out on your bird feeder and join author Sally Roth in an informative, inspirational, and often light-hearted look at the foods, feeders, and plants that invite birds to visit your feeding station.”
The author shares a lifetime’s worth of bird-feeding experience including how to identify birds at your feeder, and what foods are best for certain birds. She also includes tips on improving the attraction of your garden to birds.
4) National Wildlife Federation: Attracting Birds, Butterflies, and Other Backyard Wildlife, Expanded Second Edition.
Another outstanding book by the highly regarded National Wildlife Federation. It’s available in both Kindle and paperback forms, new and used for a very reasonable price.
If you are not familiar with the National Wildlife Federation, it is the largest U.S. nonprofit conservation organization, with 6 million members and 51 state affiliated organizations.
This book takes backyard birding to another level by urging readers to – not unlike this blog – create a backyard that is more nature-friendly by providing habitats for local wildlife, not just birds. The book includes 17 step-by-step projects that brings the entire family back to nature with easy projects. The book explores wildlife-friendly practices and how to attract backyard pollinators.
The reward from following the many ideas in the book is not only a more wildlife-friendly yard, is a blueprint for getting your garden certified by the National Wildlife Federation’s Garden for Wildlife program by following the certification application checklist that is included in the book. A worthwhile investment in its own right and one that our garden qualified for a number of years ago.
The publisher writes: Your backyard can come alive by creating an environment with plants and spaces that attract nature’s most interesting and friendly creatures! Colourful butterflies, uplifting songbirds, and lively toads can enhance your personal garden space, giving pleasure to nature lovers of all ages.”
“Author David Mizejewski, a naturalist with the National Wildlife Federation, presents simple plans for reintroducing native plants that birds, butterflies, and a whole host of critters can't resist.
5) The Humane Gardener: Nurturing a Backyard Habitat for Wildlife (How to Create a Sustainable and Ethical Garden the Promotes Native Wildlfie , Plants, and Biodiversity.
Nancy Lawson’s the Humane Gardener is a must for any gardener who cares about attracting wildlife to their backyard, whether its birds, mammals or creepy crawlies. Her new book Wildscape is another book serious natural gardeners will want to add to this list.
Click on the link for my complete review of her book The Humane Gardener. Click on this link for my review of her book Wildscape.
Available in Kindle format and hardcover both new and used at a very reasonable price.
The book follows much the same philosophy as this woodland garden blog: one that focuses on a “practical guide for the gardener who hopes to create a backyard in harmony with nature.”
The author, Nancy Lawson, examines why and how to welcome wildlife to your backyard through profiles of home gardeners as well as interviews with scientists and horticulturalists.
The book includes information on planting for wildlife by choosing native plants, providing proper habitats for animals as well as birds, bees and butterflies and encouraging natural processes and evolution in your garden.
Finally she explores the “humane gardener,” who she describes as someone who attracts wildlife and peacefully resolve conflicts with all the creatures that may inhabit your garden. The humane gardener, she concludes, “is someone who sees the garden as a meeting place for all creature, not a territory to be defended.”
Isn’t that the way we all want to garden?
Author Profile: Vic MacBournie is a former journalist and author/owner of Ferns & Feathers. He writes about his woodland wildlife garden that he has created over the past 25 years and shares his photography with readers.

Three Top Woodland garden books
Three of the best woodland gardening books to help you create the garden of your dreams. The Wild Garden, The Living Landscape and the Ken Druse’s exceptional book The New Shade Garden are all books that will open a new world for gardeners looking for solutions and landscape ideas.
Plus a few more too important to leave off the list
Winter is a time to sit back with your favourite gardening book and begin planning for the gardening season ahead. That sense of anticipation is a feeling that is hard to deny and leads me to turn another page of my favourite gardening book looking for new ideas and possible garden vignettes I can implement this spring and summer.
YouTube gardening channels and other blogs just can’t replace the joy of a good, well-worn and tattered garden book, maybe a coffee and a comfortable chair.
This lovely little book provides everything you ever wanted to know about Dogwoods with complete descriptions of just about every dogwood and cultivars available.
I am currently leafing through Dogwoods, (link to book from Alibris with incredible prices on used books) an incredibly informative and entertaining book I picked up from Alibris books (an umbrella group of independent book sellers based in the United States and the U.K. that offers used books at extremely reduced prices.) If the book has taught me anything, it’s that I need more Dogwoods in my life.
Many of the books below are available through a number of book retailers, but I urge you to check out Alibris for outstanding deals on perfectly good used books at ridiculously reduced prices.
Here are three gardening books (plus links to several more) that can turn winter evenings into productive gardening days.
So let’s get started.

The Wild Garden, Expanded Edition is an excellent resource for any gardener looking to go a little wild in their garden.
The Wild Garden: A Woodland bible
The Wild Garden (amazon link) might well be considered the bible of Woodland gardening.
(Link to Wild Garden from Alibris Books, Movies and Music)
With its roots going back to its first publishing in 1870, the new edition includes an introductory essay by award-winning photographer and landscape consultant Rick Darke (The Woodland Garden) who underscores the importance of not only the author’s original ground-breaking, and hugely influential approach to gardening at that time, but its importance to today’s environmental-conscious gardeners and more naturalistic, ecological landscape designs.
It’s a message more gardeners need to embrace as our planet comes under new, and constant threats to its very survival.
A kindle version is also available for this book.
The Living Landscape explores how to take modern family needs and apply them to a natural landscape that feeds the soul of Woodland gardeners and those looking to bring nature back to their gardens.
From the Chicago Tribune: “If there was but one book on our garden library shelf, William Robinson’s The Wild Garden would be the single tome, at once revolutionary and oozing charm. . . . With photographer and writer Rick Darke’s added chapters and insight, we understand more than ever the wisdom and urgency of Robinson’s garden gospel.”
The 356-page book includes more than 100 outstanding photographs taken by Darke that include images of modern “wild” gardens to give readers an understanding of how today’s gardeners and landscapers are interpreting the naturalistic garden. The Wild Garden includes the complete original text and illustrations from the fifth edition of 1895.
The hardcover book, published by Timber Press, is also available in a more economical Kindle edition.
The Living Landscape: A guide to backyard design
The Living Landscape: Designing for Beauty and Biodiversity in the Home Garden is another offering by Rick Darke and Timber Press.
This is a book that I keep going back to for new ideas and approaches to creating a garden that is both inspiring and family friendly as well as sympathetic to the natural environment.
It’s for gardeners who want it all but need a little help bringing their wildest dreams to fruition. In this almost 400-page guide to backyard design, Darke teams up with author Douglas W. Tallamy (Bringing Nature Home and Nature’s Best: A New Approach to Conservation that Starts in Your Yard) to create a blueprint for today’s ecological gardener looking to achieve a home landscape that satisfies their soul, their kids’ need to have a play area, some privacy and maybe even a little veggie on the side.
The Living Landscape is also available at Alibris Books, including used versions at excellent prices.
A tall order for sure, but one that is becoming increasingly in demand in backyards big and small all over the world.
The Living Landscape will guide homeowners in the creation of an outdoor space that provides both human needs while still feeding their desires to create a beautiful, wildlife-friendly space that connects them to their favourite natural areas. Along the way the authors provide ideas, richly illustrated with photographs, on incorporating outdoor rooms and entertaining areas.
The authors use favourite wild areas to guide home gardeners in methods they can use to apply these observations of natural areas to their own gardens to create and maintain a diverse, layered landscape that is so important in today’s Woodland gardens.
For my take on using natural areas as inspiration for your own backyard, check out my post here.
Available in both hardback and Kindle version.
The Natural Garden is Ken Druse's earlier book that helped to change how people garden.
The New Shade Garden: Druse sheds light on the beauty of shade
The New Shade Garden: Creating a Lush Oasis in the Age of Climate Change is another important, comprehensive garden book from award-winning garden author Ken Druse ( The Natural Habitat Garden, Natural Garden, The Natural Shade Garden).
For new gardeners looking to create their own ecologically-sensitive oasis, or an experienced gardener looking for help dealing with their ever increasing shade garden and wanting to become more environmentally aware, this book or any other books by author Ken Druse listed above will set you on the right path.
If you are interested in more on the New Shade Garden, check out my complete review here.
Be sure to check out Alibris Books, Music and Movies for used versions of these books.
The 256-page, richly illustrated, informative tome on shade gardening and its importance in a changing world, could not be more appropriate for Woodland gardeners and Woodlanders in training looking for guiding principles.
Druse explains the importance of creating shade gardens in the context of climate change and how to work with nature, including making the most of the constraints that may arise.
The New Shade Garden provides gardeners with a manual to begin down the Woodland path or methods to turn a less environmental, water-starved traditional backyard, into one that works with nature, climate change and ever-evolving garden aesthetics.
Published by Harry N. Abrams and available as both a hardcover and Kindle edition.

Nancy Lawson with her book The Humane Gardener.
The Humane Gardener and Wildscape books: Ideal for gardeners who care

Wildscapes is author Nancy Lawson’s latest book exploring the natural world that exists in our gardens.
If gardening with nature, woodland creatures, birds and the natural environment are among the reasons you garden, you simply have to put The Humane Gardener and Wildscape on your list of must-haves.
And, if you have friends who think the same, these make the perfect gift to inspire them to even greater things in their gardens.
I have written extensively about author Nancy Lawson’s critically acclaimed books.
Lawson doesn’t pull any punches about the importance of respecting the creepy crawlies, animals and other visitors we share our gardens with on a daily basis. Her approach to wildlife gardening is, however, both informative and easy to incorporate in our daily lives.
If you are interested in exploring Nancy’s books further, please check out my full reviews listed below.
Nancy Lawson, The Humane Gardener. (link to my full review.)
The Humane Gardener (Amazon link)
Wildscape book review with links to reviews of each chapter of the book.
Wildscape (Amazon link)
Author Profile: Vic MacBournie is a former journalist and author/owner of Ferns & Feathers. He writes about his woodland wildlife garden that he has created over the past 25 years and shares his photography with readers.

Why Blue Jays and Cardinals go bald
Both Blue Jays and Cardinals are often seen with bald heads in late spring or early summer when the birds are molting their feathers.
The annual molt is nothing to worry about
It’s easy to mistake a bald or partially bald Blue Jay or Cardinal with either illness or a bad case of mites or bacterial infection. The diagnosis is even more understandable considering the number of avian diseases that have reared their ugly heads most recently – avian flu and West Nile just to name a few.
And, although illnesses can be spread easily at bird feeders, a bald Blue Jay or Cardinal feeding happily at your backyard feeder is no reason for concern.

This image shows the Blue Jay losing its head feathers. The bird is not completely bald but you can see the difference with the image below when the bird has a full head of feathers.

Both Blue Jays and Cardinals are known to go bald when they are molting in the summer, right about the time we spend more time outdoors and notice them in the backyard and at our feeders.
Molting is a natural and important part of a bird’s life cycle. Without it, damaged and worn feathers would lose many of their characteristics leaving the birds more susceptible to the cold and even making it more difficult for them to fly effectively.
Not unlike humans who regularly shed, for example, our hair and fingernails, birds shed their feathers at opportune times to keep them not only looking their best, but more importantly, provide them with fresh new healthy feathers that are not worn or damaged.
How often do birds replace or molt their feathers?
While all birds replace or molt their feathers, on an annual basis, the process often goes unnoticed because they don’t necessarily lose them all at once the way Blue Jays and Cardinals tend to do.
Most typical backyard birds molt their feathers slowly over time. This explains why you will often see a few feathers on or around your feeders.

Male cardinal after losing most of the feathers on his head.

Another image showing balding male cardinal.
How long does it take for replacement feathers to grow in again?
Some Blue Jays and Cardinals, however, like to get the process over quickly and will often molt all or most of their head feathers at once, leaving them bald and more susceptible to the elements until those feathers are replaced. But fear not, replacement feathers are often in place within a week or two after the molt.
It is important to note that during these times of molting, our backyard birds can be more susceptible to dangers. Flying properly during the molt may be more difficult making them more susceptible to backyard predeators. In addition, missing feathers reduces the bird’s insulation against cold. Molting during the warmer months reduces any danger of threats from extreme weather conditions, but having good habitat such as evergreens nearby can help the birds find safety both from predators and weather extremes.
In conclusion
So, the next time you are staring at what seems like some odd, prehistoric or deathly looking Blue Jay or Cardinal in your yard, you can relax knowing that they are simply shedding their tires and worn feathers and replacing them in short order with a new set that will not only look great but provide them with better insulation during the upcoming cold winters.

Get a jump on Holiday shopping with these Black Friday deals
Great gift ideas for gardeners, birders and photographers
One of my favourite YouTubers when it comes to gardening is Oklahoma City’s Linda Vater. If you have not checked out her YouTube channel be sure to give it a watch.
She has just moved into “The Cottage on The Hill” earlier this year and in one year transformed both her front and back gardens, removing the grass and converting the front into a pollinator-style garden. Her smallish backyard has become primarily an outdoor entertaining area but there are lots of great gardening ideas in the back as well, expecially for those of us who like to garden in containers.
Linda has just released her Five-Year Garden Journal, which I know will be a garden keepsake for any any gardener who either purchases it for themselves or for a friend. It’s available on Amazon (see link below) or simply click here on the Five-Year Garden Journal to check out this lovely Journal that only gets better with each tattered page. Linda also has a book of her own out The Elegant and Edible Garden that readers might want to explore further.
Finding tasteful ways to deal with your garden hose is not always easy. In the front garden, I use a black box meant to hold the hose and hide it away when it’s not in use. The hose box matches our window boxes and pretty much melts away into the landscape. Here is a link to the hose box, and window boxes amde by Mayne. I love their simplicity and how they offer a number of containers to suit any home decor.
Looking for a pair of boots for the fall and winter. There are some great sales on at Muck Boots for the weekend. Boots for women, men and kids are available in a variety of styles and for a variety of purposes. Check them out on the link below or just click on this link to take you to the U.S. site.
In the back I’m using a rusty hangar that I like but nowhere near as much as I like this hose hangar. Not only is it a solid piece, but its double ground stakes will help it stand straight in the garden. Even better, it’s on sale for Black Friday.(see the link below).
While we are on garden hoses, Linda Vater fans probably know how much she likes these new steel hoses that are all the rage these days. Tough as nails with promises to never kink tangle or puncture these stainless steel garden hoses are really making a name for themselves. If you are thinking about trying one of these out, now might be a great time. The 50 foot hose with a nozzle is also on a Black Friday sale. And they deliver to Canada for our Cdn. readers.
If you read my last post, you’ll know that I’ve spent the last two weeks recovering from a hip replacement. Great fun. If it taught me anything, it taught me to take it easy when it comes to gardening and to ensure you have the right tools to make the job easy. First on my list is this handy little garden helper. (see link below). This heavy duty gardening bench and kneeler is discounted almost 40 per cent and is another great Black Friday Sale you’ll want to grab as soon as possible. It’s a great gift for our own knees, or the knees of mom, dad, grandma or grandpa.
There are so many great garden items on special during the Black Friday deals that I could not begin to name them all. Plus it’s kind of fun to explore on your own. Click here to see hundreds of garden deals you might want to check out to get a head start on your Holiday shopping.
And if it is bird lovers that are on your holiday shopping list, here are some great deals for them as well.
And finally, for the budding backyard photographers there are lots of great Black Friday sales to cash in on this weekend. I for one love my camera lens coffee mug for my first cup in the morning. These are fun gifts for your photographer friends.
One of the great things about the advancement of solar energy and solar batteries is that we no longer need to run expensive wiring throughout the garden. Instead, we can just use a solar panel or two to run everything from pond pumps to landscape lighting. Do you have a she shed in the corner of the yard or maybe even a greenhouse that could use some heat and lighting?
Shopsolarkits is a U.S.-based company is changing all that. The company offers a range of solar packages that will do everything from lighting up your off grid home to lighting a backyard flat, or bunky.
I hope everyone has a great Thanksgiving weekend.
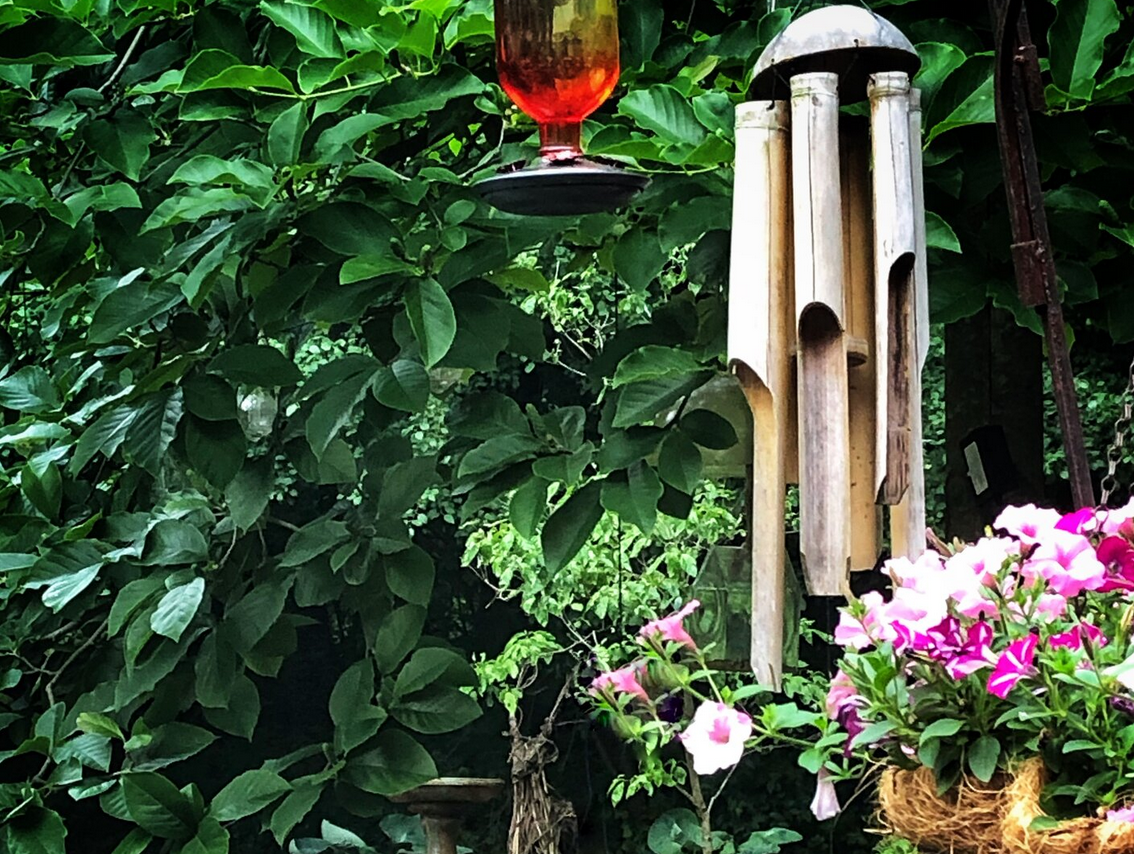
Garden Assistants: Don’t be afraid to hire some help
Creating a backyard escape has never been more important than it is today. Hiring unemployed students or part-time gardeners could be incredibly rewarding both for homeowners as well as students and small business people who learn new skills and appreciation for the importance of gardens.
Hiring garden helpers: best decision I could make
Sometimes a gift comes knocking and other times we have to go looking for it. When it comes to garden help, I’ve had it both ways. And, both times, hiring individuals to help with the garden has been one of the best decisions I’ve made.
I’m NOT talking about a landscape company to come and cut the grass, blow leaves, prune trees to within and inch of their lives and generally cause a bigger commotion than is necessary.

Our dogwood in full fall colours stands out in the woodland garden and adds a little pop to the landscape.
I am talking about two types of garden help: First a young man with little garden knowledge but a strong back and a good work ethic; and two, a young very knowledgeable woman who makes gardening her full time work.
Consider hiring a student to help fulfill your vision
My first foray into hiring help for the garden came just as Covid began to kick in. As stores and restaurants closed, jobs became quite scarce for young people. Finding work was difficult to say the least.
It was about that time that I got a text message from a young man – home from university – and looking for work. I had hired him the year prior for some garden work so I knew the type of young man and worker he was.
And, so the gift that came as a message on my phone: “Hi Vic… If there is any outdoor work that you would like to get done this summer I would be very happy to come and help out. If you are not comfortable with it, I completely understand, though I could come with my own gloves, water etc and stay outside to ensure proper distancing. Let me know what you think, no rush.”

Keeping everything tidy in the Japanese-inspired garden is just one of the benefits of having a little help around the garden.
It was a gift from heaven. I had ideas and together with his young, brute strength we managed to transform the back garden that year.
His timing could not have been better.
Like most of us, our backyard garden became our refuge during the most difficult days of the pandemic. It’s always been a place my wife and I retreat to when we need some peace from the world, but it has never been more important than it was then.
(For more on gardening on a budget check out my in-depth here.
Our garden was looking a little shabby. The projects were piling up in my mind as fast as my right hip was disintegrating and making the simplest of these projects an extremely painful exercise.
And along comes the answer to our problems in the form of a young man looking for summer work to help pay for his university.

This image shows some of the work our student finished be removing most of the grass and covering the ground with mulch and stepping stones.
Sometimes you just need a little muscle
I am sure we are not alone. Those of us lucky enough to have homes and gardens to retreat to, who are still employed or living comfortably in retirement, owe it to our youth to help them get through difficult times.
I had a garden vision, I just needed someone to make it happen and hiring a student in this case was much less expensive than hiring a landscaping firm.
Just two weeks later and our backyard was transformed by this young man.
Bringing the garden vision to life
Nine yards of natural cedar mulch plus an additional 15-20 bags have replaced huge swaths of grass and over-run gardens that are now perfectly edged.
Trees have a new home, hostas and grasses split into multiple plants and moved to new locations around the garden.
A massive woodpile was created to provide a home for chipmunks, birds, snakes, salamanders and a host of insects.
Patio stones lifted and straightened after years of slowly sinking into the ground and making the patio look shabbier than it was. Stone edges were added to the patio. Old composters and BBQs disposed of and, in some cases, replaced after laying new patio stones.
Stepping stones placed strategically around the garden to help bring it all together.
When the work was completed, I could tell he was almost as pleased with the results as I was. There was a lot for him to be proud of here.

By working with a garden helper, those little things are easier to take car of and the garden can look its best for a longer period over the summer and fall.
Together, an old retired guy with a bad hip and a young man with a quiet disposition and a fierce work habit, got together to create something extremely important – a garden.
My vision, his muscle all came together in just a few weeks of work.
And I barely lifted a finger.
Truly a gift my wife and I will enjoy for years to come, and, who knows, maybe our Woodland garden inspired a young man to take a real interest in the environment, gardening and one day creating his own Woodland retreat some time in the future.
A young woman with expertise and a vision
Fast forward to this year and that hip I mentioned earlier was only getting worse. Garden work was not an option. Heck, walking from one end of the garden to the other proved too difficult some days.
That’s when My Garden Helper, Michelle, came into the picture. Michelle operates her own gardening business aimed at helping seniors stay in their homes longer by taking care of all the garden work that gets more and more difficult as age and old bones take over.
This was the year I needed someone like Michelle more than ever. After years of having to do all the work ourselves, my wife and I were able to find someone to make life just a little easier.
From her first visit, I knew we were going to make a great team. It wasn’t just her eagerness, but when we toured the garden and I explained my non-traditional approach to gardening, I could tell she got me and my vision of a garden for wildlife rather than a pretty picture of plants lined up in a row.
Not only did I see that she got my vision, but I knew quickly that I could benefit from her garden vision and experience.
From the back half of summer, through to fall, Michelle would drop by for about four hours every second week to help out. She split and moved plants, cleaned up a couple of wilder areas, planted bags and bags of bulbs that I can’t wait to see emerge this spring and helped with a little fall cleanup.
She’ll be back in spring to begin on some of our new projects and together we’ll create a garden to dream of.
If you have been putting off hiring some help, now is the perfect time to line up your Garden Helper for next season.
Gardening on a budget links
Ten money-saving tips for the weekend gardener
DIY Bark Butter feeder for Woodpeckers
DIY reflection pond for photography
Click & Grow is ideal for Native Plants from seed

Mulch: Organic vs Non-organic
The decision to use an organic vs a non-organic mulch is not always obvious. Here are some tips on when and how I use mulch in our woodland gardens .
How and when to use various types of mulch in the garden
Our garden gets by with four types of mulch. But only one is organic.
The organic mulch – mostly shredded cedar bark – is my primary go-to mulch that I have used in the garden since day 1. I can’t begin to even think how many truck loads of cedar mulch we have had dumped at the top of the driveway over the past twenty-plus years. Much of it is long gone, absorbed into the earth helping to make for a richer, more woodsy soil.
Other mulch selections in the garden include pea gravel, river rock, boulders and a red aggregate that I use as a driveway rather than asphalt or concrete. The aggregate is not only pleasing to look at, but more importantly, it allows water from rains or snow cover to seep into the ground and feed the roots of our trees rather than running down the driveway, onto the street and into the already overburdened sewer systems.
The garden’s design will often dictate when and what type of mulch to use.
A woodland garden benefits from shredded bark that looks natural and decomposes over time enriching the earth.
But there is room for other types of organic mulch, including pine needles (a favourite in the United States), cacao hulls and, of course, compost. Cacao is a great mulch to use in small quantities near a front door or a patio so you can take in the rich chocolate smell the mulch gives off.
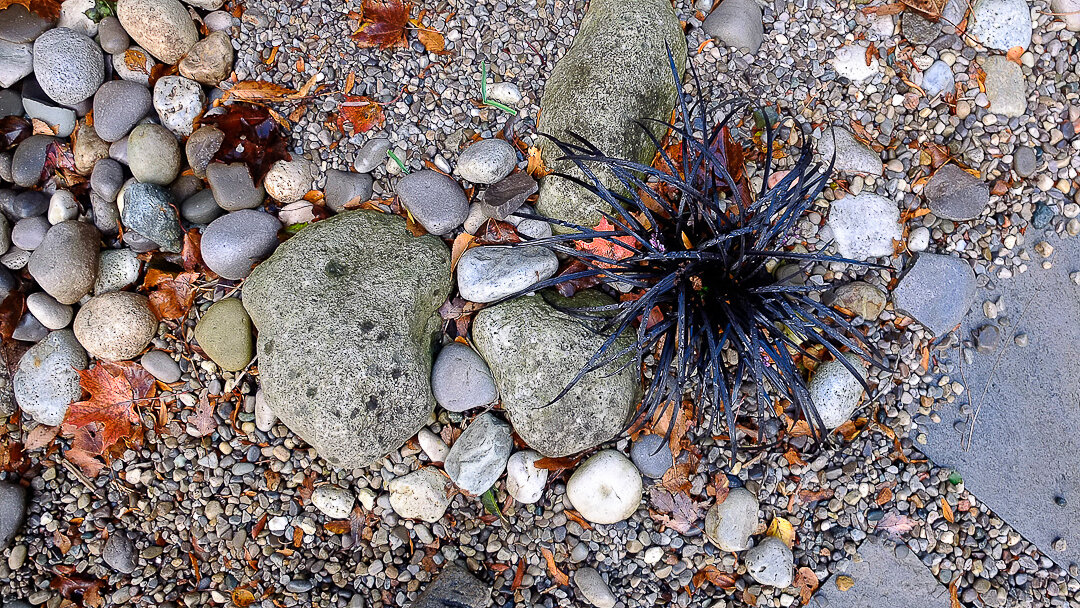
Looking down on an island of black mondo grass planted in a dry river path to break up stone and give it a more natural look. (also see below)
5 uses for organic mulch
1) Use as a substitute for a living ground cover (either for a short- or long-term solution)
2) Around individual plants to keep weeds out, moderate the temperature and water content of the soil
3) As a first step to cover large areas that will eventually become part of the natural garden
4) Together with black landscape fabric to eliminate weeds or grass to begin or revitalize an area in the garden
5) To create a natural pathway through your woodland landscape
5 uses for non-organic mulch
1) Use pea gravel and stepping stones for an inexpensive, yet pleasing pathway that is more formal than a shredded bark path
2) To create dry-creek beds as garden focal points or to deal with drainage problems
3) In service areas around the home where you have no intention of adding bedding plants (ex: around utility boxes)
4) Consider converting an old asphalt driveway back to stone to eliminate water runoff and create a more textured, natural appearance.
5) Around your home’s foundation to encourage better drainage
Our garden’s organic mulch has not all been cedar. When one of the neighbours cut down a massive spruce tree on their front lawn several years ago, I asked the tree company workers if they would drop the entire tree on our driveway when they had finished shredding it. They were happy to oblige, but warned me that it would create a very acidic soil when it broke down.
It sat at the top of the driveway for a few weeks that fall and literally burned itself up as it began to decompose. I remember finally going out to move it onto the garden on a cool morning and it was so hot that every shovel full created enough steam that it appeared to be on fire.
I think I put about six inches of mulch down the side of the driveway that year.
I could not argue with the price, but it was ugly stuff with bits of spruce needles mixed in with the still-sappy branches. The next spring I covered the whole thing with a thin layer of cedar mulch and proceeded to allow it all to break down. Today, you would be hard pressed to find much evidence of the spruce tree and the final result is not acidic soil.
Just recently we moved two dump trucks full of cedar mulch into the backyard as part of a major landscaping project to eliminate as much grass as possible and create new gardens.
It involved putting down a layer of landscaping fabric to cut off any light to the existing grass, followed by at least three inches of cedar mulch.
I am definitely not a fan of black landscape fabric, but I always use it, (or old newspapers) as a first step in a new landscape project.
A combination of all our mulches come together in this images. Large boulders combine with pea gravel, river rock, crushed red brick (driveway) and even a little cedar bark mulch to create this ground cover.
The landscape fabric is great for keeping weeds out and, more importantly, killing existing grass. Its major problem, however, is that it also blocks living organisms from moving through the different layers of soil. If you are trying to build a healthy, woodsy soil, black landscape fabric certainly does more harm than good, over the long term.
My plan is always to remove it over time as the weeds and grass die off. I would expect that it is ready to be removed one to three years after it was installed.
In the meantime, I usually begin cutting large planting holes in the fabric a year after installing it. By then most of the grass is dead and it’s safe to begin gardening as long as you are careful to cover the bare soil with a thick layer of mulch after planting.
This process not only eliminates the huge task of removing the turf, it also takes advantage of the decomposing turf and leaves behind a nice layer of top soil to begin gardening. Patience is the key obviously.
If a low-maintenance garden is your priority, by all means leave the fabric and continue to garden through it. While it lasts a long time, it will eventually break down in the soil and lose its effectiveness as a weed barrier.
When it comes to using non-organic forms of mulch, the black landscape fabric always remains in place.
These are usually areas that I have no intention of ever converting to a traditional garden, so the fabric’s main purpose is to ensure nothing grows up through it.
In fact, it’s not unusual for me to double it up just to ensure unwanted guests can never make an appearance. They usually do, eventually, but it can take years before the weeds begin to break through the fabric.
Non-organic mulch
Non-organic mulch, mostly pea gravel and river rock, play a major role in our gardens.
They are used extensively in both the front and back gardens bringing a cohesiveness to the entire space while serving as a natural bridge from the garden to the hardscaping areas located closer to the house.
Great effort is made to make them look as natural as possible. Too often, homeowners and some landscapers try to get “cute” with river rock. In a woodland or natural garden, surrounding a tree or a garden with river rocks positioned in a perfect circle just doesn’t work. It looks unnatural and would never occur in nature, so try to come up with a more natural approach.

Little Bluestem, Milkweed and Black Eyed Susans give a natural look to this dry river bed that takes advantage of small boulders, river rock and pea gravel for a more natural look.
A natural-looking dry river bed, for example, benefits from more than one size of river rock to help it take on a more natural appearance. Ideally, very large river rocks need to be set in place at strategic locations throughout the river bed to anchor the design. Then, a layer of medium-size river rock added as the base, followed by smaller river rock pushed out toward the edges and finally pea gravel in what would be the stream’s washout area.
Now you don’t have to go to such extremes every time you use pea gravel or river rocks in the landscape, but it helps to keep it as natural looking as possible.
Our dry-river-bed journey began by filling in a large gully in the front of the house after cars kept falling in while turning at the end of our cul-de-sac. By turning the drainage ditch into a dry river bed using mostly river rock along with some pea gravel to fill in the edges, the water that naturally flowed through the area in the spring and during heavy rainfall, is allowed to continue along its course under and through the river rocks. The dry river bed solved three problems: it eliminated an eyesore; cleaned up any standing water that hung around in the spring; and still allowed the water to flow through the drainage gully.

This Japanese-inspired garden uses massive boulders, river rock and pea gravel as a mulch.
Since then, we have used river rock and pea gravel, as well as some large boulders, to crate a Japanese-inspired garden in a part of the front yard. The river rock and pea gravel continue down the side of our home and pick up again in the backyard where they are used extensively as both a dry river and pea gravel pathway leading to the patio.
Inorganic mulches like stone can be effective in the landscape if used with care. Try to soften the harsh look of stone by allowing plants to spill over the edges. At times, I will even plant right into the pea gravel to create an island of green in the sea of stone. Along the back path, I have a planting of black mondo grass growing in a small island of larger river rock that never fails to make me smile when I see it.
Elsewhere, grasses grow out from a dry river bed suggesting a small island in the creek bed.
Woodland nurseries you need to know about
Not all Nurseries are created equal. Most provide plants your average gardener is looking to plant. But Woodland gardeners and native-plant gardeners are not your average gardeners. Here are four specialty nurseries you will want to check out online if you are looking for special plants or just reliable information on growing plants you already own.
Nurseries specializing in Woodland plants
It’s not always easy to find Woodland plants in your local nurseries. Even if they do carry one or two native woodland plants, there’s no guarantee the plants were not harvested from the wild or that they will do well in your area.
In the past few years since writing the original article, more and more nurseries are carrying more native and woodland plants. In fact, most nurseries are recognizing the move toward more natural and native plants, whether they would be considered “woodland” plants or more sunny meadow-style plants.
Buying from reputable local nurseries is always the best choice, but when they don’t carry what you are looking for or lack the expertise to help you in your Woodland endeavours, there is no shame tracking down nurseries that specialize in hard-to-find native plants.
Here are four that know their stuff (two American-based and two Canadian). All are working hard to offer the best native plants possible. Please recognize that transporting plants across borders is often very difficult or impossible.
Fernwood Nursery & Gardens (U.S.)
Rick and Denise Sawyer have been running “Maine’s Shadiest Nursery” since 2012 in Montville, Maine. Their nursery specializes in native and Woodland plants hardy to their area.
They are proud to say they have one of the largest collections of shade tolerant plant collections in New England, many of which are propagated at the nursery. Display beds at the nursery help demonstrate how the plants can best be grown and grouped together aesthetically.
Wild native showy lady slippers can be difficult to grow. They can be almost impossible to find at regular nurseries, but they are available through responsible specialty growers.
They do not appear to do mail-order, which is unfortunate for those living outside their area. Their down-to-earth blog, documenting life at the nursery is a good read with lots of interesting tidbits for the Woodland gardener. You can find their website at fernwoodnursery.com
Big-time hosta lovers, their website lists close to 20 with good descriptions of each. What really caught my eye, however, was the Cypripedium retinae or Showy lady slipper which they feature in a beautiful photograph showing a massive grouping on their website planted with Maidenhair fern. A glorious combination.
Other featured plants include:
Trillium grandiflorum flora plena – this double flowering great white trillium prefers a sweeter soil and more sun than most trilliums. Being sterile, the flowers bloom longer than the single and then turn from white to pink.
Sanguinaria canadense multiplex – a double flowering form of our native bloodroot that blooms a little later and much longer than the single. Grows to 6″ and tolerates drier shade.
Anemonopsis macrophylla – a wonderful Japanese woodlander with nodding lilac and white flowers on 3′ stems in late summer.
Anemonella thalictroides – ‘Snowflake’ A 6″ double flowering selection of our native. Two months of bloom beginning April/May.
Convallaria ‘Cream da Mint’ – larger leaves have gold edges on green centers with a glaucus coating, especially in the spring.
Convallaria ‘Fernwood’s Golden Slippers’ – leaves are all gold with white flowers and red fruit. Not as aggressive as most Lily-of-the-Valley.
Great Lakes Orchids (U.S. Mail order)
Is a family owned tissue culture laboratory and licensed nursery specializing in hardy terrestrial orchids. You read that right. Their orchids are grown in a laboratory using tissue culture techniques. No worries here about wild-dug orchids.
Check them out at greatlakeorchids.com
In fact, this nursery is devoted to the One Test Tube at a Time Initiative, established to share their “services, laboratory, seedlings, plants, and expertise to help save endangered orchid populations.”
There are diminishing plant populations growing in various habitats and areas. For a number of reasons these plant populations are unable to re-establish themselves or fall outside of funding sources that would allow them to remain protected or undisturbed. We would like to see the return to thriving orchid populations for the benefit and enjoyment of all.”
They offer via-mailorder a large variety of orchids both native and non-native selections, including Lady Slipper Orchids, Chinese orchids and European fringed orchids.
Their website says they are branching out with select hardy perennials and bog plants.
Besides their great work, here is the real reason I have included Great Lakes Orchids in this list: The sites Growing Tips for raising Cypripediums is first rate. If you already have native Lady Slippers in your woodland or hope to acquire them at some point soon, you have to bookmark this site and study these growing tips.
If you live in the United States, consider supporting this group by purchasing some of their plants.
Ontario Native Plants (Cda mail order)
And now a plug for newcomer and local mail-order nursery, Ontario Native Plants. A gardening friend and I decided to place an order with this Hamilton-Ontario area online provider of native trees, shrubs, grasses and wildflowers and were pleasantly surprised by not only the product we received but their professional approach. Packaging was first rate. The website says they deliver anywhere across the province of Ontario.
If their website onplants.ca is any indication of how their business will grow in the future, we can expect big things from this nursery. Their 2020 catalogue lists about 100 products. In addition, they have a newsletter notifying regular customers of promotions and native gardening tips.
Since the initial writing of this post, Ontario Native Plants have certainly grown and now offer a huge variety of top-notch native plants to Ontario Gardeners. Their 2023 catalogue can be seen here. Get your orders in early spring for best delivery dates.
For my full story on this outstanding provider of native plants, be sure to check out my posts here.
Included in the list of individual plants are groups of plants packaged together that offer, for example, high-colour impact, fall beauty, as well as shady and sunny rain garden packs. There is a fern package, a pollinator pack and a Prairie pack. As an example, the Sun Lovers pack in the 2020 catalogue includes 12 plants made up of 2 plants from 6 species.
The website is extremely informative breaking down the native plants into light requirements, moisture requirements and soil type. Well done.
This post is not sponsored by any of the above nurseries. As an affiliate marketer with Amazon or other marketing companies, I earn money from qualifying purchases.
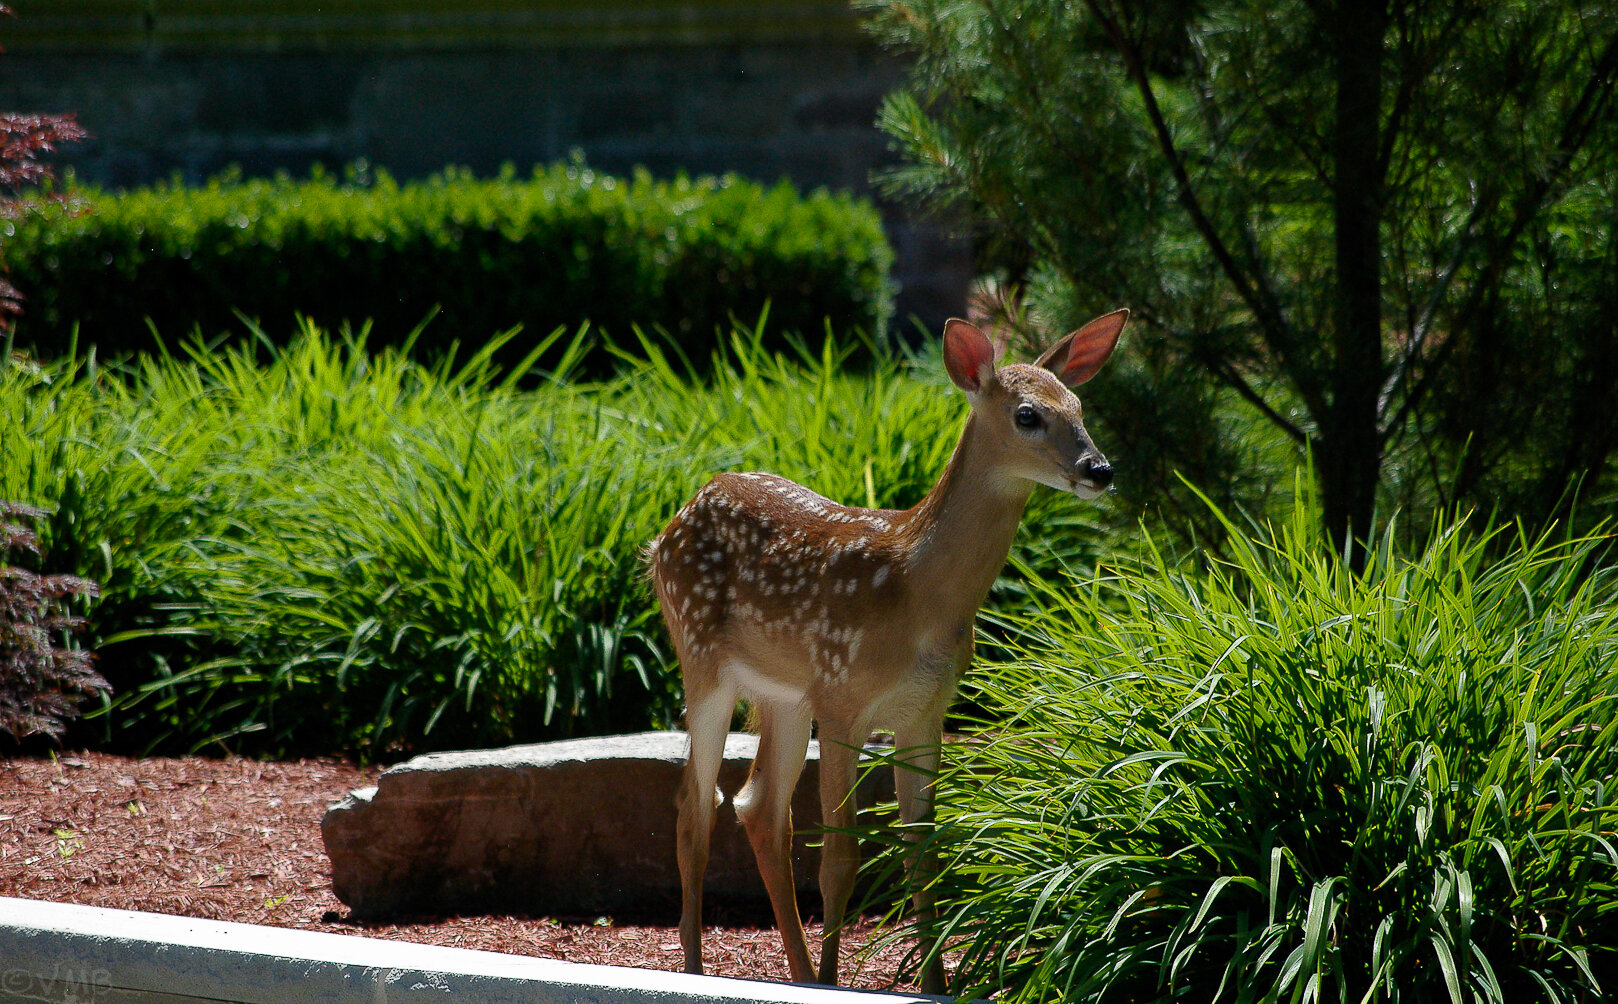
The first step to building our Woodland Garden
Building your dream garden may start with planting a tree or your favourite shrub. For us it began by escaping our new-home subdivision and taking the leap to an older fixer-upper that provided us with the property we needed to start our dream Woodland garden.
Our woodland garden began with a pool in our neighbour’s backyard. We didn’t know it then, but life in a brand new home in the middle of the suburbs where late-night pool parties, loud teenagers and the never-ending drone of gas powered mowers was the norm, was enough to push my wife and I to extremes.
These weren’t our dreams – the pools, the parties the close proximity to neighbours.
So, it was time to sell and move into a home that, in the end was totally opposite to the one we were living in at the time.
A for-sale sign went up and before long we were in ‘our’ dream home. Well not exactly a dream home, more like a dream property. We only had one child, so my wife and I decided to go against the grain and buy a small house on a big property rather than a big house on a small property.
It was the best decision we ever made for our sanity.
In the end, we compromised a little and bought a small home (at least by 1980s standards) on a decent-size lot pushing a half acre. To say the home was a fixer-upper would be a bit of an understatement.
What does this all have to do with building a woodland garden, you ask?

The Woodland garden starts in the front and carries through to the back. We’ve included a Japanese-inspired garden (at left) in the front garden.
Focus on the garden for long-term happiness
Our dream was never really to own a huge multi-level home. We realized we wanted to create a peaceful, natural area around us where we could enjoy nature rather than jumping in the car every weekend to go to cottage country to escape the neighbourhood noise.
The final selling factor, at least for me, was a photo album left on the table of the house left opened to a photo of a group of deer in the backyard of the very home we were touring. For many gardeners, this would be a deal breaker. For me it only made me want it more.
SOLD.

A fox stops by to take a drink from one of our water bowls.
Building the woodland garden
Then the slow process of building the garden began in fits and starts. Not unlike the home, the garden, what little of it there was, needed a lot of work.
We brought in soil and mulch, planted trees and native wildflowers. Expanded the gardens and eliminated grass. Then eliminated more grass. Check out my post on the benefits of eliminating grass.
We brought in boulders, lugged hundreds of wheelbarrows of stone, pea gravel, mulch and soil into the backyard. Check out my post on the importance of using stone in the garden
My wife and I made paths, created dry-river beds in the front and the back and it continues to this day.
Check out my post on some of the DIY projects my wife and I tackled over the years.
Finally, more than 20 years later, the combination of time and a lot of hard work is turning our patch of rural suburbia into a woodland garden rather than a patch of grass surrounded by neighbouring patches of grass surrounded by forest.
Now, most mornings my dog, Holly, and I step outside on the patio and enjoy some peaceful time together before the neighbourhood wakes up.
Be sure to check out some of my other posts on putting together a woodland garden or natural garden. Ken Druse’s book The Natural Garden is a great place to start. His newer book The New Shade Garden is an excellent source of information. Or take a minutes to check out this post on the 5 best books for woodland gardening.
The birds are at home here. On any given morning, a young fox wanders through looking for breakfast and maybe a deer or two comes through and offers me a chance to photograph them before they are off for their daily adventure. I’ve watched skunks wander through the yard, rabbits, more chipmunks and red squirrels than I can count and even a lone coyote. Snakes have returned to the property after not seeing a single one for many years here. Toads, fireflies and a host of native bees and butterflies call our property home.
It’s taken a while to get here, and we know we will never be done. But we took that first step that needed to be taken.
Your first step might not be to sell your home, it might be to go out and plant your first tree, shrub or native wildflower.
So what are you waiting for? Take that first step. You never know where it will lead you.
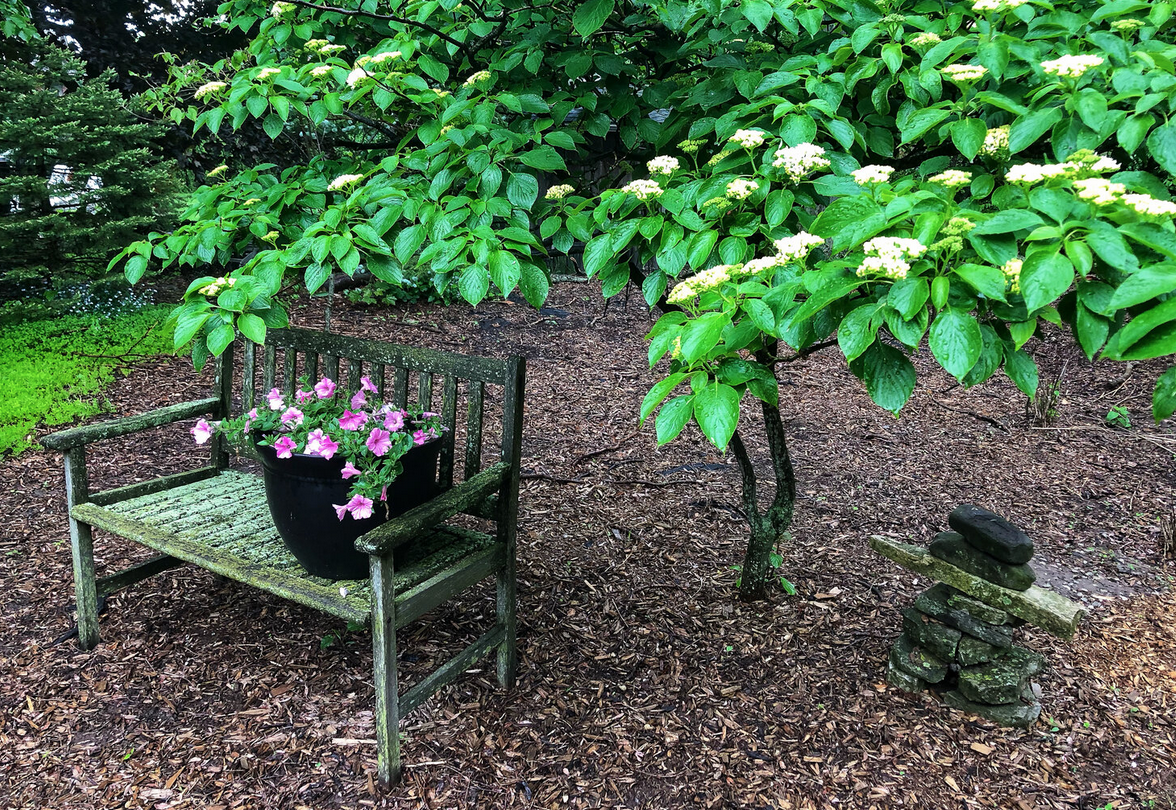
Mulch Mania: Building a foundation for a low-maintenance garden
Building a solid foundation starts with your garden’s soil and there’s no better way to build a high-quality soil than to use mulch. Cedar mulch forms the foundation of our low-maintenance woodland garden. It’s benefits are too numerous to list but here’s a start.
A temporary alternative to natural ground cover
Good or bad, we all remember the gardens of our childhood.
I remember dry, barren earth that literally turned to sand when you held it in your hands. It was the 1960s and the only plants that grew in the front gardens were traditional purple iris.
Not that my parents didn’t try. They turned over the soil religiously revealing the darker damp soil for a few hours until the sun baked it again.
It’s hard to imagine a worse recipe for building high-quality, healthy soil. But they toiled on, sometimes adding peat moss or top soil. The ending was always the same. Dry, bleached and baked sandy soil.
The missing ingredient was, of course, mulch. I am sure it was available at that time, but it certainly wasn’t piled up in bags at every building supply, grocery and nursery store.
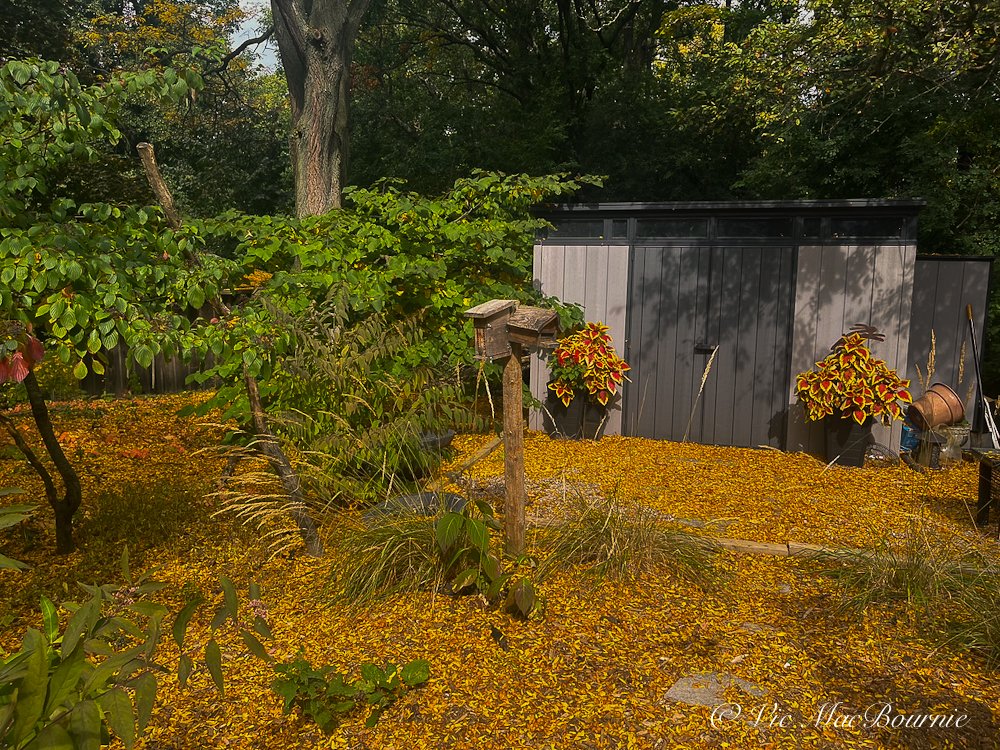
A natural mulch of fallen leaves is not only beautiful, but acts like a cover for plants, insect and small animals throughout the winter months.
Today, cedar mulch is so common in our area, it’s hard to believe there are any cedar trees still standing.
Organic mulch is commonly made from bark or wood chippings, but it can also be made of grass clippings or pine needles (a popular choice in parts of the United States,) to name just a few.
Non-organic mulch is another option and another blog post but includes stone such as pea gravel, aggregates and man-made substances.
Cedar mulch is a forest byproduct made from the shredded wood of cedar trees. Compared to pine mulch, the inherent nature of cedar makes it a longer-lasting mulch in the garden.
The benefits of mulch far outweigh any argument for not using it. Not only is cedar mulch attractive, whether you choose natural-, black-, brown- or red-coloured, it has a pleasant smell for the first few weeks it is put down, helps unify the garden and better shows off the plant foliage.
Despite its obvious benefits, it’s still not unusual to see uncovered, baked earth on my daily walks, usually accompanied by the homeowners on their hands and knees pulling weeds or, God forbid, turning the soil over so they can enjoy a few hours of dark soil before the sun comes out to bake it beige again.
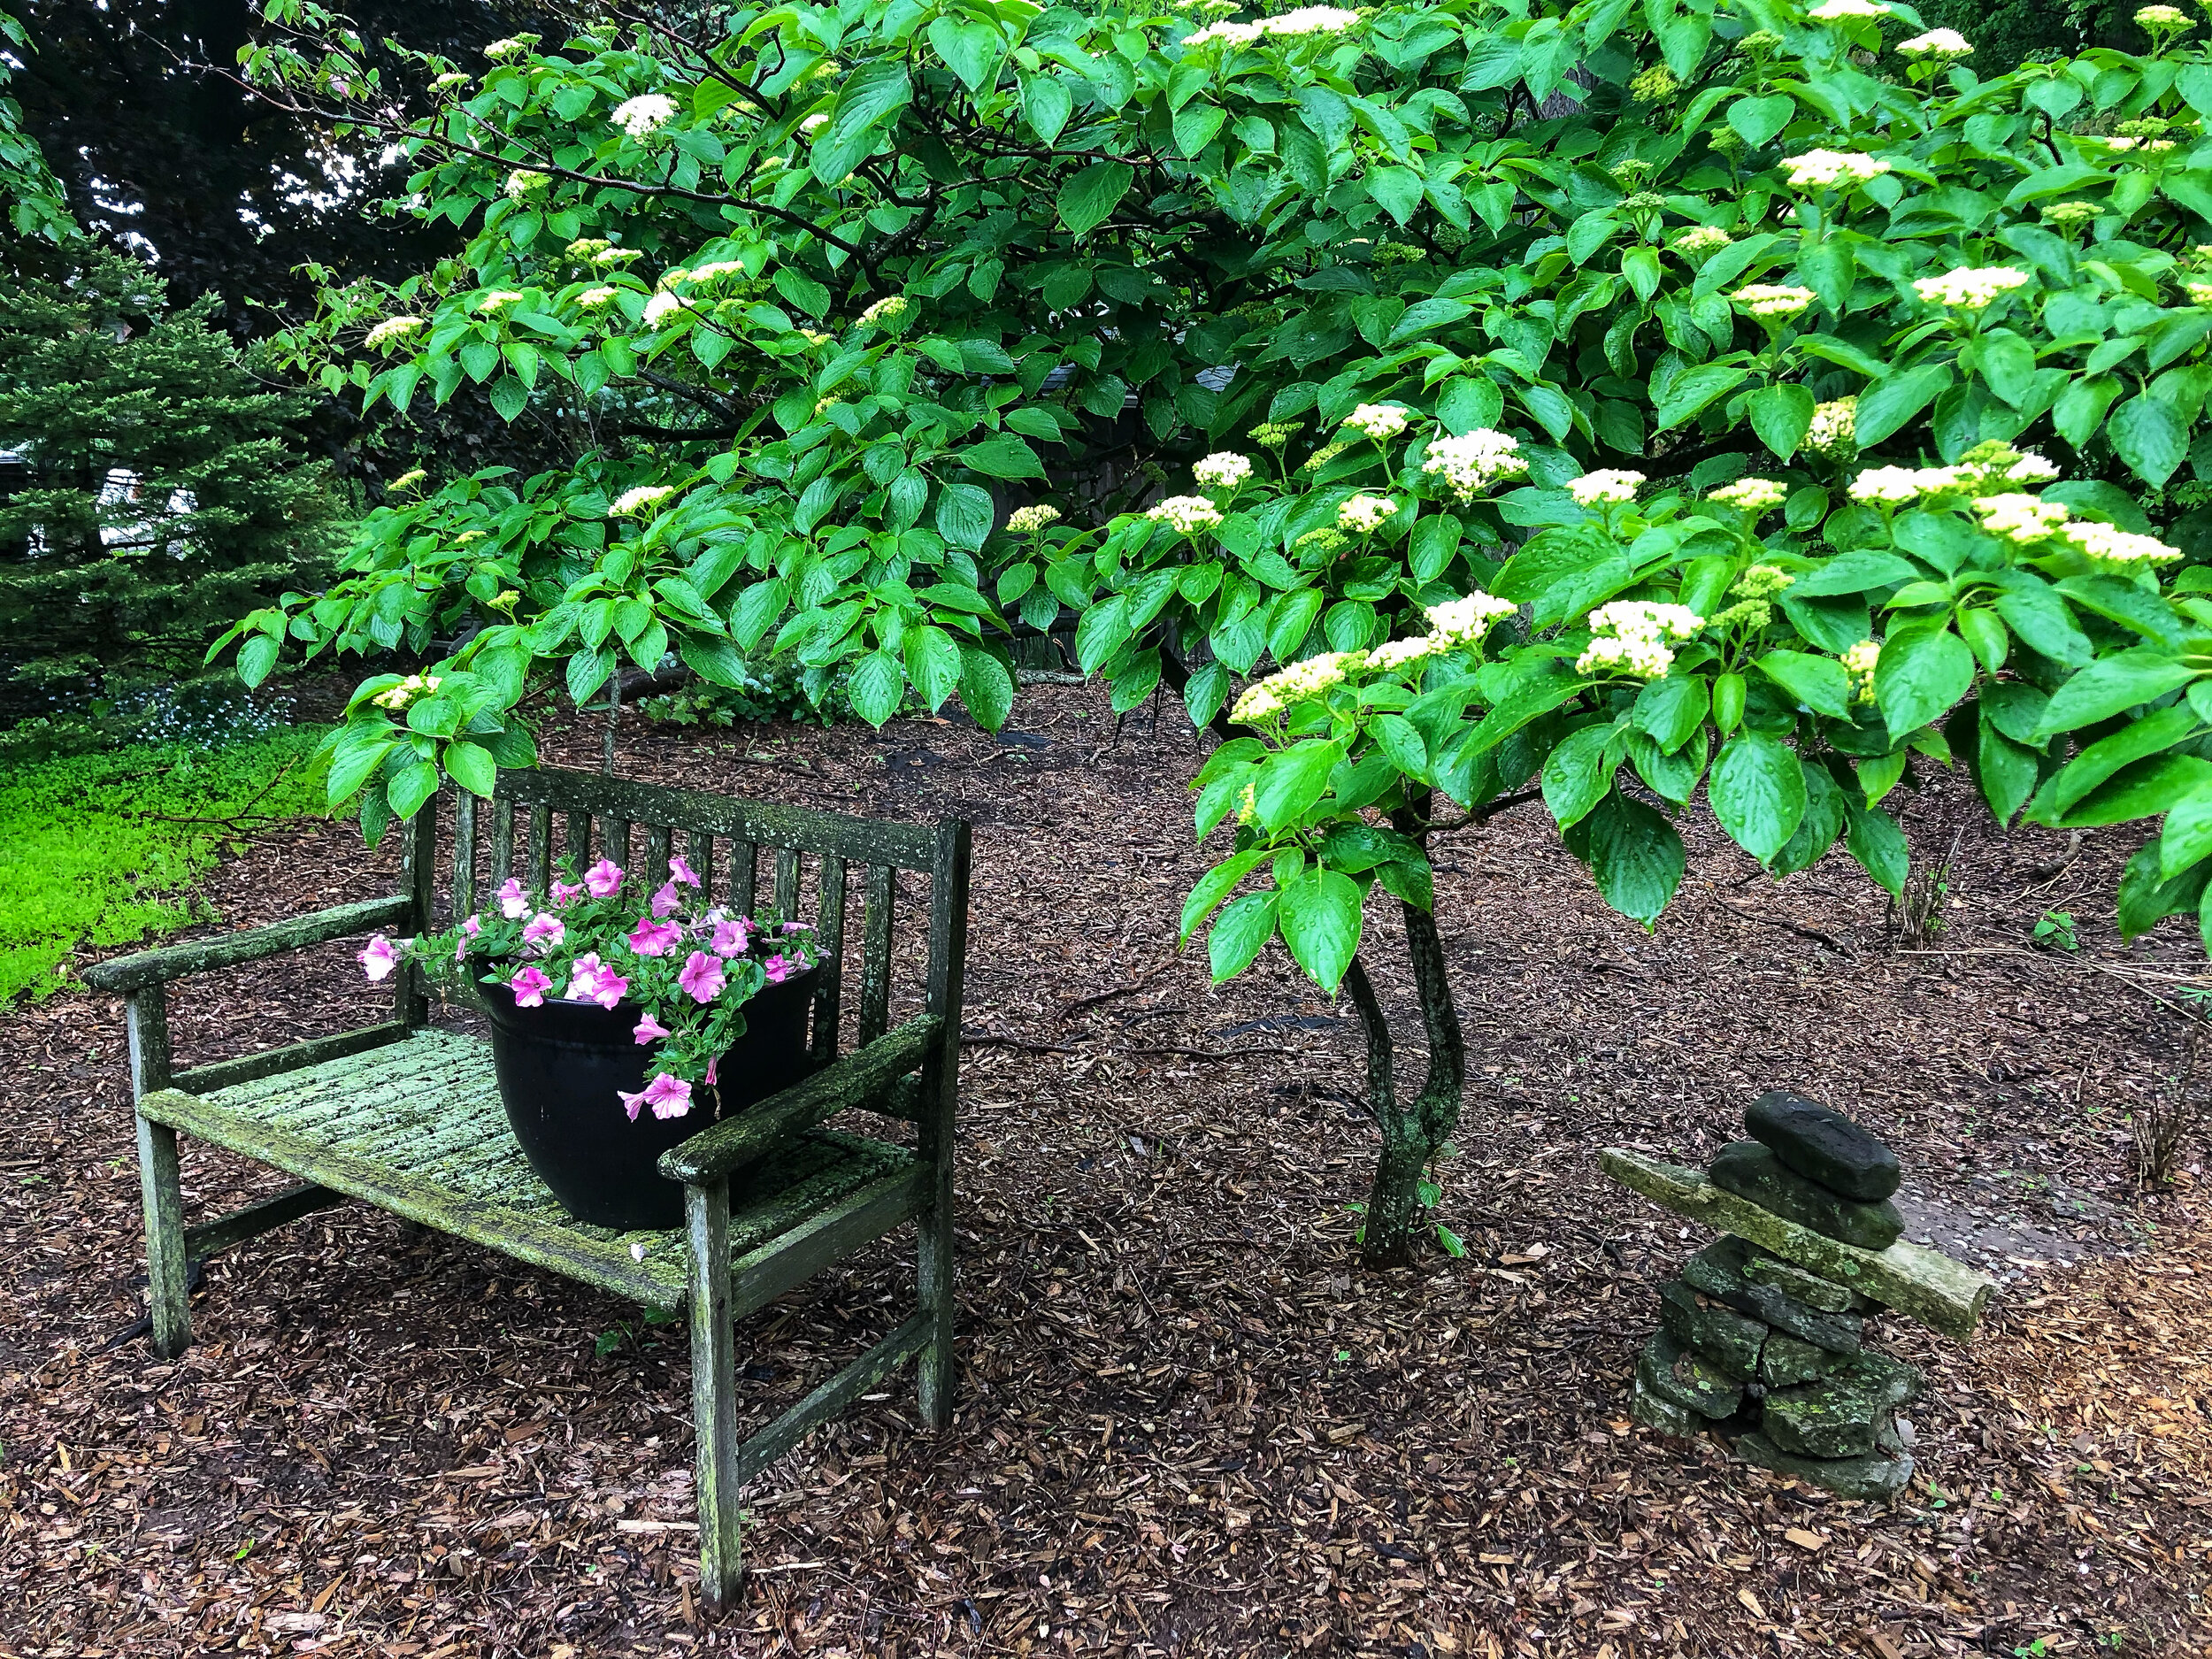
Mulch is the perfect backdrop for the foliage of this Pagoda dogwood, while it protects and insulates the soil below. Over time it breaks down and adds a woodsy organic material to the soil.
In many ways, mulch actually takes the place of a living ground cover.
And, although bark mulch is a great beginning to amending your soil an creating a more woodsy soild, it’s best not to consider it the finished product.
In a woodland garden, a native and natural ground cover such as wild geraniums, bunchberry or ferns are a more desirable alternative than organic mulch, but there are plenty of situations where a ground cover is not feasible at the time.
That’s where an organic mulch truly shines.
Without going into all the benefits of heavily mulching your gardens, let’s examine just a few of the reasons mulch should be high on your list when you are building your Woodland garden.
Water retention: By shading the soil with a thick layer of mulch (ideally 3 inches or more), evaporation, both from the sun and wind, is minimized.
It also helps to regulate the temperature of the soil further reducing water evaporation and giving the plants a layer of insulation that helps keep the plants’ roots cool in the summer and warm in winter.
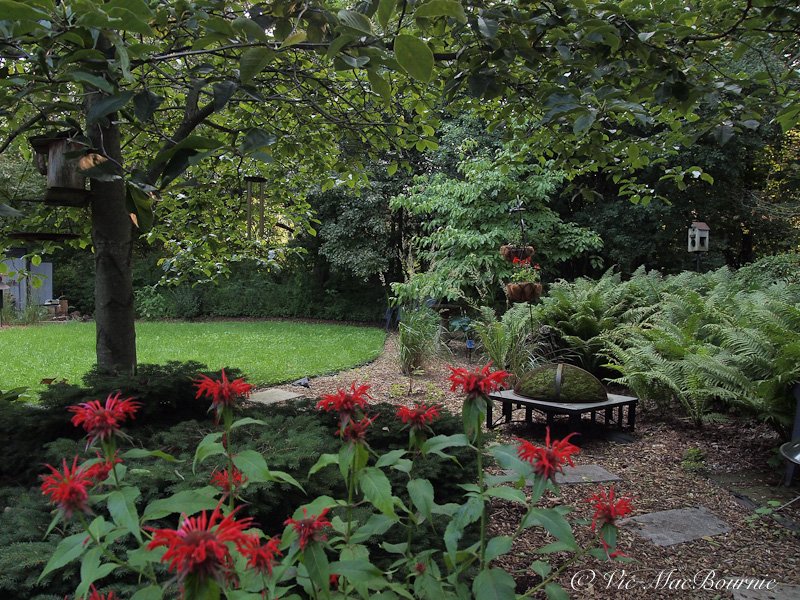
Wood mulch is used here to cover the ground around woodland plants including bee balm and ferns.
It is important to note, however, that mulch can also act as a barrier that makes getting sufficient water to your plants’ roots more difficult. It is much more water-efficient to target the plants individually either through a drip system or by hand watering them individually.
Deep watering a plant by leaving the hose dripping at its roots for several hours will allow the water to dive deep into the ground rather than getting locked into the mulch layer or just licking the top inch of the soil.
If your garden is properly mulched, you need to water less often but when you do water, ensure you are deep watering and targeting the plants’ roots.
One of the often overlooked benefits of mulch is that it helps prevent water runoff by trapping the moisture and moving it slowly to the soil below.
During a major storm, for example, water that might traditionally just run off in one direction, flooding one area and leaving another area more or less dry, will be better constrained to the general area it fell on. The result, a more evenly irrigated garden that will retain the moisture much longer than barren earth – possibly days or even weeks.
Weed Inhibition: Everyone is striving for a low-maintenance garden. Mulch is the key ingredient to achieving that end. But, let’s not kid ourselves it can’t perform miracles, especially if it is spread too thinly over the soil.
We’ve all seen it. A layer of mulch so thin that you can see the soil through it. Using large pieces of bark rather than the shredded bark, is often the biggest culprit here.
Unlike the shredded mulch, or pine needles, the bark pieces are too large to properly cover the soil and the resulting gaps make it too easy for seeds to find their way to the soil. (If you really love the look of the larger bark pieces, consider using the shredded mulch as your primary covering and top dress with the larger pieces.)
if the ground is not covered properly, once the weed seeds germinate, pulling them out brings more soil to the surface and before you know it, your garden is covered in weeds.

Here is a good example of natural wood mulch being used to cover the ground while our native virginia creeper gets a chance to establish itself as a living ground cover or mulch.
The key is to block light from reaching the soil to keep the seeds from germinating.
Some seeds will germinate right in the mulch but without proper soil they are either not long-lived or easily removed because it is near impossible for them to get properly rooted in the bark medium.
Also, if you water your individual plants rather than a general watering of the entire garden, the weeds’ roots often eventually are starved of water and die off. This is especially true following a wet spring. Weeds from the previous year will sprout in the damp mulch left by snow cover, but as the mulch dries out, the seedling roots will often die off.
A common complaint against the use of cedar mulch in the garden is that it can deplete the amount of nitrogen in the soil. While this can be true, it is not something most homeowners should be worried about.
What is more worrying is the practise of piling mulch around trees and plants in a volcanic mound that is almost guaranteed to kill the plant over time.
I often see it done by unknowing city workers who like to pile mulch up the tree’s trunk as high as possible thinking they are conserving water. Do not fall into this trap. Roots of trees and plants do not benefit from mulch touching them in any way.
Keep the mulch away from the plants and, instead, create a bowl of mulch around the tree trunks or plants where the sides can hold the water or at least slow its runoff from around the plant or tree. The bowl should be larger according to the size of the tree or plant and can actually extend out to the drip line of a young tree or plant.
The Garden Awakening will change the way you garden
Mary Reynolds’ The Garden Awakening is an important book during these troubled times. It is both a gardening book and a road map we all need to follow into the future. For some it is a treasure map to help them rediscover nature and themselves. For others, it will provide them with a new way of looking at their gardens, their land and their life. Please, click on the link for the full review.
The Garden Awakening
Designs to Nurture our Land & Ourselves
By Mary Reynolds
“If nature is left to its own devices and without imbalances in the ecosystem such as the overpopulation of hungry deer or an infestation of rabbits it will reclaim its territory and become Woodlands once more.”
This might be one of the most inspirational gardening books I have ever read.
It’s certainly not your average how-to gardening book. If you are looking for a typical gardening book, The Garden Awakening might not be for you.
Beautiful illustrations by artist Ruth Evans both on the cover and throughout the book.
But if you are interested in the environment, restoring your garden to a healthy, productive space and/or creating a Woodland naturalized garden, then you owe it to yourself to spend some time with Mary Reynold’s book, The Garden Awakening, Designs to Nurture our Land & Ourselves and her vision for the future of gardening.
Since this writing, Ms Reynolds has published a second informative book titled We Are The Ark. This follow to The Garden Awakening, expounds on her successful approach that each garden can be a small Ark in a world for where wildlife desperately needs our help.
For more information on using native plants to restore your garden, take a moment to check out my article on the importance of using native plants in your garden. For full post go here.
An important book at a crucial time
The Garden Awakening is an extremely important book for the time. It’s a reminder that we are destroying the very land we depend on for survival. It’s a reminder that the world we live in cannot continue to absorb this abuse and not unleash its own fury back upon us.
And, as climate change continues to change the world we live in, it’s important that we as inviduals take action to stem the tide.
But Reynolds offers solutions to problems that we need so desperately in these trying times.
Her inspirational book actually provides a roadmap for anyone interested in doing their part to not only protect but revive the land they live on. Along the way, she provides a “treasure map for finding your way back to the truth of who you are.”
“We are the ark” movement
Be part of the movement
Her movement, “We are the Ark” is bringing together like-minded people around the world to join her in creating a healthy environment, one garden at a time. It provides an important stepping stone to a better environment, a healthier garden and a more optimistic future.
“Gardens were like still-life paintings; controlled and manipulated spaces.... somehow, somewhere along the way gardens had become dead zones.”
If Ireland’s feisty Mary Reynolds is not familiar to you, I suggest you watch a movie called Dare to Be Wild, which maps her journey from an outsider to a gold-medal winner at the prestigious Chelsea Flower show. The movie used to be available on Netflix, but I notice that it is no longer available. (The link provided above will take you to Amazon where it is available as a DVD.)
The movie led me to her book, her vision and her unique and thoughtful approach to gardening.
To purchase the Mary Reynold’s book, here is a link from the excellent book seller Alibris: Books, Music, & Movies for The Garden Awakening. Below is the Amazon link.
For those without access to the movie, take note; Mary Reynolds was the youngest garden designer to win the highly coveted gold at the 2002 Chelsey Garden Show. That alone should be enough to interest you in her book.
Reynolds doesn’t waste much time getting to the point. She describes a vision of her embodying a crow flying over the landscape where she comes across a woman (let’s call her Mother Nature) in a forest clearing. She is then swept up high into the heavens and when she finally wakes up she comes to the instant recognition that she “shouldn’t make any more pretty gardens.”
She realizes that she must be guided by the natural world, rather than pure beauty, in her work as a garden designer.
Unlike nature, “gardens were like still-life paintings; controlled and manipulated spaces.... somehow, somewhere along the way gardens had become dead zones,” she writes.
Being in harmony with nature
The revelation that she was “failing to work in harmony with nature,” eventually leads her to unveil 5 garden design ideas in a system aimed at helping anyone, including gardeners, connect with nature.
Throughout the book, Reynolds returns to her Irish roots and uses folklore to help explain her spiritual views of nature and gardening.
Of particular interest to Woodland gardeners, Reynolds explains that all land strives to become a mature Woodland and the job of the gardener is to allow the land to become what it desires to be.
She also encourages people to design their own gardens and provides a road map in five chapters. Each chapter slowly opens up the world of garden design and includes suggestions for intimate garden areas; a nighttime place, a praying place, a gathering place…
In another chapter, she talks about designing with the patterns and shapes of nature. This all leads to a chapter encouraging readers to put their garden design concepts onto paper, including several illustrations and designs that help readers visualize their garden design ideas.
Throughout the book, Reynolds offers suggestions on plants, although these plants might not all be appropriate for all garden zones.
The book wraps up with a chapter on Forest Gardening, a style of gardening that seems to be once again gaining in popularity and importance.
Many would say that Forest gardening is a logical extension to Woodland gardening. It involves producing food by developing a multi-tiered Woodland where berries, nuts and root vegetables are encouraged to be grown.
Her forest garden includes seven layers beginning with the upper canopy including a shrub layer, a layer for herbaceous plants a ground cover layer, an underground layer and finally climbers or vines.
This is a book every Woodland gardener will enjoy and learn from. It’s a book that should be required reading for all gardeners at a time when our futures may well depend on it.
If you are interested in having Mary Reynolds help design your garden virtually, be sure to check out my post on Ms Reynolds’ virtual makeovers.

How long do hummingbirds live in the wild
Wondering how long that little hummingbird that visits your yard every year will be returning. If everything goes well, you might be surprised how long the hummers might be returning to your yard.

This image shows a hummingbird working a small feeder with a perch in the background.
Some hummingbirds can live up to ten years
Hummingbirds are fascinating creatures, but have you ever wondered how long they live in the wild? The lifespan of a hummingbird can vary depending on several factors.
One of the key factors that influence the lifespan of hummingbirds is their species.
Different species of hummingbirds have different lifespans. On average, most hummingbirds live for about 3 to 5 years in the wild. However, some species, such as the Ruby-throated Hummingbird, can live up to 10 years or more.
Hummingbirds face many dangers in nature, which can impact their lifespan. Predators play a significant role in determining the lifespan of hummingbirds.

Providing several sources of nectar-producing flowers is particularly important for the health of our hummingbirds.
Birds of prey, snakes, and even domestic cats pose a threat to these tiny birds. However, hummingbirds have developed unique adaptations to help them escape predation.
Their incredible speed and agility allow them to quickly evade predators. Additionally, their small size and ability to hover in mid-air make it difficult for predators to catch them.
Migration can be a dangerous time for hummingbirds
During migration, hummingbirds face additional dangers.
These small birds migrate huge distances, often travelling thousands of miles. Along their journey, they encounter various hazards, including extreme weather conditions, lack of food sources, and exhaustion.
Some hummingbirds may not survive the migration and perish before reaching their destinations. However, the majority of hummingbirds are able to successfully complete their migration and continue their lifecycle.
In conclusion, the lifespan of hummingbirds in the wild can range from 3 to 5 years, with some species living longer.
Factors such as species, habitat, and predators all contribute to their lifespan.
Hummingbirds have evolved unique adaptations to escape predation, and while they face dangers during migration, the majority are able to complete their journey successfully. Understanding these factors can help us appreciate and protect these remarkable creatures.
For more on hummingbirds in the garden, check out the following posts:
• How to help Hummingbirds during migration
• Five tips to attract hummingbirds

Hummingbird at feeder surrounded by petunias.
How to help hummingbirds survive in our gardens?
One of the best ways to help hummingbirds survive in our gardens is by providing them with both feeders and natural food sources.
Hummingbirds have a high metabolism and need to consume a large amount of nectar to fuel their energy. By placing hummingbird feeders in our gardens, we can provide them with a reliable source of nectar.
When choosing a hummingbird feeder, opt for one with bright colors, as hummingbirds are attracted to vibrant hues.
It’s also important to clean the feeders regularly to prevent the growth of mold or bacteria, which can be harmful to the birds. A mixture of four parts water to one part sugar is a suitable nectar solution for hummingbirds.
In addition to feeders, it’s crucial to create a garden that offers natural food sources for hummingbirds. Planting flowers that produce nectar-rich blooms, such as trumpet vine, bee balm, and salvia, will attract hummingbirds to your garden.
These flowers not only provide a natural food source but also add beauty and color to your outdoor space.
Another essential element for hummingbirds in our gardens is a water source.
Hummingbirds enjoy bathing and drinking from shallow water sources. Consider placing a birdbath or shallow dish filled with clean water in your garden. Make sure to change the water regularly to keep it fresh and prevent the breeding of mosquitoes.
By providing both feeders and natural food sources, as well as a reliable and safe water source, we can create an inviting habitat for hummingbirds in our gardens.
These small efforts can make a significant difference in helping these remarkable creatures thrive and survive.
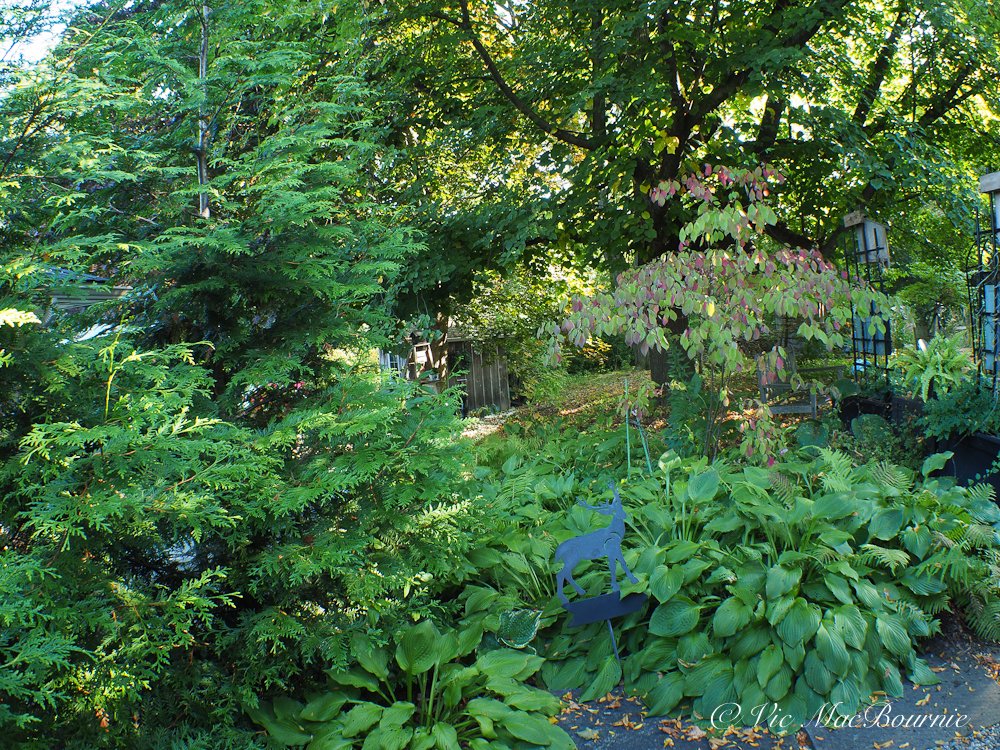
Linden tree: A stalwart in our woodland garden
The Linden is an important part of our woodland garden providing deep shade in summer and habitat for wildlife as well as lovely fall colour.
How Lindens help wildlife in our yards
Not a day goes by that I don’t appreciate the beauty of our mature Linden tree in the backyard. It stands on the edge of our property just outside our family room where I can observe the many comings and goings as it changes from season to season.
It’s a favourite of our squirrels – both red and grey – backyard birds and raccoon families that use its dense branches and leaves for nesting and hiding out from summer’s full sun.
It’s not uncommon to watch our hummingbird feed from one of our feeders and then head up into the safety of our Linden tree where it can rest high in the tree’s branches or feed from its fragrant spring flowers.

Linden tree from my childhood home that I watched grow up from a staked sapling to a 60-plus-year-old tree.
Actually, Lindens have always been a part of my life.
As a child, I watched our little Linden grow up in front of me from a tiny sapling into a fully mature tree that now dominates the front of my childhood home. It became the climbing tree for my nephews and a shady play spot and picnic area for my daughter and her cousins whenever they came to visit grandma and grandpa.

In spring and summer it provides a deep shade for many of our native wildflowers, from wild geraniums to trilliums, violets and Mayapple. Our ferns and hostas also thrive in the deep shade of our massive tree.
Our Linden was a mature tree – towering above our one-storey home – when we purchased it more than 25 years ago. Little leaf Lindens can grow to about 80 feet tall (24m) with a spread between 40 to 50 feet (15m). In most urban landscapes Linden’s normally grow 40 to 50 feet (15m) tall with a 35- to 40-foot-spread.
Lindens take on a very attractive pyramidal form as they age (as seen in the larger image above). This creates a large shaded area below, making them an ideal spot for a garden bench, sitting area or small dining area.
They would be considered by some to be a little messy dropping their flowers in spring followed by small, ball-like seeds later in the year. Of course, their dense leaf cover creates a lovely deep yellow, natural groundcover in fall after they shed their leaves. I just leave them on the ground for the wildlife to use.
In spring, its bright green leaves combine with our neighbour’s mature Crimson maple leaves creating a lovely contrast that lasts throughout the growing season and create effective habitat for a host of wildlife.
Our large, mature Linden tree towers over the woodland garden providing shade to the understory trees and plants.
How do you identify linden tree leaves?
Linden tree leaves have distinct identifying characteristics that set them apart from other tree leaves.
The key feature is their heart-shaped form, with a pointed tip and a rounded base. The edges of the leaves are serrated or toothed, adding to their unique appearance.
Another distinguishing trait is the asymmetrical leaf base, where one side is slightly larger than the other.
In terms of size, linden tree leaves are typically medium to large, ranging from 2 to 6 inches in length.
They have a smooth texture and a glossy surface, which gives them a vibrant and attractive look in the landscape. The color of the leaves varies throughout the year, transitioning from a fresh green in spring and summer to a vibrant yellow in the fall.
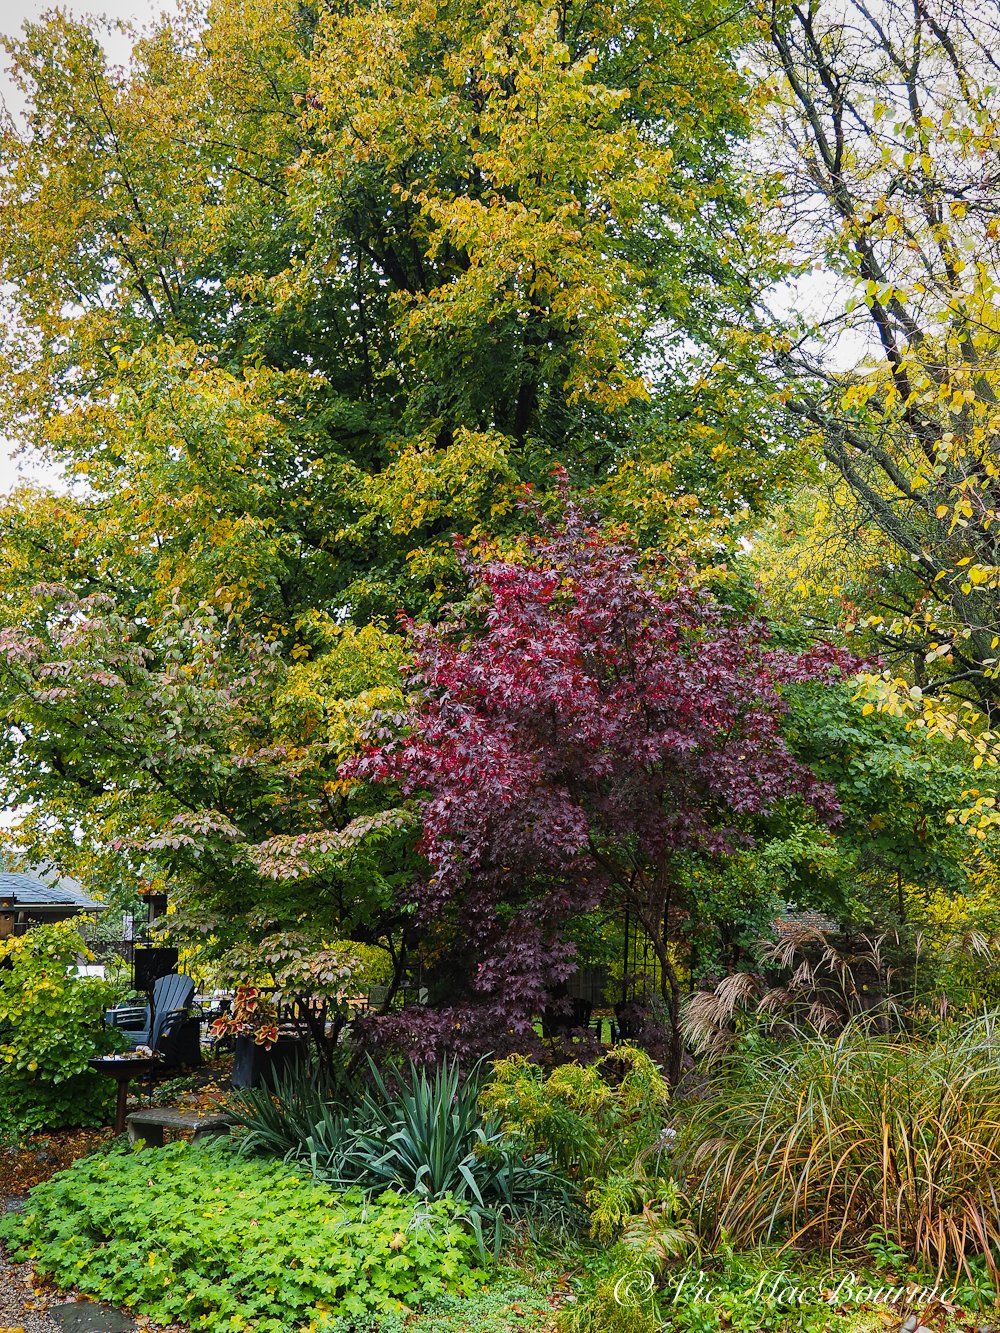
Our mature Linden towers above understory trees such as a Japanese Maple and Cornus Kousa in the landscape.
To further identify linden tree leaves, you can also examine the leaf veins. The veins are prominently visible and radiate from the central midrib toward the edges of the leaf. This venation pattern is characteristic of linden trees and can help distinguish their leaves from those of other tree species.
What is special about a linden tree?
Little Leaf Lindens are excellent trees to create shade in your garden.
Their dense foliage and broad canopy provide ample shade, making them a popular choice for homeowners and landscapers alike.
But what makes linden trees truly special goes beyond their shade-providing abilities.
Fragrant flowers attract bees, butterflies and even hummingbirds
One remarkable feature of linden trees is their fragrant flowers.
In late spring and early summer, linden trees produce clusters of small, yellowish-white flowers that emit a sweet, intoxicating scent. These flowers not only add beauty to the tree but also attract a variety of pollinators, including bees and butterflies.
The nectar-rich blossoms serve as a valuable food source for these insects, supporting their populations and contributing to the overall biodiversity of the area.
Medicinal uses of Linden trees and leaves
Linden leaves have long been used in traditional medicine for their calming and soothing effects.
They are often brewed into herbal teas that are believed to promote relaxation and alleviate stress. Additionally, linden leaves are known for their anti-inflammatory properties and can be used topically to soothe skin irritations and reduce swelling.
In conclusion, linden trees are not only beautiful shade trees but also play a vital role in supporting wildlife and providing medicinal benefits.
Whether you're looking to enhance your garden’s aesthetics or create a peaceful retreat, a linden tree is a special addition that will bring numerous benefits to your outdoor space.
Are linden trees native to the U.S. and Canada?
Linden trees can be grown in a variety of zones in both Canada and the United States, but are native to Europe and Asia.
These trees are adaptable and can thrive in different climates and conditions.
The ability of linden trees to grow in different zones makes them a popular choice for homeowners and gardeners looking to add beauty and shade to their landscapes. Whether you live in Canada or the United States, you can enjoy the benefits of linden trees in your garden or outdoor space.
In the United States, linden trees can be grown in zones 3 to 8, making them suitable for a wide range of states. From the northern states like Minnesota and Maine to the southern states like Texas and Florida, linden trees can be found in various regions across the country.
In Canada, linden trees can be grown in zones 2 to 7, which cover a large portion of the country. This means that linden trees can be enjoyed in regions such as British Columbia, Alberta, Ontario, and Quebec, among others.
With their attractive foliage, fragrant flowers, and the wildlife they support, linden trees are a valuable addition to any garden or woodland area. So, if you're considering planting a linden tree, rest assured that it can thrive in the appropriate growing zones in both Canada and the United States.
What are linden leaves good for?
Linden leaves are not only beautiful, but they also have several practical uses.
One of the main benefits of linden leaves is their medicinal properties. These leaves have been used for centuries in traditional medicine to treat various ailments. They are known for their calming and soothing effects, making them a popular choice for herbal teas and infusions.
Linden leaf tea is often consumed to help with anxiety, stress, and insomnia.
In addition to their medicinal uses, linden leaves are also beneficial for the environment. They are rich in nutrients and can be used as a natural fertilizer for plants. By composting linden leaves, you can enrich the soil and promote healthy plant growth.
Linden are host plant for certain insects and caterpillars
Furthermore, linden leaves are a valuable food source for certain insects and caterpillars. They provide nourishment for species such as the linden looper moth and the linden hawk moth. These insects play an important role in the ecosystem as pollinators and as a food source for other animals.
So, while linden trees are admired for their shade and fall color, their leaves offer even more benefits. From their medicinal properties to their role in supporting wildlife, linden leaves are truly valuable. Whether you’re enjoying a cup of linden leaf tea or observing the insects that depend on them, linden leaves are a wonderful asset to have in any garden or woodland area.
What animals, insects, and birds depend on Linden
These trees attract a wide range of animals, insects, and birds, making them an important part of any woodland garden or natural habitat.
One of the main beneficiaries of linden trees are butterflies. Species such as the Eastern Tiger Swallowtail and the Red-spotted Purple rely on linden trees as a food source for their caterpillars. The leaves of the linden tree provide nourishment and support the growth of these beautiful butterflies.
In addition to butterflies, linden trees also attract a variety of birds. Species like the American Goldfinch and the Ruby-throated Hummingbird are known to visit linden trees for their nectar-rich flowers. These birds play a crucial role in pollination and contribute to the overall health of the ecosystem.
Furthermore, linden trees provide shelter and food for mammals as well. Squirrels and chipmunks are often seen scurrying up and down the trunks of linden trees, collecting seeds and nuts.
These trees also offer a safe haven for nesting birds and provide a habitat for small mammals like bats.
Linden tree: An ideal tree for a woodland garden
In conclusion, linden trees are not only visually appealing but also support a diverse range of wildlife. From butterflies and birds to mammals, these trees play a vital role in providing food, shelter, and habitat for various species. By planting linden trees, you can create a thriving ecosystem in your own backyard.

Weeping Japanese Maple: Perfect for a small space
Weeping Japanese Maples are excellent trees to include in your landscape. They are small enough to add an accent to even the smallest yard but elegant enough to draw attention in a larger yard.

Our weeping Japanese Maple branches flow beautifully to the ground around the large boulder as part of our Japanese-inspired garden.
Our weeping Japanese Maple may not be very large, but it’s a big performer in the Japanese-inspired garden where it anchors one side of the garden with its delicate branches softening the hard edge of a giant boulder.
Its unusual form and dark red foliage makes a bold statement despite its rather demure size.
In fact, you would be hard pressed to find a better tree for that location in our Japanese-inspired garden.
Let’s take a closer look at weeping Japanese Maples with any eye on how to get the most out of these small-growing trees.
How big does a weeping Japanese maple get?
All Japanese Maples should be grown as understory trees, meaning they are generally smaller trees meant to grow in the shade of larger trees or buildings that protect them from harsh weather, especially extreme sun and heat.
Most weeping forms of Japanese Maple are dwarf, cutleaf varieties meaning that they are not only smaller than a regular, say Bloodgood variety, but are more susceptible to harsh conditions.
Interested in Japanese Maples. For more information be sure to read my other posts here:

The same weeping Japanese Maple in its fall colors just before it drops its leaves.
The typical weeping Japanese Maple will grow to about 8 feet with a similar width, but I have found the weeping Japanese Maples grow at a particularly slow pace.
While a traditional Japanese Maple can grow one to two feet a year, the weeping Japanese Maple will put on growth much more slowly. Be prepared for a vertical growth rate of just a few inches per year.
You can expect the average dwarf, weeping Japanese Maple to reach between 4-5 feet over a ten-year period making them ideal small trees for small yards or areas in the garden where you are looking for a tree to provide a spot of color without ever dominating its planting space.

Examples of the beauty of Japanese Maples including some of the weeping variety.
Which Japanese maples are the weeping variety?
There are many varieties of weeping Japanese Maples to choose from including:
• Acer Palmatum Dissectum ‘Inaba Shidare.’ This red to maroon weeping maple grows to about 5 feet with a six foot width and sports bright red fall colour. This laceleaf, pendulous tree is very hardy and is able to adapt to most situations, including sunnier areas. Three to four hours of sun helps the tree keep its best color. It can be grown in containers and is hardy in zones 5-9.
• Acer Palmatum Dissectum ‘Waterfall.’ This weeping maple leaves emerge an almost neon green in spring turning a golden yellow to orange into fall. It grows to about 5 ft by 6 ft in about ten years and is hardy in zones 5 through 9.
• Acer Palmatum Dissectum ‘Orangeola.’ Leaves emerge in spring in various shades of red, orange and green helping to give the tree an interesting look. This multi-colored pendulous dissectum acer is considered one of the most cascading Japanese maples. The leaves turn an orange red in fall and the tree is a little more compact than others reaching only about 4 ft tall with a width of about 5 ft over the course of ten years. It is hardy to zones 5 through 9 and can be grown as a container plant.
How to care for a weeping Japanese maples? Are they hardy?
Weeping Japanese maple are hardy trees (zones 5-9) that do not require a high degree of special care.
Although they benefit from some sun, they are meant to be understory trees and, therefore, benefit from being in the shade for the sunniest and hottest parts of the day.
Some varieties may have better color if exposed to short periods of sun.
Besides adequate water and mindful pruning, these small trees require little maintenance.
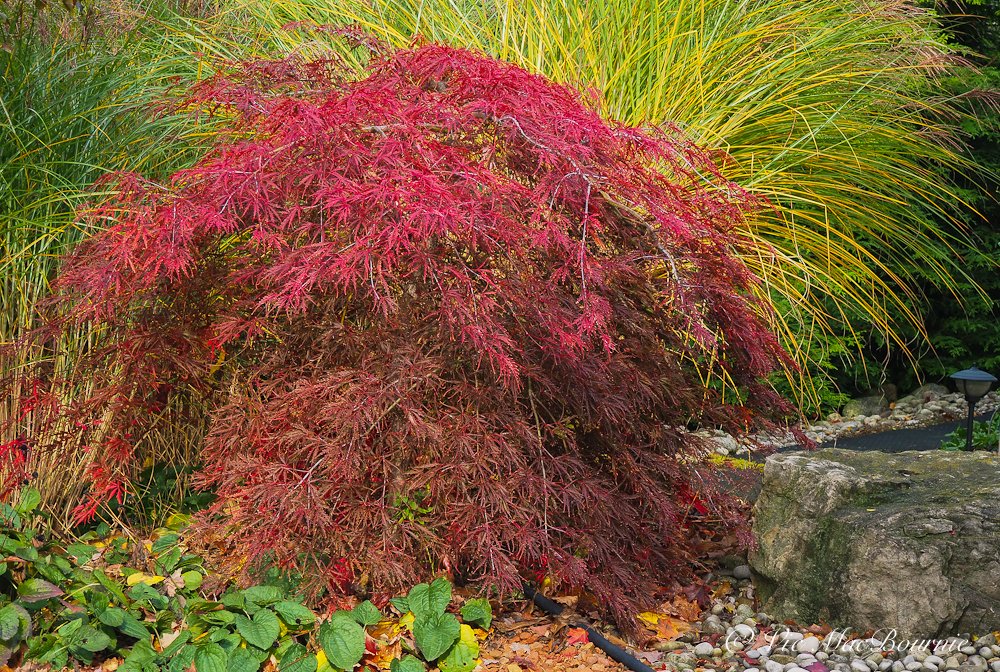
A nice example of the weeping Japanese Maple in front of Miscanthus ornamental grasses in our front yard.
How to prune weeping Japanese Maples?
Please use restraint when pruning your weeping Japanese maples and do not remove the lower half of the trees to create umbrella-looking trees in the landscape.
Japanese Maples have inherent beauty and unlike, say a weeping Catalpa tree, do not benefit from harsh pruning. I have seen Japanese Maples that are pruned into odd umbrella-looking trees that look out of place in the garden. Maybe the owners wanted to plant flowers under the trees or just didn’t think the pendulous branches would benefit from touching the ground.
Try to refrain from severely pruning these trees in such a manner. Embrace their inherent pendulous habit and let them reach their full beauty. Feel free to trim them up off the ground if you feel you must, but I have never pruned the bottom of our weeping tree and don’t intend to in the near future.

Falling in love with the Olympus 45mm F1.8 and MCON P02
The Olympus 45mm F1.8 teamed with the MCON P02 takes an already outstanding lens and makes it significantly better.

The Olympus 45mm F1.8 captures the fine detail and vivid colours of this front garden in fall with its exquisite grasses and vibrant hydrangeas.
How to maximize the Olympus 45mm F1.8 for macro with the P02
Fall is the perfect time to get out your camera and lenses and fall in love all over again, especially when it comes to macro or closeup photography. Combine the Olympus 45mm F1.8 with the Olympus P02 and it’s a love affair made in heaven.
That love affair may have roots in the wonderful colours of autumn, but it can just as easily extend to some of your finest cameras and lenses. The Olympus 45mm F1.8 is one of those lenses you’ll fall in love with over and over again.
I recently picked up a mint copy of the 45mm silver version for a fraction of its regular price and teamed it up with the magnificent MCON P02 to give me the ultimate walk around lens with impressive close focus capabilities.
This compact Olympus lens – now under the name OEM Systems – was first introduced to micro 4/3rd users in 2011. At that time, it was the fastest prime available on the micro 4/3 system.
Today, it is still easy to carry around, offers some of the sweetest bokeh of any lens, is very sharp and has fine, vivid colours.
It might have earned its reputation as a superb portrait lens, but it more than holds its own as an all-purpose lens, whether you are in your favourite woodlands, on the street or on vacation.

The close up capabilities of the Olympus 45mm F1.8, when paired with the MCON P02 as seen here, is very impressive.
Slip the Olympus MCON P02 macro converter onto the front of the lens and you’ve got an impressive, fast, short telephoto and macro lens.

The Olympus MCON P02 closeup lens also works nicely with the Olympus 14-42 kit zoom lens that was used here to capture these orchids.
What better opportunity to run it through its paces than during the annual fall celebration of colour.

The Olympus 45mm F1.8 captures this lovely fall scene with its vivid colours.
There’s lots to like about the Olympus 45mm lens
Sure, it’s a fast lens that creates tack sharp images even in low-light situations, but that’s just the beginning of what makes the lens a must-have. Focus is both fast and very precise. Build quality is very good, and its 116 grams (0.26 lb) makes the lens easy to carry around at all times.
Video shooters will appreciate the near silent autofocus capabilities of the lens, which benefits from its MSC (Movie-Still-Compatible) technology.
Check out the Olympus official site for the best deals of the day.
What’s not to like?
If you want to get picky, there is the rather expensive lens hood sold as an accessory and the fact that the lens’s minimum focus distance stretches out to almost 20 inches (19.69 to be exact) or 0.50 m for those of us using metric. The result is a magnification factor of only 0.11.
There’s not much we can do about the cost of the lens hood except keep our eye open for a good used one.
The lens’s poor close-focusing capabilities is an easy fix. Add the MCON P02 converter to the front of the lens and the 45mm opens up a new world to users. But more on that a little later.
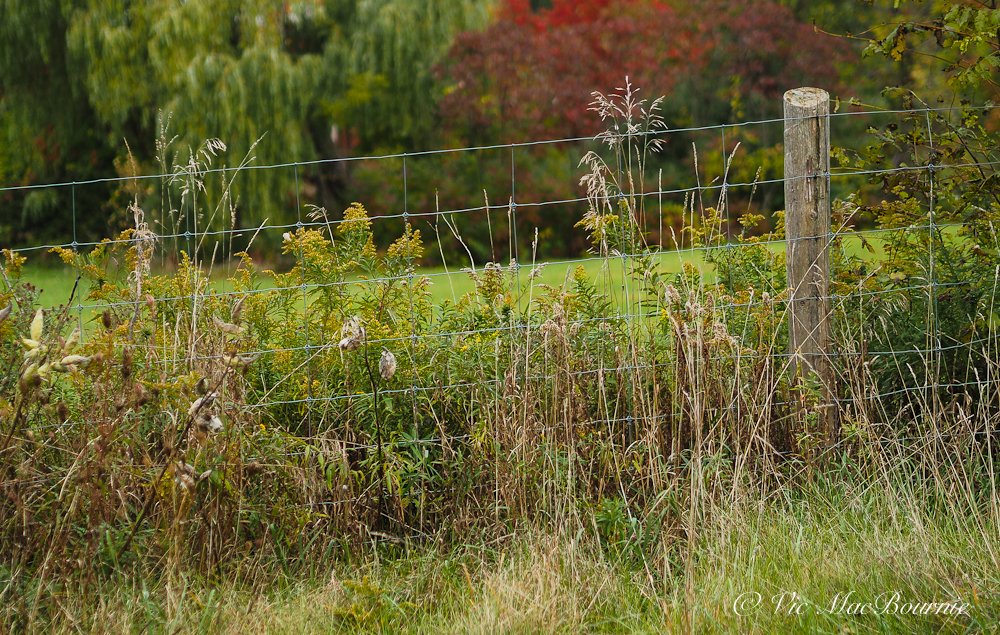
This fence line image was shot with the Olympus 45mm wide open at F1.8. Sharpness is excellent with a nice soft out-of-focus background.
Olympus 45mm F1.8 in the woodlands and in the fields
Lens specs have their place, but until we take the lens out into the field, it’s hard to really appreciate the quality and value of the lens.
So I took the lens out for a morning of early fall color on the roads around my home recently.
I have always prefered a short telephoto approach for most of my fall images. I find the telephoto helps to focus in on the intimate details rather than show the all encompassing view of a wide angle lens.
If you are looking to add a camera or lens to your arsenal, be sure to check out the huge offering from KEH Camera Exchange.

This early fall image of the open farm lands near our home was taken with the highly praised Olympus 45mm F1.8.
First impression of the Olympus 45mm
My first impressions of this lens were more than favourable.
Everything that has already been said about the lens proved true in the first few shots. Sharp even wide open, fast and effective focus, silent, great bokeh and lovely colour rendition.
And you don’t have to take my word for it.
Former Olympus ambassador and enthusiast Robin Wong states: “No matter what lenses I use on the street, I always fall back to this beautiful medium-telephoto focal length, and 45mm just fits my compositional vision almost perfectly.”
Fall in the woodland garden offers several opportunities to capture natural images like these Pagoda Dogwood berries waiting for the birds to finish them off. The medium telephoto lens helps capture the pleasing scene in a natural setting.
He goes on to say: “Being able to blur off the background is something I treasure, and the Olympus 45mm F1.8 does this very well, being a medium telephoto range as well as having a wide open aperture of F1.8. The rendering of the bokeh? Simply creamy and beautiful. Just what I needed to make some portrait shots “pop.”
Rob Trek, YouTuber and Olympus enthusiast, recommends photographers purchase the Olympus 45mm F1.8 as their first prime lens because it will give you “the best bang for the buck in terms of value…in terms of your creativity and your photography and the kinds of pictures you take.”
YouTuber Steven Heise says: “There are a lot of lenses that perform well, but then there are a small handful of lenses that come to the party ready to rock the house. This is one of those kinds of lenses.
“This is hands down one of the best budget portrait lenses you can buy for micro 4/3. When you take into consideration the image quality of this lens, the incredible sharpness, the color, the contrast and the quickness and accuracy of the autofocusing system, the answer just becomes abundantly clear.”

My sweet dog Holly taken with the Olympus 45mm F1.8 close to wide open.
Peter Forsgard, a former Olympus ambassador based in Finland, describes the lens as “One of the best quality money ratio you can get on any M Zuiko lens. I think the 45mm is the one. It’s not very expensive, but the image quality is stunning.”
He calls it the “perfect lens for environmental portraits.”
Steve Huff, another Olympus enthusiast, had high praise for the lens in his review shortly after getting the lens in October 2011. He compared the 45mm F1.8 with the Olympus 12mm F/2 after declaring the 12mm the best micro 4/3 lens ever made. “After using this 45 1.8 for a few days I can say that this lens is equally as delicious. Yes, I said delicious! The IQ from this lens on the E-P3 is nothing short of astounding for the micro 4/3 format. Some of the best quality I have seen from any M4/3 camera/lens combo.”
Here are a few impressions of the lens from Olympus users gathered from forums around the internet.
• “The images are tack sharp, the colours warm and flattering, the focus is both quiet and fast, and the “Bokeh” which all the Olympus haters go on about is feathery soft.”
• “Perfect for portraits, it’s also great for giving a different perspective on landscapes and cityscapes…. Sharpness is the outstanding feature of this lens though. You notice it from the first shot you take. It makes you feel like a pro. Contrast and colour are so good that you’ll barely need to adjust your photos in Photoshop or the like…. The bottom line is that this is a near perfect and therefore essential lens for a bargain price.”

Birch clump with Northern Sea Oats.
I think it’s fair to say that in all my research into the 45mm F1.8, I struggled to find anyone critical of the lens.
Of course there is a reason for all this praise, and it stems from the fact that the lens is among the best in its class.
The short telephoto is ideal for everyday garden and nature photography. It’s probably not long enough to capture most wildlife including birds, small mammals and insects, especially since its minimum focus distance leaves a little to be desired.
But that’s where the Olympus MCON P02 macro converter steps into action.
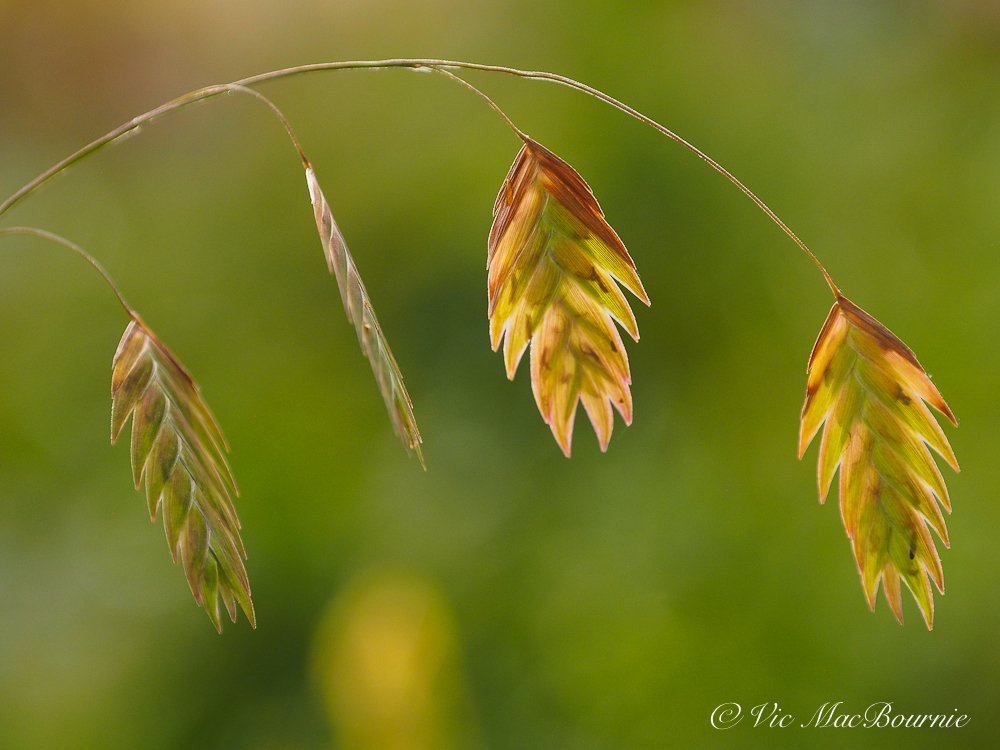
One weakness of the Olympus 45mm F1.8 lens is its close focus capabilities. Add the Olympus MCON P02 and that problem is easily solved making it the perfect walk around lens. Oh, and just take a look at that creamy bokeh.

Olympus camera equipped with the P02 macro filter.
Close-up photography with the 45mm F1.8
Very few of us really need true macro, meaning 1:1 magnification. What most of us focus on is better described as close-up photography, which is magnification less than 1:1 or lifesize.

The MCON P02 screws on to the front of your lens to reduce the minimum focus distance of the lens.
By adding the Olympus MCON P02 filter to the Olympus 45mm F1.8 you get an outstanding close-focus performer that benefits from having a lovely creamy background.
The high-quality filter that screws on to the front of the lens is constructed in 1 group with 2 elements and weighs a mere 52g. It comes with quality front and rear lens caps and a step-up ring.
Use it wide open to explore creative selective focus effects like the purple Beautyberries below.
Or, use the lens’s inherent sharpness to create exquisitely finely detailed images like the Northern Sea Oat grasses above.
For more on close-up photography check out my post here.
The lens offers endless opportunities to be creative, including the ability to shoot selective focus images using the macro converter with a large aperature of f1.8.
Why the MCON P02 close-focusing lens instead of a true macro lens?
There are many reasons to go with the P02 over a true macro lens. First, there is the cost savings. You should be able to pick up a P02 for less than $100 and considerably less than that if you are lucky enough to find one on the used market.

Olympus camera with 45mm F1.8 and P02 converter on front of lens.
In comparison, a true macro lens will set you back 5X the cost of the P02 and add another lens to your camera bag. There is something freeing about using a single sweet little lens that can double as an exquisite macro lens.
To screw the filter to the front of the lens, a ring first needs to be removed from the front of the lens.
When used with the 45mm F1.8, the lens’s closest focusing distance is almost cut in half to approximately 24cm. The image below from the Olympus website shows the difference between the close focus capabilities of the lens with and without the P02.
For more on the MCON P02, check out the official Olympus site.

This image from Olympus shows the close focus capabilities of the 45mm lens with the MCON P02.
MCON P02: A versatile addition in the palm of your hand
Don’t think for a minute that the P02 is made only for the 45mm. This little add-on filter is a versatile addition to your camera bag and fits nicely on the 14-42mm kit zoom as well as a number of other Olympus lenses. On the popular ED 14-42 F3.5-5.6 EZ the add-on lens turns the lens into a semi-macro lens with the shortest shooting distance of 18cm and the maximum image magnification of 0.38x (35mm equivalent: 0.76x). It comes with step-up rings to attach it to a 37mm filter diameter lens.
For a complete list, see chart below.
M.ZUIKO DIGITAL ED 14-42mm F3.5-5.6 EZ
M.ZUIKO DIGITAL 14-42mm F3.5-5.6II
M.ZUIKO DIGITAL 14-42mm F3.5-5.6IIR
M.ZUIKO DIGITAL 45mm F1.8
Just add a step-up ring for use on the following lensesM.ZUIKO DIGITAL 25mm F1.8
M.ZUIKO DIGITAL 17mm F1.8
M.ZUIKO DIGITAL ED 12mm F2.0