

DIY: Moss garden container (in a few simple steps)
Creating your own moss garden container is a fun and rewarding experience. This container was created in the Japanese style from a former copper fire pit combining moss, a Japanese Maple and a large stone.
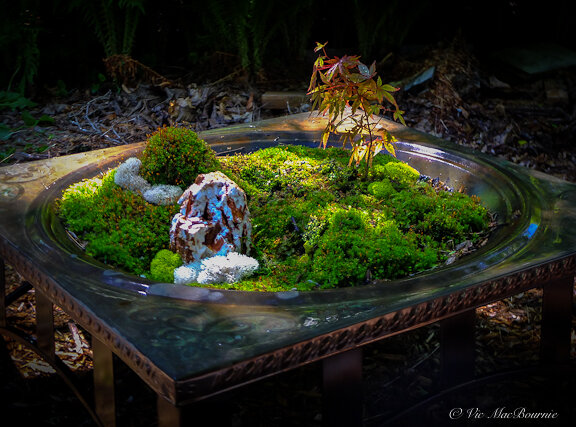
The finished moss garden container in its copper former fire pit.
DIY moss garden at home in Woodland garden
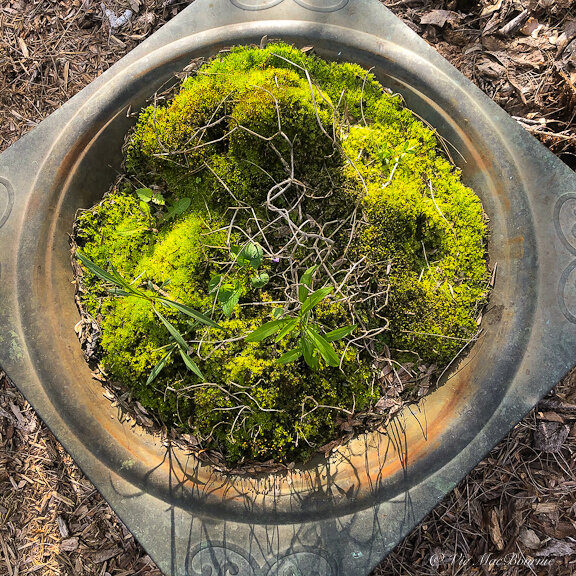
I had been harvesting moss from our old fire pit for years, but it was now time to turn it from an eyesore into a DIY piece of garden art for the woodland garden
And, once the idea came to me, I was surprised how easy it was.
I like to think the finished result was years in the making, but it actually only took about an hour worth of work once the plan was put into motion.
The result of my work, and probably about $20 in costs, is the creation of a beautiful moss garden container and a natural piece of art that looks right at home in the woodland garden and imparts a touch of Japanese-style elegance along one of our shaded paths.
I set the moss container up in a spot in the garden where I can see it when I sit on the patio. In the morning, when I’m out with my coffee, the Japanese Maple is back lit and the moss lights up as if a small spotlight were on it.
Looking for more money-saving tips for your garden. Be sure to check out my in-depth article on building your garden on a budget.
It certainly steals the show in the morning.
Although I chose to use an old, weathered fire pit with a beautiful copper top, any large bowl could serve the same purpose.
Check out thrift stores, Craig’s list or Kijiji for old fire pots that would make appropriate containers for the moss garden.
You might already even have something in the shed that would work perfectly. A galvanized steel container would impart a similar old-world feeling.
What you will need:
• A large container of some sort. Preferably with drainage holes. If there are no drainage holes, you will need to drill a few holes in the bottom to allow for proper drainage. It’s good to keep the bowl damp but not full of water.
• A base to grow the moss on. While most of us will use soil (slightly acidic soil is an excellent base), this fire pit has always been full of wood that was mostly already burnt into a charcoal. I simply left the partially burnt wood in the fire pit, in a shady spot over the years, and the most beautiful moss grew on the charcoal. In fact, plenty of years I harvested a good amount of it for use in garden containers and, by the next spring or even later that fall, it had all grown back in.
• As an alternative to growing your own moss, you can now purchase it from on line sources or likely even at high quality nurseries that specialize in garden crafts and DIY projects. Just make sure it is commercially grown and not taken from the forest. Commercially grown sheet moss performs better and is more uniform. (Check out the Supermoss sheets available at Amazon. Similar moss sheets might be available at your local nursery.)
• If you are planning to use you moss bowl in a sunnier location, consider using one of the moss-like perennials such as Irish or Scotch moss. Even thyme will give you that moss-like look without the need for much, if any, upkeep. (see my earlier article on moss-like ground covers)
• I used a small Japanese Maple mostly because we had one growing from a seed in the garden that was the perfect size for the project. I was seriously considering using a maidenhair fern rather than the Japanese Maple, but I have another project in mind that would be better suited for the fern. A small, elegant fern like the Maidenhair would be perfect, but you could also use a store-bought orchid (which would obviously need to be brought in over the winter). The damp environment in the moss bowl would likely be the perfect medium for growing an orchid.
• If you want to keep it simple, consider using elegant twigs cut from your own garden, (corkscrew willow branches work beautifully and can be purchased at most garden shops). Strip the bark and let the sun bleach them to make them stand out against the moss. Other choices include an interesting stone, much like the one I used in this setting.
• In this case, I put the Japanese Maple into a small biodegradable pot packed with fresh soil which could be easily swapped out for another plant without disrupting the moss.
• A single large stone or an odd number grouping of say 3 stones helps to anchor the design and could become the focal point of the moss garden or an anchor point to balance off the plant material. In Japanese gardens, rocks have long been used as anchor points and used to show the strength and stability of the garden and the earth.
• In my design I actually went out and purchased a rock to use in the design. Although I have lots of rocks on the property, I was looking for a certain type of stone that would look appropriate in the design. I went looking for a stone with earth-tone colours that was unique and would stand tall in the moss, appearing to emerge out of the earth rather than sitting on top of it. A grouping of threee similar stones emerging from the moss at varying heights would be stunning and likely all you would need in the moss garden.
• Finally I added a little reindeer moss and supermoss bits (purchased from the same craft store as the rock) to give the design texture and a little more variety of moss.


Simple steps to put the creation together
• Once all the items for the design are ready, it is time to begin creating your moss masterpiece.
• In my case the moss was already in place and my first steps involved cleaning up the moss of small plants (we can call them weeds) that had made their way into the moss as well as dead branches etc. I carefully removed the weeds and tucked the moss back into the holes created by removing the plants.
• If you are using commercially bought sheet moss, you will simply lay that over your acid-based soil and tamp it down for a nice fit. It is probably a wise idea to create an undulating surface with the soil prior to laying the moss in, just to give the design a more natural look.
• Once the moss is in place, cut out areas to place your stone(s) and place them into the soil, before replacing the moss around the base of the stone(s). Make sure the stones are emerging out of the moss rather than sitting on top. In proper landscaping designs, it is not uncommon for three quarters of the rock to actually be buried in the earth. Depending on the stone(s) you choose, you may not have to bury the stone(s) that deep, but it is vital that the stone(s) appear rooted in the earth.
• The same procedure is more or less followed by planting the tree or orchid etc. Create a pocket in the soil for the plant to sit in. I put the tree in a small container and planted that into the moss but you could plant it directly into the soil. If you are using an orchid, you would either plant it in a container with the suitable orchid mix or ensure the proper mix is in the pocket you created. By using a container, it’s easy to change up your design throughout the season by simply changing the container.
• Now it’s time to gently water your moss garden with a fine mist.
Caring for your moss garden
If done properly and placed in a mostly shady location your moss garden should need little care over the summer, spring and fall. In winter, depending how cold it is where you garden, you might want to cover the container or move it to a shed or garage.
Any plants that are growing in the container can either be left where they are if they are cold hardy, protected from the cold if you are concerned, or removed and taken indoors. The moss itself should not need any special care accept to clear any fall leaves off it before winter.
Although you may think it needs to be in an area of deep shade, mosses actually benefit from a little indirect sun preferably in the morning. If you can put your moss container in an area that gets dappled shade in the morning it should do very well.
One of the beauties of creating a moss container is that it can be moved around the garden either during the day or more likely through the seasons to give it just the right amount of sun and shade.
Monitor the moss to keep it free of leaves and unwanted plant growth.
Water your moss daily if possible but ideally only with a light misting. Do not drown the moss in water, a light misting to keep it damp is ideal.
A once a week watering to keep the soil below the moss damp will help create moisture around the moss.
Fertilization is not needed. If you feel you need to fertilize a plant growing in the moss, just fertilize around the plant itself, preferably by removing a small amount of moss, fertilizing the plant, and returning the moss in its place.
Other than that, enjoy your moss container.
Gardening on a budget links
Ten money-saving tips for the weekend gardener
DIY Bark Butter feeder for Woodpeckers
DIY reflection pond for photography
Click & Grow is ideal for Native Plants from seed
Remove your turf and save money
Hiring students to get your garden in shape
As an affiliate marketer with Amazon or other marketing companies, I earn money from qualifying purchases.